tow Ram ProMaster City 2020 User Guide
[x] Cancel search | Manufacturer: RAM, Model Year: 2020, Model line: ProMaster City, Model: Ram ProMaster City 2020Pages: 350, PDF Size: 13.27 MB
Page 45 of 350
42 GETTING TO KNOW YOUR VEHICLE
Vanity Mirror
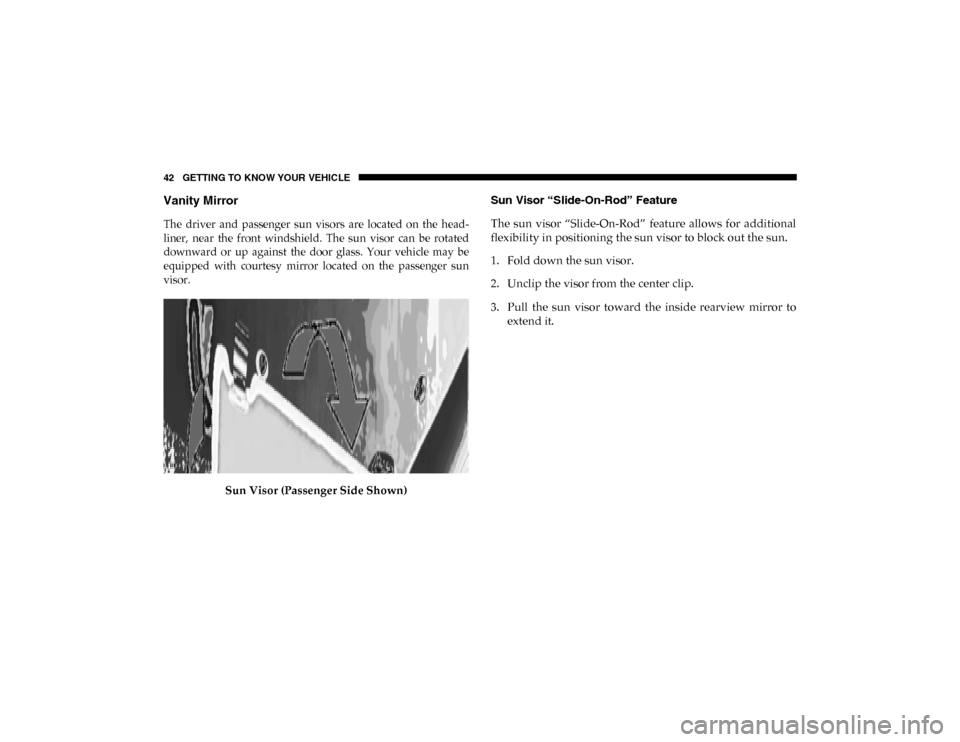
The driver and passenger sun visors are located on the head-
liner, near the front windshield. The sun visor can be rotated
downward or up against the door glass. Your vehicle may be
equipped with courtesy mirror located on the passenger sun
visor.
Sun Visor (Passenger Side Shown) Sun Visor “Slide-On-Rod” Feature
The sun visor “Slide-On-Rod” feature allows for additional
flexibility in positioning the sun visor to block out the sun.
1. Fold down the sun visor.
2. Unclip the visor from the center clip.
3. Pull the sun visor toward the inside rearview mirror to
extend it.
2020_RAM_PROMASTER_CITY_OM_USA=GUID-7B6A7FCA-79B0-423F-95C5-ED2A949C3D13=1=en=.book Page 42
Page 47 of 350
44 GETTING TO KNOW YOUR VEHICLE
High Beams
With the low beams activated, pull the multifunction lever
towards the steering wheel to turn on the high beams. A high
beam symbol will illuminate in the cluster to indicate the
high beams are on. Pull the multifunction lever a second time
to switch the headlights back to low beam.
NOTE:
If the vehicle’s ignition is turned off, both high and low beam
headlights will also turn off.
Flash-To-Pass
You can signal another vehicle with your headlights by
partially pulling the multifunction lever toward the steering
wheel. This will cause the high beam headlights to turn on
until the lever is released.
Parking Lights
These lights can only be turned on with ignition key in the
STOP (OFF/LOCK) position or removed, by moving the end
of the multifunction lever to O (Off) position and then to the
headlight position.
The warning light telltale in the instrument panel comes on.
The lights stay on until the next ignition cycle is performed.
Follow Me Home/Headlight Delay
When this feature is selected, the driver can choose to have
the headlights remain on for a preset period of time after the
engine is turned off.
Activation
Remove the key or turn the ignition to the STOP (OFF/
LOCK) position, and pull the multifunction lever toward the
steering wheel within two minutes. Each time the lever is
pulled, the activation of the lights will be extended by 30
seconds. The activation of the lights can be extended to a
maximum of 210 seconds.
2020_RAM_PROMASTER_CITY_OM_USA=GUID-7B6A7FCA-79B0-423F-95C5-ED2A949C3D13=1=en=.book Page 44
Page 48 of 350
GETTING TO KNOW YOUR VEHICLE 45
Deactivation
Pull the multifunction lever toward the steering wheel and
hold it for more than two seconds.
Fog Lights — If Equipped
The fog light switch is located on the center stack of the
instrument panel, just below the climate controls.Push the switch once to turn the fog lights on.
Push the switch a second time to turn the fog
lights off.
NOTE:
If the vehicle’s ignition is turned off, the fog lights will also
turn off.
Turn Signals
Move the multifunction lever up or down and the arrows on
each side of the instrument cluster flash to show proper oper -
ation of the front and rear turn signal lights.
NOTE:
If either light remains on and does not flash, or there is a very
fast flash rate, check for a defective outside light bulb. If an
indicator fails to light when the lever is moved, it would
suggest that the indicator bulb is defective.
Lane Change Assist
Tap the lever up or down once, without moving beyond the
detent, and the turn signal (right or left) will flash five times
then automatically turn off.
2
2020_RAM_PROMASTER_CITY_OM_USA=GUID-7B6A7FCA-79B0-423F-95C5-ED2A949C3D13=1=en=.book Page 45
Page 55 of 350
52 GETTING TO KNOW YOUR VEHICLE
Windshield Washers
Pull the windshield wiper/washer lever toward the steering
wheel to activate the washers. The wipers will activate auto-
matically for three cycles after the lever is released. Manual High Speed/Mist
Push the lever upward from the off position. The wipers will
operate at high speed to clear off road mist or spray from a
passing vehicle. This operation will continue until the lever
is released. When the lever is released, the wipers will return
to the off position and automatically shut off.
Rear Wiper Operation — If Equipped
Rear Windshield Wiper Operation
Rotate the windshield wiper lever center ring upwards to
operate the rear window wiper as follows:
• In intermittent mode when the front window wiper is not
operating
• In synchronous mode (at half the speed of the front window wiper) when the front window wiper is operating
• In continuous mode while vehicle is in REVERSE
With the windshield wipers on, and REVERSE gear engaged,
rear window wiping will be continuous in the same way.
CAUTION!
• Turn the windshield wipers off when driving through an automatic car wash. Damage to the windshield
wipers may result if the wiper control is left in any
position other than off.
• In cold weather, always turn off the wiper switch and allow the wipers to return to the park position before
turning off the engine. If the wiper switch is left on and
the wipers freeze to the windshield, damage to the
wiper motor may occur when the vehicle is restarted.
• Always remove any buildup of snow that prevents the windshield wiper blades from returning to the off posi -
tion. If the windshield wiper control is turned off and
the blades cannot return to the off position, damage to
the wiper motor may occur.
2020_RAM_PROMASTER_CITY_OM_USA=GUID-7B6A7FCA-79B0-423F-95C5-ED2A949C3D13=1=en=.book Page 52
Page 90 of 350

GETTING TO KNOW YOUR INSTRUMENT PANEL 87
If the light continues to flash when the vehicle is running,
immediate service is required and you may experience
reduced performance, an elevated/rough idle, or engine
stall and your vehicle may require towing. The light will
come on when the ignition is placed in the ON/RUN or
MAR/ON/RUN position and remain on briefly as a bulb
check. If the light does not come on during starting, have the
system checked by an authorized dealer.
Engine Coolant Temperature Warning Light This warning light warns of an overheated engine
condition. If the engine coolant temperature is too
high, this indicator will illuminate and a single
chime will sound. If the temperature reaches the upper limit,
a continuous chime will sound for four minutes or until the
engine is able to cool, whichever comes first.
If the light turns on while driving, safely pull over and stop
the vehicle. If the A/C system is on, turn it off. Also, shift the
transmission into NEUTRAL (N) and idle the vehicle. If the
temperature reading does not return to normal, turn the
engine off immediately and call for service.
Refer to “If Your Engine Overheats” in “In Case Of Emer -
gency” for further information. Oil Pressure Warning Light
This warning light will illuminate to indicate low
engine oil pressure. If the light turns on while
driving, stop the vehicle, shut off the engine as soon
as possible, and contact an authorized dealer. A chime will
sound when this light turns on.
Do not operate the vehicle until the cause is corrected. This
light does not indicate how much oil is in the engine. The
engine oil level must be checked under the hood.
Transmission Temperature Warning Light — If Equipped
This warning light will illuminate to warn of a high
transmission fluid temperature. This may occur with
strenuous usage such as trailer towing. If this light
turns on, stop the vehicle and run the engine at idle or
slightly faster, with the transmission in PARK (P) or
NEUTRAL (N), until the light turns off. Once the light turns
off, you may continue to drive normally.
WARNING!
If you continue operating the vehicle when the
Transmission Temperature Warning Light is illuminated
you could cause the fluid to boil over, come in contact
with hot engine or exhaust components and cause a fire.
3
2020_RAM_PROMASTER_CITY_OM_USA=GUID-7B6A7FCA-79B0-423F-95C5-ED2A949C3D13=1=en=.book Page 87
Page 94 of 350

GETTING TO KNOW YOUR INSTRUMENT PANEL 91
Engine Check/Malfunction Indicator Warning Light (MIL)
The Engine Check/Malfunction Indicator Light
(MIL) is a part of an Onboard Diagnostic System
called OBD II that monitors engine and automatic
transmission control systems. This warning light will illu -
minate when the ignition is in the ON/RUN position before
engine start. After placing the ignition to the ON/RUN
position, if there is a problem with the Sentry Key System,
the Vehicle Security Light will turn on. This condition will
result in the engine being shut off after two seconds. If the
bulb does not come on when turning the ignition switch
from OFF to ON/RUN, have the condition checked
promptly.
NOTE:
This warning light will illuminate when the vehicle security
alarm system has detected an attempt to break into the
vehicle.
Certain conditions, such as a loose or missing gas cap, poor
quality fuel, etc., may illuminate the light after engine start.
The vehicle should be serviced if the light stays on through
several typical driving styles. In most situations, the vehicle
will drive normally and will not require towing. When the engine is running, the MIL may flash to alert
serious conditions that could lead to immediate loss of
power or severe catalytic converter damage. The vehicle
should be serviced by an authorized dealer as soon as
possible if this occurs.
WARNING!
A malfunctioning catalytic converter, as referenced
above, can reach higher temperatures than in normal
operating conditions. This can cause a fire if you drive
slowly or park over flammable substances such as dry
plants, wood, cardboard, etc. This could result in death
or serious injury to the driver, occupants or others.
CAUTION!
Prolonged driving with the Malfunction Indicator Light
(MIL) on could cause damage to the vehicle control
system. It also could affect fuel economy and
driveability. If the MIL is flashing, severe catalytic
converter damage and power loss will soon occur.
Immediate service is required.3
2020_RAM_PROMASTER_CITY_OM_USA=GUID-7B6A7FCA-79B0-423F-95C5-ED2A949C3D13=1=en=.book Page 91
Page 96 of 350
GETTING TO KNOW YOUR INSTRUMENT PANEL 93
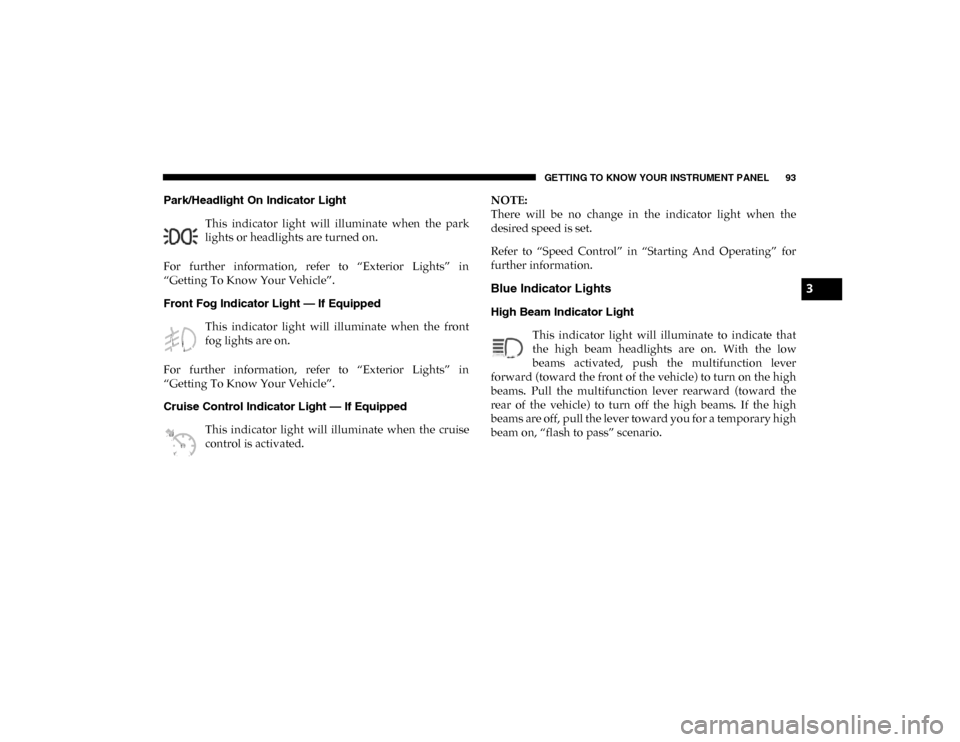
Park/Headlight On Indicator Light This indicator light will illuminate when the park
lights or headlights are turned on.
For further information, refer to “Exterior Lights” in
“Getting To Know Your Vehicle”.
Front Fog Indicator Light — If Equipped This indicator light will illuminate when the front
fog lights are on.
For further information, refer to “Exterior Lights” in
“Getting To Know Your Vehicle”.
Cruise Control Indicator Light — If Equipped This indicator light will illuminate when the cruise
control is activated. NOTE:
There will be no change in the indicator light when the
desired speed is set.
Refer to “Speed Control” in “Starting And Operating” for
further information.
Blue Indicator Lights
High Beam Indicator Light
This indicator light will illuminate to indicate that
the high beam headlights are on. With the low
beams activated, push the multifunction lever
forward (toward the front of the vehicle) to turn on the high
beams. Pull the multifunction lever rearward (toward the
rear of the vehicle) to turn off the high beams. If the high
beams are off, pull the lever toward you for a temporary high
beam on, “flash to pass” scenario.
3
2020_RAM_PROMASTER_CITY_OM_USA=GUID-7B6A7FCA-79B0-423F-95C5-ED2A949C3D13=1=en=.book Page 93
Page 97 of 350
94 GETTING TO KNOW YOUR INSTRUMENT PANEL
ONBOARD DIAGNOSTIC SYSTEM — OBD II
Your vehicle is equipped with a sophisticated Onboard
Diagnostic system called OBD II. This system monitors the
performance of the emissions, engine, and transmission
control systems. When these systems are operating properly,
your vehicle will provide excellent performance and fuel
economy, as well as engine emissions well within current
government regulations.
If any of these systems require service, the OBD II system
will turn on the Malfunction Indicator Light (MIL). It will
also store diagnostic codes and other information to assist
your service technician in making repairs. Although your
vehicle will usually be drivable and not need towing, see an
authorized dealer for service as soon as possible.
Onboard Diagnostic System (OBD II) Cybersecurity
Your vehicle is required to have an Onboard Diagnostic
system (OBD II) and a connection port to allow access to
information related to the performance of your emissions
controls. Authorized service technicians may need to access
this information to assist with the diagnosis and service of
your vehicle and emissions system.CAUTION!
• Prolonged driving with the MIL on could cause further damage to the emission control system. It could also
affect fuel economy and driveability. The vehicle must
be serviced before any emissions tests can be
performed.
• If the MIL is flashing while the vehicle is running, severe catalytic converter damage and power loss will
soon occur. Immediate service is required.
2020_RAM_PROMASTER_CITY_OM_USA=GUID-7B6A7FCA-79B0-423F-95C5-ED2A949C3D13=1=en=.book Page 94
Page 105 of 350
102 SAFETY
Traction Control System (TCS)
The Traction Control System (TCS) monitors the amount of
wheel spin of each of the driven wheels. If wheel spin is
detected, brake pressure is applied to the slipping wheel(s)
and engine power is reduced to provide enhanced accelera-
tion and stability. A feature of the TCS system, Brake Limited
Differential (BLD), functions similar to a limited slip differ -
ential and controls the wheel spin across a driven axle. If one
wheel on a driven axle is spinning faster than the other, the
system will apply the brake of the spinning wheel. This will
allow more engine torque to be applied to the wheel that is
not spinning. This feature remains active even if TCS and
ESC are in the Partial Off mode. Refer to “Electronic Stability
Control (ESC)” in this section for further information. Trailer Sway Control (TSC) — If Equipped
Trailer Sway Control (TSC) uses sensors in the vehicle to
recognize an excessively swaying trailer and will take the
appropriate actions to attempt to stop the sway. The system
may reduce engine power and apply the brake of the appro
-
priate wheel(s) to counteract the sway of the trailer. TSC will
become active automatically once an excessively swaying
trailer is recognized.
NOTE:
TSC cannot stop all trailers from swaying. Always use
caution when towing a trailer and follow the trailer tongue
weight recommendations. Refer to “Trailer Towing” in
“Starting And Operating” for further information.
When TSC is functioning, the “ESC Activation/Malfunction
Indicator Light” will flash, the engine power may be reduced
and you may feel the brakes being applied to individual
wheels to attempt to stop the trailer from swaying. TSC is
disabled when the ESC system is in the “Partial Off” mode.
WARNING!
There may be situations on minor hills with a loaded
vehicle, or while pulling a trailer, when the system will
not activate and slight rolling may occur. This could
cause a collision with another vehicle or object. Always
remember the driver is responsible for braking the
vehicle.
WARNING!
If TSC activates while driving, slow the vehicle down,
stop at the nearest safe location, and adjust the trailer
load to eliminate trailer sway.
2020_RAM_PROMASTER_CITY_OM_USA=GUID-7B6A7FCA-79B0-423F-95C5-ED2A949C3D13=1=en=.book Page 102
Page 113 of 350

110 SAFETY
Initial Indication
If the driver is unbuckled when the ignition switch is first in the
AVV/START or MAR/RUN position, a chime will signal for a few
seconds. If the driver or outboard front seat passenger (if equipped
with outboard front passenger seat BeltAlert) is unbuckled when
the ignition switch is first in the AVV/START or MAR/RUN posi-
tion the Seat Belt Reminder Light will turn on and remain on until
both outboard front seat belts are buckled. The outboard front
passenger seat BeltAlert is not active when an outboard front
passenger seat is unoccupied.
BeltAlert Warning Sequence
The BeltAlert warning sequence is activated when the vehicle is
moving above a specified vehicle speed range and the driver or
outboard front seat passenger is unbuckled (if equipped with
outboard front passenger seat BeltAlert) (the outboard front
passenger seat BeltAlert is not active when the outboard front
passenger seat is unoccupied). The BeltAlert warning sequence
starts by blinking the Seat Belt Reminder Light and sounding an
intermittent chime. Once the BeltAlert warning sequence has
completed, the Seat Belt Reminder Light will remain on until the
seat belts are buckled. The BeltAlert warning sequence may repeat
based on vehicle speed until the driver and occupied outboard front
seat passenger seat belts are buckled. The driver should instruct all
occupants to buckle their seat belts.
Change of Status
If the driver or outboard front seat passenger (if equipped
with outboard front passenger seat BeltAlert) unbuckles
their seat belt while the vehicle is traveling, the BeltAlert
warning sequence will begin until the seat belts are buckled
again.
The outboard front passenger seat BeltAlert is not active
when the outboard front passenger seat is unoccupied.
BeltAlert may be triggered when an animal or other items are
placed on the outboard front passenger seat or when the seat
is folded flat (if equipped). It is recommended that pets be
restrained in the rear seat (if equipped) in pet harnesses or
pet carriers that are secured by seat belts, and cargo is prop
-
erly stowed.
BeltAlert can be activated or deactivated by an authorized
dealer. FCA US LLC does not recommend deactivating
BeltAlert.
NOTE:
If BeltAlert has been deactivated and the driver or outboard
front seat passenger (if equipped with outboard front
passenger seat BeltAlert) is unbuckled the Seat Belt
Reminder Light will turn on and remain on until the driver
and outboard front seat passenger seat belts are buckled.
2020_RAM_PROMASTER_CITY_OM_USA=GUID-7B6A7FCA-79B0-423F-95C5-ED2A949C3D13=1=en=.book Page 110