spare wheel Ram ProMaster City 2020 Owner's Manual
[x] Cancel search | Manufacturer: RAM, Model Year: 2020, Model line: ProMaster City, Model: Ram ProMaster City 2020Pages: 350, PDF Size: 13.27 MB
Page 9 of 350
6
DRIVING TIPS................................................................... 196
Driving On Slippery Surfaces ................................... 196
Driving Through Water ............................................. 197
IN CASE OF EMERGENCY
HAZARD WARNING FLASHERS .............................. 199
BULB REPLACEMENT .................................................. 200
Replacement Bulbs ................................................... 200
Replacing Exterior Bulbs ............................................ 201
Replacing Interior Bulbs ............................................. 203
FUSES.................................................................................. 206
Underhood Fuses......................................................... 206
Interior Fuses................................................................ 209
Central Unit Fuse Panel .............................................. 211
JACKING AND TIRE CHANGING ............................... 212
Jack Location — If Equipped ..................................... 212
Removing The Spare Tire — If Equipped ................ 213
Preparations For Jacking ........................................... 217
Jacking Instructions ..................................................... 218
Vehicles With Alloy Wheels ...................................... 224
Vehicles Equipped With Wheel Covers ................... 226
TIRE SERVICE KIT — IF EQUIPPED ........................... 227
Tire Service Kit Storage .............................................. 227
Tire Service Kit Usage ................................................. 227
JUMP STARTING..............................................................231
Preparations For Jump Starting ................................. 231
Jump Starting Procedure ............................................232
IF YOUR ENGINE OVERHEATS ..................................234
IGNITION KEY REMOVAL OVERRIDE ......................235
GEAR SELECTOR OVERRIDE .....................................236
FREEING A STUCK VEHICLE ......................................237
TOWING A DISABLED VEHICLE ...............................238
ENHANCED ACCIDENT RESPONSE
SYSTEM (EARS) ...............................................................240
EVENT DATA RECORDER (EDR)................................. 240
SERVICING AND MAINTENANCE
SCHEDULED SERVICING .............................................241
Maintenance Plan ........................................................242
ENGINE COMPARTMENT .......................................... 245
Engine Compartment — 2.4L ....................................245
Checking Oil Level ......................................................246
Adding Washer Fluid .................................................246
Maintenance-Free Battery .......................................... 247
Pressure Washing ........................................................248
2020_RAM_PROMASTER_CITY_OM_USA=GUID-7B6A7FCA-79B0-423F-95C5-ED2A949C3D13=1=en=.book Page 6
Page 10 of 350
7
DEALER SERVICE ........................................................... 248
Engine Oil ................................................................... 248
Engine Oil Filter ......................................................... 250
Engine Air Cleaner Filter ......................................... 250
Air Conditioner Maintenance ................................. 251
Body Lubrication ....................................................... 252
Windshield Wiper Blades ......................................... 252
Exhaust System ........................................................... 253
Cooling System .......................................................... 255
Brake System ............................................................... 260
Power Steering Fluid................................................... 261
Automatic Transmission ........................................... 261
Upfitter Connectors — If Equipped.......................... 263
RAISING THE VEHICLE ............................................... 266
TIRES................................................................................... 266
Tire Safety Information ............................................ 266
Tires — General Information .................................... 276
Tire Types ..................................................................... 282
Spare Tires — If Equipped ....................................... 283
Wheel And Wheel Trim Care ................................. 285
Tire Chains (Traction Devices) ................................. 287
Tire Rotation Recommendations ............................... 287
DEPARTMENT OF TRANSPORTATION UNIFORM
TIRE QUALITY GRADES ...............................................288
Treadwear .....................................................................288
Traction Grades............................................................ 289
Temperature Grades ................................................... 289
STORING THE VEHICLE .............................................289
BODYWORK ......................................................................290
Protection From Atmospheric Agents ....................290
Body And Underbody Maintenance .........................290
Preserving The Bodywork .......................................... 291
INTERIORS .......................................................................292
Seats And Fabric Parts ................................................292
Plastic And Coated Parts ............................................292
Leather Parts.................................................................293
Glass Surfaces ..............................................................293
2020_RAM_PROMASTER_CITY_OM_USA=GUID-7B6A7FCA-79B0-423F-95C5-ED2A949C3D13=1=en=.book Page 7
Page 109 of 350

106 SAFETY
4. Using tire chains on the vehicle.
5. Using wheels/tires not equipped with TPM sensors.
NOTE:
Your vehicle can be equipped with either Tire Service Kit,
compact spare tire or regular size spare tire (with or without
original TPMS sensor).
1. Tire Service Kit (original tire sealant – if equipped): Afterfixing the punctured tire with original tire sealant, the
original situation will be restored, so system will turn off
the telltale during the normal drive.
2. Compact Spare Tire – (if equipped): The compact spare wheel is not equipped with TPMS sensor. So when
mounted, during the normal drive the system will turn
on the telltale (flashing for approximately 75 seconds then
remains solid). This condition persists until a wheel
equipped with original TPMS sensor has been mounted
on the vehicle. 3. Regular size spare tire (not equipped with TPMS sensor):
When mounted, during the normal drive the system will
turn on the telltale (flashing for approximately 75 seconds
then remains solid). This condition persists until a wheel
equipped with original TPMS sensor has been mounted
on the vehicle. Then the system will be restored and the
telltale will turn off during the normal drive.
4. Regular size spare tire (equipped with TPMS sensor): When mounted, the telltale will turn off during the
normal drive.
5. In all the above cases please check the replacement tire inflation pressure before driving your vehicle.
6. In case of tire replacement, if the vehicle is driven for short periods of time, then the system can take a while to
be restored.
NOTE:
For a correct Tire Pressure Monitoring behavior, please wait
for about 20 minutes in key-off during each tire substitution.
2020_RAM_PROMASTER_CITY_OM_USA=GUID-7B6A7FCA-79B0-423F-95C5-ED2A949C3D13=1=en=.book Page 106
Page 159 of 350

156 SAFETY
Periodic Safety Checks You Should Make Outside
The Vehicle
Tires
Examine tires for excessive tread wear and uneven wear
patterns. Check for stones, nails, glass, or other objects
lodged in the tread or sidewall. Inspect the tread for cuts and
cracks. Inspect sidewalls for cuts, cracks, and bulges. Check
the wheel bolts for tightness. Check the tires (including
spare) for proper cold inflation pressure.
Lights
Have someone observe the operation of brake lights and
exterior lights while you work the controls. Check turn signal
and high beam indicator lights on the instrument panel.
Door Latches
Check for proper closing, latching, and locking.
Fluid Leaks
Check area under the vehicle after overnight parking for
fuel, coolant, oil, or other fluid leaks. Also, if gasoline fumes
are detected or if fuel, or brake fluid leaks are suspected, the
cause should be located and corrected immediately.
• NEVER place any objects under the floor mat (e.g.,
towels, keys, etc.). These objects could change the posi -
tion of the floor mat and may cause interference with
the accelerator, brake, or clutch pedals.
• If the vehicle carpet has been removed and re-installed, always properly attach carpet to the floor and check the
floor mat fasteners are secure to the vehicle carpet.
Fully depress each pedal to check for interference with
the accelerator, brake, or clutch pedals then re-install
the floor mats.
• It is recommended to only use mild soap and water to clean your floor mats. After cleaning, always check
your floor mat has been properly installed and is
secured to your vehicle using the floor mat fasteners by
lightly pulling mat.
WARNING! (Continued)
2020_RAM_PROMASTER_CITY_OM_USA=GUID-7B6A7FCA-79B0-423F-95C5-ED2A949C3D13=1=en=.book Page 156
Page 216 of 350

IN CASE OF EMERGENCY 213
Removing The Spare Tire — If Equipped
1. Remove the spare tire before attempting to jack up thevehicle. Attach the wrench handle to the winch extension.
Jack Tools 2. To access the winch mechanism open the rear doors of the
vehicle to expose the winch mechanism access cover.
Remove the access cover and install the winch extension
into the winch mechanism.
Winch Location
1 — Wrench Handle
2 — Winch Extension
3 — Emergency Screwdriver
4 — Bolt Install Wrench
5 — Wheel Chock
6 — Jack
6
2020_RAM_PROMASTER_CITY_OM_USA=GUID-7B6A7FCA-79B0-423F-95C5-ED2A949C3D13=1=en=.book Page 213
Page 218 of 350

IN CASE OF EMERGENCY 215
3. Rotate the wheel wrench handle counterclockwise untilthe spare tire is on the ground with enough cable slack to
allow you to pull it out from under the vehicle.
Lowering The Spare Tire
NOTE:
The winch mechanism is designed for use with the winch
extension only. Use of an air wrench or other power tools is
not recommended and can damage the winch. 4. Pull the spare tire out from under the vehicle to gain
access to the spare tire retainer.
Spare Tire
6
2020_RAM_PROMASTER_CITY_OM_USA=GUID-7B6A7FCA-79B0-423F-95C5-ED2A949C3D13=1=en=.book Page 215
Page 219 of 350

216 IN CASE OF EMERGENCY
5. Remove the retainer nut prior to removing the retainerfrom the wheel.
Retainer Nut 6. Lift the spare tire with one hand to give clearance to tilt
the retainer at the end of the cable.
Lifting Spare Tire
2020_RAM_PROMASTER_CITY_OM_USA=GUID-7B6A7FCA-79B0-423F-95C5-ED2A949C3D13=1=en=.book Page 216
Page 225 of 350
222 IN CASE OF EMERGENCY
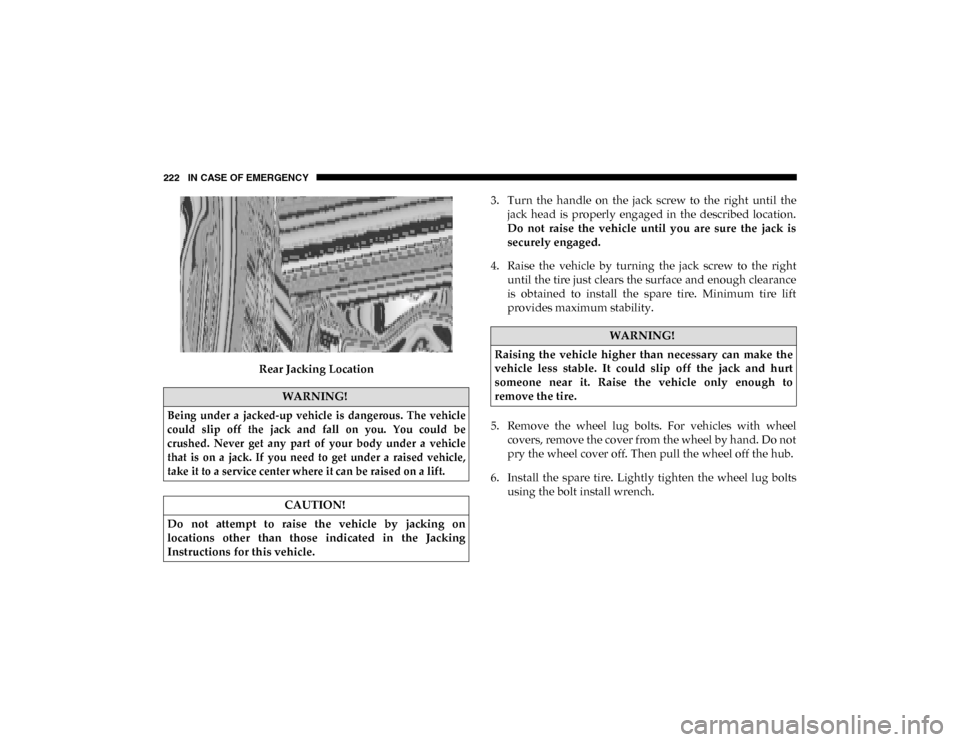
Rear Jacking Location3. Turn the handle on the jack screw to the right until the
jack head is properly engaged in the described location.
Do not raise the vehicle until you are sure the jack is
securely engaged.
4. Raise the vehicle by turning the jack screw to the right until the tire just clears the surface and enough clearance
is obtained to install the spare tire. Minimum tire lift
provides maximum stability.
5. Remove the wheel lug bolts. For vehicles with wheel covers, remove the cover from the wheel by hand. Do not
pry the wheel cover off. Then pull the wheel off the hub.
6. Install the spare tire. Lightly tighten the wheel lug bolts using the bolt install wrench.
WARNING!
Being under a jacked-up vehicle is dangerous. The vehicle
could slip off the jack and fall on you. You could be
crushed. Never get any part of your body under a vehicle
that is on a jack. If you need to get under a raised vehicle,
take it to a service center where it can be raised on a lift.
CAUTION!
Do not attempt to raise the vehicle by jacking on
locations other than those indicated in the Jacking
Instructions for this vehicle.
WARNING!
Raising the vehicle higher than necessary can make the
vehicle less stable. It could slip off the jack and hurt
someone near it. Raise the vehicle only enough to
remove the tire.
2020_RAM_PROMASTER_CITY_OM_USA=GUID-7B6A7FCA-79B0-423F-95C5-ED2A949C3D13=1=en=.book Page 222
Page 226 of 350
IN CASE OF EMERGENCY 223
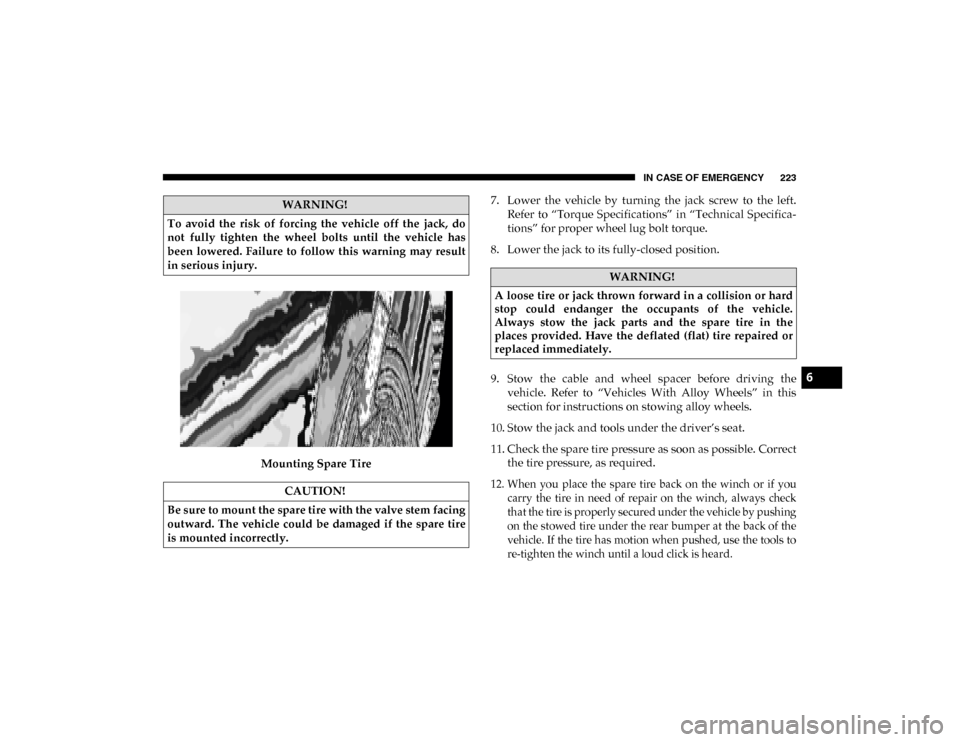
Mounting Spare Tire7. Lower the vehicle by turning the jack screw to the left.
Refer to “Torque Specifications” in “Technical Specifica -
tions” for proper wheel lug bolt torque.
8. Lower the jack to its fully-closed position.
9. Stow the cable and wheel spacer before driving the vehicle. Refer to “Vehicles With Alloy Wheels” in this
section for instructions on stowing alloy wheels.
10. Stow the jack and tools under the driver’s seat.
11. Check the spare tire pressure as soon as possible. Correct the tire pressure, as required.
12. When you place the spare tire back on the winch or if you carry the tire in need of repair on the winch, always check
that the tire is properly secured under the vehicle by pushing
on the stowed tire under the rear bumper at the back of the
vehicle. If the tire has motion when pushed, use the tools to
re-tighten the winch until a loud click is heard.
WARNING!
To avoid the risk of forcing the vehicle off the jack, do
not fully tighten the wheel bolts until the vehicle has
been lowered. Failure to follow this warning may result
in serious injury.
CAUTION!
Be sure to mount the spare tire with the valve stem facing
outward. The vehicle could be damaged if the spare tire
is mounted incorrectly.
WARNING!
A loose tire or jack thrown forward in a collision or hard
stop could endanger the occupants of the vehicle.
Always stow the jack parts and the spare tire in the
places provided. Have the deflated (flat) tire repaired or
replaced immediately.
6
2020_RAM_PROMASTER_CITY_OM_USA=GUID-7B6A7FCA-79B0-423F-95C5-ED2A949C3D13=1=en=.book Page 223
Page 283 of 350
280 SERVICING AND MAINTENANCE
Tread Wear Indicators
Tread wear indicators are in the original equipment tires to
help you in determining when your tires should be replaced.
These indicators are molded into the bottom of the tread
grooves. They will appear as bands when the tread depth
becomes a 1/16 of an inch (1.6 mm). When the tread is worn
to the tread wear indicators, the tire should be replaced.
Refer to “Replacement Tires” in this section for further infor-
mation.
Life Of Tire
The service life of a tire is dependent upon varying factors
including, but not limited to:
• Driving style.
• Tire pressure - Improper cold tire inflation pressures can cause uneven wear patterns to develop across the tire
tread. These abnormal wear patterns will reduce tread life,
resulting in the need for earlier tire replacement.
• Distance driven.
• Performance tires, tires with a speed rating of V or higher, and Summer tires typically have a reduced tread life. Rota -
tion of these tires per the vehicle scheduled maintenance is
highly recommended. NOTE:
Wheel Valve Stem must be replaced as well when installing
new tires due to wear and tear in existing tires.
Keep dismounted tires in a cool, dry place with as little expo
-
sure to light as possible. Protect tires from contact with oil,
grease, and gasoline.
Replacement Tires
The tires on your new vehicle provide a balance of many
characteristics. They should be inspected regularly for wear
and correct cold tire inflation pressures. The manufacturer
strongly recommends that you use tires equivalent to the
originals in size, quality and performance when replacement
is needed. Refer to the paragraph on “Tread Wear Indica -
tors” in this section. Refer to the Tire and Loading Informa -WARNING!
Tires and the spare tire should be replaced after six
years, regardless of the remaining tread. Failure to follow
this warning can result in sudden tire failure. You could
lose control and have a collision resulting in serious
injury or death.
2020_RAM_PROMASTER_CITY_OM_USA=GUID-7B6A7FCA-79B0-423F-95C5-ED2A949C3D13=1=en=.book Page 280