display RENAULT ESPACE 2012 J81 / 4.G Owner's Manual
[x] Cancel search | Manufacturer: RENAULT, Model Year: 2012, Model line: ESPACE, Model: RENAULT ESPACE 2012 J81 / 4.GPages: 267, PDF Size: 8.95 MB
Page 104 of 267
2.22
ENG_UD20372_1
Système antipatinage : A.S.R. (X81 - J81 - Renault)
ENG_NU_932-3_X81ph3_Renault_2
TRAcTION cONTROL: ASR (2/2)
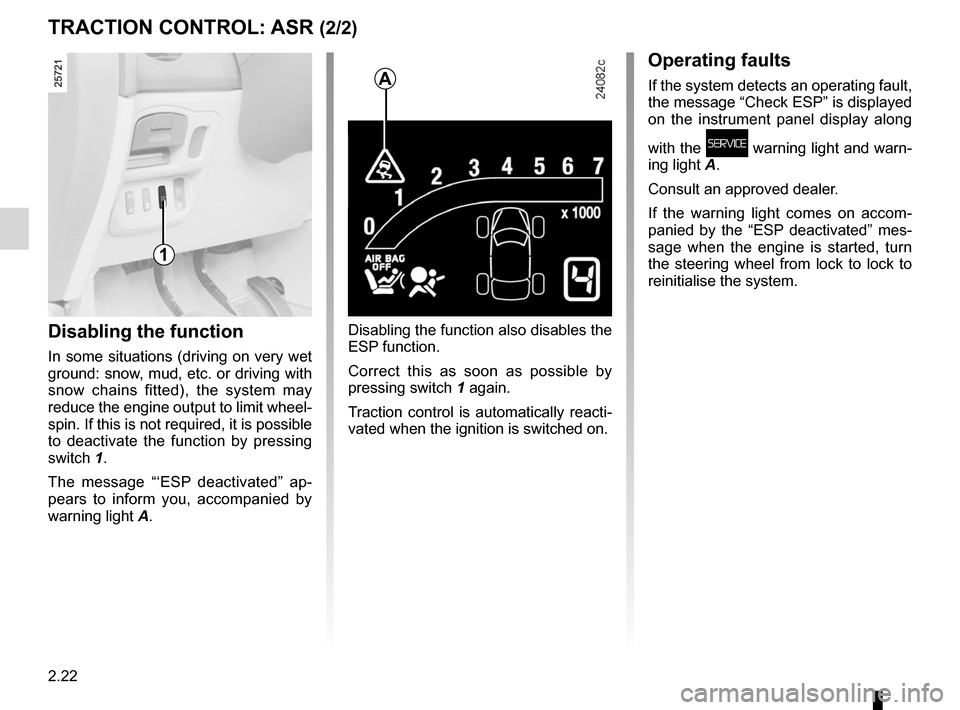
Disabling the function
In some situations (driving on very wet
ground: snow, mud, etc. or driving with
snow chains fitted), the system may
reduce the engine output to limit wheel -
spin. If this is not required, it is possible
to deactivate the function by pressing
switch 1.
The message “‘ESP deactivated” ap -
pears to inform you, accompanied by
warning light A.
Disabling the function also disables the
ESP function.
Correct this as soon as possible by
pressing switch 1 again.
Traction control is automatically reacti-
vated when the ignition is switched on.
Operating faults
If the system detects an operating fault,
the message “Check ESP” is displayed
on the instrument panel display along
with the
ú warning light and warn-
ing light A.
Consult an approved dealer.
If the warning light comes on accom -
panied by the “ESP deactivated” mes -
sage when the engine is started, turn
the steering wheel from lock to lock to
reinitialise the system.
1
A
Page 109 of 267
JauneNoirNoir texte
2.27
ENG_UD1793_1
Régulateur-Limiteur de vitesse : fonction limiteur (X81 - Renault)
ENG_NU_932-3_X81ph3_Renault_2
cRUISE cONTROL - SPEED LIMITER: limiter function (continued)
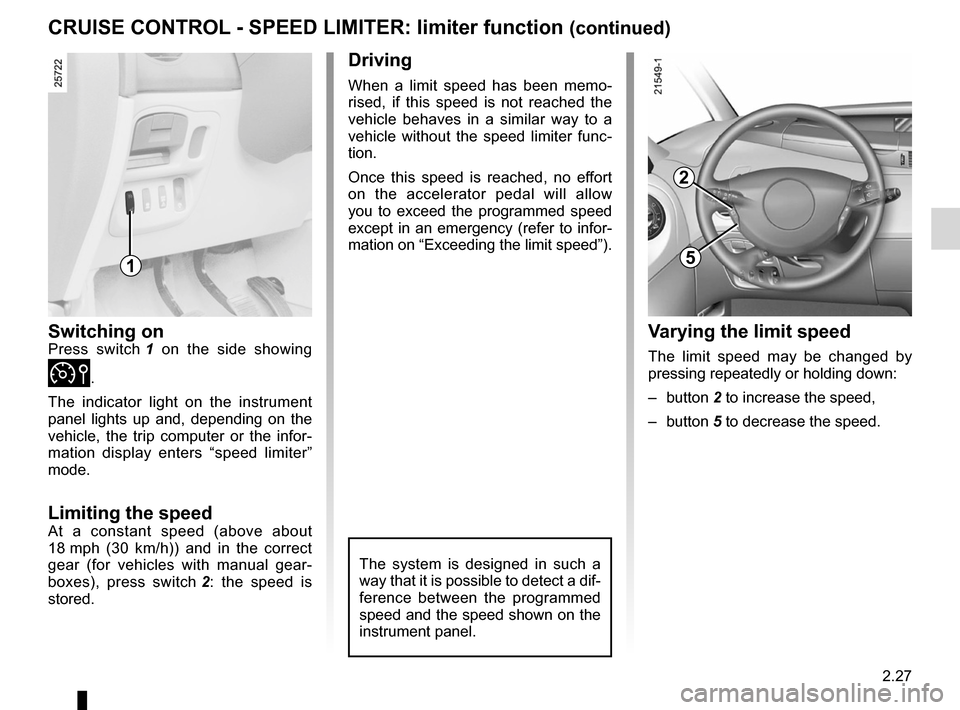
Switching onPress switch 1 on the side showing
Ì.
The indicator light on the instrument
panel lights up and, depending on the
vehicle, the trip computer or the infor -
mation display enters “speed limiter”
mode.
Limiting the speedAt a constant speed (above about
18 mph (30 km/h)) and in the correct
gear (for vehicles with manual gear -
boxes), press switch 2 : the speed is
stored.
Driving
When a limit speed has been memo -
rised, if this speed is not reached the
vehicle behaves in a similar way to a
vehicle without the speed limiter func -
tion.
Once this speed is reached, no effort
on the accelerator pedal will allow
you to exceed the programmed speed
except in an emergency (refer to infor-
mation on “Exceeding the limit speed”).
The system is designed in such a
way that it is possible to detect a dif-
ference between the programmed
speed and the speed shown on the
instrument panel.
v arying the limit speed
The limit speed may be changed by
pressing repeatedly or holding down:
– button 2 to increase the speed,
– button 5 to decrease the speed.
1
2
5
Page 112 of 267
2.30
ENG_UD1794_1
Régulateur-Limiteur de vitesse : fonction régulateur (X81 - Renau\
lt)
ENG_NU_932-3_X81ph3_Renault_2
Jaune NoirNoir texte
cRUISE cONTROL - SPEED LIMITER: cruise control function (continued)
Driving
Once a cruising speed is memorised
and the cruise control function is active,
you may lift your foot off the accelera -
tor pedal.
Important: you are never -
theless advised to keep
your feet close to the pedals
in order to react if neces -
sary.
The system is designed in such a
way that it is possible to detect a dif-
ference between the programmed
speed and the speed shown on the
instrument panel.
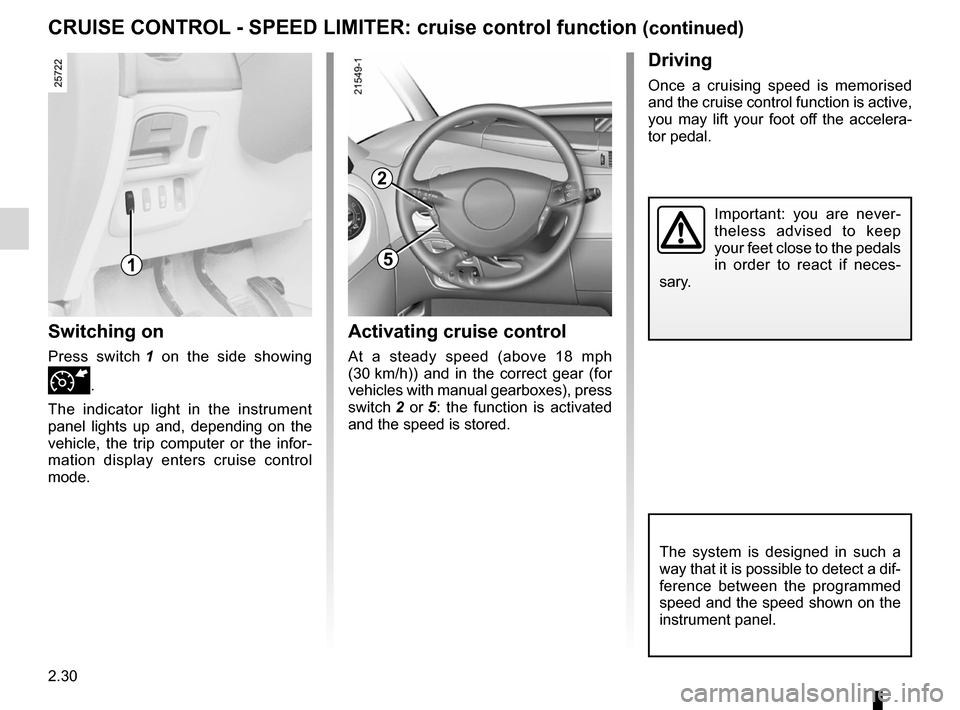
Switching on
Press switch 1 on the side showing
Í.
The indicator light in the instrument
panel lights up and, depending on the
vehicle, the trip computer or the infor -
mation display enters cruise control
mode.
Activating cruise control
At a steady speed (above 18 mph
(30 km/h)) and in the correct gear (for
vehicles with manual gearboxes), press
switch 2 or 5 : the function is activated
and the speed is stored.
1
2
5
Page 116 of 267
2.34
ENG_UD20377_1
Aide au parking (X81 - J81 - Renault)
ENG_NU_932-3_X81ph3_Renault_2
Jaune NoirNoir texte
PARKING DISTANcE cONTROL (continued)
vehicles fitted with rear
parking distance control
Operation
Rear parking distance control is only
activated when reverse is selected.
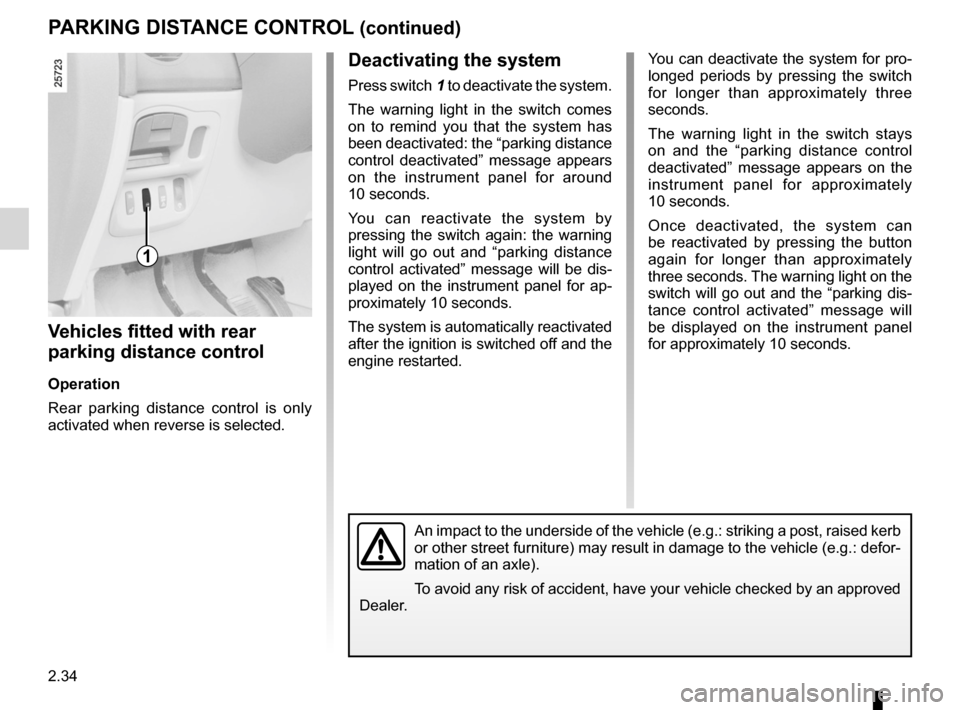
Deactivating the system
Press switch 1 to deactivate the system.
The warning light in the switch comes
on to remind you that the system has
been deactivated: the “parking distance
control deactivated” message appears
on the instrument panel for around
10 seconds.
You can reactivate the system by
pressing the switch again: the warning
light will go out and “parking distance
control activated” message will be dis-
played on the instrument panel for ap-
proximately 10 seconds.
The system is automatically reactivated
after the ignition is switched off and the
engine restarted. You can deactivate the system for pro-
longed periods by pressing the switch
for longer than approximately three
seconds.
The warning light in the switch stays
on and the “parking distance control
deactivated” message appears on the
instrument panel for approximately
10 seconds.
Once deactivated, the system can
be reactivated by pressing the button
again for longer than approximately
three seconds. The warning light on the
switch will go out and the “parking dis-
tance control activated” message will
be displayed on the instrument panel
for approximately 10 seconds.
1
An impact to the underside of the vehicle (e.g.: striking a post, raised kerb
or other street furniture) may result in damage to the vehicle (e.g.: defor-
mation of an axle).
To avoid any risk of accident, have your vehicle checked by an approved
Dealer.
Page 118 of 267
2.36
ENG_UD20377_1
Aide au parking (X81 - J81 - Renault)
ENG_NU_932-3_X81ph3_Renault_2
PARKING DISTANcE cONTROL (continued)
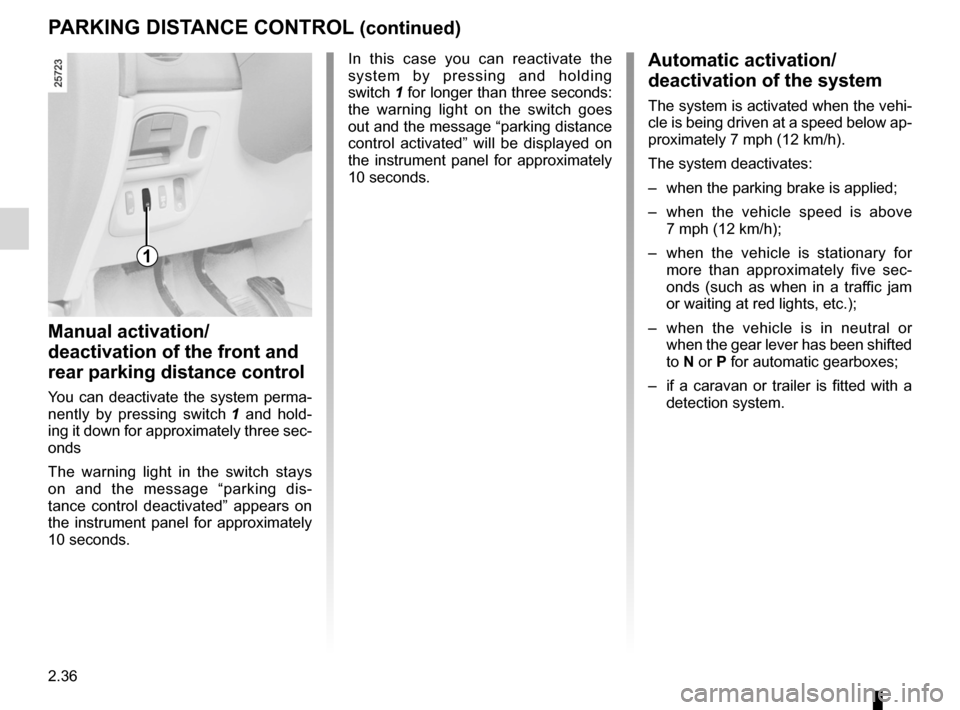
Manual activation/
deactivation of the front and
rear parking distance control
You can deactivate the system perma-
nently by pressing switch 1 and hold -
ing it down for approximately three sec-
onds
The warning light in the switch stays
on and the message “parking dis -
tance control deactivated” appears on
the instrument panel for approximately
10 seconds. In this case you can reactivate the
system by pressing and holding
switch 1 for longer than three seconds:
the warning light on the switch goes
out and the message “parking distance
control activated” will be displayed on
the instrument panel for approximately
10 seconds.
Automatic activation/
deactivation of the system
The system is activated when the vehi-
cle is being driven at a speed below ap-
proximately 7 mph (12 km/h).
The system deactivates:
–
when the parking brake is applied;
– when the vehicle speed is above
7 mph (12 km/h);
– when the vehicle is stationary for
more than approximately five sec -
onds (such as when in a traffic jam
or waiting at red lights, etc.);
– when the vehicle is in neutral or
when the gear lever has been shifted
to N or P for automatic gearboxes;
– if a caravan or trailer is fitted with a
detection system.
1
Page 119 of 267
automatic gearbox (use) ....................... (up to the end of the DU)
driving ................................................... (up to the end of the DU)
automatic gearbox selector lever ..........(up to the end of the DU)
2.37
ENG_UD24090_2
Boîte automatique (X81 - J81 - Renault)
ENG_NU_932-3_X81ph3_Renault_2
Using the automatic gearbox
AUTOMATIc GEARBOX
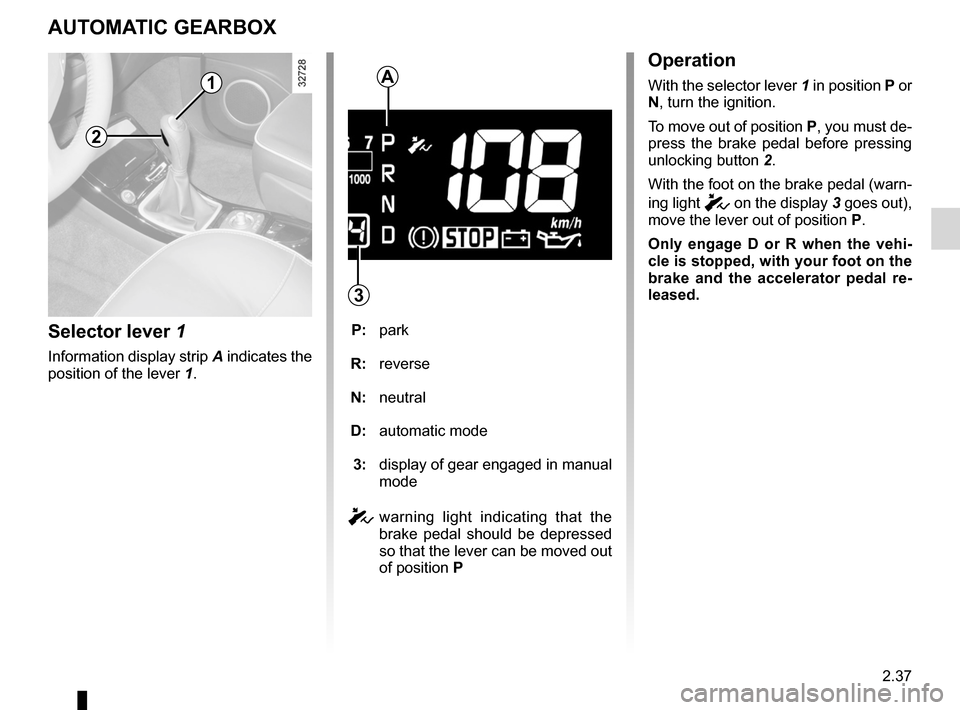
Selector lever 1
Information display strip A indicates the
position of the lever 1.
P: park
R: reverse
N: neutral
D: automatic mode
3: display of gear engaged in manual
mode
c warning light indicating that the
brake pedal should be depressed
so that the lever can be moved out
of position P
2
1A
3
Operation
With the selector lever 1 in position P or
N, turn the ignition.
To move out of position P, you must de-
press the brake pedal before pressing
unlocking button 2.
With the foot on the brake pedal (warn-
ing light
c on the display 3 goes out),
move the lever out of position P.
Only engage D or R when the vehi -
cle is stopped, with your foot on the
brake and the accelerator pedal re -
leased.
Page 120 of 267
2.38
ENG_UD24090_2
Boîte automatique (X81 - J81 - Renault)
ENG_NU_932-3_X81ph3_Renault_2
Jaune NoirNoir texte
AUTOMATIc GEARBOX (continued)
Driving in automatic mode
Select position D. In the majority of
traffic conditions, you will not have to
touch the gear selector lever again: the
gear will be changed automatically at
the right time and at the most suitable
engine speed because the automatic
system takes into account the vehicle
load and road contour and adjusts itself
to the particular driving style you have
chosen.
Economical driving
When driving, always leave the lever
in position D, keeping the accelerator
pedal lightly depressed to ensure auto-
matic gear changes at a lower engine
speed.
Accelerating and overtaking
Depress the accelerator pedal firmly
and fully (so that it goes beyond the
kickdown point).
This will enable you to change down
to the optimum gear within the
engine range.
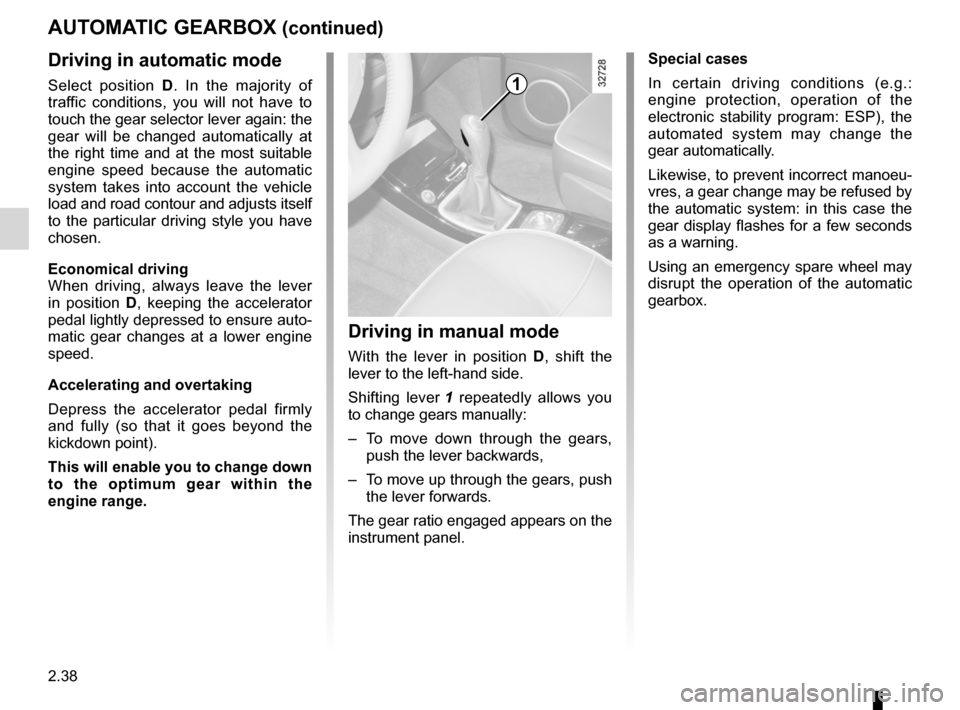
Driving in manual mode
With the lever in position D, shift the
lever to the left-hand side.
Shifting lever 1 repeatedly allows you
to change gears manually:
– To move down through the gears,
push the lever backwards,
– To move up through the gears, push
the lever forwards.
The gear ratio engaged appears on the
instrument panel. Special cases
In certain driving conditions (e.g.:
engine protection, operation of the
electronic stability program: ESP), the
automated system may change the
gear automatically.
Likewise, to prevent incorrect manoeu
-
vres, a gear change may be refused by
the automatic system: in this case the
gear display flashes for a few seconds
as a warning.
Using an emergency spare wheel may
disrupt the operation of the automatic
gearbox.
1
Page 134 of 267
air conditioning ..................................... (up to the end of the DU)
heating system ..................................... (up to the end of the DU)
air conditioning ..................................... (up to the end of the DU)
demisting windscreen ....................................................... (current page)
demisting rear screen ....................................................... (current page)
rear screen demisting ......................................................... (current page)
temperature regulation ......................... (up to the end of the DU)
ventilation ............................................. (up to the end of the DU)
heating and air conditioning system ..... (up to the end of the DU)
3.12
ENG_UD20382_1
Air conditionné automatique (X81 - J81 - Renault)
ENG_NU_932-3_X81ph3_Renault_3
Jaune NoirNoir texte
AUTOMATIC CLIMATE CONTROL
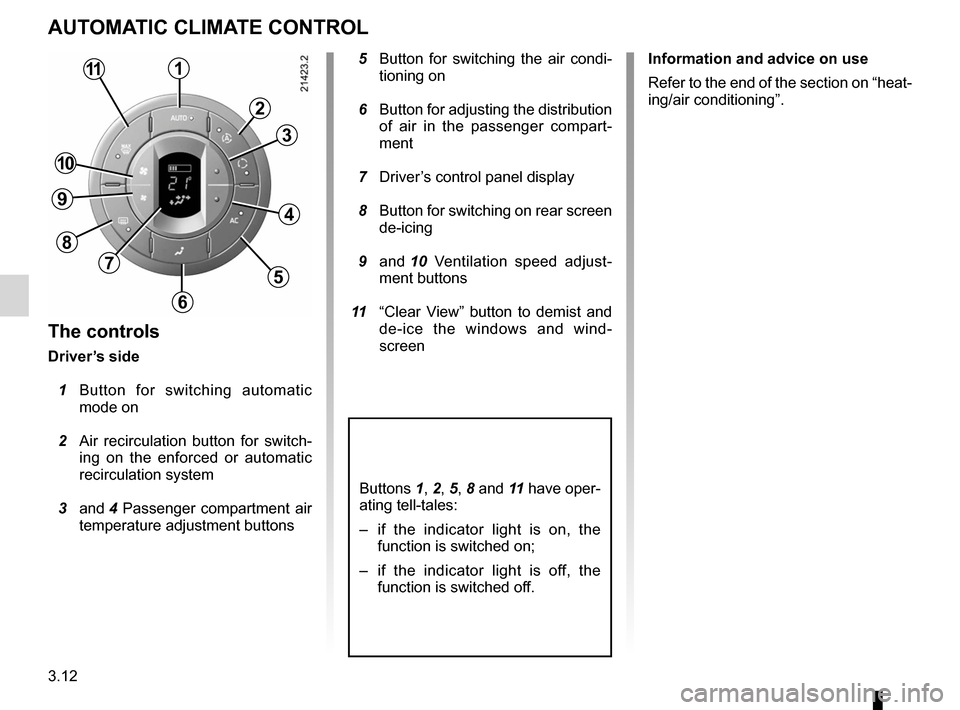
The controls
Driver’s side
1 Button for switching automatic
mode on
2 Air recirculation button for switch -
ing on the enforced or automatic
recirculation system
3 and 4 Passenger compartment air
temperature adjustment buttons
5 Button for switching the air condi -
tioning on
6 Button for adjusting the distribution
of air in the passenger compart -
ment
7 Driver’s control panel display
8 Button for switching on rear screen
de-icing
9 and 10 Ventilation speed adjust -
ment buttons
11 “Clear View” button to demist and
de-ice the windows and wind -
screen Information and advice on use
Refer to the end of the section on “heat-
ing/air conditioning”.
Buttons 1, 2, 5, 8 and 11 have oper-
ating tell-tales:
–
if the indicator light is on, the
function is switched on;
– if the indicator light is off, the
function is switched off.
1
2
3
4
5
6
7
8
9
10
11
Page 136 of 267
3.14
ENG_UD20382_1
Air conditionné automatique (X81 - J81 - Renault)
ENG_NU_932-3_X81ph3_Renault_3
Jaune NoirNoir texte
AUTOMATIC CLIMATE CONTROL (continued)
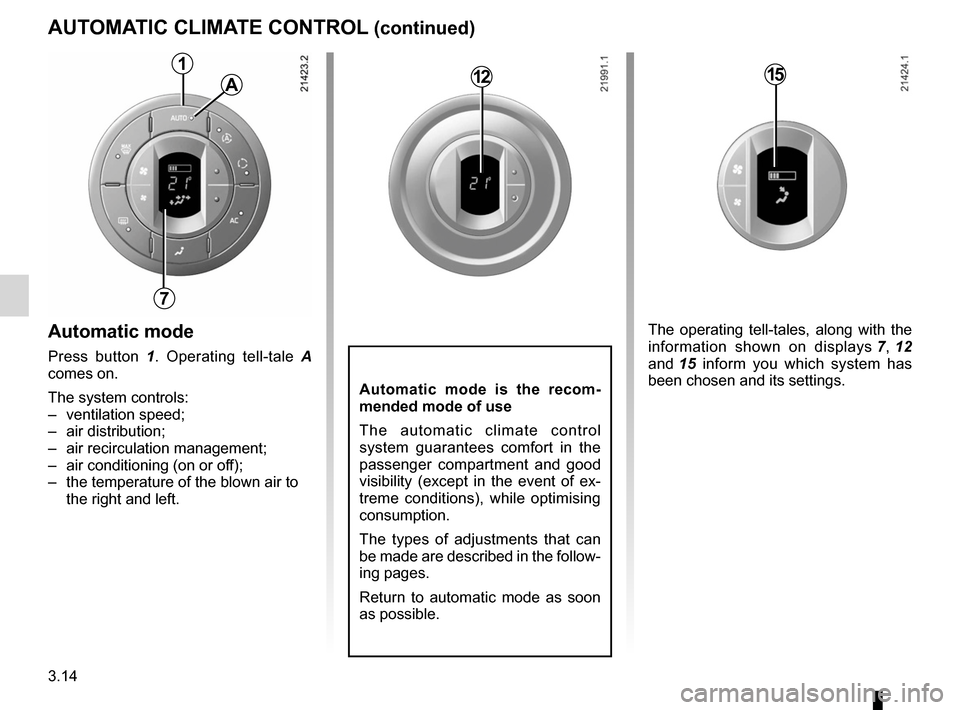
Automatic mode
Press button 1 . Operating tell-tale A
comes on.
The system controls:
– ventilation speed;
– air distribution;
– air recirculation management;
– air conditioning (on or off);
– the temperature of the blown air to
the right and left. The operating tell-tales, along with the
information shown on displays
7 , 12
and 15 inform you which system has
been chosen and its settings.
1
A
7
1215
Automatic mode is the recom -
mended mode of use
The automatic climate control
system guarantees comfort in the
passenger compartment and good
visibility (except in the event of ex -
treme conditions), while optimising
consumption.
The types of adjustments that can
be made are described in the follow-
ing pages.
Return to automatic mode as soon
as possible.
Page 137 of 267
JauneNoirNoir texte
3.15
ENG_UD20382_1
Air conditionné automatique (X81 - J81 - Renault)
ENG_NU_932-3_X81ph3_Renault_3
AUTOMATIC CLIMATE CONTROL (continued)
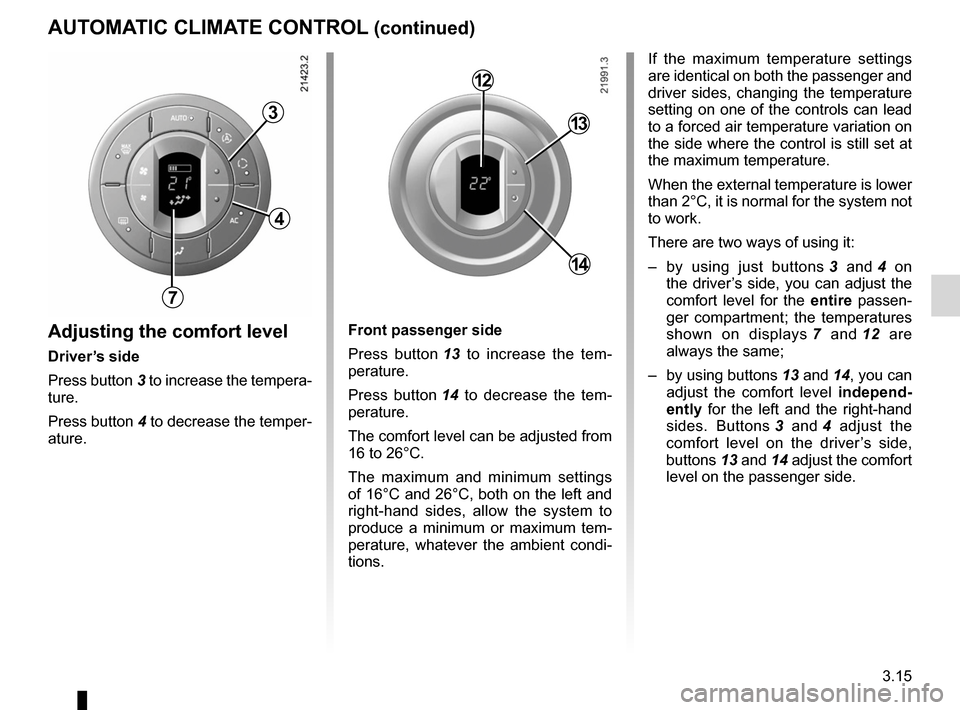
Adjusting the comfort level
Driver’s side
Press button 3 to increase the tempera-
ture.
Press button 4 to decrease the temper-
ature. Front passenger side
Press button
13 to increase the tem -
perature.
Press button 14 to decrease the tem -
perature.
The comfort level can be adjusted from
16 to 26°C.
The maximum and minimum settings
of 16°C and 26°C, both on the left and
right-hand sides, allow the system to
produce a minimum or maximum tem -
perature, whatever the ambient condi -
tions. If the maximum temperature settings
are identical on both the passenger and
driver sides, changing the temperature
setting on one of the controls can lead
to a forced air temperature variation on
the side where the control is still set at
the maximum temperature.
When the external temperature is lower
than 2°C, it is normal for the system not
to work.
There are two ways of using it:
–
by using just buttons 3 and 4 on
the driver’s side, you can adjust the
comfort level for the entire passen -
ger compartment; the temperatures
shown on displays 7 and 12 are
always the same;
– by using buttons 13 and 14, you can
adjust the comfort level independ-
ently for the left and the right-hand
sides. Buttons 3 and 4 adjust the
comfort level on the driver ’s side,
buttons 13 and 14 adjust the comfort
level on the passenger side.
7
4
3
12
13
14