check engine light RENAULT KANGOO 2013 X61 / 2.G Instrument Panel Instruments Workshop Manual
[x] Cancel search | Manufacturer: RENAULT, Model Year: 2013, Model line: KANGOO, Model: RENAULT KANGOO 2013 X61 / 2.GPages: 59, PDF Size: 0.28 MB
Page 7 of 59
83A-7
AFTER REPAIRCheck for correct operation.
V1 MR-376-X76-83A000$010.mif
INSTRUMENT PANEL INSTRUMENTS
Fault finding – Introduction83A
DISPLAYING THE TRIP COMPUTER PAGES AND FAULT FINDING HELP
First page: all the warning lights are illuminated with software version + clock on the trip computer page.
Second page: all the segments are illuminated on the trip computer.
Third page: Number of litres display
If an "open circuit or short circuit" fault is present, "- - -" is displayed.
Fourth page: Fuel flow in litres/hour information with the engine running.
If an "open circuit or short circuit" fault is present, "- -" is displayed.
Fifth page: Stored sensor faults, no present or stored fault displayed as "- - - - -".
– The stored and present "coolant temperature" faults are displayed as "- - -TO" for open circuit and " and
"- - -TC" for short circuit.
The "coolant temperature" faults are not significant, the "TO" fault must not be taken into account when the engine is
cold.
– The stored and present "fuel gauge" faults are displayed as " -JO- - "for open circuit and"-JC- -" for short circuit.
– The stored and present "fuel flow" faults are displayed as "D- - - -" for no fuel flow signal.
The "fuel flow" faults are to be taken into account only on the versions with the trip computer.
All the displayed faults of the "stored sensor faults" page are faults that were detected, but no longer confirmed as
present.
In case of several stored or present faults, they are all displayed on a single line.
To clear the stored faults and end the self-test procedure sequence, press and hold the odometer Reset button.
Page 8 of 59
83A-8
AFTER REPAIRCheck for correct operation.
V1 MR-376-X76-83A000$020.mif
83A
1. OPERATION OF THE NEEDLE INDICATORS
Speedometer
The vehicle speed signal is transmitted to the instrument panel by a wire link.
The information is produced by the ABS computer or a speed sensor located on the gearbox.
Engine speed indicator
The engine speed signal is transmitted to the instrument panel by a wire connection (signal provided by the injection
computer).
2. OPERATION OF THE TRIP COMPUTER
Coolant temperature bargraph
The coolant temperature signal is transmitted to the instrument panel by a wire connection.
The signal is produced by the coolant temperature sensor.
Above 115°C (inclusive), all the segments are illuminated with the warning light.
From 105°C (inclusive) to 115°C (not inclusive), six segments are illuminated.
From 80°C (inclusive) to 105°C (not inclusive), four segments are illuminated.
From 50°C (inclusive) to 80°C (not inclusive), two segments are illuminated.
No segments are illuminated when the temperature is below 50°C.
Fuel level bargraph and low fuel level warning light
The separate "low fuel level" warning light comes on when the reserve level is reached and nine segments of the
bargraph are extinguished.
The wire signal from the fuel sender is processed to calculate the fuel level and manage the warning light.
SPECIAL NOTE ABOUT OPERATION WHEN THE IGNITION IS SWITCHED ON:
A 3 second self-test is run on the "low fuel level" warning light when the ignition is switched on.
Case 1: if the fuel sender is connected but the fuel level in the tank is lower than the reserve threshold, the
continued illumination of the warning light after 3 seconds depends on the fuel level signal (smoothed and taking
into account recalibrations).
Case 2: if the fuel sender is not connected and it is the first time the fault appears when switching on the ignition, the
low fuel level warning light first flashes quickly for 2 seconds, then after 1 minute 40 seconds maximum (fault
detection time), the fuel level bargraph goes out, then the low fuel level warning light is illuminated continuously.
Case 3: if the fuel sender is not connected and the warning light had been illuminated before the ignition was
switched on this time, the low fuel level warning light stays illuminated, then after 1 minute 40 seconds, all the
bargraph segments go out.
INSTRUMENT PANEL INSTRUMENTS
Fault finding – System operation
Page 9 of 59
83A-9
AFTER REPAIRCheck for correct operation.
V1 MR-376-X76-83A000$020.mif
INSTRUMENT PANEL INSTRUMENTS
Fault finding – System operation83A
Oil pressure warning light
When the ignition is switched on, the oil pressure warning light illuminates.
When the engine is running and the oil pressure is sufficient, the warning light goes out.
The oil pressure signal is transmitted to the instrument panel by a wire connection.
The signal is produced by the oil pressure switch.
3. ODOMETER
Total mileage
The total mileage is displayed as soon as the ignition is switched on.
Press the Trip computer scroll button or the Reset button to move to the next page.
Trip mileage
The trip mileage is displayed instead of the total mileage when the Trip computer or the Reset button is pressed
briefly.
Except in the following cases:
– it is reset by a long press of the instrument panel Reset button,
– resetting the trip mileage is different from resetting the trip computer (distance travelled).
Trip computer
The various sequences of the trip computer can be displayed instead of the mileage by pressing the button at the
end of the wiper stalk (Trip computer button). It is reset by a long press of the Reset button.
The signals from the trip computer are displayed after the trip mileage as follows:
–Fuel consumed (in litres per 100 km) since the last reset,
–Average consumption (in litres per 100 km) since the last reset.
This is only displayed after the vehicle has travelled 400 m.
This takes into consideration the distance covered and the fuel consumption since the last time the reset button was
pressed.
Page 11 of 59
83A-11
AFTER REPAIRCheck for correct operation.
V1 MR-376-X76-83A000$020.mif
INSTRUMENT PANEL INSTRUMENTS
Fault finding – System operation83A
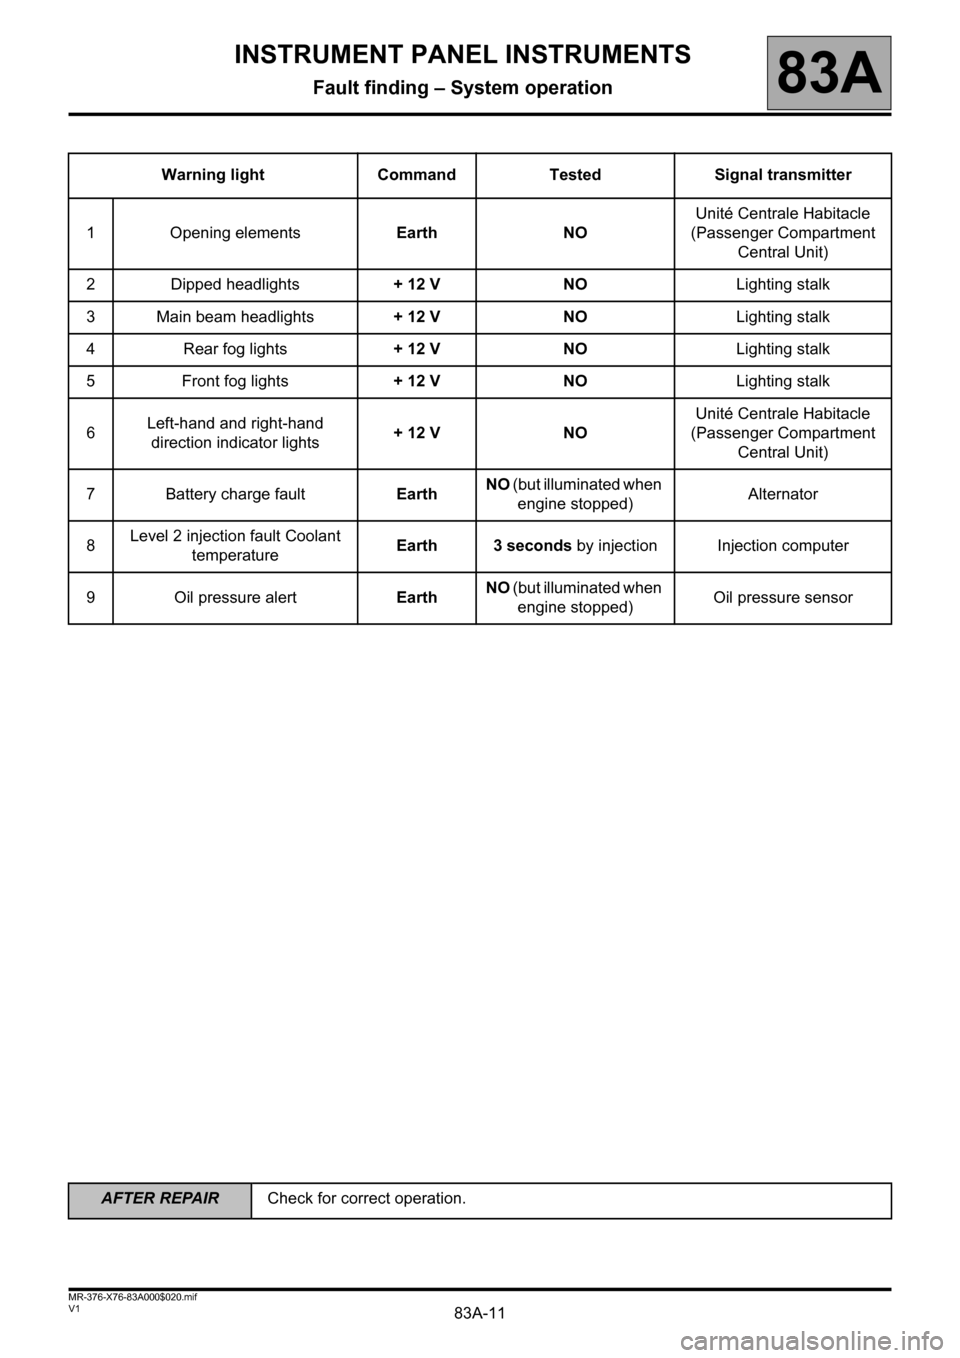
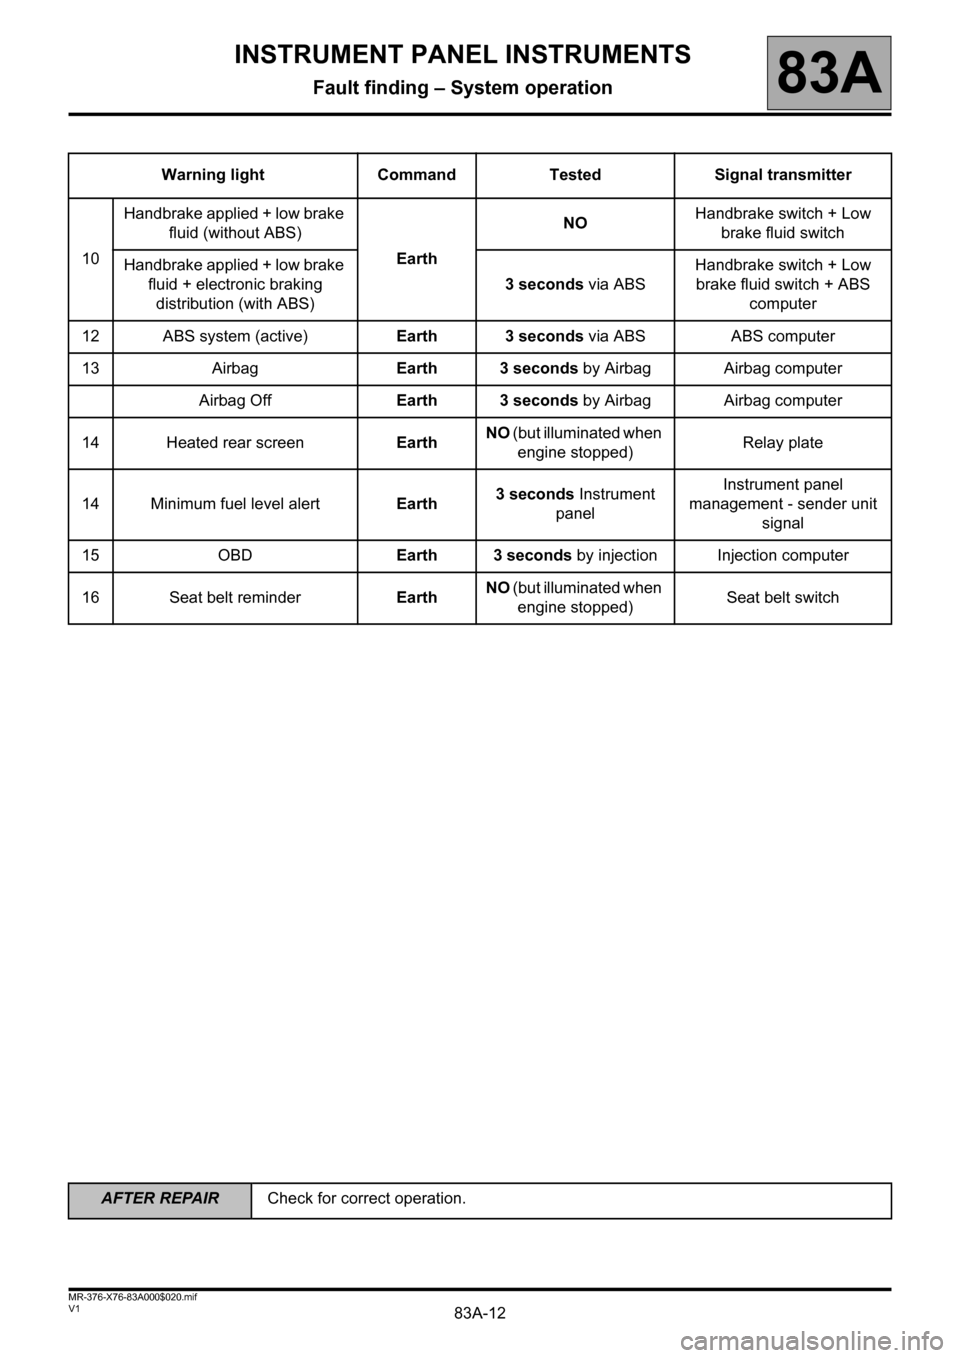
Warning light Command Tested Signal transmitter
1 Opening elementsEarth NOUnité Centrale Habitacle
(Passenger Compartment
Central Unit)
2 Dipped headlights+ 12 V NOLighting stalk
3 Main beam headlights+ 12 V NOLighting stalk
4 Rear fog lights+ 12 V NOLighting stalk
5 Front fog lights+ 12 V NOLighting stalk
6Left-hand and right-hand
direction indicator lights+ 12 V NOUnité Centrale Habitacle
(Passenger Compartment
Central Unit)
7 Battery charge faultEarthNO (but illuminated when
engine stopped)Alternator
8Level 2 injection fault Coolant
temperatureEarth 3 seconds by injection Injection computer
9 Oil pressure alertEarthNO (but illuminated when
engine stopped)Oil pressure sensor
Page 12 of 59
83A-12
AFTER REPAIRCheck for correct operation.
V1 MR-376-X76-83A000$020.mif
INSTRUMENT PANEL INSTRUMENTS
Fault finding – System operation83A
Warning light Command Tested Signal transmitter
10Handbrake applied + low brake
fluid (without ABS)
EarthNOHandbrake switch + Low
brake fluid switch
Handbrake applied + low brake
fluid + electronic braking
distribution (with ABS)3 seconds via ABSHandbrake switch + Low
brake fluid switch + ABS
computer
12 ABS system (active)Earth 3 seconds via ABS ABS computer
13 AirbagEarth 3 seconds by Airbag Airbag computer
Airbag OffEarth 3 seconds by Airbag Airbag computer
14 Heated rear screenEarthNO (but illuminated when
engine stopped)Relay plate
14 Minimum fuel level alertEarth3 seconds Instrument
panelInstrument panel
management - sender unit
signal
15 OBDEarth 3 seconds by injection Injection computer
16 Seat belt reminderEarthNO (but illuminated when
engine stopped)Seat belt switch
Page 16 of 59
83A-16
AFTER REPAIRCheck for correct operation.
V1 MR-376-X76-83A000$050.mif
83A
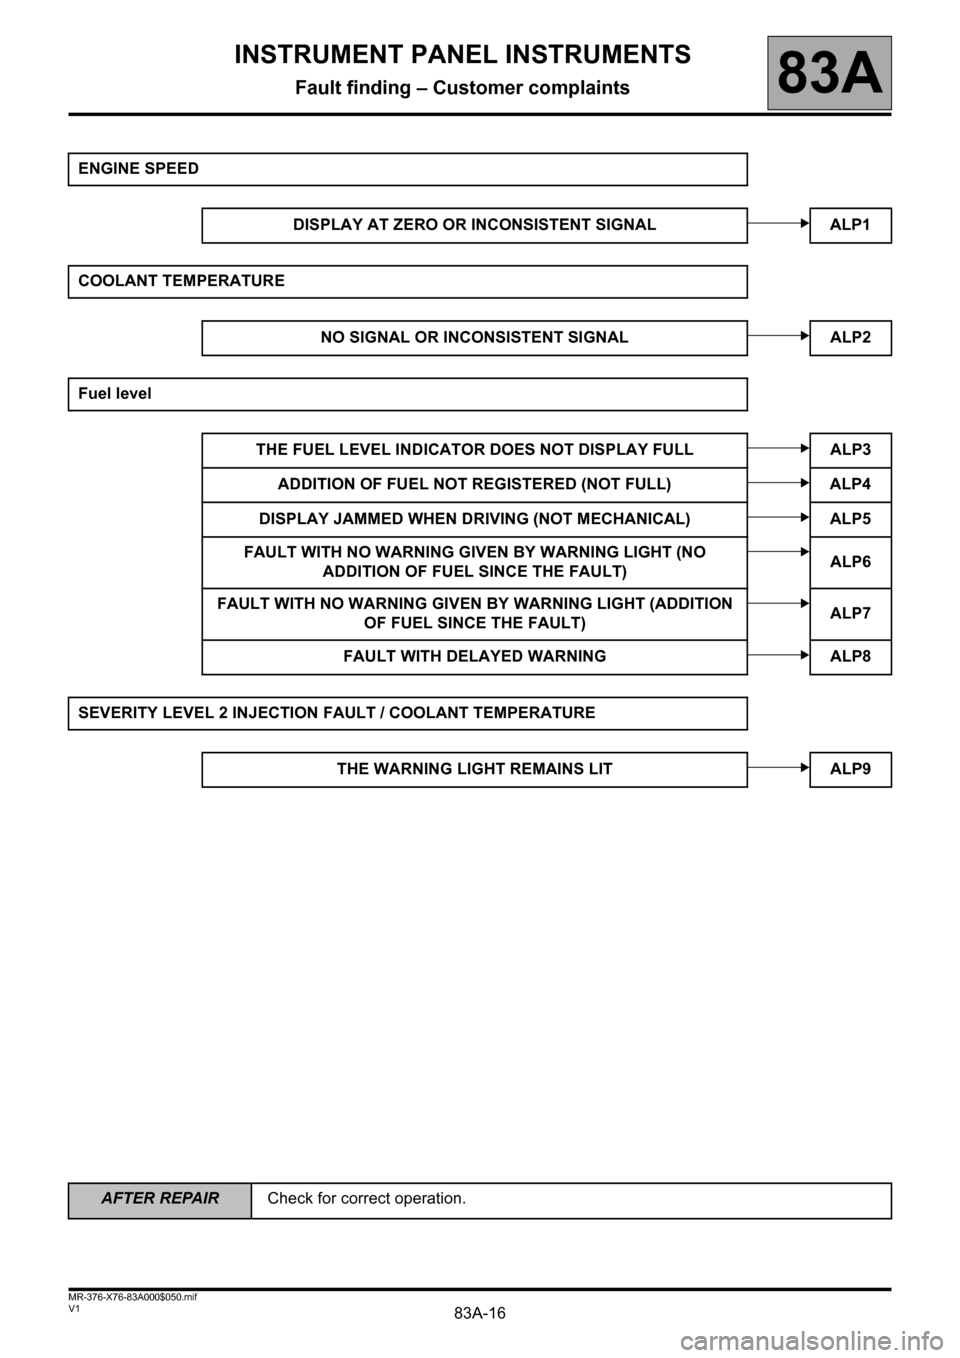
ENGINE SPEED
DISPLAY AT ZERO OR INCONSISTENT SIGNAL ALP1
COOLANT TEMPERATURE
NO SIGNAL OR INCONSISTENT SIGNAL ALP2
Fuel level
THE FUEL LEVEL INDICATOR DOES NOT DISPLAY FULL ALP3
ADDITION OF FUEL NOT REGISTERED (NOT FULL) ALP4
DISPLAY JAMMED WHEN DRIVING (NOT MECHANICAL) ALP5
FAULT WITH NO WARNING GIVEN BY WARNING LIGHT (NO
ADDITION OF FUEL SINCE THE FAULT)ALP6
FAULT WITH NO WARNING GIVEN BY WARNING LIGHT (ADDITION
OF FUEL SINCE THE FAULT)ALP7
FAULT WITH DELAYED WARNING ALP8
SEVERITY LEVEL 2 INJECTION FAULT / COOLANT TEMPERATURE
THE WARNING LIGHT REMAINS LIT ALP9
INSTRUMENT PANEL INSTRUMENTS
Fault finding – Customer complaints
Page 18 of 59
83A-18
AFTER REPAIRCheck for correct operation.
V1 MR-376-X76-83A000$050.mif
INSTRUMENT PANEL INSTRUMENTS
Fault finding – Customer complaints83A
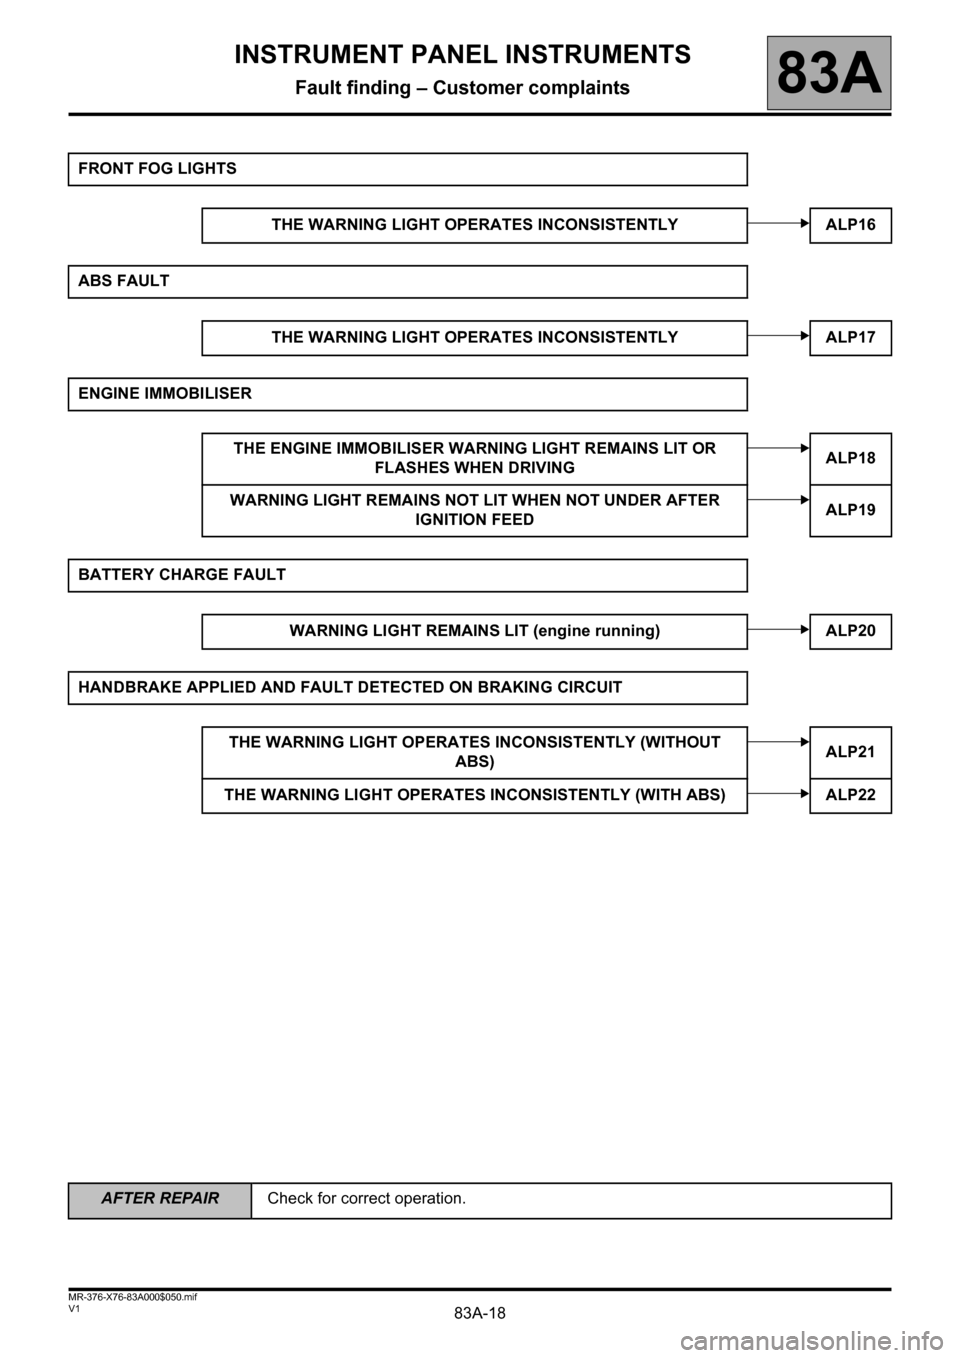
FRONT FOG LIGHTS
THE WARNING LIGHT OPERATES INCONSISTENTLY ALP16
ABS FAULT
THE WARNING LIGHT OPERATES INCONSISTENTLY ALP17
ENGINE IMMOBILISER
THE ENGINE IMMOBILISER WARNING LIGHT REMAINS LIT OR
FLASHES WHEN DRIVINGALP18
WARNING LIGHT REMAINS NOT LIT WHEN NOT UNDER AFTER
IGNITION FEEDALP19
BATTERY CHARGE FAULT
WARNING LIGHT REMAINS LIT (engine running) ALP20
HANDBRAKE APPLIED AND FAULT DETECTED ON BRAKING CIRCUIT
THE WARNING LIGHT OPERATES INCONSISTENTLY (WITHOUT
ABS)ALP21
THE WARNING LIGHT OPERATES INCONSISTENTLY (WITH ABS) ALP22
Page 38 of 59
83A-38
AFTER REPAIRCheck for correct operation.
V1 MR-376-X76-83A000$060.mif
INSTRUMENT PANEL INSTRUMENTS
Fault finding – Fault Finding Chart83A
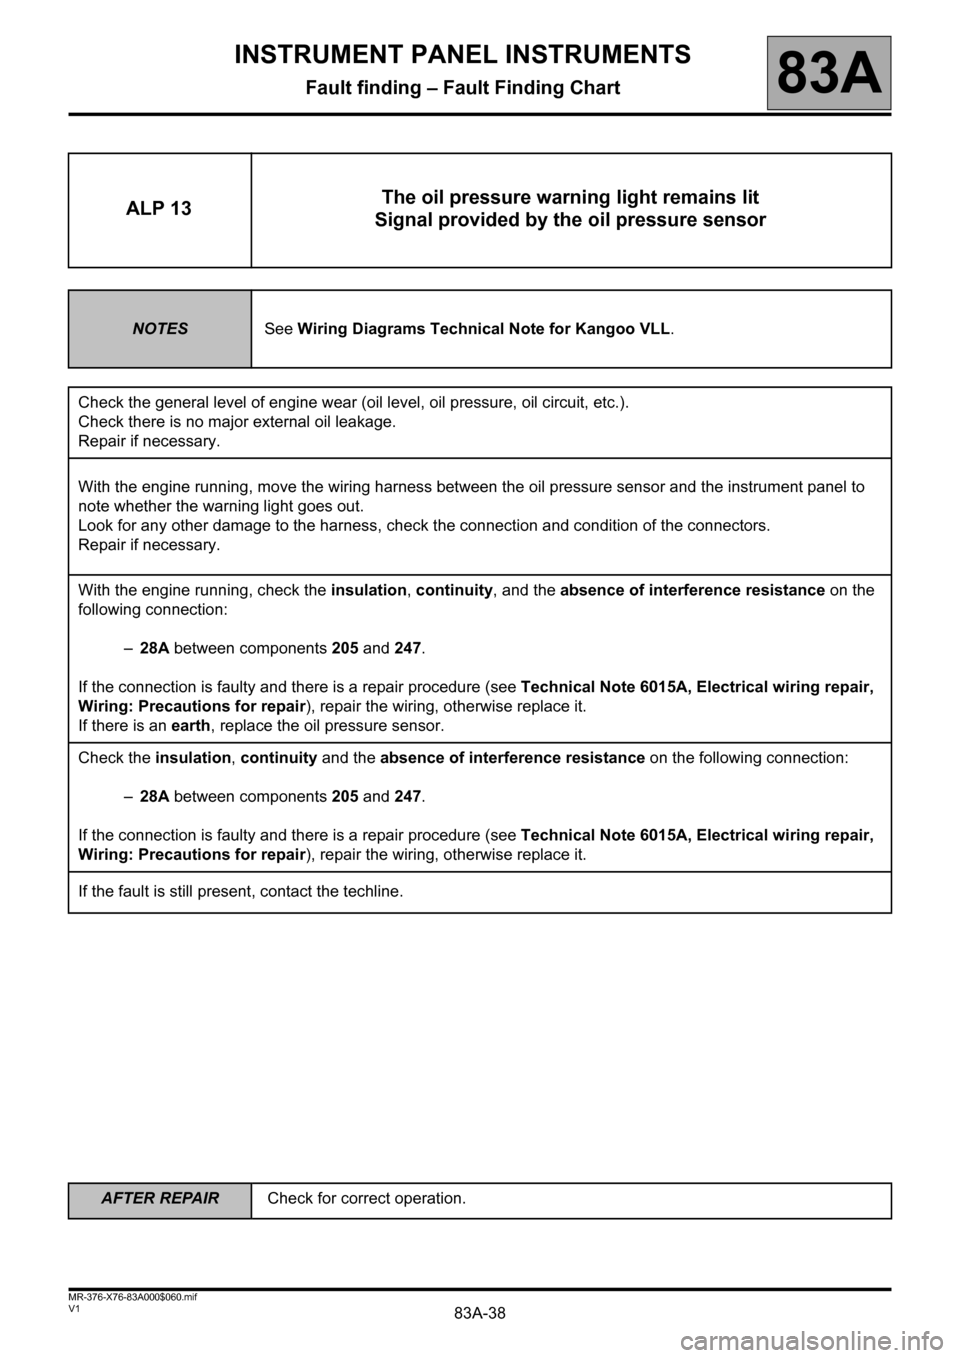
ALP 13The oil pressure warning light remains lit
Signal provided by the oil pressure sensor
NOTESSee Wiring Diagrams Technical Note for Kangoo VLL.
Check the general level of engine wear (oil level, oil pressure, oil circuit, etc.).
Check there is no major external oil leakage.
Repair if necessary.
With the engine running, move the wiring harness between the oil pressure sensor and the instrument panel to
note whether the warning light goes out.
Look for any other damage to the harness, check the connection and condition of the connectors.
Repair if necessary.
With the engine running, check the insulation, continuity, and the absence of interference resistance on the
following connection:
–28A between components 205 and 247.
If the connection is faulty and there is a repair procedure (see Technical Note 6015A, Electrical wiring repair,
Wiring: Precautions for repair), repair the wiring, otherwise replace it.
If there is an earth, replace the oil pressure sensor.
Check the insulation, continuity and the absence of interference resistance on the following connection:
–28A between components 205 and 247.
If the connection is faulty and there is a repair procedure (see Technical Note 6015A, Electrical wiring repair,
Wiring: Precautions for repair), repair the wiring, otherwise replace it.
If the fault is still present, contact the techline.
Page 47 of 59
83A-47
AFTER REPAIRCheck for correct operation.
V1 MR-376-X76-83A000$070.mif
INSTRUMENT PANEL INSTRUMENTS
Fault finding – Fault Finding Chart83A
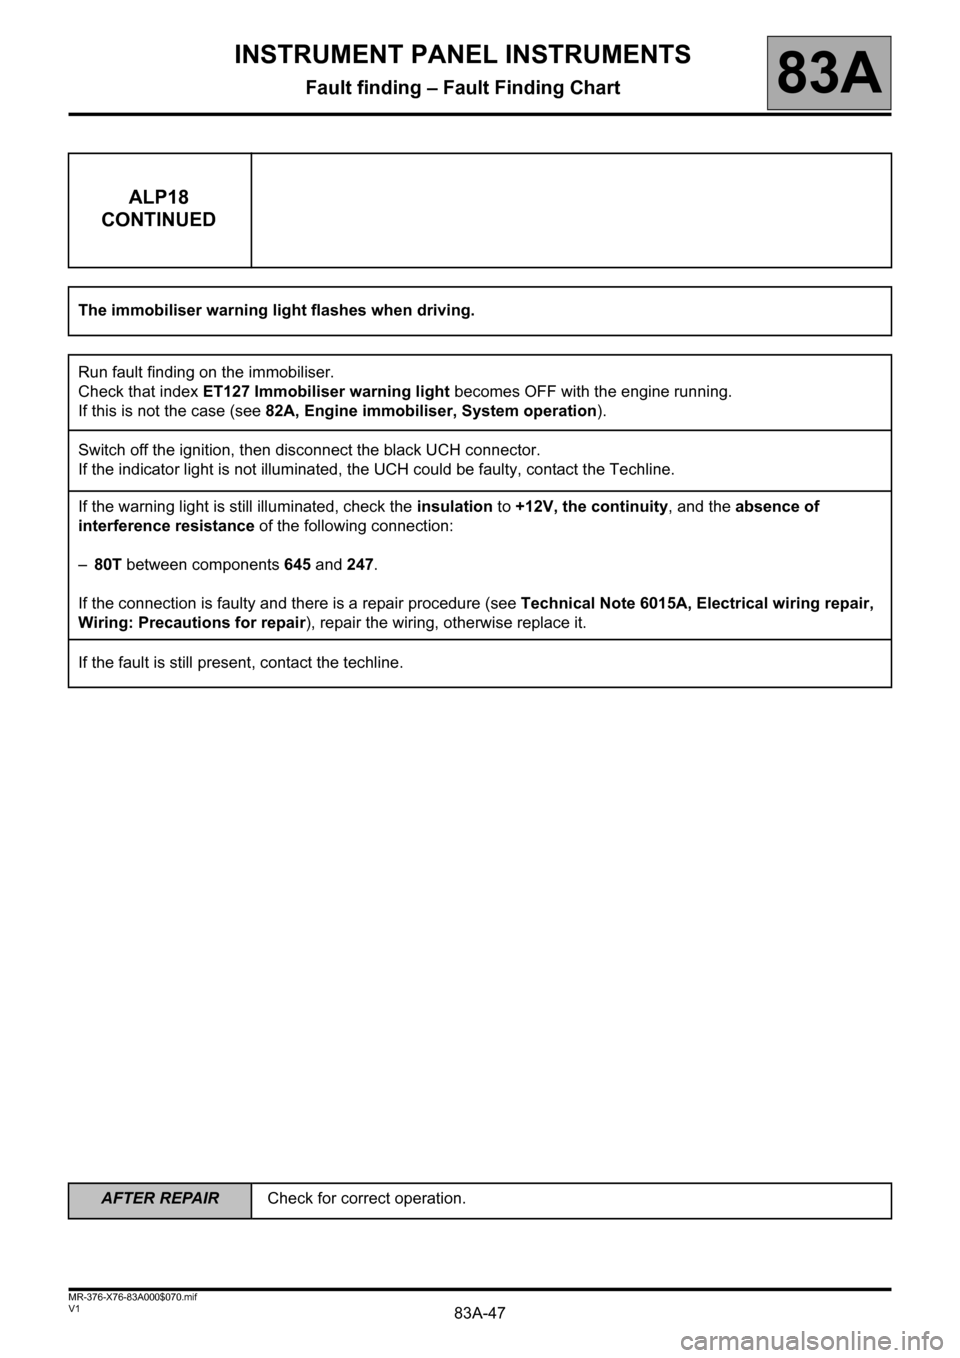
ALP18
CONTINUED
The immobiliser warning light flashes when driving.
Run fault finding on the immobiliser.
Check that index ET127 Immobiliser warning light becomes OFF with the engine running.
If this is not the case (see 82A, Engine immobiliser, System operation).
Switch off the ignition, then disconnect the black UCH connector.
If the indicator light is not illuminated, the UCH could be faulty, contact the Techline.
If the warning light is still illuminated, check the insulation to +12V, the continuity, and the absence of
interference resistance of the following connection:
–80T between components 645 and 247.
If the connection is faulty and there is a repair procedure (see Technical Note 6015A, Electrical wiring repair,
Wiring: Precautions for repair), repair the wiring, otherwise replace it.
If the fault is still present, contact the techline.
Page 49 of 59
83A-49
AFTER REPAIRCheck for correct operation.
V1 MR-376-X76-83A000$070.mif
INSTRUMENT PANEL INSTRUMENTS
Fault finding – Fault Finding Chart83A
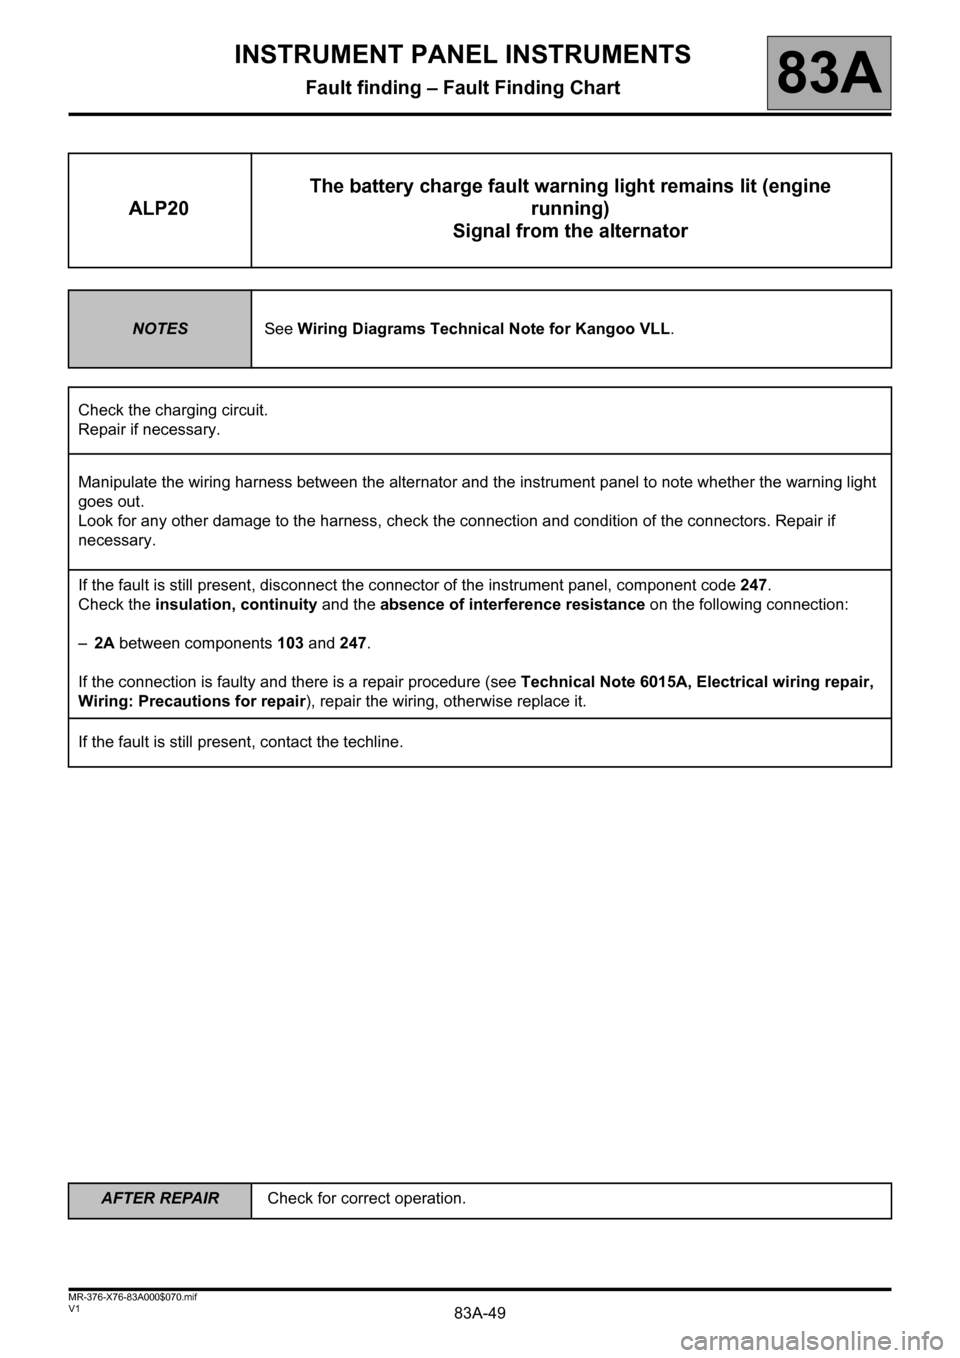
ALP20The battery charge fault warning light remains lit (engine
running)
Signal from the alternator
NOTESSee Wiring Diagrams Technical Note for Kangoo VLL.
Check the charging circuit.
Repair if necessary.
Manipulate the wiring harness between the alternator and the instrument panel to note whether the warning light
goes out.
Look for any other damage to the harness, check the connection and condition of the connectors. Repair if
necessary.
If the fault is still present, disconnect the connector of the instrument panel, component code 247.
Check the insulation, continuity and the absence of interference resistance on the following connection:
–2A between components 103 and 247.
If the connection is faulty and there is a repair procedure (see Technical Note 6015A, Electrical wiring repair,
Wiring: Precautions for repair), repair the wiring, otherwise replace it.
If the fault is still present, contact the techline.