RENAULT KANGOO VAN ZERO EMISSION 2017 X61 / 2.G Owners Manual
KANGOO VAN ZERO EMISSION 2017 X61 / 2.G
RENAULT
RENAULT
https://www.carmanualsonline.info/img/7/1633/w960_1633-0.png
RENAULT KANGOO VAN ZERO EMISSION 2017 X61 / 2.G Owners Manual
Trending: coolant level, fuel tank capacity, relay, battery, traction control, high beam, sport mode
Page 181 of 232
5.13
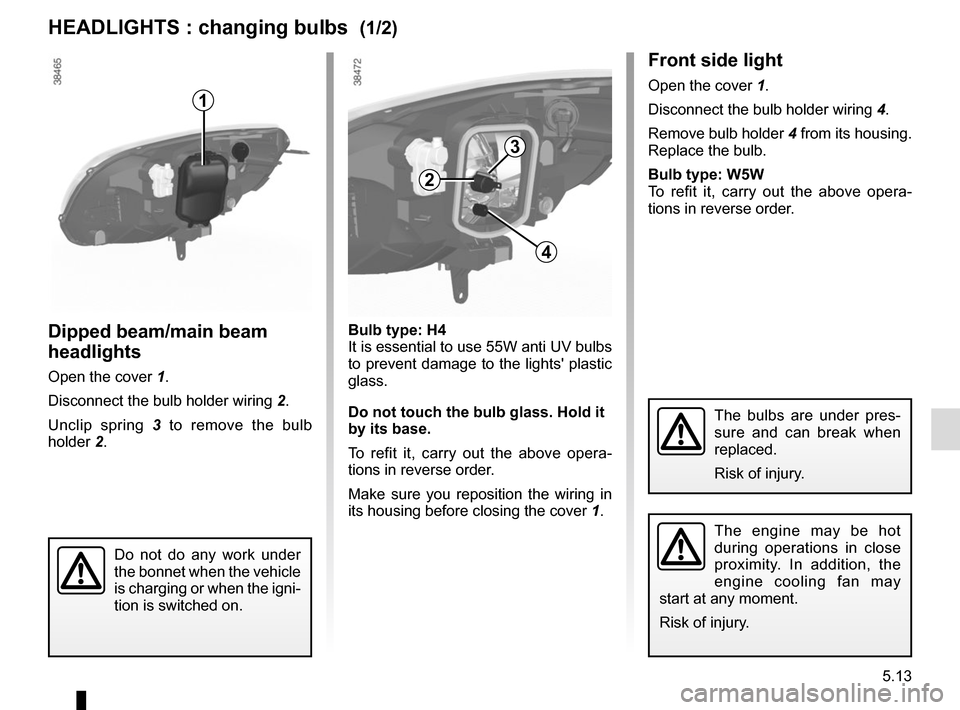
Front side light
Open the cover 1.
Disconnect the bulb holder wiring 4.
Remove bulb holder 4 from its housing.
Replace the bulb.
Bulb type: W5W
To refit it, carry out the above opera-
tions in reverse order.
Bulb type: H4 It is essential to use 55W anti UV bulbs
to prevent damage to the lights' plastic
glass.
Do not touch the bulb glass. Hold it
by its base.
To refit it, carry out the above opera-
tions in reverse order.
Make sure you reposition the wiring in
its housing before closing the cover 1.
The bulbs are under pres-
sure and can break when
replaced.
Risk of injury.
HEADLIGHTS : changing bulbs (1/2)
The engine may be hot
during operations in close
proximity. In addition, the
engine cooling fan may
start at any moment.
Risk of injury.
Do not do any work under
the bonnet when the vehicle
is charging or when the igni-
tion is switched on.
Dipped beam/main beam
headlights
Open the cover 1.
Disconnect the bulb holder wiring 2.
Unclip spring 3 to remove the bulb
holder 2.
2
1
4
3
Page 182 of 232
5.14
HEADLIGHTS : changing bulbs (2/2)
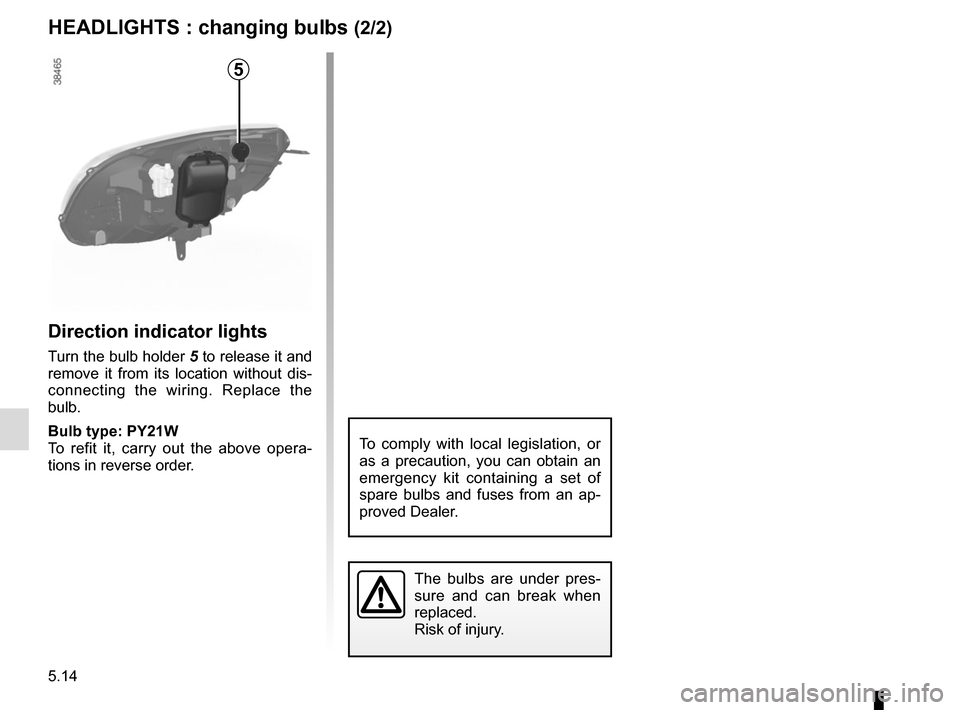
Direction indicator lights
Turn the bulb holder 5 to release it and
remove it from its location without dis-
connecting the wiring. Replace the
bulb.
Bulb type: PY21W
To refit it, carry out the above opera-
tions in reverse order.
The bulbs are under pres-
sure and can break when
replaced.
Risk of injury.
To comply with local legislation, or
as a precaution, you can obtain an
emergency kit containing a set of
spare bulbs and fuses from an ap-
proved Dealer.
5
Page 183 of 232
5.15
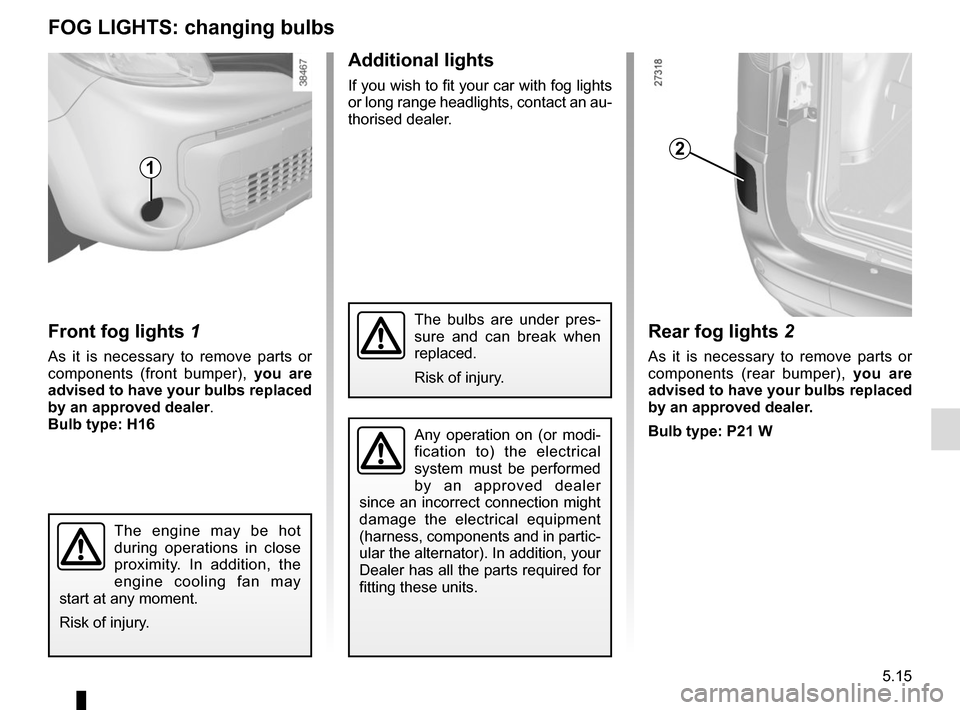
Front fog lights 1
As it is necessary to remove parts or
components (front bumper), you are
advised to have your bulbs replaced
by an approved dealer.
Bulb type: H16
Additional lights
If you wish to fit your car with fog lights
or long range headlights, contact an au-
thorised dealer.
FOG LIGHTS: changing bulbs
1
The engine may be hot
during operations in close
proximity. In addition, the
engine cooling fan may
start at any moment.
Risk of injury.
Any operation on (or modi-
fication to) the electrical
system must be performed
by an approved dealer
since an incorrect connection might
damage the electrical equipment
(harness, components and in partic-
ular the alternator). In addition, your
Dealer has all the parts required for
fitting these units.
Rear fog lights 2
As it is necessary to remove parts or
components (rear bumper), you are
advised to have your bulbs replaced
by an approved dealer.
Bulb type: P21 W
2
The bulbs are under pres-
sure and can break when
replaced.
Risk of injury.
Page 184 of 232
5.16
The bulbs are under pres-
sure and can break when
replaced.
Risk of injury.
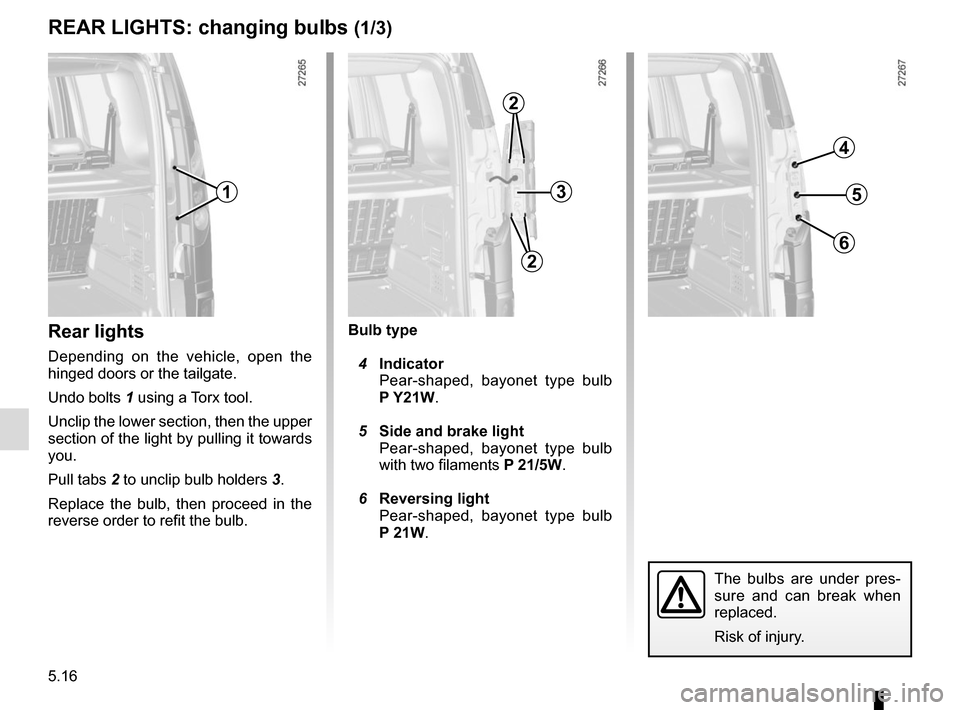
Bulb type
4 Indicator
Pear-shaped, bayonet type bulb
P Y21W.
5 Side and brake light
Pear-shaped, bayonet type bulb
with two filaments P 21/5W.
6 Reversing light
Pear-shaped, bayonet type bulb
P 21W.Rear lights
Depending on the vehicle, open the
hinged doors or the tailgate.
Undo bolts 1 using a Torx tool.
Unclip the lower section, then the upper
section of the light by pulling it towards
you.
Pull tabs 2 to unclip bulb holders 3.
Replace the bulb, then proceed in the
reverse order to refit the bulb.
REAR LIGHTS: changing bulbs (1/3)
31
2
2
5
4
6
Page 185 of 232
5.17
REAR LIGHTS: changing bulbs (2/3)
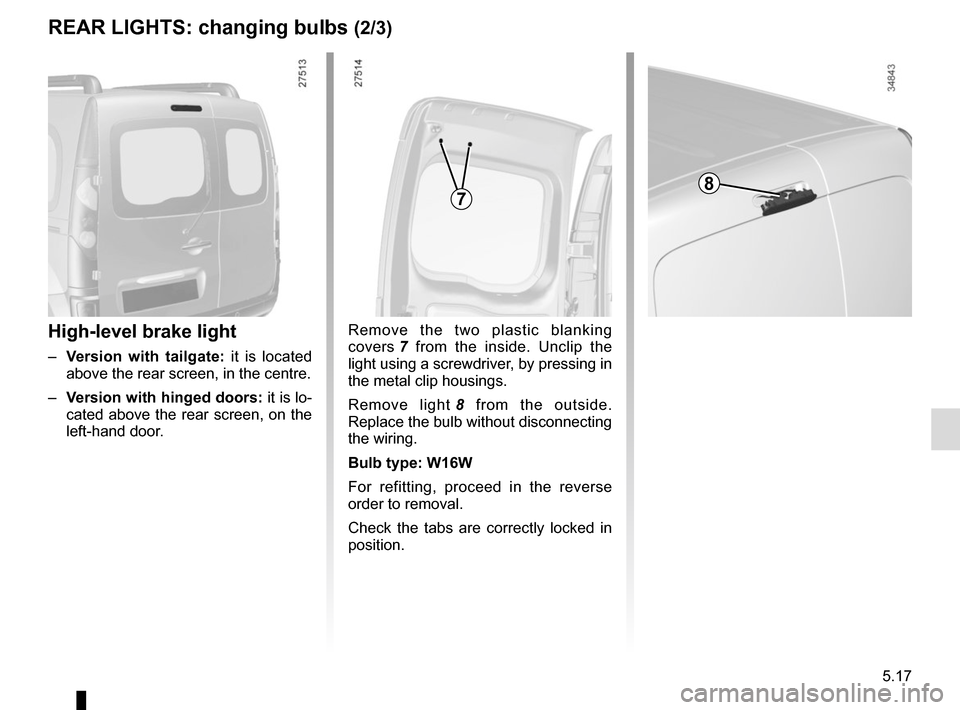
High-level brake light
– Version with tailgate: it is located
above the rear screen, in the centre.
– Version with hinged doors: it is lo-
cated above the rear screen, on the
left-hand door. Remove the two plastic blanking
covers 7
from the inside. Unclip the
light using a screwdriver, by pressing in
the metal clip housings.
Remove light 8 from the outside.
Replace the bulb without disconnecting
the wiring.
Bulb type: W16W
For refitting, proceed in the reverse
order to removal.
Check the tabs are correctly locked in
position.
78
Page 186 of 232
5.18
REAR LIGHTS: changing bulbs (3/3)
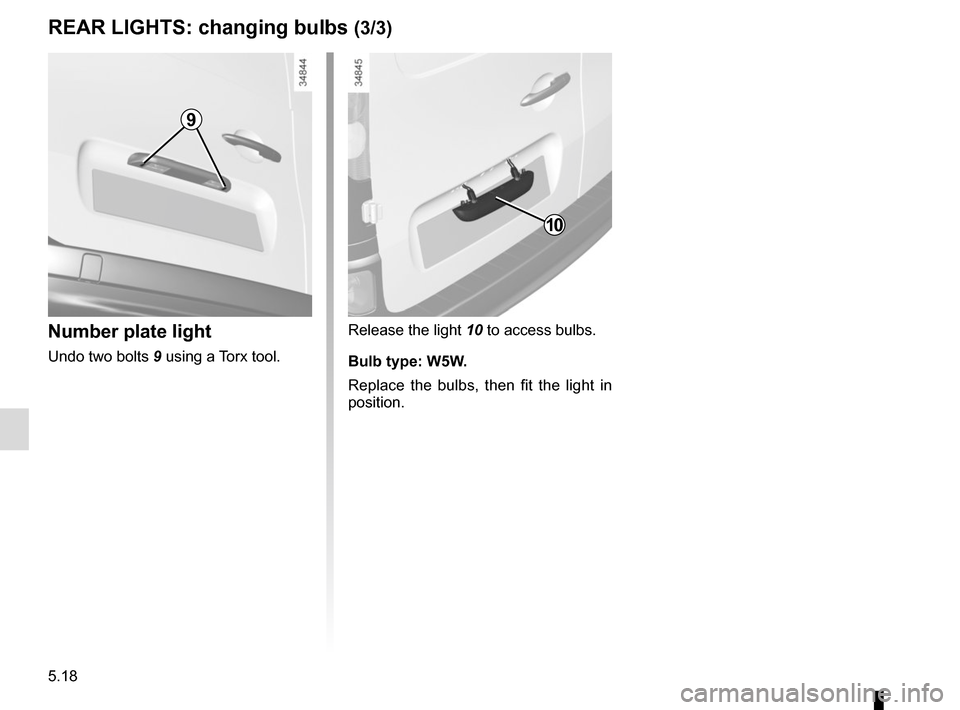
Release the light 10 to access bulbs.
Bulb type: W5W.
Replace the bulbs, then fit the light in
position.Number plate light
Undo two bolts 9 using a Torx tool.
9
10
Page 187 of 232
5.19
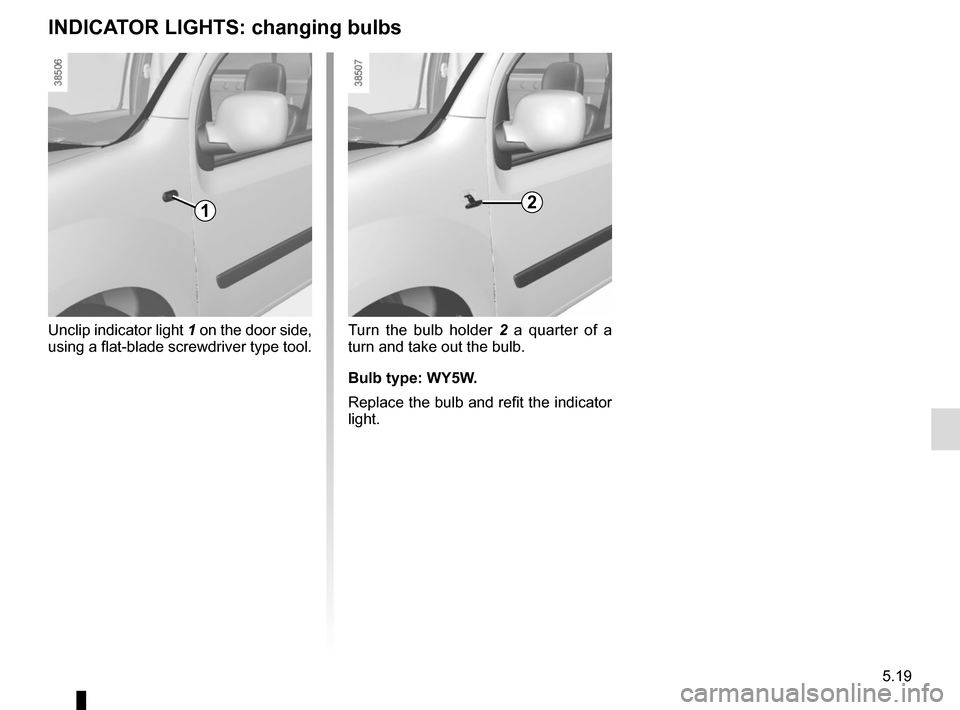
Turn the bulb holder 2 a quarter of a
turn and take out the bulb.
Bulb type: WY5W.
Replace the bulb and refit the indicator
light.
Unclip indicator light
1 on the door side,
using a flat-blade screwdriver type tool.
INDICATOR LIGHTS: changing bulbs
12
Page 188 of 232
5.20
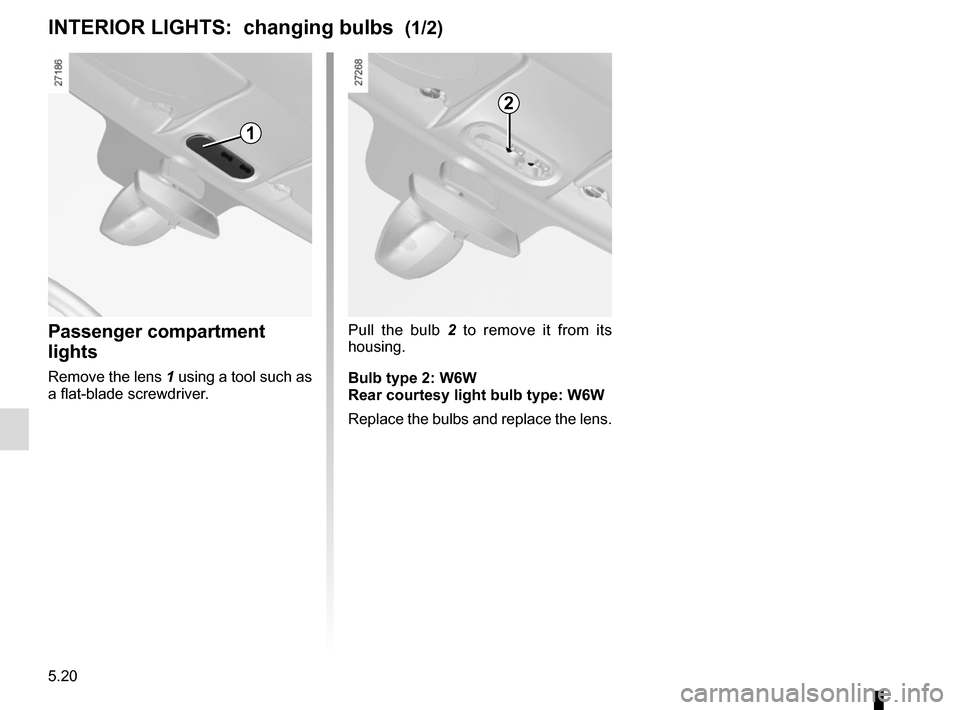
Passenger compartment
lights
Remove the lens 1 using a tool such as
a flat-blade screwdriver.
INTERIOR LIGHTS: changing bulbs (1/2)
1
Pull the bulb 2 to remove it from its
housing.
Bulb type 2: W6W
Rear courtesy light bulb type: W6W
Replace the bulbs and replace the lens.
2
Page 189 of 232
5.21
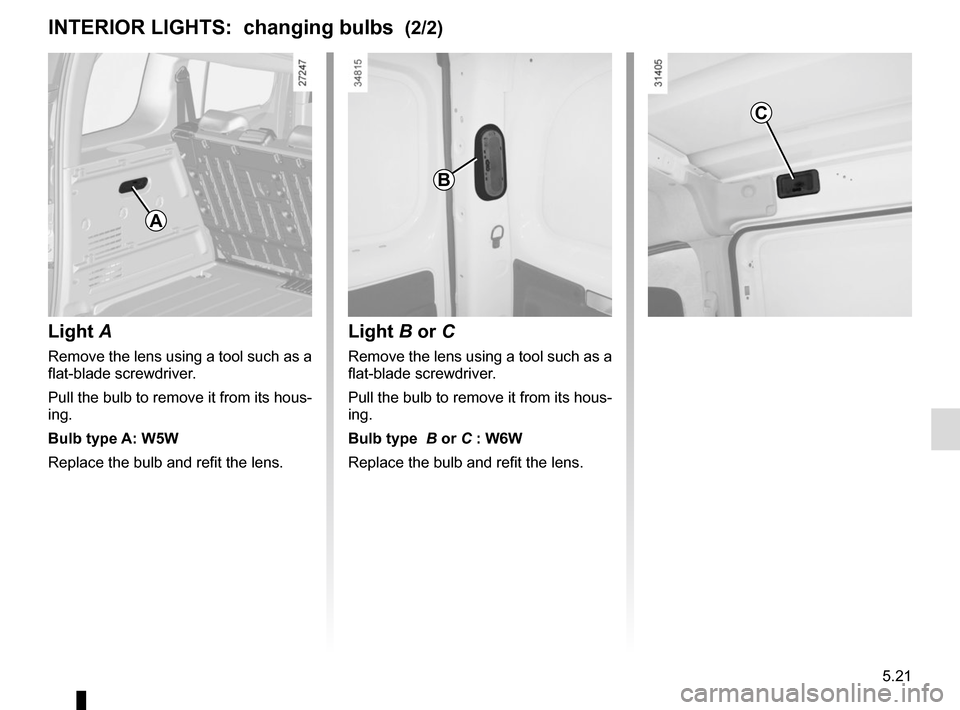
INTERIOR LIGHTS: changing bulbs (2/2)
Light A
Remove the lens using a tool such as a
flat-blade screwdriver.
Pull the bulb to remove it from its hous-
ing.
Bulb type A: W5W
Replace the bulb and refit the lens.
Light B or C
Remove the lens using a tool such as a
flat-blade screwdriver.
Pull the bulb to remove it from its hous-
ing.
Bulb type B or C : W6W
Replace the bulb and refit the lens.
A
B
C
Page 190 of 232
5.22
12 VOLT BATTERY: breakdown recovery (1/2)
To avoid all risk of sparks:
– Switch off the vehicle ignition.
– Ensure that any electrical consumers (courtesy lights, etc.) are switched
off before disconnecting or recon-
necting the battery.
– When charging, stop the charger before connecting or disconnecting
the battery.
– Do not place metal objects on the battery to avoid creating a short cir-
cuit between the terminals.
– Make sure that you reconnect the battery terminals after refitting.
Connecting a battery charger
The battery charger must be com-
patible with a battery with nominal
voltage of 12 volts.
Before disconnecting the battery, check
that:
– the ignition is switched off;
– the gear control is in position P
(please see the information on “Gear
control”;
– the charging cable is disconnected.
Special procedures may be
required to charge some
batteries. Contact your ap-
proved dealer.
Avoid all risk of sparks which may
cause an immediate explosion, and
charge the battery in a well-venti-
lated area. Risk of serious injury.
Handle the battery with care
as it contains sulphuric acid,
which must not come into
contact with eyes or skin. If
it does, wash the affected area with
plenty of cold water. If necessary,
consult a doctor.
Ensure that naked flames, red hot
objects and sparks do not come into
contact with the battery as there is a
risk of explosion.
The engine may be hot when car-
rying out operations in close prox-
imity. In addition, the engine cooling
fan can come on at any moment.
Risk of injury.
Disconnect the leads connected to both
battery terminals, starting with the
negative terminal.
Follow the instructions given by the
manufacturer of the battery charger
you are using.
Do not work on the 12 volt
battery (charging, replac-
ing, etc.):
– without switching off the
ignition;
– if your traction battery is charg- ing.
Please refer to the information
on “Electric vehicle: charging” in
Section 1.
Risk of serious injury.
Trending: brake fluid, inflation pressure, diagram, cooling, wipers, tow, rims

