heater RENAULT SCENIC 2011 J95 / 3.G Engine And Peripherals EDC16 User Guide
[x] Cancel search | Manufacturer: RENAULT, Model Year: 2011, Model line: SCENIC, Model: RENAULT SCENIC 2011 J95 / 3.GPages: 365, PDF Size: 2.11 MB
Page 61 of 365
13B-61
MR-372-J84-13B200$252.mif
V13
DIESEL INJECTION
Fault finding – Interpretation of faults
EDC16
Program No.: C1
Vdiag No.: 50, 58, 5C
13B
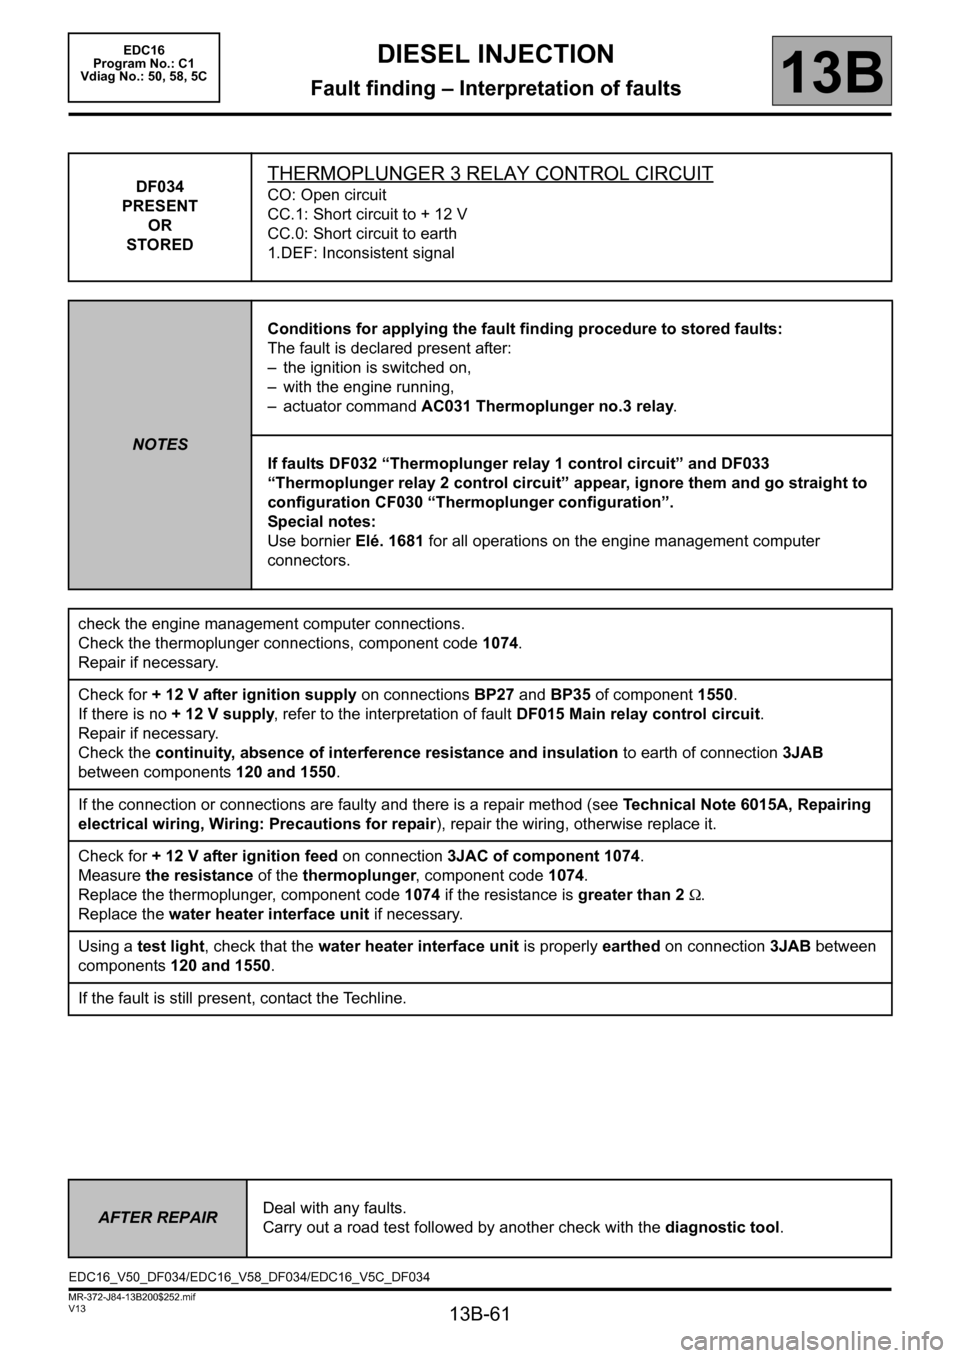
DF034
PRESENT
OR
STOREDTHERMOPLUNGER 3 RELAY CONTROL CIRCUIT
CO: Open circuit
CC.1: Short circuit to + 12 V
CC.0: Short circuit to earth
1.DEF: Inconsistent signal
NOTESConditions for applying the fault finding procedure to stored faults:
The fault is declared present after:
– the ignition is switched on,
– with the engine running,
– actuator command AC031 Thermoplunger no.3 relay.
If faults DF032 “Thermoplunger relay 1 control circuit” and DF033
“Thermoplunger relay 2 control circuit” appear, ignore them and go straight to
configuration CF030 “Thermoplunger configuration”.
Special notes:
Use bornier Elé. 1681 for all operations on the engine management computer
connectors.
check the engine management computer connections.
Check the thermoplunger connections, component code 1074.
Repair if necessary.
Check for + 12 V after ignition supply on connections BP27 and BP35 of component 1550.
If there is no + 12 V supply, refer to the interpretation of fault DF015 Main relay control circuit.
Repair if necessary.
Check the continuity, absence of interference resistance and insulation to earth of connection 3JAB
between components 120 and 1550.
If the connection or connections are faulty and there is a repair method (see Technical Note 6015A, Repairing
electrical wiring, Wiring: Precautions for repair), repair the wiring, otherwise replace it.
Check for + 12 V after ignition feed on connection3JAC of component 1074.
Measure the resistance of the thermoplunger, component code 1074.
Replace the thermoplunger, component code 1074 if the resistance is greater than 2 Ω.
Replace the water heater interface unit if necessary.
Using a test light, check that the water heater interface unit is properly earthed on connection 3JAB between
components 120 and 1550.
If the fault is still present, contact the Techline.
AFTER REPAIRDeal with any faults.
Carry out a road test followed by another check with the diagnostic tool.
EDC16_V50_DF034/EDC16_V58_DF034/EDC16_V5C_DF034
Page 168 of 365
13B-168
MR-372-J84-13B200$504.mif
V13
EDC16
Program No: C1
Vdiag No: 18, 1C, 20,
50, 58, 5CDIESEL INJECTION
Fault finding – Interpretation of statuses13B
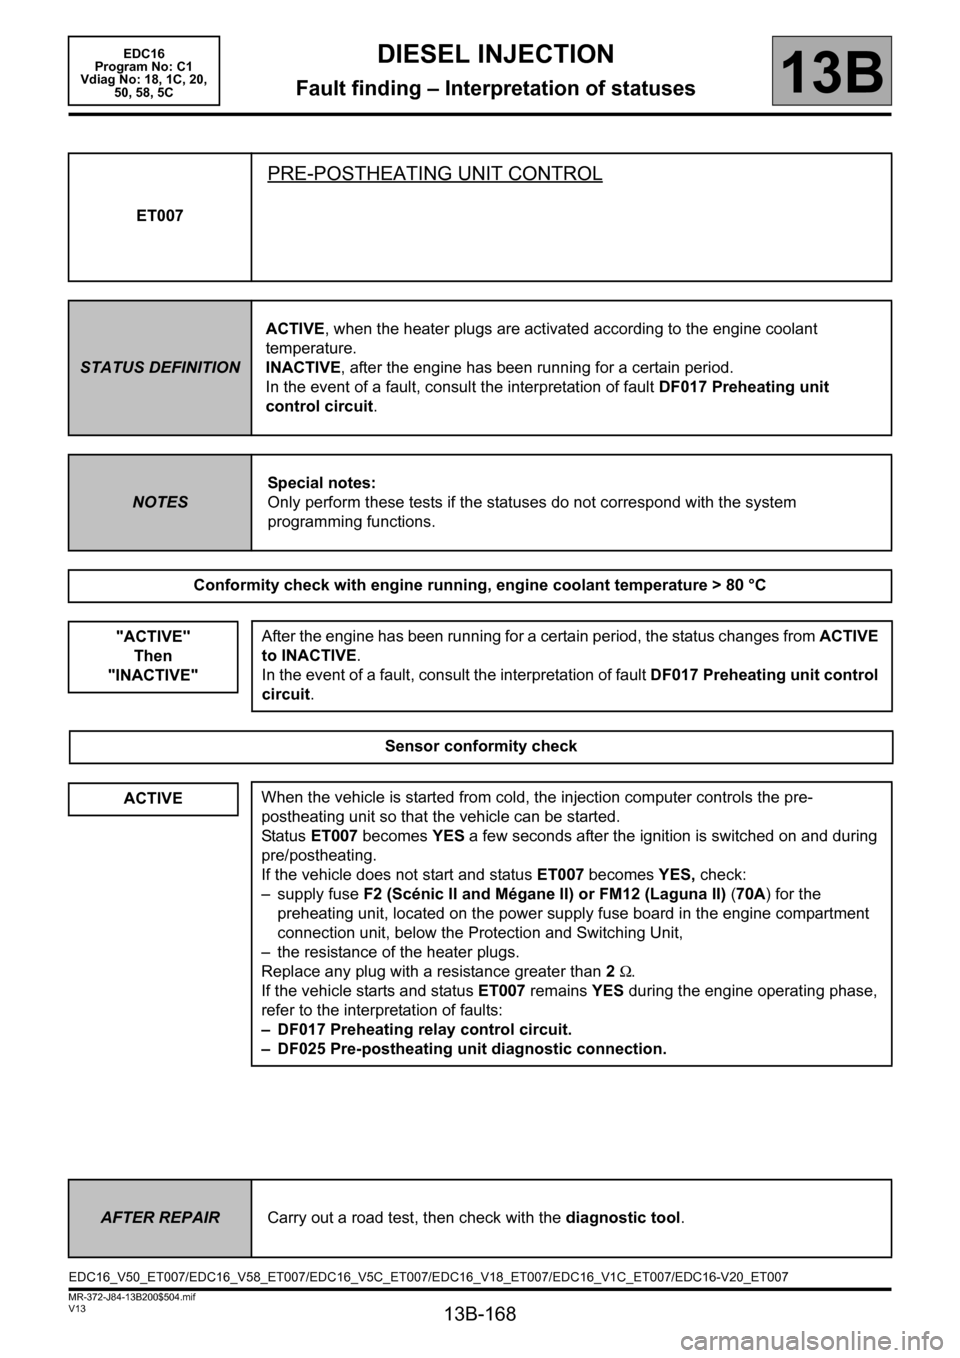
ET007
PRE-POSTHEATING UNIT CONTROL
STATUS DEFINITIONACTIVE, when the heater plugs are activated according to the engine coolant
temperature.
INACTIVE, after the engine has been running for a certain period.
In the event of a fault, consult the interpretation of fault DF017 Preheating unit
control circuit.
NOTESSpecial notes:
Only perform these tests if the statuses do not correspond with the system
programming functions.
Conformity check with engine running, engine coolant temperature > 80 °C
"ACTIVE"
Then
"INACTIVE"
After the engine has been running for a certain period, the status changes from ACTIVE
to INACTIVE.
In the event of a fault, consult the interpretation of fault DF017 Preheating unit control
circuit.
Sensor conformity check
ACTIVEWhen the vehicle is started from cold, the injection computer controls the pre-
postheating unit so that the vehicle can be started.
Status ET007 becomes YES a few seconds after the ignition is switched on and during
pre/postheating.
If the vehicle does not start and status ET007 becomes YES, check:
– supply fuse F2 (Scénic II and Mégane II) or FM12 (Laguna II) (70A) for the
preheating unit, located on the power supply fuse board in the engine compartment
connection unit, below the Protection and Switching Unit,
– the resistance of the heater plugs.
Replace any plug with a resistance greater than 2Ω.
If the vehicle starts and status ET007 remains YES during the engine operating phase,
refer to the interpretation of faults:
– DF017 Preheating relay control circuit.
– DF025 Pre-postheating unit diagnostic connection.
AFTER REPAIRCarry out a road test, then check with the diagnostic tool.
EDC16_V50_ET007/EDC16_V58_ET007/EDC16_V5C_ET007/EDC16_V18_ET007/EDC16_V1C_ET007/EDC16-V20_ET007
Page 302 of 365
13B-302
MR-372-J84-13B200$756.mif
V13
DIESEL INJECTION
Fault finding – Interpretation of commands
EDC16
Program No: C1
Vdiag No: 18, 1C, 20,
50, 58, 5C
13B
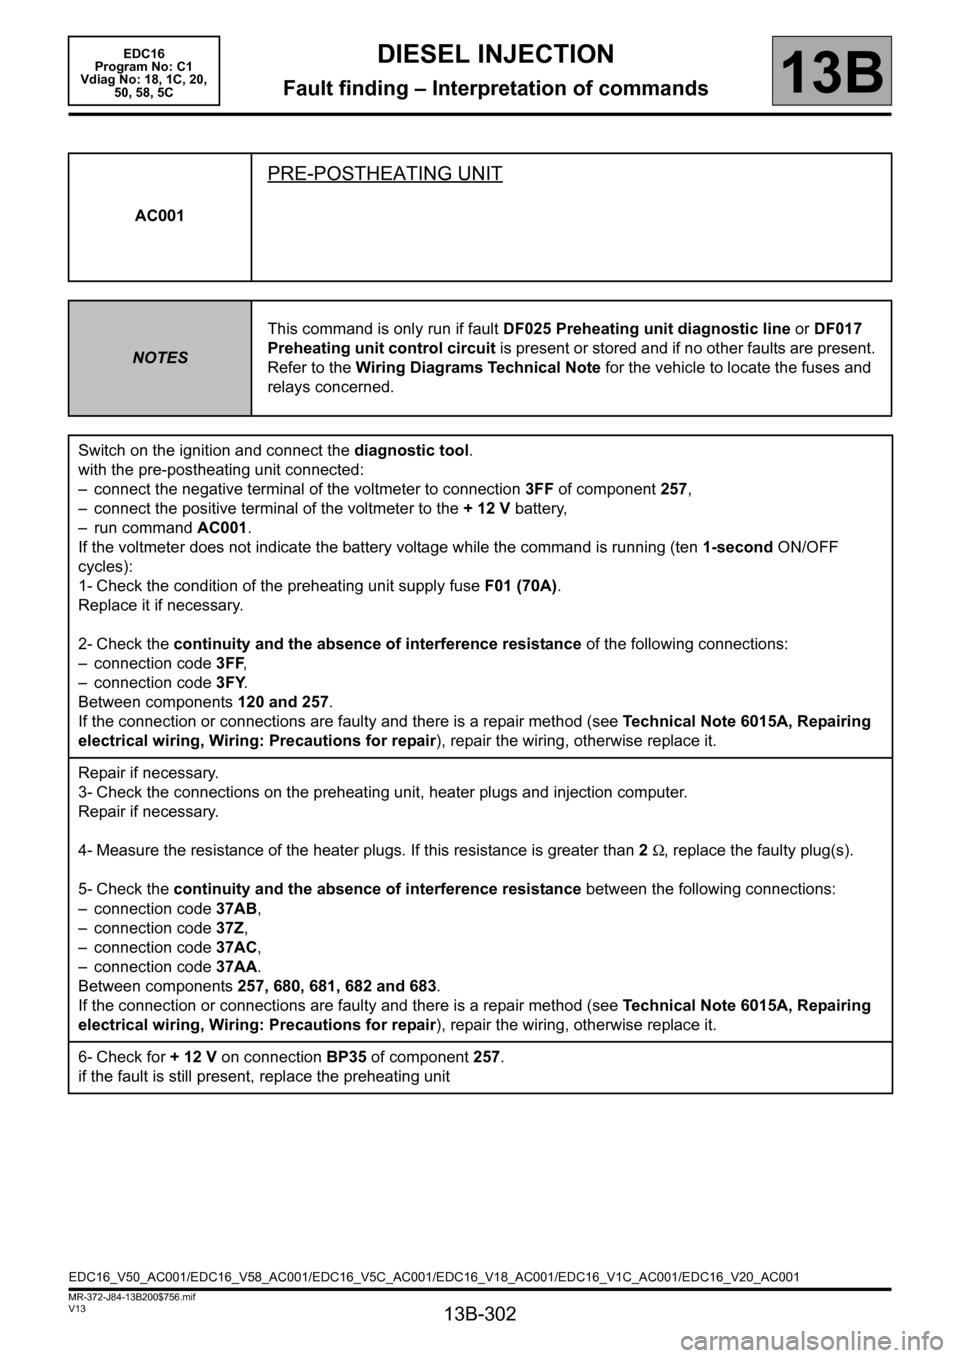
AC001
PRE-POSTHEATING UNIT
NOTESThis command is only run if fault DF025 Preheating unit diagnostic line or DF017
Preheating unit control circuit is present or stored and if no other faults are present.
Refer to the Wiring Diagrams Technical Note for the vehicle to locate the fuses and
relays concerned.
Switch on the ignition and connect the diagnostic tool.
with the pre-postheating unit connected:
– connect the negative terminal of the voltmeter to connection 3FF of component 257,
– connect the positive terminal of the voltmeter to the + 12 V battery,
– run command AC001.
If the voltmeter does not indicate the battery voltage while the command is running (ten 1-second ON/OFF
cycles):
1- Check the condition of the preheating unit supply fuse F01 (70A).
Replace it if necessary.
2- Check the continuity and the absence of interference resistance of the following connections:
– connection code 3FF,
– connection code 3FY.
Between components 120 and 257.
If the connection or connections are faulty and there is a repair method (see Technical Note 6015A, Repairing
electrical wiring, Wiring: Precautions for repair), repair the wiring, otherwise replace it.
Repair if necessary.
3- Check the connections on the preheating unit, heater plugs and injection computer.
Repair if necessary.
4- Measure the resistance of the heater plugs. If this resistance is greater than 2 Ω, replace the faulty plug(s).
5- Check the continuity and the absence of interference resistance between the following connections:
– connection code 37AB,
– connection code 37Z,
– connection code 37AC,
– connection code 37AA.
Between components 257, 680, 681, 682 and 683.
If the connection or connections are faulty and there is a repair method (see Technical Note 6015A, Repairing
electrical wiring, Wiring: Precautions for repair), repair the wiring, otherwise replace it.
6- Check for + 12 V on connectionBP35 of component257.
if the fault is still present, replace the preheating unit
EDC16_V50_AC001/EDC16_V58_AC001/EDC16_V5C_AC001/EDC16_V18_AC001/EDC16_V1C_AC001/EDC16_V20_AC001
Page 308 of 365
13B-308
MR-372-J84-13B200$756.mif
V13
DIESEL INJECTION
Fault finding – Interpretation of commands
EDC16
Program No: C1
Vdiag No: 18, 1C, 20,
50, 58, 5C
13B
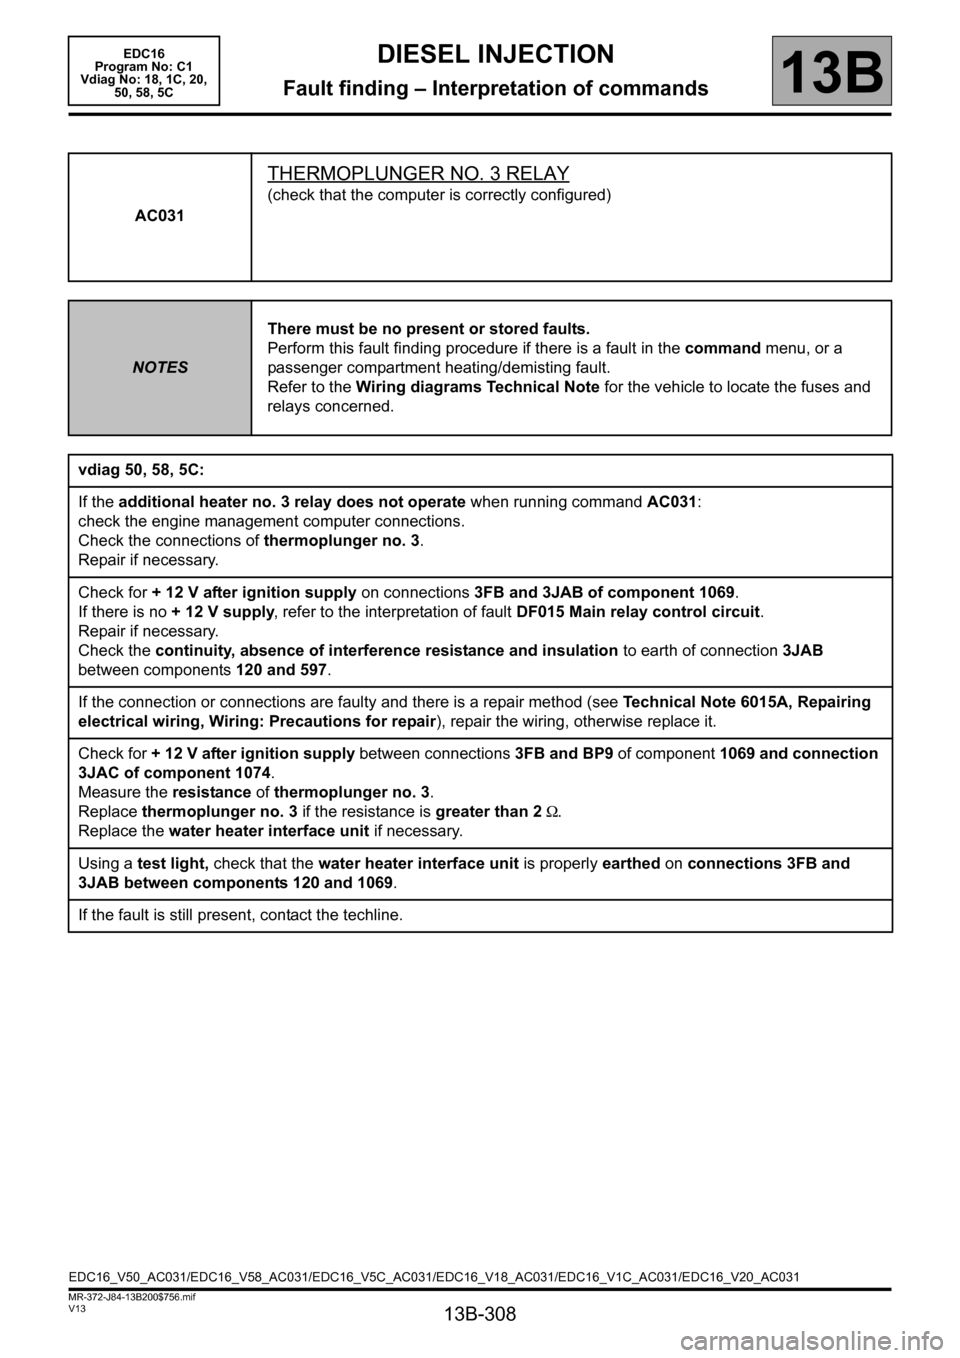
AC031
THERMOPLUNGER NO. 3 RELAY
(check that the computer is correctly configured)
NOTESThere must be no present or stored faults.
Perform this fault finding procedure if there is a fault in the command menu, or a
passenger compartment heating/demisting fault.
Refer to the Wiring diagrams Technical Note for the vehicle to locate the fuses and
relays concerned.
vdiag 50, 58, 5C:
If the additional heater no. 3 relay does not operate when running command AC031:
check the engine management computer connections.
Check the connections of thermoplunger no. 3.
Repair if necessary.
Check for + 12 V after ignition supply on connections 3FB and 3JAB of component 1069.
If there is no + 12 V supply, refer to the interpretation of fault DF015 Main relay control circuit.
Repair if necessary.
Check the continuity, absence of interference resistance and insulation to earth of connection 3JAB
between components 120 and 597.
If the connection or connections are faulty and there is a repair method (see Technical Note 6015A, Repairing
electrical wiring, Wiring: Precautions for repair), repair the wiring, otherwise replace it.
Check for + 12 V after ignition supply between connections 3FB and BP9 of component 1069 and connection
3JAC of component 1074.
Measure the resistance of thermoplunger no. 3.
Replace thermoplunger no. 3 if the resistance is greater than 2 Ω.
Replace the water heater interface unit if necessary.
Using a test light, check that the water heater interface unit is properly earthed on connections 3FB and
3JAB between components 120 and 1069.
If the fault is still present, contact the techline.
EDC16_V50_AC031/EDC16_V58_AC031/EDC16_V5C_AC031/EDC16_V18_AC031/EDC16_V1C_AC031/EDC16_V20_AC031
Page 309 of 365
13B-309
MR-372-J84-13B200$756.mif
V13
DIESEL INJECTION
Fault finding – Interpretation of commands
EDC16
Program No: C1
Vdiag No: 18, 1C, 20,
50, 58, 5C
13B
AC031
CONTINUED
vdiag 18, 1C, 20:
If the additional heater no. 3 relay does not operate when running command AC031:
Check the additional heater no. 3 relay mounting.
check the engine management computer connections.
Repair if necessary.
if the fault is still present, check as follows that this relay is controlled by the engine management computer:
Disconnect the additional heater no. 3 relay, fit a 50 to 100Ω resistor on the mounting in place of the coil and
connect a voltmeter as follows:
Positive terminal to +12 V battery.
Negative terminal to connection 3JAB of the additional heater no. 3 relay mounting.
Clear the fault and actuate the relay using command AC031.
If the voltmeter shows the battery voltage (two, 2-second ON-OFF cycles), replace the additional heater no. 3
relay.
If the voltmeter does not show the battery voltage (two 2 second ON-OFF cycles), contact the Techline.
If the additional heater no. 3 relay is supplied by command AC031, but there is still a fault with the passenger
compartment heating and demisting, check using a wiring diagram:
– the conformity of the thermoplunger maxi-fuse,
– the presence of + 12 V battery on connection BP9 of the additional heater no. 3 relay mounting,
– the conformity of the additional heater relay 3;
– the continuity between connection 3JAC of the additional heater no. 3 relay mounting and the supply terminal
for thermoplunger no. 3.
– the conformity of the thermoplunger resistance: 0.4 Ω < X < 0.5 Ω at 20 °C,
– the presence of earth at the water chamber (thermoplunger mounting).
Also check the level of the cooling circuit and that there are no leaks.
Carry out the necessary repairs.
Page 312 of 365
13B-312
MR-372-J84-13B200$756.mif
V13
DIESEL INJECTION
Fault finding – Interpretation of commands
EDC16
Program No: C1
Vdiag No: 18, 1C, 20,
50, 58, 5C
13B
AC063
THERMOPLUNGER NO. 1 RELAY
(check that the computer is correctly configured).
NOTESThere must be no present or stored faults.
Perform this fault finding procedure if there is a fault in the command menu, or a
passenger compartment heating/demisting problem.
Refer to the Wiring diagrams Technical Note for the vehicle to locate the fuses and
relays concerned.
vdiag 50, 58, 5c:
If the additional heater no. 1 relay does not operate when running command AC063:
check the engine management computer connections.
Check the connections of thermoplunger no. 1.
Repair if necessary.
Check for + 12 V after ignition supply on connections BP9 and 3FB of component 1067.
If there is no + 12 V supply, refer to the interpretation of fault DF015 Main relay control circuit.
Repair if necessary.
Check the continuity, absence of interference resistance and insulation on connection 3JA between
components 120 and 597.
If the connection or connections are faulty and there is a repair method (see Technical Note 6015A, Repairing
electrical wiring, Wiring: Precautions for repair), repair the wiring, otherwise replace it.
Using a test light, check the supply by running command AC063 on connection 3JB between components 1067
and 898.
Measure the resistance of thermoplunger no. 1.
Replace thermoplunger no. 1 if the resistance is greater than 2 Ω.
Replace the water heater interface unit if necessary.
Using a test light, check that the water heater interface unit is properly earthed by running command AC063
on connection 3JA between components 120 and 597.
If the fault is still present, contact the techline.
EDC16_V50_AC063/EDC16_V58_AC063/EDC16_V5C_AC063/EDC16_V18_AC063/EDC16_V1C_AC063/EDC16_V20_AC063
Page 313 of 365
13B-313
MR-372-J84-13B200$756.mif
V13
DIESEL INJECTION
Fault finding – Interpretation of commands
EDC16
Program No: C1
Vdiag No: 18, 1C, 20,
50, 58, 5C
13B
AC063
CONTINUED
vdiag 18, 1C, 20:
If the additional heater no. 1 relay does not operate when running command AC063:
Check the additional heater no. 1 relay mounting.
Check the engine management computer connectors.
Repair if necessary.
if the fault is still present, check as follows that this relay is controlled by the engine management computer:
Disconnect the additional heater no. 1 relay, fit a 50 Ω < X < 100 Ω resistor on the relay mounting in place of the
coil, and connect a voltmeter as follows:
Positive terminal to the +12 V battery.
Negative terminal to connection 3JA of component 597.
Clear the fault and actuate the relay using command AC063.
If the voltmeter shows the battery voltage (two, 2-second ON-OFF cycles), replace the additional heater no. 1
relay.
If the voltmeter does not show the battery voltage (two, 2-second ON-OFF cycles), contact the Techline.
If the additional heater no. 1 relay is supplied by command AC063, but there is still a fault with the passenger
compartment heating and demisting, check the following using a wiring diagram:
– the conformity of the thermoplunger maxi-fuse,
–+12V battery on connection 3FB of component 597.
– the conformity of the additional heater no. 1 relay,
– the continuity between connection 3JB of component 597 and connection 3JB of component 898,
– the conformity of the thermoplunger resistance: 0.40 Ω < X < 0.50 Ω at 20°C,
– the presence of earth at the water chamber (thermoplunger mounting).
Also check the level of the cooling circuit and that there are no leaks.
Carry out the necessary repairs.
Page 314 of 365
13B-314
MR-372-J84-13B200$756.mif
V13
DIESEL INJECTION
Fault finding – Interpretation of commands
EDC16
Program No: C1
Vdiag No: 18, 1C, 20,
50, 58, 5C
13B
AC064
THERMOPLUNGER NO. 2 RELAY
(check that the computer is correctly configured).
NOTESThere must be no present or stored faults.
Perform this fault finding procedure if there is a fault in the Command menu, or a
passenger compartment heating/demisting problem.
Refer to the Wiring Diagram Technical Notes for the vehicle to locate the fuses and
relays concerned.
vdiag 50, 58, 5c:
If the additional heater no. 2 relay does not operate when running command AC064:
check the engine management computer connections.
Check the connections of thermoplungers 2 and 3.
Repair if necessary.
Check for + 12 V after ignition supply on connections 3FB and BP91 of component 1068.
If there is no + 12 V supply, refer to the interpretation of fault DF015 Main relay control circuit.
Repair if necessary.
Check the continuity, absence of interference resistance and insulation to earth of connection 3JAA
between components 120 and 597.
If the connection or connections are faulty and there is a repair method (see Technical Note 6015A, Repairing
electrical wiring, Wiring: Precautions for repair), repair the wiring, otherwise replace it.
Check for + 12 V after ignition feed between connections BP91 and 3JAD of component 597 and connection
3JAD of components 1072 and 1073.
Measure the resistance of thermoplungers 2 and 3.
Replace thermoplunger no. 2 or 3 if the resistance is greater than 2 Ω.
Replace the water heater interface unit if necessary.
Using a test light, check that the water heater interface unit is properly earthed on connection 3JAA between
components 120 and 597.
if the fault is present, contact the techline.
EDC16_V50_AC064/EDC16_V58_AC064/EDC16_V5C_AC064/EDC16_V18_AC064/EDC16_V1C_AC064/EDC16_V20_AC064
Page 315 of 365
13B-315
MR-372-J84-13B200$756.mif
V13
DIESEL INJECTION
Fault finding – Interpretation of commands
EDC16
Program No: C1
Vdiag No: 18, 1C, 20,
50, 58, 5C
13B
AC064
CONTINUED
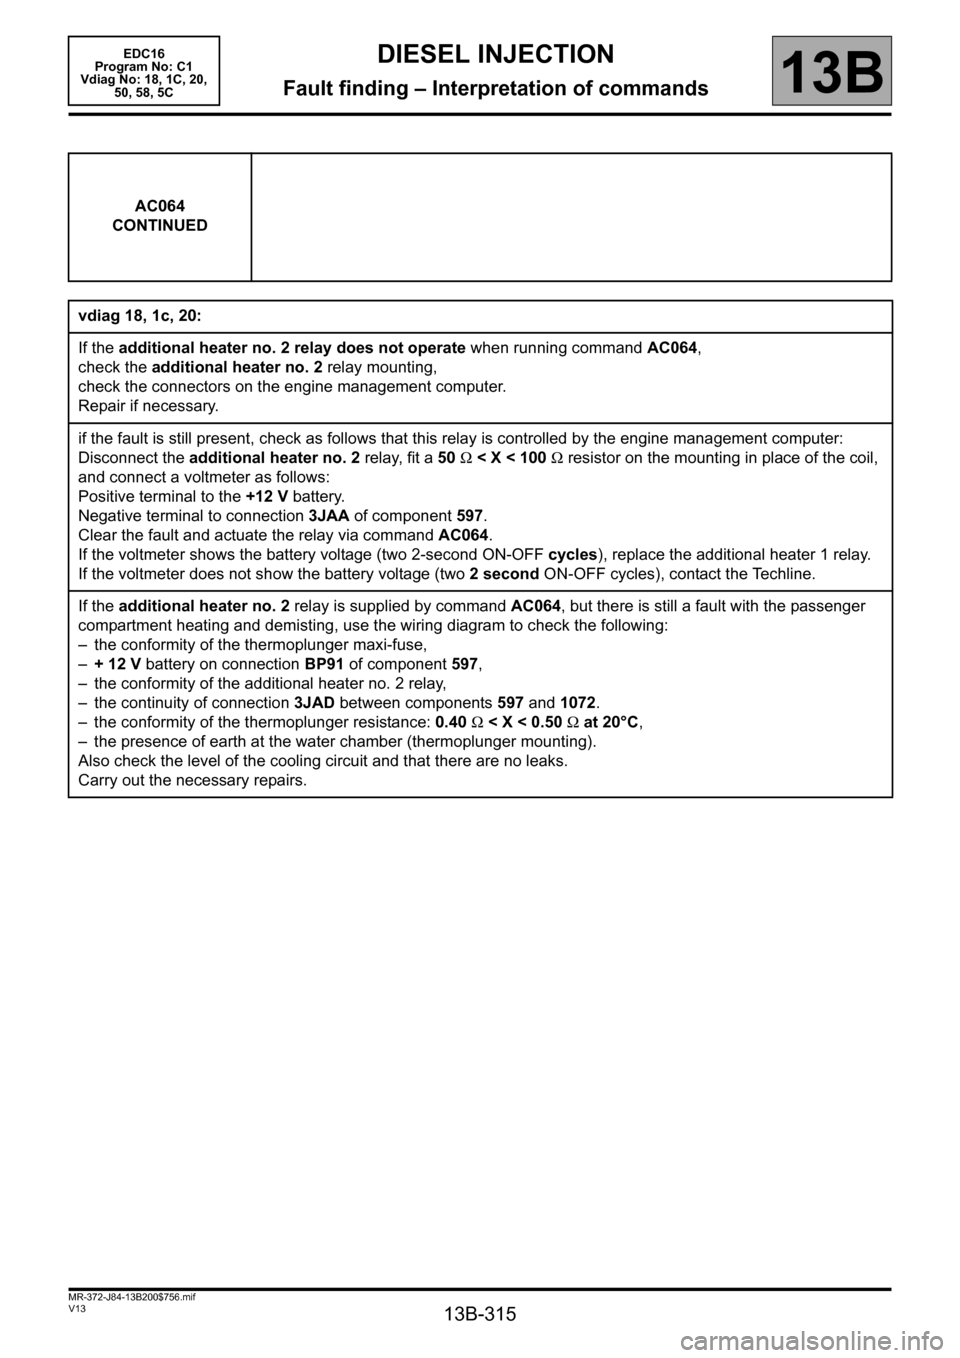
vdiag 18, 1c, 20:
If the additional heater no. 2 relay does not operate when running command AC064,
check the additional heater no. 2 relay mounting,
check the connectors on the engine management computer.
Repair if necessary.
if the fault is still present, check as follows that this relay is controlled by the engine management computer:
Disconnect the additional heater no. 2 relay, fit a 50 Ω < X < 100 Ω resistor on the mounting in place of the coil,
and connect a voltmeter as follows:
Positive terminal to the +12 V battery.
Negative terminal to connection 3JAA of component 597.
Clear the fault and actuate the relay via command AC064.
If the voltmeter shows the battery voltage (two 2-second ON-OFF cycles), replace the additional heater 1 relay.
If the voltmeter does not show the battery voltage (two 2 second ON-OFF cycles), contact the Techline.
If the additional heater no. 2 relay is supplied by command AC064, but there is still a fault with the passenger
compartment heating and demisting, use the wiring diagram to check the following:
– the conformity of the thermoplunger maxi-fuse,
–+12V battery on connection BP91 of component 597,
– the conformity of the additional heater no. 2 relay,
– the continuity of connection 3JAD between components 597 and 1072.
– the conformity of the thermoplunger resistance: 0.40 Ω < X < 0.50 Ω at 20°C,
– the presence of earth at the water chamber (thermoplunger mounting).
Also check the level of the cooling circuit and that there are no leaks.
Carry out the necessary repairs.
Page 319 of 365
13B-319
MR-372-J84-13B200$828.mif
V13
EDC16
Program No.: C1
Vdiag no.: 18, 1C, 20,
50, 58, 5CDIESEL INJECTION
Fault finding – Fault Finding Chart13B
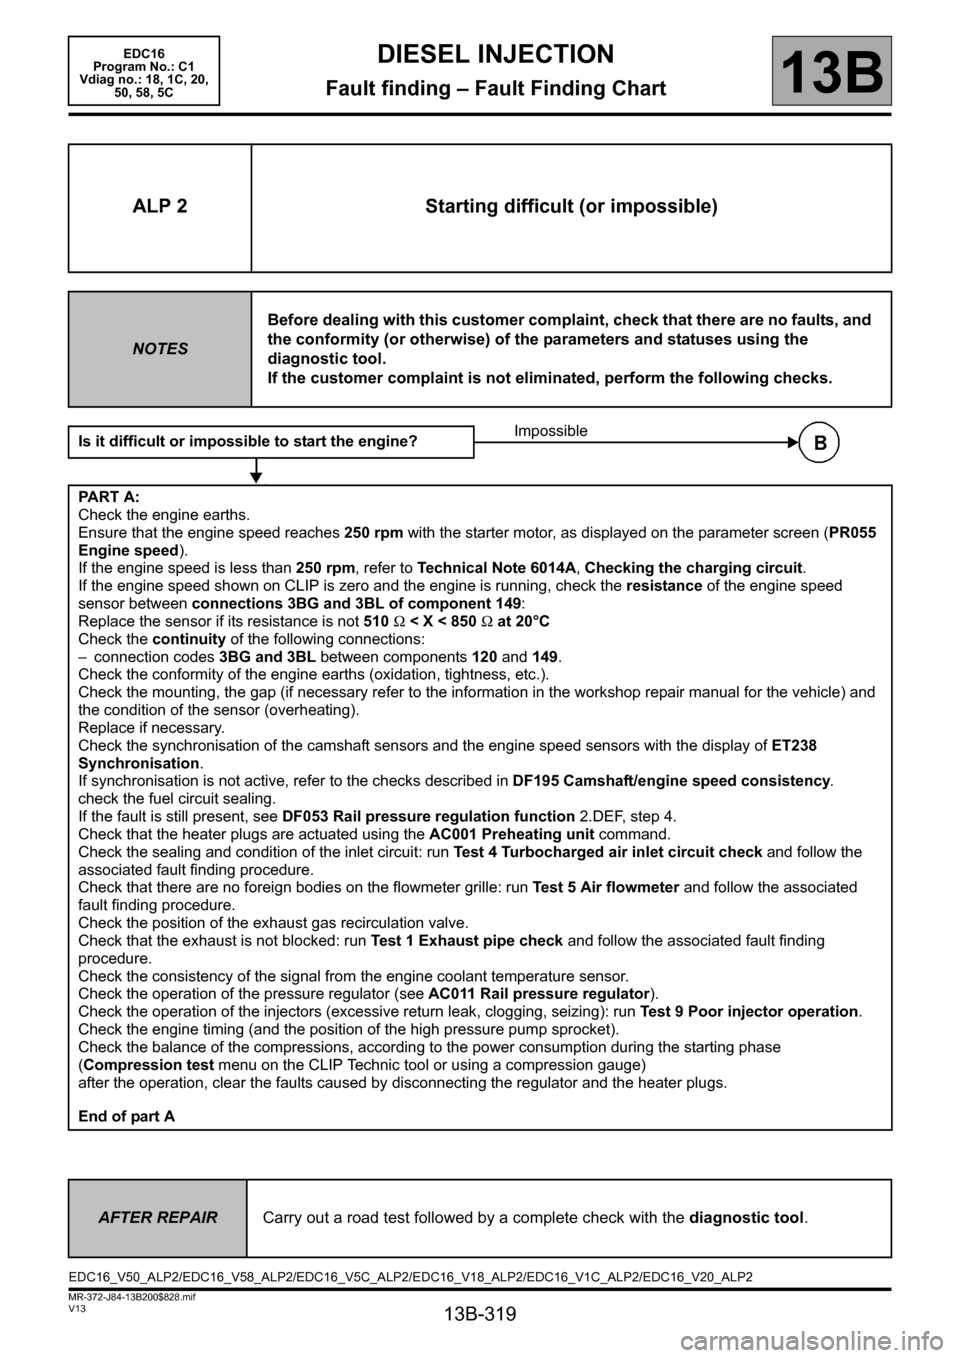
ALP 2 Starting difficult (or impossible)
NOTESBefore dealing with this customer complaint, check that there are no faults, and
the conformity (or otherwise) of the parameters and statuses using the
diagnostic tool.
If the customer complaint is not eliminated, perform the following checks.
Is it difficult or impossible to start the engine?
PART A:
Check the engine earths.
Ensure that the engine speed reaches 250 rpm with the starter motor, as displayed on the parameter screen (PR055
Engine speed).
If the engine speed is less than 250 rpm, refer to Technical Note 6014A, Checking the charging circuit.
If the engine speed shown on CLIP is zero and the engine is running, check the resistance of the engine speed
sensor between connections 3BG and 3BL of component 149:
Replace the sensor if its resistance is not 510 Ω < X < 850 Ω at 20°C
Check the continuity of the following connections:
– connection codes 3BG and 3BL between components 120 and 149.
Check the conformity of the engine earths (oxidation, tightness, etc.).
Check the mounting, the gap (if necessary refer to the information in the workshop repair manual for the vehicle) and
the condition of the sensor (overheating).
Replace if necessary.
Check the synchronisation of the camshaft sensors and the engine speed sensors with the display of ET238
Synchronisation.
If synchronisation is not active, refer to the checks described in DF195 Camshaft/engine speed consistency.
check the fuel circuit sealing.
If the fault is still present, see DF053 Rail pressure regulation function 2.DEF, step 4.
Check that the heater plugs are actuated using the AC001 Preheating unit command.
Check the sealing and condition of the inlet circuit: run Test 4 Turbocharged air inlet circuit check and follow the
associated fault finding procedure.
Check that there are no foreign bodies on the flowmeter grille: run Test 5 Air flowmeter and follow the associated
fault finding procedure.
Check the position of the exhaust gas recirculation valve.
Check that the exhaust is not blocked: run Test 1 Exhaust pipe check and follow the associated fault finding
procedure.
Check the consistency of the signal from the engine coolant temperature sensor.
Check the operation of the pressure regulator (see AC011 Rail pressure regulator).
Check the operation of the injectors (excessive return leak, clogging, seizing): run Test 9 Poor injector operation.
Check the engine timing (and the position of the high pressure pump sprocket).
Check the balance of the compressions, according to the power consumption during the starting phase
(Compression test menu on the CLIP Technic tool or using a compression gauge)
after the operation, clear the faults caused by disconnecting the regulator and the heater plugs.
End of part AImpossible
AFTER REPAIRCarry out a road test followed by a complete check with the diagnostic tool.
EDC16_V50_ALP2/EDC16_V58_ALP2/EDC16_V5C_ALP2/EDC16_V18_ALP2/EDC16_V1C_ALP2/EDC16_V20_ALP2