sensor RENAULT SCENIC 2014 J95 / 3.G Petrol Injection - Sagem3000 Manual Online
[x] Cancel search | Manufacturer: RENAULT, Model Year: 2014, Model line: SCENIC, Model: RENAULT SCENIC 2014 J95 / 3.GPages: 181
Page 176 of 181

PETROL INJECTION
Fault finding – Fault Finding Chart17B
17B - 176V12 MR-372-J84-17B000$900.mif
SAGEM 3000
Program No.: A7
Vdiag No.: 44, 48PETROL INJECTION
Fault finding – Fault Finding Chart
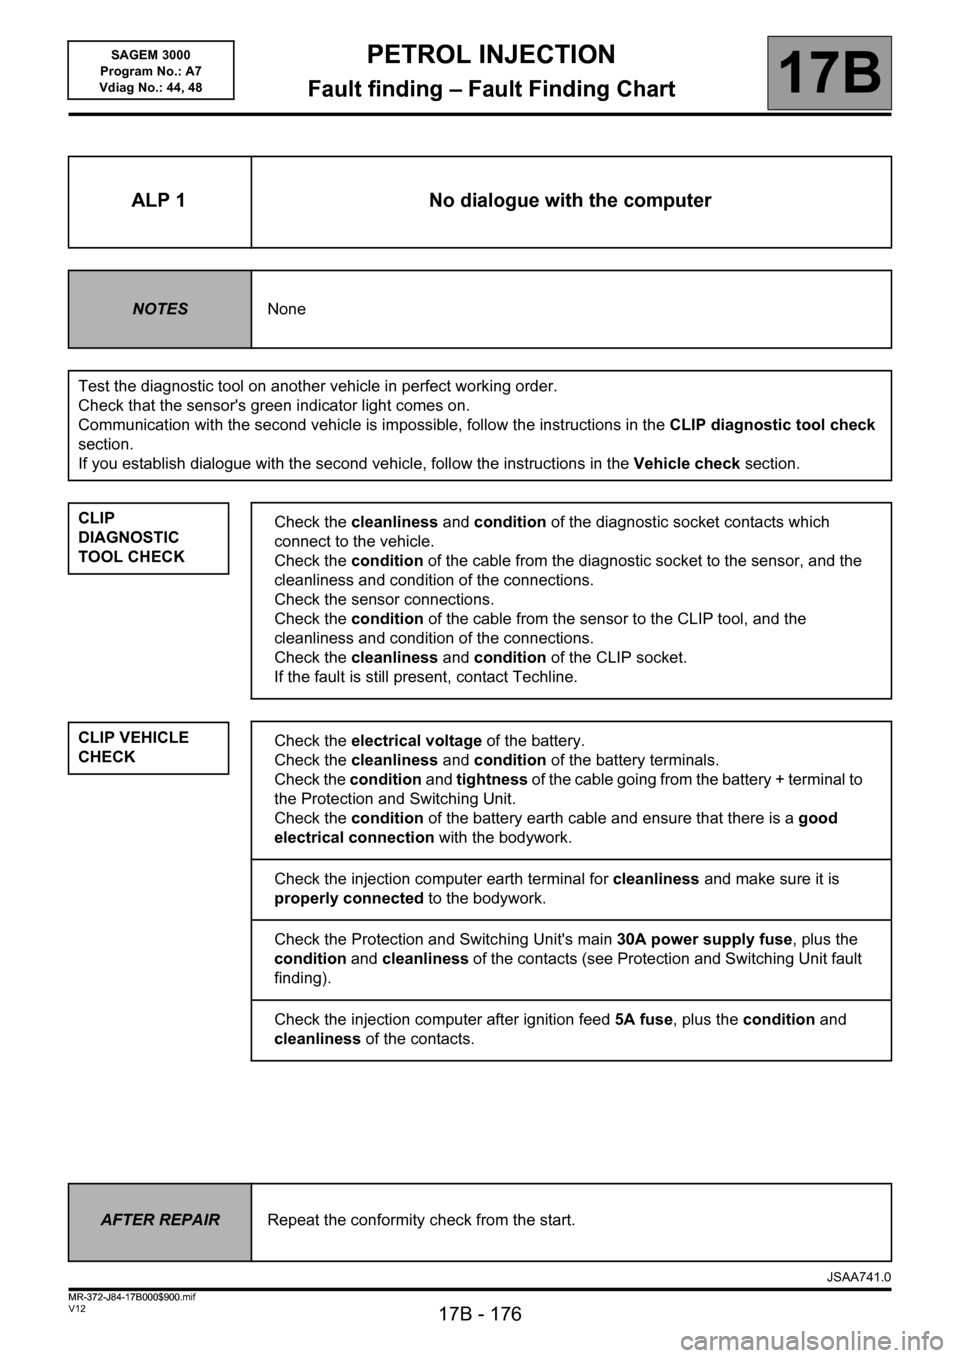
ALP 1 No dialogue with the computer
NOTESNone
Test the diagnostic tool on another vehicle in perfect working order.
Check that the sensor's green indicator light comes on.
Communication with the second vehicle is impossible, follow the instructions in the CLIP diagnostic tool check
section.
If you establish dialogue with the second vehicle, follow the instructions in the Vehicle check section.
CLIP
DIAGNOSTIC
TOOL CHECK
CLIP VEHICLE
CHECK
Check the cleanliness and condition of the diagnostic socket contacts which
connect to the vehicle.
Check the condition of the cable from the diagnostic socket to the sensor, and the
cleanliness and condition of the connections.
Check the sensor connections.
Check the condition of the cable from the sensor to the CLIP tool, and the
cleanliness and condition of the connections.
Check the cleanliness and condition of the CLIP socket.
If the fault is still present, contact Techline.
Check the electrical voltage of the battery.
Check the cleanliness and condition of the battery terminals.
Check the condition and tightness of the cable going from the battery + terminal to
the Protection and Switching Unit.
Check the condition of the battery earth cable and ensure that there is a good
electrical connection with the bodywork.
Check the injection computer earth terminal for cleanliness and make sure it is
properly connected to the bodywork.
Check the Protection and Switching Unit's main 30A power supply fuse, plus the
condition and cleanliness of the contacts (see Protection and Switching Unit fault
finding).
Check the injection computer after ignition feed 5A fuse, plus the condition and
cleanliness of the contacts.
AFTER REPAIRRepeat the conformity check from the start.
JSAA741.0
MR-372-J84-17B000$900.mif
Page 179 of 181

PETROL INJECTION
Fault finding – Fault Finding Chart17B
17B - 179V12 MR-372-J84-17B000$900.mif
SAGEM 3000
Program No.: A7
Vdiag No.: 44, 48
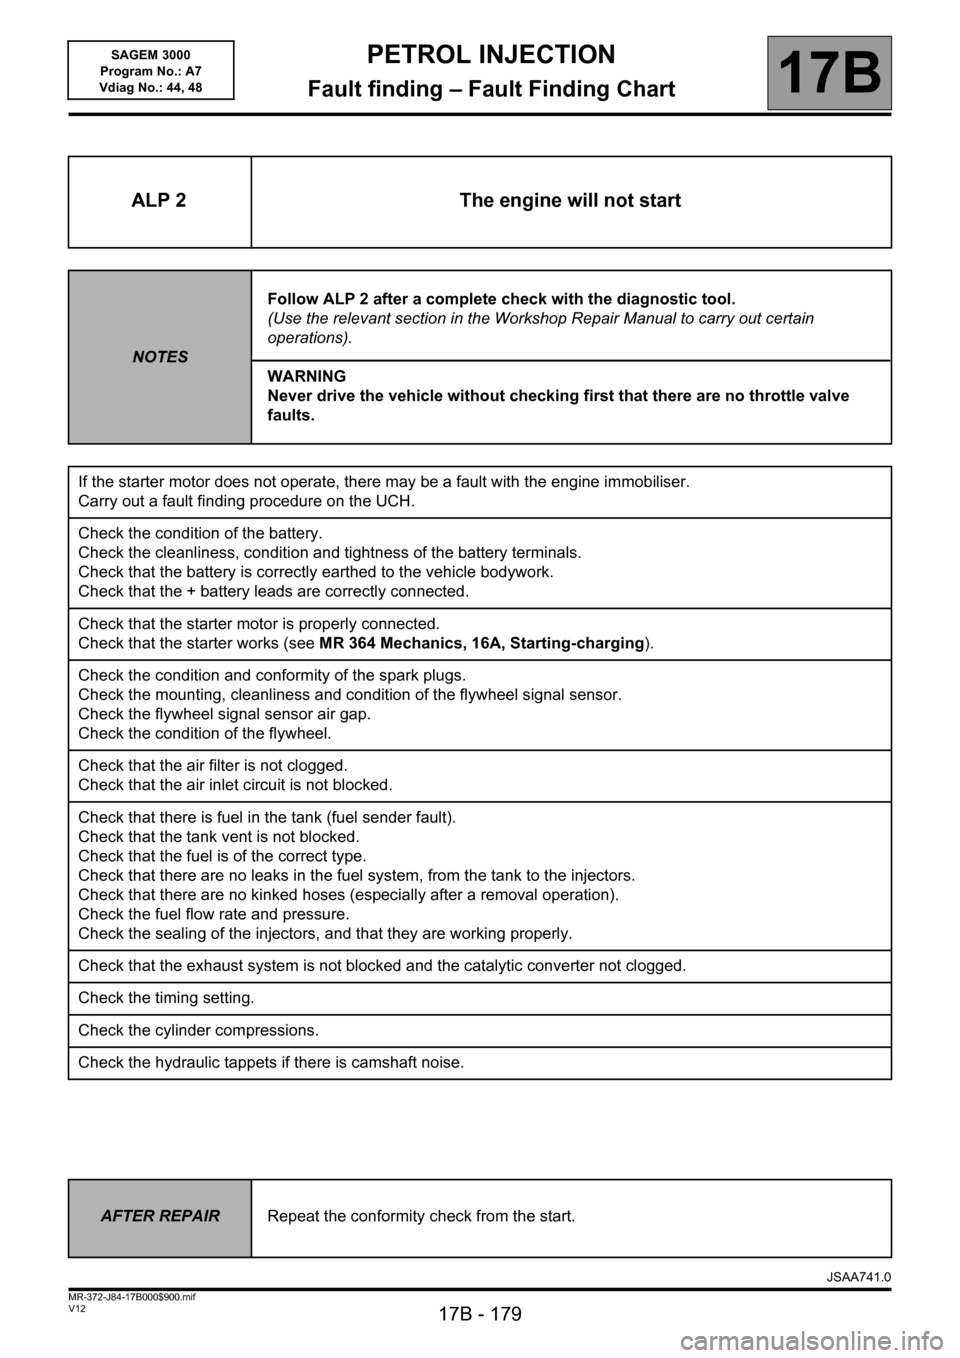
ALP 2 The engine will not start
NOTESFollow ALP 2 after a complete check with the diagnostic tool.
(Use the relevant section in the Workshop Repair Manual to carry out certain
operations).
WARNING
Never drive the vehicle without checking first that there are no throttle valve
faults.
If the starter motor does not operate, there may be a fault with the engine immobiliser.
Carry out a fault finding procedure on the UCH.
Check the condition of the battery.
Check the cleanliness, condition and tightness of the battery terminals.
Check that the battery is correctly earthed to the vehicle bodywork.
Check that the + battery leads are correctly connected.
Check that the starter motor is properly connected.
Check that the starter works (see MR 364 Mechanics, 16A, Starting-charging).
Check the condition and conformity of the spark plugs.
Check the mounting, cleanliness and condition of the flywheel signal sensor.
Check the flywheel signal sensor air gap.
Check the condition of the flywheel.
Check that the air filter is not clogged.
Check that the air inlet circuit is not blocked.
Check that there is fuel in the tank (fuel sender fault).
Check that the tank vent is not blocked.
Check that the fuel is of the correct type.
Check that there are no leaks in the fuel system, from the tank to the injectors.
Check that there are no kinked hoses (especially after a removal operation).
Check the fuel flow rate and pressure.
Check the sealing of the injectors, and that they are working properly.
Check that the exhaust system is not blocked and the catalytic converter not clogged.
Check the timing setting.
Check the cylinder compressions.
Check the hydraulic tappets if there is camshaft noise.
AFTER REPAIRRepeat the conformity check from the start.
JSAA741.0
Page 180 of 181

PETROL INJECTION
Fault finding – Fault Finding Chart17B
17B - 180V12 MR-372-J84-17B000$900.mif
SAGEM 3000
Program No.: A7
Vdiag No.: 44, 48
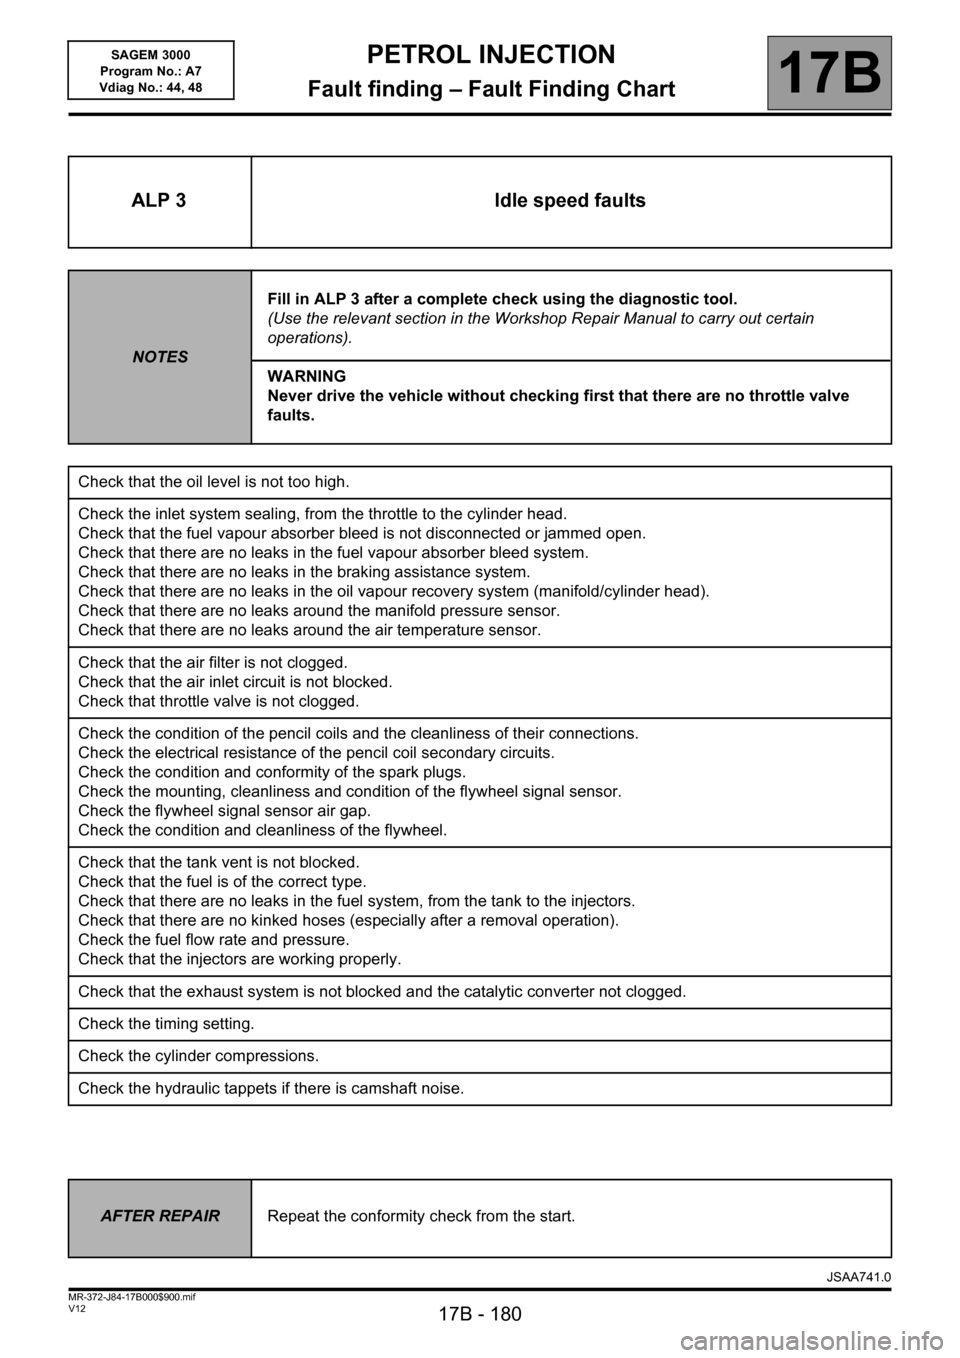
ALP 3 Idle speed faults
NOTESFill in ALP 3 after a complete check using the diagnostic tool.
(Use the relevant section in the Workshop Repair Manual to carry out certain
operations).
WARNING
Never drive the vehicle without checking first that there are no throttle valve
faults.
Check that the oil level is not too high.
Check the inlet system sealing, from the throttle to the cylinder head.
Check that the fuel vapour absorber bleed is not disconnected or jammed open.
Check that there are no leaks in the fuel vapour absorber bleed system.
Check that there are no leaks in the braking assistance system.
Check that there are no leaks in the oil vapour recovery system (manifold/cylinder head).
Check that there are no leaks around the manifold pressure sensor.
Check that there are no leaks around the air temperature sensor.
Check that the air filter is not clogged.
Check that the air inlet circuit is not blocked.
Check that throttle valve is not clogged.
Check the condition of the pencil coils and the cleanliness of their connections.
Check the electrical resistance of the pencil coil secondary circuits.
Check the condition and conformity of the spark plugs.
Check the mounting, cleanliness and condition of the flywheel signal sensor.
Check the flywheel signal sensor air gap.
Check the condition and cleanliness of the flywheel.
Check that the tank vent is not blocked.
Check that the fuel is of the correct type.
Check that there are no leaks in the fuel system, from the tank to the injectors.
Check that there are no kinked hoses (especially after a removal operation).
Check the fuel flow rate and pressure.
Check that the injectors are working properly.
Check that the exhaust system is not blocked and the catalytic converter not clogged.
Check the timing setting.
Check the cylinder compressions.
Check the hydraulic tappets if there is camshaft noise.
AFTER REPAIRRepeat the conformity check from the start.
JSAA741.0
Page 181 of 181

PETROL INJECTION
Fault finding – Fault Finding Chart17B
17B - 181V12 MR-372-J84-17B000$900.mif
SAGEM 3000
Program No.: A7
Vdiag No.: 44, 48
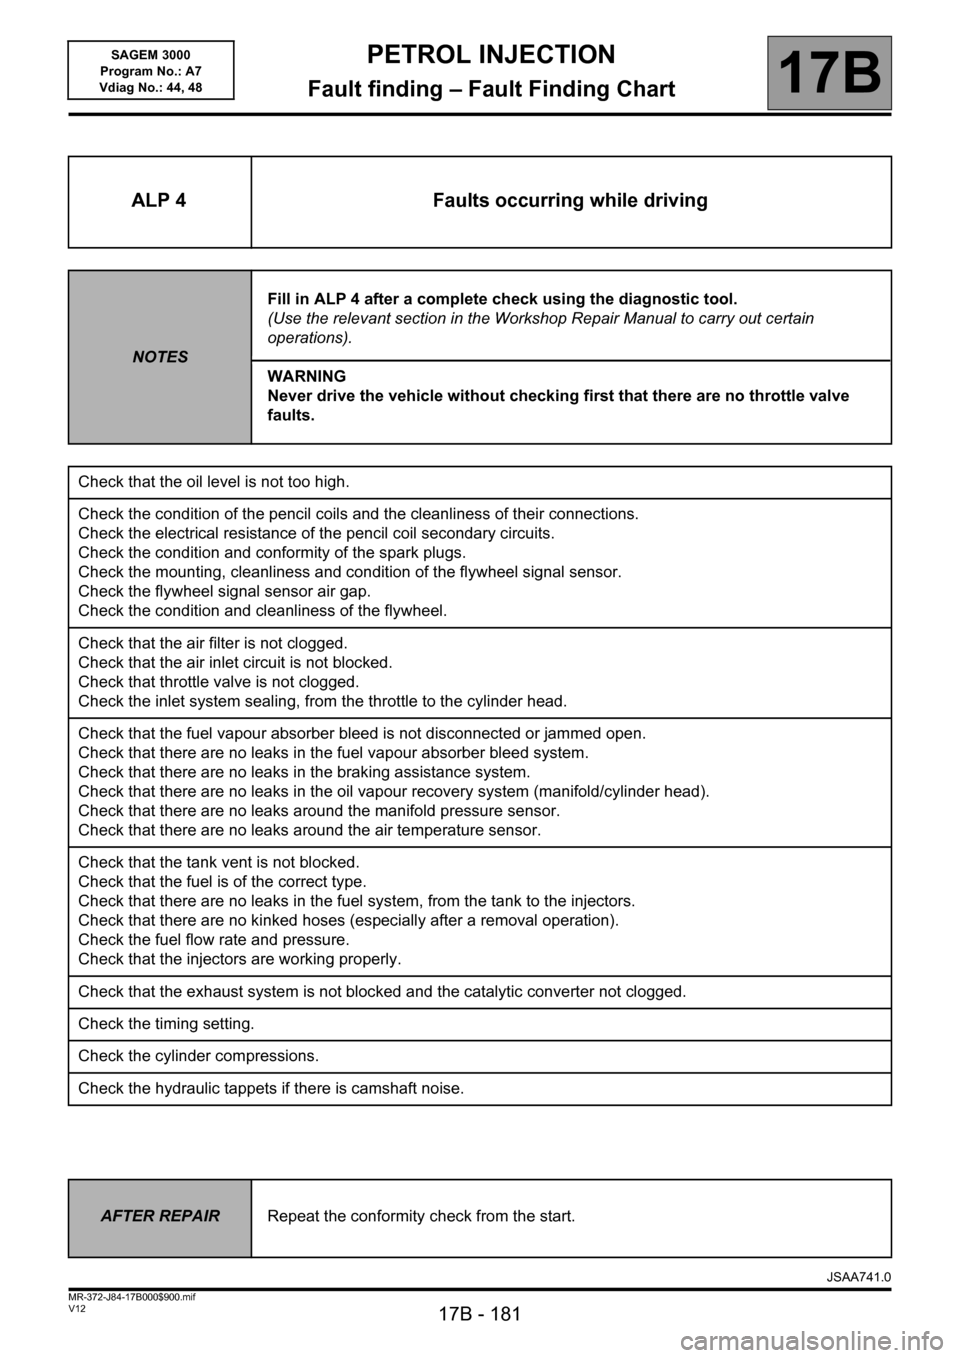
ALP 4 Faults occurring while driving
NOTESFill in ALP 4 after a complete check using the diagnostic tool.
(Use the relevant section in the Workshop Repair Manual to carry out certain
operations).
WARNING
Never drive the vehicle without checking first that there are no throttle valve
faults.
Check that the oil level is not too high.
Check the condition of the pencil coils and the cleanliness of their connections.
Check the electrical resistance of the pencil coil secondary circuits.
Check the condition and conformity of the spark plugs.
Check the mounting, cleanliness and condition of the flywheel signal sensor.
Check the flywheel signal sensor air gap.
Check the condition and cleanliness of the flywheel.
Check that the air filter is not clogged.
Check that the air inlet circuit is not blocked.
Check that throttle valve is not clogged.
Check the inlet system sealing, from the throttle to the cylinder head.
Check that the fuel vapour absorber bleed is not disconnected or jammed open.
Check that there are no leaks in the fuel vapour absorber bleed system.
Check that there are no leaks in the braking assistance system.
Check that there are no leaks in the oil vapour recovery system (manifold/cylinder head).
Check that there are no leaks around the manifold pressure sensor.
Check that there are no leaks around the air temperature sensor.
Check that the tank vent is not blocked.
Check that the fuel is of the correct type.
Check that there are no leaks in the fuel system, from the tank to the injectors.
Check that there are no kinked hoses (especially after a removal operation).
Check the fuel flow rate and pressure.
Check that the injectors are working properly.
Check that the exhaust system is not blocked and the catalytic converter not clogged.
Check the timing setting.
Check the cylinder compressions.
Check the hydraulic tappets if there is camshaft noise.
AFTER REPAIRRepeat the conformity check from the start.
JSAA741.0