buttons SATURN AURA 2010 User Guide
[x] Cancel search | Manufacturer: SATURN, Model Year: 2010, Model line: AURA, Model: SATURN AURA 2010Pages: 428, PDF Size: 2.78 MB
Page 159 of 428
Cruise Control
Cruise control lets a speed of about 40 km/h (25 mph)
or more be maintained without keeping your foot on
the accelerator. Cruise control does not work at speeds
below 40 km/h (25 mph).
{WARNING:
Cruise control can be dangerous where you
cannot drive safely at a steady speed. So, do not
use the cruise control on winding roads or in
heavy traffic.
Cruise control can be dangerous on slippery roads.
On such roads, fast changes in tire traction can
cause excessive wheel slip, and you could lose
control. Do not use cruise control on slippery roads.
Setting Cruise Control
{WARNING:
If you leave your cruise control on when you are
not using cruise, you might hit a button and go
into cruise when you do not want to. You could be
startled and even lose control. Keep the cruise
control switch off until you want to use cruise
control.
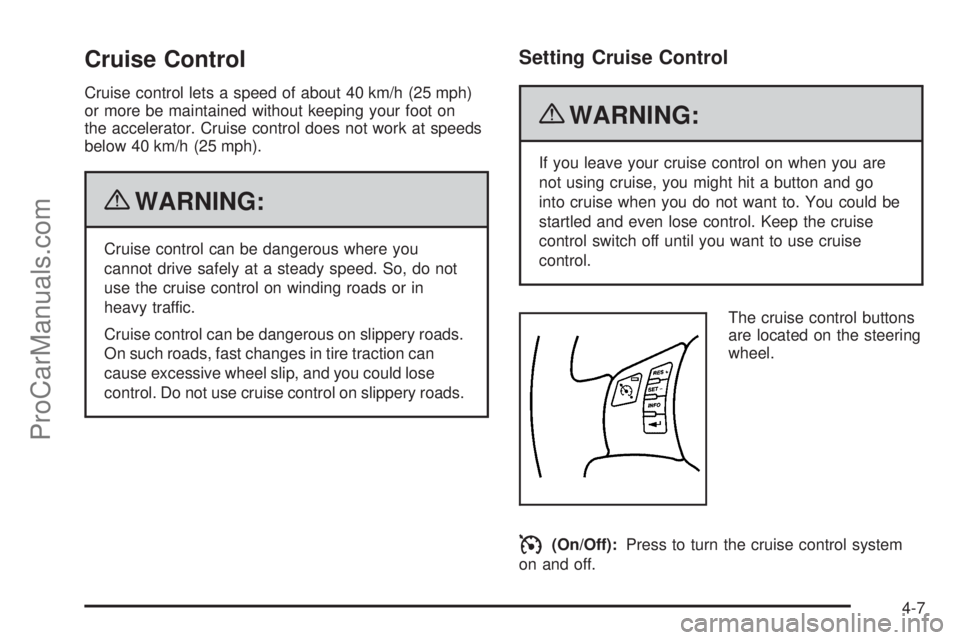
The cruise control buttons
are located on the steering
wheel.
I(On/Off):Press to turn the cruise control system
on and off.
4-7
ProCarManuals.com
Page 171 of 428
Remote Start Climate Control Operation
For vehicles with the remote start feature, when it
is activated the climate control system heats or cools
the inside of the vehicle using the modes that were set
before the vehicle was turned off. The climate control
knobs will remain active during a remote start. However,
the climate control buttons will be inactive until the
ignition is turned on by the key. If the fan is off,
the climate control system will not operate during remote
start. SeeRemote Keyless Entry (RKE) System
Operation on page 3-3.
Automatic Climate Control System
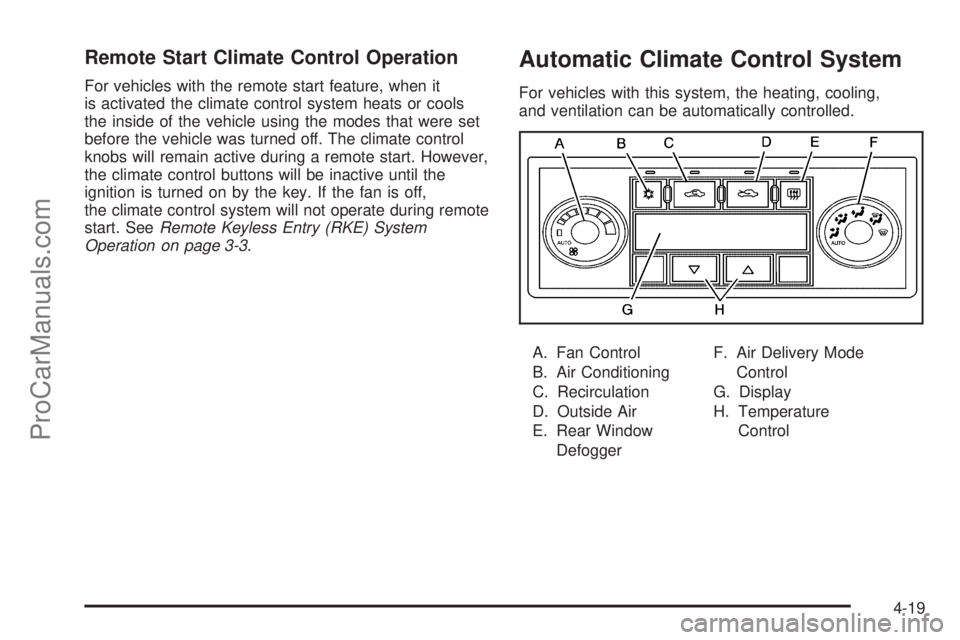
For vehicles with this system, the heating, cooling,
and ventilation can be automatically controlled.
A. Fan Control
B. Air Conditioning
C. Recirculation
D. Outside Air
E. Rear Window
DefoggerF. Air Delivery Mode
Control
G. Display
H. Temperature
Control
4-19
ProCarManuals.com
Page 173 of 428
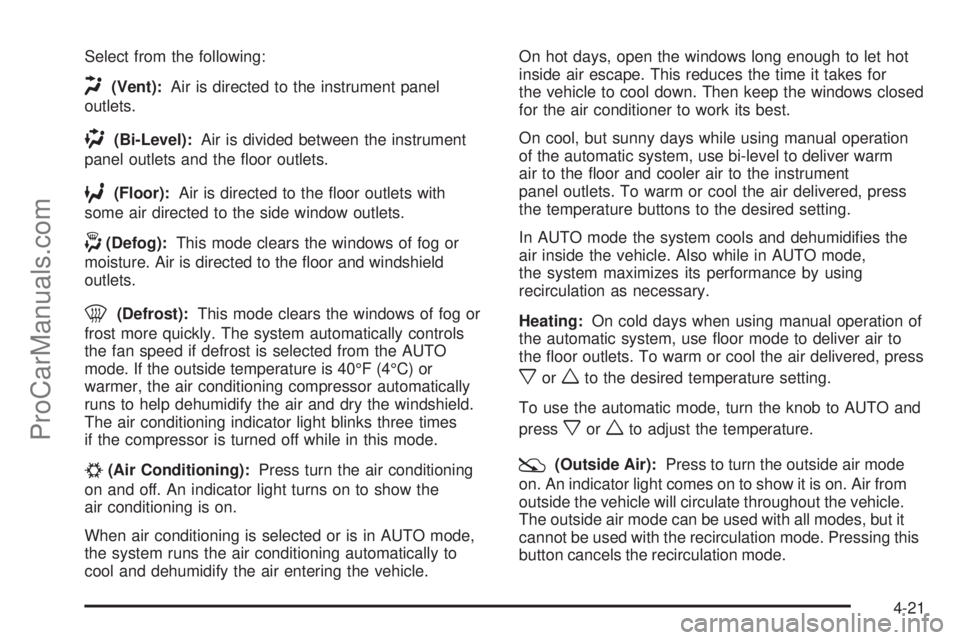
Select from the following:
H(Vent):Air is directed to the instrument panel
outlets.
)(Bi-Level):Air is divided between the instrument
panel outlets and the floor outlets.
6(Floor):Air is directed to the floor outlets with
some air directed to the side window outlets.
-(Defog):This mode clears the windows of fog or
moisture. Air is directed to the floor and windshield
outlets.
0(Defrost):This mode clears the windows of fog or
frost more quickly. The system automatically controls
the fan speed if defrost is selected from the AUTO
mode. If the outside temperature is 40°F (4°C) or
warmer, the air conditioning compressor automatically
runs to help dehumidify the air and dry the windshield.
The air conditioning indicator light blinks three times
if the compressor is turned off while in this mode.
#(Air Conditioning):Press turn the air conditioning
on and off. An indicator light turns on to show the
air conditioning is on.
When air conditioning is selected or is in AUTO mode,
the system runs the air conditioning automatically to
cool and dehumidify the air entering the vehicle.On hot days, open the windows long enough to let hot
inside air escape. This reduces the time it takes for
the vehicle to cool down. Then keep the windows closed
for the air conditioner to work its best.
On cool, but sunny days while using manual operation
of the automatic system, use bi-level to deliver warm
air to the floor and cooler air to the instrument
panel outlets. To warm or cool the air delivered, press
the temperature buttons to the desired setting.
In AUTO mode the system cools and dehumidifies the
air inside the vehicle. Also while in AUTO mode,
the system maximizes its performance by using
recirculation as necessary.
Heating:On cold days when using manual operation of
the automatic system, use floor mode to deliver air to
the floor outlets. To warm or cool the air delivered, press
xorwto the desired temperature setting.
To use the automatic mode, turn the knob to AUTO and
press
xorwto adjust the temperature.
:(Outside Air):Press to turn the outside air mode
on. An indicator light comes on to show it is on. Air from
outside the vehicle will circulate throughout the vehicle.
The outside air mode can be used with all modes, but it
cannot be used with the recirculation mode. Pressing this
button cancels the recirculation mode.
4-21
ProCarManuals.com
Page 175 of 428
Remote Start Climate Control Operation
For vehicles with remote start, when it is activated the
climate control system heats and cools the inside of
the vehicle using the previous system settings before the
vehicle was turned off. The climate control knobs will
remain active during a remote start. However, the
climate control buttons will be inactive until the ignition
is turned on by the key. If the fan is off, the climate
control system will not operate during remote start.
With the automatic climate control system, the climate
control displays “RS” in place of the temperature to
indicate that remote start is activated. For best
performance, turn both the fan and mode knobs to
AUTO. If the temperature is cold enough and the mode
knob is set to AUTO, the system begins in defrost to
clear the windows. SeeRemote Keyless Entry
(RKE) System Operation on page 3-3.
Outlet Adjustment
There are four main air outlets on the instrument panel.
Move the lever located in the center of each outlet
side-to-side or up and down, to change the direction and
amount of airflow in the vehicle. The center thumbwheel
does not control the main outlets.
Rear Seat Air Outlet
For vehicles with this feature, the rear seat air outlet is
located in the center of the instrument panel above
the two main center outlets.
Use the thumbwheel in the center of the outlet to turn
the airflow on or off.
4-23
ProCarManuals.com
Page 191 of 428
Here are four things that some owners ask about.
These are normal and do not indicate a problem with
the fuel gage:
•At the service station, the gas pump shuts off
before the gage reads full.
•It takes a little more or less fuel to fill up than the
gage indicated. For example, the gage may have
indicated the fuel tank was half full, but it actually
took a little more or less than half the fuel tank’s
capacity to fill it.
•The indicator moves a little when while turning a
corner or speeding up.
•The gage goes back to empty when the ignition is
turned off.
Driver Information Center (DIC)
Your vehicle has a Driver Information Center (DIC).
The DIC display gives you the status of many of your
vehicle’s systems. The DIC is also used to display driver
personalization menu modes and warning/status
messages. All messages will appear in the DIC display,
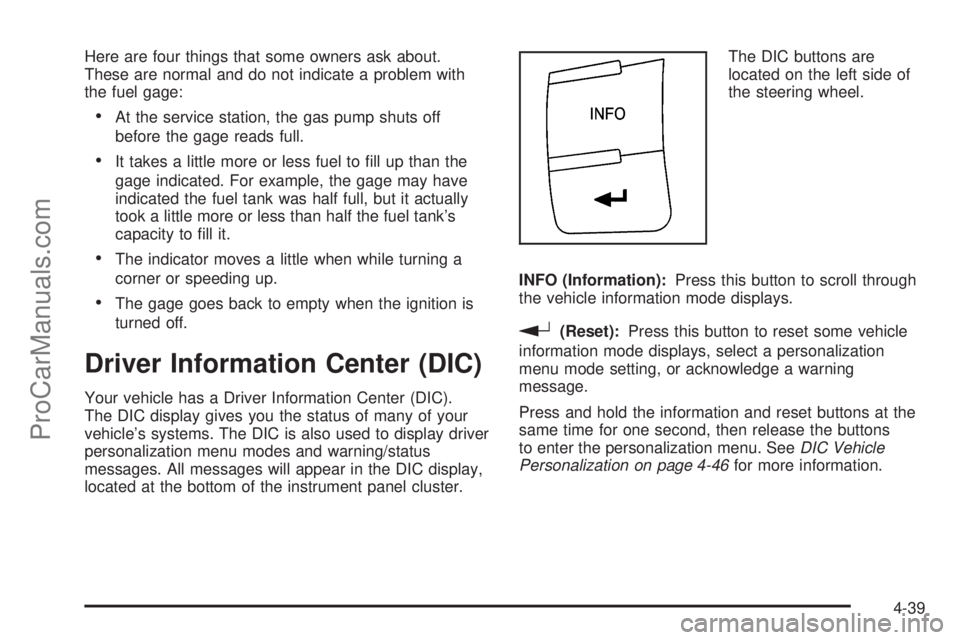
located at the bottom of the instrument panel cluster.The DIC buttons are
located on the left side of
the steering wheel.
INFO (Information):Press this button to scroll through
the vehicle information mode displays.
r(Reset):Press this button to reset some vehicle
information mode displays, select a personalization
menu mode setting, or acknowledge a warning
message.
Press and hold the information and reset buttons at the
same time for one second, then release the buttons
to enter the personalization menu. SeeDIC Vehicle
Personalization on page 4-46for more information.
4-39
ProCarManuals.com
Page 192 of 428
DIC Operation and Displays
The DIC comes on when the ignition is on. The DIC has
different modes which can be accessed by pressing
the DIC buttons. The button functions are detailed in the
following.
Information Modes
INFO (Information):Press this button to scroll through
the following vehicle information modes:
Outside Air Temperature
The outside air temperature will be displayed at the
same time as the Odometer and the Trip Odometer. The
temperature outside of the vehicle will be displayed in
either degrees Celsius (°C) or degrees Fahrenheit (°F).
The outside air temperature appears on the left side
of the DIC display and the odometer, or trip odometer,
appears on the right side of the display.
Odometer
Press the information button until the outside air
temperature and the odometer displays. This mode
shows the total distance the vehicle has been driven in
either kilometers (km) or miles (mi).
To change the DIC display to English or metric units,
see “UNITS” underDIC Vehicle Personalization on
page 4-46.
Trip Odometer
Press the information button until the outside air
temperature along with A or B displays. These modes
show the current distance traveled since the last reset for
each trip odometer in either kilometers (km) or miles (mi).
Both odometers can be used at the same time.
To reset the trip odometer to zero, press and hold the
reset button for a few seconds while the desired
trip odometer is displayed.
FUEL RANGE
Press the information button until FUEL RANGE
displays. This mode shows the remaining distance you
can drive without refueling in either kilometers (km)
or miles (mi). It is based on fuel economy and the fuel
remaining in the tank.
When the fuel level is low, FUEL RANGE LOW displays.
The fuel economy data used to determine fuel range
is an average of recent driving conditions. As your
driving conditions change, this data is gradually updated.
The FUEL RANGE mode cannot be reset.
4-40
ProCarManuals.com
Page 194 of 428
DIC Warnings and Messages
These messages appear if there is a problem detected
in one of your vehicle’s systems.
A message clears when the vehicle’s condition is no
longer present. To acknowledge a message and clear it
from the display, press and hold any of the DIC
buttons. If the condition is still present, the warning
message comes back on the next time the vehicle is
turned off and back on. With most messages, a warning
chime sounds when the message displays. Your
vehicle may have other warning messages.
AUTO (Automatic) LIGHTS OFF
This message displays if the automatic headlamp
system is disabled with the headlamp switch. See
Automatic Headlamp System on page 4-11for more
information.
AUTO (Automatic) LIGHTS ON
This message displays if the automatic headlamp
system is enabled with the headlamp switch. See
Automatic Headlamp System on page 4-11for more
information.
BRAKE FLUID
This message displays, while the ignition is on, when
the brake fluid level is low. The brake system warning
light on the instrument panel cluster also comes on.SeeBrake System Warning Light on page 4-30for more
information. Have the brake system serviced by your
dealer/retailer as soon as possible.
CHANGE OIL SOON
This message displays when the life of the engine oil
has expired and it should be changed.
When this message is acknowledged and cleared from
the display, the engine oil life system must still be
reset separately. SeeEngine Oil Life System on
page 6-20,Engine Oil on page 6-17, andScheduled
Maintenance on page 7-3for more information.
CHECK GAS CAP
This message displays if the fuel cap has not been fully
tightened. Recheck the fuel cap to make sure that it
is on properly. A few driving trips with the cap properly
installed should turn the message off.
CRUISE ENGAGED
This message displays when the cruise control system
is active. SeeCruise Control on page 4-7for more
information.
DOOR AJAR
This message displays if one or more of the vehicle’s
doors are not closed properly. Make sure that the
door(s) are closed completely.
4-42
ProCarManuals.com
Page 198 of 428
DIC Vehicle Personalization
Your vehicle has personalization capabilities that allow
you to program certain features to a preferred setting.
All of the features listed may not be available on
your vehicle. Only the features available will be
displayed on the DIC.
The default settings for the features were set when your
vehicle left the factory, but may have been changed
from their default state since that time.
To change feature settings, use the following procedure:
Entering Personalization Menu
1. Turn the ignition on while the vehicle is stopped.
To avoid excessive drain on the battery, it is
recommended that the headlamps are turned off.
2. Press and hold the information and reset buttons at
the same time for one second, then release to enter
the personalization menu.
If the vehicle speed is greater than 2 mph (3 km/h),
only the UNITS menu will be accessible.
3. Press the information button to scroll through the
available personalization menu modes.
Press the reset button to scroll through the available
settings for each mode.If you do not make a selection within ten seconds,
the display will go back to the previous information
displayed.
Personalization Menu Modes
OIL LIFE RESET
When this feature is displayed, you can reset the engine
oil life system. To reset the system, seeEngine Oil
Life System on page 6-20. See “OIL LIFE” underDIC
Operation and Displays on page 4-40for more
information.
UNITS
This feature allows you to select the units of
measurement in which the DIC will display the vehicle
information. When UNITS appears on the display, press
and hold the reset button for at least one second to
scroll through the available settings:
ENGLISH (default in United States):All information
will be displayed in English units.
METRIC (default in Canada):All information will be
displayed in metric units.
To select a setting and move on to the next feature,
press the information button while the desired setting is
displayed on the DIC.
4-46
ProCarManuals.com
Page 200 of 428
LIGHT FLASH
This feature, which allows the vehicle’s exterior
hazard/turn signal lighting to flash every time the lock,
unlock, or trunk release buttons on the Remote Keyless
Entry (RKE) transmitter are pressed, can be enabled
or disabled. When LIGHT FLASH appears on the
display, press and hold the reset button for at least one
second to scroll through the available settings:
OFF:The exterior hazard/turn signal lighting will not
flash when the lock, unlock, or trunk release buttons on
the RKE transmitter are pressed.
ON (default):The exterior hazard/turn signal lighting
will flash when the lock, unlock, or trunk release buttons
on the RKE transmitter are pressed.
SeeRemote Keyless Entry (RKE) System Operation on
page 3-3for more information.
To select a setting and move on to the next feature,
press the information button while the desired setting is
displayed on the DIC.
DELAY LOCK
This feature, which delays the actual locking of the
vehicle, can be enabled or disabled. When DELAY
LOCK appears on the display, press and hold the reset
button for at least one second to scroll through the
available settings:
ON (default):The doors will not lock until five seconds
after the last door is closed. You can temporarily
override delayed locking by pressing the power lock
switch or the lock button on the Remote Keyless Entry
(RKE) transmitter a second time.
OFF:The doors will lock immediately when pressing
the power lock switch or the lock button on the
RKE transmitter.
SeePower Door Locks on page 3-8,Delayed Locking
on page 3-9, andRemote Keyless Entry (RKE)
System Operation on page 3-3for more information.
To select a setting and move on to the next feature,
press the information button while the desired setting is
displayed on the DIC.
4-48
ProCarManuals.com
Page 212 of 428
Using the Auxiliary Input Jack
The radio system may have an auxiliary input jack
located on the lower right side of the faceplate. This is
not an audio output; do not plug the headphone set
into the front auxiliary input jack. An external audio
device such as an iPod
®, laptop computer, MP3 player,
CD changer, etc. can be connected to the auxiliary
input jack for use as another audio source.
Drivers are encouraged to set up any auxiliary device
while the vehicle is in P (Park). SeeDefensive
Driving on page 5-2for more information on driver
distraction.
To use a portable audio player, connect a 3.5 mm
(1/8 inch) cable to the radio’s front auxiliary input jack.
When a device is connected, press the radio CD/AUX
button to begin playing audio from the device over
the vehicle speakers.
O(Power/Volume):Turn to adjust the volume.
Additional volume adjustments may have to be made
from the portable device if the volume is too quiet or
not loud.
BAND:Press to listen to the radio while a portable
audio device is playing. The portable audio device
continues playing until it is stopped or turned off.CD/AUX (CD/Auxiliary):Press to play a CD while a
portable audio device is playing. Press again and
the system begins playing audio from the connected
portable audio player. If a portable audio player is
not connected, No Aux Input Device Found may display.
Using the USB Port
Radio’s with a USB port can control a USB storage
device or an iPod®using the radio buttons and knobs.
SeeUsing an MP3 on page 4-61for information
about how to connect and control a USB storage device
or an iPod.
USB Support
The USB connector is located on the front of the radio
and uses the USB 2.0 standard.
USB Supported Devices
•
USB Flash Drives
•Portable USB Hard Drives
•Fifth generation or later iPod
•First, Second, or Third generation iPod nano
•iPod touch
•iPod classic
4-60
ProCarManuals.com