Seat Alhambra 2009 Owner's Manual
Manufacturer: SEAT, Model Year: 2009, Model line: Alhambra, Model: Seat Alhambra 2009Pages: 285, PDF Size: 7.62 MB
Page 131 of 285
Seats and stowage129
Safety First
Operating instructions
Tips and Maintenance
Te c h n i c a l D a t a
Folding the backrest and the seat forwards
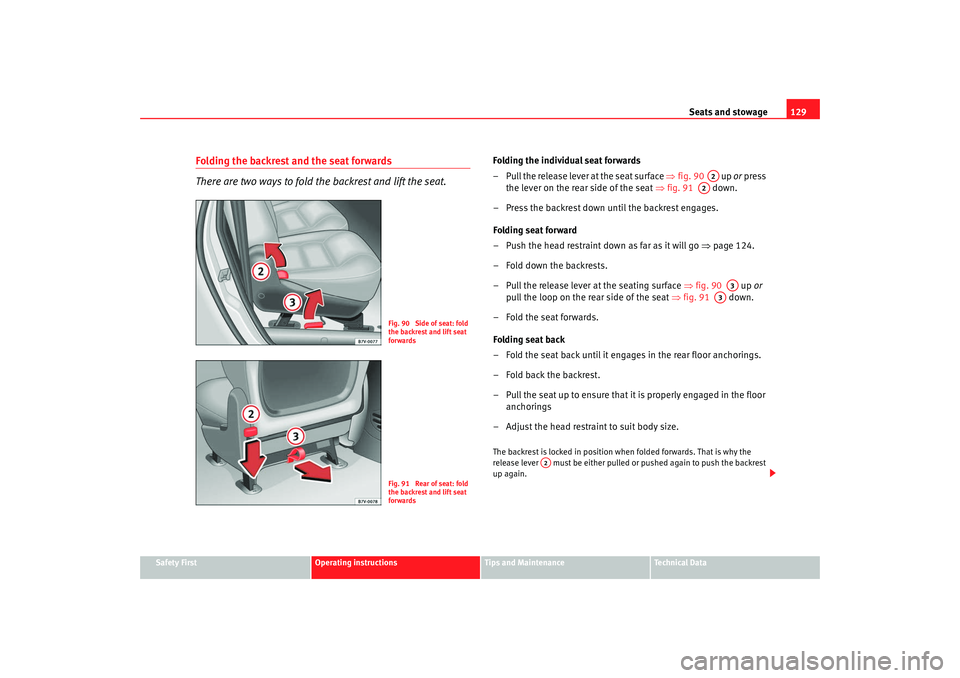
There are two ways to fold the backrest and lift the seat.
Folding the individual seat forwards
– Pull the release lever at the seat surface ⇒fig. 90 up or press
the lever on the rear side of the seat ⇒fig. 91 down.
– Press the backrest down until the backrest engages.
Folding seat forward
– Push the head restraint down as far as it will go ⇒page 124.
– Fold down the backrests.
– Pull the release lever at the seating surface ⇒fig. 90 up or
pull the loop on the rear side of the seat ⇒fig. 91 down.
–Fold the seat forwards.
Folding seat back
– Fold the seat back until it engages in the rear floor anchorings.
– Fold back the backrest.
– Pull the seat up to ensure that it is properly engaged in the floor anchorings
– Adjust the head restraint to suit body size.The backrest is locked in position when folded forwards. That is why the
release lever must be either pulled or pushed again to push the backrest
up again.
Fig. 90 Side of seat: fold
the backrest and lift seat
forwardsFig. 91 Rear of seat: fold
the backrest and lift seat
forwards
A2
A2
A3
A3
A2
alhambra_aleman.book Seite 129 Montag, 23. M‰ rz 2009 1:12 13
Page 132 of 285
Seats and stowage
130
WARNING
If you do not hold the backrest firmly when you operate the lever for
adjusting the backrest angle, the backrest will be pushed forward by
springs. Risk of injury.•
Always hold the backrest firmly when you adjust the backrest angle.
•
Please observe safety recommendations concerning seats
⇒ page 132.
Removing and fitting individual seats
The seats can be fitted and removed more easily by two
people than by one person.
Removing an individual seat
– Push the head restraint down as far as it will go ⇒ page 124.
– Fold down the backrests ⇒page 129.
– Fold the seat forwards ⇒ page 129.
– When removing a seat in the third row
28)
, push the seat back as
far as it will go and forwards as far as it will go when removing a
seat in the second row.
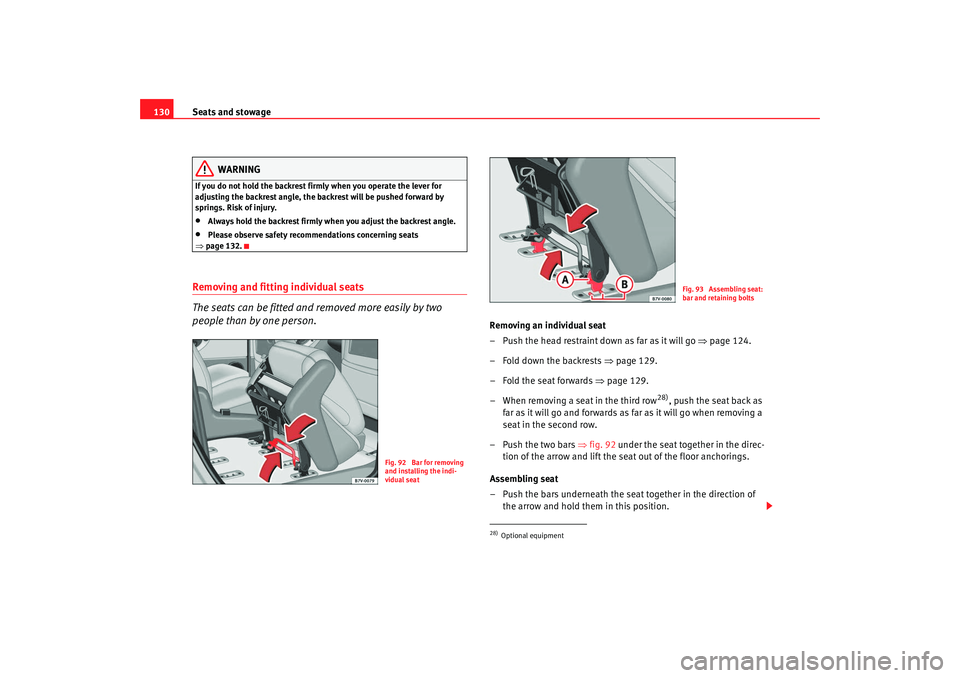
– Push the two bars ⇒fig. 92 under the seat together in the direc-
tion of the arrow and lift the seat out of the floor anchorings.
Assembling seat
– Push the bars underneath the seat together in the direction of the arrow and hold them in this position.
Fig. 92 Bar for removing
and installing the indi-
vidual seat
28)Optional equipment
Fig. 93 Assembling seat:
bar and retaining bolts
alhambra_aleman.book Seite 130 Montag, 23. M‰ rz 2009 1:12 13
Page 133 of 285
Seats and stowage131
Safety First
Operating instructions
Tips and Maintenance
Te c h n i c a l D a t a
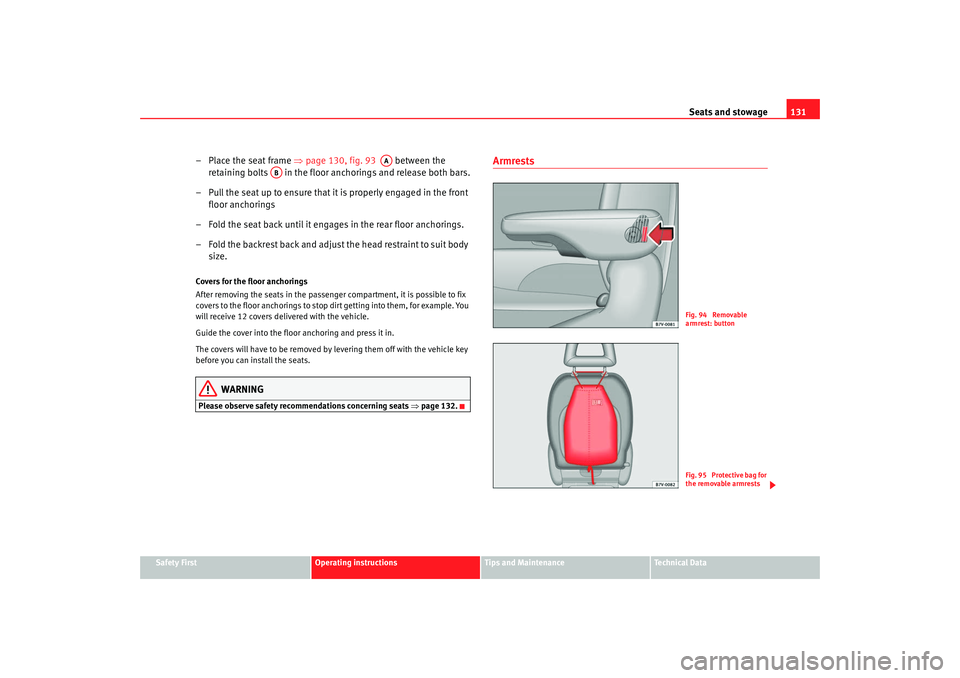
–Place the seat frame ⇒ page 130, fig. 93 between the
retaining bolts in the floor anchorings and release both bars.
– Pull the seat up to ensure that it is properly engaged in the front floor anchorings
– Fold the seat back until it engages in the rear floor anchorings.
– Fold the backrest back and adjust the head restraint to suit body size.Covers for the floor anchorings
After removing the seats in the passenger compartment, it is possible to fix
covers to the floor anchorings to stop dirt getting into them, for example. You
will receive 12 covers delivered with the vehicle.
Guide the cover into the floor anchoring and press it in.
The covers will have to be removed by levering them off with the vehicle key
before you can install the seats.
WARNING
Please observe safety recommendations concerning seats ⇒page 132.
Armrests
AA
AB
Fig. 94 Removable
armrest: buttonFig. 95 Protective bag for
the removable armrests
alhambra_aleman.book Seite 131 Montag, 23. M‰ rz 2009 1:12 13
Page 134 of 285
Seats and stowage
132
Adjusting the armrest
– Turn the thumb wheel underneath the armrests to adjust the angle of the armrests to your requirement.
Removable armrest*
29)
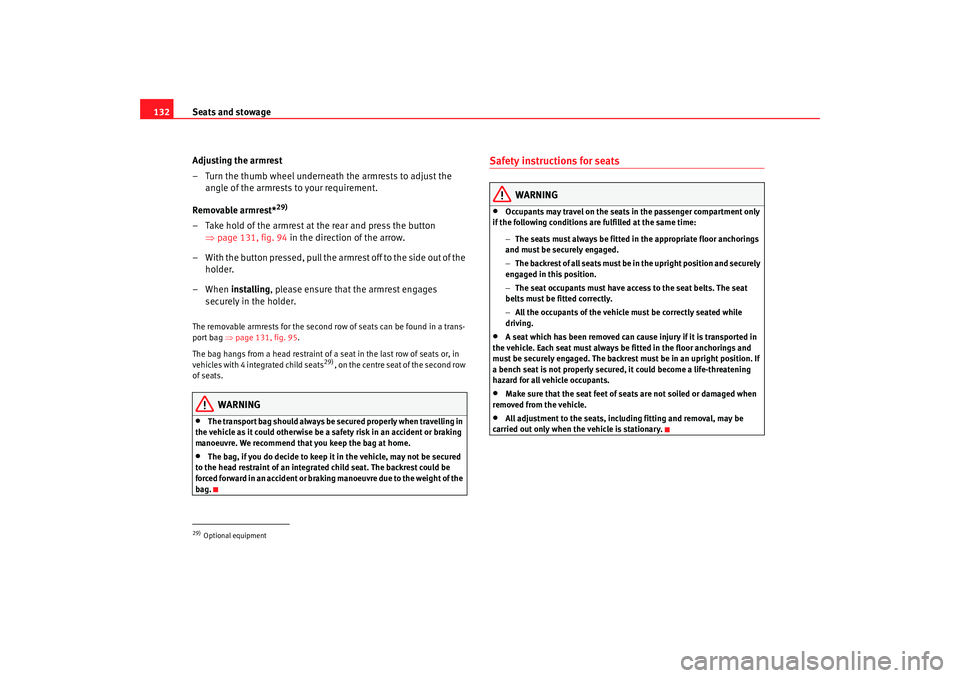
– Take hold of the armrest at the rear and press the button ⇒page 131, fig. 94 in the direction of the arrow.
– With the button pressed, pull the armrest off to the side out of the holder.
–When installing , please ensure that the armrest engages
securely in the holder.The removable armrests for the second row of seats can be found in a trans-
port bag ⇒page 131, fig. 95 .
The bag hangs from a head restraint of a seat in the last row of seats or, in
vehicles with 4 integrated child seats
29), on the centre seat of the second row
of seats.
WARNING
•
The transport bag should always be secured properly when travelling in
the vehicle as it could otherwise be a safety risk in an accident or braking
manoeuvre. We recommend that you keep the bag at home.
•
The bag, if you do decide to keep it in the vehicle, may not be secured
to the head restraint of an integrated child seat. The backrest could be
forced forward in an accident or braking manoeuvre due to the weight of the
bag.
Safety instructions for seats
WARNING
•
Occupants may travel on the seats in the passenger compartment only
if the following conditions are fulfilled at the same time:
−The seats must always be fitted in the appropriate floor anchorings
and must be securely engaged.
− The backrest of all seats must be in the upright position and securely
engaged in this position.
− The seat occupants must have access to the seat belts. The seat
belts must be fitted correctly.
− All the occupants of the vehicle must be correctly seated while
driving.
•
A seat which has been removed can cause injury if it is transported in
the vehicle. Each seat must always be fitted in the floor anchorings and
must be securely engaged. The backrest must be in an upright position. If
a bench seat is not properly secured, it could become a life-threatening
hazard for all vehicle occupants.
•
Make sure that the seat feet of seats are not soiled or damaged when
removed from the vehicle.
•
All adjustment to the seats, including fitting and removal, may be
carried out only when the vehicle is stationary.
29)Optional equipment
alhambra_aleman.book Seite 132 Montag, 23. M‰ rz 2009 1:12 13
Page 135 of 285
Seats and stowage133
Safety First
Operating instructions
Tips and Maintenance
Te c h n i c a l D a t a
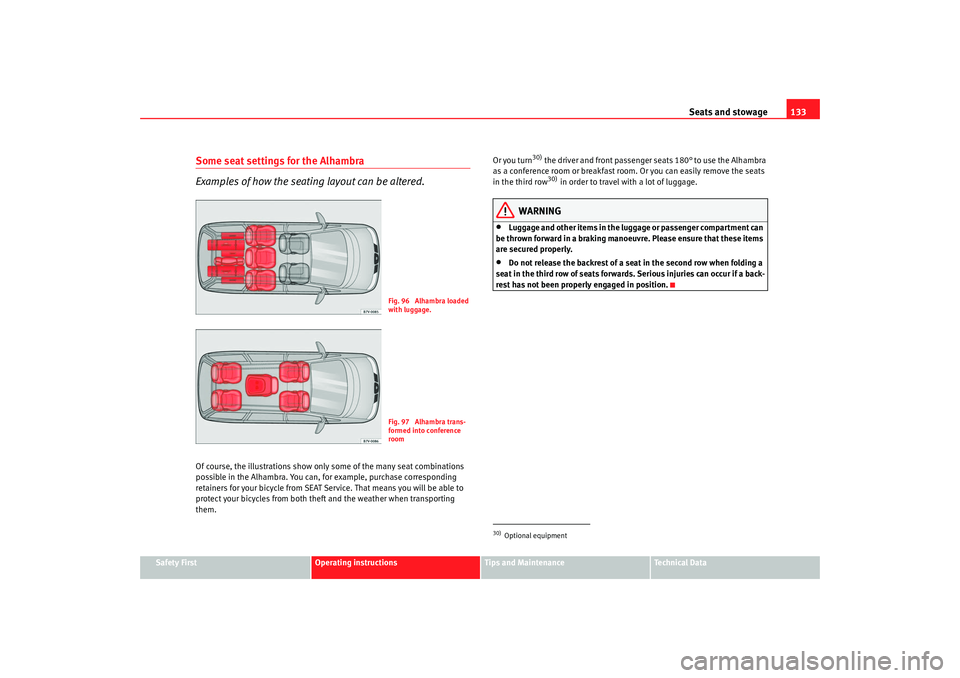
Some seat settings for the Alhambra
Examples of how the seating layout can be altered.Of course, the illustrations show only some of the many seat combinations
possible in the Alhambra. You can, for example, purchase corresponding
retainers for your bicycle from SEAT Service. That means you will be able to
protect your bicycles from both theft and the weather when transporting
them. Or you turn
30) the driver and front passenger seats 180° to use the Alhambra
as a conference room or breakfast room. Or you can easily remove the seats
in the third row30) in order to travel with a lot of luggage.
WARNING
•
Luggage and other items in the luggage or passenger compartment can
be thrown forward in a braking manoeuvre. Please ensure that these items
are secured properly.
•
Do not release the backrest of a seat in the second row when folding a
seat in the third row of seats forwards. Serious injuries can occur if a back-
rest has not been properly engaged in position.
Fig. 96 Alhambra loaded
with luggage.Fig. 97 Alhambra trans-
formed into conference
room
30)Optional equipment
alhambra_aleman.book Seite 133 Montag, 23. M‰ rz 2009 1:12 13
Page 136 of 285
Seats and stowage
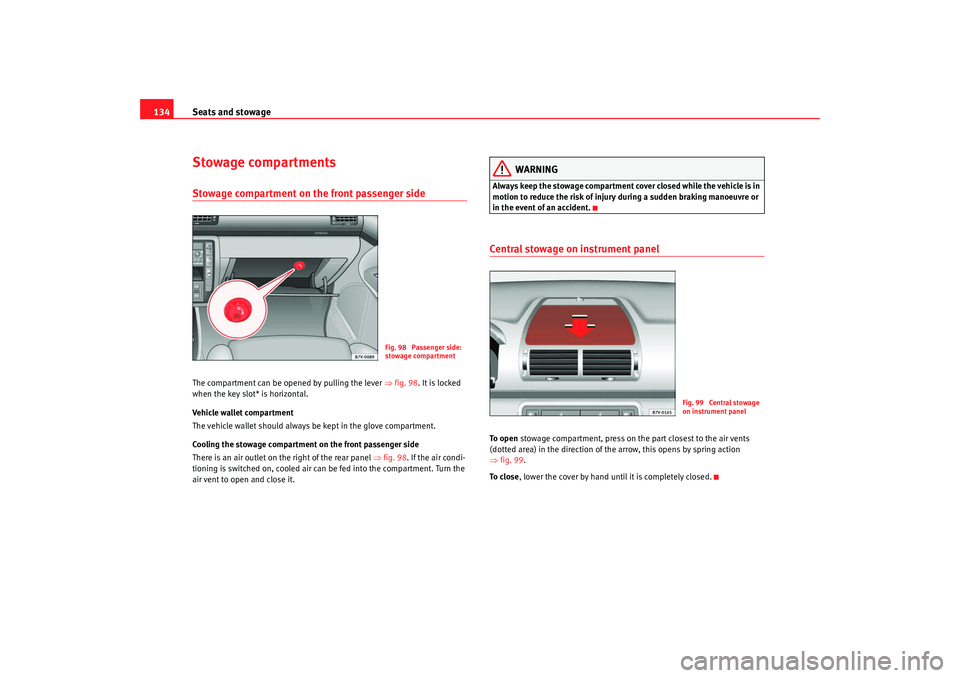
134Stowage compartmentsStowage compartment on the front passenger sideThe compartment can be opened by pulling the lever ⇒fig. 98 . It is locked
when the key slot* is horizontal.
Vehicle wallet compartment
The vehicle wallet should always be kept in the glove compartment.
Cooling the stowage compartment on the front passenger side
There is an air outlet on the right of the rear panel ⇒fig. 98 . If the air condi-
tioning is switched on, cooled air can be fed into the compartment. Turn the
air vent to open and close it.
WARNING
Always keep the stowage compartment cover closed while the vehicle is in
motion to reduce the risk of injury during a sudden braking manoeuvre or
in the event of an accident.Central stowage on instrument panelTo o p e n stowage compartment, press on the part closest to the air vents
(dotted area) in the direction of the arrow, this opens by spring action
⇒ fig. 99 .
To c l o s e , lower the cover by hand until it is completely closed.
Fig. 98 Passenger side:
stowage compartment
Fig. 99 Central stowage
on instrument panel
alhambra_aleman.book Seite 134 Montag, 23. M‰ rz 2009 1:12 13
Page 137 of 285
Seats and stowage135
Safety First
Operating instructions
Tips and Maintenance
Te c h n i c a l D a t a
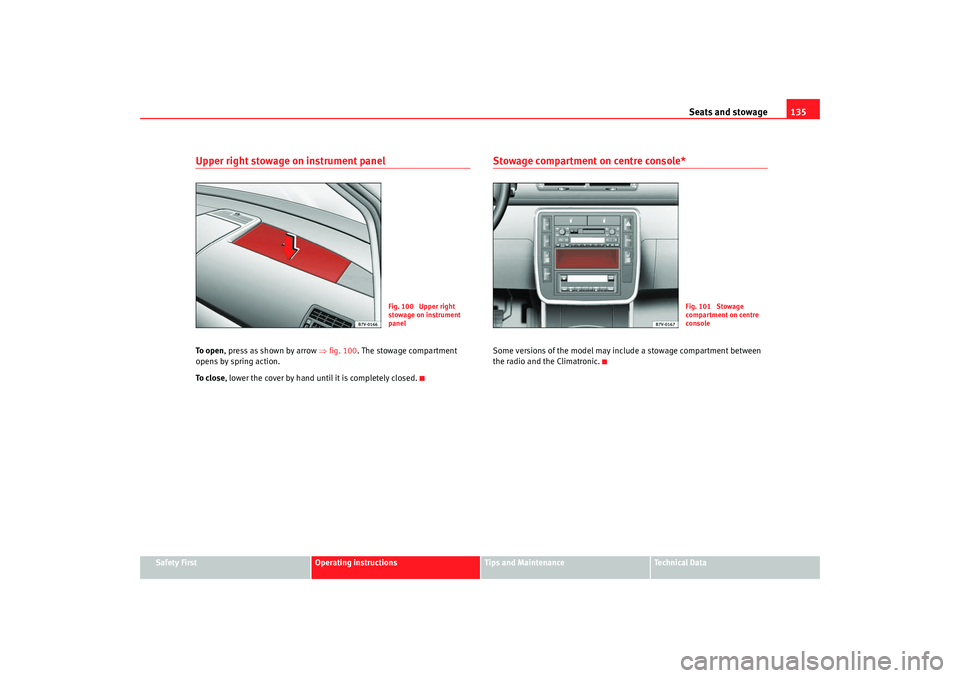
Upper right stowage on instrument panelTo o p e n, press as shown by arrow ⇒fig. 100 . The stowage compartment
opens by spring action.
To c l o s e , lower the cover by hand until it is completely closed.
Stowage compartment on centre console*Some versions of the model may include a stowage compartment between
the radio and the Climatronic.
Fig. 100 Upper right
stowage on instrument
panel
Fig. 101 Stowage
compartment on centre
console
alhambra_aleman.book Seite 135 Montag, 23. M‰ rz 2009 1:12 13
Page 138 of 285
Seats and stowage
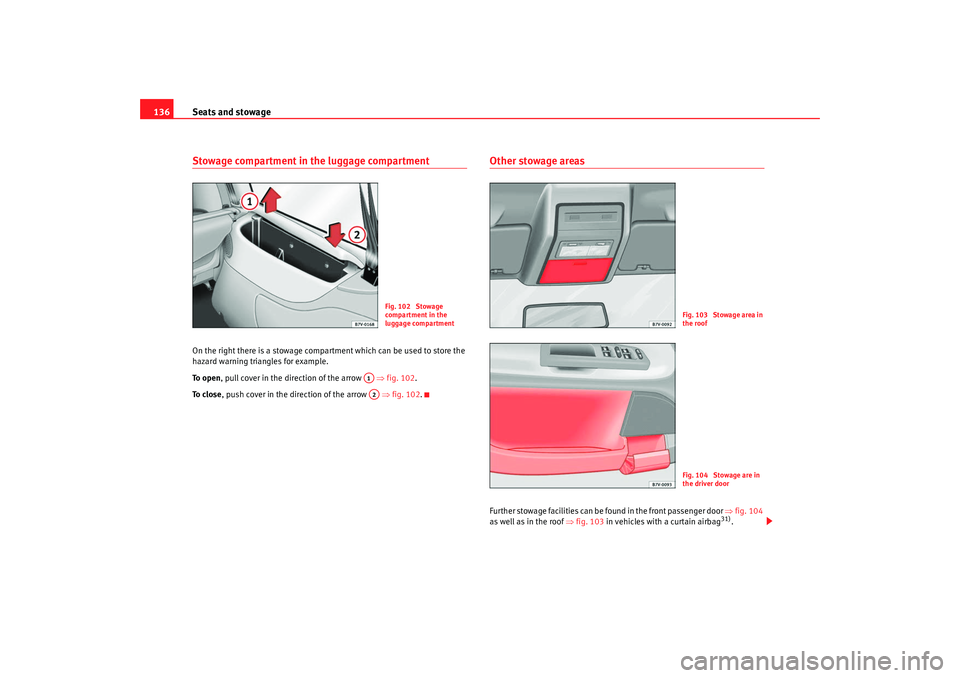
136Stowage compartment in the luggage compartmentOn the right there is a stowage compartment which can be used to store the
hazard warning triangles for example.
To o p e n , pull cover in the direction of the arrow ⇒fig. 102 .
To c l o s e , push cover in the direction of the arrow ⇒fig. 102.
Other stowage areasFurther stowage facilities can be found in the front passenger door ⇒fig. 104
as well as in the roof ⇒fig. 103 in vehicles with a curtain airbag
31).
Fig. 102 Stowage
compartment in the
luggage compartment
A1A2
Fig. 103 Stowage area in
the roofFig. 104 Stowage are in
the driver door
alhambra_aleman.book Seite 136 Montag, 23. M‰ rz 2009 1:12 13
Page 139 of 285
Seats and stowage137
Safety First
Operating instructions
Tips and Maintenance
Te c h n i c a l D a t a
Coat hooks are located in the roof. They are integrated in the grab handles in
the passenger compartment.
Location of CD changer
31)
The CD changer, which can be factory fitted, is located either in the dash
panel or in the right-hand stowage compartment in the luggage compart-
ment.
WARNING
•
Ensure that no objects can fall from the dash panel or other stowage
areas into the driver footwell while the vehicle is moving. In the event of a
sudden braking manoeuvre, you will not be able to use the brake, clutch or
accelerator. Risk of accident.
•
Clothing hung on the coat hooks must not restrict the driver's view.
Risk of accident. The coat hooks are intended only for use with light arti-
cles of clothing. Do not leave any hard, sharp or heavy objects in hanging
a r ticle s of cl oth ing. Du rin g sudd en b ra kin g ma n oe uv res or a ccide n ts, e sp e-
cially those involving airbag deployment, these objects could injure the
vehicle occupants.
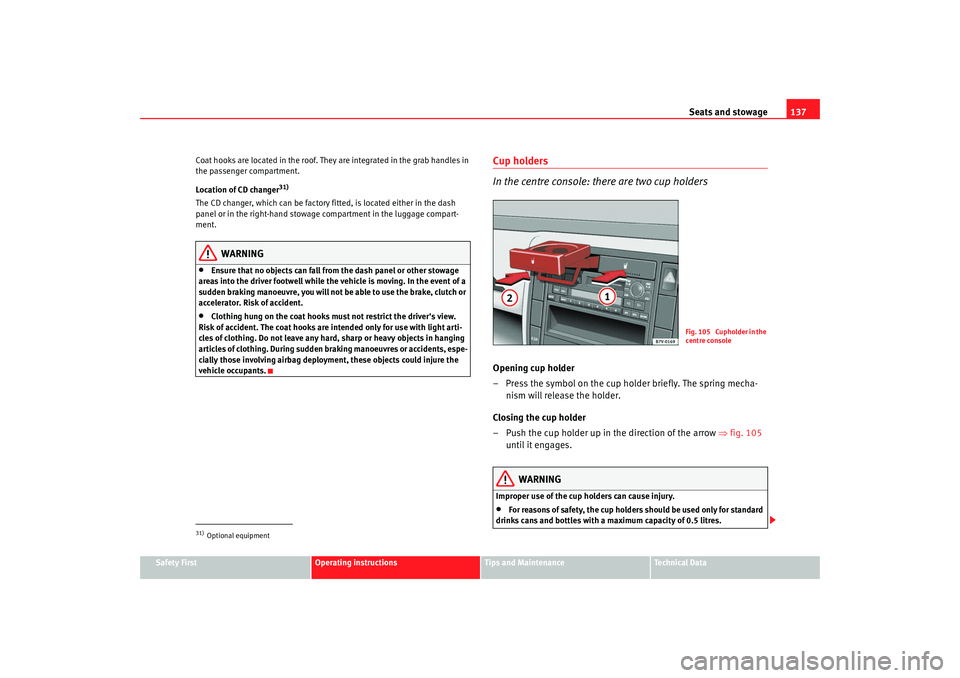
Cup holders
In the centre console: there are two cup holdersOpening cup holder
– Press the symbol on the cup holder briefly. The spring mecha- nism will release the holder.
Closing the cup holder
– Push the cup holder up in the direction of the arrow ⇒fig. 105
until it engages.
WARNING
Improper use of the cup holders can cause injury.•
For reasons of safety, the cup holders should be used only for standard
drinks cans and bottles with a maximum capacity of 0.5 litres.
31)Optional equipment
Fig. 105 Cupholder in the
centre console
alhambra_aleman.book Seite 137 Montag, 23. M‰ rz 2009 1:12 13
Page 140 of 285
Seats and stowage
138•
Never place hot drinks in the drink holders. During normal or sudden
driving manoeuvres, sudden braking or an accident, the hot drink could be
spilled. Danger of scalding.
•
Ensure, when driving, that no can or other object is dropped in the
driver footwell, as it could get under the pedals and obstruct their working.
In the event of a sudden driving or braking manoeuvre, you will not be able
to operate the brake, clutch or accelerator pedal. Risk of accident!
•
Never leave closed drinks cans in direct sunlight for any length of time.
If the inside temperature is high they could explode.Caution
When driving, do not leave open cans in the cup holders. The drink might be
spilt on braking, for example, and could damage the vehicle.
Note
There is no left-hand cup holder on vehicles fitted with a hands-free tele-
phone system
32)
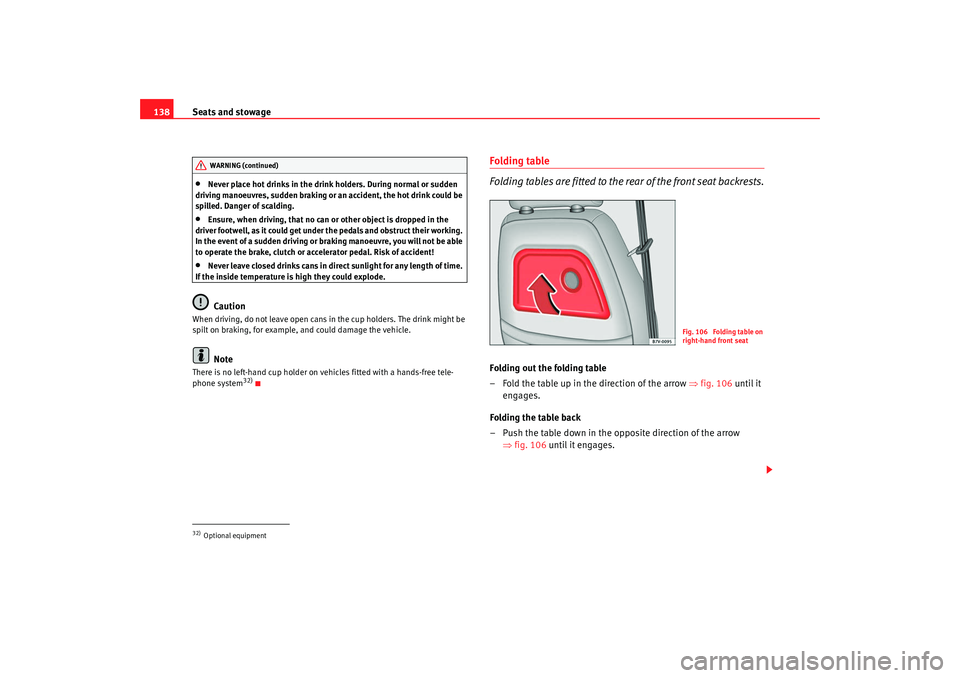
Folding table
Folding tables are fitted to the rear of the front seat backrests.Folding out the folding table
– Fold the table up in the direction of the arrow ⇒fig. 106 until it
engages.
Folding the table back
– Push the table down in the opposite direction of the arrow ⇒fig. 106 until it engages.
32)Optional equipmentWARNING (continued)
Fig. 106 Folding table on
right-hand front seat
alhambra_aleman.book Seite 138 Montag, 23. M‰ rz 2009 1:12 13