steering wheel Seat Alhambra 2011 Owner's Manual
[x] Cancel search | Manufacturer: SEAT, Model Year: 2011, Model line: Alhambra, Model: Seat Alhambra 2011Pages: 385, PDF Size: 7.92 MB
Page 12 of 385
10
Safe driving
Adjusting the seat position
Introduction Number of seats
Dependin
g on the equipment,
your vehicle has a total of five or seven seats.
Each seat is equipped with a seat belt. Equipment Seats in the
front Seats in the sec-
ond ro w Seats in the
third r o
w 5 seats 2 3 –
7 seats 2 3 2
Additional information and warnings:
●
Seat functions ⇒ page 117
● Se
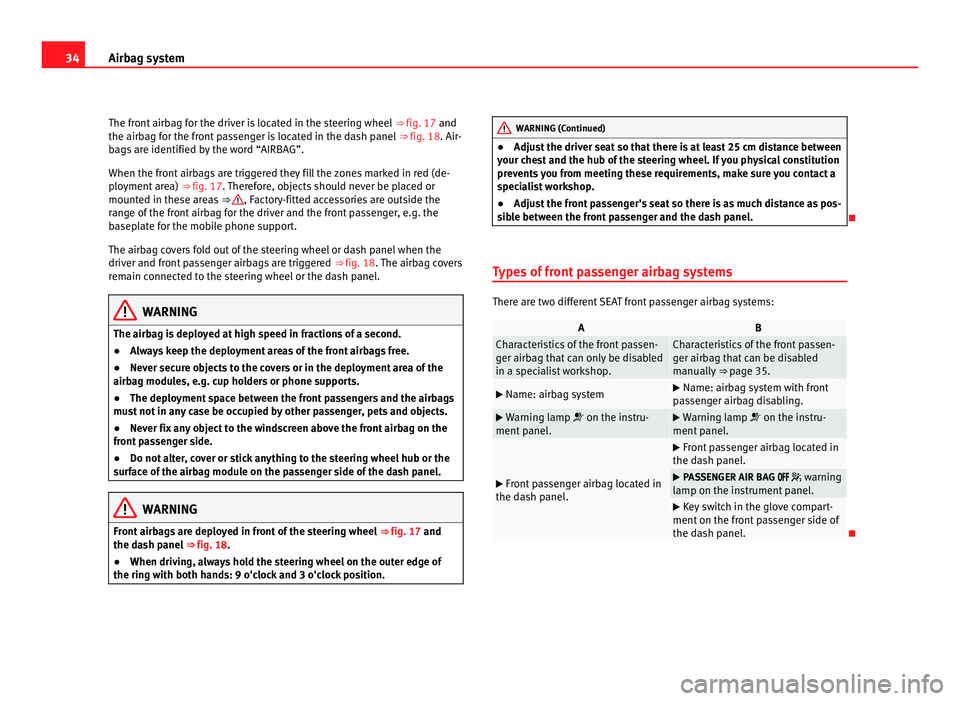
at belts ⇒ page 21
● Airb
ag system ⇒ page 31
● Chi
ld seats (accessories) ⇒ page 39WARNING
An incorrect sitting position in the vehicle can lead to severe injuries or
death in the ev ent
of sudden braking or manoeuvres, collision or acci-
dents or if the airbag deploys.
● Before the vehicle moves, assume the proper sitting position and
maintain it
throughout the trip. This also includes fastening the seat
belt.
● Never transport more people than there are seats with a seat belt
avail
able in the vehicle. WARNING (Continued)
● Children must always be protected with an approved child restraint
sy s
tem suited to their height and weight ⇒ page 39, ⇒ page 31.
● Always keep your feet in the footwell while the vehicle is in motion.
Never, f
or example, put your feet on the surface of a seat or on the dash
panel and never put them out of a window. Otherwise the airbag and seat
belt offer insufficient protection and the risk of injury in the event of an
accident is increased. WARNING
Before every trip, adjust the seat, the seat belt and the head restraints
and ins truct
your passengers to fasten their seat belts properly.
● Move the front passenger seat back as far as possible.
● Adjust the driver's seat so that there is a distance of at least 25 cm
(10 inches) betw
een the centre of your chest and the hub of the steering
wheel. Adjust the driver's seat so that you are able to press the accelera-
tor, brake and clutch pedals to the floor with your knees slightly angled
and that the distance between your knees and the dash panel is at least
10 cm (4 inches). If you physical constitution prevents you from meeting
these requirements, contact a Technical Service to make any modifica-
tions required.
● Never drive with the backrest tilted far back. The further the backrests
are tilt
ed to the rear, the greater the risk of injury due to incorrect posi-
tioning of the belt web or to the incorrect sitting position.
● Never drive with the backrest tilted forwards. Should a front airbag
deploy
, it could throw the backrest backwards and injure the passengers
of the rear seats.
● Sit as far away as possible from the steering wheel and the dash pan-
el.
Page 14 of 385
12
Safe driving
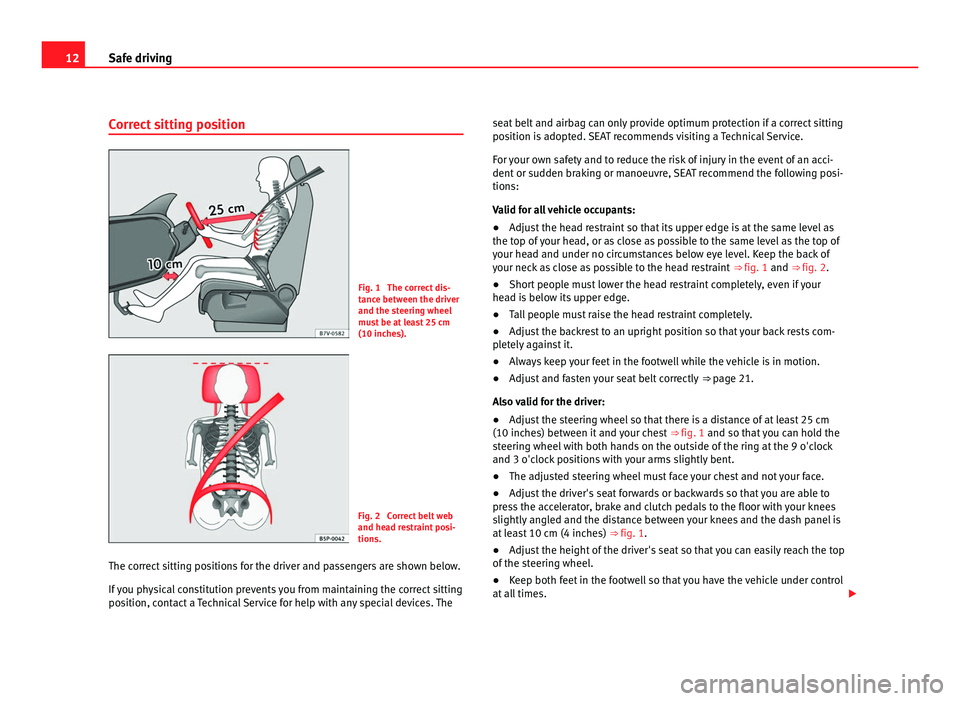
Correct sitting position Fig. 1 The correct dis-
tanc
e betw
een the driver
and the steering wheel
must be at least 25 cm
(10 inches). Fig. 2 Correct belt web
and hea
d r
estraint posi-
tions.
The correct sitting positions for the driver and passengers are shown below.
If y
ou physical constitution prevents you from maintaining the correct sitting
position, contact a Technical Service for help with any special devices. The seat belt and airbag can only provide optimum protection if a correct sitting
position i
s adopted. SEAT recommends visiting a Technical Service.
For your own safety and to reduce the risk of injury in the event of an acci-
dent or sudden braking or manoeuvre, SEAT recommend the following posi-
tions:
Valid for all vehicle occupants:
● Adjust the head restraint so that its upper edge is at the same level as
the top of
your head, or as close as possible to the same level as the top of
your head and under no circumstances below eye level. Keep the back of
your neck as close as possible to the head restraint ⇒ fig. 1 and ⇒ fig. 2.
● Short people must lower the head restraint completely, even if your
head i
s below its upper edge.
● Tall people must raise the head restraint completely.
● Adjust the backrest to an upright position so that your back rests com-
plet
ely against it.
● Always keep your feet in the footwell while the vehicle is in motion.
● Adjust and fasten your seat belt correctly ⇒ page 21.
A
lso valid for the driver:
● Adjust the steering wheel so that there is a distance of at least 25 cm
(10 inches) betw
een it and your chest ⇒ fig. 1 and so that you can hold the
steering wheel with both hands on the outside of the ring at the 9 o'clock
and 3 o'clock positions with your arms slightly bent.
● The adjusted steering wheel must face your chest and not your face.
● Adjust the driver's seat forwards or backwards so that you are able to
pres
s the accelerator, brake and clutch pedals to the floor with your knees
slightly angled and the distance between your knees and the dash panel is
at least 10 cm (4 inches) ⇒ fig. 1.
● Adjust the height of the driver's seat so that you can easily reach the top
of the st
eering wheel.
● Keep both feet in the footwell so that you have the vehicle under control
at all
times.
Page 22 of 385
20
Seat belts
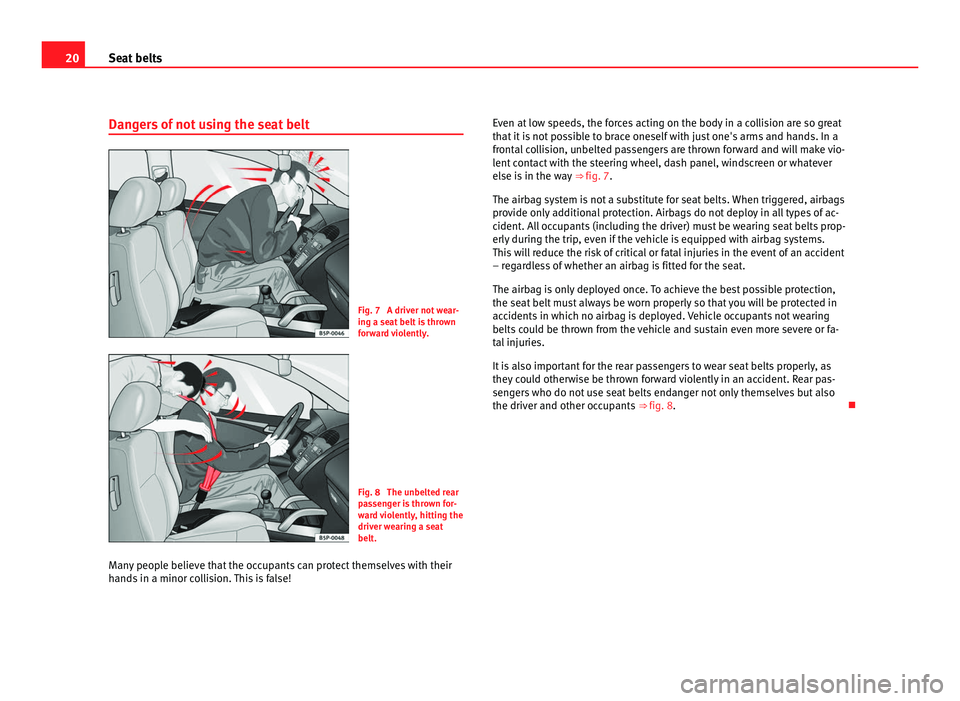
Dangers of not using the seat belt Fig. 7 A driver not wear-
ing a se
at
belt is thrown
forward violently. Fig. 8 The unbelted rear
pa
s
senger is thrown for-
ward violently, hitting the
driver wearing a seat
belt.
Many people believe that the occupants can protect themselves with their
hands
in a minor collision. This is false! Even at low speeds, the forces acting on the body in a collision are so great
that it
is not possible to brace oneself with just one's arms and hands. In a
frontal collision, unbelted passengers are thrown forward and will make vio-
lent contact with the steering wheel, dash panel, windscreen or whatever
else is in the way ⇒ fig. 7.
The airbag system is not a substitute for seat belts. When triggered, airbags
provide only additional protection. Airbags do not deploy in all types of ac-
cident. All occupants (including the driver) must be wearing seat belts prop-
erly during the trip, even if the vehicle is equipped with airbag systems.
This will reduce the risk of critical or fatal injuries in the event of an accident
– regardless of whether an airbag is fitted for the seat.
The airbag is only deployed once. To achieve the best possible protection,
the seat belt must always be worn properly so that you will be protected in
accidents in which no airbag is deployed. Vehicle occupants not wearing
belts could be thrown from the vehicle and sustain even more severe or fa-
tal injuries.
It is also important for the rear passengers to wear seat belts properly, as
they could otherwise be thrown forward violently in an accident. Rear pas-
sengers who do not use seat belts endanger not only themselves but also
the driver and other occupants ⇒ fig. 8.
Page 30 of 385
28
Airbag system
Airbag system
Brief introduction Introduction Front airbags have been installed for both driver and passenger. The front
airbag
s
can also protect the chest and head of driver and passenger if the
seats, seat belts head restraints and, for the driver, the steering wheel are
correctly adjusted and used. Airbags are considered as additional safety
equipment. An airbag cannot replace the safety belt, which must be worn at
all times, even in front seats where front airbags have been installed.
Additional information and warnings:
● Driving tips ⇒ pag
e 7
● Correct sitting positions ⇒ pag
e 10
● Seat belts ⇒ pag
e 21
● Child seats (accessories) ⇒ pag
e 39
● Care and cleaning of the vehicle interior ⇒ pag
e 249
● Accessories, parts replacement, repairs and modifications ⇒ pag
e 257
● Notes for the user ⇒ pag
e 255WARNING
Never exclusively trust the airbag system as a means of protection.
● Even when triggered, airbag protection is only auxiliary. WARNING (Continued)
● The airb ags provide the best protection when the seat belts are prop-
erly f
astened, thus reducing the risk of sustaining injuries ⇒ page 21,
Seat belts.
● Before each trip, every occupant must sit properly, correctly fasten
the seat belt
belonging to his or her seat and keeping it fastened
throughout the trip. This rule is valid for all occupants. WARNING
Occupants sitting in the front of the vehicle must never carry any objects
in the deplo yment
space between them and the airbags, as this increa-
ses the risk of sustaining injuries if the airbag is triggered. This modifies
the airbag deployment space or the objects may fly uncontrollably and
hit your body.
● Never carry objects in your hand or on your lap while the vehicle is in
motion.
● Never transport objects on the front passenger seat. In the event of
sudden br
aking and manoeuvres, the objects may end up in the airbag
deployment space and fly uncontrollably around the vehicle interior if the
airbag is activated.
● Occupants of the front and outer rear seats must never carry any oth-
er people, pet
s or objects in the deployment space between them and
the airbags. Make sure children and other passengers also respect this
recommendation.
Page 36 of 385
34
Airbag system
The front airbag for the driver is located in the steering wheel ⇒ fig. 17 and
the airb ag for the front passenger is located in the dash panel ⇒ fig. 18. Air-
bags are identified by the word “AIRBAG”.
When the front airbags are triggered they fill the zones marked in red (de-
ployment area) ⇒ fig. 17. Therefore, objects should never be placed or
mounted in these areas ⇒ , Factory-fitted accessories are outside the
ran g
e of the front airbag for the driver and the front passenger, e.g. the
baseplate for the mobile phone support.
The airbag covers fold out of the steering wheel or dash panel when the
driver and front passenger airbags are triggered ⇒ fig. 18. The airbag covers
remain connected to the steering wheel or the dash panel. WARNING
The airbag is deployed at high speed in fractions of a second.
● Always keep the deployment areas of the front airbags free.
● Never secure objects to the covers or in the deployment area of the
airbag modu l
es, e.g. cup holders or phone supports.
● The deployment space between the front passengers and the airbags
must
not in any case be occupied by other passenger, pets and objects.
● Never fix any object to the windscreen above the front airbag on the
front p
assenger side.
● Do not alter, cover or stick anything to the steering wheel hub or the
surf
ace of the airbag module on the passenger side of the dash panel. WARNING
Front airbags are deployed in front of the steering wheel ⇒ fig. 17 and
the da sh p
anel ⇒ fig. 18.
● When driving, always hold the steering wheel on the outer edge of
the ring with both h
ands: 9 o'clock and 3 o'clock position. WARNING (Continued)
● Adju st the driver seat so that there is at least 25 cm distance between
y our c
hest and the hub of the steering wheel. If you physical constitution
prevents you from meeting these requirements, make sure you contact a
specialist workshop.
● Adjust the front passenger's seat so there is as much distance as pos-
sibl
e between the front passenger and the dash panel.
Types of front passenger airbag systems There are two different SEAT front passenger airbag systems:
A B
Characteristics of the front passen-
ger airb
ag th
at can only be disabled
in a specialist workshop. Characteristics of the front passen-
ger airb
ag th
at can be disabled
manually ⇒ page 35.
Name: airbag sy s
tem
Name: airbag sy s tem with front
passenger airbag disabling.
Warning lamp on the in s
tru-
ment panel.
Warning lamp on the in s tru-
ment panel.
Front passenger airbag located in
the d a
sh panel.
Front passenger airbag located in
the d a
sh panel.
PASSENGER AIR BAG warning
l amp on the in
strument panel.
Key switch in the glove compart-
ment on the fr
ont passenger side of
the dash panel.
Page 55 of 385
53
Cockpit
Operating instructions Coc kpit
Ov
erview
Overv
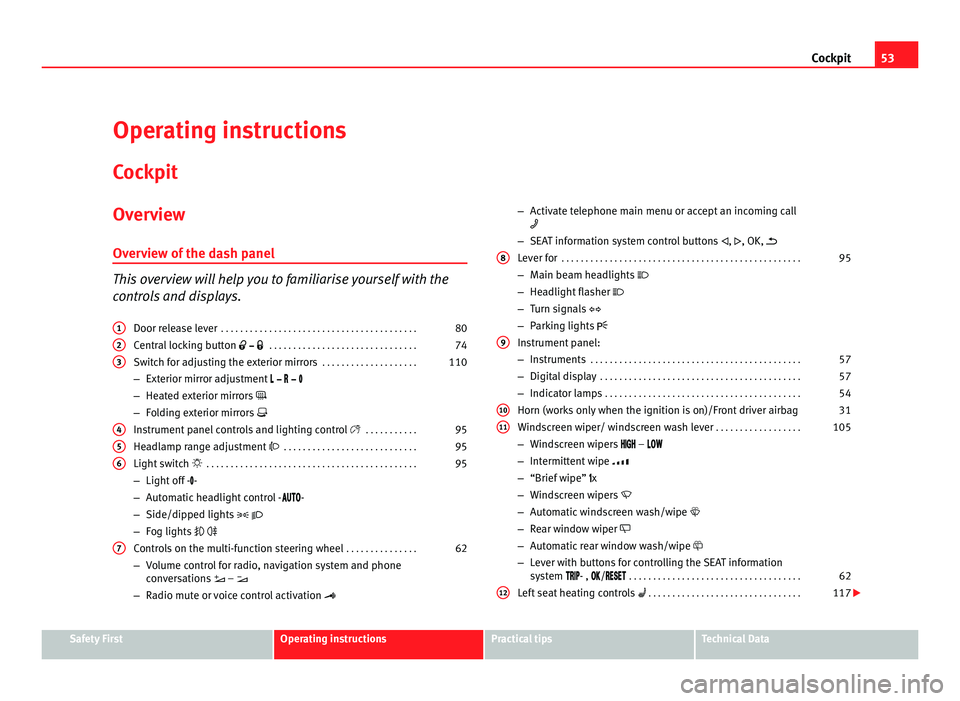
iew of the dash panel This overview will help you to familiarise yourself with the
con
tr
ols and displays.
Door release lever . . . . . . . . . . . . . . . . . . . . . . . . . . . . . . . . . . . . . . . . . 80
Central locking button . . . . . . . . . . . . . . . . . . . . . . . . . . . . . . . 74
Switch for adjusting the exterior mirrors . . . . . . . . . . . . . . . . . . . .110
– Exterior mirror adjustment
– Heat
ed exterior mirrors
– Folding exterior mirrors
Instrument panel controls and lighting control . . . . . . . . . . . 95
Headlamp range adjustment . . . . . . . . . . . . . . . . . . . . . . . . . . . . 95
Light switch . . . . . . . . . . . . . . . . . . . . . . . . . . . . . . . . . . . . . . . . . . . . 95
– Light off - -
– Autom
atic headlight control - -
– Side/dipped lights
– Fog lights
Controls on the multi-function steering wheel . . . . . . . . . . . . . . .62
– Volume control for radio, navigation system and phone
con
versations –
– Radio mute or voice control activation
1 2
3
4
5
6
7 –
Activate telephone main menu or accept an incoming call
– SEA
T information system control buttons , , OK,
Lever for . . . . . . . . . . . . . . . . . . . . . . . . . . . . . . . . . . . . . . . . . . . . . . . . . . 95
– Main beam headlights
– Hea
dlight flasher
– Turn signals
– Parking lights
Instrument panel:
– Instruments . . . . . . . . . . . . . . . . . . . . . . . . . . . . . . . . . . . . . . . . . . . . 57
– Digital display . . . . . . . . . . . . . . . . . . . . . . . . . . . . . . . . . . . . . . . . . . 57
– Indicator lamps . . . . . . . . . . . . . . . . . . . . . . . . . . . . . . . . . . . . . . . . . 54
Horn (work
s only when the ignition is on)/Front driver airbag 31
Windscreen wiper/ windscreen wash lever . . . . . . . . . . . . . . . . . .105
– Windscreen wipers –
– Int
ermittent wipe
– “Brief wipe” x
– Windscreen wipers
– Automatic windscreen wash/wipe
– Rear window wiper
– Automatic rear window wash/wipe
– Lever with buttons for controlling the SEAT information
system - , / . . . . . . . . . . . . . . . . . . . . . . . . . . . . . . . . . . . . 62
Left seat heating controls . . . . . . . . . . . . . . . . . . . . . . . . . . . . . . . . 117
8
9
10
11
12
Safety First Operating instructions Practical tips Technical Data
Page 56 of 385
54
Cockpit
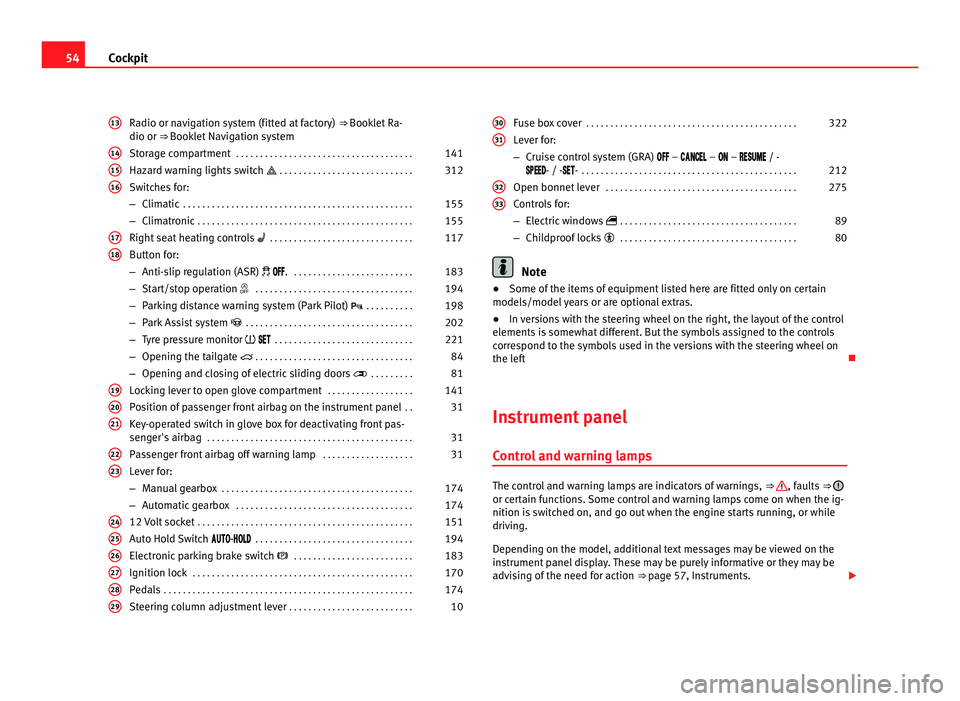
Radio or navigation system (fitted at factory) ⇒ Booklet Ra-
dio or ⇒ Booklet Navigation system
Storage compartment . . . . . . . . . . . . . . . . . . . . . . . . . . . . . . . . . . . . . 141
Hazard warning lights switch . . . . . . . . . . . . . . . . . . . . . . . . . . . . 312
Switches for:
– Climatic . . . . . . . . . . . . . . . . . . . . . . . . . . . . . . . . . . . . . . . . . . . . . . . . 155
– C
limatronic . . . . . . . . . . . . . . . . . . . . . . . . . . . . . . . . . . . . . . . . . . . . . 155
Right se
at heating controls . . . . . . . . . . . . . . . . . . . . . . . . . . . . . . 117
Button for:
– Anti-slip r
egulation (ASR) . . . . . . . . . . . . . . . . . . . . . . . . . . 183
– Start/stop operation . . . . . . . . . . . . . . . . . . . . . . . . . . . . . . . . . 194
– Parking distance warning system (Park Pilot) . . . . . . . . . . 198
– Park Assist system . . . . . . . . . . . . . . . . . . . . . . . . . . . . . . . . . . . 202
– Tyre pressure monitor
. . . . . . . . . . . . . . . . . . . . . . . . . . . . . 221
– Opening the tailgate . . . . . . . . . . . . . . . . . . . . . . . . . . . . . . . . . 84
– Opening and closing of electric sliding doors . . . . . . . . . 81
Loc
king lever to open glove compartment . . . . . . . . . . . . . . . . . .141
Position of passenger front airbag on the instrument panel . .31
Key-operated switch in glove box for deactivating front pas-
senger's
airbag . . . . . . . . . . . . . . . . . . . . . . . . . . . . . . . . . . . . . . . . . . . 31
Passenger front airbag off warning lamp . . . . . . . . . . . . . . . . . . .31
Lever for:
– Manual g
earbox . . . . . . . . . . . . . . . . . . . . . . . . . . . . . . . . . . . . . . . . 174
– Automatic gearbox . . . . . . . . . . . . . . . . . . . . . . . . . . . . . . . . . . . . . 174
12 V
olt socket . . . . . . . . . . . . . . . . . . . . . . . . . . . . . . . . . . . . . . . . . . . . . 151
Auto Hold Switch - . . . . . . . . . . . . . . . . . . . . . . . . . . . . . . . . . 194
Electr
onic parking brake switch . . . . . . . . . . . . . . . . . . . . . . . . . 183
Ignition lock . . . . . . . . . . . . . . . . . . . . . . . . . . . . . . . . . . . . . . . . . . . . . . 170
Pedals . . . . . . . . . . . . . . . . . . . . . . . . . . . . . . . . . . . . . . . . . . . . . . . . . . . . 174
Steering column adjustment lever . . . . . . . . . . . . . . . . . . . . . . . . . . 10
13 14
15
16
17
18
19
20
21
22
23
24
25
26
27
28
29 Fuse box cover
. . . . . . . . . . . . . . . . . . . . . . . . . . . . . . . . . . . . . . . . . . . . 322
Lever for:
– Crui se c
ontrol system (GRA) – – – / -
- / -- . . . . . . . . . . . . . . . . . . . . . . . . . . . . . . . . . . . . . . . . . . . . . 212
Open bonnet lever . . . . . . . . . . . . . . . . . . . . . . . . . . . . . . . . . . . . . . . . 275
Controls for:
– Electric w
indows . . . . . . . . . . . . . . . . . . . . . . . . . . . . . . . . . . . . . 89
– Childproof locks . . . . . . . . . . . . . . . . . . . . . . . . . . . . . . . . . . . . . 80 Note
● Some of the items of equipment listed here are fitted only on certain
model s/model
years or are optional extras.
● In versions with the steering wheel on the right, the layout of the control
elements i
s somewhat different. But the symbols assigned to the controls
correspond to the symbols used in the versions with the steering wheel on
the left
Instrument panel Contro
l and warning lamps The control and warning lamps are indicators of warnings,
⇒ , faults
⇒ or certain functions. Some control and warning lamps come on when the ig-
nition is
sw
itched on, and go out when the engine starts running, or while
driving.
Depending on the model, additional text messages may be viewed on the
instrument panel display. These may be purely informative or they may be
advising of the need for action ⇒ page 57, Instruments.
30 31
32
33
Page 64 of 385
62
Cockpit
The service interval display is reset
If the ser v
ice was not carried out by a Technical Service, the display can be
reset as follows: In vehicles with text messages:
Select the
Settings
menu.In the submenu Serv
ic
e, select the option Reset.Confirm with
OK when requested to do so by the system.
In vehicles without text messages:
Switch the ignition off.
Press and hold the
0.0 / S
ET button.
Switch the ignition back on.
Release the
0.0 / S
ET button and, press
for the next 20 seconds.
Do not reset the indicator to zero between two intervals, otherwise the dis-
p l
ay will be incorrect.
If, while the LongLife service is valid, the service interval display is reset to
zero, the “service will be activated by time or mileage”. The service interval
is no longer calculated individually ⇒ Booklet Maintenance Programme.Note
● The service message disappears after a few seconds, when the engine is
s t
arted or when OK is pressed.
● In vehicles with the LongLife system in which the battery has been dis-
connect ed f
or a long period of time, it is not possible to calculate the date
of the next service. Therefore the service interval display may not be correct.
In this case, please check the maximum permitted service intervals ⇒ Book-
let Maintenance Programme. SEAT information system
Introduction With the ignition switched on, it is possible to read the different functions of
the dis
p
lay by scrolling through the menus.
In vehicles with a multifunction steering wheel, there are no buttons on the
windscreen wiper lever. The multifunction display can only be controlled
from the buttons on the multifunction steering wheel.
The number of menus displayed on the instrument panel will vary according
to the vehicle electronics and equipment.
A specialised dealer will be able to programme or modify additional func-
tions, according to the vehicle equipment. SEAT recommends visiting a
Technical Service.
Some menu options can only be read when the vehicle is at a standstill.
As long as a priority 1 warning is displayed, it will not be possible to read
the menus. To display the menus, confirm the warning by pressing OK .
Addition a
l information and warnings:
● Exterior mirrors ⇒ pag
e 110
● Auxiliary heating ⇒ pag
e 163 WARNING
Any distraction may lead to an accident, with the risk of injury.
● Do not read the instrument panel menus when driving.
Page 67 of 385
65
Cockpit
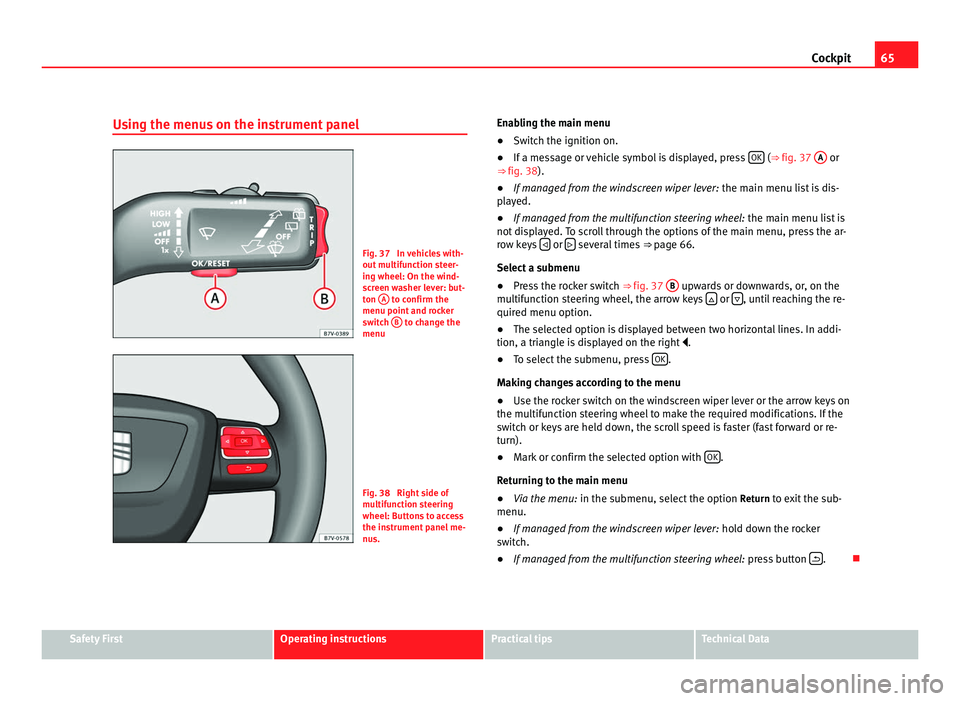
Using the menus on the instrument panel Fig. 37 In vehicles with-
out mu
ltif
unction steer-
ing wheel: On the wind-
screen washer lever: but-
ton A to confirm the
menu point and r oc
ker
switch B to change the
menu Fig. 38 Right side of
multif
u
nction steering
wheel: Buttons to access
the instrument panel me-
nus. Enabling the main menu
●
Switch the ignition on.
● If a message or vehicle symbol is displayed, press OK (⇒
fig. 37 A or
⇒ fig. 38).
● If managed from the windscreen wiper lever: the main menu lis
t is dis-
played.
● If managed from the multifunction steering wheel: the main menu lis
t is
not displayed. To scroll through the options of the main menu, press the ar-
row keys or
several times
⇒ pag
e 66.
Select a submenu
● Press the rocker switch ⇒ fig. 37 B upwards or downwards, or, on the
multif u
nction steering wheel, the arrow keys or
, until reaching the re-
quired menu option.
● The sel ect
ed option is displayed between two horizontal lines. In addi-
tion, a triangl
e is displayed on the right .
● To select the submenu, press OK .
Mak in
g changes according to the menu
● Use the rocker switch on the windscreen wiper lever or the arrow keys on
the multifu
nction steering wheel to make the required modifications. If the
switch or keys are held down, the scroll speed is faster (fast forward or re-
turn).
● Mark or confirm the selected option with OK .
Ret urnin
g to the main menu
● Via the menu: in the submenu, select
the option Return to exit the sub-
menu.
● If managed from the windscreen wiper lever: hold do
wn the rocker
switch.
● If managed from the multifunction steering wheel: pres
s button .
Safety First Operating instructions Practical tips Technical Data
Page 69 of 385
67
Cockpit Menu Function
Average fuel con-
sumption When the ignition is switched on, the average con-
sumption (in l/100 km or in mp
g) i
s displayed after
the vehicle has moved approximately 100 metres
(328 feet). Otherwise horizontal lines are displayed.
The value shown is updated approximately every 5
seconds. Distance to empty
(the dis
t
ance you
can travel with the
remaining fuel) Approximate distance in km (or miles) that can still
be trav
el
led with the fuel remaining in the tank, as-
suming the same style of driving is maintained. This
is calculated using the current fuel consumption. Distance covered Distance travelled, after ignition is switched on, in
km (or mil
e
s). Average speed After the ignition is switched on, the average speed
wi
l
l be shown after a distance of approximately 100
metres (328 feet) has been travelled. Otherwise hori-
zontal lines are displayed. The value shown is upda-
ted approximately every 5 seconds. Digital display of
speed Current speed displayed digitally.
Oil temperature digi-
ta
l
display Updated engine oil temperature digital display
Speed warning to ---
km/h If the stored speed is exceeded (between
30 - 250 km/h, or 18 - 155 mph), an audibl
e w
arning
is given together with a visual warning. Changing between display modes
●
In vehicles without multifunction steering wheel: pres
s the lever.
● Vehicles with a multifunction steering wheel: pres
s or
.
Storin g a s
peed for the speed warning
● Select the display Speed warnin
g at --- km/h.
● Press OK to store the current speed and switch off the warning. ●
In addition, set the required speed by pressing the rocker switch on the
w ind
screen wiper lever or buttons or
on the multifunction steering
wheel f or 5 sec
onds. Next, press OK again or wait a few seconds. The
speed i s
stored and the warning activated.
● To switch off , pres
s OK . The stored speed is deleted.
Manua l
ly erasing memory 1 or 2
● Select the memory to be erased.
● Press and hold OK for approximately two seconds.
Per son
alising the displays
It is possible to select which of the displays in the multifunction display you
wish to see on the instrument panel in the settings menu. The units of
measurement can also be modified ⇒ page 67.
Configuration Menu Configuration
Menu Function
Multifunction
dis
p
lay data Configuration of the multifunction display data which you
wi
sh t
o see on the instrument panel display ⇒ page 66. Compass Changing the magnetic region and calibration of the com-
pa
s
s. To calibrate the compass, please follow the instruc-
tions given on the instrument panel display. Convenience Changing vehicle convenience functions
⇒ page 68. Lights & visi-
bi
lity Configuration of vehicle lighting
⇒ page 69. Time Changing the hours and minutes of the clock and the navi-
gation sy
s
tem. The time can be set here and the choice
can be made between the 24 hour and 12 hour display.
The S in the upper part of the display indicates that the
clock is set to summer time. Safety First Operating instructions Practical tips Technical Data