Seat Alhambra 2014 Manual PDF
Manufacturer: SEAT, Model Year: 2014, Model line: Alhambra, Model: Seat Alhambra 2014Pages: 381, PDF Size: 5.75 MB
Page 71 of 381
69
Cockpit
Convenience menueffectRear vision mirror adjustmentTilts passenger mirror downwards when reverse gear is engaged. This enables the driver to see the edge of the pavement,
for example ⇒ page 111.
Exterior mirror adjust.If synchronised adjustment is selected, when the driver side exterior mirror is adjusted, the passenger exterior mirror is also
moved.
Factory settingsSome functions of the Convenience submenu will be reset to the factory value.BackThe Configuration menu is displayed again.
Lights & visibility submenu
Lights & visi-
bility menueffect
Coming HomeThis permits the adjustment of the time the headlamps
stay on after locking or unlocking the vehicle, the function
can also be connected or disconnected here ⇒ page 101.Leaving Home
Footwell lightThis permits the adjustment of the brightness of the foot-
well lighting when the doors are open, the function can al-
so be connected or disconnected here
Convenience
turn signalsSwitching convenience turn signals on and off When the
convenience turn signals are connected, when the turn
signal is switched on, these flash at least three times
⇒ page 96.
Factory set-
tingsAll the configurations in the submenu Lights & visibility are
reset to the predefined factory values.
Tourist lightHeadlamp adjustment for countries in which vehicles are
driven on the other side of the road. When the mark is acti-
vated, the headlamps of a left-hand drive vehicle are ad-
justed for driving on the left. This function must only be
used for a short period.
BackThe Configuration menu is displayed again. Personal convenience settings
When two people use a vehicle, SEAT recommends that each person always
uses “their” own remote control key. When the ignition is switched off, or
the vehicle is locked, the personal convenience settings are stored and au-
tomatically allocated to the vehicle key
⇒ page 62.
The values of the personalised convenience settings of the following menu
options are allocated to the vehicle key: ■ Parking heating menu
■ Configuration Menu
■ Time
■ Language
■ Units
■ Convenience settings menu
■ Door unlock (individual opening, Auto Lock)
■ Convenience handling of windows
■ Rear vision mirror adjustment
■ Lights & visibility settings menu
■ Coming home and leaving home
■ Footwell light
■ Convenience turn signals
Safety FirstOperating instructionsPractical TipsTechnical Specifications
Page 72 of 381
70Cockpit
The stored settings are automatically activated, at the latest when the igni-
tion is switched on. Please refer to the information and tips relating to the
seat memory ⇒ page 118.
Three button unit in headliner Three button unit*
Fig. 39 Three button
unit in headliner: con-
trols for the telephone
management system.
Fig. 39effect
Press it briefly : To accept or end a call.
Press the button : To reject a call
Press it briefly: To start or stop the voice control function, for ex-
ample to make a call. a)
Fig. 39effect
Press the button for more than 2 seconds
: To obtain information
about the SEAT brand and selected additional services related to
traffic and travel.
Press the button for more than 2 seconds : To obtain help from the
network of SEAT dealers in case of a breakdown.
a) Not applicable if a SEAT Media System 2.2 navigation system with voice control is moun-
ted.
Information and assistance calls
Communication with the SEAT Customer Care Service is established using
the and buttons of the three button unit. 1)
The system will automatically
connect you with the service centre of the relevant country. You will only be
able to make calls if your mobile is turned on and connected to the pre-in-
stalled Bluetooth.
Information call
The Information call button offers information on the SEAT brand and selec-
ted additional services related to traffic and your travel.
To establish communication, press the button for more than 2 seconds.
In countries where there is no information telephone number, an informa-
tion call is made after pressing the button.
Assistance call
The assistance call button gives immediate help in case of a breakdown.
To this end, the SEAT dealer network, with its mobile service vehicles, is at
your disposal.
To establish communication, press the button for more than 2 seconds.
1)
Depending on country
Page 73 of 381
71
Cockpit
Note
Calls made with the and buttons take priority over normal calls. If the or
button is pressed during a normal telephone call, this call will be cut off
and a connection will be made to the information or assistance centre.
Note
Any call made to the information service will be interrupted if the assistance
button is pressed. The connection to the assistance service will then be
made (and vice versa).
Note
Mobile phone coverage must be available to place a call to the information
and assistance services. This service might not be available in some coun-
tries.
Activating and deactivating voice control
Switching on the speech control system
● Press the button on the multi-function steering wheel.
● OR: Press the button in the three button unit in the headliner.
● Wait for the acoustic signal.
● Speak the command.
● Follow the dialogue instructions (extended dialogue).
Ending voice control
● Press the button on the multi-function steering wheel.
● OR: Press the button in the three button unit in the headliner. Interrupting the instructions
●
During the instructions, press the button on the multi-function steer-
ing wheel.
● OR: Press the button in the three button unit in the headliner.
● You will be able to speak a command immediately after.
Safety FirstOperating instructionsPractical TipsTechnical Specifications
Page 74 of 381
72Opening and closing
Opening and closing
Vehicle key set
Introduction
Additional information and warnings:
● Adjustments to the SEAT information system ⇒ page 62
● Central locking and locking system ⇒ page 75
● Start and stop the engine ⇒ page 172
● Notes for the user ⇒ page 259
● Emergency locking and unlocking ⇒ page 318
WARNING
Careless or incorrect use of vehicle keys may result in severe injury and
accident.
● Always take all the keys with you whenever you leave the vehicle.
Children and unauthorised individuals could lock the doors or the rear
lid, start the engine or turn the ignition on activating electrical systems,
for example: the electric windows.
● Never leave children or disabled people alone in the car. They could
be trapped in the car in an emergency and will not be able to get them-
selves to safety. For example, depending on the time of the year, temper-
atures inside a locked and closed vehicle can be extremely high or ex-
tremely low resulting in serious injuries and illness or even death, partic-
ularly for young children.
● Never remove the key from the ignition if the vehicle is in motion. The
steering may lock and it will not be possible to turn the steering wheel.
Vehicle key
Fig. 40 Vehicle keys
Fig. 41 Vehicle key for
vehicles with electric
sliding doors
Page 75 of 381
73
Opening and closing
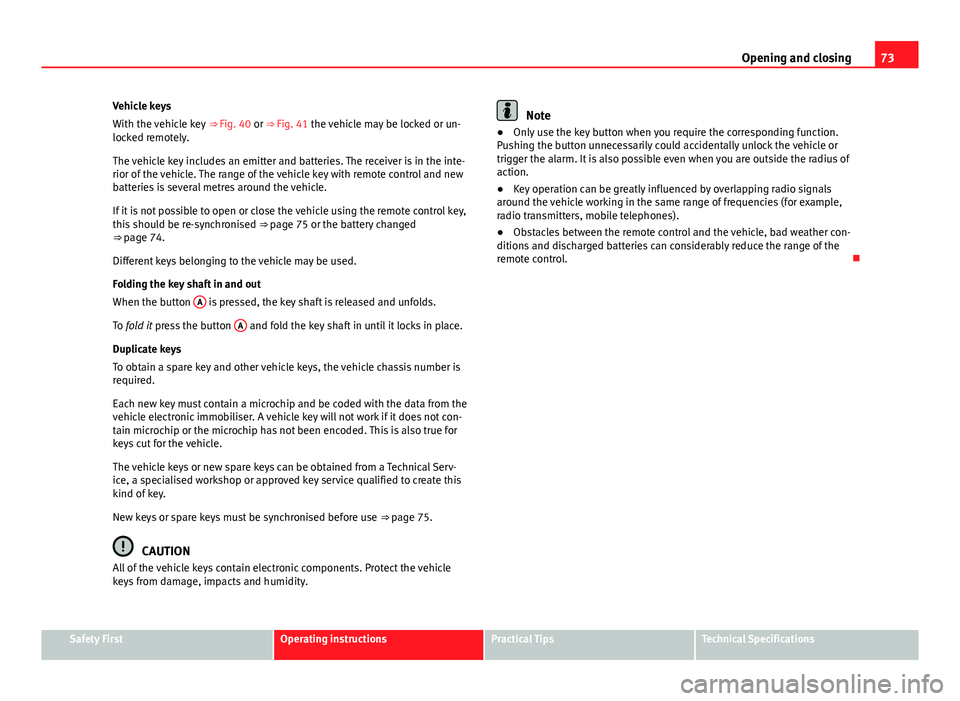
Vehicle keys
With the vehicle key ⇒ Fig. 40 or ⇒ Fig. 41 the vehicle may be locked or un-
locked remotely.
The vehicle key includes an emitter and batteries. The receiver is in the inte-
rior of the vehicle. The range of the vehicle key with remote control and new
batteries is several metres around the vehicle.
If it is not possible to open or close the vehicle using the remote control key,
this should be re-synchronised ⇒ page 75 or the battery changed
⇒ page 74.
Different keys belonging to the vehicle may be used.
Folding the key shaft in and out
When the button A
is pressed, the key shaft is released and unfolds.
To fold it press the button A
and fold the key shaft in until it locks in place.
Duplicate keys
To obtain a spare key and other vehicle keys, the vehicle chassis number is
required.
Each new key must contain a microchip and be coded with the data from the
vehicle electronic immobiliser. A vehicle key will not work if it does not con-
tain microchip or the microchip has not been encoded. This is also true for
keys cut for the vehicle.
The vehicle keys or new spare keys can be obtained from a Technical Serv-
ice, a specialised workshop or approved key service qualified to create this
kind of key.
New keys or spare keys must be synchronised before use ⇒ page 75.
CAUTION
All of the vehicle keys contain electronic components. Protect the vehicle
keys from damage, impacts and humidity.
Note
● Only use the key button when you require the corresponding function.
Pushing the button unnecessarily could accidentally unlock the vehicle or
trigger the alarm. It is also possible even when you are outside the radius of
action.
● Key operation can be greatly influenced by overlapping radio signals
around the vehicle working in the same range of frequencies (for example,
radio transmitters, mobile telephones).
● Obstacles between the remote control and the vehicle, bad weather con-
ditions and discharged batteries can considerably reduce the range of the
remote control.
Safety FirstOperating instructionsPractical TipsTechnical Specifications
Page 76 of 381
74Opening and closing
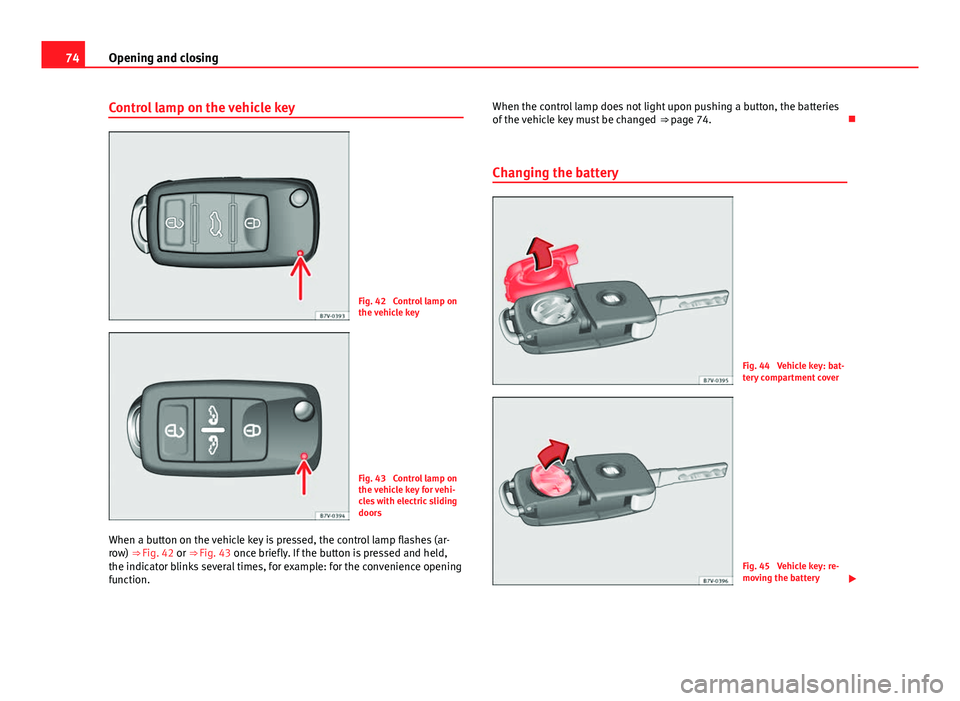
Control lamp on the vehicle key
Fig. 42 Control lamp on
the vehicle key
Fig. 43 Control lamp on
the vehicle key for vehi-
cles with electric sliding
doors
When a button on the vehicle key is pressed, the control lamp flashes (ar-
row) ⇒ Fig. 42 or ⇒ Fig. 43 once briefly. If the button is pressed and held,
the indicator blinks several times, for example: for the convenience opening
function. When the control lamp does not light upon pushing a button, the batteries
of the vehicle key must be changed
⇒ page 74.
Changing the battery
Fig. 44 Vehicle key: bat-
tery compartment cover
Fig. 45 Vehicle key: re-
moving the battery
Page 77 of 381
75
Opening and closing
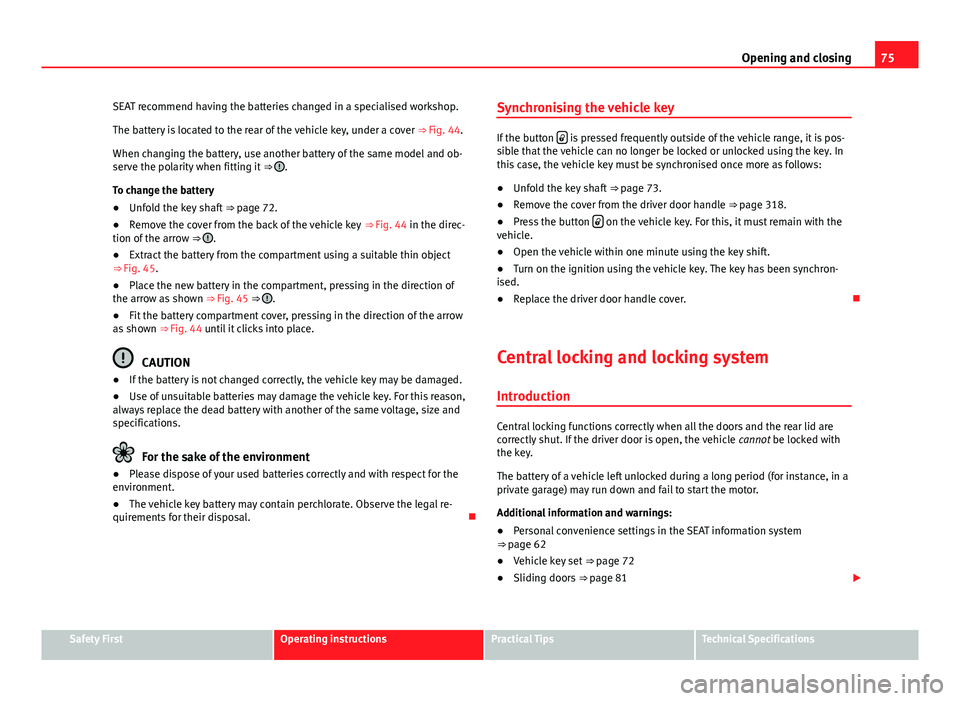
SEAT recommend having the batteries changed in a specialised workshop.
The battery is located to the rear of the vehicle key, under a cover ⇒ Fig. 44.
When changing the battery, use another battery of the same model and ob-
serve the polarity when fitting it ⇒
.
To change the battery
● Unfold the key shaft ⇒ page 72.
● Remove the cover from the back of the vehicle key ⇒ Fig. 44 in the direc-
tion of the arrow ⇒
.
● Extract the battery from the compartment using a suitable thin object
⇒ Fig. 45.
● Place the new battery in the compartment, pressing in the direction of
the arrow as shown ⇒ Fig. 45 ⇒
.
● Fit the battery compartment cover, pressing in the direction of the arrow
as shown ⇒ Fig. 44 until it clicks into place.
CAUTION
● If the battery is not changed correctly, the vehicle key may be damaged.
● Use of unsuitable batteries may damage the vehicle key. For this reason,
always replace the dead battery with another of the same voltage, size and
specifications.
For the sake of the environment
● Please dispose of your used batteries correctly and with respect for the
environment.
● The vehicle key battery may contain perchlorate. Observe the legal re-
quirements for their disposal. Synchronising the vehicle key
If the button
is pressed frequently outside of the vehicle range, it is pos-
sible that the vehicle can no longer be locked or unlocked using the key. In
this case, the vehicle key must be synchronised once more as follows:
● Unfold the key shaft ⇒ page 73.
● Remove the cover from the driver door handle ⇒ page 318.
● Press the button
on the vehicle key. For this, it must remain with the
vehicle.
● Open the vehicle within one minute using the key shift.
● Turn on the ignition using the vehicle key. The key has been synchron-
ised.
● Replace the driver door handle cover.
Central locking and locking system
Introduction
Central locking functions correctly when all the doors and the rear lid are
correctly shut. If the driver door is open, the vehicle cannot be locked with
the key.
The battery of a vehicle left unlocked during a long period (for instance, in a
private garage) may run down and fail to start the motor.
Additional information and warnings:
● Personal convenience settings in the SEAT information system
⇒ page 62
● Vehicle key set ⇒ page 72
● Sliding doors ⇒ page 81
Safety FirstOperating instructionsPractical TipsTechnical Specifications
Page 78 of 381
76Opening and closing
● Electric windows ⇒ page 89
● Panoramic sliding sunroof ⇒ page 93
● Towing mode ⇒ page 237
● Emergency locking and unlocking ⇒ page 318
WARNING
The incorrect use of the central locking system may cause serious inju-
ries.
● The central locking system will lock all doors. A vehicle locked from
the inside can prevent any non-authorised individual from opening the
doors and accessing the vehicle. Nevertheless, in case of emergency or
accident, locked doors will complicate access to the vehicle interior to
help the passengers.
● Never leave children or disabled people alone in the vehicle. The cen-
tral locking button can be used to lock all the doors from within. There-
fore, passengers will be locked inside the vehicle. Individuals locked in
the vehicle can be exposed to very high or very low temperatures.
● Depending on the time of the year, temperatures inside a locked and
closed vehicle can be extremely high or extremely low resulting in seri-
ous injuries and illness or even death, particularly for young children.
● Never leave individuals locked in a closed and locked vehicle. In case
of emergency, they may not be able to exit the vehicle by themselves or
get help.
Description of the central locking system
The central locking system allows all doors and the rear lid to be locked and
unlocked centrally.
● From outside, using the vehicle key.
● From inside, by pushing the central locking button ⇒ page 78. In the submenu Convenience in the Configuration menu, or by visiting a spe-
cialised workshop, special functions of the central locking system can be
switched on or off ⇒ page 62.
In case of a vehicle key fault or central locking system fault, all doors can be
locked or unlocked manually.
Locking the vehicle after the airbags have been deployed
If the airbags are deployed due to an accident, the vehicle will be automati-
cally and completely unlocked. Depending on the amount of damage, the
vehicle can be locked following an accident in the following ways:
effectNecessary operationsLocking the vehicle
from within:– Turn off the ignition and turn it on again.
– Push the central locking button .Locking the vehicle
from the outside:– Turn off the ignition and turn it on again.
OR: – Remove the key from the ignition.
– Open any door just once.
– Lock the vehicle with the key.
Page 79 of 381
77
Opening and closing
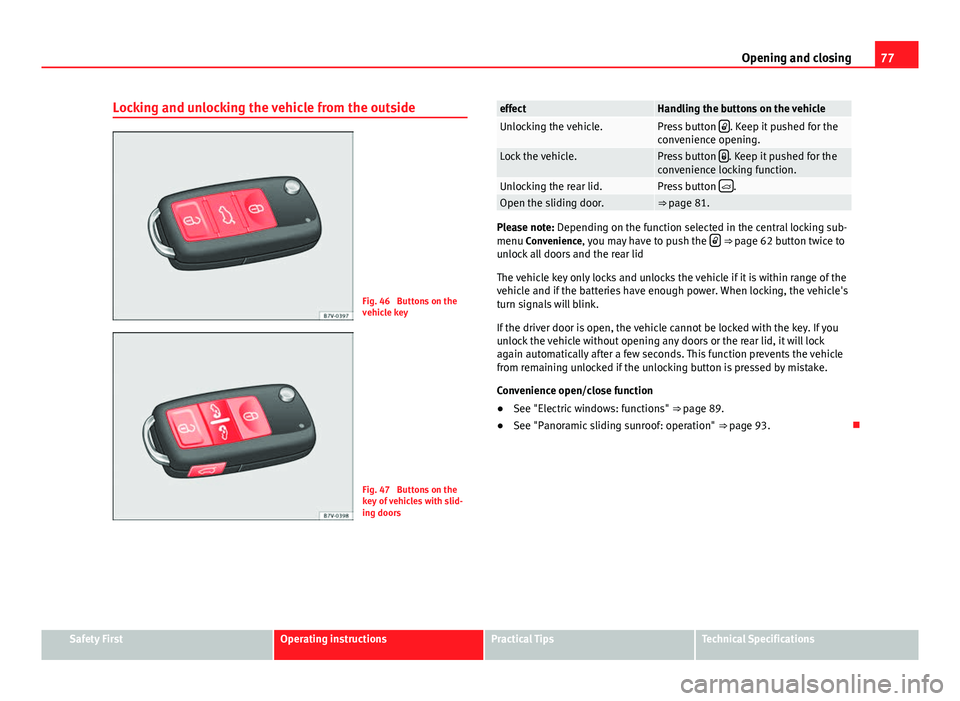
Locking and unlocking the vehicle from the outside
Fig. 46 Buttons on the
vehicle key
Fig. 47 Buttons on the
key of vehicles with slid-
ing doors
effectHandling the buttons on the vehicleUnlocking the vehicle.Press button . Keep it pushed for the
convenience opening.
Lock the vehicle.Press button . Keep it pushed for the
convenience locking function.
Unlocking the rear lid.Press button .Open the sliding door.⇒ page 81.
Please note: Depending on the function selected in the central locking sub-
menu Convenience, you may have to push the ⇒
page 62 button twice to
unlock all doors and the rear lid
The vehicle key only locks and unlocks the vehicle if it is within range of the
vehicle and if the batteries have enough power. When locking, the vehicle's
turn signals will blink.
If the driver door is open, the vehicle cannot be locked with the key. If you
unlock the vehicle without opening any doors or the rear lid, it will lock
again automatically after a few seconds. This function prevents the vehicle
from remaining unlocked if the unlocking button is pressed by mistake.
Convenience open/close function
● See "Electric windows: functions" ⇒ page 89.
● See "Panoramic sliding sunroof: operation" ⇒ page 93.
Safety FirstOperating instructionsPractical TipsTechnical Specifications
Page 80 of 381
78Opening and closing
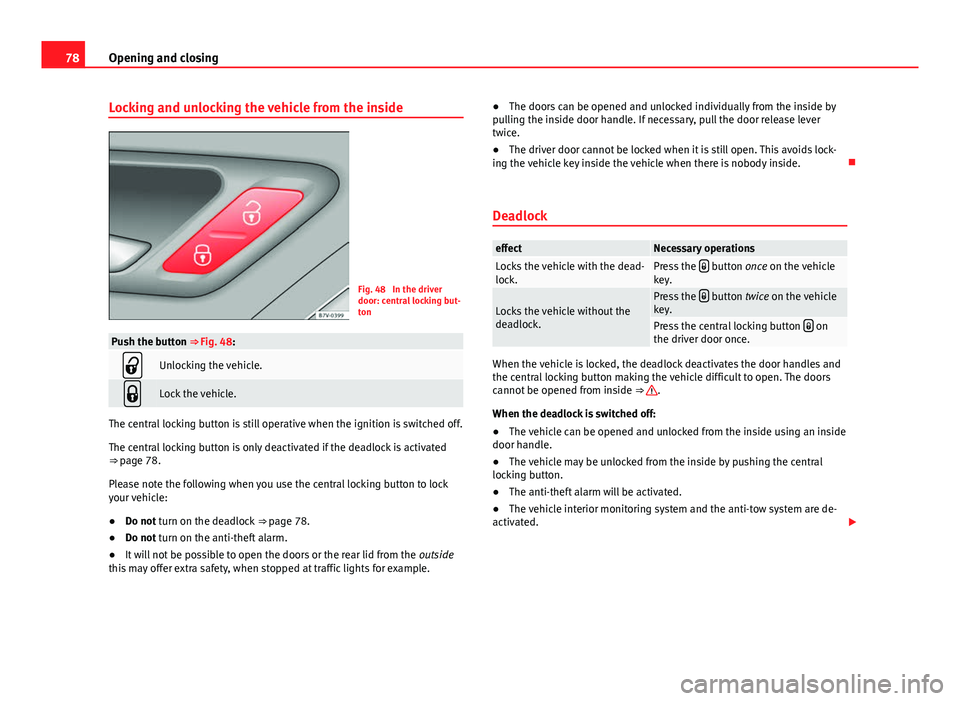
Locking and unlocking the vehicle from the inside
Fig. 48 In the driver
door: central locking but-
ton
Push the button ⇒ Fig. 48:
Unlocking the vehicle.
Lock the vehicle.
The central locking button is still operative when the ignition is switched off.
The central locking button is only deactivated if the deadlock is activated
⇒ page 78.
Please note the following when you use the central locking button to lock
your vehicle:
●Do not turn on the deadlock ⇒ page 78.
● Do not turn on the anti-theft alarm.
● It will not be possible to open the doors or the rear lid from the outside
this may offer extra safety, when stopped at traffic lights for example. ●
The doors can be opened and unlocked individually from the inside by
pulling the inside door handle. If necessary, pull the door release lever
twice.
● The driver door cannot be locked when it is still open. This avoids lock-
ing the vehicle key inside the vehicle when there is nobody inside.
Deadlock
effectNecessary operationsLocks the vehicle with the dead-
lock.Press the button once on the vehicle
key.
Locks the vehicle without the
deadlock.Press the button twice on the vehicle
key.
Press the central locking button on
the driver door once.
When the vehicle is locked, the deadlock deactivates the door handles and
the central locking button making the vehicle difficult to open. The doors
cannot be opened from inside ⇒
.
When the deadlock is switched off:
● The vehicle can be opened and unlocked from the inside using an inside
door handle.
● The vehicle may be unlocked from the inside by pushing the central
locking button.
● The anti-theft alarm will be activated.
● The vehicle interior monitoring system and the anti-tow system are de-
activated.