service Seat Alhambra 2015 Owner's Manual
[x] Cancel search | Manufacturer: SEAT, Model Year: 2015, Model line: Alhambra, Model: Seat Alhambra 2015Pages: 305, PDF Size: 5.46 MB
Page 5 of 305
Table of Contents
Table of Contents
Safety . . . . . . . . . . . . . . . . . . . . . . . . . . . . . . . . 5
Safe driving . . . . . . . . . . . . . . . . . . . . . . . . . . . . 5
Safety first! . . . . . . . . . . . . . . . . . . . . . . . . . . . . . 5
Tips for driving . . . . . . . . . . . . . . . . . . . . . . . . . . 5
Sitting position for occupants . . . . . . . . . . . . . . 6
Pedal area . . . . . . . . . . . . . . . . . . . . . . . . . . . . . . 9
Seat belts . . . . . . . . . . . . . . . . . . . . . . . . . . . . . . 10
The whys and wherefores of seat belts . . . . . . . 10
How to properly adjust your seatbelt . . . . . . . . 14
Seat belt tensioners . . . . . . . . . . . . . . . . . . . . . . 17
Airbag system . . . . . . . . . . . . . . . . . . . . . . . . . . 18
Brief introduction . . . . . . . . . . . . . . . . . . . . . . . . 18
General overview of the airbag . . . . . . . . . . . . . 20
Deactivating airbags . . . . . . . . . . . . . . . . . . . . . 25
Transporting children safely . . . . . . . . . . . . . . . 26
Child safety . . . . . . . . . . . . . . . . . . . . . . . . . . . . . 26
Integrated child seat . . . . . . . . . . . . . . . . . . . . . 33
Operation . . . . . . . . . . . . . . . . . . . . . . . . . . . . . 39
Cockpit . . . . . . . . . . . . . . . . . . . . . . . . . . . . . . . . 39
Overview . . . . . . . . . . . . . . . . . . . . . . . . . . . . . . . 38
Instruments . . . . . . . . . . . . . . . . . . . . . . . . . . . . 40
Control lamps . . . . . . . . . . . . . . . . . . . . . . . . . . . 45
SEAT information system . . . . . . . . . . . . . . . . . . 47
Three button unit in headliner . . . . . . . . . . . . . . 53
Opening and closing . . . . . . . . . . . . . . . . . . . . . 54
Vehicle key set . . . . . . . . . . . . . . . . . . . . . . . . . . 54
Central locking and locking system . . . . . . . . . 57
Doors . . . . . . . . . . . . . . . . . . . . . . . . . . . . . . . . . . 63
Sliding doors . . . . . . . . . . . . . . . . . . . . . . . . . . . 64
Rear lid . . . . . . . . . . . . . . . . . . . . . . . . . . . . . . . . 66
Electric windows . . . . . . . . . . . . . . . . . . . . . . . . . 70
Panoramic sliding sunroof* . . . . . . . . . . . . . . . . 72 Lights and visibility
. . . . . . . . . . . . . . . . . . . . . . 74
Lights . . . . . . . . . . . . . . . . . . . . . . . . . . . . . . . . . 74
Visibility . . . . . . . . . . . . . . . . . . . . . . . . . . . . . . . 80
Windscreen wiper and window wiper systems . 81
Rear vision mirror . . . . . . . . . . . . . . . . . . . . . . . . 85
Seats and head restraints . . . . . . . . . . . . . . . . . 88
Adjusting the seats and head restraints . . . . . . 88
Seat functions . . . . . . . . . . . . . . . . . . . . . . . . . . 93
Transport and practical equipment . . . . . . . . . 98
Transporting objects . . . . . . . . . . . . . . . . . . . . . 98
Loading luggage compartment . . . . . . . . . . . . . 100
Roof carrier system* . . . . . . . . . . . . . . . . . . . . . . 110
Storage compartments . . . . . . . . . . . . . . . . . . . 112
Drink holders . . . . . . . . . . . . . . . . . . . . . . . . . . . 117
Ashtray and cigarette lighter* . . . . . . . . . . . . . . 118
Power sockets . . . . . . . . . . . . . . . . . . . . . . . . . . . 119
Air conditioning . . . . . . . . . . . . . . . . . . . . . . . . . 122
Air conditioner . . . . . . . . . . . . . . . . . . . . . . . . . . 122
Auxiliary heater* (additional heater) . . . . . . . . 128
Driving . . . . . . . . . . . . . . . . . . . . . . . . . . . . . . . . 131
Address . . . . . . . . . . . . . . . . . . . . . . . . . . . . . . . . 131
Stopping and starting the engine . . . . . . . . . . . 133
Braking and parking . . . . . . . . . . . . . . . . . . . . . 137
Changing gear . . . . . . . . . . . . . . . . . . . . . . . . . . 143
Run-in and economical driving . . . . . . . . . . . . . 148
Engine management and exhaust gas
purification system . . . . . . . . . . . . . . . . . . . . . . 151
Driving abroad . . . . . . . . . . . . . . . . . . . . . . . . . . 153
Driving along flooded roadways . . . . . . . . . . . . 153
Driver assistance systems . . . . . . . . . . . . . . . . . 154
Braking and stability systems . . . . . . . . . . . . . . 154
Start assist systems . . . . . . . . . . . . . . . . . . . . . . 156
Parking sensor system* . . . . . . . . . . . . . . . . . . . 159
Park Assist system* . . . . . . . . . . . . . . . . . . . . . . 162
Rear Assist system* . . . . . . . . . . . . . . . . . . . . . . 166
Cruise control* (Cruise control system - CCS) . . 169
Lane Assist system* . . . . . . . . . . . . . . . . . . . . . . 172
Sign Assist* . . . . . . . . . . . . . . . . . . . . . . . . . . . . 174 Tiredness detection (recommendation to take
a break) . . . . . . . . . . . . . . . . . . . . . . . . . . . . . . . . 176
Tyre monitoring systems . . . . . . . . . . . . . . . . . . 177
Towing bracket device
. . . . . . . . . . . . . . . . . . . . 179
Driving with a trailer . . . . . . . . . . . . . . . . . . . . . . 179
Advice . . . . . . . . . . . . . . . . . . . . . . . . . . . . . . . . 189
Care and maintenance . . . . . . . . . . . . . . . . . . . . 189
Accessories, replacement of parts and
modifications . . . . . . . . . . . . . . . . . . . . . . . . . . . 189
Care and cleaning the vehicle exterior . . . . . . . 195
Caring for and cleaning the vehicle interior . . . 200
Notes for the user . . . . . . . . . . . . . . . . . . . . . . . . 205
Checking and refilling levels . . . . . . . . . . . . . . . 206
Filling the tank . . . . . . . . . . . . . . . . . . . . . . . . . . 206
Fuel . . . . . . . . . . . . . . . . . . . . . . . . . . . . . . . . . . . 209
Selective catalytic reduction* (AdBlue) . . . . . . 212
Working in the engine compartment . . . . . . . . 214
Engine oil . . . . . . . . . . . . . . . . . . . . . . . . . . . . . . 218
Engine coolant . . . . . . . . . . . . . . . . . . . . . . . . . . 221
Brake fluid . . . . . . . . . . . . . . . . . . . . . . . . . . . . . 225
Checking and topping up the windscreen
washer reservoir with water . . . . . . . . . . . . . . . . 226
Vehicle battery . . . . . . . . . . . . . . . . . . . . . . . . . . 227
Wheels and tyres . . . . . . . . . . . . . . . . . . . . . . . . 231
Wheels . . . . . . . . . . . . . . . . . . . . . . . . . . . . . . . . 231
Winter service . . . . . . . . . . . . . . . . . . . . . . . . . . . 241
Emergencies . . . . . . . . . . . . . . . . . . . . . . . . . . . . 242
In case of emergency . . . . . . . . . . . . . . . . . . . . . 242
Vehicle tool kit* . . . . . . . . . . . . . . . . . . . . . . . . . 244
Changing a wheel* . . . . . . . . . . . . . . . . . . . . . . . 246
Tyre repair . . . . . . . . . . . . . . . . . . . . . . . . . . . . . . 250
Starting assistance . . . . . . . . . . . . . . . . . . . . . . 253
Towing and tow starting . . . . . . . . . . . . . . . . . . . 255
3
Page 7 of 305
Safe driving
Safety
Safe driving Safety first! This chapter contains important information,
tips, suggestions and warnings that you
should read and consider for both your own
safety and for your passengers' safety.
WARNING
● This manual contains important informa-
tion about the operation of the vehicle, both
for the driver and the passengers. The other
sections of the on-board documentation also
contain further information that you should
be aware of for your own safety and for the
safety of your passengers.
● Ensure that the on-board documentation is
kept in the vehicle at all times. This is espe-
cially important when lending or selling the
vehicle to another person. Tips for driving
Introduction Depending upon how you expect to use your
vehicle, it may a good idea to protect the en-
gine from below. An undercarriage may help to reduce the risk of damage to the lower part
of the vehicle and the oil sump when driving
over kerbs, or along dirt tracks or unsurfaced
roads, etc. SEAT recommends you have the
guard fitted by a technical service centre.
WARNING
Driving under the influence of alcohol, drugs,
medication or narcotics may result in severe
accidents and even loss of life.
● Alcohol, drugs, medication and narcotics
may significantly alter perception, affect re-
action times and safety while driving, which
could result in the loss of control of the vehi-
cle. Before starting every trip
For your own safety and the safety of your
passengers, always note the following points
before every trip:
– Make sure that the vehicle's lights and turn
signals are working properly.
– Check tyre pressure.
– Ensure that all windows provide a clear and
good view of the surroundings.
– Make sure all luggage is secured
››› page 98.
– Make sure that no objects can interfere
with the pedals. –
Adjust front seat, head restraint and rear vi-
sion mirrors properly according to your
size.
– Ensure that the passengers in the rear
seats always have the head restraints in
the in-use position ››› page 90.
– Instruct passengers to adjust the head re-
straints according to their height.
– Protect children with appropriate child
seats and properly applied seat belts
››› page 26 .
– As s
ume the correct sitting position. Instruct
your passengers also to assume a proper
sitting position. ››› page 6.
– Fasten your seat belt securely. Instruct your
passengers also to fasten their seat belts
properly. ››› page 14.
What
affects driving safety? As a driver, you are responsible for yourself
and your passengers. When your concentra-
tion or driving safety is affected by any cir-
cumstance, you endanger yourself as well as
others on the road
››› , for this reason:
– Always pay attention to traffic and do not
get distracted by passengers or telephone calls.
– Never drive when your driving ability is im-
paired (e.g. by medication, alcohol, drugs).
»
5
Technical specifications
Advice
Operation
Safety
Page 14 of 305
Safety
Seat belt status display for rear seats
The seat belt status display on the instru-
ment panel informs the driver, when the igni-
tion is switched on, whether any passengers
in the rear seats have fastened their seat
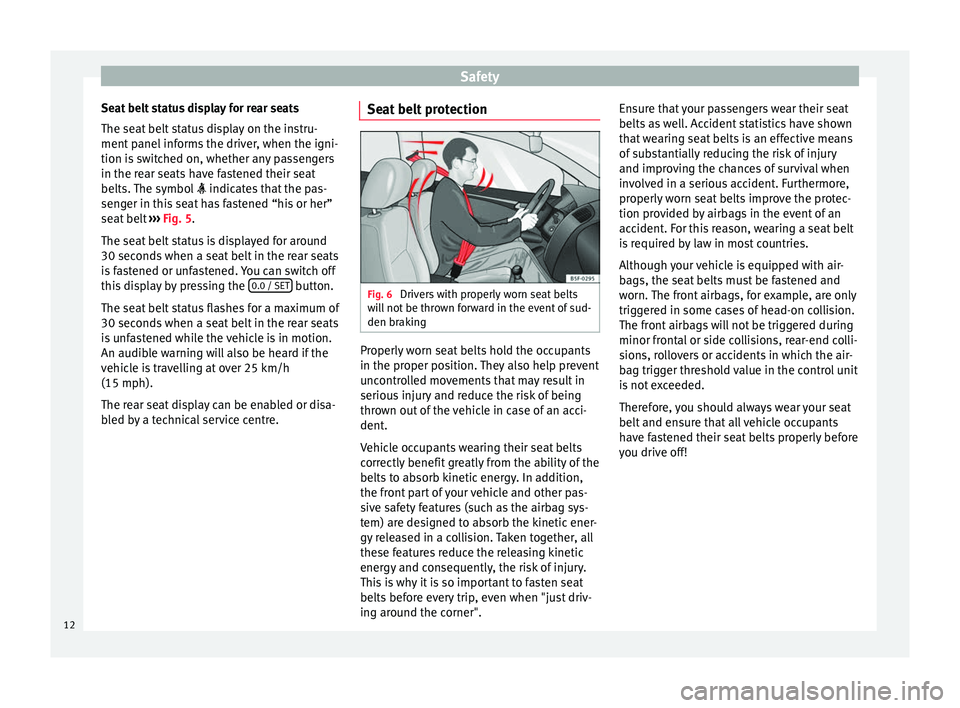
belts. The symbol indicates that the pas-
sen g
er in this seat has fastened “his or her”
seat belt ››› Fig. 5.
The seat
belt status is displayed for around
30 seconds when a seat belt in the rear seats
is fastened or unfastened. You can switch off
this display by pressing the 0.0 / SET button.
The seat belt status flashes for a maximum of
30 seconds when a seat belt in the rear seats
is unfastened while the vehicle is in motion.
An audible warning will also be heard if the
vehicle is travelling at over 25 km/h
(15 mph).
The rear seat display can be enabled or disa-
bled by a technical service centre. Seat belt protection Fig. 6
Drivers with properly worn seat belts
will not be thrown forward in the event of sud-
den braking Properly worn seat belts hold the occupants
in the proper position. They also help prevent
uncontrolled movements that may result in
serious injury and reduce the risk of being
thrown out of the vehicle in case of an acci-
dent.
Vehicle occupants wearing their seat belts
correctly benefit greatly from the ability of the
belts to absorb kinetic energy. In addition,
the front part of your vehicle and other pas-
sive safety features (such as the airbag sys-
tem) are designed to absorb the kinetic ener-
gy released in a collision. Taken together, all
these features reduce the releasing kinetic
energy and consequently, the risk of injury.
This is why it is so important to fasten seat
belts before every trip, even when "just driv-
ing around the corner".Ensure that your passengers wear their seat
belts as well. Accident statistics have shown
that wearing seat belts is an effective means
of substantially reducing the risk of injury
and improving the chances of survival when
involved in a serious accident. Furthermore,
properly worn seat belts improve the protec-
tion provided by airbags in the event of an
accident. For this reason, wearing a seat belt
is required by law in most countries.
Although your vehicle is equipped with air-
bags, the seat belts must be fastened and
worn. The front airbags, for example, are only
triggered in some cases of head-on collision.
The front airbags will not be triggered during
minor frontal or side collisions, rear-end colli-
sions, rollovers or accidents in which the air-
bag trigger threshold value in the control unit
is not exceeded.
Therefore, you should always wear your seat
belt and ensure that all vehicle occupants
have fastened their seat belts properly before
you drive off!
12
Page 17 of 305
Seat belts
● Pull the belt to ensure that the latch plate is
securely engaged in the buckle.
Unfastening the seat belt
The seat belt must not be unfastened until
the vehicle has come to a standstill ››› .
● Press the red button on the buckle ››› Fig. 9
B . The latch plate is released from the buckle.
● Guide the belt b
ack by hand so that it rolls
up easily and the trim will not be damaged.
Correct belt position
Seat belts offer their maximum protection in
the event of an accident and reduce the risk
of sustaining severe or fatal injuries only
when they are properly positioned. Further-
more, if the webbing is correctly positioned,
the seat belt will hold the vehicle occupants
in the optimum position to ensure the airbag
provides the maximum protection. The seat
belt must therefore always be worn and the
webbing correctly positioned.
Incorrectly worn seat belts can cause severe
or even fatal injuries ››› page 6, Sitting posi-
tion for occupants.
● The shoul
der part of the seat belt must lie
on the centre of the shoulder, never across
the neck or the arm, under the arm or behind
the shoulder.
● The lap part of the seat belt must lie across
the pelvis, never across the stomach. ●
The seat belt must lie flat and fit comforta-
bly. Pull the belt tight if necessary to take up
any slack.
In the case of pregnant women , the seat belt
must lie evenly across the chest and as low
as possible over the pelvis, never across the
stomach and must be worn properly at all
times during the pregnancy ››› Fig. 10.
Adaptin
g the position of the belt webbing to
your size
The seat belt can be adapted using the fol-
lowing equipment:
● Belt height adjustment for the front seats.
● Front seat height adjustment. WARNING
An incorrectly worn seat belt web can cause
severe or fatal injuries in the event of an acci-
dent.
● The seat belt cannot offer its full protection
unless the seat backrest is in an upright posi-
tion and the seat belt is worn correctly, ac-
cording to your size.
● Unbuckling your seat belt while the vehicle
is in motion can cause severe or fatal injuries
in the event of an accident or sudden braking.
● The seat belt itself, or a loose seat belt, can
cause severe injuries if the belt moves from
hard areas of the body to soft areas (e.g. the
stomach). ●
The shoulder part of the seat belt must lie
on the centre of the shoulder, never across
the neck or the arm.
● The seat belt must lie flat and fit comforta-
bly on the torso
● The lap part of the seat belt must lie across
the pelvis, never across the stomach. The
seat belt must lie flat and fit comfortably on
the pelvis Pull the belt tight if necessary to
take up any slack.
● For pregnant women, the lap part of the
seat belt must lie as low as possible over the
pelvis and always lie flat, “surrounding” the
stomach.
● Do not twist the seat belt while it is fas-
tened.
● Never pull the seat belt away from your
body using your hand.
● Do not lie the seat belt across rigid or frag-
ile objects, e.g. glasses, pens or keys.
● Never use seat belt clips, retaining rings or
similar instruments to alter the position of
the belt webbing. Note
If your physical constitution prevents you
from maintaining the correct position of the
belt webbing, contact a specialised workshop
for help with any special devices to ensure
the optimum protection of the seat belt and
airbag. SEAT recommends taking your car in
for technical service. 15Technical specifications
Advice
Operation
Safety
Page 19 of 305
Seat belts
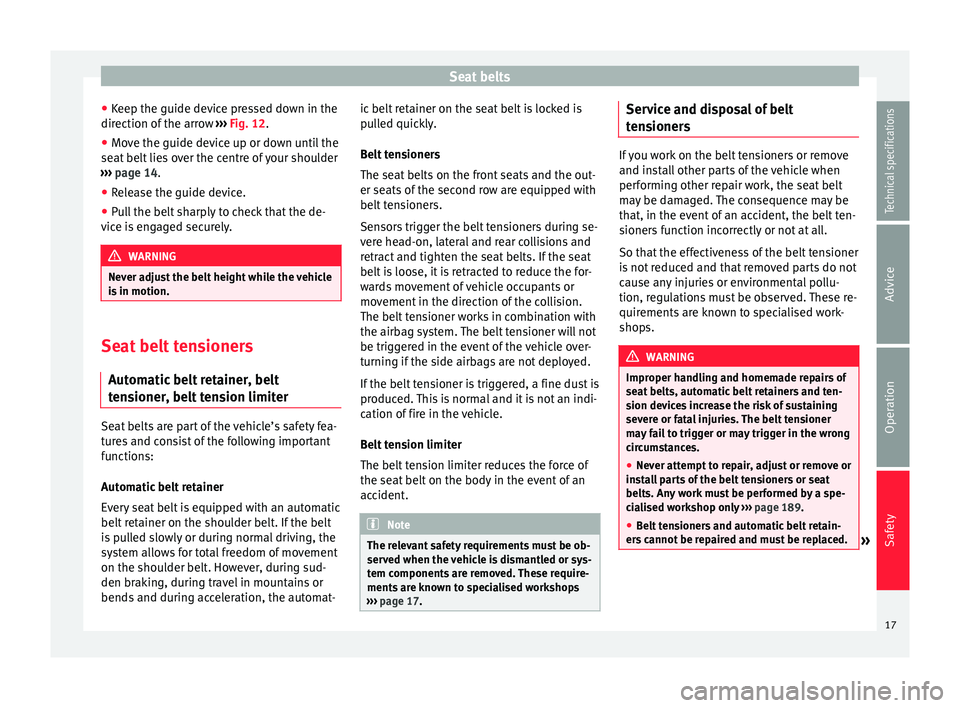
● Keep the guide device pressed down in the
direction of the arrow ››› Fig. 12 .
● Mo v
e the guide device up or down until the
seat belt lies over the centre of your shoulder
››› page 14.
● Rel
ease the guide device.
● Pull the belt sharply to check that the de-
vice is engaged securely. WARNING
Never adjust the belt height while the vehicle
is in motion. Seat belt tensioners
Automatic belt retainer, belt
tensioner, belt tension limiter Seat belts are part of the vehicle’s safety fea-
tures and consist of the following important
functions:
Automatic belt retainer
Every seat belt is equipped with an automatic
belt retainer on the shoulder belt. If the belt
is pulled slowly or during normal driving, the
system allows for total freedom of movement
on the shoulder belt. However, during sud-
den braking, during travel in mountains or
bends and during acceleration, the automat- ic belt retainer on the seat belt is locked is
pulled quickly.
Belt tensioners
The seat belts on the front seats and the out-
er seats of the second row are equipped with
belt tensioners.
Sensors trigger the belt tensioners during se-
vere head-on, lateral and rear collisions and
retract and tighten the seat belts. If the seat
belt is loose, it is retracted to reduce the for-
wards movement of vehicle occupants or
movement in the direction of the collision.
The belt tensioner works in combination with
the airbag system. The belt tensioner will not
be triggered in the event of the vehicle over-
turning if the side airbags are not deployed.
If the belt tensioner is triggered, a fine dust is
produced. This is normal and it is not an indi-
cation of fire in the vehicle.
Belt tension limiter
The belt tension limiter reduces the force of
the seat belt on the body in the event of an
accident.
Note
The relevant safety requirements must be ob-
served when the vehicle is dismantled or sys-
tem components are removed. These require-
ments are known to specialised workshops
››› page 17. Service and disposal of belt
tensioners
If you work on the belt tensioners or remove
and install other parts of the vehicle when
performing other repair work, the seat belt
may be damaged. The consequence may be
that, in the event of an accident, the belt ten-
sioners function incorrectly or not at all.
So that the effectiveness of the belt tensioner
is not reduced and that removed parts do not
cause any injuries or environmental pollu-
tion, regulations must be observed. These re-
quirements are known to specialised work-
shops.
WARNING
Improper handling and homemade repairs of
seat belts, automatic belt retainers and ten-
sion devices increase the risk of sustaining
severe or fatal injuries. The belt tensioner
may fail to trigger or may trigger in the wrong
circumstances.
● Never attempt to repair, adjust or remove or
install parts of the belt tensioners or seat
belts. Any work must be performed by a spe-
cialised workshop only ››› page 189.
● Belt tensioners and automatic belt retain-
ers cannot be repaired and must be replaced. » 17
Technical specifications
Advice
Operation
Safety
Page 28 of 305
Safety
● Then turn the key gently to the OFF posi-
tion. Do not f
orce it if you feel resistance, and
make sure you have inserted the key fully.
● Close the glove compartment on the front
passenger side.
● The
control lamp on
the dash panel will remain lit while the igni-
tion is switched on ››› page 25.
Activating the front passenger front airbag ● Switch the ignition off.
● Open the glove compartment on the front
passenger side.
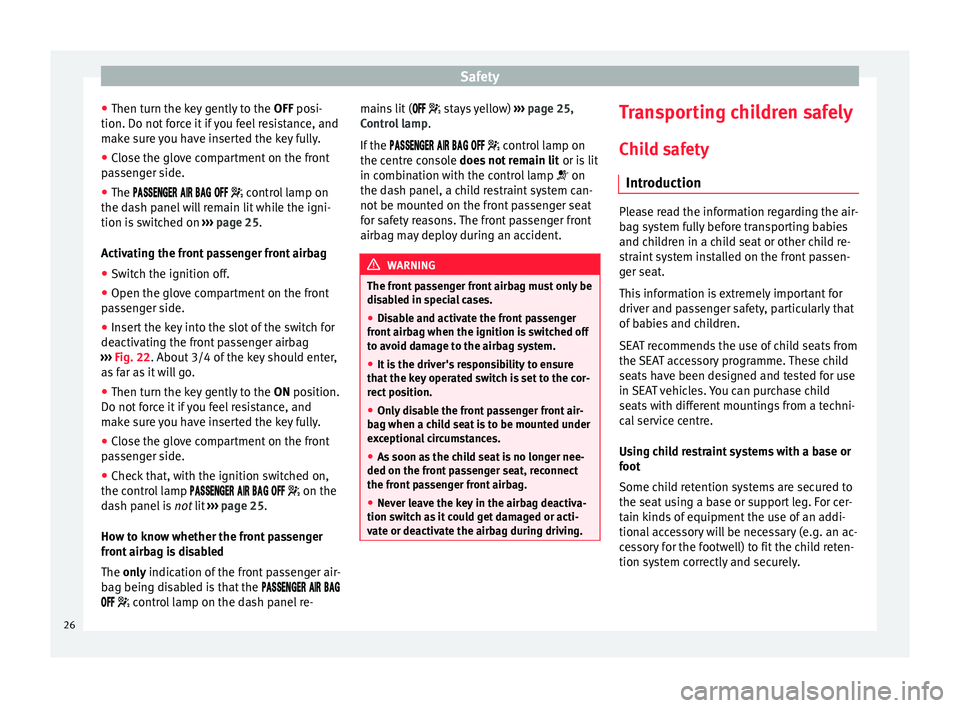
● Insert the key into the slot of the switch for
deactivating the front passenger airbag
››› Fig. 22
. About 3/4 of the key should enter,
as far as it will go.
● Then turn the key gently to the ON
position.
Do not force it if you feel resistance, and
make sure you have inserted the key fully.
● Close the glove compartment on the front
passenger side.
● Check that, with the ignition switched on,
the control lamp on the
dash panel is not
lit ››› page 25.
How to know whether the front passenger
front airbag is disabled
The only indication of the front passenger air-
b
ag being disabled is that the
control lamp on the dash panel re- mains lit (
stays yellow) ››› page 25,
Control lamp .
If the
control lamp on
the centre console does not remain lit or is lit
in combination with the control lamp on
the da
sh panel, a child restraint system can-
not be mounted on the front passenger seat
for safety reasons. The front passenger front
airbag may deploy during an accident. WARNING
The front passenger front airbag must only be
disabled in special cases.
● Disable and activate the front passenger
front airbag when the ignition is switched off
to avoid damage to the airbag system.
● It is the driver's responsibility to ensure
that the key operated switch is set to the cor-
rect position.
● Only disable the front passenger front air-
bag when a child seat is to be mounted under
exceptional circumstances.
● As soon as the child seat is no longer nee-
ded on the front passenger seat, reconnect
the front passenger front airbag.
● Never leave the key in the airbag deactiva-
tion switch as it could get damaged or acti-
vate or deactivate the airbag during driving. Transporting children safely
Child safety Introduction Please read the information regarding the air-
bag system fully before transporting babies
and children in a child seat or other child re-
straint system installed on the front passen-
ger seat.
This information is extremely important for
driver and passenger safety, particularly that
of babies and children.
SEAT recommends the use of child seats from
the SEAT accessory programme. These child
seats have been designed and tested for use
in SEAT vehicles. You can purchase child
seats with different mountings from a techni-
cal service centre.
Using child restraint systems with a base or
foot
Some child retention systems are secured to
the seat using a base or support leg. For cer-
tain kinds of equipment the use of an addi-
tional accessory will be necessary (e.g. an ac-
cessory for the footwell) to fit the child reten-
tion system correctly and securely.
26
Page 30 of 305
Safety
the safety information included in the follow-
ing chapters:
● Child seats and passenger side airbag
››› page 29, Use of the child seat on the
front passenger seat .
● Safety distance with respect to the passen-
ger airbag ››› in Introduction on page 18.
● Objects between the passenger and the
passenger side airbag ››› in Front airbags
on page 21 .
Gener a
l information on transporting
children in the vehicle Legal regulations and provisions will always
take priority over the descriptions of this in-
struction manual. There are different regula-
tions and provisions for the use of child seats
and their mountings (
›››
table on page 28).
In some countries, for example, the use of
child seats on certain seats in the vehicle
may be forbidden.
The physical principles and the forces acting
on the vehicle in the event of a collision or
other type of accidents also apply to children
››› page 14 . However, unlike adults and
y ou
ngsters, children do not have fully devel-
oped muscle and bone structures. In the
event of an accident, children are subject to a
greater risk than adults of sustaining severe
injuries. Given that children's bodies are not yet fully
developed, child restraint systems must be
used that are especially adapted to their
height, weight and constitution. There are
laws in force in many countries that indicate
the use of approved seat systems for trans-
porting babies and children.
Only used authorised, approved child seats
that are suitable for the vehicle. Always con-
sult with a technical service centre or a speci-
alised workshop should you have any
doubts.
Specific child seat regulations for each
country (selection)
RegulationFurther information
ECE-R 44
a)technical service centre
a)
ECE-R: Economic Comission for Europe Regulation.
Categorisation of child seats according to
ECE-R 44
Weight
catego- ryWeight ofthe childInstallation of the child seat
Group 0up to 10 kgRear-facing. On rear seats,
optionally using the ISOFIX system.
Group 0+up to 13 kg
Group 19 to 18 kgForward-facing. On rear
seats, optionally using the ISOFIX system.
Weight
catego- ryWeight ofthe childInstallation of the child seat
Group 215 to 25 kg
Forward-facing. On the outerrear seats or in the centreseat of the second row of
seats and on all seats in the third row. Optionally with ISOFIX system.
Group 322 to 36 kgForward-facing. Not all children fit in the seat of their weight
group. Nor do all seats adapt to the vehicle.
Therefore, always check whether the child fits
properly in the child seat and whether the
seat can be installed safely in the vehicle.
The rear seats are suitable for child seats
with the
ISOFIX system spec
ially designed
for this type of vehicle in accordance with
regulation ECE-R 44.
Child seats approved under the ECE-R 44 reg-
ulation are fitted with the corresponding ap-
proval symbol. The sign is an upper-case E in
a circle with the identification number below
it. WARNING
In general, the rear seat is always the safest
place for correctly belted in children in the
event of an accident.
● A suitable child seat that is correctly instal-
led and used on one of the rear seats offer 28
Page 31 of 305
Transporting children safely
the most protection possible for babies and
small children in most accidents. Note
Other accessories may be required to fit the
child retention system with a base or foot se- curity and safely. Contact a technical service
centre or specialised workshop.
Different mounting systems
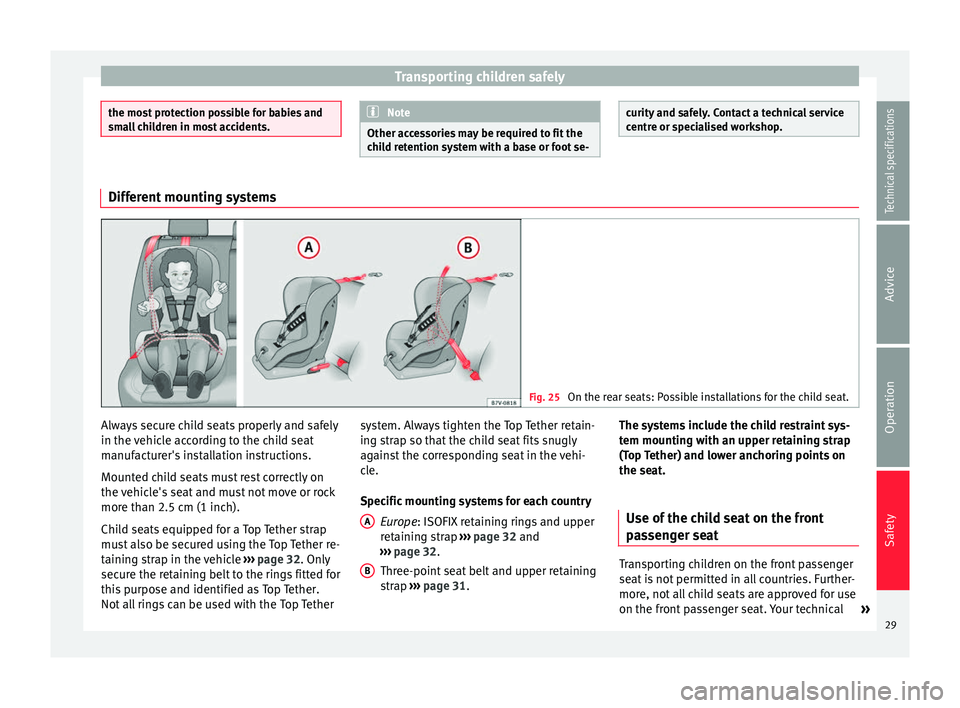
Fig. 25
On the rear seats: Possible installations for the child seat. Always secure child seats properly and safely
in the vehicle according to the child seat
manufacturer's installation instructions.
Mounted child seats must rest correctly on
the vehicle's seat and must not move or rock
more than 2.5 cm (1 inch).
Child seats equipped for a Top Tether strap
must also be secured using the Top Tether re-
taining strap in the vehicle
››› page 32. Only
secure the retaining belt to the rings fitted for
this purpose and identified as Top Tether.
Not all rings can be used with the Top Tether system. Always tighten the Top Tether retain-
ing strap so that the child seat fits snugly
against the corresponding seat in the vehi-
cle.
Specific mounting systems for each country
Europe : ISOFIX retaining rings and upper
r et
aining strap ››› page 32 and
››› page 32.
Three-point
seat belt and upper retaining
strap ››› page 31
.
A B The systems include the child restraint sys-
tem mounting with an upper retaining strap
(Top Tether) and lower anchoring points on
the seat.
Use of the child seat on the front
passenger seat Transporting children on the front passenger
seat is not permitted in all countries. Further-
more, not all child seats are approved for use
on the front passenger seat. Your technical
»
29
Technical specifications
Advice
Operation
Safety
Page 32 of 305
Safety
service centre has an updated list of all ap-
proved child seats. Only used child seats that
are approved for each vehicle.
The front airbag on the front passenger side
is highly dangerous for a child. The front pas-
senger seat is life-threatening to a child if he
or she is transported in a rear-facing child
seat.
If a rear-facing child seat is secured to the
front passenger seat, an inflating front airbag
can strike it with such great force that severe
or fatal injuries may result ››› . Therefore,
rear-facing child seats must never be placed
on the fr ont
passenger seat when the front
passenger front airbag is enabled.
Only use a rear-facing child seat on the front
passenger seat if the front passenger front
airbag is disabled. When it is disabled, the
yellow PASSENGER AIR BAG control lamp
on the dash panel will be lit ››› page 20. If
you cannot disable the front passenger front
airbag and it remains activated, it is forbid-
den to transport children on the front pas-
senger seat ››› .
Things to note if using a child seat on the
front passenger seat:
● The front passenger front airbag must be
disabled when using a rear-facing child
seat ››› page 25 .
● The se at
backrest of the front passenger
seat must be upright. ●
The front passenger seat must be moved as
far back as possible.
● The seat backrest of the front passenger
seat must be upright.
● The seat belt height adjustment must be as
high as possible.
Suitable child seats
The child seat must be authorised by the
manufacturer especially for use on a front
passenger seat with a front or side airbag.
If the front passenger seat is equipped with
retaining rings, the child seat can be secured
us
ing an approved retaining system provided
it is approved for this type of vehicle in ac-
cordance with current regulations of the
country in question.
Universal seats for children of groups 0, 0+,
1, 2 or 3 according to the standard ECE-R 44
can be mounted on the front passenger seat
and the rear seats. WARNING
If a child seat is mounted on the front passen-
ger seat, the risk of the child sustaining se-
vere or fatal injuries in the event of an acci-
dent increases. Rear-facing child seats must
never be mounted on the front passenger
seat when the front passenger front airbag is
enabled. This is life-threatening to the child
should the front airbag deploy, as the child seat would be struck by the inflated airbag
and thrown against the seat backrest.
WARNING
If, in exceptional circumstances, a child must
be transported in a rear-facing child seat on
the front passenger seat, strictly observe the
following:
● Always disable the front passenger front
airbag and leave it disabled.
● The child seat must be approved by the
manufacturer for use on a front passenger
seat with front and side airbag.
● Follow the installation instructions of the
child seat manufacturer and observe the
warnings.
● Move the front passenger seat as far back
as possible and adjust it to its highest posi-
tion to keep as far away as possible from the
front airbag.
● Move the seat backrest to the upright posi-
tion.
● The seat belt height adjustment must be as
high as possible.
● Children must always be protected with an
approved child restraint system suited to
their height and weight. Use of the child seat on the rear seat
If a child seat is mounted on the rear seat,
adapt the position of the front passenger
30
Page 43 of 305
Cockpit
Details of the instruments ››› Fig. 34 :
C loc
k set button 1)
.
– Press button to select the hour or
minute display.
– To continue setting, press 0.0 / SET›››
Fig. 34 7 . Hold button down to
scroll through the numbers quickly.
– Press button again to end the clock
setting.
Rev counter (with the engine running, in
thousands of revolutions per minute).
The beginning of the red zone of the rev
counter indicates the maximum speed in
any gear after running-in and with the en-
1 2 gine hot. However, it is advisable to
change up a gear or move the selector
lever to
D
(or lift your foot off the acceler-
at
or) before the needle reaches the red
zone ››› .
Engine coolant temperature display
››› page 221 .
Di s
plays on the screen ››› page 41.
Fuel reserve display ››› page 206.
Speedometer.
Reset knob for trip recorder (trip).
– Pre
ss button 0.0 / SET to reset to zero.
3 4
5
6
7 WARNING
Any distraction may lead to an accident, with
the risk of injury.
● Do not operate the instrument panel con-
trols when driving. CAUTION
To prevent damage to the engine, the rev
counter needle should only remain in the red
zone for a short period of time. For the sake of the environment
Changing up a gear in time reduces fuel con-
sumption and noise. Displays on screen
A variety of information can be viewed on the
instrument panel display
››› Fig. 34 4 , de-
pending on the vehicle equipment:
● Warning and information text.
● Mileage.
● Time.
● Outside temperature.
● Compass. ●
Selector lever positions ››› page 143.
● Recommended gear (manual gearbox)
››› page 143 .
● Mu
ltifunction display (MFI) and menus for
different setting options ››› page 47.
● Service interval display ››› page 44 .
● Second speed display (menu Configuration)
››› page 47. ●
Star
t-Stop operation indicator
››› page 43.
Warning and information texts
The system runs a check on certain compo-
nents and functions when the ignition is
switched on and while the vehicle is moving.
Faults in the operation are displayed on the
screen using red and yellow symbols and
messages on the instrument panel display »1)
Depending on the vehicle equipment, it is also
possible to set the time using the settings menu on
the in s
trument panel display ››› page 51.
41
Technical specifications
Advice
Operation
Safety