service interval Seat Alhambra 2015 Owner's Manual
[x] Cancel search | Manufacturer: SEAT, Model Year: 2015, Model line: Alhambra, Model: Seat Alhambra 2015Pages: 305, PDF Size: 5.46 MB
Page 43 of 305
Cockpit
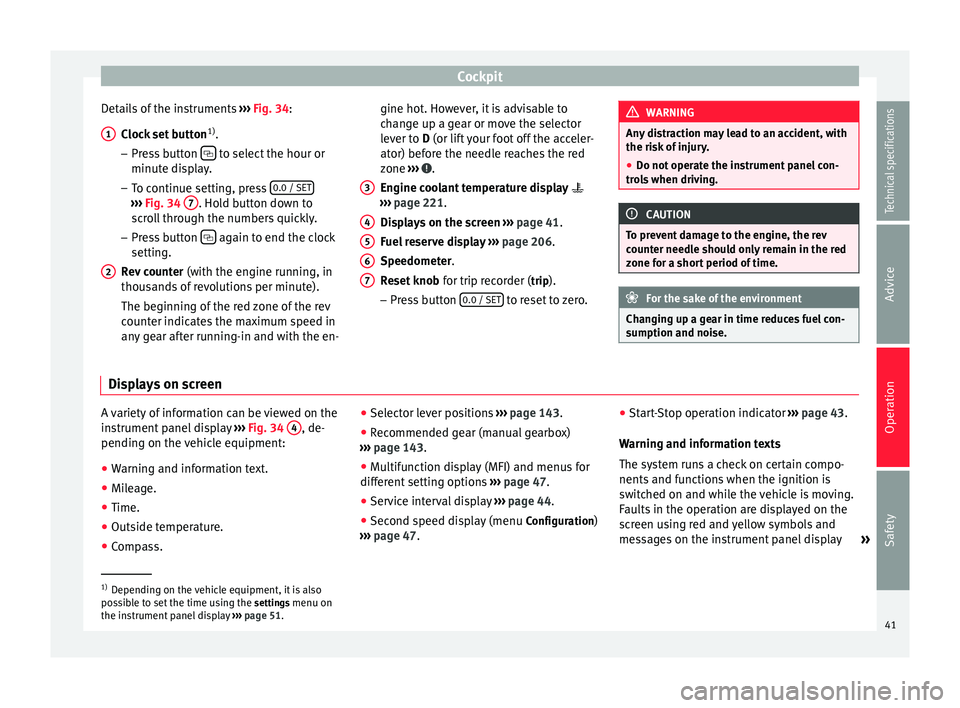
Details of the instruments ››› Fig. 34 :
C loc
k set button 1)
.
– Press button to select the hour or
minute display.
– To continue setting, press 0.0 / SET›››
Fig. 34 7 . Hold button down to
scroll through the numbers quickly.
– Press button again to end the clock
setting.
Rev counter (with the engine running, in
thousands of revolutions per minute).
The beginning of the red zone of the rev
counter indicates the maximum speed in
any gear after running-in and with the en-
1 2 gine hot. However, it is advisable to
change up a gear or move the selector
lever to
D
(or lift your foot off the acceler-
at
or) before the needle reaches the red
zone ››› .
Engine coolant temperature display
››› page 221 .
Di s
plays on the screen ››› page 41.
Fuel reserve display ››› page 206.
Speedometer.
Reset knob for trip recorder (trip).
– Pre
ss button 0.0 / SET to reset to zero.
3 4
5
6
7 WARNING
Any distraction may lead to an accident, with
the risk of injury.
● Do not operate the instrument panel con-
trols when driving. CAUTION
To prevent damage to the engine, the rev
counter needle should only remain in the red
zone for a short period of time. For the sake of the environment
Changing up a gear in time reduces fuel con-
sumption and noise. Displays on screen
A variety of information can be viewed on the
instrument panel display
››› Fig. 34 4 , de-
pending on the vehicle equipment:
● Warning and information text.
● Mileage.
● Time.
● Outside temperature.
● Compass. ●
Selector lever positions ››› page 143.
● Recommended gear (manual gearbox)
››› page 143 .
● Mu
ltifunction display (MFI) and menus for
different setting options ››› page 47.
● Service interval display ››› page 44 .
● Second speed display (menu Configuration)
››› page 47. ●
Star
t-Stop operation indicator
››› page 43.
Warning and information texts
The system runs a check on certain compo-
nents and functions when the ignition is
switched on and while the vehicle is moving.
Faults in the operation are displayed on the
screen using red and yellow symbols and
messages on the instrument panel display »1)
Depending on the vehicle equipment, it is also
possible to set the time using the settings menu on
the in s
trument panel display ››› page 51.
41
Technical specifications
Advice
Operation
Safety
Page 46 of 305
Operation
Service interval display The service indication is shown on the dash
panel display
››› Fig. 34 4 .
SEAT distinguishes between services with en-
gine oi l
change (Interval Service) and serv-
ices without
engine oil change (Inspection
Service). The service interval display only
gives information for service dates which in-
volve an engine oil change. The dates for the
other services (e.g. the next Inspection Serv-
ice or change of brake fluid) are listed on the
label attached to the door strut, or in the
Maintenance Programme.
In vehicles with Services established by time
or mileage, the service intervals are already
pr e-defined.
In
vehicles with LongLife Service , the inter-
vals are determined individually. Technical
progress has made it possible to considera-
bly reduce servicing requirements. The tech-
nology used by SEAT ensures that your vehi-
cle only has an Interval Service when it is
necessary. To establish when the Interval
Service is due (max. 2 years), the vehicle's
conditions of use and individual driving
styles are considered. The service pre-warn-
ing first appears 20 days before the date es-
tablished for the corresponding service. The
kilometres (miles) remaining until the next
service are always rounded up to the nearest
100 km (miles) and the time is given in com-
plete days. The current service message can- not be viewed until 500 km after the last
service. Prior to this only lines are visible on
the display.
Inspection reminder
When the Service date is approaching, when
the ignition is switched on a
Service remind-
er
is displayed.
In
vehicles without text messages , a spanner
is displayed on the instrument panel with
a figure given in km. The number of kilome- tre
s shown is the maximum number that may
be driven until the next service. After a few
seconds, the display mode changes. A clock
symbol appears and the number of days until
the next service appointment is due.
In vehicles with text messages , Serv
ice in ---
km (miles) or --- days is displayed on the in- strument panel.
Service due
After the service date, an audible warning is
giv
en when the ignition is switched on and
the spanner displayed on the screen flashes
for a few seconds . In
vehicles with text
messages, Service in --- km or --- days is dis-
played on the instrument panel.
Reading a service notification
With the ignition switched on, the engine off
and the vehicle at a standstill, the current
service notification
can be read: ●
Press the button on the instrument pan-
el several times until the spanner symbol is
displayed
.
● OR:
select the Setting
s menu.
● From the
Service submenu, select the op-
tion Info.
When the service date has past , a minus
sign
is displayed in front of the number of kilome-
tres or days. In vehicles with text messages
the following is displayed: Service --- km
(miles) or --- days ago .
Resetting service interval display
If the service was not carried out by a techni-
cal service centre, the display can be reset as
follows:
In vehicles with text messages:
Select the Settings menu.
In the submenu Service, select the option Reset.
Confirm with OK when requested to do so by the sys-
tem.
In vehicles without text messages:
Switch the ignition off.
Press and hold the 0.0 / SET button.
Switch the ignition back on.44
Page 47 of 305
CockpitIn vehicles without text messages:
Release the
0.0 / SET button and, press for the next
20 seconds. Do not
reset the indicator to zero between
tw
o intervals, otherwise the display will be
incorrect.
If, while the LongLife service is valid, the
service interval display is reset to zero, the
“service will be activated by time or mile-
age”. The service interval is no longer calcu-
lated individually ›››
Booklet Maintenance
Programme. Note
● The service message disappears after a few
seconds, when the engine is started or when OK is pressed.
● In vehicles with the LongLife system in
which the battery has been disconnected for
a long period of time, it is not possible to cal-
culate the date of the next service. Therefore
the service interval display may not be cor-
rect. In this case, bear in mind the maximum
service intervals permitted in the ››› Book-
let Maintenance Programme. Control lamps
Control and warning lamps The control and warning lamps are indicators
of warnings,
››› , faults
››› or certain func-
tions. Some control and warning lamps come
on when the ignition is switched on, and
switch off when the engine starts running, or
while driving.
Depending on the model, additional text
messages may be viewed on the instrument
panel display. These may be purely informa-
tive or they may be advising of the need for
action ›››
page 40, Instruments .
D ependin
g upon the equipment fitted in the
vehicle, instead of a warning lamp, some-
times a symbol may be displayed on the in-
strument panel.
When certain control and warning lamps are
lit, an audible warning is also heard.
Red symbols
Sym- bolMeaning ››› See
Do not continue driving!
The electronic parking brake is on,
the brake fluid level is too low or
the brake system is faulty.››› page
137
Sym-
bolMeaning ››› See
Do not continue driving!
Fault in the engine cooling sys-
tem.››› page
221
Do not continue driving!
Engine oil pressure too low.››› page
218
Do not continue driving!
At least one of the vehicles doors
is open, or is not correctly closed.››› page
63
Do not continue driving!
The rear lid is open or is incorrect-
ly closed.››› page
66
Do not continue driving!
Fault in the steering.››› page
131
Engine cannot be started again!
"AdBlue" level too low.›››
page
212
Driver or passenger has not fas-
tened seat belt.›››
page
14
Use the foot brake!
Change
››› page
143
Brake
››› page
137
Faulty generator.›››
page
227» 45
Technical specifications
Advice
Operation
Safety
Page 49 of 305
Cockpit
Other control lampsSym- bolMeaning ››› See
Electronic immobiliser active.›››
page
133
Service interval display›››
page 44
Mobile telephone is connected
via Bluetooth to the original tel-
ephone device.›››
Book-
let Radio
or
››› Book-
let Navi-
gation
system
Mobile telephone battery
charge meter. Available only for
pre-installed factory-fitted devi-
ces.
Freezing warning. The outside
temperature is lower than +4 °C
(+39 °F).›››
page 42 WARNING
If the warning lamps and messages are ignor-
ed, the vehicle may stall in traffic, or may
cause accidents and severe injuries.
● Never ignore the warning lamps or text
messages.
● Stop the vehicle safely as soon as possible.
● Park the vehicle away from traffic and en-
sure that there are no highly flammable ma-
terials under the vehicle that could come into
contact with the exhaust system (e.g. dry
grass, fuel). ●
A faulty vehicle represents a risk of acci-
dent for the driver and for other road users. If
necessary, switch on the hazard warning
lamps and put out the warning triangle to ad-
vise other drivers.
● Before opening the bonnet, switch off the
engine and allow it to cool.
● In any vehicle, the engine compartment is a
hazardous area and could cause severe inju-
ries ››› page 214. CAUTION
Failure to heed the control lamps and text
messages when they appear may result in
faults in the vehicle. SEAT information system
Introduction With the ignition switched on, it is possible
to read the different functions of the display
by scrolling through the menus.
In vehicles with a multifunction steering
wheel, there are no buttons on the wind-
screen wiper lever. The multifunction display
can only be controlled from the buttons on
the steering wheel.
The number of menus displayed on the in-
strument panel will vary according to the ve-
hicle electronics and equipment.A specialised workshop will be able to pro-
gramme or modify additional functions, ac-
cording to the vehicle equipment. SEAT rec-
ommends taking your car in for technical
service.
Some menu options can only be read when
the vehicle is at a standstill.
As long as a priority 1 warning is displayed, it
will not be possible to read the menus. To
display the menus, confirm the warning by
pressing
OK .
Summary of the menu structure ■
Multifunction display (MFI) ››› page 50
■ Journey duration
■ Current fuel consumption
■ Average fuel consumption
■ Operating range
■ Distance covered
■ Average speed
■ Digital display of speed
■ Oil temperature digital display
■ Speed warning
■ Audio ›
›
›
Booklet Radio or ›››
Booklet Navi-
gation system
■ Navigation ››
›
Booklet Navigation system
■ Telephone ›››
Booklet Radio or ›››
Book-
let Navigation system
■ Auxiliary heating ››› page 128
»
47
Technical specifications
Advice
Operation
Safety
Page 53 of 305
CockpitMenuFunction
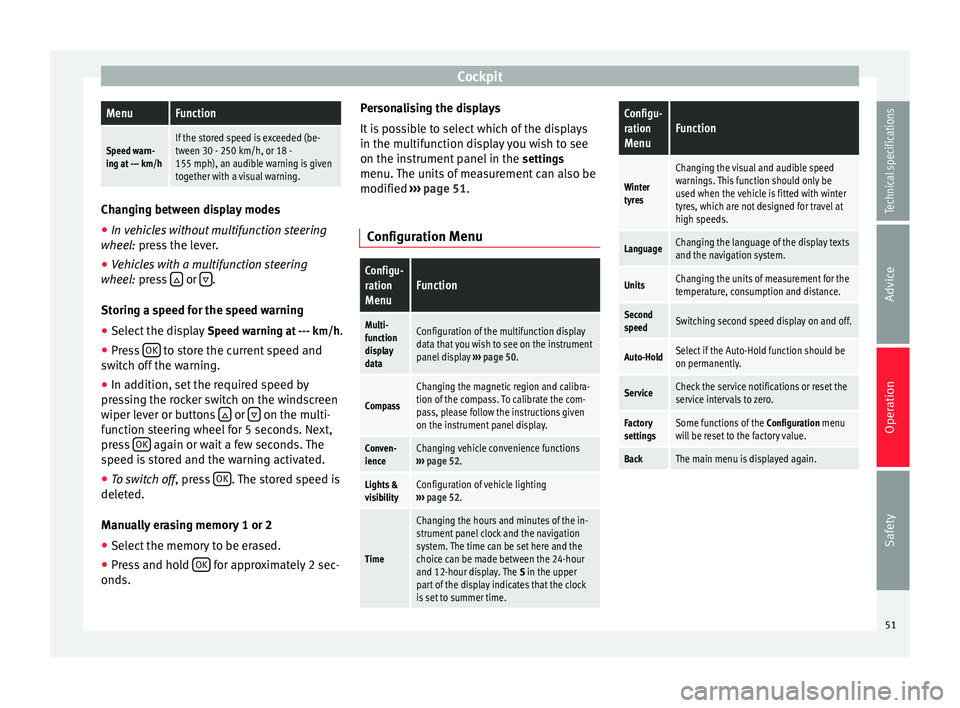
Speed warn-
ing at --- km/hIf the stored speed is exceeded (be-
tween 30 - 250 km/h, or 18 -
155 mph), an audible warning is given
together with a visual warning. Changing between display modes
● In vehicles without multifunction steering
wheel: press the lever.
● Vehicle
s with a multifunction steering
wheel:
press or
.
Storing a speed for the speed warning
● Select the display Speed warning at --- km/h
.
● Press OK to store the current speed and
switch off the warning.
● In addition, set the required speed by
pressing the rocker switch on the windscreen
wiper lever or buttons or
on the multi-
function steering wheel for 5 seconds. Next,
press OK again or wait a few seconds. The
speed is stored and the warning activated.
● To switch off , press OK . The stored speed is
deleted.
Manually erasing memory 1 or 2
● Select the memory to be erased.
● Press and hold OK for approximately 2 sec-
onds. Personalising the displays
It is possible to select which of the displays
in the multifunction display you wish to see
on the instrument panel in the
settings
menu. The units of measurement can also be
modified ››› page 51 .
C onfigur
ation Menu
Configu-
ration
MenuFunction
Multi-
function
display
dataConfiguration of the multifunction display
data that you wish to see on the instrument
panel display ››› page 50.
Compass
Changing the magnetic region and calibra-
tion of the compass. To calibrate the com-
pass, please follow the instructions given
on the instrument panel display.
Conven-
ienceChanging vehicle convenience functions
››› page 52.
Lights &
visibilityConfiguration of vehicle lighting
››› page 52.
Time
Changing the hours and minutes of the in-
strument panel clock and the navigation
system. The time can be set here and the
choice can be made between the 24-hour
and 12-hour display. The S in the upper
part of the display indicates that the clock
is set to summer time.
Configu-
ration
MenuFunction
Winter
tyres
Changing the visual and audible speed
warnings. This function should only be
used when the vehicle is fitted with winter
tyres, which are not designed for travel at
high speeds.
LanguageChanging the language of the display texts
and the navigation system.
UnitsChanging the units of measurement for the
temperature, consumption and distance.
Second
speedSwitching second speed display on and off.
Auto-HoldSelect if the Auto-Hold function should be
on permanently.
ServiceCheck the service notifications or reset the
service intervals to zero.
Factory
settingsSome functions of the Configuration menu
will be reset to the factory value.
BackThe main menu is displayed again. 51
Technical specifications
Advice
Operation
Safety
Page 84 of 305
Operation
parked with the wipers in service position
››› page 83. Control lampIt
lights upPossible causeSolution
Windscreen wiper
fluid level too lowTop up the windscreen
wiper reservoir as
soon as possible
››› page 226. Several warning and control lamps light up
for a few seconds when the ignition is switch-
ed on, signalling that the function is being
verified. They will switch off after a few sec-
onds.
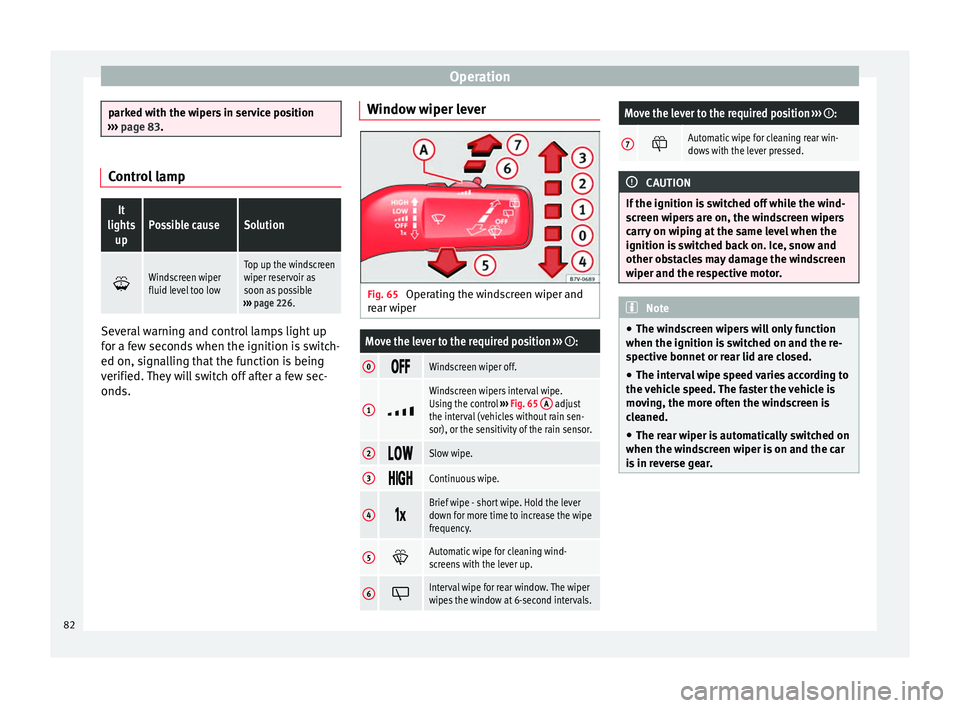
Window wiper lever Fig. 65
Operating the windscreen wiper and
rear wiper
Move the lever to the required position ››› :
0 Windscreen wiper off.
1
Windscreen wipers interval wipe.
Using the control
››› Fig. 65 A adjust
the interval (vehicles without rain sen-
sor), or the sensitivity of the rain sensor.
2 Slow wipe.
3
Continuous wipe.
4
Brief wipe - short wipe. Hold the lever
down for more time to increase the wipe
frequency.
5
Automatic wipe for cleaning wind-
screens with the lever up.
6
Interval wipe for rear window. The wiper
wipes the window at 6-second intervals.
Move the lever to the required position
››› :
7 Automatic wipe for cleaning rear win-
dows with the lever pressed.
CAUTION
If the ignition is switched off while the wind-
screen wipers are on, the windscreen wipers
carry on wiping at the same level when the
ignition is switched back on. Ice, snow and
other obstacles may damage the windscreen
wiper and the respective motor. Note
● The windscreen wipers will only function
when the ignition is switched on and the re-
spective bonnet or rear lid are closed.
● The interval wipe speed varies according to
the vehicle speed. The faster the vehicle is
moving, the more often the windscreen is
cleaned.
● The rear wiper is automatically switched on
when the windscreen wiper is on and the car
is in reverse gear. 82
Page 85 of 305
Lights and visibility
Windscreen wiper functionsWindscreen wiper performance in different sit-
uations
If the vehicle
is at a stand-
stillThe activated position provisionally
changes to the previous position.
During auto-
matic wipe
The air conditioner comes on for ap-
proximately 30 seconds in air recircula-
tion mode to prevent the smell of the
windscreen washer fluid entering the
inside the vehicle.
For the inter-
val wipeIntervals between wipes depend on the
vehicle's speed. The higher the vehicle
speed the shorter the intervals. Heated windscreen washer jets
The heating only thaws the frozen jets, it
does not thaw the water in the washer hoses.
The heated windscreen washer jets automati-
cally adjust the heat depending on the ambi-
ent temperature, when the ignition is switch-
ed on.
Headlight wash/wipe system
The headlight washers/wipers clean the
headlight lenses.
After the ignition is switched on, the first and
every fifth time the windscreen washer is
switched on, the headlights are also washed.
Therefore, the windscreen wiper lever should
be pulled towards the steering wheel when the dipped beam or main beam are on. Any
incrusted dirt (such as insects) should be
cleaned regularly (e.g. when refuelling).
To ensure the headlight washers work cor-
rectly in winter, any snow which has got into
the bumper jet supports should be cleaned
away. If necessary, remove snow with an anti-
icing spray.
Note
The wiper will try to wipe away any obstacles
that are on the windscreen. The wiper will
stop moving if the obstacle blocks its path.
Remove the obstacle and switch the wiper
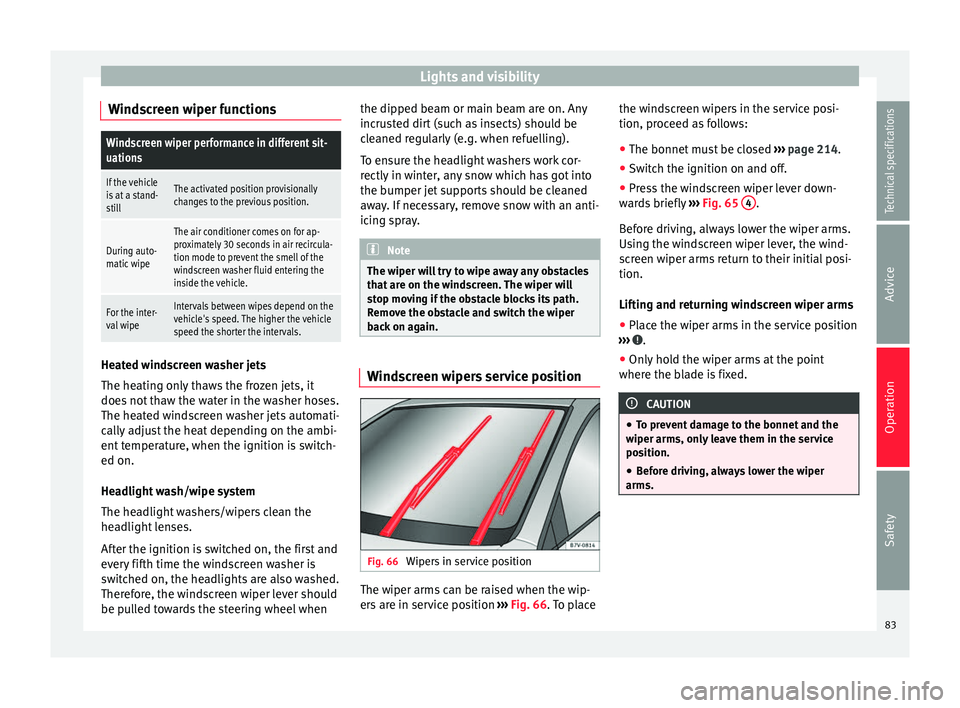
back on again. Windscreen wipers service position
Fig. 66
Wipers in service position The wiper arms can be raised when the wip-
ers are in service position
››› Fig. 66 . To place the w
ind
screen wipers in the service posi-
tion, proceed as follows:
● The bonnet must be closed ››› page 214.
● Switch the ignition on and off.
● Press the windscreen wiper lever down-
wards briefly ››› Fig. 65 4 .
Before driving, always lower the wiper arms.
Using the windscreen wiper lever, the wind-
screen wiper arms return to their initial posi-
tion.
Lifting and returning windscreen wiper arms
● Place the wiper arms in the service position
››› .
● Only hold the wiper arms at the point
where the blade is fixed. CAUTION
● To prevent damage to the bonnet and the
wiper arms, only leave them in the service
position.
● Before driving, always lower the wiper
arms. 83
Technical specifications
Advice
Operation
Safety
Page 113 of 305
Transport and practical equipment
roof. All these system components are
available from a technical service centre.
Securing the base supports and roof carrier
system
Always secure the base supports and roof
carrier system correctly.
The roof carrier system must always be instal-
led exactly according to the instructions pro-
vided.
The position openings are located on the in-
ner side of the side roof rods ››› Fig. 99 . WARNING
If the base supports and the roof carrier sys-
tem are incorrectly fitted or used in an unsuit-
able manner, the entire system could break
free causing accident and injury.
● Always take the manufacturer assembly in-
structions into account.
● Only use base supports and roof carrier
systems that are not damaged and are cor-
rectly fitted.
● The base support should only be fitted to
the points indicated in the diagram ››› Fig. 99.
● Sec ur
e the base supports and roof carrier
system correctly.
● Check the screws and attachments before
driving and after a short distance. During
each long journey, check the attachments
during every break. ●
Always fit the roof carrier system correctly
for wheels, skis, surfboards, etc.
● Never modify or repair the basic supports
or roof carrier system. Note
Read and take into account the instructions
included with the roof carrier system fitted
and keep them in the vehicle. Loading the roof carrier system
Loads can only be correctly secured when the
roof carrier system is correctly fitted
››› .
Maximum authorised roof load
The maximum authorised roof load is 100 kg
(about 220 lbs) . The roof load includes the
r oof
carrier system and the load being trans-
ported ››› .
Always check the roof carrier system weight
and the weight of the load to be transported
and, if necessary, weigh them. Never exceed
the maximum authorised roof load.
If you are using a roof carrier with a lower
weight rating, you cannot transport the maxi-
mum roof load. Do not exceed the maximum
weight limit for the roof carrier given in the
fitting instructions. Distributing a load
Uniformly distribute loads and secure them
correctly
››› .
Check attachments
After fitting the base supports and the roof
carrier system, always check the attachments
after a short trip and at regular intervals. WARNING
Exceeding the maximum authorised roof load
can result in accidents and/or vehicle dam-
age.
● Never surpass the maximum authorised
weight for the roof, the maximum authorised
weight on the axles and the total maximum
authorised weight of the vehicle.
● Never exceed the capacity of the roof carri-
er system even if this is less than the maxi-
mum authorised roof load.
● Secure heavy items as far forward as possi-
ble and, in general, distribute the vehicle
load uniformly. WARNING
Loose and incorrectly secured loads can fall
from the roof carrier system causing acci-
dents and injury.
● Always use suitable ropes and straps in
good condition.
● Always secure loads correctly. 111
Technical specifications
Advice
Operation
Safety
Page 153 of 305
Driving
they flow around the engine more quickly
and efficiently, particularly in cold starts. The
effect is particularly noticeable in vehicles
frequently used for short journeys.
Always check the engine oil level and ob-
serve service intervals (engine oil change in-
tervals).
When purchasing engine oil, always observe
legal requirements and ensure that the oil is
approved by SEAT.
Avoid carrying unnecessary loads
The lighter the vehicle, the more economical
and ecological the driving style. For example,
an additional weight of 100 kg will increase
fuel consumption up to 0.3 l/100 km.
Remove any unnecessary objects or loads
from the vehicle.
Remove optional equipment and
unnecessary accessories
The more aerodynamic the vehicle, the lower
the fuel consumption. Optional equipment
and accessories (such as roof racks or bike
carriers) reduce the aerodynamic benefits of
the vehicle.
Therefore, we recommend you remove all op-
tional and unnecessary equipment and racks,
especially if you intend to drive at high
speeds. Other factors which increase fuel
consumption (examples):
●
Fault in engine management.
● Driving on hills.
● Trailer towing. WARNING
Always adapt your speed and the distance to
the vehicles ahead in line with visibility,
weather conditions, the condition of the road
and the traffic situation. Engine management and
exhaust gas purification
system
Introduction WARNING
The components of the exhaust system reach
very high temperatures. This could cause a
fire.
● Always park your vehicle so that no part of
the exhaust system can come in contact with
flammable materials (such as dried grass).
● Do not apply additional underseal or anti-
corrosion coatings to the exhaust pipes, cata-
lytic converter, heat shields or the diesel par-
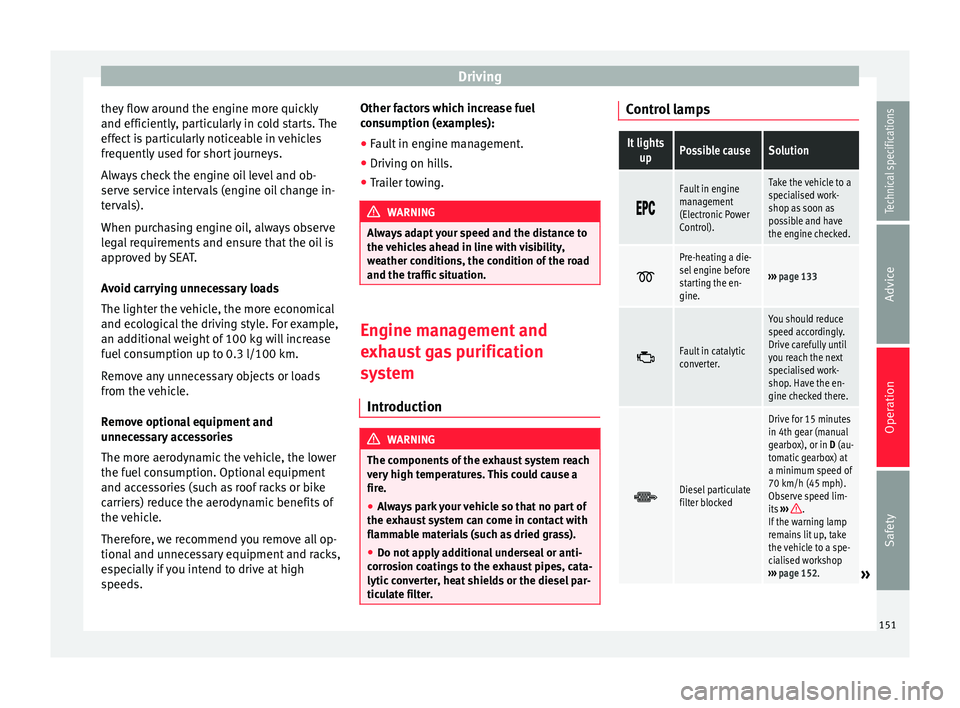
ticulate filter. Control lampsIt lights
upPossible causeSolution
Fault in engine
management
(Electronic Power
Control).Take the vehicle to a
specialised work-
shop as soon as
possible and have
the engine checked.
Pre-heating a die-
sel engine before
starting the en-
gine.
›››
page 133
Fault in catalytic
converter.
You should reduce
speed accordingly.
Drive carefully until
you reach the next
specialised work-
shop. Have the en-
gine checked there.
Diesel particulate
filter blocked
Drive for 15 minutes
in 4th gear (manual
gearbox), or in D (au-
tomatic gearbox) at
a minimum speed of
70 km/h (45 mph).
Observe speed lim-
its
›››
.
If the warning lamp
remains lit up, take
the vehicle to a spe-
cialised workshop
››› page 152.
» 151
Technical specifications
Advice
Operation
Safety
Page 162 of 305
Operation
show it. Therefore, it will not warn you of
these objects. Ignoring the warnings of the
parking sensor system could cause consider-
able damage to the vehicle.
● The bumper sensors may become damaged
or misaligned, for example, when parking.
● To ensure that the system works properly,
the bumper sensors must be kept clean, free
of ice and snow and uncovered.
● When cleaning the sensors with high-pres-
sure or steam cleaning equipment, spray the
sensors briefly at a distance of no less than
10 cm (4 inches). Note
Acoustic sources may lead to erroneous warn-
ings on the parking sensor system, e.g.
rough tarmac, cobbles or the noise of other
vehicles. Parking sensor system*
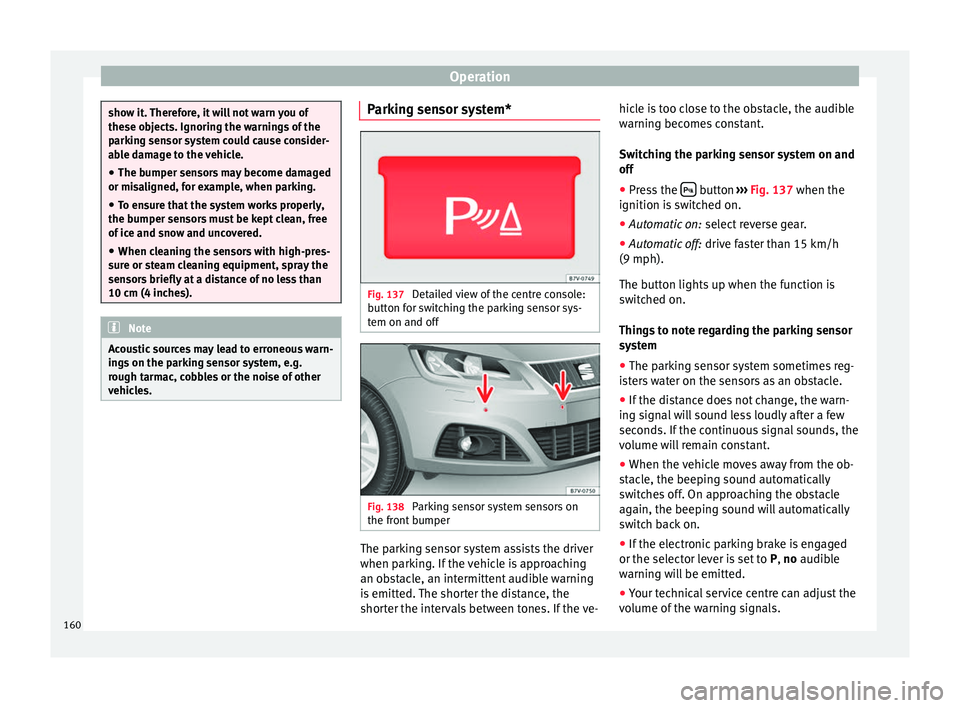
Fig. 137
Detailed view of the centre console:
button for switching the parking sensor sys-
tem on and off Fig. 138
Parking sensor system sensors on
the front bumper The parking sensor system assists the driver
when parking. If the vehicle is approaching
an obstacle, an intermittent audible warning
is emitted. The shorter the distance, the
shorter the intervals between tones. If the ve-hicle is too close to the obstacle, the audible
warning becomes constant.
Switching the parking sensor system on and
off
● Press the button
››› Fig. 137 when the
ignition i s
switched on.
● Automatic on: select reverse gear.
● Automatic off: drive faster than 15 km/h
(9 mph).
The button lights up when the function is
switched on.
Things to note regarding the parking sensor
system
● The parking sensor system sometimes reg-
isters water on the sensors as an obstacle.
● If the distance does not change, the warn-
ing signal will sound less loudly after a few
seconds. If the continuous signal sounds, the
volume will remain constant.
● When the vehicle moves away from the ob-
stacle, the beeping sound automatically
switches off. On approaching the obstacle
again, the beeping sound will automatically
switch back on.
● If the electronic parking brake is engaged
or the selector lever is set to P, no
audible
warning will be emitted.
● Your technical service centre can adjust the
volume of the warning signals.
160