sensor Seat Arona 2018 User Guide
[x] Cancel search | Manufacturer: SEAT, Model Year: 2018, Model line: Arona, Model: Seat Arona 2018Pages: 316, PDF Size: 6.77 MB
Page 139 of 316
Opening and closing
blocked for engine ignition ››
› page 173. In
order to enable engine ignition, the button
on the key inside the vehicle needs to be
pressed.
Automatically disabling sensors
If the vehicle is not locked or unlocked for a
long period of time, the proximity sensors on
the passenger doors are automatically disa-
bled.
If one of the sensor surfaces on the door han-
dles is often activated in an unusual manner
with the vehicle locked (e.g. by the branches
of a bush rubbing against it), all proximity
sensors are disabled for a certain period of
time.
Sensors will again be enabled:
● After a time.
● OR: if the vehicle is unlocked with the
butt
on on the key.
● OR: if the boot is opened.
● OR: if
the vehicle is unlocked manually with
the key
.
Keyless Access temporary disconnection
function*
You can deactivate the vehicle's Keyless Ac-
cess unlocking for a locking and unlocking
cycle. ●
Move the g
ear lever to position P (if the ve-
hicle has automatic gearbox), since other-
wise the vehicle cannot be locked.
● Close the door.
● Push the central locking button on the
remote c
ontrol and touch the locking sensor
surface ››› Fig. 143 B on the driver door han-
dl e onc
e w
ithin the following 5 seconds. Do
not grip the door handle, otherwise the vehi-
cle will not lock. Deactivation is also possible
if the vehicle is locked through the driver’s
door lock.
● To check that the function has been deacti-
vated, w
ait at least 10 seconds, grip and pull
on the door handle. The door should not
open.
The next time the door can only be unlocked
via the remote control or the lock cylinder.
The next time the door is locked/unlocked,
Keyless Access will be active again.
Convenience functions
To close all the electric windows using the
convenience function, keep a finger on the
locking sensor surface B (arrow) of the door
h andl
e f
or a few seconds until the windows
have closed.
The doors opened by touching the sensor
surface of the door handle depend on the
settings that have been activated in the Easy
Connect system with the button and theSETTINGS and
Openin
g and c
lo
sing function but-
t on
s. CAUTION
The sensor surfaces on the door handles
cou l
d engage if hit with a water jet or high
pressure steam if there is a valid vehicle key
in the proximity. If at least one of the electric
windows is open and the sensor surface B (arrow) on the handle is activated continu-
ous
ly
, all windows will close. Note
● If the v
ehicle battery has little or no charge,
or the vehicle key battery is almost or entire-
ly out of charge, you will probably not be able
to lock or unlock the vehicle with the Keyless
Access system. The vehicle can be unlocked
or locked manually.
● To control the proper locking of the vehicle,
the rele
ase function is disabled for approx. 2
seconds.
● If the message Keyless access system
faulty is di
splayed on the screen of the
dash panel, abnormalities may occur in the
operation of the Keyless Access system. Con-
tact a specialised workshop. SEAT recom-
mends visiting a SEAT dealership for this.
● Depending on the function set on the info-
tainment sy
stem for the mirrors, the exterior
mirrors will unfold and the surround lighting
will come on when unlocking the vehicle us-
ing the sensor surface on the driver door han-
dle. » 137
Technical data
Advice
Operation
Emergencies
Safety
Page 140 of 316
Operation
●
If ther e i
s no valid key inside the vehicle or
the system fails to detect one, a warning will
display on the dash panel screen. This could
happen if any other radio frequency signal in-
terferes with the key signal (e.g. from a mo-
bile device accessory) or if the key is covered
by another object (e.g. an aluminium case).
● If the sensors are very dirty, e.g. have a lay-
er of sa
lt, the correct functioning of the sen-
sors on the door handles may be affected. In
this case, clean the vehicle.
● If the vehicle is equipped with an automatic
gearbo
x, it may only be locked in the gear
stick is in position P. Childproof lock
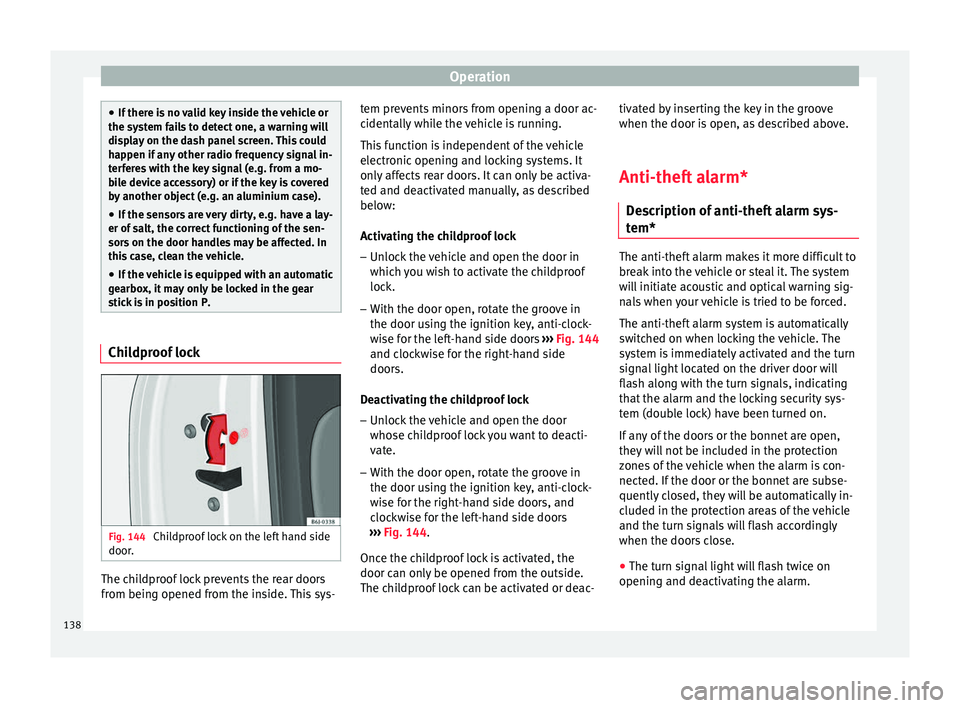
Fig. 144
Childproof lock on the left hand side
door . The childproof lock prevents the rear doors
fr
om bein
g opened fr
om the inside. This sys- tem prevents minors from opening a door ac-
cidental
ly while the vehicle is running.
This function is independent of the vehicle
electronic opening and locking systems. It
only affects rear doors. It can only be activa-
ted and deactivated manually, as described
below:
Activating the childproof lock – Unlock the vehicle and open the door in
which y
ou wish to activate the childproof
lock.
– With the door open, rotate the groove in
the door usin
g the ignition key, anti-clock-
wise for the left-hand side doors ››› Fig. 144
and clockwise for the right-hand side
doors.
Deactivating the childproof lock – Unlock the vehicle and open the door
whose chi
ldproof lock you want to deacti-
vate.
– With the door open, rotate the groove in
the door usin
g the ignition key, anti-clock-
wise for the right-hand side doors, and
clockwise for the left-hand side doors
››› Fig. 144.
Once the childproof lock is activated, the
door can only be opened from the outside.
The childproof lock can be activated or deac- tivated by inserting the key in the groove
when the door is open, a
s described above.
Anti-theft alarm* Des
cription of anti-theft alarm sys-
tem* The anti-theft alarm makes it more difficult to
bre
ak
into the vehicle or steal it. The system
will initiate acoustic and optical warning sig-
nals when your vehicle is tried to be forced.
The anti-theft alarm system is automatically
switched on when locking the vehicle. The
system is immediately activated and the turn
signal light located on the driver door will
flash along with the turn signals, indicating
that the alarm and the locking security sys-
tem (double lock) have been turned on.
If any of the doors or the bonnet are open,
they will not be included in the protection
zones of the vehicle when the alarm is con-
nected. If the door or the bonnet are subse-
quently closed, they will be automatically in-
cluded in the protection areas of the vehicle
and the turn signals will flash accordingly
when the doors close.
● The turn signal light will flash twice on
opening and de activ
ating the alarm.
138
Page 141 of 316
Opening and closing
● The t urn s
ign
al light will flash once on clos-
ing and activating the alarm.
When does the system trigger an alarm?
The system triggers an alarm, if the following
unauthorised actions are carried out when
the vehicle is locked:
● Mechanical opening of the vehicle with the
vehicl
e key without switching on the ignition
in the next 15 seconds (in certain markets,
such as the Netherlands, the alarm is activa-
ted immediately).
● A door is opened.
● Opening the bonnet.
● The rear lid is opened.
● Ignition switched on with a non-validated
key.
● Mo
vements in the driving compartment
(vehicl
es with a volume sensor).
● Towing of the vehicle 1)
.
● Vehicle tilt angle 1)
.
● Undue manipulation of the alarm.
● Battery handling.
In this c
ase, the acoustic signals will go off
and the turn signal will flash for approximate-
ly 30 seconds. This cycle may be repeated up
to 10 times depending on the country. Opening all the doors in manual mode
In vehic
les without an alarm, when opening
the driver door manually, all doors are
opened.
How to switch the alarm off
To deactivate the anti-theft alarm, turn the
key in the opening direction, open the door
and switch the ignition on, or press the un-
lock button on the remote control.
In vehicles equipped with an anti-theft alarm
system, you have 15 seconds to insert the
key in the ignition lock and activate the igni-
tion if the vehicle is opened using the driver
door key.
Otherwise, the alarm will trigger for 30 sec.
and the ignition will be blocked. Note
● Aft er 28 d
ays, the indicator light will be
switched off to prevent the battery from
draining if the vehicle has been left parked
for a long period of time. The alarm system
remains activated.
● The alarm will trigger again if attempts are
made t
o open another protection zone.
● The alarm system can be activated or deac-
tivated u
sing the radio frequency remote con-
trol ››› page 130. ●
The anti-theft a
larm is not activated when
the vehicle is locked from within using the
central locking button .
● If the vehicle battery is run down or flat
then the anti-theft a
larm will not operate cor-
rectly.
● Vehicle monitoring remains active even if
the batter
y is disconnected or not working for
any reason.
● The alarm is triggered immediately if one of
the batter
y cables is disconnected while the
alarm system is active. Vehicle interior monitoring and anti-
t
o
w sy
stem* Monitoring or control function incorporated
in the anti-thef
t
al
arm* which detects unau-
thorised vehicle entry by means of ultra-
sound.
Activation
– It is automatically switched on when the
anti-theft al
arm is activated.
Deactivation – Open the vehicle with the key, either me-
chanic
ally or by pressing the button on
the remote control. If the vehicle is opened »1)
With vehicles fitted with a tow-away protection
139
Technical data
Advice
Operation
Emergencies
Safety
Page 142 of 316
Operation
mechanically, the time period from when
the door i s
opened u
ntil the key is inserted
into the contact should not exceed 15 sec-
onds, otherwise the alarm will be triggered.
– Press the button on the remote c
ontrol
twice. The volumetric sensor and tilt sen-
sors will be deactivated. The alarm system
remains activated.
The vehicle interior monitoring and the anti-
tow system are automatically switched on
again next time the vehicle is locked.
The vehicle interior monitoring and anti-tow
sensor (tilt sensor) are automatically switch-
ed on when the anti-theft alarm is switched
on. In order to activate it, all the doors and
the rear lid must be closed.
If you wish to switch off the vehicle interior
monitoring and the anti-tow system, it must
be done each time that the vehicle is locked;
if not, they will be automatically switched on.
The vehicle interior monitoring and the anti-
tow system should be switched off if animals
are left inside the locked vehicle (otherwise,
their movements will trigger the alarm) or
when, for example, the vehicle is transported
or has to be towed with only one axle on the
ground. False alarms
Interior monitorin
g will only operate correctly
if the vehicle is completely closed. Please ob-
serve related legal requirements.
The following cases may cause a false alarm:
● Open windows (partially or fully),
● Movement of objects inside the vehicle,
such a
s loose papers, items hanging from
the rear vision mirror (air fresheners), etc. Note
● If the v
ehicle is relocked and the alarm is
activated without the volumetric sensor func-
tion, relocking will activate the alarm with all
its functions, except the volumetric sensor.
This function is reactivated when the alarm is
switched on again, unless it is deliberately
switched off.
● If the alarm has been triggered by the volu-
metric sensor
, this will be indicated by a
flashing of the warning lamp on the driver
door when the vehicle is opened. The flash is
different to the flash indicating the alarm is
activated.
● The vibration of a mobile phone left inside
the vehic
le may cause the vehicle interior
monitoring alarm to trigger, as both sensors
react to movements and shakes inside the ve-
hicle.
● If on activating the alarm, any door or the
rear lid i
s open, only the alarm will be activa-
ted. The vehicle interior monitoring and the anti-tow system will only be activated once
al
l
the doors are closed (including the rear
lid). Deactivating the vehicle interior moni-
torin
g and anti-t
ow system* When the vehicle is locked, the alarm will be
trigg
er
ed if movements are detected in the
interior (e.g. by animals) or if the vehicle's in-
clination is changed (e.g. during transport).
You can prevent the alarm from being trig-
gered accidentally by switching off the vehi-
cle interior monitoring and/or tow-away pro-
tection.
– To switch off the interior monitoring and
to w-
away protection, switch off the ignition
and, using the Infotainment system, select: button >
S
ET
TINGS function button >
Openin g and c
lo
sing > Central locking >
Switch off alarm.
– When the vehicle is locked now, the vehicle
interior monitorin
g and the tow-away pro-
tection are switched off until the next time
the door is opened.
If the anti-theft security system (Safelock)*
››› page 133 is switched off, the vehicle interi-
or monitoring and the tow-away protection
are automatically switched off.
140
Page 146 of 316
Operation
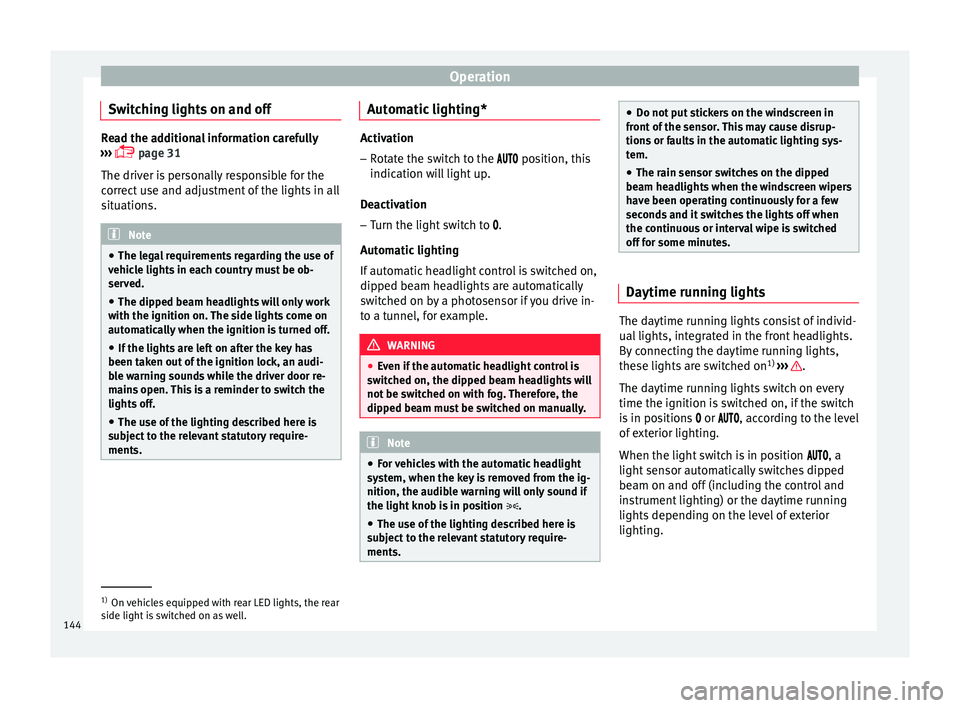
Switching lights on and off Read the additional information carefully
›› ›
page 31
The driver is personally responsible for the
correct use and adjustment of the lights in all
situations. Note
● The le g
al requirements regarding the use of
vehicle lights in each country must be ob-
served.
● The dipped beam headlights will only work
with the ignition on. The s
ide lights come on
automatically when the ignition is turned off.
● If the lights are left on after the key has
been taken out
of the ignition lock, an audi-
ble warning sounds while the driver door re-
mains open. This is a reminder to switch the
lights off.
● The use of the lighting described here is
subj
ect to the relevant statutory require-
ments. Automatic lighting*
Activation
– Rotate the switch to the po
sition, this
indication will light up.
Deactivation
– Turn the light switch to .
Automatic
lighting
If automatic headlight control is switched on,
dipped beam headlights are automatically
switched on by a photosensor if you drive in-
to a tunnel, for example. WARNING
● Ev en if
the automatic headlight control is
switched on, the dipped beam headlights will
not be switched on with fog. Therefore, the
dipped beam must be switched on manually. Note
● For v
ehicles with the automatic headlight
system, when the key is removed from the ig-
nition, the audible warning will only sound if
the light knob is in position .
● The use of the lighting described here is
subj
ect to the relevant statutory require-
ments. ●
Do not p ut
stickers on the windscreen in
front of the sensor. This may cause disrup-
tions or faults in the automatic lighting sys-
tem.
● The rain sensor switches on the dipped
beam hea
dlights when the windscreen wipers
have been operating continuously for a few
seconds and it switches the lights off when
the continuous or interval wipe is switched
off for some minutes. Daytime running lights
The daytime running lights consist of individ-
ual
lights, int
e
grated in the front headlights.
By connecting the daytime running lights,
these lights are switched on 1)
››› .
The d a
ytime ru
nning lights switch on every
time the ignition is switched on, if the switch
is in positions or , according to the level
of exterior lighting.
When the light switch is in position , a
light sensor automatically switches dipped
beam on and off (including the control and
instrument lighting) or the daytime running
lights depending on the level of exterior
lighting. 1)
On vehicles equipped with rear LED lights, the rear
side light i
s switched on as well.
144
Page 148 of 316
Operation
are already on. The warning lamp
then
come s
on in the instrument panel.
● The headlight flasher come
s on for as long
as you pull the lever – even if no other lights
are switched on. The warning lamp then
comes on in the instrument panel.
● When the parking ligh
ts are switched on,
the headlight and the tail light on the corre-
sponding side of the vehicle light up. The
parking lights will only work with the ignition
off. If said light is on, an audible warning will
be emitted while the driver door is open.
● If the turn signal lever is left on after the
key h
as been taken out of the ignition lock,
an acoustic signal sounds when the driver
door is opened. This is intended as a remind-
er to switch off the turn signal, unless you
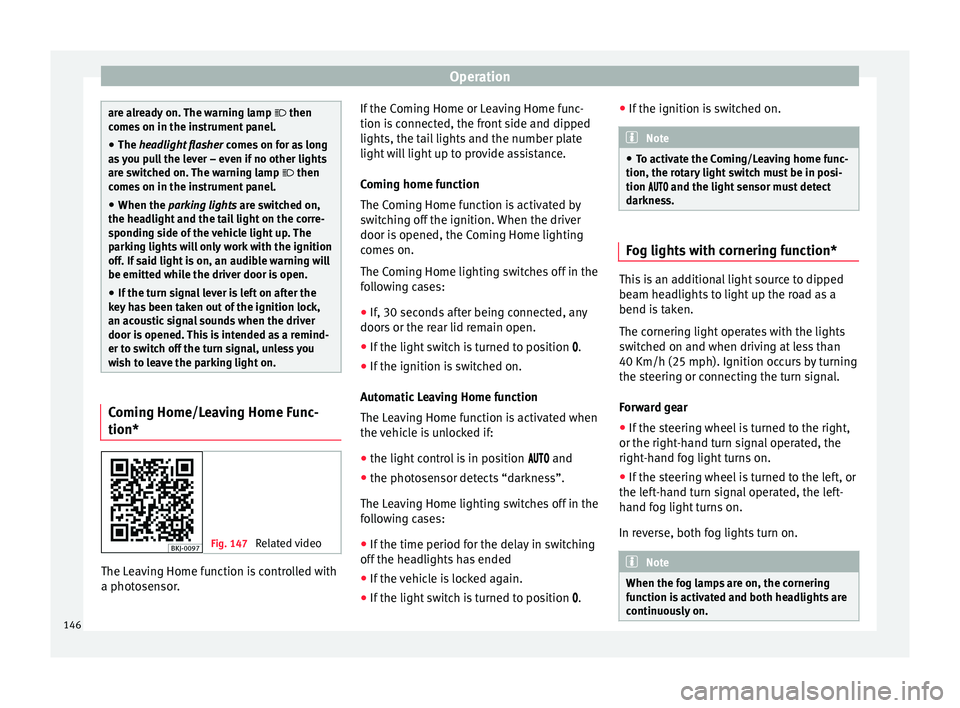
wish to leave the parking light on. Coming Home/Leaving Home Func-
tion*
Fig. 147
Related video The Leaving Home function is controlled with
a phot
o
sen
sor. If the Coming Home or Leaving Home func-
tion is c
onnected, the front side and dipped
lights, the tail lights and the number plate
light will light up to provide assistance.
Coming home function
The Coming Home function is activated by
switching off the ignition. When the driver
door is opened, the Coming Home lighting
comes on.
The Coming Home lighting switches off in the
following cases:
● If, 30 seconds after being connected, any
doors or the r
ear lid remain open.
● If the light switch is turned to position .
● If the ignition is switched on.
Automatic
Leaving Home function
The Leaving Home function is activated when
the vehicle is unlocked if:
● the light control is in position and
● the photo
sensor detects “darkness”.
The Leav
ing Home lighting switches off in the
following cases:
● If the time period for the delay in switching
off the hea
dlights has ended
● If the vehicle is locked again.
● If the light switch is turned to position .●
If the ignition is
switched on. Note
● To activ at
e the Coming/Leaving home func-
tion, the rotary light switch must be in posi-
tion and the light sensor must detect
darkness. Fog lights with cornering function*
This is an additional light source to dipped
beam he
a
dlights to light up the road as a
bend is taken.
The cornering light operates with the lights
switched on and when driving at less than
40 Km/h (25 mph). Ignition occurs by turning
the steering or connecting the turn signal.
Forward gear
● If the steering wheel is turned to the right,
or the right-h and t
urn signal operated, the
right-hand fog light turns on.
● If the steering wheel is turned to the left, or
the left
-hand turn signal operated, the left-
hand fog light turns on.
In reverse, both fog lights turn on. Note
When the fog lamps are on, the cornering
fu nction i
s activated and both headlights are
continuously on. 146
Page 152 of 316
Operation
could otherwise freeze on the windscreen and
ob
s
cure your view of the road.
● Always note the corresponding warnings
›››
page 73. WARNING
The rain sensor* may not detect enough rain
t o sw it
ch on the wipers.
● If necessary, switch on the wipers manually
when water on the w
indscreen obstructs visi-
bility. CAUTION
In icy conditions, always check that the wind-
sc r
een wipers and the window wiper are not
frozen. If you switch on the windscreen wip-
ers when the wiper blades are frozen to the
windscreen, you could damage both the wip-
er blades and the wiper motor. Note
● The wiper s
and washers will work only
when the ignition is switched on.
● The heat output of the heated jets* is con-
trol
led automatically when the ignition is
switched on, depending upon the outside
temperature.
● In certain versions of vehicles with alarms,
the winds
creen wiper will only work in inter-
val/rain sensor mode when the ignition is on
and the bonnet closed. ●
When the inter v
al wipe function is on, the
intervals are directly proportional to the
speed. This way, the higher the vehicle speed
the shorter the intervals.
● If you stop the vehicle with the windscreen
wiper in pos
ition 1 or 2, it will automatically
change to a lower position speed. The set
speed will be resumed when the vehicle pulls
away.
● The windscreen will be wiped again after
appro
ximately five seconds once the “auto-
matic wash/wipe system” has been activa-
ted, provided the vehicle is moving (drip func-
tion). If you activate the wipers less than 3
seconds after the drip function, a new wash
sequence will begin without performing the
last wipe. For the “drip” function to work
again, you have to turn the ignition off and
then on again.
● Do not put stickers on the windscreen in
front of
the rain sensor*. This may cause sen-
sor disruption or faults.
● Depending on the version of the model,
when you en
gage reverse gear and with the
headlight wiper activated, this can start a
wipe. Rear view mirrors
Int erior mirr or It is dangerous to drive if you cannot see
c
le
arly through the rear window. Interior mirror with automatic anti-dazzle
function*
The anti-d
azzle function is activated every
time the ignition is switched on.
When the anti-dazzle function is enabled, the
interior rear vision mirror will darken auto-
matically according to the amount of light it
receives. The anti-dazzle function is cancel-
led if reverse gear is engaged. Note
● The autom atic
anti-dazzle function will only
work properly if the sun blind* for the rear
window is retracted and there are no other
objects preventing light from reaching the in-
terior rear vision mirror.
● If you have to stick any type of sticker on
the winds
creen, do not do so in front of the
sensors. Doing so could prevent the anti-daz-
zle function from working well or even from
working at all. Folding in the exterior mirrors man-
ua
l
ly The exterior mirrors of the vehicle may be fol-
ded in. F
or thi
s, pr
ess the mirror housing to-
wards the vehicle.
150
Page 174 of 316
Operation
● Adju s
t
the vents so that the air flow is di-
rected slightly upwards.
Change between degrees Centigrade and de-
grees Fahrenheit
The units of degrees can be changed via the
Easy Connect system using the button
and the f u
nction b
utton SETTINGS >
Units > Temperature .
Automatic mode
Automatic mode is used to maintain a con-
stant temperature and demist the windows
inside the vehicle.
● Set a interior temperature between +16°C
(+64°F) and +29°C (+84°F).
● Adjus
t the vents so that the air flow is di-
rected s
lightly upwards.
● Press the butt
on, AUTO is displayed on
the screen.
Automatic mode is switched off by pressing
the air distribution buttons or increasing or
decreasing the blower speed. However, the
temperature remains regulated.
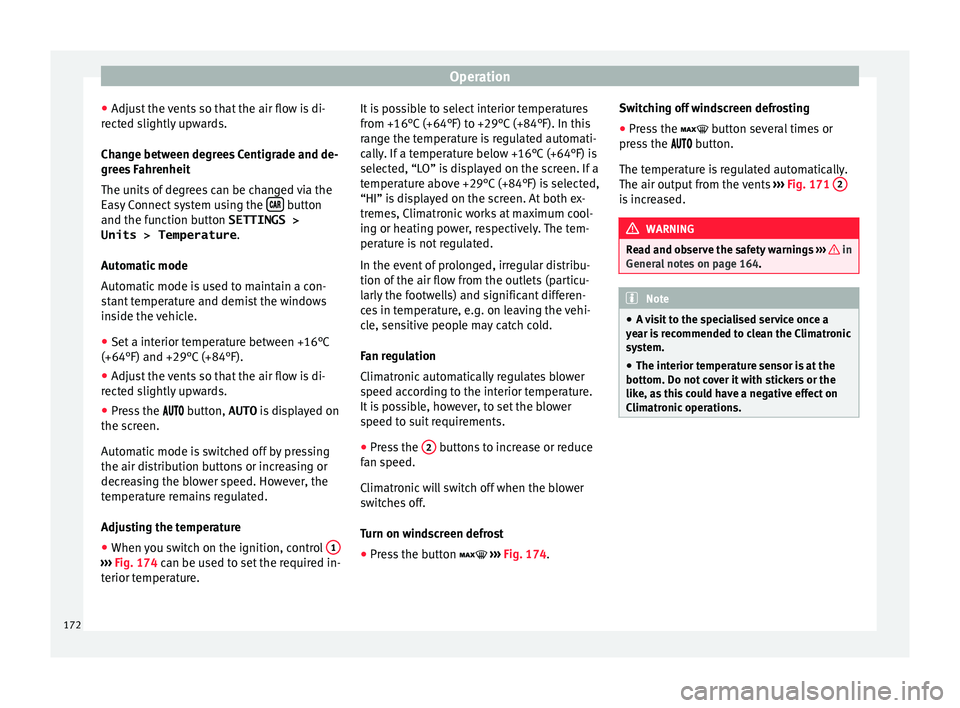
Adjusting the temperature
● When you switch on the ignition, control 1›››
Fig. 174 can be u sed t
o set the required in-
terior temperature. It is possible to select interior temperatures
from +16°C
(+64°F) t
o +29°C (+84°F). In this
range the temperature is regulated automati-
cally. If a temperature below +16°C (+64°F) is
selected, “LO” is displayed on the screen. If a
temperature above +29°C (+84°F) is selected,
“HI” is displayed on the screen. At both ex-
tremes, Climatronic works at maximum cool-
ing or heating power, respectively. The tem-
perature is not regulated.
In the event of prolonged, irregular distribu-
tion of the air flow from the outlets (particu-
larly the footwells) and significant differen-
ces in temperature, e.g. on leaving the vehi-
cle, sensitive people may catch cold.
Fan regulation
Climatronic automatically regulates blower
speed according to the interior temperature.
It is possible, however, to set the blower
speed to suit requirements.
● Press the 2 buttons to increase or reduce
f an s
peed.
C
limatronic will switch off when the blower
switches off.
Turn on windscreen defrost
● Press the button ›››
Fig. 174. Switching off windscreen defrosting
●
Press the button sev
eral times or
press the button.
The temperature is regulated automatically.
The air output from the vents ››› Fig. 171 2 is increased.
WARNING
Read and observe the safety warnings ›››
in
Genera l
notes on page 164. Note
● A v i
sit to the specialised service once a
year is recommended to clean the Climatronic
system.
● The interior temperature sensor is at the
bottom. Do not c
over it with stickers or the
like, as this could have a negative effect on
Climatronic operations. 172
Page 178 of 316
Operation
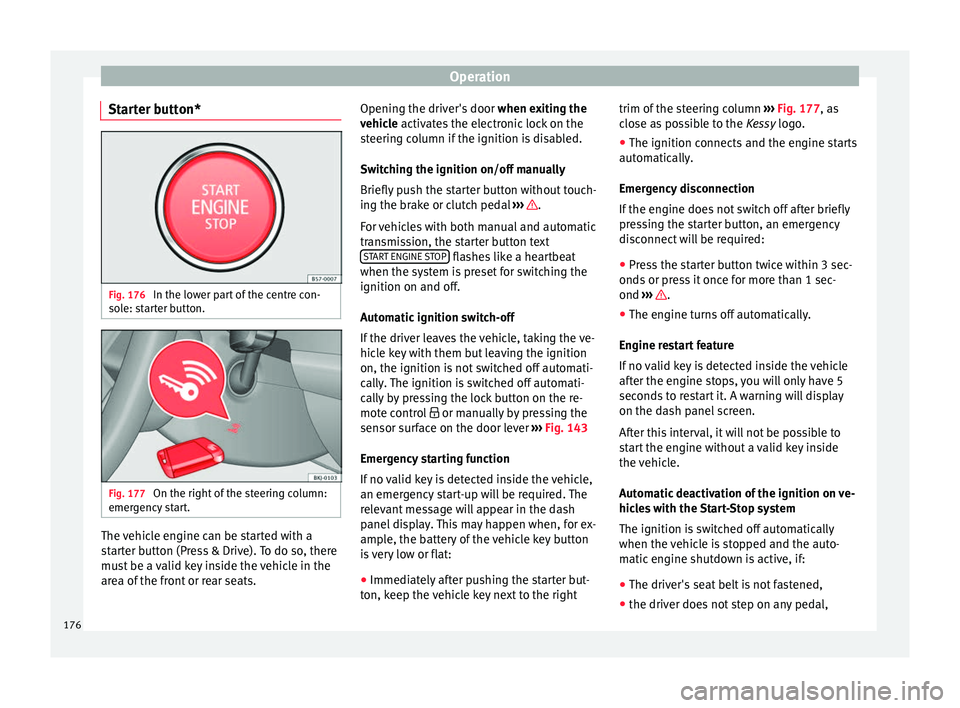
Starter button* Fig. 176
In the lower part of the centre con-
so l
e: s
tarter button. Fig. 177
On the right of the steering column:
emer gency
start. The vehicle engine can be started with a
s
t
ar
ter button (Press & Drive). To do so, there
must be a valid key inside the vehicle in the
area of the front or rear seats. Opening the driver's door
when exitin
g the
vehicle activates the electronic lock on the
steering column if the ignition is disabled.
Switching the ignition on/off manually
Briefly push the starter button without touch-
ing the brake or clutch pedal ››› .
F or
v
ehicles with both manual and automatic
transmission, the starter button text START ENGINE STOP flashes like a heartbeat
when the sy s
t
em is preset for switching the
ignition on and off.
Automatic ignition switch-off
If the driver leaves the vehicle, taking the ve-
hicle key with them but leaving the ignition
on, the ignition is not switched off automati-
cally. The ignition is switched off automati-
cally by pressing the lock button on the re-
mote control or manually by pressing the
sensor surface on the door lever ››› Fig. 143
Emergency starting function
If no valid key is detected inside the vehicle,
an emergency start-up will be required. The
relevant message will appear in the dash
panel display. This may happen when, for ex-
ample, the battery of the vehicle key button
is very low or flat:
● Immediately after pushing the starter but-
ton, k eep the
vehicle key next to the right trim of the steering column
›››
Fig. 177, as
close as possible to the Kessy logo.
● The ignition connects and the engine starts
automatic
ally.
Emergency disconnection
If the engine does not switch off after briefly
pressing the starter button, an emergency
disconnect will be required:
● Press the starter button twice within 3 sec-
onds or pr
ess it once for more than 1 sec-
ond ››› .
● The engine turns off automatically.
En gine r
e
start feature
If no valid key is detected inside the vehicle
after the engine stops, you will only have 5
seconds to restart it. A warning will display
on the dash panel screen.
After this interval, it will not be possible to
start the engine without a valid key inside
the vehicle.
Automatic deactivation of the ignition on ve-
hicles with the Start-Stop system
The ignition is switched off automatically
when the vehicle is stopped and the auto-
matic engine shutdown is active, if:
● The driver's seat belt is not fastened,
● the driver does not step on any pedal,
176
Page 186 of 316
Operation
the
button and the
S
ET
TINGS and
E SC
System function buttons.
WARNING
You should switch on the ESC Sport mode on-
ly if the tr
affic conditions and your driving
ability allow you to do so safely: risk of skid-
ding!
● With ESC in Sport mode, the stabilising
function w
ill be limited to allow for a sportier
drive. The driving wheels could spin and the
vehicle could skid. Note
If the ASR is disconnected or the ESC’s Sport
mode is sel
ected, cruise control* will be
switched off. Electronic differential lock (EDS)*
The EDL operates along with the ABS in vehi-
c
l
e
s equipped with Electronic Stability Con-
trol (ESC)*.
EDL helps the vehicle to start moving, accel-
erate and climb a gradient in slippery condi-
tions where this may otherwise be difficult or
even impossible.
It uses the ABS sensors to monitor the speed
of the driven wheels.
At speeds of up to approximately 80 km/h
(50 mph), it is able to balance out differences in the speed of the driven wheels of approxi-
mately
100 rpm/min caused by a partially
slippery road surface. It does this by braking
the wheel which has lost traction and distrib-
uting more driving force to the other driven
wheel via the differential.
To prevent the disc brake of the braking
wheel from overheating, the EDL cuts out au-
tomatically if subjected to excessive loads.
The vehicle will continue to function normally
without EDL. For this reason, the driver is not
informed that the EDL has been switched off.
The EDL will switch on again automatically
when the brake has cooled down.
Control lamp
A malfunction in the EDL is indicated by the
ESC control lamp . Take the vehicle to a
specialised workshop as soon as possible. WARNING
● When acc el
erating on a slippery surface,
for example on ice and snow, press the accel-
erator carefully. Despite EDL, the driven
wheels may start to spin. This could impair
the vehicle's stability.
● Always adapt your driving style to suit road
conditions
and the traffic situation. Do not let
the extra safety afforded by EDL tempt you in-
to taking any risks when driving, this can
cause accidents. CAUTION
Modifications to the vehicle (e.g. to the en-
gine, the brak e sy
stem, running gear or any
components affecting the wheels and tyres)
could affect the efficiency of the EDL
››› page 259. Hydraulic Brake Assist (HBA)*
The function (Hydraulic Brake Assist HBA) is
only
inc
luded in vehicles with ESC.
In an emergency, most drivers brake in time,
but not with maximum force. This results in
unnecessarily long braking distances.
This is when the brake assist system comes
into action. When pressing the brake pedal
rapidly, the assistant interprets it as an emer-
gency. It very quickly builds up the full brake
pressure so that the ABS can be activated
more quickly and efficiently, thus reducing
braking distance.
Do not reduce the pressure on the brake ped-
al, since the brake assist system switches off
automatically as soon as you release the
brake.
Automatic hazard warning lights activation
The brake lights flash automatically to indi-
cate that the vehicle is braking suddenly or in
an emergency situation. If the emergency
braking continues until the vehicle comes to
184