oil Seat Ateca 2017 User Guide
[x] Cancel search | Manufacturer: SEAT, Model Year: 2017, Model line: Ateca, Model: Seat Ateca 2017Pages: 328, PDF Size: 6.36 MB
Page 168 of 328

Operation
WARNING
● Nev er ru
n the engine in confined spaces, as
the exhaust gases are poisonous. CAUTION
Avoid high engine speeds, full throttle and
e xtr
eme load conditions until the engine has
reached its normal operating temperature,
otherwise this can damage the engine. For the sake of the environment
Do not warm up the engine by idling it. You
shou l
d drive off as soon as you start the en-
gine. This will help avoid unnecessary ex-
haust emissions. Note
● If it
is difficult to turn the ignition key to
the position 1 , turn the steering wheel to
both s ide
s to release the steering lock.
● When starting from cold, the engine may be
a little noi
sy for the first few seconds until oil
pressure has built up in the hydraulic valve
lifters. This is quite normal, and no cause for
concern.
● If the vehicle battery is disconnected and
rec
onnected, the key must remain in the posi-
tion 1 for around 5 seconds before starting
up .
● V
ehicles with automatic gearbox: after
swit
ching off the ignition, you can only re-
move the ignition key if the selector lever is in position “P” (parking lock). Next, the se-
l
ect
or lever is locked. Switching off the engine with the key
Switching off the engine
– Stop the vehicle.
– Turn the ignition key to position 1 ›››
Fig. 163.
En g
aging the steering wheel lock
In vehicles with automatic gearbox, the igni-
tion key can only be removed when the selec-
tor lever is in position P.
– Remove the key from the ignition in posi-
tion 1
› ›
›
Fig. 163 ››› .
– Turn the steering wheel until you hear it en-
gag
e.
Possible vehicle theft is prevented with the
steering lock engaged. WARNING
● Nev er sw
itch the engine off until the vehi-
cle is stationary. The brake servo and power
steering functions will not be completely cov-
ered under warranty. More force may also be
needed to turn the steering wheel or to brake.
As you cannot steer and brake in the normal
manner, there is a greater risk of accidents
and serious injury. ●
Nev er r
emove the key from the ignition if
the vehicle is in motion. Otherwise, the steer-
ing could suddenly lock, making it impossible
to steer the vehicle: risk of accident!
● Always take the key with you when you
le
ave the vehicle. This is particularly impor-
tant if there are children in the vehicle, as
they might otherwise be able to start the en-
gine or use power-operated equipment (e.g.
the electric windows), which could cause in-
juries. CAUTION
If the engine has been running under high
lo a
d for a long time, there is a risk of heat
building up in the engine compartment after
it has been switched off; this could cause en-
gine damage. For this reason, you should idle
the engine for approximately 2 minutes be-
fore you switch it off. Note
● Af t
er the engine is switched off the radiator
fan may run on for up to 10 minutes, even if
the ignition is switched off. It is also possible
that the fan turns itself on once more if the
coolant temperature increases due to the
heat accumulated in the engine compartment
or due to its prolonged exposure to solar ra-
diation.
● If the vehicle is stopped and the Start-Stop
sys
tem* switches off the engine, the ignition 166
Page 175 of 328
Driving
●
Bef
ore driving down a long, steep gradient,
it is advisable to reduce speed and select a
lower gear. This makes use of engine braking
and relieves the brakes. If you still have to
use the brakes, it is better to brake firmly at
intervals than to apply the brakes continu-
ously. Note
● If the br
ake servo is out of action, for exam-
ple when the car is being towed, you will
have to press the brake pedal considerably
harder than normal to make up for the lack of
servo assistance.
● If you wish to equip the vehicle with acces-
sories
such as a front spoiler or wheel covers,
it is important that the flow of air to the front
wheels is not obstructed, otherwise the
brakes can overheat. Front assist system
Electronic stability control (ESC)
The E
SC
helps to improve safety. It reduces
the tendency to skid and improves the stabil-
ity and roadholding of the vehicle. The ESC
detects critical handling situations, such as
vehicle understeer or oversteer, or wheelspin
on the driving wheels. It stabilises the vehi-
cle by braking individual wheels or by reduc-
ing the engine torque. The warning lamp will flash on the instrument panel when the ESC
is
intervening .
The ESC includes the anti-lock brake system
(ABS), the front assist system (HBA), the trac-
tion control system (ASR), electronic differen-
tial lock (EDS), electronic torque control
(XDS) and tractor-trailer sway mitigation*.
ESC also helps stabilise the vehicle by chang-
ing the torque.
Anti-lock brake system (ABS)
ABS prevents the wheels from locking up un-
der braking until the vehicle has reached a
virtual standstill. You can continue to steer
the vehicle even when the brakes are on full.
Keep your foot on the brake pedal and do not
pump the brakes. You will feel the brake ped-
al pulsate while the ABS is working.
Front assist system (HBA)
The brake assist system can reduce the re-
quired braking distance. The braking force is
automatically boosted if you press the brake
pedal quickly in an emergency. You must
keep pressing the brake pedal until the dan-
ger has passed.
Traction control system (ASR)
In the event of wheelspin, the traction control
system reduces the engine torque to match
the amount of grip available. This helps the car to start moving, accelerate or climb a gra-
dient.
El
ectronic differential lock (EDL)
When the EDL detects wheelspin, it brakes
the spinning wheel and directs the power to
the other driven wheel. This function is active
up to approximately 100 km/h (62 mph).
To prevent the disc brake of the braked wheel
from overheating, the EDL cuts out automati-
cally if subjected to excessive loads. The ve-
hicle can still be driven. The EDL will switch
on again automatically when the brake has
cooled down.
Tractor-trailer sway mitigation*
If the vehicle is pulling a trailer, it will control
the following: Tractor-trailers tend to sway.
When the swaying of the trailer is felt by the
vehicle and detected by the ESC, it will auto-
matically brake the towing vehicle within the
limits of the system and mitigate the sway.
Tractor-trailer sway mitigation is not available
in all countries.
Electronic torque management (XDS)
When taking a curve, the driveshaft differen-
tial mechanism allows the outer wheel to turn
at a higher speed than the inner wheel. In
this way, the wheel that is turning faster (out-
er wheel) receives less drive torque than the
inner wheel. This may mean that in certain »
173
Technical data
Advice
Operation
Emergencies
Safety
Page 202 of 328
Operation
WARNING
Observe the safety warnings ›› › in Warning
and c ontr
ol lamps on page 107. Note
When the ACC is connected, the indications
on the in s
trument panel screen may be con-
cealed by warnings from other functions,
such as an incoming call. Radar sensor
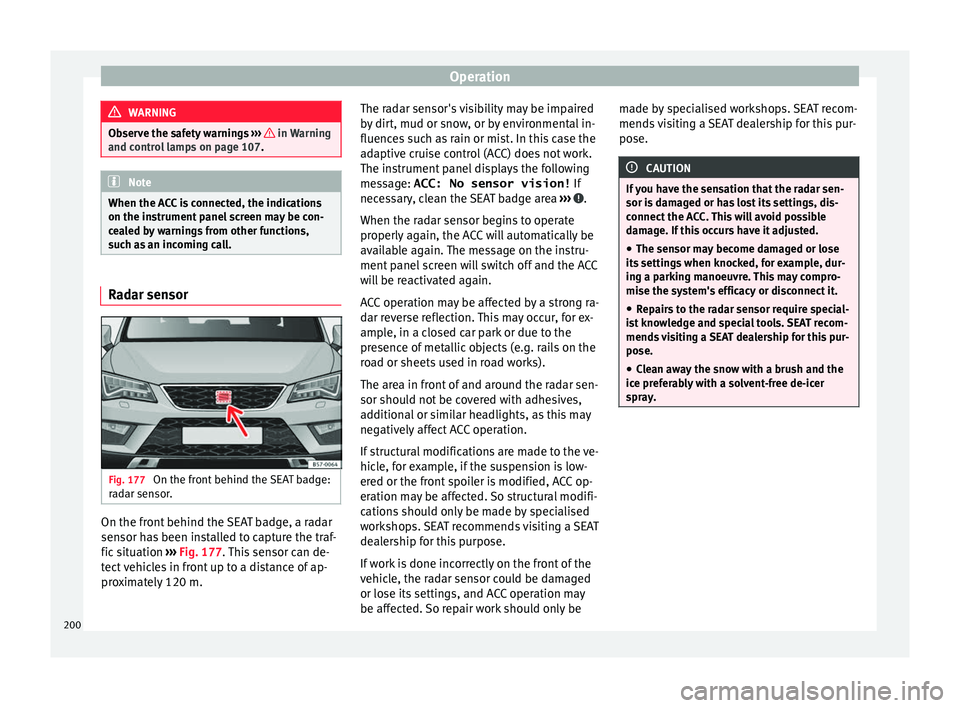
Fig. 177
On the front behind the SEAT badge:
r a
dar sensor. On the front behind the SEAT badge, a radar
sen
sor h
as been installed to capture the traf-
fic situation ›››
Fig. 177. This sensor can de-
tect vehicles in front up to a distance of ap-
proximately 120 m. The radar sensor's visibility may be impaired
by
dirt, mud or snow, or by environmental in-
fluences such as rain or mist. In this case the
adaptive cruise control (ACC) does not work.
The instrument panel displays the following
message: ACC: No sensor vision! If
necessary, clean the SEAT badge area ››› .
When the r a
dar sensor begins to operate
properly again, the ACC will automatically be
available again. The message on the instru-
ment panel screen will switch off and the ACC
will be reactivated again.
ACC operation may be affected by a strong ra-
dar reverse reflection. This may occur, for ex-
ample, in a closed car park or due to the
presence of metallic objects (e.g. rails on the
road or sheets used in road works).
The area in front of and around the radar sen-
sor should not be covered with adhesives,
additional or similar headlights, as this may
negatively affect ACC operation.
If structural modifications are made to the ve-
hicle, for example, if the suspension is low-
ered or the front spoiler is modified, ACC op-
eration may be affected. So structural modifi-
cations should only be made by specialised
workshops. SEAT recommends visiting a SEAT
dealership for this purpose.
If work is done incorrectly on the front of the
vehicle, the radar sensor could be damaged
or lose its settings, and ACC operation may
be affected. So repair work should only be made by specialised workshops. SEAT recom-
mends
visiting a SEAT dealership for this pur-
pose. CAUTION
If you have the sensation that the radar sen-
sor i s
damaged or has lost its settings, dis-
connect the ACC. This will avoid possible
damage. If this occurs have it adjusted.
● The sensor may become damaged or lose
its
settings when knocked, for example, dur-
ing a parking manoeuvre. This may compro-
mise the system's efficacy or disconnect it.
● Repairs to the radar sensor require special-
is
t knowledge and special tools. SEAT recom-
mends visiting a SEAT dealership for this pur-
pose.
● Clean away the snow with a brush and the
ice pr
eferably with a solvent-free de-icer
spray. 200
Page 211 of 328
Driver assistance systems
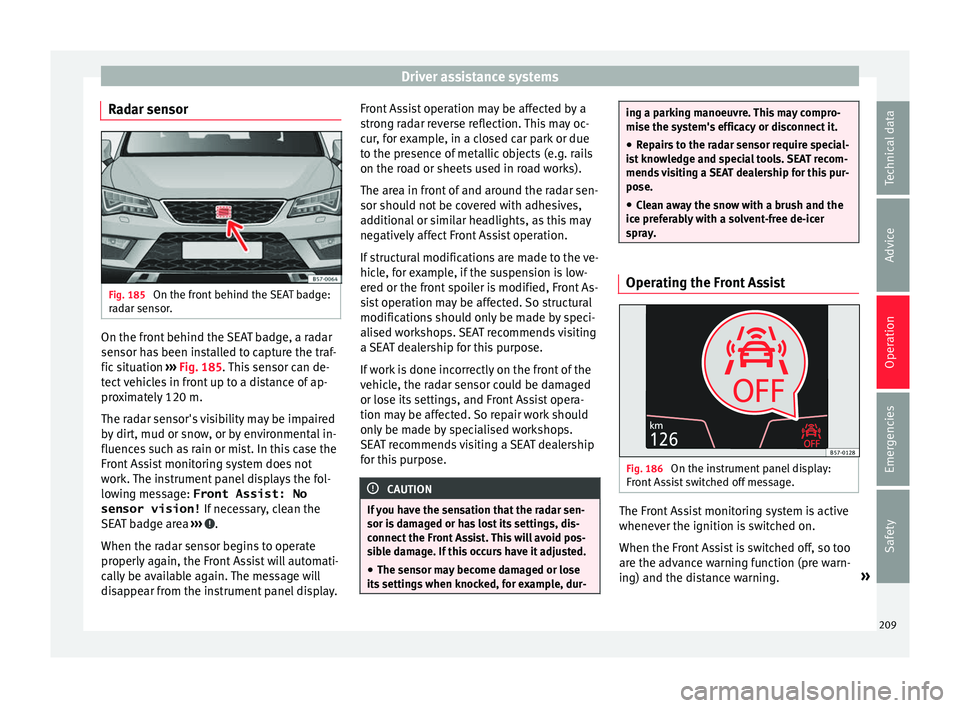
Radar sensor Fig. 185
On the front behind the SEAT badge:
r a
dar sensor. On the front behind the SEAT badge, a radar
sen
sor h
as been installed to capture the traf-
fic situation ››› Fig. 185. This sensor can de-
tect vehicles in front up to a distance of ap-
proximately 120 m.
The radar sensor's visibility may be impaired
by dirt, mud or snow, or by environmental in-
fluences such as rain or mist. In this case the
Front Assist monitoring system does not
work. The instrument panel displays the fol-
lowing message: Front Assist: No sensor vision! If necessary, clean the
SEAT badge area ››› .
When the r a
dar sensor begins to operate
properly again, the Front Assist will automati-
cally be available again. The message will
disappear from the instrument panel display. Front Assist operation may be affected by a
str
ong radar reverse reflection. This may oc-
cur, for example, in a closed car park or due
to the presence of metallic objects (e.g. rails
on the road or sheets used in road works).
The area in front of and around the radar sen-
sor should not be covered with adhesives,
additional or similar headlights, as this may
negatively affect Front Assist operation.
If structural modifications are made to the ve-
hicle, for example, if the suspension is low-
ered or the front spoiler is modified, Front As-
sist operation may be affected. So structural
modifications should only be made by speci-
alised workshops. SEAT recommends visiting
a SEAT dealership for this purpose.
If work is done incorrectly on the front of the
vehicle, the radar sensor could be damaged
or lose its settings, and Front Assist opera-
tion may be affected. So repair work should
only be made by specialised workshops.
SEAT recommends visiting a SEAT dealership
for this purpose. CAUTION
If you have the sensation that the radar sen-
sor i s
damaged or has lost its settings, dis-
connect the Front Assist. This will avoid pos-
sible damage. If this occurs have it adjusted.
● The sensor may become damaged or lose
its
settings when knocked, for example, dur- ing a parking manoeuvre. This may compro-
mi
se the sy
stem's efficacy or disconnect it.
● Repairs to the radar sensor require special-
is
t knowledge and special tools. SEAT recom-
mends visiting a SEAT dealership for this pur-
pose.
● Clean away the snow with a brush and the
ice pr
eferably with a solvent-free de-icer
spray. Operating the Front Assist
Fig. 186
On the instrument panel display:
Fr ont
Assist switched off message. The Front Assist monitoring system is active
whenev
er the ignition i
s switched on.
When the Front Assist is switched off, so too
are the advance warning function (pre warn-
ing) and the distance warning. »
209
Technical data
Advice
Operation
Emergencies
Safety
Page 269 of 328
Care and maintenance
Automatic car washes
B ef
ore going through a car wash, be sure to
take the usual precautions such as closing
the windows and roof. If the vehicle has spe-
cial accessories such as spoilers or a roof
rack or two-way radio aerial, etc., it is advisa-
ble to consult the car wash tunnel operator.
It is best to use a car wash without revolving
bristles if possible.
Washing the vehicle with a high pressure
cleaner
When washing the vehicle with a high-pres-
sure cleaner, always follow the operating in-
structions for the equipment. This applies
particularly to the operating pressure and the
spraying distance. Do not hold the nozzle too
close to soft materials such as rubber hoses
or seals. The same applies to the parking aid
sensors*, which are located in the rear bump-
er.
Do not use a nozzle that sprays the water out
in a direct stream or one that has a rotating
jet for forcing off dirt.
Washing the car by hand
When washing the car by hand, use plenty of
water to soften the dirt first, and rinse off as
well as possible.
Then clean the vehicle with a soft sponge,
glove or brush using only slight pressure.
You should start on the roof and work down. Special car
soap should only be used for very
persistent dirt.
Rinse the sponge or glove thoroughly and of-
ten.
Wheels, sills and similar should be cleaned
last. Use a second sponge for this. WARNING
● The v
ehicle should only be washed with the
ignition switched off. Failure to follow this in-
struction could result in an accident.
● Do not clean the underside of chassis, the
ins
ide of wheel arches or wheel trims without
protecting your hands and arms. You may cut
yourself on sharp-edged metal parts. Other-
wise, there is a risk of sustaining cuts.
● When washing the car during the winter
sea
son: water and ice in the brake system
can reduce braking effectiveness: risk of acci-
dent! CAUTION
● Do not w
ash the vehicle in direct sunlight –
otherwise the paint can be damaged.
● Do not use sponges, abrasive household
spon
ges or similar to clean insect remains.
This could damage the surface.
● Clean off stubborn dirt (insects, etc.) from
the hea
dlights at regular intervals, for in-
stance when filling the fuel tank. The head-
lights should only be washed with water, do not wipe them with a dry cloth or sponge. It
i
s
best to use soapy water.
● Never wash tyres with a jet that sprays the
wat
er out in a direct stream. This could dam-
age the tyres even if the spray is kept at a
distance and only used for a very short time.
● Before washing the vehicle in an automatic
car w
ash, please make sure to retract the ex-
terior mirrors to prevent them from being
damaged. Electrically retractable exterior
mirrors must not be folded in or out by hand,
always use the electrical power control. CAUTION
● Bef
ore washing the vehicle in an automatic
car wash, please proceed as follows to lock
the wiper arms so that they are not moved to-
wards the top of the windscreen:
–the bonnet must be closed.
– switch the ignition on and off.
– press the windscreen wiper lever forward
briefly (windscreen washer function).
This will lock the wiper arms. For the sake of the environment
The car should only be washed in special
w a
sh bays. These areas are prepared to pre-
vent oily water from getting into the public
drains. In some places, washing vehicles out-
side the areas intended for this purpose is
prohibited. 267
Technical data
Advice
Operation
Emergencies
Safety
Page 271 of 328
Care and maintenance
Carbon parts The carbon parts on your vehicle have a pain-
t
ed s
urface. They do not need any special
care and are cleaned just like any other pain-
ted part ››› page 266.
Paint damage Minor damage to the paint, such as scratches
or s
t
one chips, should be touched up without
delay before the metal starts to corrode. Suit-
able touch-up brushes or sprays for your car
can be obtained from a SEAT Official Service.
The number of the original paint finish on the
vehicle is given on the data sticker
››› page 301.
If corrosion is already visible it must be thor-
oughly removed by a specialised workshop.
Windows Clear vision is an essential safety factor.
The w
ind
screen must not be cleaned with in-
sect remover or wax, otherwise the wind-
screen wipers will not function properly (jud-
dering).
Traces of rubber, oil, grease or silicone can
be removed with a window cleaning solution
or a silicone remover. Wax residue can only be removed with a special cleaner. Your SEAT
Offic
ial Service will be able to provide you
with more detailed information.
The windows should also be cleaned on the
inside at regular intervals.
Use a separate cloth or chamois to dry the
windows. Cloths used for waxing and polish-
ing contain residues that will cause smears
on the glass. WARNING
Do not use water-repellent coatings on the
w ind
screen. In bad visibility conditions (e.g.
in the rain, dark or with a low sun), these
coatings may cause dazzle: risk of accident!
Such coatings can also cause the windscreen
wiper blades to make noise. CAUTION
● Remo
ve snow and ice from windows and ex-
terior mirrors with a plastic scraper only. To
avoid scratches caused by dirt on the glass,
the scraper should only be pushed in one di-
rection and not moved to and fro.
● The heating element for the rear window is
locat
ed on the inner side of the window. To
avoid damaging them, do not apply stickers
to these heating elements.
● Never use warm or hot water to remove
sno
w and ice from windows and mirrors. This
could cause the glass to crack! Wheels
The wheels require regular attention to pre-
ser
v
e their appearance. It is important to re-
move road salt and brake dust by washing
the wheels at regular intervals, otherwise the
finish will be impaired.
After washing, the wheels should only be
cleaned with an "acid-free" cleaning agent
for alloy wheels. This is available from SEAT
Official Services and specialist retailers. Nev-
er leave the cleaning agent on the rims for
any longer than specified in the instructions
before rinsing it off. If the wheel cleaner fluid
contains acid it can attack the surfaces of the
wheel bolts.
Car polish or other abrasive agents should
not be used for maintaining the rims. If the
protective coating is damaged, e.g. by flying
stones, the damaged area should be re-
paired immediately. WARNING
Please note when cleaning the wheels that
w at
er, ice and road salt can impair the effec-
tiveness of the brakes; this can cause an acci-
dent. Exhaust tail pipe
It is important to remove road salt and brake
du
s
t by washing the wheels at regular »
269
Technical data
Advice
Operation
Emergencies
Safety
Page 272 of 328

Advice
intervals, otherwise the exhaust tail pipe ma-
t eri
al could be damaged. To remove impuri-
ties, do not use rim, paint or chrome cleaners
or other abrasive products. Clean the exhaust
tail pipes with cleaning products that are
suitable for stainless steel.
SEAT Official Services carry stocks of cleaning
products that have been tested and ap-
proved for use on your vehicle.
Caring for the vehicle interior
Ra
dio display/Easy Connect* and con-
trol panel* The display can be cleaned with a soft cloth
and a pr
of
essionally available “LCD cleaner”.
Moisten the cloth with a small amount of the
cleaning fluid.
The Easy Connect control panel* should first
be cleaned with a brush so that no dirt goes
into the device or between the keys and
housing. Next, we recommend cleaning the
Easy Connect control panel* using a cloth
dampened with water and washing-up liquid. CAUTION
● To av
oid scratching the screen, do not wipe
the display with a dry cloth.
● To avoid damage, ensure that no liquid
goe
s into the Easy Connect control panel*. Plastic and leatherette parts
Plastic parts and leatherette can be cleaned
w
ith a d
amp cloth. If this is not sufficient,
plastic parts and leatherette should only be
treated with a special solvent-free plastic
cleaner.
Textile covers and trim parts Textile covers and trim parts (e.g. seats, door
trim) shou
l
d be cleaned regularly with a vac-
uum cleaner. This will remove surface dirt
which could otherwise be rubbed into the
textile material during use. Do not use steam
cleaners, as the steam could carry the dirt
deeper into the textile material.
Normal cleaning
We recommend that you use a soft sponge or
a commercially available lint-free, micro-fibre
cloth for normal cleaning. Only use brushes
on floor coverings and mats, as other textile
surfaces could become damaged.
In the case of normal surface dirt you can use
a foam cleaner. Use a sponge to spread the
foam on the textile surface and to work it into
the material lightly. However, make sure that
the textile material does not become soaking
wet. Then dab off the foam with a dry and ab-
sorbent cloth (e.g. a micro-fibre cloth) and vacuum off any residue once the surface is
c
omp
letely dry.
Cleaning stains
Treat drink stains (such as coffee or fruit
juice, etc.) with a cleaning solution for deli-
cate fabrics. This solution should be applied
with a sponge. If the stains are difficult to re-
move, a washing paste can be applied direct-
ly onto the stain and worked into the fabric.
The surface will then have to be wiped with
clear water to remove any residue left by the
paste. To do so, use a damp cloth or sponge
and then dab the stain with an absorbent
cloth.
Remove chocolate or make-up stains with a
cleaning paste (for e.g., soft soap). Then re-
move the soap with water (wet sponge).
A spirit-based cleaner can be used to remove
grease, oil, lipstick or ball point pen. Then
dab the dissolved grease or colour particles
off with an absorbent cloth or similar. You
may also have to treat the stain once more
using washing paste and water.
If the covers or textile trim panels are badly
soiled we recommend that you have them
cleaned by a professional cleaning company
with a shampoo and spray.
270
Page 284 of 328
Advice
Engine compartment Chec k
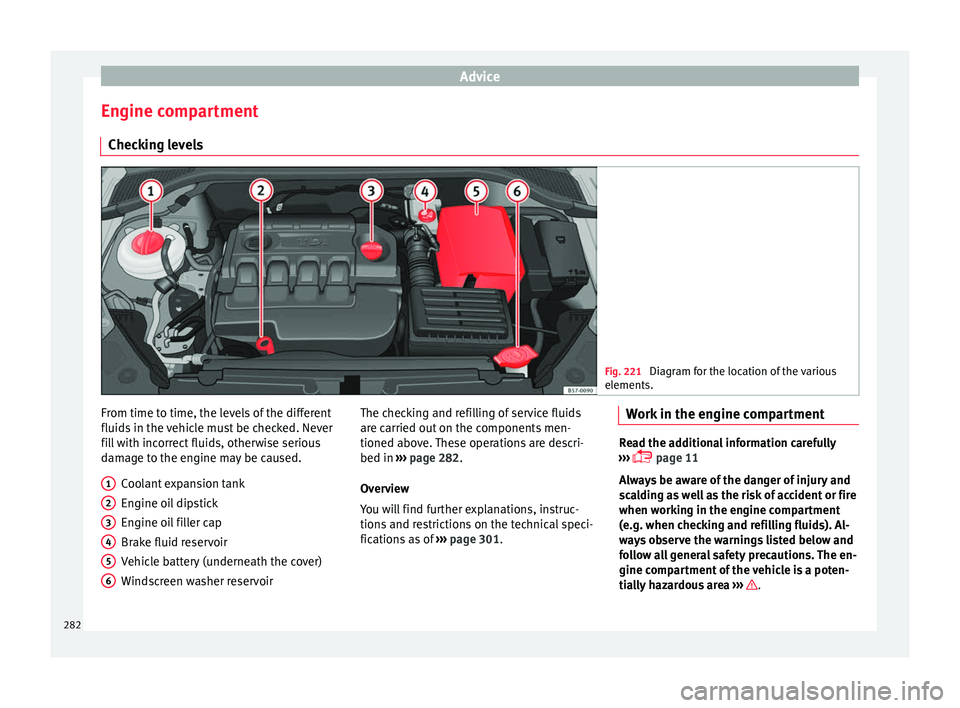
ing levels Fig. 221
Diagram for the location of the various
el ements. From time to time, the levels of the different
fluid
s
in the vehicle must be checked. Never
fill with incorrect fluids, otherwise serious
damage to the engine may be caused.
Coolant expansion tank
Engine oil dipstick
Engine oil filler cap
Brake fluid reservoir
Vehicle battery (underneath the cover)
Windscreen washer reservoir
1 2
3
4
5
6 The checking and refilling of service fluids
ar
e c
arried out on the components men-
tioned above. These operations are descri-
bed in ››› page 282.
Overview
You will find further explanations, instruc-
tions and restrictions on the technical speci-
fications as of ››› page 301. Work in the engine compartment Read the additional information carefully
› ›
› page 11
Always be aware of the danger of injury and
scalding as well as the risk of accident or fire
when working in the engine compartment
(e.g. when checking and refilling fluids). Al-
ways observe the warnings listed below and
follow all general safety precautions. The en-
gine compartment of the vehicle is a poten-
tially hazardous area ››› .
282
Page 285 of 328
Checking and refilling levels
WARNING
● Sw it
ch the engine off, remove the key from
the ignition and apply the hand brake. If the
vehicle has a manual gearbox, place the lever
in neutral; if it has an automatic gearbox,
place the selector lever in position P. Wait for
the engine to cool down.
● Keep children away from the engine com-
par
tment.
● Never spill liquids used for vehicle opera-
tion on the engine c
ompartment, as these
may catch fire (e.g. the antifreeze in coolant).
● Take care not to cause short circuits in the
electric
al system, especially when working
on the battery.
● If working inside the engine compartment,
remember th
at, even when the ignition is
switched off, the radiator fan may start up au-
tomatically, and therefore there is a risk of in-
jury.
● Never cover the engine with additional in-
su
lating materials such as a blanket. Risk of
fire!
● Do not unscrew the cap on the coolant ex-
pan
sion tank when the engine is hot. The
cooling system is under pressure.
● Protect face, hands and arms by covering
the cap w
ith a large, thick rag to protect
against escaping coolant and steam.
● If it is necessary to work in the engine com-
par
tment while the engine is running, the ro-
tating components (for example, poly-V belt, alternator, radiator fan) and the high voltage
ignition sy
s
tem are an additional hazard.
● Observe the following additional warnings
if w
ork on the fuel system or the electrical
system is necessary:
– Always disconnect the battery from the
on-board network.
– Do not smoke.
– Never work near naked flames.
– Always keep an approved fire extinguish-
er immediately available. CAUTION
When topping up fluids make sure the correct
fluid i s
put into the correct filler opening, oth-
erwise this can cause serious malfunctions or
engine damage. For the sake of the environment
Inspect the ground underneath your vehicle
r e
gularly so that any leaks are detected at an
early stage. If you find spots of oil or other
fluids in the area where it was parked, have
your vehicle inspected at the workshop. Note
In right-hand drive vehicles* some brake flu-
id r e
servoirs are on the other side of the en-
gine compartment ››› Fig. 221. Opening the bonnet
Read the additional information carefully
› ›
› page 11
The bonnet is released from inside the vehi-
cle.
Check that the windscreen wiper arms are
not unfolded. Otherwise the paint may be
damaged.
The bonnet can only be unlocked when the
driver door is open. WARNING
Never open the bonnet if you see steam or
drip s
of coolant being released from the en-
gine compartment. Failure to comply could
result in burns. Wait until no steam or coolant
can be seen before opening the bonnet. Closing the bonnet
–
Slightly lift the bonnet.
– Release the bonnet stay before pressing it
bac
k into its support.
– Carefully close the bonnet.
– Press the bonnet down until it locks into
pl
ace.
– Make sure that the bonnet catches onto its
cl
asp. Do not press down too hard ››› .
»
283
Technical data
Advice
Operation
Emergencies
Safety
Page 286 of 328
Advice
WARNING
● For s
afety reasons the bonnet must always
be completely closed when the vehicle is
moving. Therefore, after closing the bonnet,
always check that the locking element is
properly engaged. This is the case if the bon-
net is flush with the adjacent body panels.
● Should you notice that the bonnet is not
saf
ely secured when the vehicle is moving,
stop the vehicle immediately and close the
bonnet. Failure to follow this instruction
could result in an accident. Engine oil
Gener a
l notes The engine comes with a special, multi-grade
oi
l
that can be used all year round.
Because the use of high-quality oil is essen-
tial for the correct operation of the engine
and its long useful life, when topping up or
changing oil, use only those oils that comply
with VW standards.
The specifications (VW standards) set out in
the following page should appear on the con-
tainer of the service oil; when the container
displays the specific standards for petrol and
diesel engines together, it means that the oil
can be used for both types of engines. We recommend that the oil change indicated
in the Maint
enance Programme, be per-
formed by a technical service or specialised
workshop.
The correct oil specifications for your engine
are listed in the ›››
page 49, Oil proper-
ties.
Service intervals
Service intervals can be flexible (LongLife
service) or fixed (dependent on time/dis-
tance travelled).
If the PR code that appears on the back of the
Maintenance Programme booklet is PR QI6,
this means that your vehicle has the LongLife
service programmed. If it lists the codes QI1,
QI2, QI3, QI4 or QI7, the interval service is
dependent on time/distance travelled.
Flexible service intervals (LongLife service
intervals*)
Special oils and processes have been devel-
oped which, depending on the characteris-
tics and individual driving profiles, enable
the extension of the oil change service (Long-
Life service intervals).
Because this oil is essential for extending the
service intervals, it must only be used ob-
serving the following indications:
● Avoid mixing it with oil for fixed service in-
ter
vals. ●
Only
in exceptional circumstances, if the
engine oil level is too low ››› page 285 and
LongLife oil is not available, it is permitted to
top up (once) with oil for fixed service inter-
vals ›››
page 49 (up to a maximum of 0.5
litres).
Fixed service intervals*
If your vehicle does not have the “LongLife
service interval” or it has been disabled (by
request), you may use oils for fixed service
intervals, which also appear in
››› page 49, Oil properties
. In this case,
your vehicle must be serviced after a fixed in-
terval of 1 year/15,000 km (10,000 miles)
(whatever comes first) ››› Booklet Mainte-
nance Programme.
● In exceptional circumstances, if the engine
oil
level is too low ››› page 285 and you can-
not obtain the oil specified for your vehicle,
you can add a small quantity of oil conform-
ing to the specification ACEA A2 or ACEA A3
(petrol engines) or ACEA B3 or ACEA B4 (die-
sel engines) (up to 0.5 l).
Vehicles with diesel particulate filter*
The Maintenance Programme states whether
your vehicle is fitted with a diesel particulate
filter.
Only VW 507 00 engine oil, with reduced ash
formation, may be used in diesel engines
equipped with particulate filter. Using other
284