Seat Exeo 2009 MEDIA SYSTEM 1.0
Manufacturer: SEAT, Model Year: 2009, Model line: Exeo, Model: Seat Exeo 2009Pages: 124, PDF Size: 6.27 MB
Page 41 of 124
RADIO
40
– Press the rotary pushbutton. The station will be stored in the memory list.Radio stations from all wavebands can be stored in the memory list
⇒page 34.
A new station will be stored automatically at a vacant position in the memory
list. Alternatively, you may choose a specific position in the list to store the
station.
Note
•For more information about storing radio stations, please refer to
⇒ page 37.•In the radio setup function, you can delete all stations stored in the
memory list using the option Delete memory list ⇒ page 43. Individual radio
stations stored in the memory list can be overwritten.
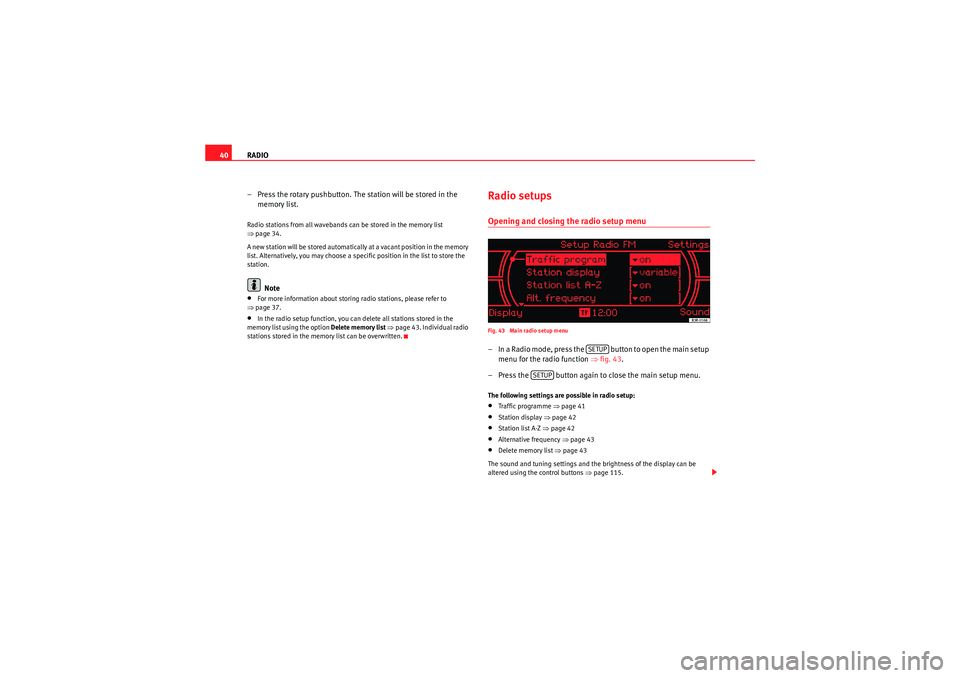
Radio setupsOpening and closing the radio setup menuFig. 43 Main radio setup menu– In a Radio mode, press the button to open the main setup menu for the radio function ⇒fig. 43 .
– Press the button again to close the main setup menu.The following settings are possible in radio setup:•Traffic programme ⇒ page 41•Station display ⇒page 42•Station list A-Z ⇒page 42•Alternative frequency ⇒page 43•Delete memory list ⇒page 43
The sound and tuning settings and the brightness of the display can be
altered using the control buttons ⇒ page 115.
SETUP
SETUP
Media System 1.0_EN.book Seite 40 Donnerstag, 10. September 2009 1:52 13
Page 42 of 124
RADIO41
Operating
RADIO, CD/MP3
TEL (telephone)
NAV, INFO
SETUP
Note
We recommend that you enter these settings when the vehicle is stationary.
Please note ⇒page 6, “Notes on road safety”.Traffic programme
Use the traffic programme option to switch the function on
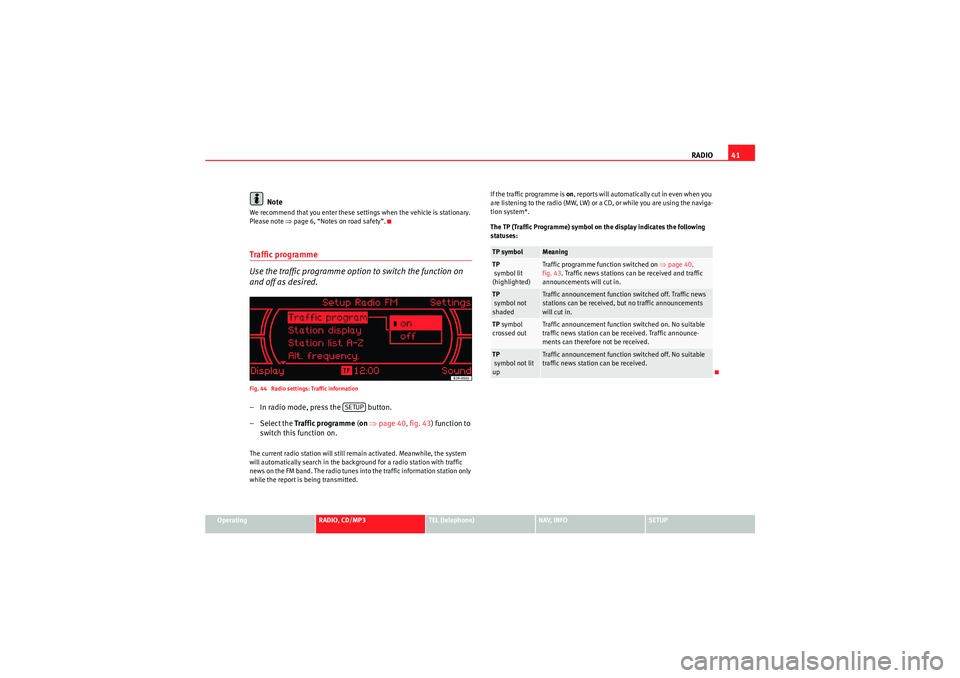
and off as desired.Fig. 44 Radio settings: Traffic information– In radio mode, press the button.
– Select the Traffic programme (on ⇒ page 40, fig. 43 ) function to
switch this function on.The current radio station will still remain activated. Meanwhile, the system
will automatically search in the background for a radio station with traffic
news on the FM band. The radio tunes into the traffic information station only
while the report is being transmitted. If the traffic programme is on
, reports will automatically cut in even when you
are listening to the radio (MW, LW) or a CD, or while you are using the naviga-
tion system*.
The TP (Traffic Programme) symbol on the display indicates the following
statuses:
SETUP
TP symbol
Meaning
TP
symbol lit
(highlighted)
Traffic programme function switched on ⇒page 40,
fig. 43 . Traffic news stations can be received and traffic
announcements will cut in.
TP
symbol not
shaded
Traffic announcement function switched off. Traffic news
stations can be received, but no traffic announcements
will cut in.
TP symbol
crossed out
Traffic announcement function switched on. No suitable
traffic news station can be received. Traffic announce-
ments can therefore not be received.
TP
symbol not lit
up
Traffic announcement function switched off. No suitable
traffic news station can be received.
Media System 1.0_EN.book Seite 41 Donnerstag, 10. September 2009 1:52 13
Page 43 of 124
RADIO
42Station display
Ticker texts broadcast by certain radio stations can be
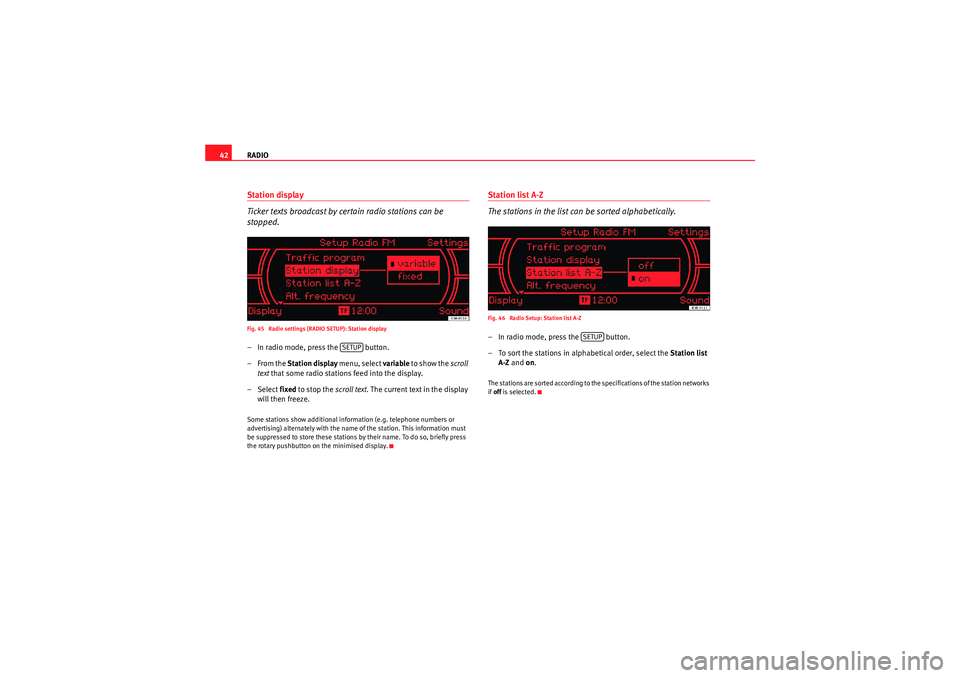
stopped.Fig. 45 Radio settings (RADIO SETUP): Station display– In radio mode, press the button.
–From the Station display menu, select variable to show the scroll
text that some radio stations feed into the display.
– Select fixed to stop the scroll text. The current text in the display
will then freeze.Some stations show additional information (e.g. telephone numbers or
advertising) alternately with the name of the station. This information must
be suppressed to store these stations by their name. To do so, briefly press
the rotary pushbutton on the minimised display.
Station list A-Z
The stations in the list can be sorted alphabetically.Fig. 46 Radio Setup: Station list A-Z– In radio mode, press the button.
– To sort the stations in alphabetical order, select the Station list
A-Z and on .The stations are sorted according to the specifications of the station networks
if off is selected.
SETUP
SETUP
Media System 1.0_EN.book Seite 42 Donnerstag, 10. September 2009 1:52 13
Page 44 of 124
RADIO43
Operating
RADIO, CD/MP3
TEL (telephone)
NAV, INFO
SETUP
Alternative frequencies
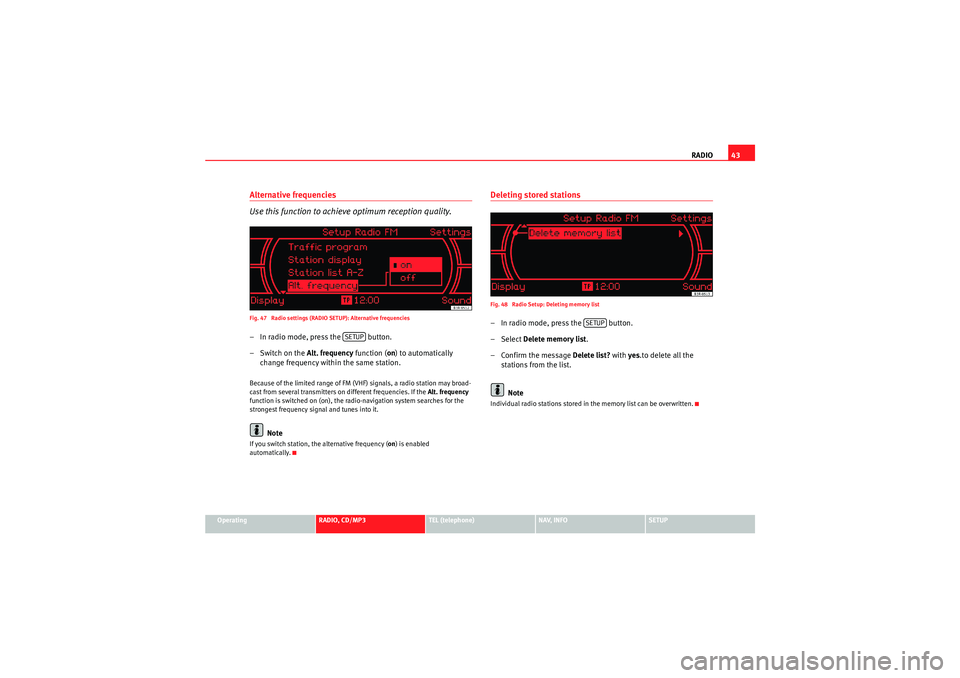
Use this function to achieve optimum reception quality.Fig. 47 Radio settings (RADIO SETUP): Alternative frequencies– In radio mode, press the button.
– Switch on the Alt. frequency function (on) to automatically
change frequency within the same station.Because of the limited range of FM (VHF) signals, a radio station may broad-
cast from several transmitters on different frequencies. If the Alt. frequency
function is switched on (on), the radio-navigation system searches for the
strongest frequency signal and tunes into it.
Note
If you switch station, the alternative frequency ( on) is enabled
automatically.
Deleting stored stationsFig. 48 Radio Setup: Deleting memory list– In radio mode, press the button.
– Select Delete memory list .
–Confirm the message Delete list? with yes.to delete all the
stations from the list.
NoteIndividual radio stations stored in the memory list can be overwritten.
SETUP
SETUP
Media System 1.0_EN.book Seite 43 Donnerstag, 10. September 2009 1:52 13
Page 45 of 124
CD/MP3
44CD/MP3IntroductionTraffic programme
Audio playback can be interrupted for traffic news announce-
ments.Switching traffic programme on and off:
– Switch the option Traffic programme under Setup Radio
⇒ page 41 or Setup Info ⇒page 112 on or off as desired. The TP
symbol is lit in the status line ⇒page 18 when the traffic
programme is activated.
Cancelling a traffic news announcement:
– Select Cancel on the display or briefly press the knob to suppress
the traffic report being heard at that time. The audio playback will
then be continued.If the traffic programme function is activated, the audio playback will be inter-
rupted for traffic news announcements.
All following traffic announcements will cut in even after cancelling a running
announcement.
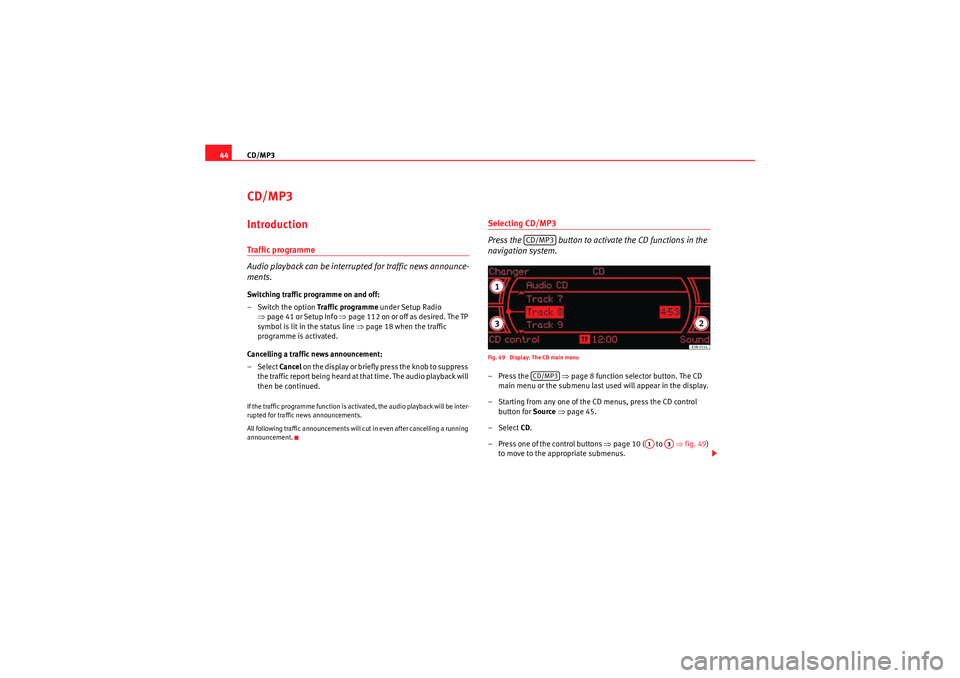
Selecting CD/MP3
Press the button to activate the CD functions in the
navigation system.Fig. 49 Display: The CD main menu–Press the ⇒ page 8 function selector button. The CD
main menu or the submenu last used will appear in the display.
– Starting from any one of the CD menus, press the CD control button for Source ⇒ page 45.
– Select CD .
– Press one of the control buttons ⇒page 10 ( to ⇒fig. 49 )
to move to the appropriate submenus.
CD/MP3CD/MP3
A1
A3
Media System 1.0_EN.book Seite 44 Donnerstag, 10. September 2009 1:52 13
Page 46 of 124
CD/MP345
Operating
RADIO, CD/MP3
TEL (telephone)
NAV, INFO
SETUP
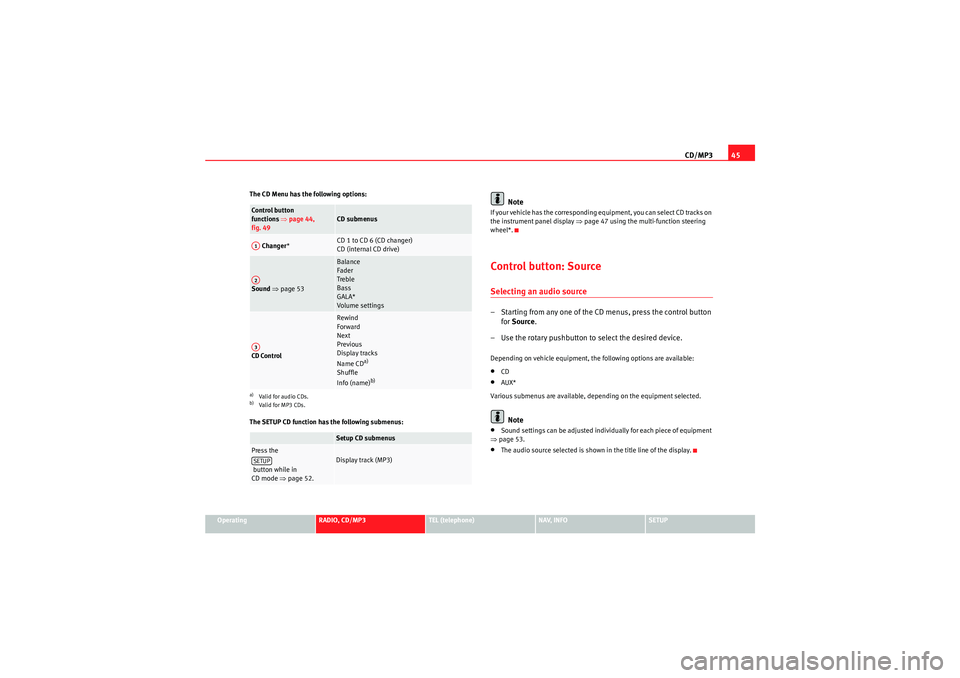
The CD Menu has the following options:
The SETUP CD function has the following submenus:
Note
If your vehicle has the corresponding equipment, you can select CD tracks on
the instrument panel display
⇒page 47 using the multi-function steering
wheel*.Control button: SourceSelecting an audio source– Starting from any one of the CD menus, press the control button for Source .
– Use the rotary pushbutton to select the desired device.Depending on vehicle equipment, the following options are available:•CD•AUX*
Various submenus are available, depending on the equipment selected.Note
•Sound settings can be adjusted individually for each piece of equipment
⇒ page 53.•The audio source selected is shown in the title line of the display.
Control button
functions ⇒page 44,
fig. 49
CD submenus
Changer *
CD 1 to CD 6 (CD changer)
CD (internal CD drive)
Sound ⇒ page 53
Balance
Fader
Treble
Bass
GALA*
Volume settings
CD Control
Rewind
Forward
Next
Previous
Display tracks
Name CD
a)
Shuffle
Info (name)
b)
a)Valid for audio CDs.b)Valid for MP3 CDs.
Setup CD submenus
Press the
button while in
CD mode ⇒page 52.
Display track (MP3)
A1A2A3SETUP
Media System 1.0_EN.book Seite 45 Donnerstag, 10. September 2009 1:52 13
Page 47 of 124
CD/MP3
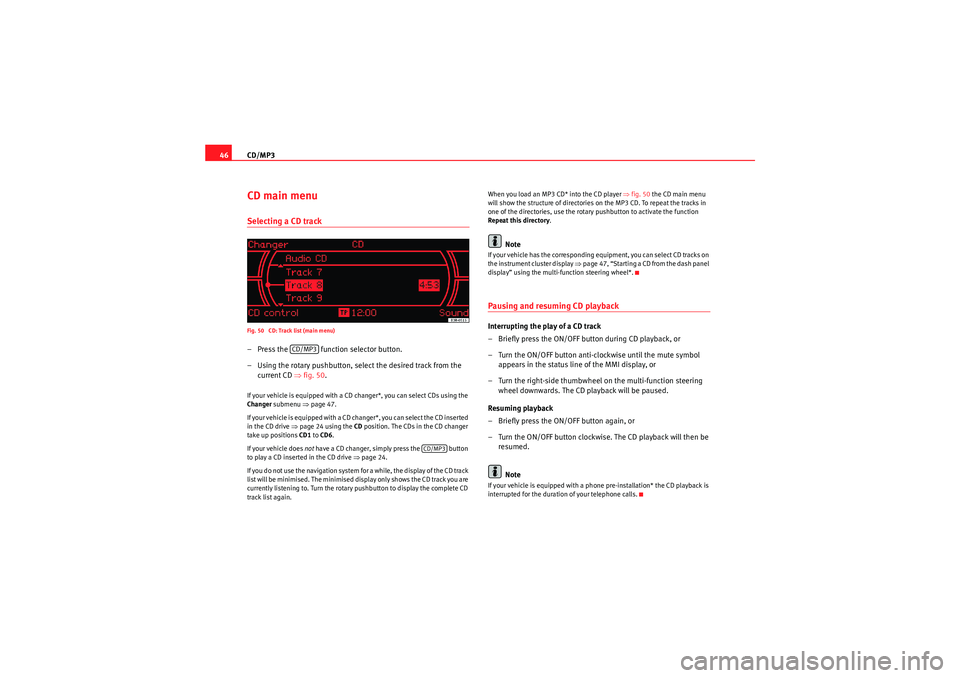
46CD main menuSelecting a CD trackFig. 50 CD: Track list (main menu)– Press the function selector button.
– Using the rotary pushbutton, select the desired track from the
current CD ⇒fig. 50 .If your vehicle is equipped with a CD changer*, you can select CDs using the
Changer submenu ⇒page 47.
If your vehicle is equipped with a CD changer*, you can select the CD inserted
in the CD drive ⇒page 24 using the CD position. The CDs in the CD changer
take up positions CD1 to CD6 .
If your vehicle does not have a CD changer, simply press the button
to play a CD inserted in the CD drive ⇒page 24.
If you do not use the navigation system for a while, the display of the CD track
list will be minimised. The minimised display only shows the CD track you are
currently listening to. Turn the rotary pushbutton to display the complete CD
track list again. When you load an MP3 CD* into the CD player
⇒fig. 50 the CD main menu
will show the structure of directories on the MP3 CD. To repeat the tracks in
one of the directories, use the rotary pushbutton to activate the function
Repeat this directory .
Note
If your vehicle has the corresponding equipment, you can select CD tracks on
the instrument cluster display ⇒page 47, “Starting a CD from the dash panel
display” using the multi-function steering wheel*.Pausing and resuming CD playbackInterrupting the play of a CD track
– Briefly press the ON/OFF button during CD playback, or
– Turn the ON/OFF button anti-clockwise until the mute symbol appears in the status line of the MMI display, or
– Turn the right-side thumbwheel on the multi-function steering wheel downwards. The CD playback will be paused.
Resuming playback
– Briefly press the ON/OFF button again, or
– Turn the ON/OFF button clockwise. The CD playback will then be resumed.
NoteIf your vehicle is equipped with a phone pre-installation* the CD playback is
interrupted for the duration of your telephone calls.
CD/MP3
CD/MP3
Media System 1.0_EN.book Seite 46 Donnerstag, 10. September 2009 1:52 13
Page 48 of 124
CD/MP347
Operating
RADIO, CD/MP3
TEL (telephone)
NAV, INFO
SETUP
Starting a CD from the dash panel displaySelecting CD track (CD player activated):
– Press the button on the multi-function steering wheel
⇒page 14 until TR appears at the top of the dash panel display.
– Scroll and press the left thumbwheel on the multi-function steering wheel to select the CD track.
Selecting CD track (CD player deactivated):
– Press the function selector button.
– Press the button on the multi-function steering wheel ⇒page 14 until TR appears at the top of the dash panel display.
– Scroll and press the left thumbwheel on the multi-function steering wheel to select the CD track.
Start fast forward:
– Keep the left thumbwheel on the multi-function steering wheel ⇒page 14 pressed down.
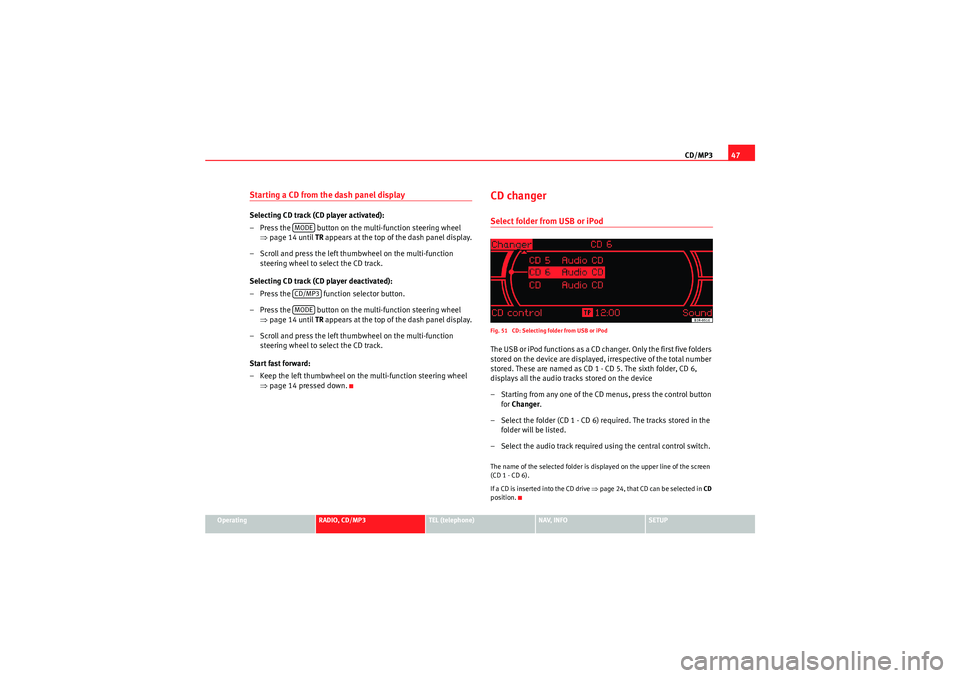
CD changerSelect folder from USB or iPodFig. 51 CD: Selecting folder from USB or iPodThe USB or iPod functions as a CD changer. Only the first five folders
stored on the device are displayed, irrespective of the total number
stored. These are named as CD 1 - CD 5. The sixth folder, CD 6,
displays all the audio tracks stored on the device
– Starting from any one of the CD menus, press the control button
for Changer .
– Select the folder (CD 1 - CD 6) required. The tracks stored in the folder will be listed.
– Select the audio track required using the central control switch.The name of the selected folder is displayed on the upper line of the screen
(CD 1 - CD 6).
If a CD is inser ted into the CD drive ⇒page 24, that CD can be selected in CD
position.
MODECD/MP3MODE
Media System 1.0_EN.book Seite 47 Donnerstag, 10. September 2009 1:52 13
Page 49 of 124
CD/MP3
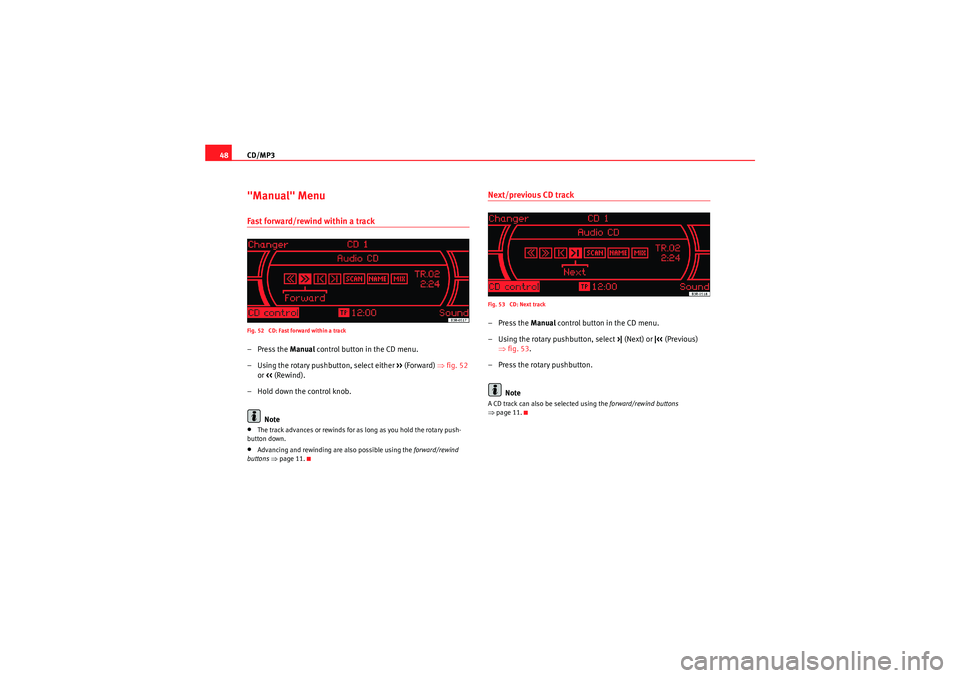
48"Manual" MenuFast forward/rewind within a trackFig. 52 CD: Fast forward within a track–Press the Manual control button in the CD menu.
– Using the rotary pushbutton, select either >> (Forward) ⇒fig. 52
or << (Rewind).
– Hold down the control knob.
Note•The track advances or rewinds for as long as you hold the rotary push-
button down.•Advancing and rewinding are also possible using the forward/rewind
buttons ⇒ page 11.
Next/previous CD trackFig. 53 CD: Next track–Press the Manual control button in the CD menu.
– Using the rotary pushbutton, select >| (Next) or |<< (Previous)
⇒ fig. 53 .
– Press the rotary pushbutton.
NoteA CD track can also be selected using the forward/rewind buttons
⇒ page 11.
Media System 1.0_EN.book Seite 48 Donnerstag, 10. September 2009 1:52 13
Page 50 of 124
CD/MP349
Operating
RADIO, CD/MP3
TEL (telephone)
NAV, INFO
SETUP
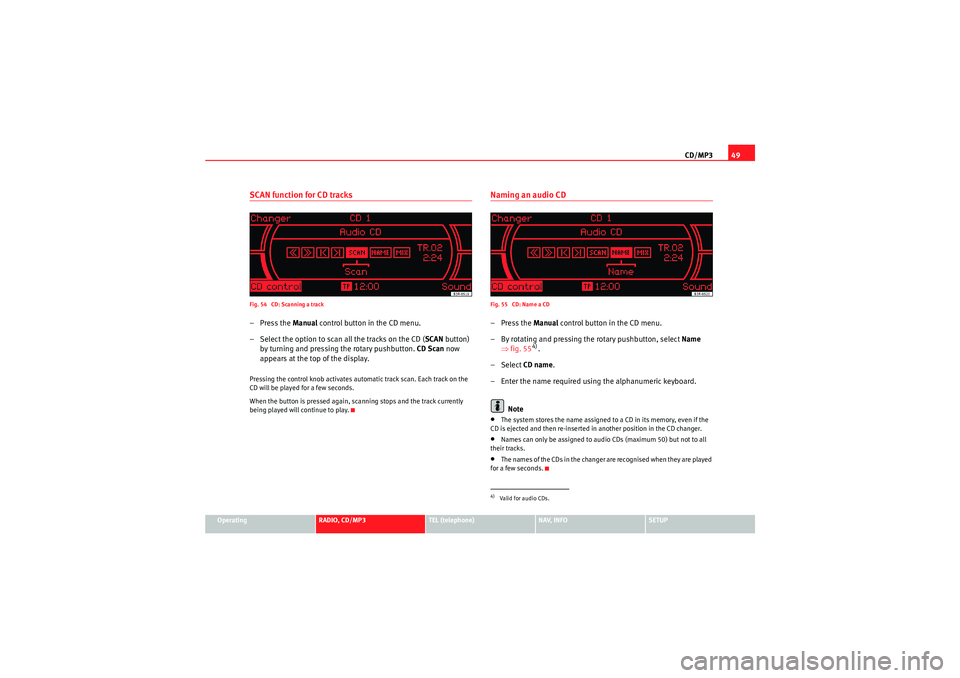
SCAN function for CD tracksFig. 54 CD: Scanning a track–Press the Manual control button in the CD menu.
– Select the option to scan all the tracks on the CD ( SCAN button)
by turning and pressing the rotary pushbutton. CD Scan now
appears at the top of the display.Pressing the control knob activates automatic track scan. Each track on the
CD will be played for a few seconds.
When the button is pressed again, scanning stops and the track currently
being played will continue to play.
Naming an audio CDFig. 55 CD: Name a CD–Press the Manual control button in the CD menu.
– By rotating and pressing the rotary pushbutton, select Name
⇒ fig. 55
4).
– Select CD name.
– Enter the name required using the alphanumeric keyboard.
Note
•The system stores the name assigned to a CD in its memory, even if the
CD is ejected and then re-inserted in another position in the CD changer.•Names can only be assigned to audio CDs (maximum 50) but not to all
their tracks.•The names of the CDs in the changer are recognised when they are played
for a few seconds.4)Valid for audio CDs.
Media System 1.0_EN.book Seite 49 Donnerstag, 10. September 2009 1:52 13