Seat Exeo 2009 MEDIA SYSTEM 1.0
Manufacturer: SEAT, Model Year: 2009, Model line: Exeo, Model: Seat Exeo 2009Pages: 124, PDF Size: 6.27 MB
Page 51 of 124
CD/MP3
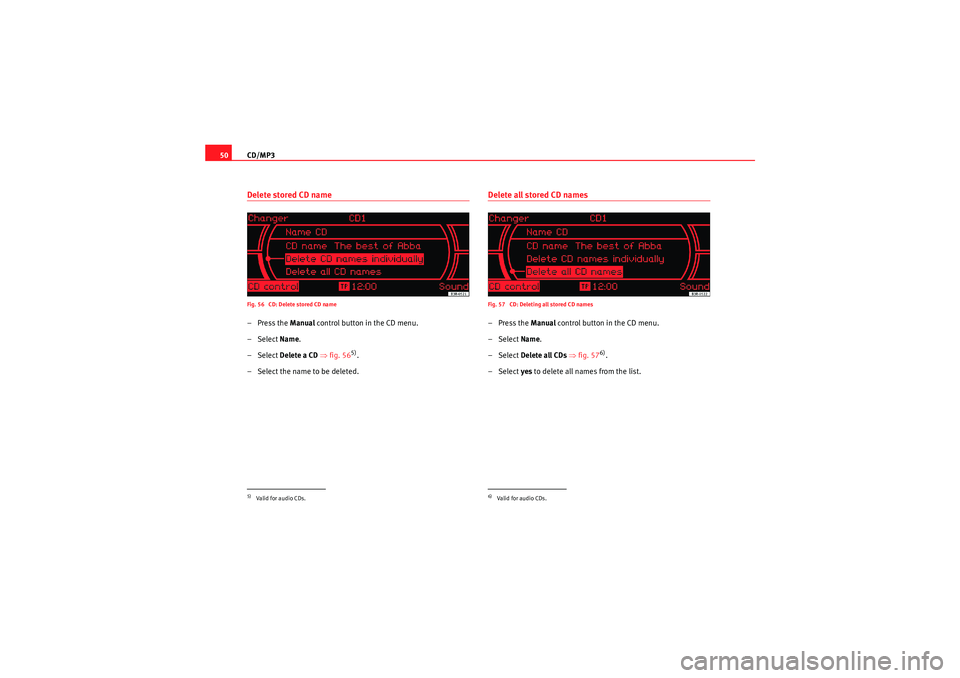
50Delete stored CD nameFig. 56 CD: Delete stored CD nameŌĆōPress the Manual control button in the CD menu.
ŌĆō Select Name.
ŌĆō Select Delete a CD ŌćÆ fig. 56
5).
ŌĆō Select the name to be deleted.
Delete all stored CD namesFig. 57 CD: Deleting all stored CD namesŌĆōPress the Manual control button in the CD menu.
ŌĆō Select Name .
ŌĆō Select Delete all CDs ŌćÆ fig. 57
6).
ŌĆō Select yes to delete all names from the list.
5)Valid for audio CDs.
6)Valid for audio CDs.
Media System 1.0_EN.book Seite 50 Donnerstag, 10. September 2009 1:52 13
Page 52 of 124
CD/MP351
Operating
RADIO, CD/MP3
TEL (telephone)
NAV, INFO
SETUP
CD shuffle ("mix")
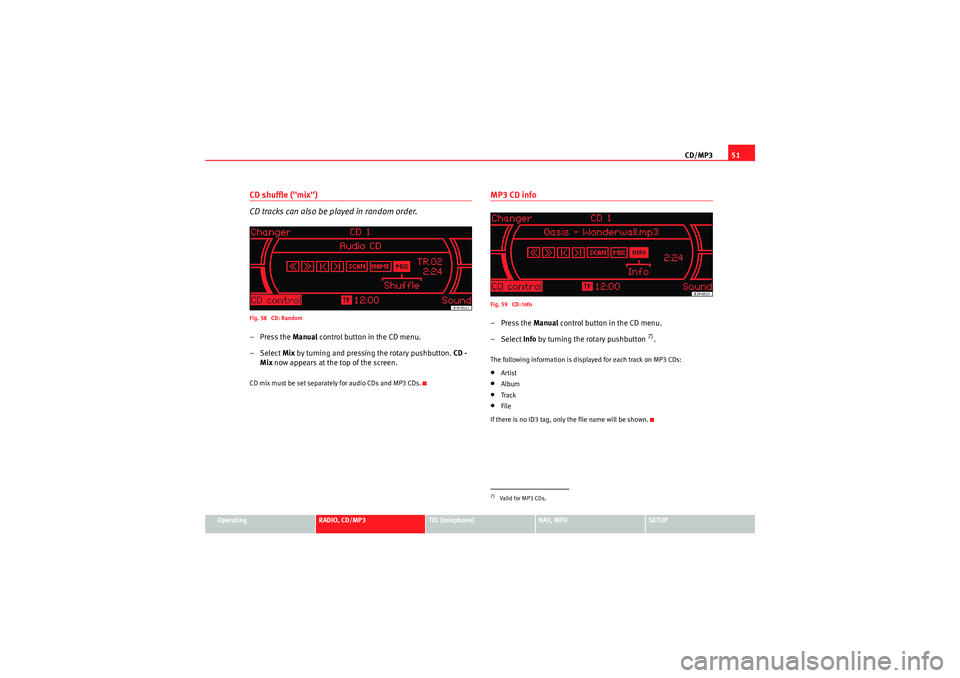
CD tracks can also be played in random order.Fig. 58 CD: RandomŌĆōPress the Manual control button in the CD menu.
ŌĆō Select Mix by turning and pressing the rotary pushbutton. CD -
Mix now appears at the top of the screen.CD mix must be set separately for audio CDs and MP3 CDs.
MP3 CD infoFig. 59 CD: InfoŌĆōPress the Manual control button in the CD menu.
ŌĆō Select Info by turning the ro tary pushbutton
7).
The following information is displayed for each track on MP3 CDs:ŌĆóArtistŌĆóAlbumŌĆóTrackŌĆóFile
If there is no ID3 tag, only the file name will be shown.7)Valid for MP3 CDs.
Media System 1.0_EN.book Seite 51 Donnerstag, 10. September 2009 1:52 13
Page 53 of 124
CD/MP3
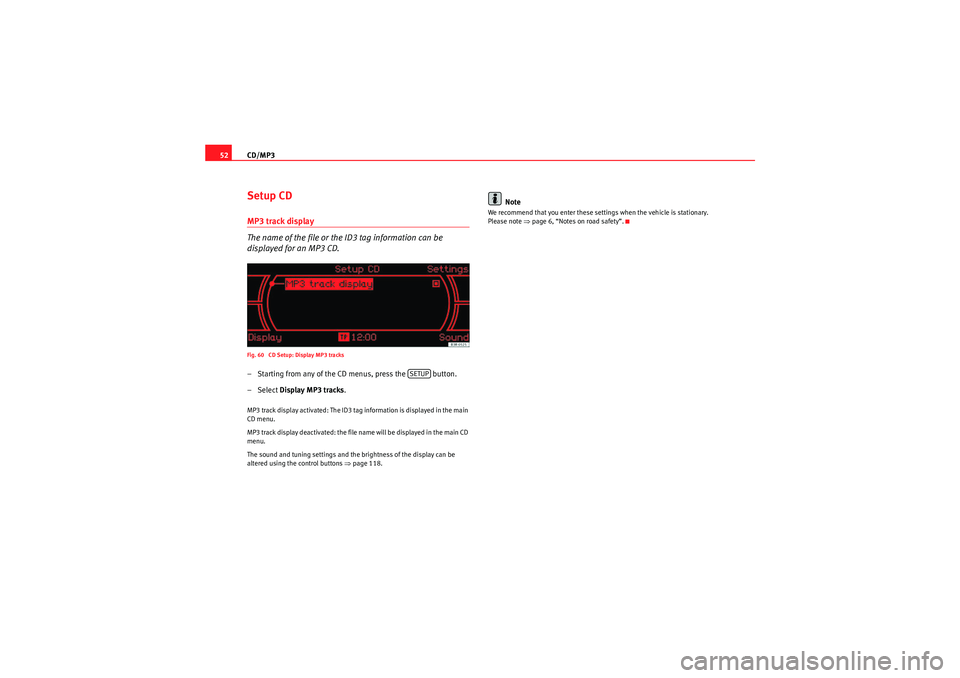
52Setup CDMP3 track display
The name of the file or the ID3 tag information can be
displayed for an MP3 CD.Fig. 60 CD Setup: Display MP3 tracksŌĆō Starting from any of the CD menus, press the button.
ŌĆō Select Display MP3 tracks .MP3 track display activated: The ID3 tag information is displayed in the main
CD menu.
MP3 track display deactivated: the file name will be displayed in the main CD
menu.
The sound and tuning settings and the brightness of the display can be
altered using the control buttons ŌćÆ page 118.
Note
We recommend that you enter these settings when the vehicle is stationary.
Please note ŌćÆpage 6, ŌĆ£Notes on road safetyŌĆØ.
SETUP
Media System 1.0_EN.book Seite 52 Donnerstag, 10. September 2009 1:52 13
Page 54 of 124
Sound settings53
Operating
RADIO, CD/MP3
TEL (telephone)
NAV, INFO
SETUP
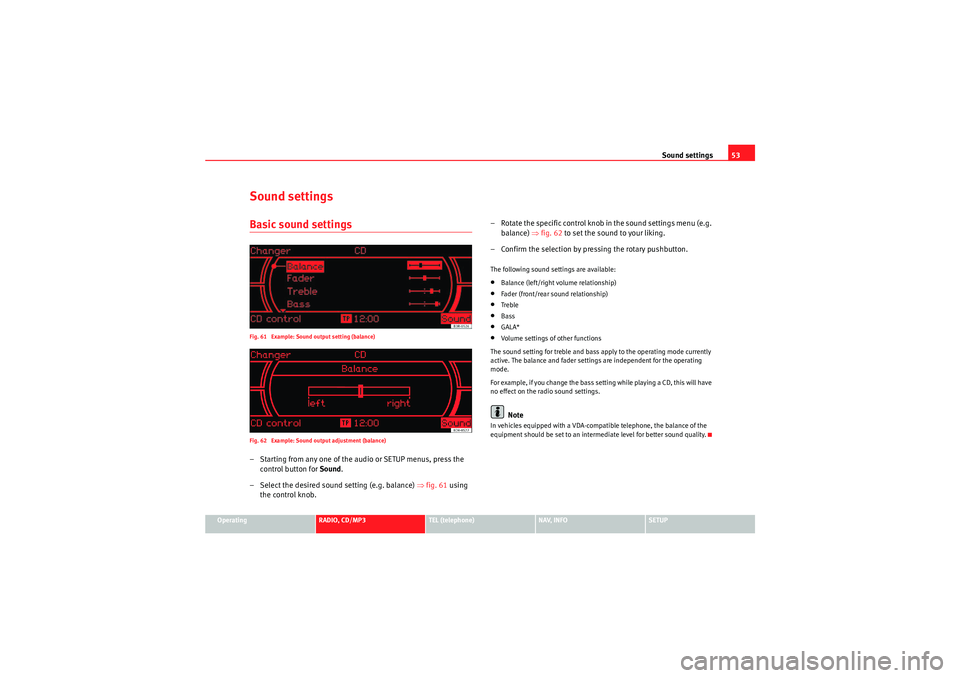
Sound settingsBasic sound settingsFig. 61 Example: Sound output setting (balance)
Fig. 62 Example: Sound output adjustment (balance)ŌĆō Starting from any one of the audio or SETUP menus, press the
control button for Sound .
ŌĆō Select the desired sound setting (e.g. balance) ŌćÆ fig. 61 using
the control knob. ŌĆō Rotate the specific control knob in the sound settings menu (e.g.
balance) ŌćÆfig. 62 to set the sound to your liking.
ŌĆō Confirm the selection by pressing the rotary pushbutton.
The following sound settings are available:ŌĆóBalance (left/right volume relationship)ŌĆóFader (front/rear sound relationship)ŌĆóTrebleŌĆóBassŌĆóGALA*ŌĆóVolume settings of other functions
The sound setting for treble and bass apply to the operating mode currently
active. The balance and fader settings are independent for the operating
mode.
For example, if you change the bass setting while playing a CD, this will have
no effect on the radio sound settings.Note
In vehicles equipped with a VDA-compatible telephone, the balance of the
equipment should be set to an intermediate level for better sound quality.
Media System 1.0_EN.book Seite 53 Donnerstag, 10. September 2009 1:52 13
Page 55 of 124
Sound settings
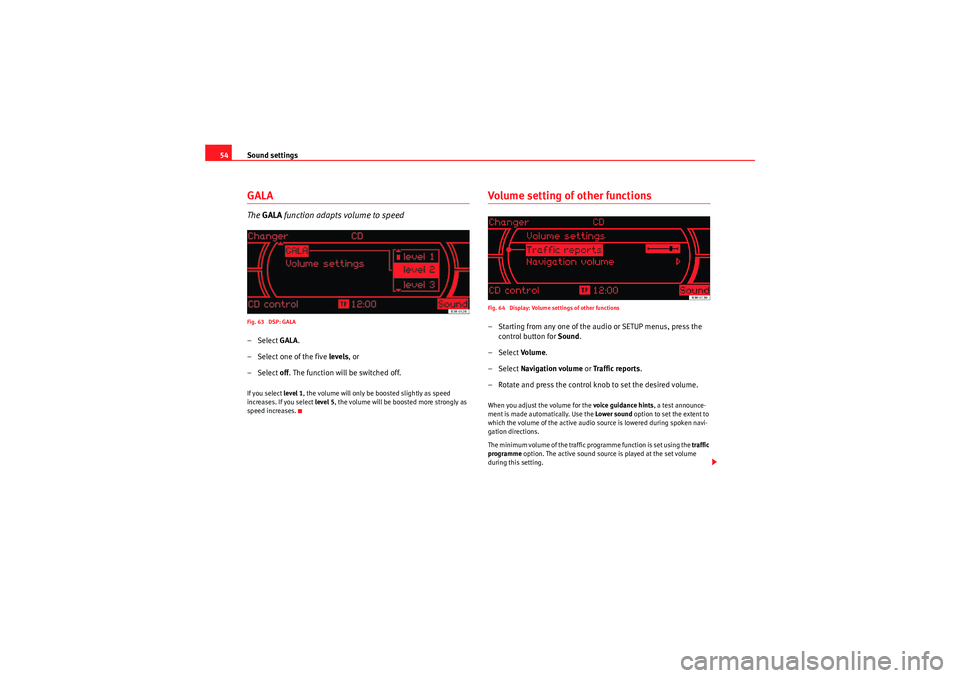
54GALAThe GALA function adapts volume to speedFig. 63 DSP: GALAŌĆō Select GALA.
ŌĆō Select one of the five levels, or
ŌĆō Select off. The function will be switched off.If you select level 1, the volume will only be boosted slightly as speed
increases. If you select level 5, the volume will be boosted more strongly as
speed increases.
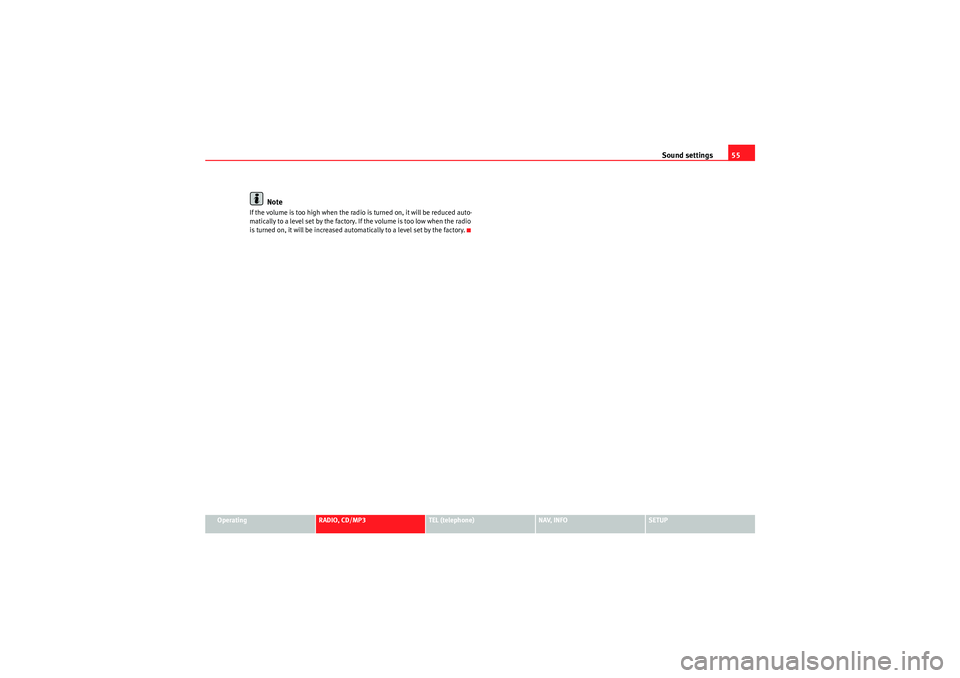
Volume setting of other functionsFig. 64 Display: Volume settings of other functionsŌĆō Starting from any one of the audio or SETUP menus, press the control button for Sound.
ŌĆō Select Volu m e .
ŌĆō Select Navigation volume or Traffic reports .
ŌĆō Rotate and press the control knob to set the desired volume.When you adjust the volume for the voice guidance hints , a test announce-
ment is made automatically. Use the Lower sound option to set the extent to
which the volume of the active audio source is lowered during spoken navi-
gation directions.
The minimum volume of the traffic programme function is set using the traffic
programme option. The active sound source is played at the set volume
during this setting.
Media System 1.0_EN.book Seite 54 Donnerstag, 10. September 2009 1:52 13
Page 56 of 124
Sound settings55
Operating
RADIO, CD/MP3
TEL (telephone)
NAV, INFO
SETUP
Note
If the volume is too high when the radio is turned on, it will be reduced auto-
matically to a level set by the factory. If the volume is too low when the radio
is turned on, it will be increased automatically to a level set by the factory.
Media System 1.0_EN.book Seite 55 Donnerstag, 10. September 2009 1:52 13
Page 57 of 124

Media System 1.0_EN.book Seite 56 Donnerstag, 10. September 2009 1:52 13
Page 58 of 124
Mobile phone system57
Operating
RADIO, CD/MP3
TEL (telephone)
NAV, INFO
SETUP
TEL (telephone)Mobile phone systemIntroductionA mobile phone can be connected to the phone pre-installa-
tion and operated via the navigation system, the multi-func-
tion steering wheel* or the speech control system*.The mobile phone adapter is located either on the centre console or in the
armrest. A special mobile phone adapter is needed in order to connect your
mobile phone to this interface. Mobile phone adapters are available from
your Dealer or specialist retailers.
You can then operate your mobile phone using the navigation system, the
multi-function steering wheel* ŌćÆpage 14 or the speech control system
ŌćÆ page 75. You can also use the talk button * on the mobile phone
adapter to answer and end a call.
W he n yo ur m obile ph one is i n th e m obile p ho ne adap te r, call si gna ls ar e s e nt
and received via the external car aerial. This ensures that transmission
quality is good while the mobile phone battery is being charged.
WARNING
ŌĆóAccording to the health authorities, mobile phones may interfere with
the function of pacemakers. A minimum distance of 20 cm should therefore
be kept between the mobile phone aerial and the pacemaker.
ŌłÆDo not carry a mobile phone in your breast pocket directly over the
pacemaker when the phone is switched on. ŌłÆ
If you suspect interference, switch the mobile phone off immedi-
ately.
ŌĆóPlease direct your full attention to the road at all times! As the driver,
you bear the responsibility for road safety. Therefore, you should only use
the functions in a manner that allows you to maintain control of the vehicle
in all situations.Caution
ŌĆóAlways obey the laws concerning the use of telephones in vehicles!ŌĆóAlways switch off your mobile phone in areas where using mobile phones
is prohibited!ŌĆóSwitch off the telephone in all areas where there may be a risk of explo-
sion. Remember that these areas may not always be adequately marked.
Such places are filling stations, fuel and chemical storage facilities or trans-
port vehicles and other places where fumes, chemicals (e.g. from leaking
propane or fuel vapours in vehicles or buildings) or large quantities of dust
particles (e.g. from flour or wood) could accumulate in the air. This warning
also applies to all other places where you would normally switch off your
engine.Note
ŌĆóIn order to use the mobile phone functions, your mobile phone must be
compatible with the mobile phone adapter in the vehicle and the functions
must be supported by your service provider.
’ü¦
WARNING (continued)
Media System 1.0_EN.book Seite 57 Donnerstag, 10. September 2009 1:52 13
Page 59 of 124
Mobile phone system
58ŌĆóThe range of the handset may be affected in isolated areas (such as a
tunnel or underground garage).ŌĆóSome places have no range at all. You will not be able to use the tele-
phone in these places.ŌĆóFor up-to-date information on the mobile phone adapter, please ask your
dealer or refer to our website.InstallationInstalling and removing the mobile phone adapter
The mobile phone adapter is fitted to the top of the mounting
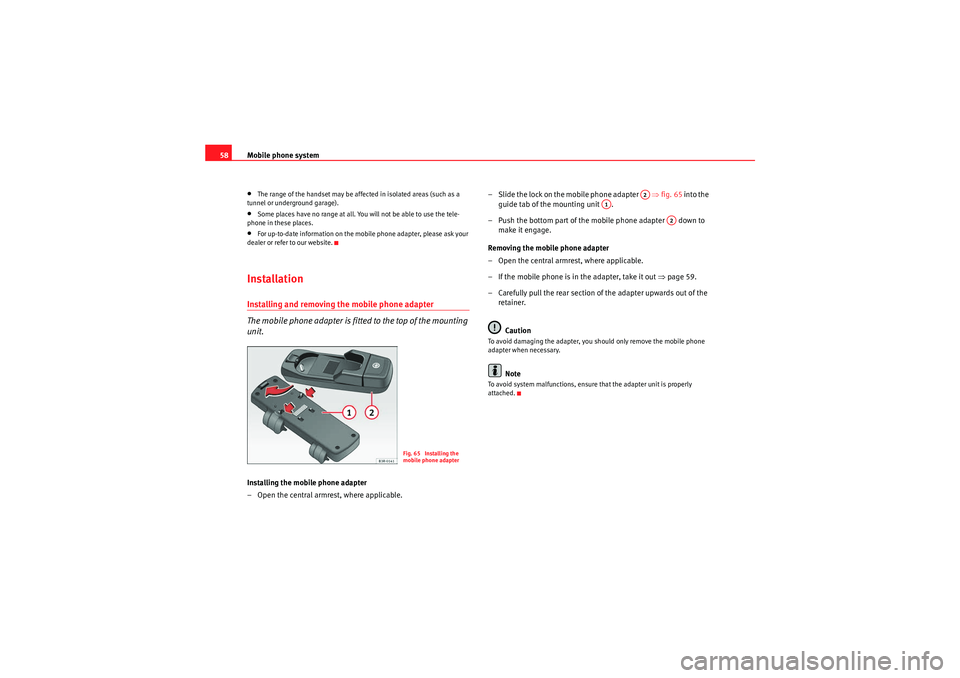
unit.Installing the mobile phone adapter
ŌĆō Open the central armrest, where applicable. ŌĆō Slide the lock on the mobile phone adapter
ŌćÆfig. 65 into the
guide tab of the mounting unit .
ŌĆō Push the bottom part of the mobile phone adapter down to make it engage.
Removing the mobile phone adapter
ŌĆō Open the central armrest, where applicable.
ŌĆō If the mobile phone is in the adapter, take it out ŌćÆpage 59.
ŌĆō Carefully pull the rear section of the adapter upwards out of the retainer.
Caution
To avoid damaging the adapter, you should only remove the mobile phone
adapter when necessary.
Note
To avoid system malfunctions, ensure that the adapter unit is properly
attached.
Fig. 65 Installing the
mobile phone adapter
A2
A1
A2
Media System 1.0_EN.book Seite 58 Donnerstag, 10. September 2009 1:52 13
Page 60 of 124
Mobile phone system59
Operating
RADIO, CD/MP3
TEL (telephone)
NAV, INFO
SETUP
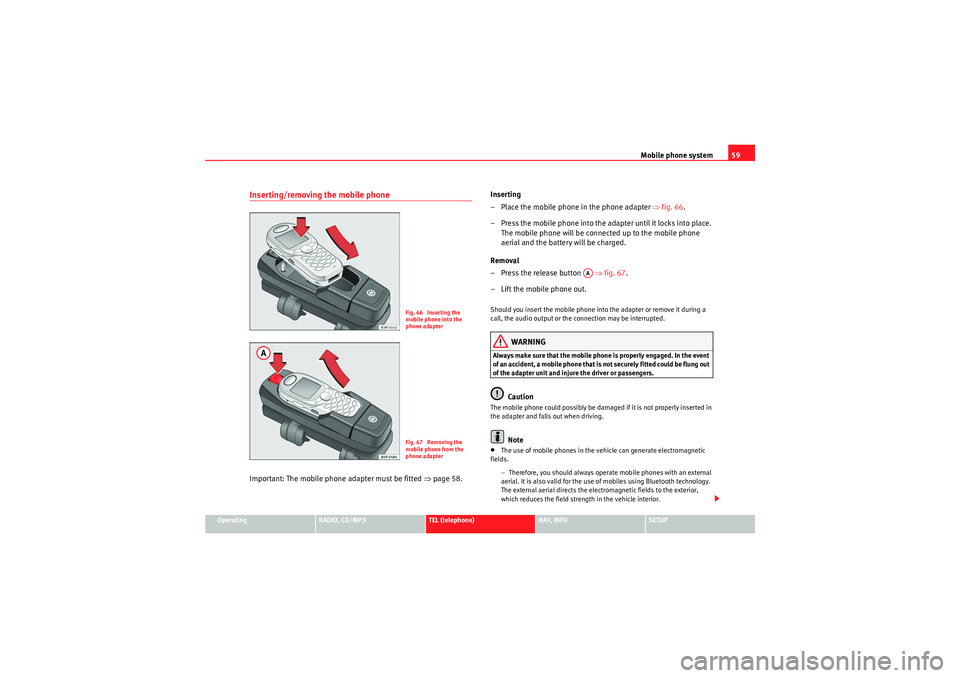
Inserting/removing the mobile phoneImportant: The mobile phon e adapter must be fitted ŌćÆpage 58. Inserting
ŌĆō Place the mobile phone in the phone adapter
ŌćÆfig. 66 .
ŌĆō Press the mobile phone into the adapter until it locks into place. The mobile phone will be connected up to the mobile phone
aerial and the battery will be charged.
Removal
ŌĆō Press the release button ŌćÆfig. 67 .
ŌĆō Lift the mobile phone out.
Should you insert the mobile phone into the adapter or remove it during a
call, the audio output or the connection may be interrupted.
WARNING
Always make sure that the mobile phone is properly engaged. In the event
of an accident, a mobile phone that is not securely fitted could be flung out
of the adapter unit and injure the driver or passengers.
Caution
The mobile phone could possibly be damaged if it is not properly inserted in
the adapter and falls out when driving.
Note
ŌĆóThe use of mobile phones in the vehicle can generate electromagnetic
fields.
ŌłÆTherefore, you should always operate mobile phones with an external
aerial. It is also valid for the use of mobiles using Bluetooth technology.
The external aerial directs the electromagnetic fields to the exterior,
which reduces the field strength in the vehicle interior.
Fig. 66 Inserting the
mobile phone into the
phone adapterFig. 67 Removing the
mobile phone from the
phone adapter
AA
Media System 1.0_EN.book Seite 59 Donnerstag, 10. September 2009 1:52 13