Seat Exeo 2009 MEDIA SYSTEM 1.0
Manufacturer: SEAT, Model Year: 2009, Model line: Exeo, Model: Seat Exeo 2009Pages: 124, PDF Size: 6.27 MB
Page 11 of 124
Handling: General information
10Control buttons
The control buttons are logically assigned to the menus in the
corners of the display.
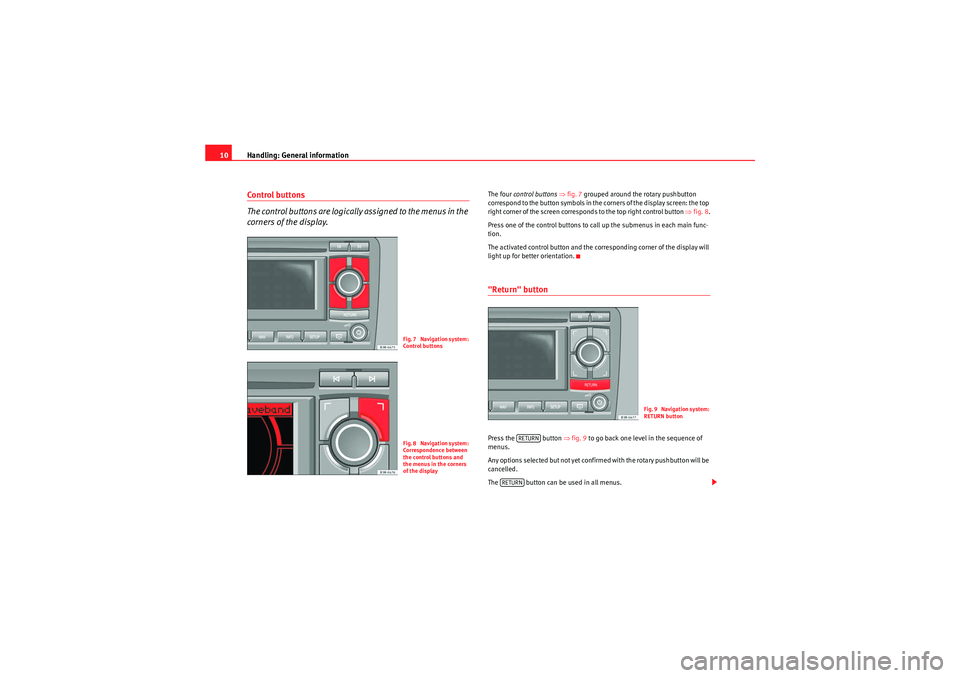
The four control buttons ⇒ fig. 7 grouped around the rotary pushbutton
correspond to the button symbols in the corners of the display screen: the top
right corner of the screen corresponds to the top right control button ⇒fig. 8 .
Press one of the control buttons to call up the submenus in each main func-
tion.
The activated control button and the corresponding corner of the display will
light up for better orientation."Return" buttonPress the button ⇒fig. 9 to go back one level in the sequence of
menus.
Any options selected but not yet confirmed with the rotary pushbutton will be
cancelled.
The button can be used in all menus.
Fig. 7 Navigation system:
Control buttonsFig. 8 Navigation system:
Correspondence between
the control buttons and
the menus in the corners
of the display
Fig. 9 Navigation system:
RETURN button
RETURN
RETURN
Media System 1.0_EN.book Seite 10 Donnerstag, 10. September 2009 1:52 13
Page 12 of 124
Handling: General information11
Operating
RADIO, CD/MP3
TEL (telephone)
NAV, INFO
SETUP
Note
Press the corresponding function selector button ⇒page 8 for the current
main function at any point in a submenu to return to the main menu for that
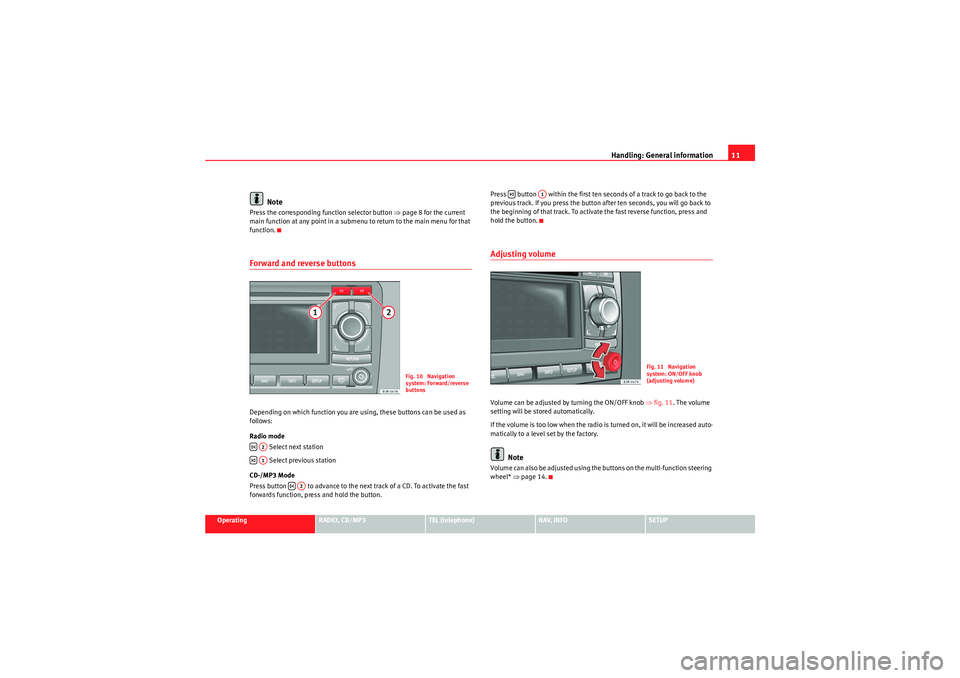
function.Forward and reverse buttonsDepending on which function you are using, these buttons can be used as
follows:
Radio mode
Select next station
Select previous station
CD-/MP3 Mode
Press button to advance to the next track of a CD. To activate the fast
forwards function, press and hold the button. Press button within the first ten seconds of a track to go back to the
previous track. If you press the button after ten seconds, you will go back to
the beginning of that track. To activate the fast reverse function, press and
hold the button.
Adjusting volumeVolume can be adjusted by turning the ON/OFF knob
⇒fig. 11. The volume
setting will be stored automatically.
If the volume is too low when the radio is turned on, it will be increased auto-
matically to a level set by the factory.
Note
Volume can also be adjusted using the buttons on the multi-function steering
wheel* ⇒page 14.
Fig. 10 Navigation
system: Forward/reverse
buttons
A2A1
A2
A1
Fig. 11 Navigation
system: ON/OFF knob
(adjusting volume)
Media System 1.0_EN.book Seite 11 Donnerstag, 10. September 2009 1:52 13
Page 13 of 124
Handling: General information
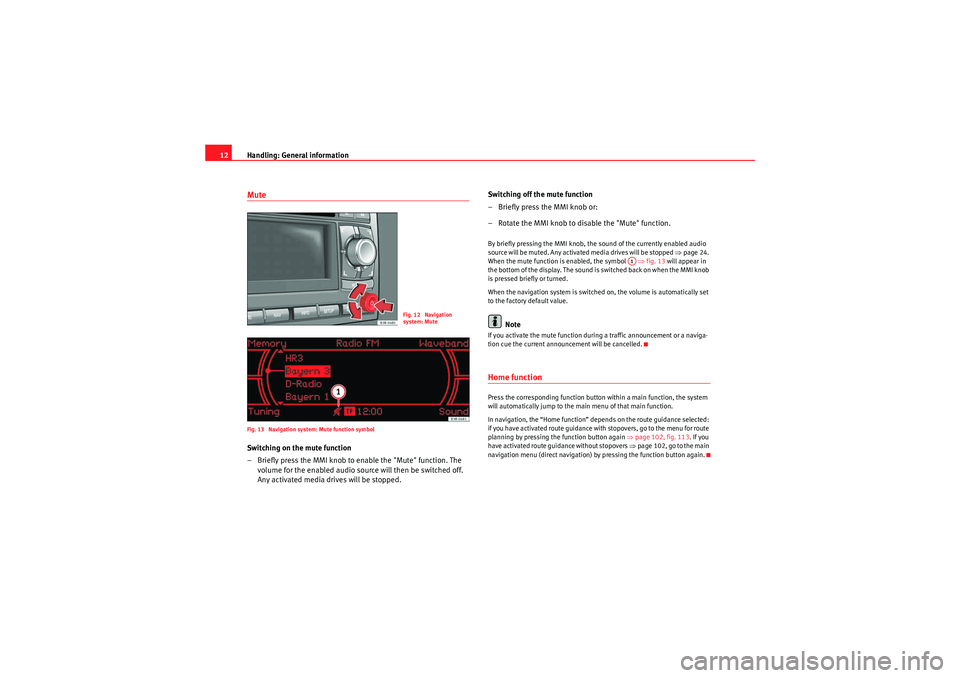
12MuteFig. 13 Navigation system: Mute function symbolSwitching on the mute function
– Briefly press the MMI knob to enable the "Mute" function. The
volume for the enabled audio source will then be switched off.
Any activated media drives will be stopped. Switching off the mute function
– Briefly press the MMI knob or:
– Rotate the MMI knob to disable the "Mute" function.
By briefly pressing the MMI knob, the sound of the currently enabled audio
source will be muted. Any activated media drives will be stopped
⇒page 24.
When the mute function is enabled, the symbol ⇒fig. 13 will appear in
the bottom of the display. The sound is switched back on when the MMI knob
is pressed briefly or turned.
When the navigation system is switched on, the volume is automatically set
to the factory default value.
Note
If you activate the mute function during a traffic announcement or a naviga-
tion cue the current announcement will be cancelled.Home functionPress the corresponding function button within a main function, the system
will automatically jump to the main menu of that main function.
In navigation, the “Home function” depends on the route guidance selected:
if you have activated route guidance with stopovers, go to the menu for route
planning by pressing the function button again ⇒page 102, fig. 113 . If you
have activated route guidance without stopovers ⇒page 102, go to the main
navigation menu (direct navigation) by pressing the function button again.
Fig. 12 Navigation
system: Mute
A1
Media System 1.0_EN.book Seite 12 Donnerstag, 10. September 2009 1:52 13
Page 14 of 124
Handling: General information13
Operating
RADIO, CD/MP3
TEL (telephone)
NAV, INFO
SETUP
History function
The system stores the last settings made.When a function button is pressed, the system will switch to the most recently
accessed menu level for the specific main function. This includes any
sublevels that were opened. This excludes the Setup menus.
The log data are erased when the system moves into standby mode.
An example: You are currently in radio mode and have selected the Manual
menu. You switch to the navigation menu by pressing the button. If you
then press the button, you will return to the menu selected before
leaving radio mode. In this case, the Manual menu of the radio is shown in
the display.
NAV
RADIO
Media System 1.0_EN.book Seite 13 Donnerstag, 10. September 2009 1:52 13
Page 15 of 124
Handling: General information
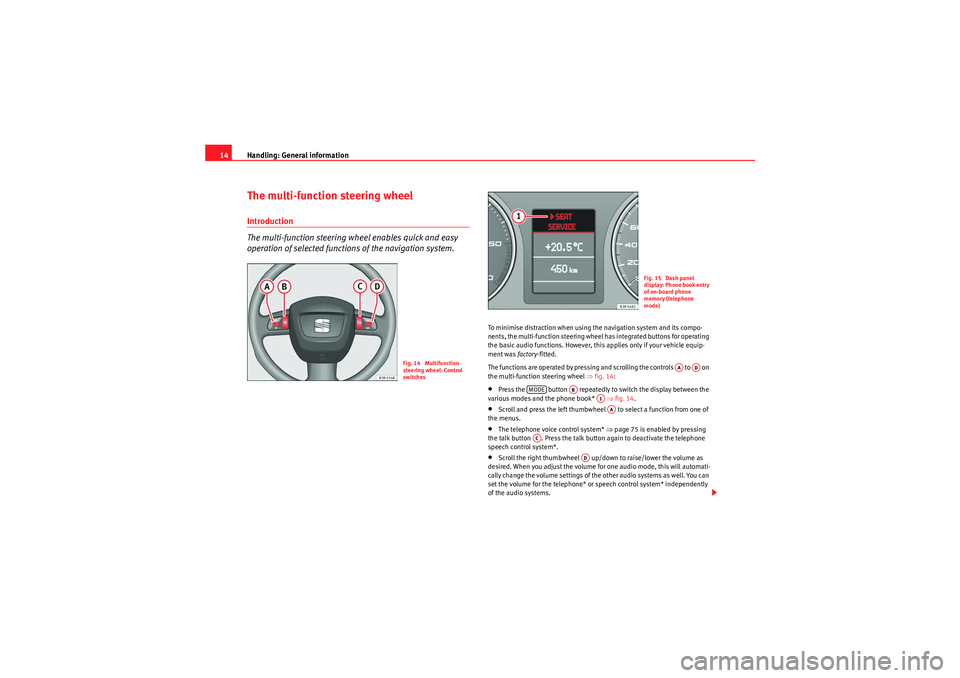
14The multi-function steering wheelIntroduction
The multi-function steering wheel enables quick and easy
operation of selected functions of the navigation system.
To minimise distraction when using the navigation system and its compo-
nents, the multi-function steering wheel has integrated buttons for operating
the basic audio functions. However, this applies only if your vehicle equip-
ment was factory-fitted.
The functions are operated by pressing and scrolling the controls to on
the multi-function steering wheel ⇒fig. 14 :•Press the button repeatedly to switch the display between the
various modes and the phone book* ⇒fig. 14 .•Scroll and press the left thumbwheel to select a function from one of
the menus.•The telephone voice control system* ⇒page 75 is enabled by pressing
the talk button . Press the talk button again to deactivate the telephone
speech control system*.•Scroll the right thumbwheel up/down to raise/lower the volume as
desired. When you adjust the volume for one audio mode, this will automati-
cally change the volume settings of the other audio systems as well. You can
set the volume for the telephone* or speech control system* independently
of the audio systems.
Fig. 14 Multifunction
steering wheel: Control
switches
Fig. 15 Dash panel
display: Phone book entry
of on-board phone
memory (telephone
mode)
AA
AD
MODE
AB
A1AA
AC
AD
Media System 1.0_EN.book Seite 14 Donnerstag, 10. September 2009 1:52 13
Page 16 of 124
Handling: General information15
Operating
RADIO, CD/MP3
TEL (telephone)
NAV, INFO
SETUP
•Press the right thumbwheel while the route guidance is enabled to
repeat the last navigation voice cue*.Note
If certain equipment has not been installed in the vehicle, the multi-function
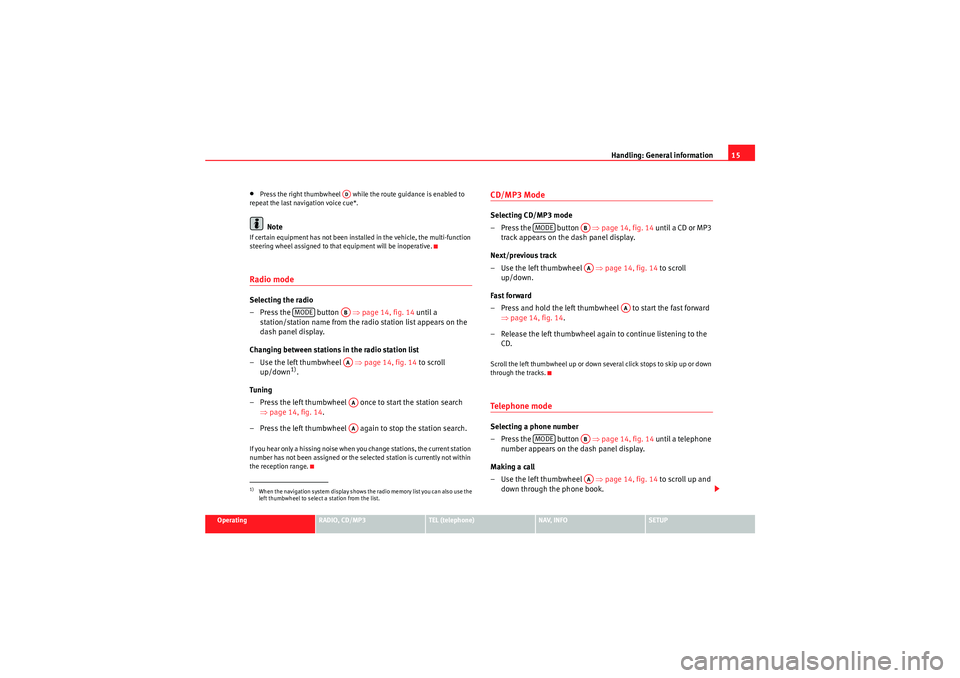
steering wheel assigned to that equipment will be inoperative.Radio modeSelecting the radio
– Press the button ⇒page 14, fig. 14 until a
station/station name from the ra dio station list appears on the
dash panel display.
Changing between stations in the radio station list
– Use the left thumbwheel ⇒page 14, fig. 14 to scroll
up/down
1).
Tun ing
– Press the left thumbwheel once to start the station search ⇒page 14, fig. 14 .
– Press the left thumbwheel again to stop the station search.
If you hear only a hissing noise when you change stations, the current station
number has not been assigned or the selected station is currently not within
the reception range.
CD/MP3 ModeSelecting CD/MP3 mode
– Press the button ⇒page 14, fig. 14 until a CD or MP3
track appears on the dash panel display.
Next/previous track
– Use the left thumbwheel ⇒page 14, fig. 14 to scroll
up/down.
Fast forward
– Press and hold the left thumbwheel to start the fast forward ⇒page 14, fig. 14 .
– Release the left thumbwheel again to continue listening to the CD.Scroll the left thumbwheel up or down several click stops to skip up or down
through the tracks.Te l e p h o n e m o d eSelecting a phone number
– Press the button ⇒page 14, fig. 14 until a telephone
number appears on the dash panel display.
Making a call
– Use the left thumbwheel ⇒page 14, fig. 14 to scroll up and
down through the phone book.
1)When the navigation system display shows the radio memory list you can also use the
left thumbwheel to select a station from the list.
AD
MODE
ABAAAAAA
MODE
ABAA
AA
MODE
ABAA
Media System 1.0_EN.book Seite 15 Donnerstag, 10. September 2009 1:52 13
Page 17 of 124
Handling: General information
16
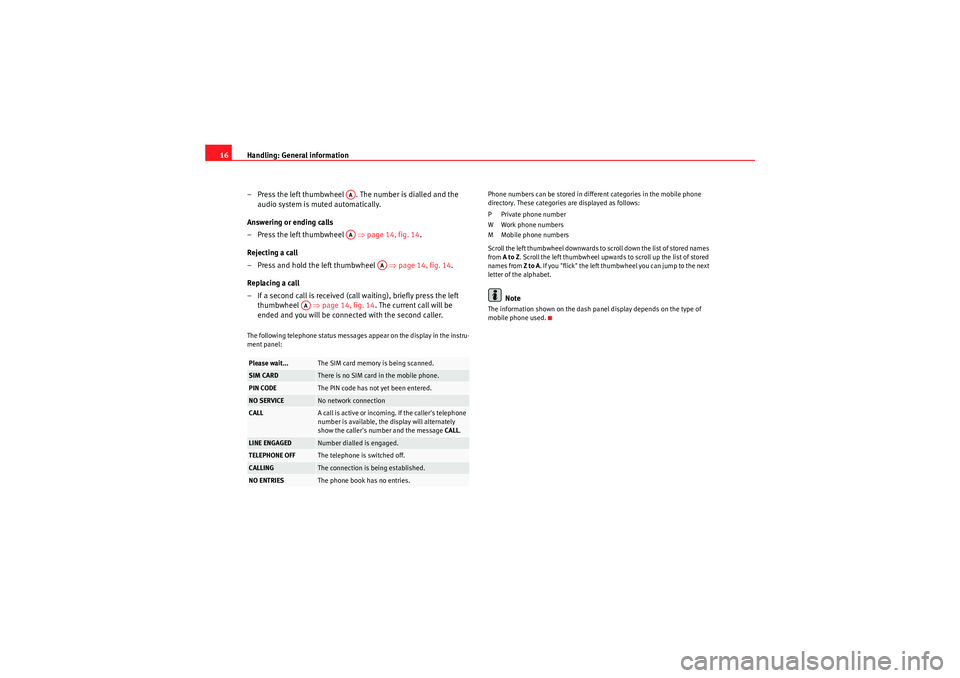
– Press the left thumbwheel . The number is dialled and the audio system is muted automatically.
Answering or ending calls
–Press the left thumbwheel ⇒ page 14, fig. 14.
Rejecting a call
– Press and hold the left thumbwheel ⇒page 14, fig. 14 .
Replacing a call
– If a second call is received (ca ll waiting), briefly press the left
thumbwheel ⇒page 14, fig. 14 . The current call will be
ended and you will be connected with the second caller.The following telephone status messages appear on the display in the instru-
ment panel: Phone numbers can be stored in different categories in the mobile phone
directory. These categories are displayed as follows:
P Private phone number
W Work phone numbers
M Mobile phone numbers
Scroll the left thumbwheel downwards to scroll down the list of stored names
from
A to Z . Scroll the left thumbwheel upwards to scroll up the list of stored
names from Z to A. If you "flick" the left thumbwheel you can jump to the next
letter of the alphabet.
Note
The information shown on the dash panel display depends on the type of
mobile phone used.
Please wait...
The SIM card memory is being scanned.
SIM CARD
There is no SIM card in the mobile phone.
PIN CODE
The PIN code has not yet been entered.
NO SERVICE
No network connection
CALL
A call is active or incoming. If the caller's telephone
number is available, the display will alternately
show the caller's number and the message CALL.
LINE ENGAGED
Number dialled is engaged.
TELEPHONE OFF
The telephone is switched off.
CALLING
The connection is being established.
NO ENTRIES
The phone book has no entries.
AAAA
AA
AA
Media System 1.0_EN.book Seite 16 Donnerstag, 10. September 2009 1:52 13
Page 18 of 124
Display17
Operating
RADIO, CD/MP3
TEL (telephone)
NAV, INFO
SETUP
DisplayA guide to the displayDescription
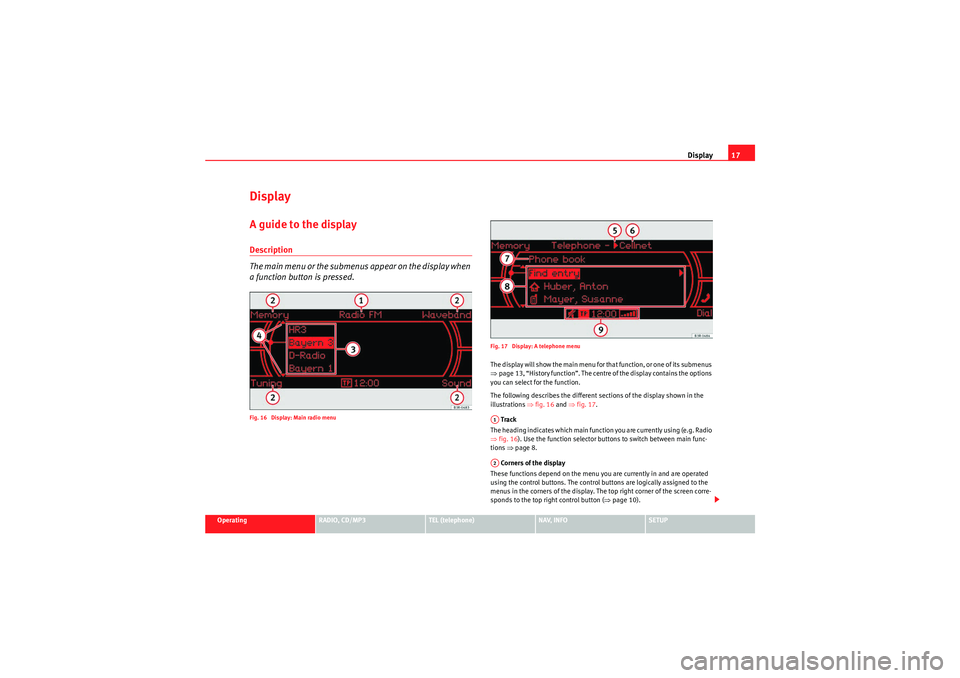
The main menu or the submenus appear on the display when
a function button is pressed.Fig. 16 Display: Main radio menu Fig. 17 Display: A telephone menu
The display will show the main menu for that function, or one of its submenus
⇒
page 13, “History function”. The centre of the display contains the options
you can select for the function.
The following describes the different sections of the display shown in the
illustrations ⇒fig. 16 and ⇒fig. 17 .
Track
The heading indicates which main function you are currently using (e.g. Radio
⇒ fig. 16 ). Use the function selector buttons to switch between main func-
tions ⇒page 8.
Corners of the display
These functions depend on the menu you are currently in and are operated
using the control buttons. The control buttons are logically assigned to the
menus in the corners of the display. The top right corner of the screen corre-
sponds to the top right control button ( ⇒page 10).A1A2
Media System 1.0_EN.book Seite 17 Donnerstag, 10. September 2009 1:52 13
Page 19 of 124
Display
18 Main menu display centre
The settings of the available options that you can modify and the system
messages are indicated in the centre of the display.
Cursor and arrows
The cursor and the arrows in the centre of the display help select other func-
tions ⇒page 19.
Roaming symbol*
If your vehicle is equipped with a telephone* and you are not using your home
network, the roaming symbol will also appear in the display header.
Mobile network service provider*
If your vehicle is equipped with a telephone*, the name of the mobile network
service provider your telephone is using will appear in the display header.
The name of the mobile network service provider as it appears in the display
may be different from the name that appears in the phone display.
Subtitle
The subtitle shows detailed information about the selected menu option,
such as Phone book ⇒ page 17, fig. 17 .
Submenu display centre
In the centre of the display, the available options in the particular menu are
listed or notes are displayed.
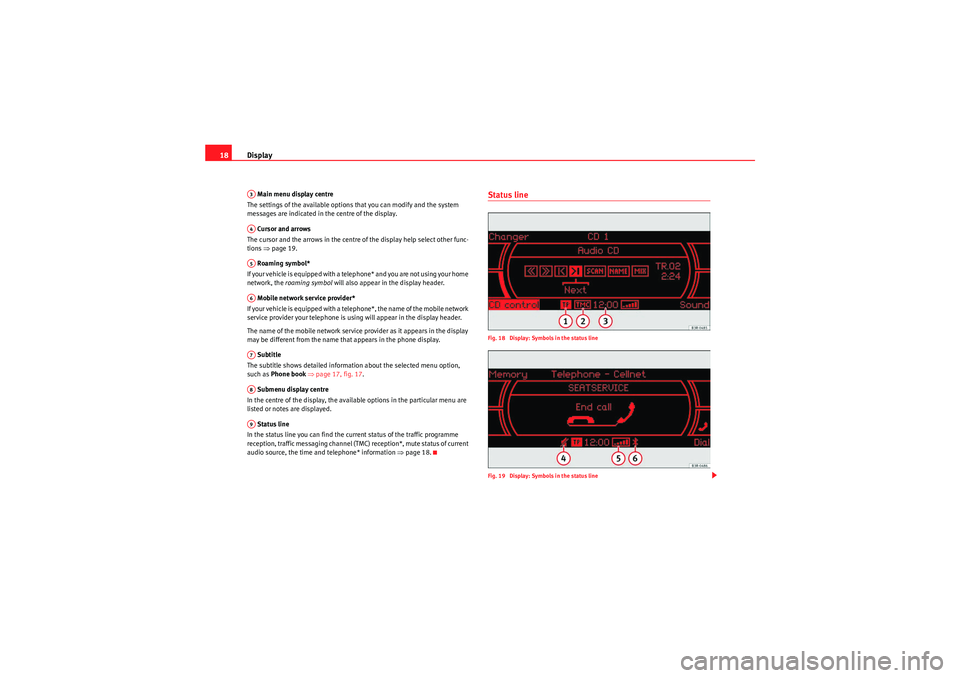
Status line
In the status line you can find the current status of the traffic programme
reception, traffic messaging channel (TMC) reception*, mute status of current
audio source, the time and telephone* information ⇒ page 18.
Status lineFig. 18 Display: Symbols in the status line
Fig. 19 Display: Symbols in the status line
A3A4A5A6A7A8A9
Media System 1.0_EN.book Seite 18 Donnerstag, 10. September 2009 1:52 13
Page 20 of 124
Display19
Operating
RADIO, CD/MP3
TEL (telephone)
NAV, INFO
SETUP
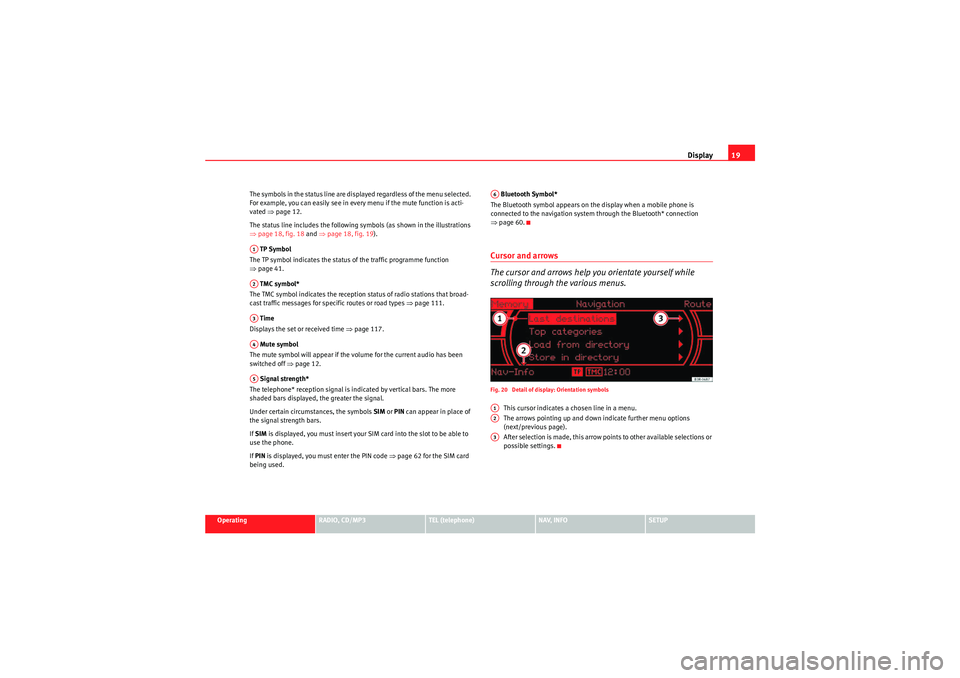
The symbols in the status line are displayed regardless of the menu selected.
For example, you can easily see in every menu if the mute function is acti-
vated
⇒page 12.
The status line includes the following symbols (as shown in the illustrations
⇒ page 18, fig. 18 and ⇒page 18, fig. 19 ).
TP Symbol
The TP symbol indicates the status of the traffic programme function
⇒ page 41.
TMC symbol*
The TMC symbol indicates the reception status of radio stations that broad-
cast traffic messages for specific routes or road types ⇒page 111.
Time
Displays the set or received time ⇒page 117.
Mute symbol
The mute symbol will appear if the volume for the current audio has been
switched off ⇒page 12.
Signal strength*
The telephone* reception signal is indicated by vertical bars. The more
shaded bars displayed, the greater the signal.
Under certain circumstances, the symbols SIM or PIN can appear in place of
the signal strength bars.
If SIM is displayed, you must insert your SIM card into the slot to be able to
use the phone.
If PIN is displayed, you must enter the PIN code ⇒page 62 for the SIM card
being used. Bluetooth Symbol*
The Bluetooth symbol appears on the display when a mobile phone is
connected to the navigation system through the Bluetooth* connection
⇒ page 60.
Cursor and arrows
The cursor and arrows help you orientate yourself while
scrolling through the various menus.Fig. 20 Detail of display: Orientation symbols
This cursor indicates a chosen line in a menu.
The arrows pointing up and down indicate further menu options
(next/previous page).
After selection is made, this arrow points to other available selections or
possible settings.
A1A2A3A4A5
A6A1A2A3
Media System 1.0_EN.book Seite 19 Donnerstag, 10. September 2009 1:52 13