ignition Seat Ibiza 2017 Edition 11.17 Workshop Manual
[x] Cancel search | Manufacturer: SEAT, Model Year: 2017, Model line: Ibiza, Model: Seat Ibiza 2017Pages: 312, PDF Size: 6.51 MB
Page 153 of 312
Lights and visibility
headlights in good time when light condi-
tion s
bec
ome poor.
Interior and reading lights Read the additional information carefully
›› ›
page 33
Luggage compartment lighting
The light is activated when the rear lid is
open, even when the ignition and lights are
turned off. For this reason, ensure that the
rear lid is always closed.
Ambient light*
The ambient light lights up the area of the
centre console and the footwell area and, de-
pending on the version, the front door panels
as well.
It will be switched on at full brightness when
the doors are opened and the lights will be
dimmed during driving, when the light selec-
tor is in the , or position.
The brightness of the ambient light* can be
adjusted through the Easy Connect menu, as
can colour, in versions with lighting on the
front door panel (the button and the func-
tion b utt
on
SETTINGS > background
lighting ›››
page 34). Note
If not all the vehicle doors are closed, the in-
terior light s
will be switched off after approx.
10 minutes, providing the ignition key has
been removed and the courtesy light position
selected. This prevents the battery from dis-
charging. Visibility
Heat ed r
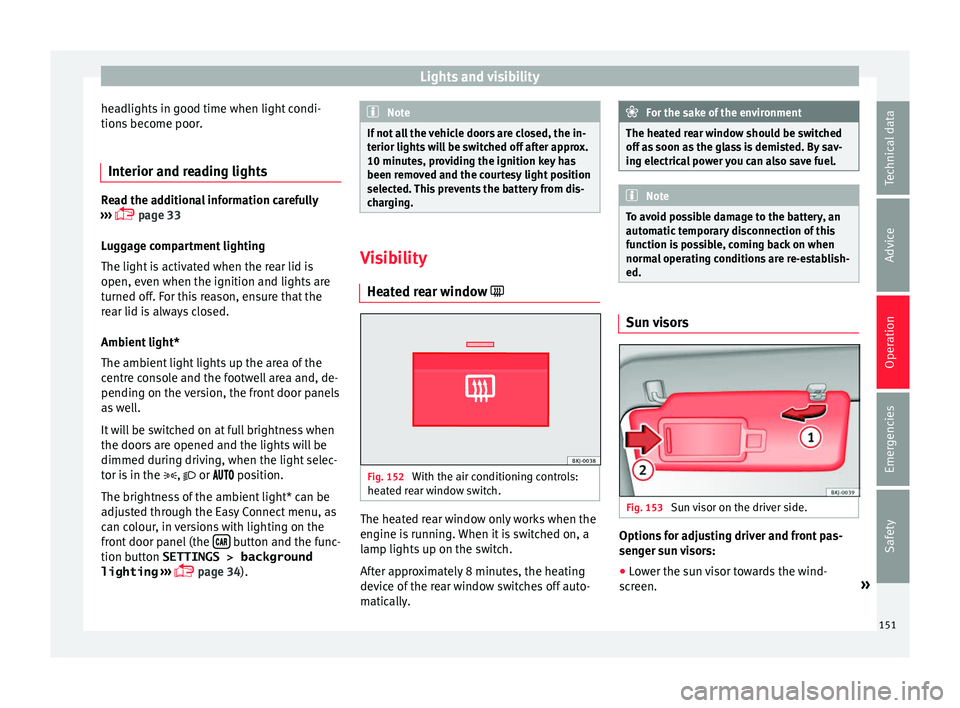
ear window Fig. 152
With the air conditioning controls:
he at
ed r
ear window switch. The heated rear window only works when the
en
gine i
s
running. When it is switched on, a
lamp lights up on the switch.
After approximately 8 minutes, the heating
device of the rear window switches off auto-
matically. For the sake of the environment
The heated rear window should be switched
off a s
soon as the glass is demisted. By sav-
ing electrical power you can also save fuel. Note
To avoid possible damage to the battery, an
autom atic
temporary disconnection of this
function is possible, coming back on when
normal operating conditions are re-establish-
ed. Sun visors
Fig. 153
Sun visor on the driver side. Options for adjusting driver and front pas-
sen
g
er s
un visors:
● Lower the sun visor towards the wind-
sc r
een. »
151
Technical data
Advice
Operation
Emergencies
Safety
Page 154 of 312
Operation
● The s u
n
visor can be pulled out of its
mounting and turned towards the door
››› Fig. 153 1 .
● Swing the sun visor towards the door, lon-
git udin
al
ly backwards.
Vanity mirror
There is a vanity mirror, with a cover 2 , on
the r e
ar of
the sun blind. WARNING
Folded sun blinds can reduce visibility.
● Always store sun blinds and visors in their
hous in
g when not in use. Windscreen wiper and rear win-
do
w w
iper sy
stems
Windscreen wiper and window wiper Read the additional information carefully
› ›
›
page 33 WARNING
● Worn and dir ty
wiper blades reduce visibili-
ty and safety levels while driving.
● In cold conditions you should not use the
wash/w
ipe system unless you have warmed
the windscreen with the heating and ventila-
tion system. The windscreen washer fluid could otherwise freeze on the windscreen and
ob
s
cure your view of the road.
● Always note the corresponding warnings
›››
page 73. WARNING
The rain sensor* may not detect enough rain
t o sw it
ch on the wipers.
● If necessary, switch on the wipers manually
when water on the w
indscreen obstructs visi-
bility. CAUTION
In icy conditions, always check that the wind-
sc r
een wipers and the window wiper are not
frozen. If you switch on the windscreen wip-
ers when the wiper blades are frozen to the
windscreen, you could damage both the wip-
er blades and the wiper motor. Note
● The wiper s
and washers will work only
when the ignition is switched on.
● The heat output of the heated jets* is con-
trol
led automatically when the ignition is
switched on, depending upon the outside
temperature.
● In certain versions of vehicles with alarms,
the winds
creen wiper will only work in inter-
val/rain sensor mode when the ignition is on
and the bonnet closed. ●
When the inter v
al wipe function is on, the
intervals are directly proportional to the
speed. This way, the higher the vehicle speed
the shorter the intervals.
● If you stop the vehicle with the windscreen
wiper in pos
ition 1 or 2, it will automatically
change to a lower position speed. The set
speed will be resumed when the vehicle pulls
away.
● The windscreen will be wiped again after
appro
ximately five seconds once the “auto-
matic wash/wipe system” has been activa-
ted, provided the vehicle is moving (drip func-
tion). If you activate the wipers less than 3
seconds after the drip function, a new wash
sequence will begin without performing the
last wipe. For the “drip” function to work
again, you have to turn the ignition off and
then on again.
● Do not put stickers on the windscreen in
front of
the rain sensor*. This may cause sen-
sor disruption or faults.
● Depending on the version of the model,
when you en
gage reverse gear and with the
headlight wiper activated, this can start a
wipe. Rear view mirrors
Int erior mirr or It is dangerous to drive if you cannot see
c
le
arly through the rear window.
152
Page 155 of 312
Lights and visibility
Interior mirror with automatic anti-dazzle
f u
nction*
The anti-d
azzle function is activated every
time the ignition is switched on.
When the anti-dazzle function is enabled, the
interior rear vision mirror will darken auto-
matically according to the amount of light it
receives. The anti-dazzle function is cancel-
led if reverse gear is engaged. Note
● The autom atic
anti-dazzle function will only
work properly if the sun blind* for the rear
window is retracted and there are no other
objects preventing light from reaching the in-
terior rear vision mirror.
● If you have to stick any type of sticker on
the winds
creen, do not do so in front of the
sensors. Doing so could prevent the anti-daz-
zle function from working well or even from
working at all. Folding in the exterior mirrors man-
ua
l
ly The exterior mirrors of the vehicle may be fol-
ded in. F
or thi
s, pr
ess the mirror housing to-
wards the vehicle. Note
Before washing the vehicle with an automatic
car w a
sh, fold in the exterior mirrors to avoid
damage. Electric exterior mirrors*
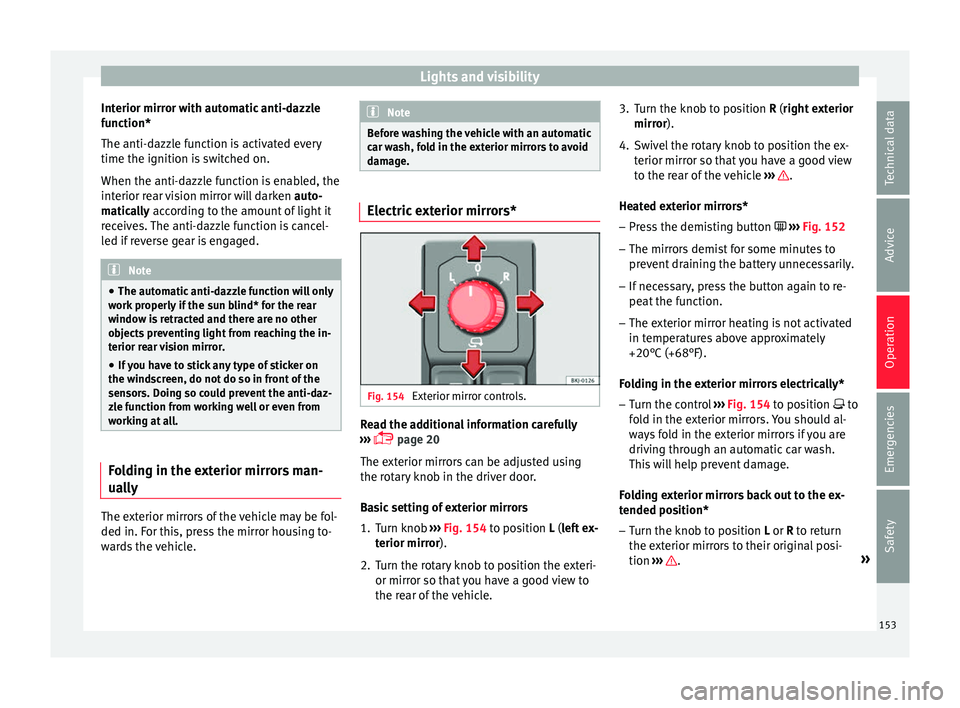
Fig. 154
Exterior mirror controls. Read the additional information carefully
› ›
›
page 20
The exterior mirrors can be adjusted using
the rotary knob in the driver door.
Basic setting of exterior mirrors
1. Turn knob ›››
Fig. 154 to position L (left ex-
terior mirror).
2. Turn the rotary knob to position the exteri- or mirror so that
you have a good view to
the rear of the vehicle. 3. Turn the knob to position R (right ext
erior
mirror).
4. Swivel the rotary knob to position the ex- terior mirror so th
at you have a good view
to the rear of the vehicle ››› .
He at
ed e
xterior mirrors*
– Press the demisting button ›››
Fig. 152
– The mirrors demist for some minutes to
prevent
draining the battery unnecessarily.
– If necessary, press the button again to re-
peat the f
unction.
– The exterior mirror heating is not activated
in temperat
ures above approximately
+20°C (+68°F).
Folding in the exterior mirrors electrically* – Turn the control ›››
Fig. 154 to position to
fold in the exterior mirrors. You should al-
ways fold in the exterior mirrors if you are
driving through an automatic car wash.
This will help prevent damage.
Folding exterior mirrors back out to the ex-
tended position* – Turn the knob to position L or R to ret
urn
the exterior mirrors to their original posi-
tion ››› .
»
153
Technical data
Advice
Operation
Emergencies
Safety
Page 158 of 312
Operation
WARNING
● Ple a
se observe the general notes
››› page 79.
● Remove the rear head restraints only when
it is
necessary for the placement of a child
seat ››› page 92. After removing a child seat,
remount the head restraint immediately.
Travelling with the head restraints removed
or improperly adjusted increases the risk of
severe injuries. Seat functions
Intr oduction WARNING
Inappropriate use of the seat functions can
cau se sev
ere injuries.
● Assume the proper sitting position before
your trip and rem
ain in it throughout. This al-
so applies to the other occupants.
● Always keep hands, fingers, feet and other
part
s of the body away from the operating ra-
dius and the adjustment of seats. Heated seats*
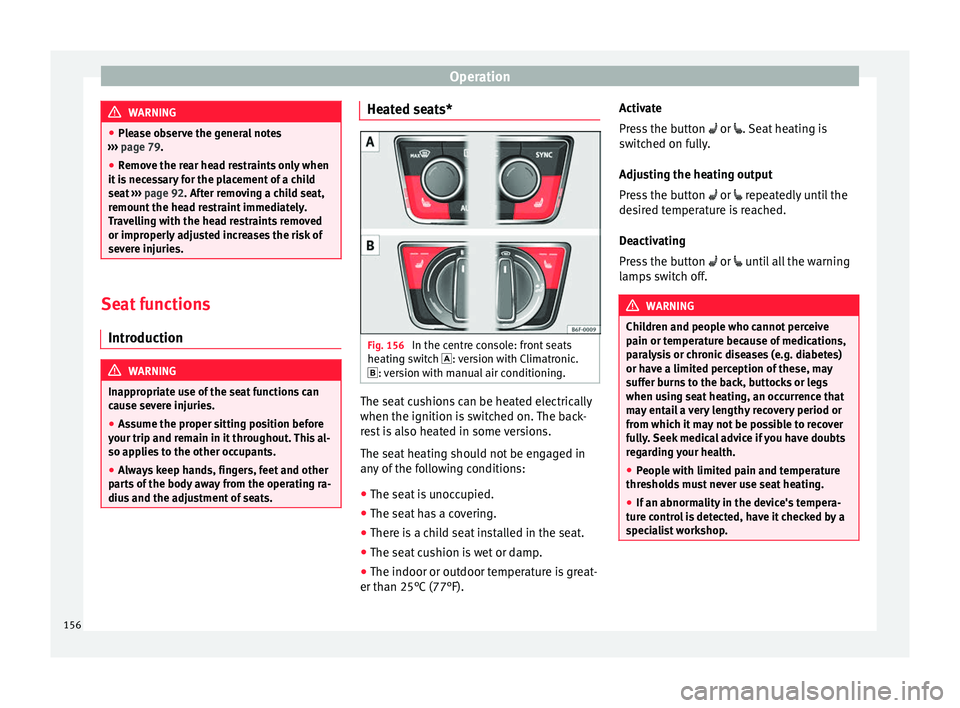
Fig. 156
In the centre console: front seats
he atin
g sw
itch : version with Climatronic.
: version with manual air conditioning. The seat cushions can be heated electrically
when the ignition i
s
sw
itched on. The back-
rest is also heated in some versions.
The seat heating should not be engaged in
any of the following conditions:
● The seat is unoccupied.
● The seat has a covering.
● There is a child seat installed in the seat.
● The seat cushion is wet or damp.
● The indoor or outdoor temperature is great-
er than 25°C (77°F). A
ctivate
Pres
s the button or . Seat heating is
switched on fully.
Adjusting the heating output
Press the button or repeatedly until the
desired temperature is reached.
Deactivating
Press the button or until all the warning
lamps switch off. WARNING
Children and people who cannot perceive
pain or t emper
ature because of medications,
paralysis or chronic diseases (e.g. diabetes)
or have a limited perception of these, may
suffer burns to the back, buttocks or legs
when using seat heating, an occurrence that
may entail a very lengthy recovery period or
from which it may not be possible to recover
fully. Seek medical advice if you have doubts
regarding your health.
● People with limited pain and temperature
thresho
lds must never use seat heating.
● If an abnormality in the device's tempera-
ture c
ontrol is detected, have it checked by a
specialist workshop. 156
Page 162 of 312
Operation
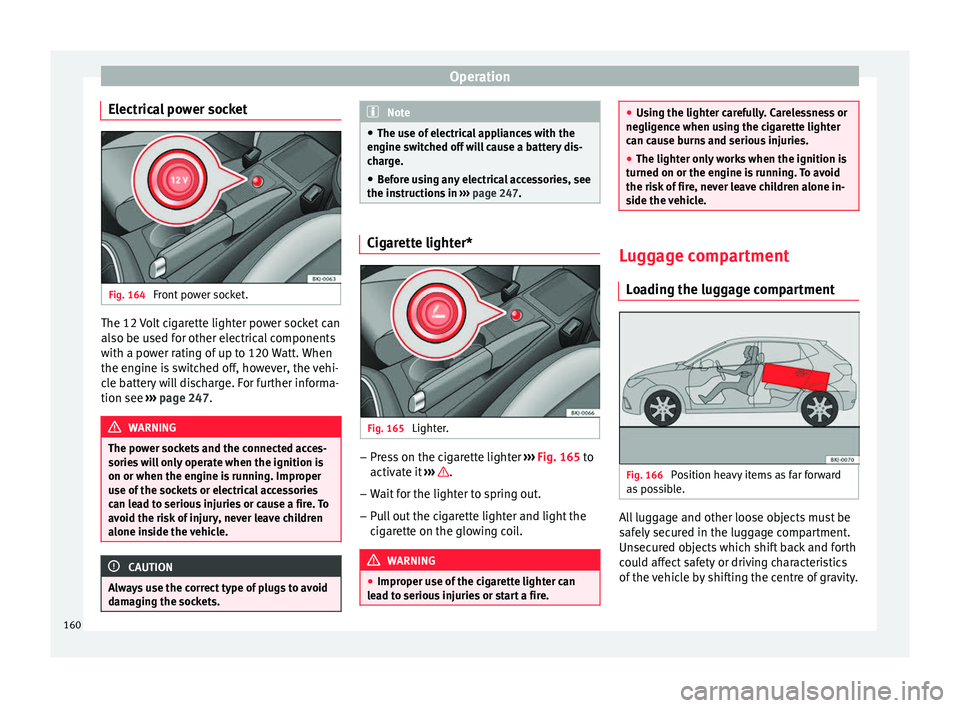
Electrical power socket Fig. 164
Front power socket. The 12 Volt cigarette lighter power socket can
al
so be u
sed f
or other electrical components
with a power rating of up to 120 Watt. When
the engine is switched off, however, the vehi-
cle battery will discharge. For further informa-
tion see ››› page 247. WARNING
The power sockets and the connected acces-
sories w
ill only operate when the ignition is
on or when the engine is running. Improper
use of the sockets or electrical accessories
can lead to serious injuries or cause a fire. To
avoid the risk of injury, never leave children
alone inside the vehicle. CAUTION
Always use the correct type of plugs to avoid
dam agin
g the sockets. Note
● The use of el
ectrical appliances with the
engine switched off will cause a battery dis-
charge.
● Before using any electrical accessories, see
the instruction
s in ››› page 247. Cigarette lighter*
Fig. 165
Lighter. –
Press on the cigarette lighter ››
›
Fig. 165 to
activate it ››› .
– Wait for the lighter to spring out.
– Pull out the cigarette lighter and light the
cig
ar
ette on the glowing coil. WARNING
● Improper u se of
the cigarette lighter can
lead to serious injuries or start a fire. ●
Us in
g the lighter carefully. Carelessness or
negligence when using the cigarette lighter
can cause burns and serious injuries.
● The lighter only works when the ignition is
turned on or the engine i
s running. To avoid
the risk of fire, never leave children alone in-
side the vehicle. Luggage compartment
Lo a
ding the luggage compartment Fig. 166
Position heavy items as far forward
a s
po
ssible. All luggage and other loose objects must be
s
af
ely
secured in the luggage compartment.
Unsecured objects which shift back and forth
could affect safety or driving characteristics
of the vehicle by shifting the centre of gravity.
160
Page 176 of 312
Operation
● Adju s
t
the vents so that the air flow is di-
rected slightly upwards.
Change between degrees Centigrade and de-
grees Fahrenheit
The units of degrees can be changed via the
Easy Connect system using the button
and the f u
nction b
utton SETTINGS >
Units > Temperature .
Automatic mode
Automatic mode is used to maintain a con-
stant temperature and demist the windows
inside the vehicle.
● Set a interior temperature between +16°C
(+64°F) and +29°C (+84°F).
● Adjus
t the vents so that the air flow is di-
rected s
lightly upwards.
● Press the butt
on, AUTO is displayed on
the screen.
Automatic mode is switched off by pressing
the air distribution buttons or increasing or
decreasing the blower speed. However, the
temperature remains regulated.
Adjusting the temperature
● When you switch on the ignition, control 1›››
Fig. 176 can be u sed t
o set the required in-
terior temperature. It is possible to select interior temperatures
from +16°C
(+64°F) t
o +29°C (+84°F). In this
range the temperature is regulated automati-
cally. If a temperature below +16°C (+64°F) is
selected, “LO” is displayed on the screen. If a
temperature above +29°C (+84°F) is selected,
“HI” is displayed on the screen. At both ex-
tremes, Climatronic works at maximum cool-
ing or heating power, respectively. The tem-
perature is not regulated.
In the event of prolonged, irregular distribu-
tion of the air flow from the outlets (particu-
larly the footwells) and significant differen-
ces in temperature, e.g. on leaving the vehi-
cle, sensitive people may catch cold.
Fan regulation
Climatronic automatically regulates blower
speed according to the interior temperature.
It is possible, however, to set the blower
speed to suit requirements.
● Press the 2 buttons to increase or reduce
f an s
peed.
C
limatronic will switch off when the blower
switches off.
Turn on windscreen defrost
● Press the button ›››
Fig. 176. Switching off windscreen defrosting
●
Press the button sev
eral times or
press the button.
The temperature is regulated automatically.
The air output from the vents ››› Fig. 173 2 is increased.
WARNING
Read and observe the safety warnings ›››
in
Genera l
notes on page 166. Note
● A v i
sit to the specialised service once a
year is recommended to clean the Climatronic
system.
● The interior temperature sensor is at the
bottom. Do not c
over it with stickers or the
like, as this could have a negative effect on
Climatronic operations. 174
Page 177 of 312
Driving
Driving St ar
tin
g and stopping the en-
gine
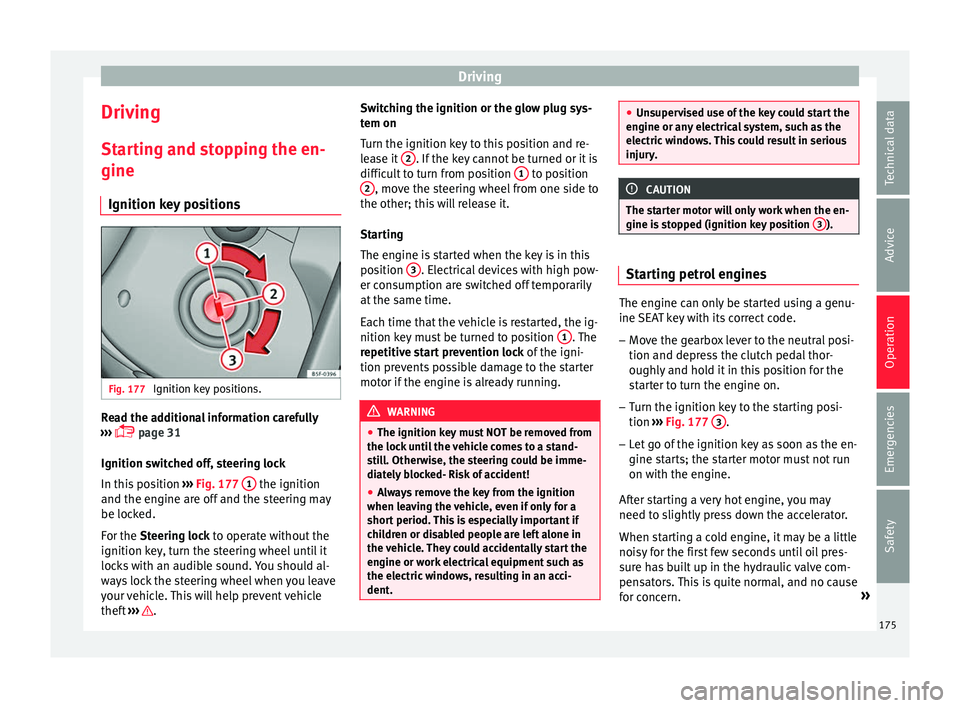
Ignition key positions Fig. 177
Ignition key positions. Read the additional information carefully
› ›
›
page 31
Ignition switched off, steering lock
In this position ››› Fig. 177 1 the ignition
and the en gine ar
e off
and the steering may
be locked.
For the Steering lock to operate without the
ignition key, turn the steering wheel until it
locks with an audible sound. You should al-
ways lock the steering wheel when you leave
your vehicle. This will help prevent vehicle
theft ››› . Switching the ignition or the glow plug sys-
t
em on
T urn the ignition k
ey to this position and re-
lease it 2 . If the key cannot be turned or it is
diffic u
lt
to turn from position 1 to position
2 , move the steering wheel from one side to
the other; thi s
w
ill release it.
Starting
The engine is started when the key is in this
position 3 . Electrical devices with high pow-
er c on
s
umption are switched off temporarily
at the same time.
Each time that the vehicle is restarted, the ig-
nition key must be turned to position 1 . The
r epetitiv
e s
tart prevention lock of the igni-
tion prevents possible damage to the starter
motor if the engine is already running. WARNING
● The ignition key mu
st NOT be removed from
the lock until the vehicle comes to a stand-
still. Otherwise, the steering could be imme-
diately blocked- Risk of accident!
● Always remove the key from the ignition
when leav
ing the vehicle, even if only for a
short period. This is especially important if
children or disabled people are left alone in
the vehicle. They could accidentally start the
engine or work electrical equipment such as
the electric windows, resulting in an acci-
dent. ●
Uns uper
vised use of the key could start the
engine or any electrical system, such as the
electric windows. This could result in serious
injury. CAUTION
The starter motor will only work when the en-
gine i s s
topped (ignition key position 3 ).
Starting petrol engines
The engine can only be started using a genu-
ine
S
EA
T key with its correct code.
– Move the gearbox lever to the neutral posi-
tion and depres
s the clutch pedal thor-
oughly and hold it in this position for the
starter to turn the engine on.
– Turn the ignition key to the starting posi-
tion ›››
Fig. 177 3 .
– Let go of the ignition key as soon as the en-
gine s t
ar
ts; the starter motor must not run
on with the engine.
After starting a very hot engine, you may
need to slightly press down the accelerator.
When starting a cold engine, it may be a little
noisy for the first few seconds until oil pres-
sure has built up in the hydraulic valve com-
pensators. This is quite normal, and no cause
for concern. »
175
Technical data
Advice
Operation
Emergencies
Safety
Page 178 of 312
Operation
If the engine does not start immediately,
sw it
c
h the starter off after 10 seconds and try
again after half a minute. If the engine still
does not start, the fuel pump fuse should be
checked ››› page 104, Fuses. WARNING
● Never s t
art or run the engine in unventila-
ted or closed rooms. The exhaust gases con-
tain carbon monoxide, an odourless and col-
ourless poisonous gas. Risk of fatal acci-
dents. Carbon monoxide can cause loss of
consciousness and result in death.
● Never leave the vehicle unattended if the
engine is
running.
● Never use “cold start sprays”, they could
explode or c
ause the engine to run at high
revs. Risk of injury. CAUTION
● When the engine i s
cold, you should avoid
high engine speeds, driving at full throttle
and over-loading the engine. Risk of engine
damage.
● The vehicle should not be pushed or towed
more than 50 metr
es to start the engine. Un-
burnt fuel could enter the catalytic converter
and damage it.
● Before attempting to push-start or tow a ve-
hicle in or
der to start it, you should first try to
start it using the battery of another vehicle.
Please observe and follow the notes on the
››› page 71, How to jump start. For the sake of the environment
Do not warm-up the engine by running the
engine w ith the
vehicle stationary. Start off
immediately, driving gently. This helps the
engine reach operating temperature faster
and reduces emissions. Starting diesel engines
The engine can only be started using a genu-
ine S
EA
T key with its correct code.
– Move the gearbox lever to the neutral posi-
tion and depre s
s the clutch pedal thor-
oughly and hold it in this position for the
starter to turn the engine on.
– Turn the ignition key to position ›››
Fig. 177
2 . The warning lamp
wi
l l light for en-
gine pre-heating.
– When the lamp turns off, turn the ignition
key t
o position 3 to start the engine. Do
not pr
e
ss the accelerator.
– Release the ignition key as soon as the en-
gine star
ts. The starter motor should not
turn at the same time.
When starting a cold engine, it may be a little
noisy for the first few seconds until oil pres-
sure has built up in the hydraulic valve com-
pensators. This is quite normal, and no cause
for concern. If there are problems starting the engine, see
the
›››
page 71.
Glow plug system for diesel engines
To avoid unnecessary discharging of the bat-
tery, do not use any other major electrical
equipment while the glow plugs are pre-heat-
ing.
Start the engine as soon as the glow plug
warning lamp goes out.
Starting a diesel engine after the fuel tank
has run dry
If the fuel tank has been completely run dry,
it may take longer than normal (up to one mi-
nute) to start a diesel engine after refuelling.
This is because the fuel system must elimi-
nate air first. WARNING
Observe the safety warnings ›››
in Starting
petro l
engines on page 176. CAUTION
● When the engine i s
cold, you should avoid
high engine speeds, driving at full throttle
and over-loading the engine. Risk of engine
damage.
● The vehicle should not be pushed or towed
more than 50 metr
es to start the engine. Un-
burnt fuel could enter the particulate filter
and damage it. 176
Page 179 of 312
Driving
●
Bef or
e attempting to push-start or tow a ve-
hicle in order to start it, you should first try to
start it using the battery of another vehicle.
Please observe and follow the notes on the
››› page 71, How to jump start. For the sake of the environment
Do not warm-up the engine by running the
en gine w ith the
vehicle stationary. You
should drive off as soon as you start the en-
gine. This helps the engine reach operating
temperature faster and reduces emissions. “SAFE” electronic immobiliser
1)The electronic immobiliser prevents unau-
thori
sed per
son
s from driving the vehicle.
Inside the key there is a chip that deactivates
the electronic immobiliser automatically
when the key is inserted into the ignition.
The electronic immobiliser will be activated
again automatically as soon as you pull the
key out of the ignition lock.
The engine can only be started using a genu-
ine SEAT key with its correct code.
If the following message* is shown on the in-
strument panel display: SAFE, the vehicle
cannot be started. The engine can, however, be started if the
appropri
ate coded SEAT genuine key is used. Note
A perfect operation of the vehicle is ensured
if g enuine
SEAT keys are used. Switching off the engine
–
Stop the vehicle.
– Turn the ignition key to position ›
› ›
Fig. 177
1 .
Af t
er sw
itching the engine off, the radiator
fan may run on for up to 10 minutes. It is also
possible that the fan turns itself on once
more if the coolant temperature increases
due to the heat accumulated in the engine
compartment or due to its prolonged expo-
sure to solar radiation. WARNING
● Never sw it
ch the engine off until the vehi-
cle is completely stationary.
● The brake servo works only when the en-
gine is ru
nning. With the engine switched off,
more strength is needed to brake. As normal
brake operation cannot be performed, risk of
accidents and serious injury may exist. ●
The st eerin
g lock can be immediately
blocked once the key is removed from the ig-
nition. The vehicle cannot be steered. Risk of
accident.
● Power-assisted steering does not work
when the engine is
off, and more strength is
needed to turn the wheel.
● If the key is removed from the ignition lock
the steerin
g lock could be engaged and vehi-
cle steering would not work. CAUTION
● When the en gine ha
s been running under a
heavy load for a long period, heat can accu-
mulate in the engine compartment and cause
engine damage. For this reason, idle the en-
gine for approximately 2 minutes before
switching it off.
● If the vehicle is stopped and the Start-Stop
syst
em* switches off the engine, the ignition
remains switched on. Make sure that the igni-
tion is switched off before leaving the vehi-
cle, otherwise the battery could discharge. 1)
Available depending on the market
177
Technical data
Advice
Operation
Emergencies
Safety
Page 180 of 312
Operation
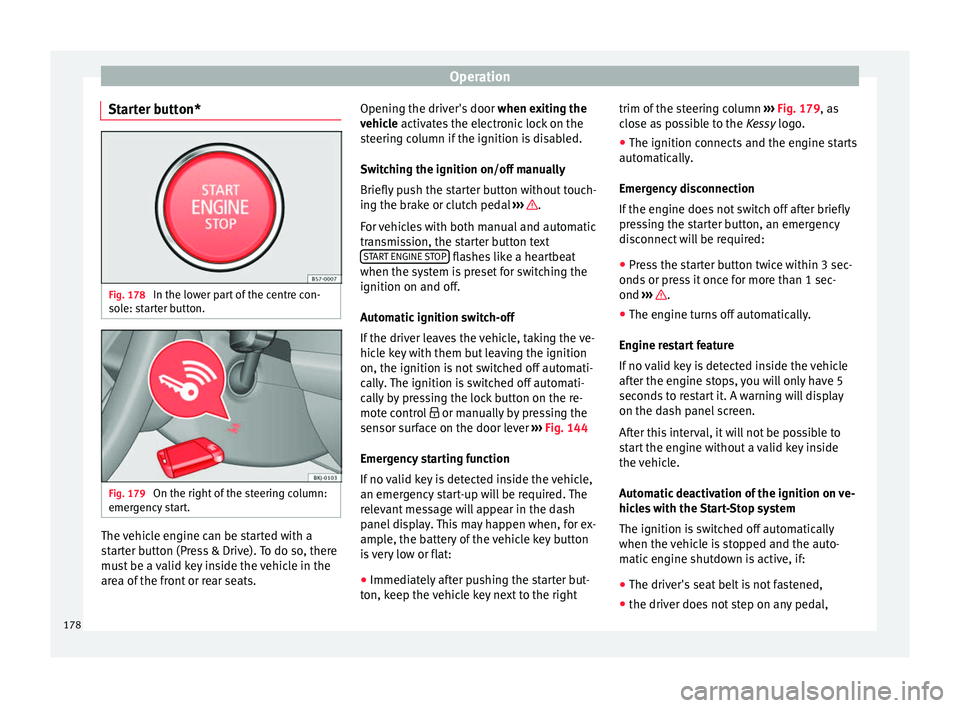
Starter button* Fig. 178
In the lower part of the centre con-
so l
e: s
tarter button. Fig. 179
On the right of the steering column:
emer gency
start. The vehicle engine can be started with a
s
t
ar
ter button (Press & Drive). To do so, there
must be a valid key inside the vehicle in the
area of the front or rear seats. Opening the driver's door
when exitin
g the
vehicle activates the electronic lock on the
steering column if the ignition is disabled.
Switching the ignition on/off manually
Briefly push the starter button without touch-
ing the brake or clutch pedal ››› .
F or
v
ehicles with both manual and automatic
transmission, the starter button text START ENGINE STOP flashes like a heartbeat
when the sy s
t
em is preset for switching the
ignition on and off.
Automatic ignition switch-off
If the driver leaves the vehicle, taking the ve-
hicle key with them but leaving the ignition
on, the ignition is not switched off automati-
cally. The ignition is switched off automati-
cally by pressing the lock button on the re-
mote control or manually by pressing the
sensor surface on the door lever ››› Fig. 144
Emergency starting function
If no valid key is detected inside the vehicle,
an emergency start-up will be required. The
relevant message will appear in the dash
panel display. This may happen when, for ex-
ample, the battery of the vehicle key button
is very low or flat:
● Immediately after pushing the starter but-
ton, k eep the
vehicle key next to the right trim of the steering column
›››
Fig. 179, as
close as possible to the Kessy logo.
● The ignition connects and the engine starts
automatic
ally.
Emergency disconnection
If the engine does not switch off after briefly
pressing the starter button, an emergency
disconnect will be required:
● Press the starter button twice within 3 sec-
onds or pr
ess it once for more than 1 sec-
ond ››› .
● The engine turns off automatically.
En gine r
e
start feature
If no valid key is detected inside the vehicle
after the engine stops, you will only have 5
seconds to restart it. A warning will display
on the dash panel screen.
After this interval, it will not be possible to
start the engine without a valid key inside
the vehicle.
Automatic deactivation of the ignition on ve-
hicles with the Start-Stop system
The ignition is switched off automatically
when the vehicle is stopped and the auto-
matic engine shutdown is active, if:
● The driver's seat belt is not fastened,
● the driver does not step on any pedal,
178