technical specifications Seat Ibiza 5D 2014 User Guide
[x] Cancel search | Manufacturer: SEAT, Model Year: 2014, Model line: Ibiza 5D, Model: Seat Ibiza 5D 2014Pages: 240, PDF Size: 4.89 MB
Page 25 of 240
The essentials
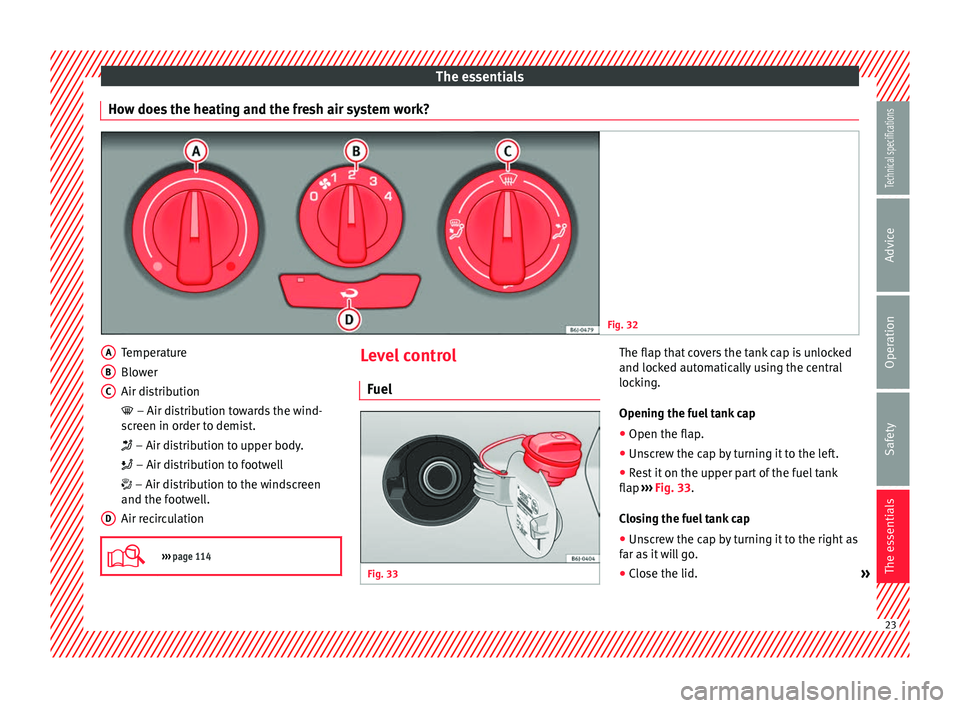
How does the heating and the fresh air system work? Fig. 32
Temperature
Blower
Air distribution
– Air distribution towards the wind-
s c
reen in order to demist.
– Air distribution to upper body.
– Air distribution to footwell
– Air distribution to the windscreen
and the footwell.
Air recirculation
››› page 114 A
B
C
D Level control
Fuel Fig. 33
The flap that covers the tank cap is unlocked
and locked automatically using the central
locking.
Opening the fuel tank cap
●
Open the flap.
● Unscrew the cap by turning it to the left.
● Rest it on the upper part of the fuel tank
flap ››› Fig. 33 .
C lo
sing the fuel tank cap
● Unscrew the cap by turning it to the right as
far as it will go.
● Close the lid. » 23
Technical specifications
Advice
Operation
Safety
The essentials
Page 27 of 240
The essentials
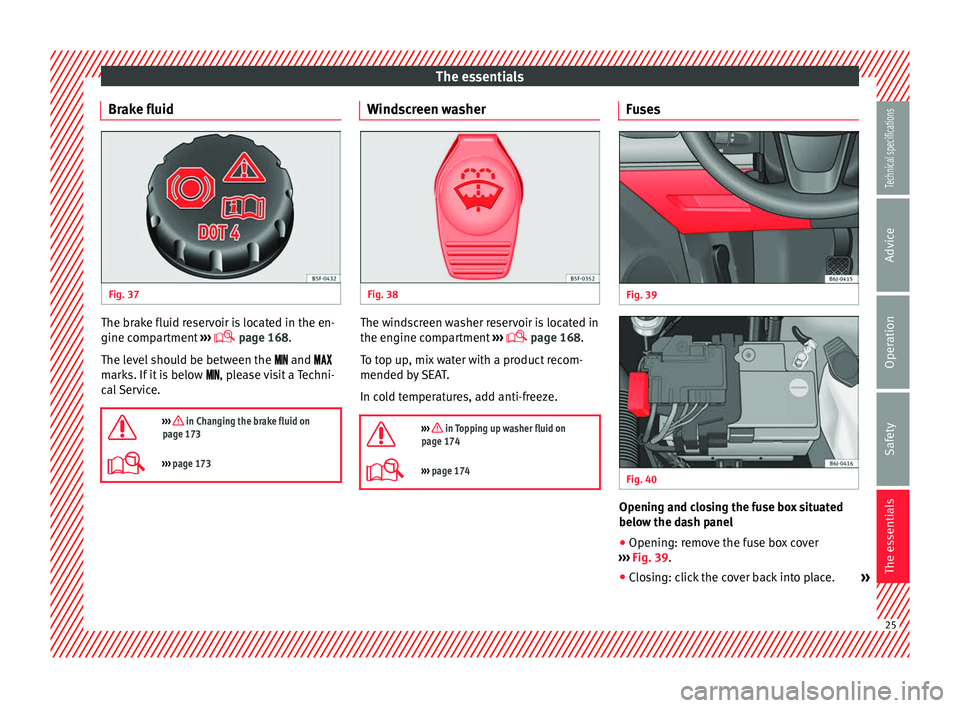
Brake fluid Fig. 37
The brake fluid reservoir is located in the en-
gine compartment
›››
page 168.
The level should be between the and
marks. If it is below , please visit a Techni-
cal Service.
››› in Changing the brake fluid on
page 173
››› page 173 Windscreen washer
Fig. 38
The windscreen washer reservoir is located in
the engine compartment
›››
page 168.
To top up, mix water with a product recom-
mended by SEAT.
In cold temperatures, add anti-freeze.
››› in Topping up washer fluid on
page 174
››› page 174 Fuses
Fig. 39
Fig. 40
Opening and closing the fuse box situated
below the dash panel
●
Opening: remove the fuse box cover
››› Fig. 39 .
● Clo
sing: click the cover back into place. » 25
Technical specifications
Advice
Operation
Safety
The essentials
Page 29 of 240
The essentials
● Screw the compressor tyre inflator into the
valve.
● Repeat the inflation process.
● If the indicated pressure still cannot be
reached, the tyre is too badly damaged. Stop
and request assistance from an authorised
technician.
● Disconnect the air compressor. Unscrew
the tyre inflator tube from the tyre valve.
● When the tyre pressure is between 2.5 and
2.0 bars, continue driving without exceeding
80 km/h (50 mph).
● Check the pressure again after 10 minutes
››› page 188
.
››› in TMS (Tyre Mobility System)* on
page 186
››› page 186 With a spare wheel
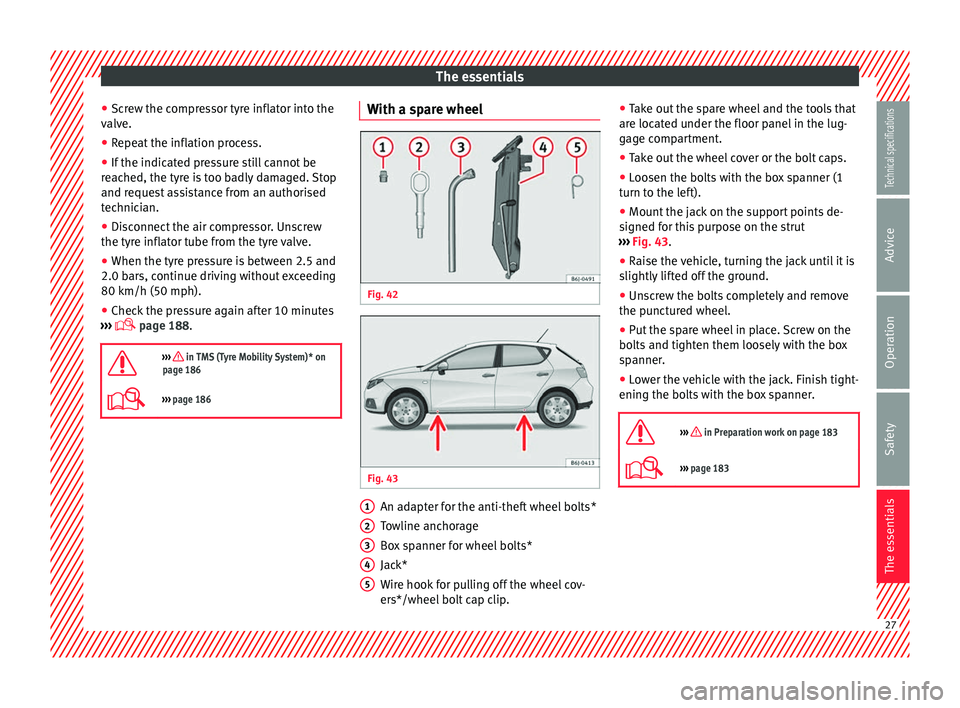
Fig. 42
Fig. 43
An adapter for the anti-theft wheel bolts*
Towline anchorage
Box spanner for wheel bolts*
Jack*
Wire hook for pulling off the wheel cov-
ers*/wheel bolt cap clip.
1 2
3
4
5 ●
Take out the spare wheel and the tools that
are located under the floor panel in the lug-
gage compartment.
● Take out the wheel cover or the bolt caps.
● Loosen the bolts with the box spanner (1
turn to the left).
● Mount the jack on the support points de-
signed for this purpose on the strut
››› Fig. 43 .
● Rai
se the vehicle, turning the jack until it is
slightly lifted off the ground.
● Unscrew the bolts completely and remove
the punctured wheel.
● Put the spare wheel in place. Screw on the
bolts and tighten them loosely with the box
spanner.
● Lower the vehicle with the jack. Finish tight-
ening the bolts with the box spanner.
››› in Preparation work on page 183
››› page 183 27
Technical specifications
Advice
Operation
Safety
The essentials
Page 31 of 240
Safe driving
Safety
Safe driving Safety first! This chapter contains important information,
tips, suggestions and warnings that you
should read and consider for both your own
safety and for your passengers' safety.
WARNING
● This manual contains important informa-
tion about the operation of the vehicle, both
for the driver and the passengers. The other
sections of the on-board documentation also
contain further information that you should
be aware of for your own safety and for the
safety of your passengers.
● Ensure that the on-board documentation is
kept in the vehicle at all times. This is espe-
cially important when lending or selling the
vehicle to another person. Advice about driving
Before setting off For your own safety and the safety of your
passengers, always note the following points
before every trip: –
Make sure that the vehicle's lights and turn
signals are working properly.
– Check tyre pressure.
– Ensure that all windows provide a clear and
good view of the surroundings.
– Ensure that all luggage is correctly secured
››› page 108.
– Make sure that no objects can interfere
with the pedals.
– Adjust front seat, head restraint and rear vi-
sion mirrors properly according to your
size.
– Ensure that the passenger in the central
rear seat always has the head restraint in
the correct position for use.
– Instruct passengers to adjust the head re-
straints according to their height.
– Protect children with appropriate child
seats and properly applied seat belts
››› page 46 .
– As s
ume the correct sitting position. Instruct
your passengers also to assume a proper
sitting position. ››› page 30.
– Fasten your seat belt securely. Instruct your
passengers also to fasten their seat belts
properly. ›››
page 34. What
affects driving safety? As a driver, you are responsible for yourself
and your passengers. When your concentra-
tion or driving safety is affected by any cir-
cumstance, you endanger yourself as well as
others on the road
››› , for this reason:
– Always pay attention to traffic and do not
get distracted by passengers or telephone calls.
– Never drive when your driving ability is im-
paired (e.g. by medication, alcohol, drugs).
– Observe traffic laws and speed limits.
– Always reduce your speed as appropriate
for road, traffic and weather conditions.
– When travelling long distances, take
breaks regularly - at least every two hours.
– If possible, avoid driving when you are tired
or stressed. WARNING
When driving safety is impaired during a trip,
the risk of injury and accidents increases. Safety equipment
Never put your safety or the safety of your
passengers in danger. In the event of an acci-
dent, the safety equipment may reduce the
»
29
Technical specifications
Advice
Operation
Safety
The essentials
Page 33 of 240
Safe driving
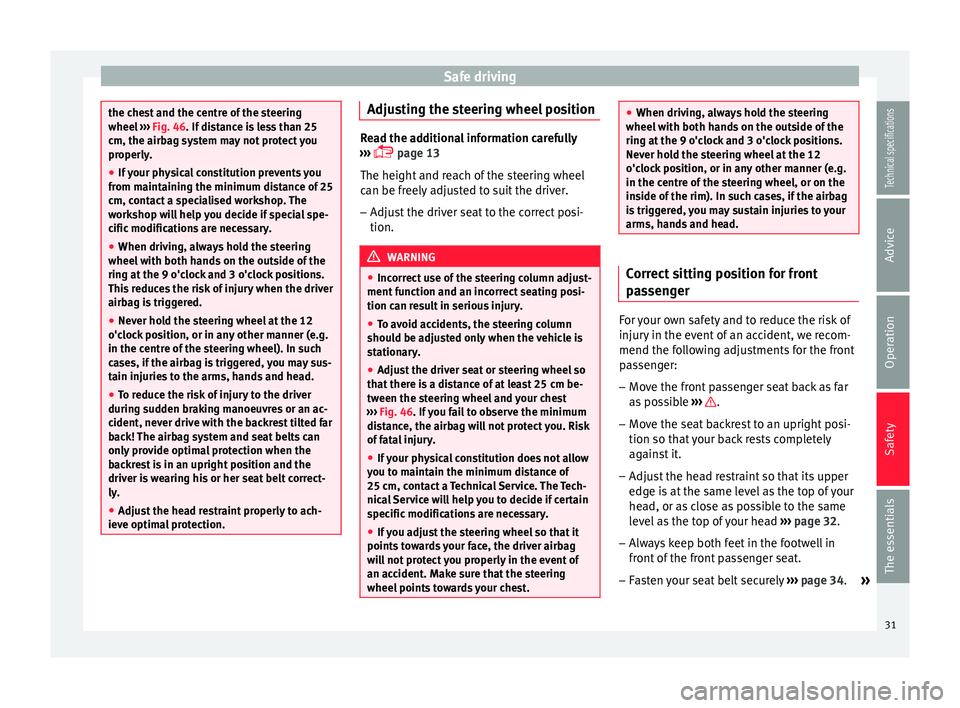
the chest and the centre of the steering
wheel
››› Fig. 46. If distance is less than 25
c m, the airb
ag system may not protect you
properly.
● If your physical constitution prevents you
from maintaining the minimum distance of 25
cm, contact a specialised workshop. The
workshop will help you decide if special spe-
cific modifications are necessary.
● When driving, always hold the steering
wheel with both hands on the outside of the
ring at the 9 o'clock and 3 o'clock positions.
This reduces the risk of injury when the driver
airbag is triggered.
● Never hold the steering wheel at the 12
o'clock position, or in any other manner (e.g.
in the centre of the steering wheel). In such
cases, if the airbag is triggered, you may sus-
tain injuries to the arms, hands and head.
● To reduce the risk of injury to the driver
during sudden braking manoeuvres or an ac-
cident, never drive with the backrest tilted far
back! The airbag system and seat belts can
only provide optimal protection when the
backrest is in an upright position and the
driver is wearing his or her seat belt correct-
ly.
● Adjust the head restraint properly to ach-
ieve optimal protection. Adjusting the steering wheel position
Read the additional information carefully
››› page 13
The height and reach of the steering wheel
can be freely adjusted to suit the driver.
– Adjust the driver seat to the correct posi-
tion. WARNING
● Incorrect use of the steering column adjust-
ment function and an incorrect seating posi-
tion can result in serious injury.
● To avoid accidents, the steering column
should be adjusted only when the vehicle is
stationary.
● Adjust the driver seat or steering wheel so
that there is a distance of at least 25 cm be-
tween the steering wheel and your chest
››› Fig. 46. If you fail to observe the minimum
di s
tance, the airbag will not protect you. Risk
of fatal injury.
● If your physical constitution does not allow
you to maintain the minimum distance of
25 cm, contact a Technical Service. The Tech-
nical Service will help you to decide if certain
specific modifications are necessary.
● If you adjust the steering wheel so that it
points towards your face, the driver airbag
will not protect you properly in the event of
an accident. Make sure that the steering
wheel points towards your chest. ●
When driving, always hold the steering
wheel with both hands on the outside of the
ring at the 9 o'clock and 3 o'clock positions.
Never hold the steering wheel at the 12
o'clock position, or in any other manner (e.g.
in the centre of the steering wheel, or on the
inside of the rim). In such cases, if the airbag
is triggered, you may sustain injuries to your
arms, hands and head. Correct sitting position for front
passenger
For your own safety and to reduce the risk of
injury in the event of an accident, we recom-
mend the following adjustments for the front
passenger:
– Move the front passenger seat back as far
as possible ››› .
– Move the seat backrest to an upright posi-
tion so that your back rests completely
against it.
– Adjust the head restraint so that its upper
edge is at the same level as the top of your
head, or as close as possible to the same
level as the top of your head ››› page 32.
– Always keep both feet in the footwell in
front of the front passenger seat.
– Fasten your seat belt securely ››› page 34.
»
31
Technical specifications
Advice
Operation
Safety
The essentials
Page 35 of 240
Safe driving
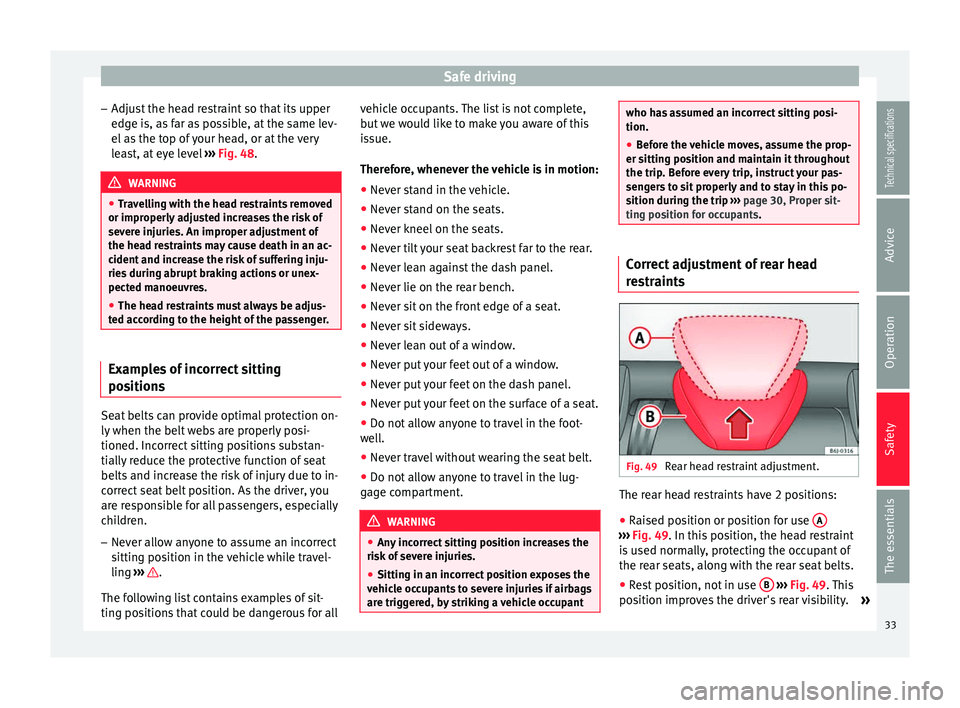
– Adjust the head restraint so that its upper
edge is, as far as possible, at the same lev-
el as the top of your head, or at the very
least, at eye level ››› Fig. 48 . WARNING
● Travelling with the head restraints removed
or improperly adjusted increases the risk of
severe injuries. An improper adjustment of
the head restraints may cause death in an ac-
cident and increase the risk of suffering inju-
ries during abrupt braking actions or unex-
pected manoeuvres.
● The head restraints must always be adjus-
ted according to the height of the passenger. Examples of incorrect sitting
positions
Seat belts can provide optimal protection on-
ly when the belt webs are properly posi-
tioned. Incorrect sitting positions substan-
tially reduce the protective function of seat
belts and increase the risk of injury due to in-
correct seat belt position. As the driver, you
are responsible for all passengers, especially
children.
– Never allow anyone to assume an incorrect
sitting position in the vehicle while travel-
ling ››› .
The following list contains examples of sit-
ting positions that could be dangerous for all vehicle occupants. The list is not complete,
but we would like to make you aware of this
issue.
Therefore, whenever the vehicle is in motion:
●
Never stand in the vehicle.
● Never stand on the seats.
● Never kneel on the seats.
● Never tilt your seat backrest far to the rear.
● Never lean against the dash panel.
● Never lie on the rear bench.
● Never sit on the front edge of a seat.
● Never sit sideways.
● Never lean out of a window.
● Never put your feet out of a window.
● Never put your feet on the dash panel.
● Never put your feet on the surface of a seat.
● Do not allow anyone to travel in the foot-
well.
● Never travel without wearing the seat belt.
● Do not allow anyone to travel in the lug-
gage compartment. WARNING
● Any incorrect sitting position increases the
risk of severe injuries.
● Sitting in an incorrect position exposes the
vehicle occupants to severe injuries if airbags
are triggered, by striking a vehicle occupant who has assumed an incorrect sitting posi-
tion.
●
Before the vehicle moves, assume the prop-
er sitting position and maintain it throughout
the trip. Before every trip, instruct your pas-
sengers to sit properly and to stay in this po-
sition during the trip ››› page 30, Proper sit-
ting position for occupants. Correct adjustment of rear head
restraints
Fig. 49
Rear head restraint adjustment. The rear head restraints have 2 positions:
● Raised position or position for use A ›››
Fig. 49 . In this position, the head restraint
i s
used normally, protecting the occupant of
the rear seats, along with the rear seat belts.
● Rest position, not in use B
››› Fig. 49 . This
po s
ition improves the driver's rear visibility. »
33
Technical specifications
Advice
Operation
Safety
The essentials
Page 37 of 240
Seat belts
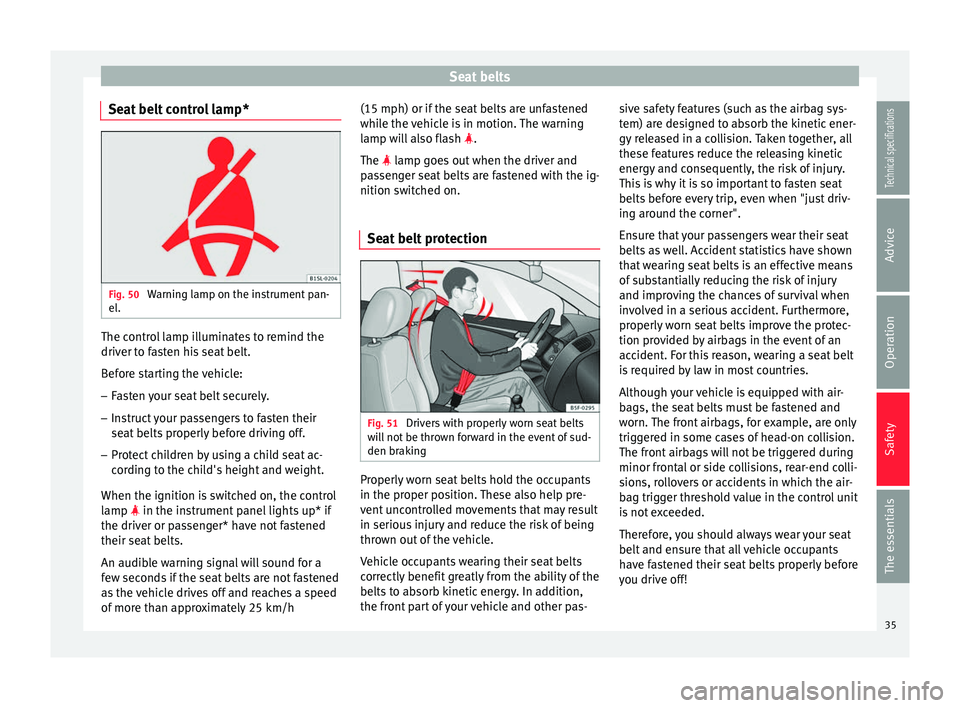
Seat belt control lamp* Fig. 50
Warning lamp on the instrument pan-
el. The control lamp illuminates to remind the
driver to fasten his seat belt.
Before starting the vehicle:
– Fasten your seat belt securely.
– Instruct your passengers to fasten their
seat belts properly before driving off.
– Protect children by using a child seat ac-
cording to the child's height and weight.
When the ignition is switched on, the control
lamp in the instrument panel lights up* if
the driver or passenger* have not fastened
their seat belts.
An audible warning signal will sound for a
few seconds if the seat belts are not fastened
as the vehicle drives off and reaches a speed
of more than approximately 25 km/h (15 mph) or if the seat belts are unfastened
while the vehicle is in motion. The warning
lamp will also flash
.
The
l
amp goes out when the driver and
p
assenger seat belts are fastened with the ig-
nition switched on.
Seat belt protection Fig. 51
Drivers with properly worn seat belts
will not be thrown forward in the event of sud-
den braking Properly worn seat belts hold the occupants
in the proper position. These also help pre-
vent uncontrolled movements that may result
in serious injury and reduce the risk of being
thrown out of the vehicle.
Vehicle occupants wearing their seat belts
correctly benefit greatly from the ability of the
belts to absorb kinetic energy. In addition,
the front part of your vehicle and other pas-sive safety features (such as the airbag sys-
tem) are designed to absorb the kinetic ener-
gy released in a collision. Taken together, all
these features reduce the releasing kinetic
energy and consequently, the risk of injury.
This is why it is so important to fasten seat
belts before every trip, even when "just driv-
ing around the corner".
Ensure that your passengers wear their seat
belts as well. Accident statistics have shown
that wearing seat belts is an effective means
of substantially reducing the risk of injury
and improving the chances of survival when
involved in a serious accident. Furthermore,
properly worn seat belts improve the protec-
tion provided by airbags in the event of an
accident. For this reason, wearing a seat belt
is required by law in most countries.
Although your vehicle is equipped with air-
bags, the seat belts must be fastened and
worn. The front airbags, for example, are only
triggered in some cases of head-on collision.
The front airbags will not be triggered during
minor frontal or side collisions, rear-end colli-
sions, rollovers or accidents in which the air-
bag trigger threshold value in the control unit
is not exceeded.
Therefore, you should always wear your seat
belt and ensure that all vehicle occupants
have fastened their seat belts properly before
you drive off!
35
Technical specifications
Advice
Operation
Safety
The essentials
Page 39 of 240
Seat belts
called “kinetic energy” is created both in the
passengers and inside the vehicle.
The amount of “kinetic energy” depends on
the speed of the vehicle and the weight of
the vehicle and its passengers. The higher
the speed and the greater the weight, the
more energy there is to be “absorbed” in an
accident.
The most significant factor, however, is the
speed of the vehicle. If the speed doubles
from 25 km/h (15 mph) to 50 km/h
(30 mph), for example, the corresponding ki-
netic energy is multiplied by four.
Because the vehicle occupants in our exam-
ple are not restrained by seat belts, in the
event of crashing against a wall, all of the oc-
cupants' kinetic energy will be absorbed
solely by said impact.
Even at speeds of 30 km/h (19 mph) to
50 km/h (30 mph), the forces acting on bod-
ies in a collision can easily exceed one tonne
(1000 kg). At greater speed these forces are
even higher.
Vehicle occupants not wearing seat belts are
not “attached” to the vehicle. In a head-on
collision, they will move forward at the same
speed their vehicle was travelling just before
the impact. This example applies not only to
head-on collisions, but to all accidents and
collisions. Even at low speeds the forces acting on the
body in a collision are so great that it is not
possible to brace oneself with one's hands.
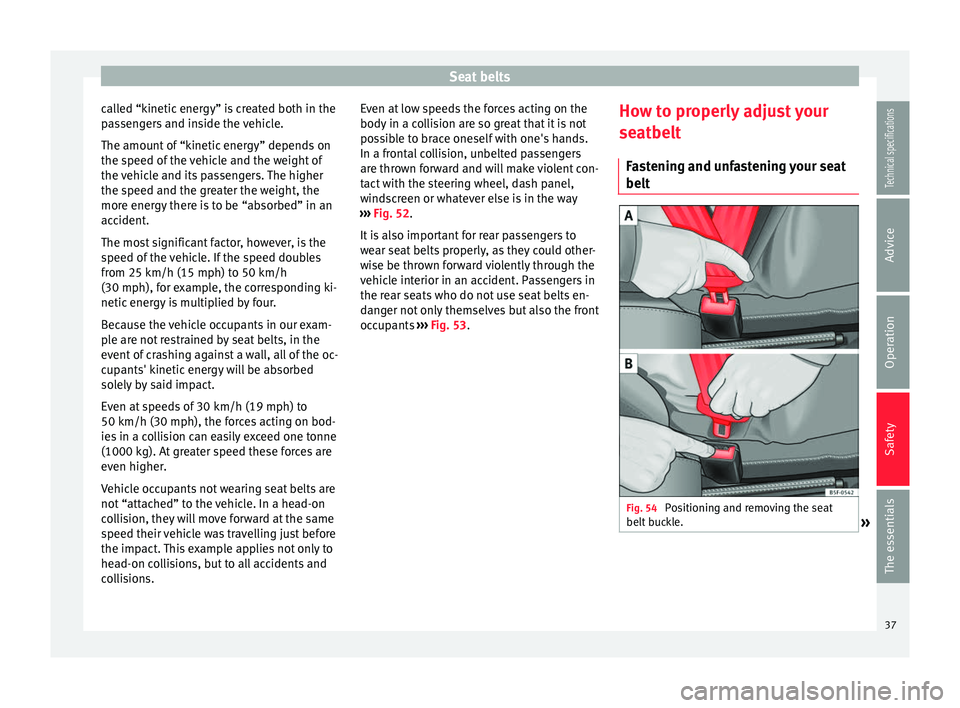
In a frontal collision, unbelted passengers
are thrown forward and will make violent con-
tact with the steering wheel, dash panel,
windscreen or whatever else is in the way
››› Fig. 52 .
It i
s also important for rear passengers to
wear seat belts properly, as they could other-
wise be thrown forward violently through the
vehicle interior in an accident. Passengers in
the rear seats who do not use seat belts en-
danger not only themselves but also the front
occupants ››› Fig. 53. How t
o properly adjust your
seatbelt
Fastening and unfastening your seat
belt Fig. 54
Positioning and removing the seat
belt buckle. » 37
Technical specifications
Advice
Operation
Safety
The essentials
Page 41 of 240
Seat belts
Belt pretensioners* How the seat belt tensioner works During a frontal collision, the seat belts on
the front seats are retracted automatically.
The seat belts for the occupants in the front
seats are equipped with belt tensioners. Sen-
sors will trigger the belt pretensioners during
severe head-on, lateral and rear collisions
only if the seat belt is being worn. This re-
tracts and tightens the seat belts, reducing
the forward motion of the occupants.
The seat belt tensioner can be triggered only
once.
The belt tensioners will not be triggered in
the event of light frontal and side collisions,
if the vehicle overturns, or in situations
where no large forces act on the front, side or
rear of the vehicle.
Note
● If the seat belt tensioners are triggered, a
fine dust is produced. This is normal and it is
not an indication of fire in the vehicle.
● The relevant safety requirements must be
observed when the vehicle or components of
the system are scrapped. Specialised work-
shops are familiar with these regulations,
which are also available to you. Service and disposal of belt
tensioners
The belt tensioners are components of the
seat belts that are installed in the seats of
your vehicle. If you work on the belt tension-
ers or remove and install parts of the system
when performing other repair work, the seat
belt may be damaged. The consequence may
be that, in the event of an accident, the belt
tensioners function incorrectly or may not
function at all.
So that the effectiveness of the seat belt ten-
sioner is not reduced and that removed parts
do not cause any injuries or environmental
pollution, regulations, which are known to
the specialised workshops, must be ob-
served.
WARNING
● Improper use or repairs not carried out by
qualified mechanics increase the risk of se-
vere or fatal injuries. The belt tensioners may
fail to trigger or may trigger in the wrong cir-
cumstances.
● Never attempt to repair, adjust, remove or
install parts of the belt tensioners or seat
belts.
● The seat belt tensioner, seat belt and auto-
matic retractor cannot be repaired.
● Any work on the belt tensioners and seat
belts, including the removal and refitting of
system parts in conjunction with other repair work, must be performed by a specialised
workshop only.
●
The belt tensioners will only provide pro-
tection for one accident and must be changed
if they have been activated. 39Technical specifications
Advice
Operation
Safety
The essentials
Page 43 of 240
Airbag system
The airbag system operation is monitored
electronically. The airbag control lamp will il-
luminate for a few seconds every time the ig-
nition is switched on (self-diagnosis).
There is a fault in the system if the control
lamp
:
● doe
s not light up when the ignition is
switched on ››› page 42
,
● turns off after 4 seconds after the ignition
is switched on
● turns off and then lights up again after the
ignition is switched on
● illuminates or flashes while the vehicle is
moving.
The airbag system is not triggered if:
● the ignition is switched off
● there is a minor frontal collision
● there is a minor side collision
● there is a rear-end collision
● the vehicle turns over. WARNING
● The seat belts and airbags can only provide
maximum protection if the occupants are
seated correctly ››› page 30, Proper sitting
position for occupants.
● If a fault has occurred in the airbag system,
have the system checked immediately by a
specialised workshop. Otherwise, during a frontal collision the system might not trigger
correctly or may fail to trigger at all.
Airbag activation
The airbags deploy extremely rapidly, within
thousandths of a second, to provide addi-
tional protection in the event of an accident.
A fine dust may develop when the airbag de-
ploys. This is normal and it is not an indica-
tion of fire in the vehicle.
The airbag system is only ready to function
when the ignition is on.
In special accidents instances, several air-
bags may activate at the same time.
In the event of minor head-on and side colli-
sions, rear-end collisions, overturning or roll-
over of the vehicle, airbags
do not activate.
Activation factors
The conditions that lead to the airbag system
activating in each situation cannot be gener-
alised. Some factors play an important role,
such as the properties of the object the vehi-
cle hits (hard/soft), angle of impact, vehicle
speed, etc.
Deceleration trajectory is key for airbag acti-
vation. The control unit analyses the collision trajec-
tory and activates the respective restraint
system.
If the deceleration rate is below the prede-
fined reference value in the control unit the
airbags will not be triggered, even though
the accident may cause extensive damage to
the car.
The following airbags are triggered in
serious head-on collisions
● Driver airbag.
● Front passenger front airbag
The following airbags are triggered in
serious side-on collisions
● Front side airbag on the side of the acci-
dent.
● Rear side airbag on the side of the acci-
dent.
● Curtain (head) airbag on the side of the ac-
cident.
In an accident with airbag activation:
● the interior lights switch on (if the interior
light switch is in the courtesy light position);
● the hazard warning lights switch on;
● all doors are unlocked;
● the fuel supply to the engine is cut.
41
Technical specifications
Advice
Operation
Safety
The essentials