technical specifications Seat Ibiza 5D 2014 Manual Online
[x] Cancel search | Manufacturer: SEAT, Model Year: 2014, Model line: Ibiza 5D, Model: Seat Ibiza 5D 2014Pages: 240, PDF Size: 4.89 MB
Page 167 of 240
Checking and refilling levels
For the sake of the environment
Just one full tank of leaded fuel would seri-
ously impair the efficiency of the catalytic
converter. Petrol additives
The quality of the fuel influences the behav-
iour, power and service life of the engine.
This is why the petrol you use should carry
suitable additives already included by the
petrol industry, free of metals. These addi-
tives will help to prevent corrosion, keep the
fuel system clean and prevent deposits from
building up in the engine.
If good-quality petrol with metal-free addi-
tives is not available or engine problems
arise, the necessary additives must be added
when refuelling.
Not all petrol additives have been shown to
be effective. The use of unsuitable petrol ad-
ditives may cause significant damage to the
engine and the catalytic converter. Metal ad-
ditives should never be used. Metal additives
may also be contained in petrol additives for
improving anti-detonation ratings or octane
ratings.
SEAT recommends “genuine Volkswagen
Group fuel additives for petrol engines”.
These additives can be bought at SEAT deal- ers, where information on how to use them
can also be obtained. CAUTION
Do not refuel if the filler indicates that the
fuel contains metal. LRP (lead replacement
petrol) fuels contain high concentrations of
metal additives. Using them may damage the
engine! Diesel
Diesel* Diesel fuel
must conform to DIN EN 590 (EN =
“European Standard”). It must have a cetane
number (CN) of at least 51. The cetane num-
ber indicates the ignition quality of the diesel
fuel.
Notes on refuelling ›››
page 163.
Biodiesel* CAUTION
● Your vehicle is not designed to use biodie-
sel fuel. Never, under any circumstances re-
fuel with biodiesel. The use of biodiesel fuel
could damage the engine and the fuel sys-
tem. The addition of biodiesel to diesel fuel
by the diesel manufacturer in accordance with standard EN 590 or DIN 51628 is author-
ised and will not cause damage to the engine
or the fuel system.
● The diesel engine has been designed to be
used exclusively with diesel fuel conforming
to standard EN 590. Never refuel or use pet-
rol, kerosene, fuel oil or any other type of
fuel. If you accidentally fill up the vehicle with the wrong type of fuel, do not start the
engine. Seek assistance from specialised per-
sonnel. The composition of these fuels may
severely damage the fuel system and the en-
gine. Winter operation
Winter-grade diesel
When using “summer-grade diesel fuel”, dif-
ficulties may be experienced at temperatures
below 0 °C (+32 °F) because the fuel thickens
due to wax separation. For this reason, “win-
ter-grade diesel fuel” is available in some
countries during the cold months. It can be
used at temperatures as low as -22 °C (-8 ºF).
In countries with different climatic conditions
the diesel fuel generally sold has different
temperature characteristics. Check with the
Technical Services or filling stations in the
country concerned regarding the type of die-
sel fuels available.
»
165Technical specifications
Advice
Operation
Safety
The essentials
Page 169 of 240
Checking and refilling levels
support the vehicle, there is a risk of acci-
dent!. A hydraulic jack is insufficient for se-
curing the vehicle and there is a risk of injury.
●
If any work has to be performed when the
engine is started or with the engine running,
there is an additional, potentially fatal, safety
risk from the rotating parts, such as the drive
belts, alternator, radiator fan, etc., and from
the high-voltage ignition system. You should
also observe the following:
– Never touch the electrical wiring of the
ignition system.
– Ensure that jewellery, loose clothing and
long hair do not get trapped in rotating
engine parts. Danger of death. Before
starting any work remove jewellery, tie
back and cover hair, and wear tight-fit-
ting clothes.
– Never accelerate with a gear engaged
without taking the necessary precau-
tions. The vehicle could move, even if the
handbrake is applied. Danger of death.
● If work has to be carried out on the fuel
system or on electrical components, you
must observe the following safety notes in
addition to the above warnings:
– Always disconnect the battery from the
on-board network. The vehicle must be
unlocked when this is done, otherwise
the alarm will be triggered.
– Do not smoke.
– Never work near naked flames.
– Always have a fire extinguisher on hand. CAUTION
When topping up service fluids, make sure
not to mistake them. Using the wrong fluids
could cause serious malfunctions and engine
damage! For the sake of the environment
Service fluids leaks are harmful to the envi-
ronment. For this reason you should make
regular checks on the ground underneath
your vehicle. If you find spots of oil or other
fluids, have your vehicle inspected in a speci-
alised workshop. Opening the bonnet
Read the additional information carefully
››› page 10
The bonnet is released from inside the vehi-
cle.
Before opening the bonnet ensure that the
windscreen wipers are in rest position. WARNING
Hot coolant can scald!
● Never open the bonnet if you see steam,
smoke or coolant escaping from the engine
compartment. ●
Wait until no more steam, smoke or coolant
is emitted from the bonnet, then carefully
open the bonnet.
● When working in the engine compartment,
always observe the safety warnings
››› page 166. Closing the bonnet
–
Slightly lift the bonnet.
– Release the bonnet stay and replace it in its
support.
– At a height of approximately 30 cm let it fall
so it locks.
If the bonnet does not close, do not press
downwards. Open it again and let it fall as
mentioned above. WARNING
If the bonnet is not closed properly, it could
open while you are driving and completely
obscure your view of the road. Risk of acci-
dent.
● After closing the bonnet, always check that
it is properly secured. The bonnet must be
flush with the surrounding body panels.
● If you notice that the bonnet latch is not se-
cured when the vehicle is moving, stop the
vehicle immediately and close the bonnet
properly. Risk of accident. 167Technical specifications
Advice
Operation
Safety
The essentials
Page 171 of 240
Checking and refilling levels
The specifications (VW standards) set out in
the following page should appear on the con-
tainer of the service oil; when the container
displays the specific standards for petrol and
diesel engines together, it means that the oil
can be used for both types of engines.
We recommend that the oil change indicated
in the Maintenance Programme, be per-
formed by a technical service or specialised
workshop.
The correct oil specifications for your engine
are listed in the ››› page 169, Oil properties .
Service intervals
Service intervals can be flexible (LongLife
service) or fixed (dependent on time/dis-
tance travelled).
If the PR code that appears on the back of the
Maintenance Programme booklet is PR QI6,
this means that your vehicle has the LongLife
service program. If it lists the codes QI1, QI2,
QI3, QI4 or QI7, the interval service is de-
pendent on the time/distance travelled.
Flexible service intervals (LongLife service
intervals*)
Special oils and processes have been devel-
oped which, depending on the characteris-
tics and individual driving profiles, enable
the extension of the oil change service (Long-
Life service intervals). Because this oil is essential for extending the
service intervals, it
must only be used ob-
serving the following indications:
● Avoid mixing it with oil for fixed service in-
tervals.
● Only in exceptional circumstances, if the
engine oil level is too low ››› page 170 and
LongLife oil is not available, it is permitted to
top up (once) with oil for fixed service inter-
vals
›
›› page 169 (up to a maximum of 0.5 li-
tres).
Fixed service intervals*
If your vehicle does not have the “LongLife
service interval” or it has been disabled (by
request), you may use oils for fixed service
intervals
, which also appear in ››› page 169,
Oil properties . In this case, your vehicle must
be serviced after a fixed interval of 1
year/15,000 km (10,000 miles)(whatever
comes first) ››› Booklet Maintenance Pro-
gramme.
● In ex
ceptional circumstances, if the engine
oil level is too low ››› page 170 and you can-
not o
btain the oil specified for your vehicle,
you can add a small quantity of oil conform-
ing to the specification ACEA A2 or ACEA A3
(petrol engines) or ACEA B3 or ACEA B4 (die-
sel engines) (up to 0.5 l). Vehicles with diesel particulate filter*
The Maintenance Programme states whether
your vehicle is fitted with a diesel particulate
filter.
Only VW 507 00 engine oil, with reduced ash
formation, may be used in diesel engines
equipped with particulate filter. Using other
types of oil will cause a higher soot concen-
tration and reduce the life of the DPF. There-
fore:
●
Avoid mixing this oil with other engine oils.
● Only in exceptional circumstances, if the
engine oil level is too low ››› page 170 and
you cannot obtain the oil specified for your
vehicle, you can use a small quantity of oil
(once) conforming to the VW 506 00,
VW 506 01, VW 505 00, VW 505 01 or
ACEA B3/ACEA B4 specification. (up to 0.5 l).
Oil propertiesEngine typeSpecification
Petrol without flexible serv-
ice intervalVW 502 00/VW 504 00
Petrol with flexible service
interval (LongLife)VW 504 00
Diesel. Engines without Par-
ticulate filter (DPF)VW 505 01/VW 506
01/VW 507 00» 169
Technical specifications
Advice
Operation
Safety
The essentials
Page 172 of 240
AdviceEngine typeSpecification
Diesel. Particulate Filter En-
gines (DPF).
With or without flexible
service interval (with and
without LongLife)
a)VW 507 00
a)
Only use recommended oils, otherwise you may damage the
engine.
Engine oil additives
No type of additive should be mixed with the
engine oil. The deterioration caused by these
additives is not covered by the warranty. Note
Before a long trip, we recommend finding an
engine oil that conforms to the correspond-
ing VW specifications and recommend keep-
ing it in the vehicle. This way, the correct en-
gine oil will always be available for a top-up if
needed. Checking the engine oil level
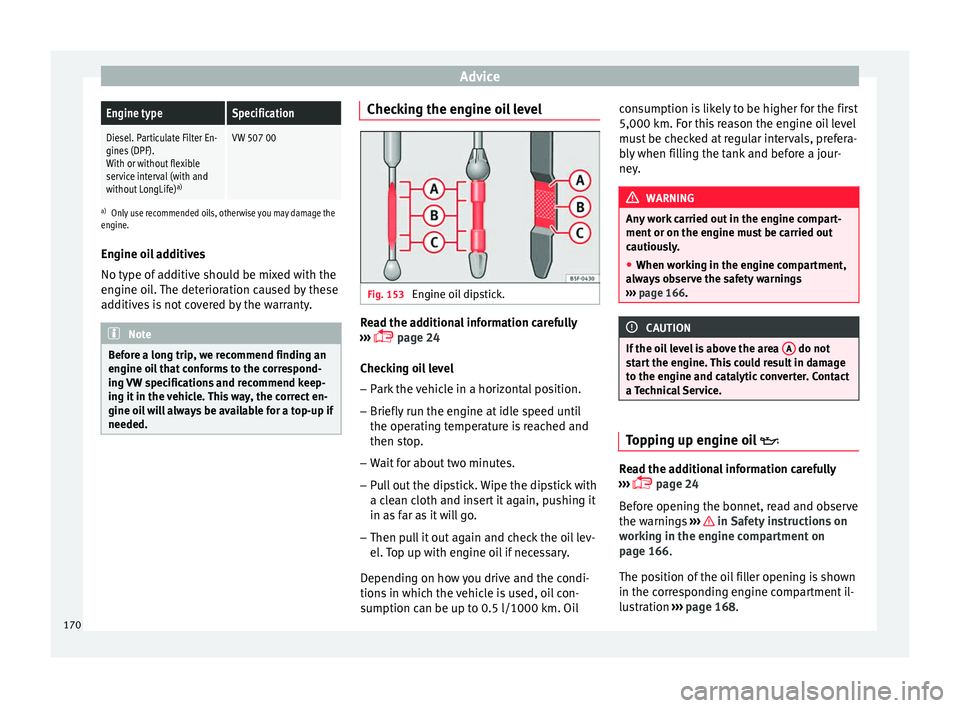
Fig. 153
Engine oil dipstick. Read the additional information carefully
››› page 24
Checking oil level
– Park the vehicle in a horizontal position.
– Briefly run the engine at idle speed until
the operating temperature is reached and
then stop.
– Wait for about two minutes.
– Pull out the dipstick. Wipe the dipstick with
a clean cloth and insert it again, pushing it
in as far as it will go.
– Then pull it out again and check the oil lev-
el. Top up with engine oil if necessary.
Depending on how you drive and the condi-
tions in which the vehicle is used, oil con-
sumption can be up to 0.5 l/1000 km. Oil consumption is likely to be higher for the first
5,000 km. For this reason the engine oil level
must be checked at regular intervals, prefera-
bly when filling the tank and before a jour-
ney.
WARNING
Any work carried out in the engine compart-
ment or on the engine must be carried out
cautiously.
● When working in the engine compartment,
always observe the safety warnings
››› page 166. CAUTION
If the oil level is above the area A do not
start the engine. This could result in damage
to the engine and catalytic converter. Contact
a Technical Service. Topping up engine oil
Read the additional information carefully
››› page 24
Before opening the bonnet, read and observe
the warnings ››› in Safety instructions on
working in the engine compartment on
page 166 .
The po s
ition of the oil filler opening is shown
in the corresponding engine compartment il-
lustration ›››
page 168.
170
Page 173 of 240
Checking and refilling levels
Engine oil specification ››› page 169. WARNING
Oil is highly inflammable! Ensure that no oil
comes into contact with hot engine compo-
nents when topping up. CAUTION
If the oil level is above the area A do not
start the engine. This could result in damage
to the engine and catalytic converter. Contact
a specialised workshop. For the sake of the environment
The oil level must never be above area A .
Otherwise oil can be drawn in through the
crankcase breather and escape into the at-
mosphere via the exhaust system. Changing engine oil
Read the additional information carefully
››› page 24
The engine oil must be changed at the inter-
vals given in the service schedule.
We recommend that you have the engine oil
changed by a Technical Service.
The oil change intervals are shown in the
Maintenance Programme. WARNING
Only change the engine oil yourself if you
have the specialist knowledge required!
● Before opening the bonnet, read and ob-
serve the warnings ››› page 166, Safety in-
structions on working in the engine compart-
ment.
● Wait
for the engine to cool down. Hot oil
may cause burn injuries.
● Wear eye protection to avoid injuries, such
as acid burns, caused by splashes of oil.
● When removing the oil drain plug with your
fingers, keep your arm horizontal to help pre-
vent oil from running down your arm.
● Wash your skin thoroughly if it comes into
contact with engine oil.
● Engine oil is poisonous! Used oil must be
stored in a safe place out of the reach of chil-
dren. CAUTION
No additives should be used with engine oil.
This could result in engine damage. Any dam-
age caused by the use of such additives
would not be covered by the factory warranty. For the sake of the environment
● Because of disposal problems and the spe-
cial tools and specialist knowledge required,
we recommend that you have the engine oil
and filter changed by a Technical Service. ●
Never pour oil down drains or into the
ground.
● Use a suitable container when draining the
used oil. It must be large enough to hold all
the engine oil. Cooling system
Engine coolant specifications The engine cooling system is supplied from
the factory with a specially treated mixture of
water and, at least, 40 % of the additive
G 13
(TL-VW 774 J). The engine coolant additive is
recognisable by its purple colour. This mix-
ture of water and additive gives the necessa-
ry frost protection down to -25°C (-13 F) and
protects the light alloy parts of the cooling
system against corrosion. It also prevents
scaling and considerably raises the boiling
point of the coolant.
To protect the engine cooling system, the
percentage of additive must always be at
l e
ast 40 %, even in warm climates where an-
ti-freeze protection is not required.
If greater frost protection is required in very
cold climates, the proportion of additive can
be increased. However, the percentage of ad-
ditive should not exceed 60%, as this would
reduce the frost protection and, in turn, de-
crease the cooling capacity. »
171
Technical specifications
Advice
Operation
Safety
The essentials
Page 175 of 240
Checking and refilling levels
●
When working in the engine compartment,
always observe the safety warnings
››› page 166.
● When the en gine i
s warm or hot, the cool-
ing system is pressurised! Do not unscrew
the cap on the coolant expansion tank when
the engine is hot. This is a burn injury risk. CAUTION
● If you notice a change in the colour of the
liquid because it has been in use for a long
time, it is recommended to change it, as it
will have lost some of its properties and
could cause damage to the engine.
● If a lot of coolant fluid has been lost, wait
for the engine to cool. This avoids damaging
the engine. Large coolant losses are an indi-
cation of leaks in the cooling system. See a
specialised workshop immediately and have
the cooling system checked. Otherwise, there
is a risk of engine damage. Brake fluid
Checking the brake fluid level Read the additional information carefully
››› page 25
The position of the brake fluid reservoir is
shown in the corresponding engine compart- ment illustration
››› page 168 . The brake fluid
r e
servoir has a black and yellow cap.
The brake fluid level drops slightly when the
vehicle is being used as the brake pads are
automatically adjusted as they wear.
However, if the level goes down noticeably in
a short time, or drops below the “MIN” mark,
there may be a leak in the brake system. A
display on the instrument panel will warn you
if the brake fluid level is too low ››› page 57. WARNING
Before opening the bonnet to check the brake
fluid level, read and observe the warnings
››› page 166. Changing the brake fluid
The Maintenance Programme indicates brake
fluid change intervals.
We recommend that you have the brake fluid
changed by a Technical Service.
Before opening the bonnet, please read and
follow the warnings
››› in Safety instruc-
tions on working in the engine compartment
on page 166 in section “Safety notes for
w ork
ing in the engine compartment”.
In the course of time, brake fluid becomes
hygroscopic and absorbs water from the am-
bient air. If the water content in the brake flu- id is too high, the brake system could cor-
rode. This also considerably reduces the boil-
ing point of the brake fluid. Heavy use of the
brakes may then cause a vapour lock which
could impair the braking effect.
Be sure to always use the correct brake fluid.
Only use brake fluid that expressly meets the
VW 501 14 standard.
You can buy VW 501 14 standard brake fluid
in a SEAT dealership or a SEAT Official Serv-
ice. If none is available, use only high-quality
brake fluid that meets DIN ISO 4925 CLASS 4
standards, or USA Standards FMVSS 116 DOT
4.
Using any other kind of brake fluid or one
that is not of a high quality may affect opera-
tion of the brake system and reduce its effec-
tiveness. Never use a brake fluid if the con-
tainer does not state that it complies with VW
501 14, DIN ISO 4925 CLASS 4 standards, or
USA standards FMVSS 116 DOT 4.
WARNING
Brake fluid is poisonous. Old brake fluid im-
pairs the braking effect.
● Before opening the bonnet to check the
brake fluid level, read and observe the warn-
ings ››› page 166.
● Br ak
e fluid should be stored in the closed
original container in a safe place out of reach
of children. There is a toxic risk. » 173
Technical specifications
Advice
Operation
Safety
The essentials
Page 177 of 240
Checking and refilling levels
●
Fires, sparks, open flames and smoking are
prohibited. When handling cables and electri-
cal equipment, avoid causing sparks and
electrostatic charge. Never short the battery
terminals. High-energy sparks can cause in-
jury.
● A highly explosive mixture of gases is re-
leased when the battery is under charge. The
batteries should be charged in a well-ventila-
ted room only.
● Keep children away from acid and batteries.
● Before working on the electrical system,
you must switch off the engine, the ignition
and all electrical devices. The negative cable
on the battery must be disconnected. When a
light bulb is changed, you need only switch
off the light.
● Deactivate the anti-theft alarm by unlock-
ing the vehicle before you disconnect the bat-
tery! The alarm will otherwise be triggered.
● When disconnecting the battery from the
vehicle on-board network, disconnect first
the negative cable and then the positive ca-
ble.
● Switch off all electrical devices before re-
connecting the battery. Reconnect first the
positive cable and then the negative cable.
Never reverse the polarity of the connections.
This could cause an electrical fire.
● Never charge a frozen battery, or one which
has thawed. This could result in explosions
and chemical burns. Always replace a battery
which has frozen. A flat battery can also
freeze at temperatures close to 0 °C (+32 °F). ●
Ensure that the vent hose is always connec-
ted to the battery.
● Never use a defective battery. This could
cause an explosion. Replace a damaged bat-
tery immediately.
● For vehicles with the battery in the luggage
compartment: Check that the battery gas
ventilation hose is securely attached. CAUTION
● Never disconnect the battery if the ignition
is switched on or if the engine is running.
This could damage the electrical system or
electronic components.
● Do not expose the battery to direct sunlight
over a long period of time, as the intense ul-
traviolet radiation can damage the battery
housing.
● If the vehicle is left standing in cold condi-
tions for a long period, protect the battery
from “freezing”. If it freezes it will be dam-
aged. Checking the electrolyte level
The electrolyte level should be checked regu-
larly in high-mileage vehicles, in hot coun-
tries and in older batteries.
– Open the bonnet and open the battery cov-
er at the front ››› in Safety instructions
on working in the engine compartment on
page 166
›
›› in Warnings on handlingthe battery on page 174. For vehicles with
the battery under the spare wheel, open
the rear lid and lift the floor covering. The
battery is located next to the spare wheel.
– Check the colour display in the "magic eye"
on the top of the battery.
– If there are air bubbles in the window, tap
the window gently until they disperse.
The position of the battery is shown in the
corresponding engine compartment diagram
››› page 168 . The location of the battery in
the lug g
age compartment can be seen in
››› Fig. 152.
The “magic
eye” indicator, located on the top
of the battery changes colour, depending on
the charge state and electrolyte level of the
battery.
There are two different colours:
● Black: correct charge status.
● Transparent/clear yellow: the battery must
be replaced. Contact a specialised workshop.
Charging and changing the vehicle
battery The battery is maintenance-free and is
checked during the inspection service. All
work on the vehicle battery requires special-
ist knowledge.
»
175
Technical specifications
Advice
Operation
Safety
The essentials
Page 178 of 240
Advice
If you often drive short distances or if the ve-
hicle is not driven for long periods, the bat-
tery should be checked by a specialised
workshop between the scheduled services.
If the battery has discharged and you have
problems starting the vehicle, the battery
might be damaged. If this happens, we rec-
ommend you have the vehicle battery
checked by a Technical Service where it will
be re-charged or replaced.
Charging the battery
The vehicle battery should be charged by a
specialised workshop only, as batteries us-
ing special technology have been installed
and they must be charged in a controlled en-
vironment.
Replacing a vehicle battery
The battery has been developed to suit the
conditions of its location and has special
safety features.
Genuine SEAT batteries meet the mainte-
nance, performance and safety specifications
of your vehicle. WARNING
● We recommend you use only maintenance-
free or cycle free leak-proof batteries which
comply with standards T 825 06 and
VW 7 50 73. This standard applies as of
2001. ●
Before starting any work on the batteries,
you must read and observe the warnings
››› in Warnings on handling the battery on
page 174. For the sake of the environment
Batteries contain toxic substances such as
sulphuric acid and lead. They must be dis-
posed of appropriately and must not be dis-
posed of with ordinary household waste. Wheels
Wheels and tyres General notes Avoiding damage
– If you have to drive over a kerb or similar
obstacle, drive very slowly and at a right
angle.
– Keep grease, oil and fuel off the tyres.
– Inspect the tyres regularly for damage
(cuts, cracks or blisters, etc.). Remove any
foreign objects embedded in the treads.
Storing tyres
– When you remove the tyres, mark them in
order to maintain the same direction of ro-
tation when they are installed again.
– When removed, the wheels and/or tyres
should be stored in a cool, dry and prefera-
bly dark location.
– Store tyres in a vertical position, if they are
not fitted on wheel rims.
New tyres
New tyres must be run in ›››
page 134.
The tread depth of new tyres may vary, ac-
cording to the type and make of tyre and the
tread pattern.
176
Page 179 of 240
Wheels
Concealed damage
Damage to tyres and rims is often not readily
visible. If you notice unusual vibrations or the
vehicle pulling to one side, this may indicate
that one of the tyres is damaged. They
should be checked immediately by a Techni-
cal Service.
Tyres with directional tread pattern
An arrow on the tyre sidewall indicates the di-
rection of rotation on tyres with directional
tread. Always observe the direction of rota-
tion indicated when fitting the wheel. This
guarantees optimum grip and helps to avoid
aquaplaning, excessive noise and wear. WARNING
● New tyres do not have maximum grip dur-
ing the first 500 km. Drive particularly care-
fully to avoid possible accidents.
● Never drive with damaged tyres. This may
cause an accident.
● If you notice unusual vibrations or if the ve-
hicle pulls to one side when driving, stop the
vehicle immediately and check the tyres for
damage. Checking tyre pressure
The correct tyre pressure can be seen on the
sticker on the inside of the fuel tank flap. 1. Read the required tyre inflation pressure
from the sticker. The values refer to Sum-
mer tyres.
2. The tyre pressures should only be checked when the tyres are cold. The slightly raised
pressures of warm tyres must not be re-
duced.
3. Adjust the tyre pressure to the load you are carrying.
Tyre pressure
The correct tyre pressure is especially impor-
tant at high speeds. The pressure should
therefore be checked at least once a month
and before starting a journey. WARNING
A tyre can easily burst if the pressure is too
low, causing an accident!
● At continuously high speeds, a tyre with in-
sufficient pressure flexes more. In this way it
becomes too hot, and this can cause tread
separation and tyre blow-out. Always observe
the recommended tyre pressures.
● If the tyre pressure is too low or too high,
the tyres will wear prematurely and the vehi-
cle will not handle well. Risk of accident! For the sake of the environment
Under-inflated tyres will increase fuel con-
sumption. Tyre useful life
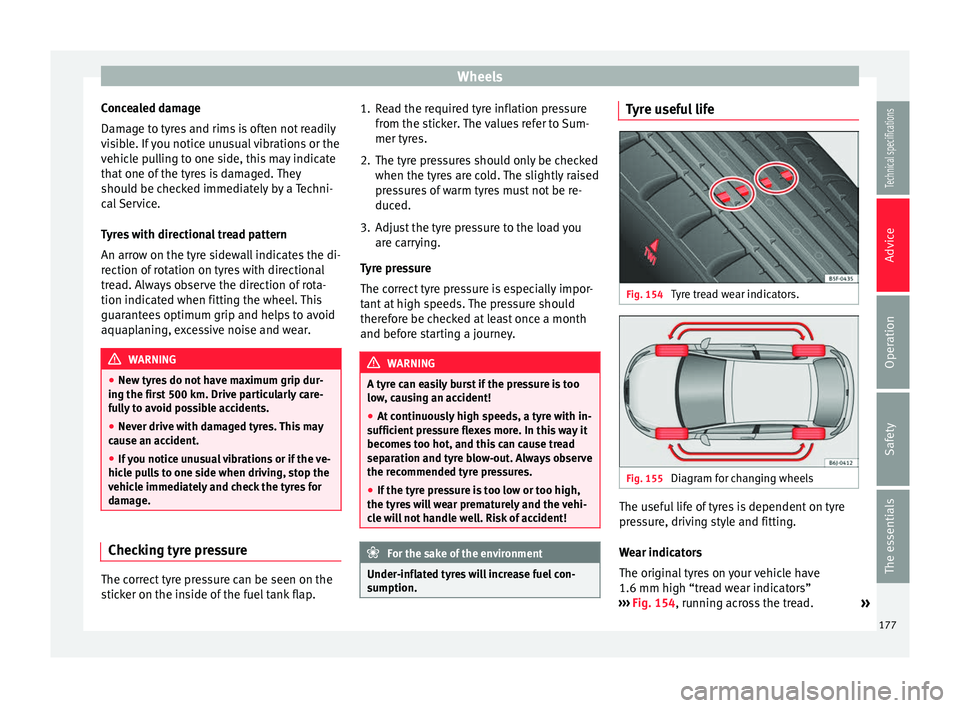
Fig. 154
Tyre tread wear indicators. Fig. 155
Diagram for changing wheels The useful life of tyres is dependent on tyre
pressure, driving style and fitting.
Wear indicators
The original tyres on your vehicle have
1.6 mm high “tread wear indicators”
››› Fig. 154 , running across the tread.
»
177Technical specifications
Advice
Operation
Safety
The essentials
Page 181 of 240
Wheels
The tyres could also have the following infor-
mation:
● A direction of rotation symbol
● “Reinforced” denotes heavy-duty tyres.
The manufacturing date is also indicated on
the tyre sidewall (possibly only on the inner
side of the wheel).
“DOT ... 1103 ...” means, for example, that
the tyre was produced in the 11th week of
2003.
We recommend that work on tyres and
wheels be carried out by a Technical Service.
They are familiar with the procedure and
have the necessary special tools and spare
parts as well as the proper facilities for dis-
posing of the old tyres.
Any technical service has full information on
the technical requirements when installing or
changing tyres, wheels or wheel trims.
Note for Italy: A SEAT Service Centre should
be c on
sulted whether different sized wheels
or tyres to those originally fitted by SEAT may
be fitted, as well as the combinations al-
lowed between the front axle (axle 1) and
back axle (axle 2). WARNING
● We recommend that you use only wheels
and tyres which have been approved by SEAT for your model. Failure to do so could impair
vehicle handling. Risk of accident.
●
Avoid running the vehicle on tyres that are
more than 6 years old. If you have no alterna-
tive, you should drive slowly and with extra
care at all times.
● Never use old tyres or those with an un-
known “history of use”.
● If wheel trims are retrofitted, you must en-
sure that the flow of air to the brakes is not
restricted. This could cause the brake system
to overheat.
● All four wheels must be fitted with radial
tyres of the same type, size (rolling circumfer-
ence) and the same tread pattern. For the sake of the environment
Old tyres must be disposed of according to
the laws in the country concerned. Note
● For technical reasons, it is not generally
possible to use the wheels from other vehi-
cles. This can also apply to wheels of the
same model. The use of wheels or tyres
which have not been approved by SEAT for
use with your model may invalidate the vehi-
cle's type approval for use on public roads.
● If the spare tyre is not the same as the
tyres that are mounted on the vehicle (e.g.
winter tyres) you should only use the spare
tyre for a short period of time and drive with extra care. Refit the normal road wheel as
soon as possible.
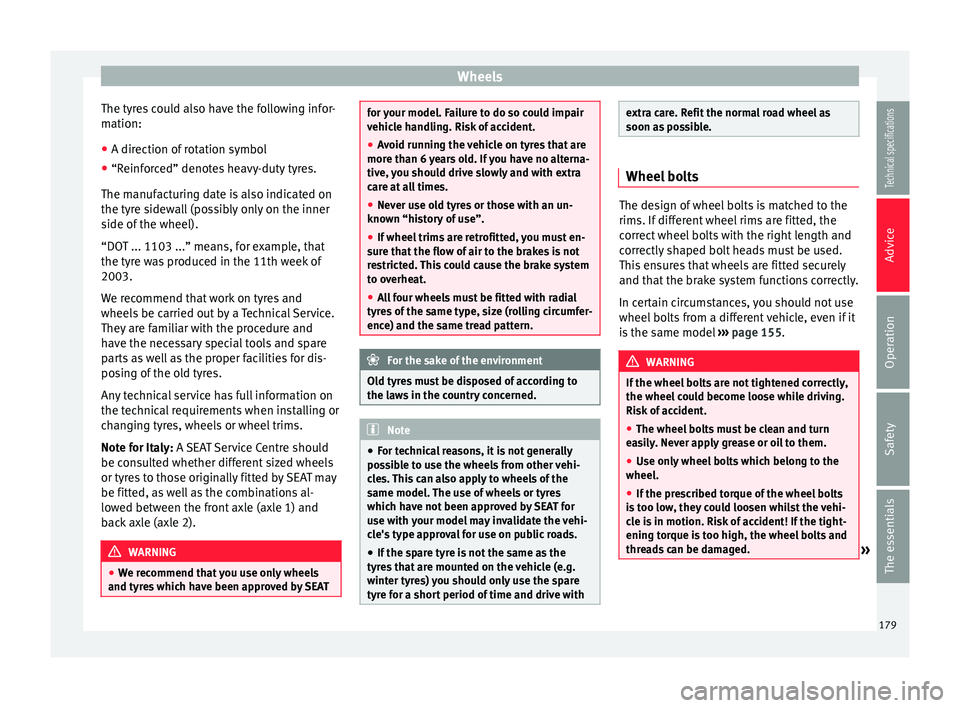
Wheel bolts
The design of wheel bolts is matched to the
rims. If different wheel rims are fitted, the
correct wheel bolts with the right length and
correctly shaped bolt heads must be used.
This ensures that wheels are fitted securely
and that the brake system functions correctly.
In certain circumstances, you should not use
wheel bolts from a different vehicle, even if it
is the same model
››› page 155. WARNING
If the wheel bolts are not tightened correctly,
the wheel could become loose while driving.
Risk of accident.
● The wheel bolts must be clean and turn
easily. Never apply grease or oil to them.
● Use only wheel bolts which belong to the
wheel.
● If the prescribed torque of the wheel bolts
is too low, they could loosen whilst the vehi-
cle is in motion. Risk of accident! If the tight-
ening torque is too high, the wheel bolts and
threads can be damaged. » 179
Technical specifications
Advice
Operation
Safety
The essentials