fog light Seat Ibiza SC 2008 Owner's manual
[x] Cancel search | Manufacturer: SEAT, Model Year: 2008, Model line: Ibiza SC, Model: Seat Ibiza SC 2008Pages: 258, PDF Size: 7.93 MB
Page 60 of 258
Cockpit
58
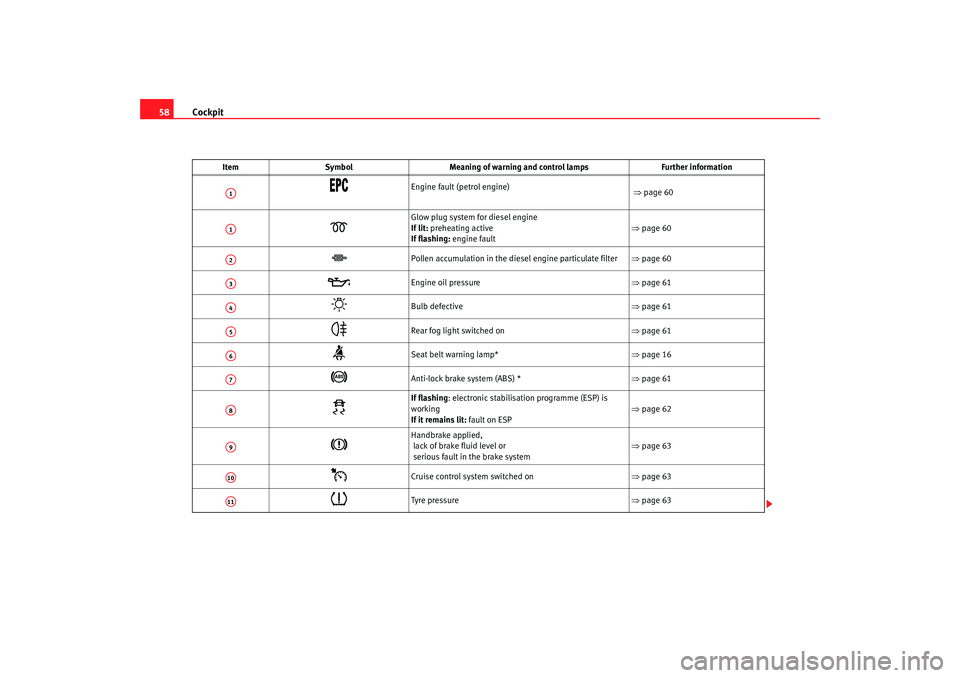
Item Symbol Meaning of warning and control lamps Further information
Engine fault (petrol engine)
⇒ page 60
Glow plug system for diesel engine
If lit: preheating active
If flashing: engine fault ⇒
page 60
Pollen accumulation in the diesel engine particulate filter ⇒page 60
Engine oil pressure ⇒page 61
Bulb defective ⇒page 61
Rear fog light switched on ⇒page 61
Seat belt warning lamp* ⇒page 16
Anti-lock brake system (ABS) * ⇒page 61
If flashing : electronic stabilisation programme (ESP) is
working
If it remains lit: fault on ESP ⇒
page 62
Handbrake applied,
lack of brake fluid level or
serious fault in the brake system ⇒
page 63
Cruise control system switched on ⇒page 63
Tyre pressure ⇒page 63
A1A1A2A3A4A5A6A7A8A9A10A11
Ibiza SC_EN.book Seite 58 Dienstag, 8. Juli 2008 5:36 17
Page 63 of 258
Cockpit61
Safety First
Operating instructions
Practical tips
Te c h n i c a l D a t a
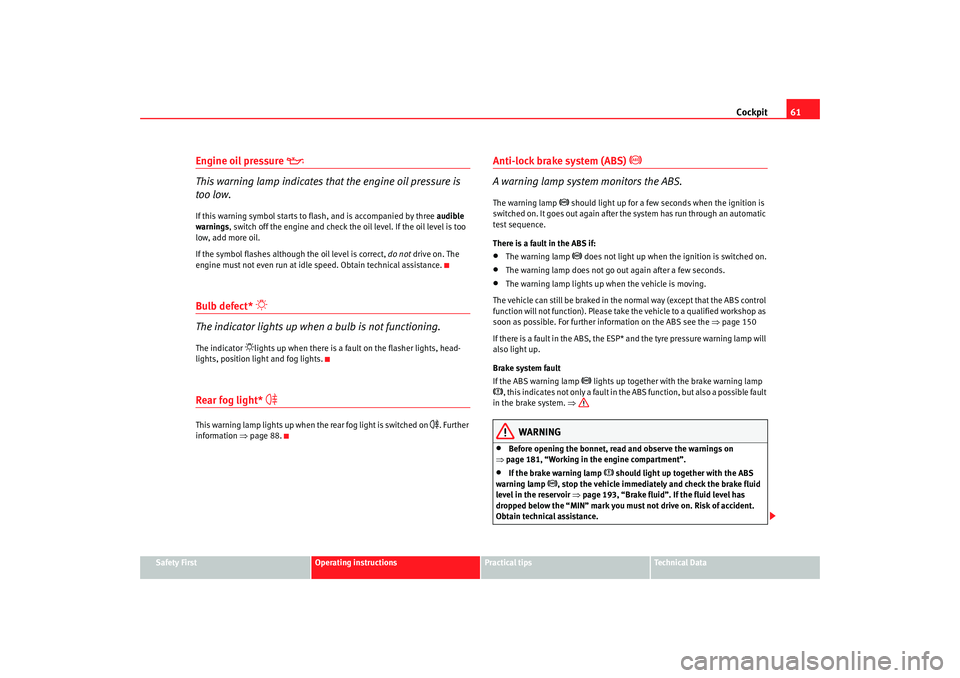
Engine oil pressure
This warning lamp indicates that the engine oil pressure is
too low.If this warning symbol starts to flash, and is accompanied by three audible
warnings , switch off the engine and check the oil level. If the oil level is too
low, add more oil.
If the symbol flashes although the oil level is correct, do not drive on. The
engine must not even run at idle speed. Obtain technical assistance.Bulb defect*
The indicator lights up when a bulb is not functioning.The indicator
lights up when there is a fault on the flasher lights, head-
lights, position light and fog lights.
Rear fog light*
This warning lamp lights up when the rear fog light is switched on
. Further
information ⇒page 88.
Anti-lock brake system (ABS)
A warning lamp system monitors the ABS.
The warning lamp
should light up for a few seconds when the ignition is
switched on. It goes out again after th e system has run through an automatic
test sequence.
There is a fault in the ABS if:
•
The warning lamp
does not light up when the ignition is switched on.
•
The warning lamp does not go out again after a few seconds.
•
The warning lamp lights up when the vehicle is moving.
The vehicle can still be braked in the normal way (except that the ABS control
function will not function). Please take the vehicle to a qualified workshop as
soon as possible. For further information on the ABS see the ⇒page 150
If there is a fault in the ABS, the ESP* and the tyre pressure warning lamp will
also light up.
Brake system fault
If the ABS warning lamp
lights up together with the brake warning lamp
, this indicates not only a fault in the ABS function, but also a possible fault
in the brake system. ⇒
WARNING
•
Before opening the bonnet, read and observe the warnings on
⇒ page 181, “Working in the engine compartment”.
•
If the brake warning lamp
should light up together with the ABS
warning lamp
, stop the vehicle immediately and check the brake fluid
level in the reservoir ⇒page 193, “Brake fluid”. If the fluid level has
dropped below the “MIN” mark you must not drive on. Risk of accident.
Obtain technical assistance.
Ibiza SC_EN.book Seite 61 Dienstag, 8. Juli 2008 5:36 17
Page 84 of 258
Unlocking and locking
82
WARNING
•
Always close the tailgate properly. Risk of accident or injury.
•
The tailgate must not be opened when the reverse or rear fog lights are
lit. This may damage the pilot lights
•
Do not close the tailgate by pushing it down with your hand on the rear
window. The glass could smash. Risk of injury!
•
Ensure the tailgate is locked after closing it. If not, it may open unex-
pectedly while driving.
•
Never allow children to play in or around the vehicle. A locked vehicle
can be subjected to extremely high and low temperatures, depending on
the time of year, thus causing serious injuries/illness. It could even have
fatal consequences. Close and lock both the tailgate and all the other doors
when you are not using the vehicle.
•
Closing the tailgate without observin g and ensuring it is clear could
cause serious injury to you and to third parties. Make sure that no one is in
the path of the tailgate.
•
Never drive with the tailgate open or half-closed, exhaust gases may
penetrate into the interior of the vehicle. Danger of poisoning!
•
If you only open the tailgate, do not leave the key inside. The vehicle
will not be opened if the key is left inside.
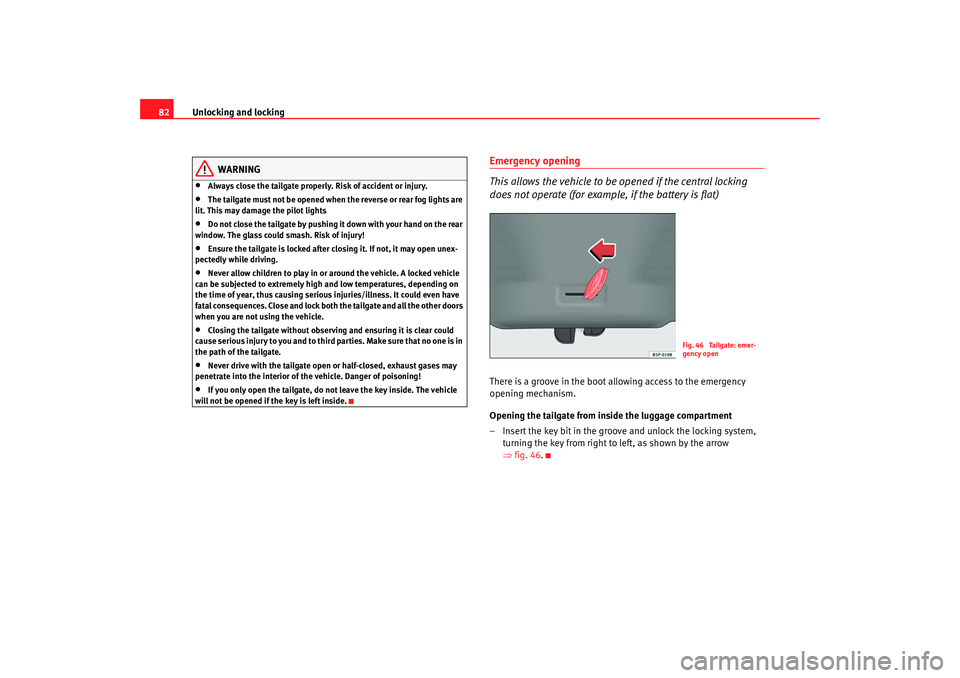
Emergency opening
This allows the vehicle to be opened if the central locking
does not operate (for example, if the battery is flat)There is a groove in the boot allowing access to the emergency
opening mechanism.
Opening the tailgate from inside the luggage compartment
– Insert the key bit in the groove and unlock the locking system, turning the key from right to left, as shown by the arrow
⇒fig. 46.
Fig. 46 Tailgate: emer-
gency open
Ibiza SC_EN.book Seite 82 Dienstag, 8. Juli 2008 5:36 17
Page 90 of 258
Lights and visibility
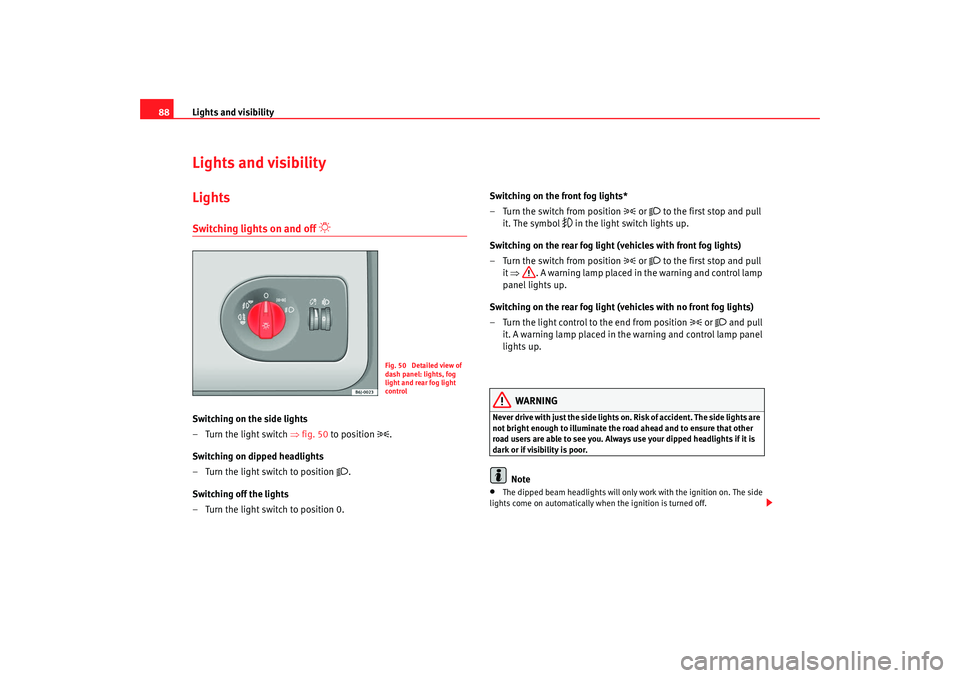
88Lights and visibilityLightsSwitching lights on and off
Switching on the side lights
– Turn the light switch ⇒fig. 50 to position
.
Switching on dipped headlights
– Turn the light switch to position
.
Switching off the lights
– Turn the light switch to position 0. Switching on the front fog lights*
– Turn the switch from position
or
to the first stop and pull
it. The symbol
in the light switch lights up.
Switching on the rear fog light (vehicles with front fog lights)
– Turn the switch from position
or
to the first stop and pull
it ⇒ . A warning lamp placed in the warning and control lamp
panel lights up.
Switching on the rear fog light (vehicles with no front fog lights)
– Turn the light control to the end from position
or
and pull
it. A warning lamp placed in the warning and control lamp panel
lights up.
WARNING
Never drive with just the side lights on . Risk of accident. The side lights are
not bright enough to illuminate the road ahead and to ensure that other
road users are able to see you. Always use your dipped headlights if it is
dark or if visibility is poor.
Note
•
The dipped beam headlights will only work with the ignition on. The side
lights come on automatically when the ignition is turned off.
Fig. 50 Detailed view of
dash panel: lights, fog
light and rear fog light
control
Ibiza SC_EN.book Seite 88 Dienstag, 8. Juli 2008 5:36 17
Page 91 of 258
Lights and visibility89
Safety First
Operating instructions
Practical tips
Te c h n i c a l D a t a
•
If the lights are left on after the key has been taken out of the ignition lock,
a buzzer will sound while the driver door remains open. This is a reminder to
switch the lights off.
•
The rear fog light is so bright that it can dazzle drivers behind you. You
should use the rear fog light only when visibility is very poor.
•
The use of the lighting described here is subject to the relevant statutory
requirements.
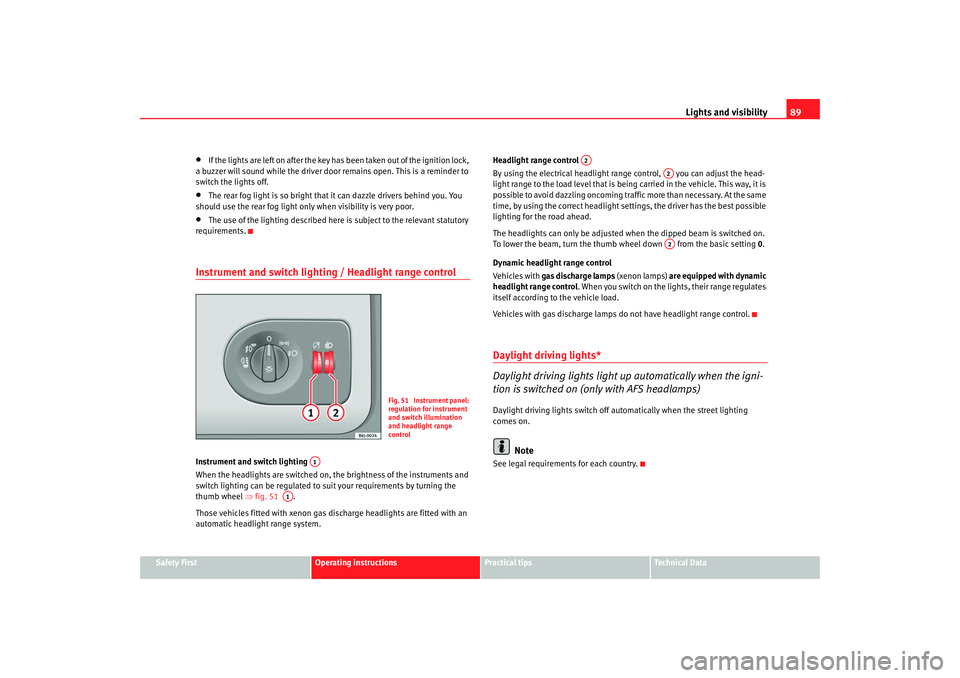
Instrument and switch lighting / Headlight range controlInstrument and switch lighting
When the headlights are switched on, the brightness of the instruments and
switch lighting can be regulated to suit your requirements by turning the
thumb wheel ⇒fig. 51 .
Those vehicles fitted with xenon gas discharge headlights are fitted with an
automatic headlight range system. Headlight range control
By using the electrical headlight range control, you can adjust the head-
light range to the load level that is bei
ng carried in the vehicle. This way, it is
possible to avoid dazzling oncoming traffic more than necessary. At the same
time, by using the correct headlight settings, the driver has the best possible
lighting for the road ahead.
The headlights can only be adjusted when the dipped beam is switched on.
To lower the beam, turn the thumb wheel down from the basic setting 0.
Dynamic headlight range control
Vehicles with gas discharge lamps (xenon lamps) are equipped with dynamic
headlight range control . When you switch on the lights, their range regulates
itself according to the vehicle load.
Vehicles with gas discharge lamps do not have headlight range control.
Daylight driving lights*
Daylight driving lights light up automatically when the igni-
tion is switched on (only with AFS headlamps)Daylight driving lights switch off automatically when the street lighting
comes on.
Note
See legal requirements for each country.
Fig. 51 Instrument panel:
regulation for instrument
and switch illumination
and headlight range
control
A1
A1
A2
A2A2
Ibiza SC_EN.book Seite 89 Dienstag, 8. Juli 2008 5:36 17
Page 92 of 258
Lights and visibility
90Self directional headlights*
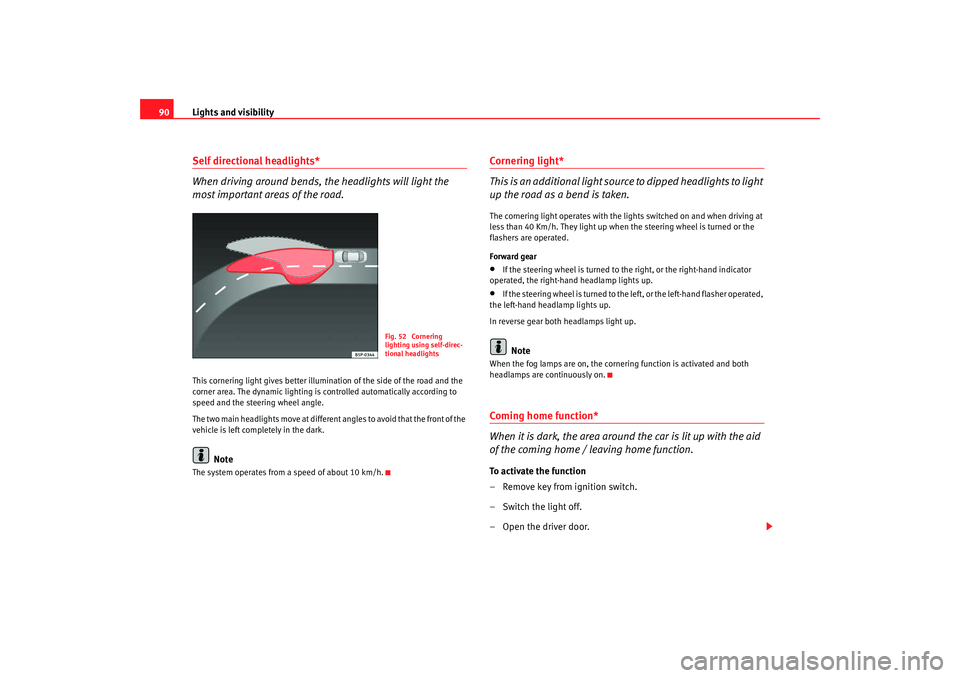
When driving around bends, the headlights will light the
most important areas of the road.This cornering light gives better illumination of the side of the road and the
corner area. The dynamic lighting is controlled automatically according to
speed and the steering wheel angle.
The two main headlights move at different angles to avoid that the front of the
vehicle is left completely in the dark.
Note
The system operates from a speed of about 10 km/h.
Cornering light*
This is an additional light sour ce to dipped headlights to light
up the road as a bend is taken.The cornering light operates with the lights switched on and when driving at
less than 40 Km/h. They light up when the steering wheel is turned or the
flashers are operated.
Forward gear•
If the steering wheel is turned to th e right, or the right-hand indicator
operated, the right-hand headlamp lights up.
•
If the steering wheel is turned to the left, or the left-hand flasher operated,
the left-hand headlamp lights up.
In reverse gear both headlamps light up.Note
When the fog lamps are on, the cornering function is activated and both
headlamps are continuously on.Coming home function*
When it is dark, the area around the car is lit up with the aid
of the coming home / leaving home function.To activate the function
– Remove key from ignition switch.
– Switch the light off.
– Open the driver door.
Fig. 52 Cornering
lighting using self-direc-
tional headlights
Ibiza SC_EN.book Seite 90 Dienstag, 8. Juli 2008 5:36 17
Page 119 of 258
Heating, Ventilation and Air conditioning 117
Safety First
Operating instructions
Practical tips
Te c h n i c a l D a t a
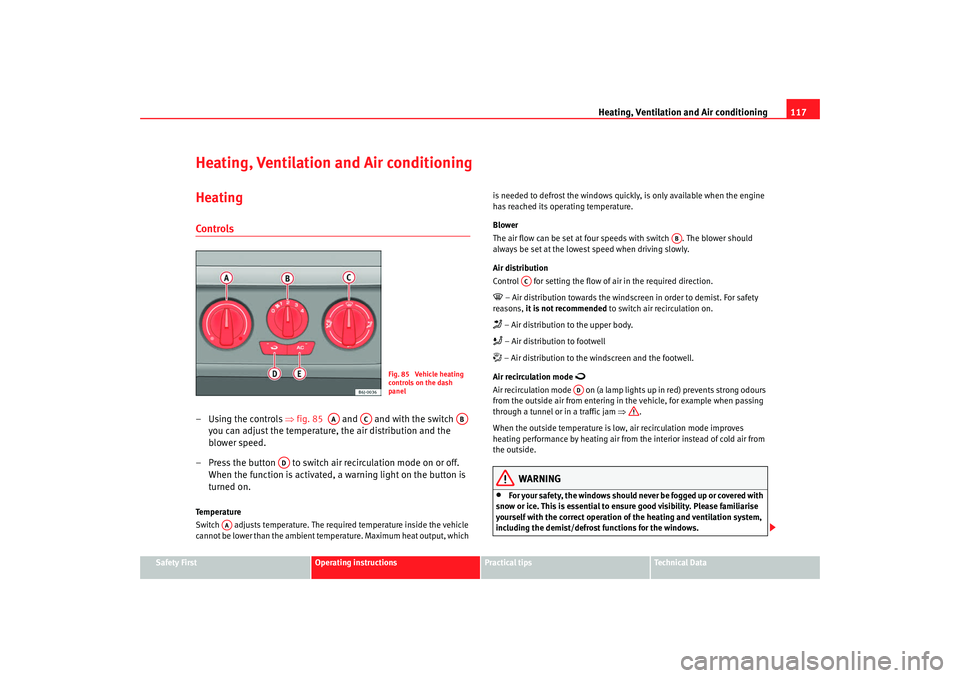
Heating, Ventilation and Air conditioningHeatingControls– Using the controls ⇒fig. 85 and and with the switch
you can adjust the temperature, the air distribution and the
blower speed.
– Press the button to switch air recirculation mode on or off. When the function is activated, a warning light on the button is
turned on.Temperature
Switch adjusts temperature. The required temperature inside the vehicle
cannot be lower than the ambient tem perature. Maximum heat output, which is needed to defrost the windows quickly, is only available when the engine
has reached its operating temperature.
Blower
The air flow can be set at four s
peeds with switch . The blower should
always be set at the lowest speed when driving slowly.
Air distribution
Control for setting the flow of air in the required direction.
– Air distribution towards the windsc reen in order to demist. For safety
reasons, it is not recommended to switch air recirculation on. – Air distribution to the upper body. – Air distribution to footwell – Air distribution to the windscreen and the footwell.
Air recirculation mode
Air recirculation mode on (a lamp ligh ts up in red) prevents strong odours
from the outside air from entering in the vehicle, for example when passing
through a tunnel or in a traffic jam ⇒.
When the outside temperature is low, air recirculation mode improves
heating performance by heating air from the interior instead of cold air from
the outside.
WARNING
•
For your safety, the windows should never be fogged up or covered with
snow or ice. This is essential to ensure good visibility. Please familiarise
yourself with the correct operation of the heating and ventilation system,
including the demist/defrost functions for the windows.
Fig. 85 Vehicle heating
controls on the dash
panel
AA
AC
AB
AD
AA
AB
AC
AD
Ibiza SC_EN.book Seite 117 Dienstag, 8. Juli 2008 5:36 17
Page 123 of 258
Heating, Ventilation and Air conditioning 121
Safety First
Operating instructions
Practical tips
Te c h n i c a l D a t a
– Turn the fan control to one of the two levels depending on the
speed required.
– Rotate the temperature control to the desired level of comfort.
– Close outlets
– Open and turn outlets towards side windows
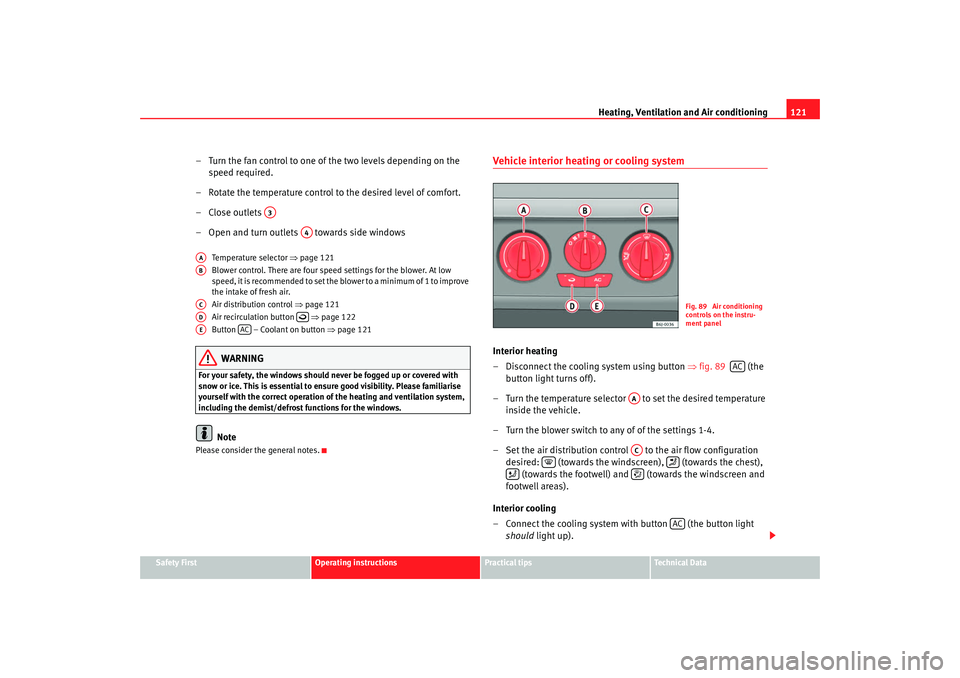
Temperature selector ⇒page 121
Blower control. There are four speed settings for the blower. At low
speed, it is recommended to set the blower to a minimum of 1 to improve
the intake of fresh air.
Air distribution control ⇒page 121
Air recirculation button ⇒page 122
Button – Coolant on button ⇒page 121WARNING
For your safety, the windows should never be fogged up or covered with
snow or ice. This is essential to ensu re good visibility. Please familiarise
yourself with the correct operation of the heating and ventilation system,
including the demist/defrost functions for the windows.
Note
Please consider the general notes.
Vehicle interior heating or cooling system Interior heating
– Disconnect the cooling system using button ⇒fig. 89 (the
button light turns off).
– Turn the temperature selector to set the desired temperature inside the vehicle.
– Turn the blower switch to any of of the settings 1-4.
– Set the air distribution control to the air flow configuration desired: (towards the windsc reen), (towards the chest),
(towards the footwell) and (towards the windscreen and
footwell areas).
Interior cooling
– Connect the cooling system with button (the button light should light up).
A3
A4
AAABACAD
AE
AC
Fig. 89 Air conditioning
controls on the instru-
ment panel
AC
AAAC
AC
Ibiza SC_EN.book Seite 121 Dienstag, 8. Juli 2008 5:36 17
Page 126 of 258
Heating, Ventilation and Air conditioning
124
– Turn the temperature selector ⇒ page 123, fig. 90 to adjust
the desired temperature.
– The functions will be switched on when its buttons are pressed. When the function is activated, a symbol is displayed on the
screen. Press the button again to switch off the function.
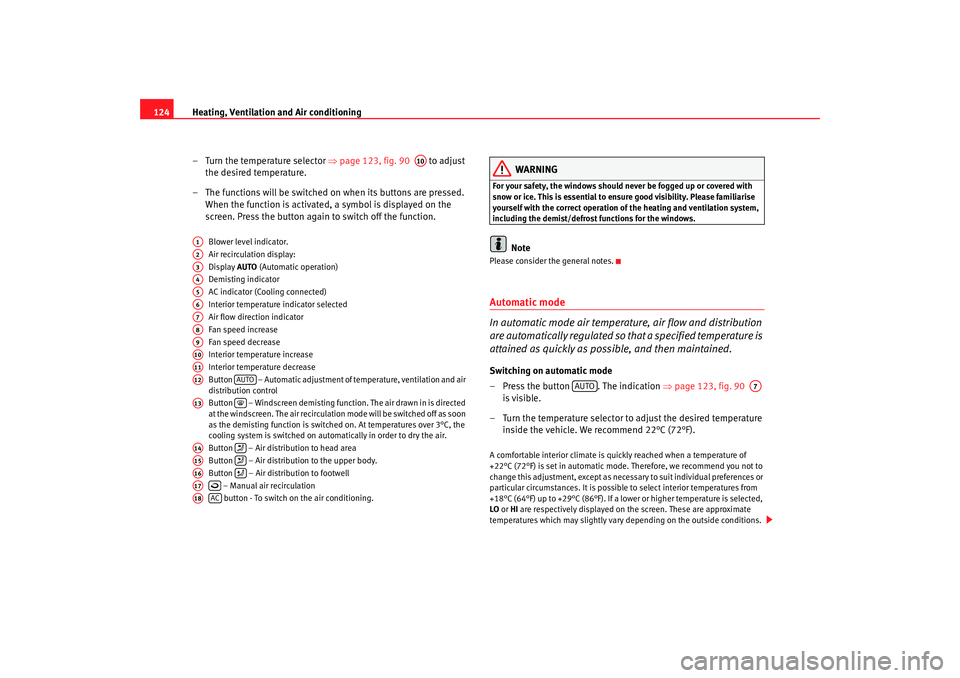
Blower level indicator.
Air recirculation display:
Display AUTO (Automatic operation)
Demisting indicator
AC indicator (Cooling connected)
Interior temperature indicator selected
Air flow direction indicator
Fan speed increase
Fan speed decrease
Interior temperature increase
Interior temperature decrease
Button – Automatic adjustment of temperature, ventilation and air
distribution control
Button – Windscreen demisting function. The air drawn in is directed
at the windscreen. The air re circulation mode will be switched off as soon
as the demisting function is switched on. At temperatures over 3°C, the
cooling system is switched on automatically in order to dry the air.
Button – Air distribution to head area
Button – Air distribution to the upper body.
Button – Air distribution to footwell
– Manual air recirculation button - To switch on the air conditioning.
WARNING
For your safety, the windows should never be fogged up or covered with
snow or ice. This is essential to ensure good visibility. Please familiarise
yourself with the correct operation of the heating and ventilation system,
including the demist/defrost functions for the windows.
Note
Please consider the general notes.Automatic mode
In automatic mode air temperatur e, air flow and distribution
are automatically regulated so that a specified temperature is
attained as quickly as possible, and then maintained.Switching on automatic mode
– Press the button . The indication ⇒page 123, fig. 90
is visible.
– Turn the temperature selector to adjust the desired temperature inside the vehicle. We recommend 22°C (72°F).A comfortable interior climate is quickly reached when a temperature of
+22°C (72°F) is set in automatic mode. Therefore, we recommend you not to
change this adjustment, except as necessary to suit individual preferences or
particular circumstances. It is possible to select interior temperatures from
+18°C (64°F) up to +29°C (86° F). If a lower or higher temperature is selected,
LO or HI are respectively displayed on the screen. These are approximate
temperatures which may slightly vary depending on the outside conditions.
A10
A1A2A3A4A5A6A7A8A9A10A11A12
AUTO
A13
A14
A15
A16
A17
A18
AC
AUTO
A7
Ibiza SC_EN.book Seite 124 Dienstag, 8. Juli 2008 5:36 17
Page 220 of 258
If and when
218Bulb changeGeneral notesBefore changing any bulb, first turn off the failed component.
Do not touch the bulb glass. Fingerprints vaporise in the heat, causing a
reduction in the bulb life and conden sation on the mirror surface, thus
reducing efficiency.
A bulb should only be replaced by one of the same type. The type is inscribed
on the bulb, either on the glass part or on the base.
It is highly recommended to keep a box of spare bulbs in the vehicle. At the
very least, the following spare bulbs, which are essential for road safety,
should be kept in the vehicle.
Double headlamps
Dipped beam - H7 Long Life
Main beam - H7
Position - 2 x W5W Long Life
Indicator - PY21W
Single headlamp
Dipped/Main H4 Long Life
Position W5W Long Life
Indicator PY 21W
Xenon headlights
13)/ self-adjusting*
Dipped and full beam - D1S
14)
Position W5W Blue Long Life DRL (day light) P21W Super Long Life
Indicators PY21W
Fog lights
Fog light/cornering - H11
Rear lights
Fog light - P21W
Reverse gear - R10W
Stop/position P21 /5W Long Life
Indicator - PY21W
Side indicator
Side indicator - W5W
Registration plate light
Registration plate light - W5W Long Life
Note
•
However, the following is a description of how to change the bulbs except
for the fog lights.
13)On this type of headlight, the bulb changes must be made by the SEAT dealer, given
that complex elements must be removed from the vehicle and a reset must be made
on the automatic control system incorporated.
14)The Xenon bulbs discharge 2.5 times the light flux and have an average lifespan of 5
times more than that of halogen bulbs, this means that, except due to unusual circum-
stances, there is no need to change the bulbs for the whole life of the vehicle.
Ibiza SC_EN.book Seite 218 Dienstag, 8. Juli 2008 5:36 17