Seat Leon 5D 2010 SOUND SYSTEM 2.0
Manufacturer: SEAT, Model Year: 2010, Model line: Leon 5D, Model: Seat Leon 5D 2010Pages: 43, PDF Size: 1.54 MB
Page 21 of 43
Audio mode
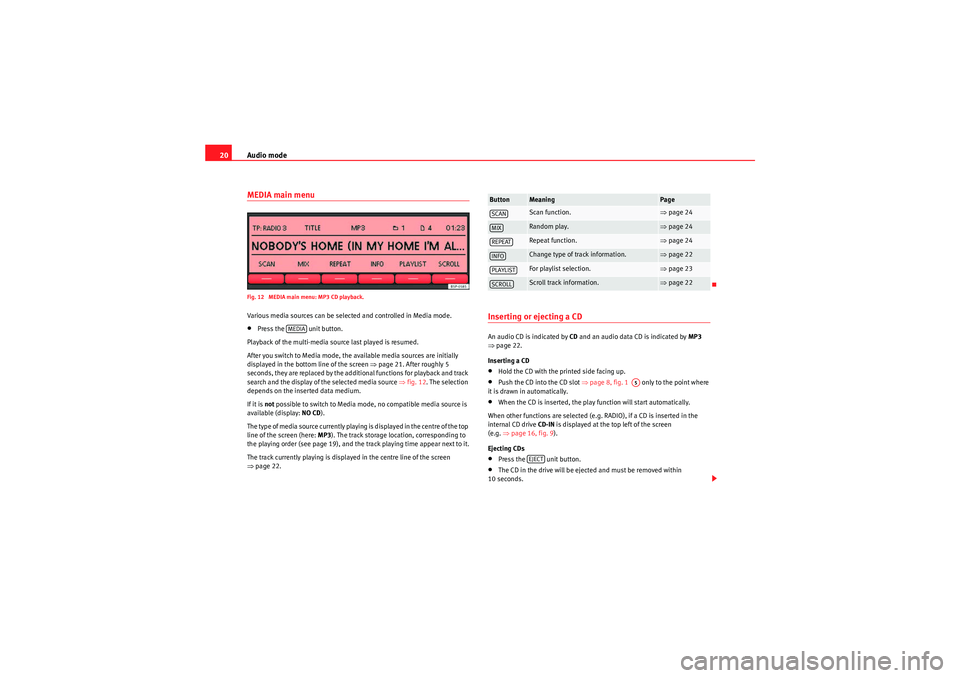
20MEDIA main menuFig. 12 MEDIA main menu: MP3 CD playback.Various media sources can be selected and controlled in Media mode.•Press the unit button.
Playback of the multi-media source last played is resumed.
After you switch to Media mode, the available media sources are initially
displayed in the bottom line of the screen ⇒page 21. After roughly 5
seconds, they are replaced by the additional functions for playback and track
search and the display of the selected media source ⇒fig. 12. The selection
depends on the inserted data medium.
If it is not possible to switch to Media mode, no compatible media source is
available (display: NO CD).
The type of media source currently playing is displayed in the centre of the top
line of the screen (here: MP3). The track storage location, corresponding to
the playing order (see page 19), and the track playing time appear next to it.
The track currently playing is displayed in the centre line of the screen
⇒ page 22.
Inserting or ejecting a CDAn audio CD is indicated by CD and an audio data CD is indicated by MP3
⇒ page 22.
Inserting a CD•Hold the CD with the printed side facing up.•Push the CD into the CD slot ⇒page 8, fig. 1 only to the point where
it is drawn in automatically.•When the CD is inserted, the play function will start automatically.
When other functions are selected (e.g. RADIO), if a CD is inserted in the
internal CD drive CD-IN is displayed at the top left of the screen
(e.g. ⇒page 16, fig. 9 ).
Ejecting CDs•Press the unit button.•The CD in the drive will be ejected and must be removed within
10 seconds.
MEDIA
Button
Meaning
Page
Scan function.
⇒ page 24
Random play.
⇒page 24
Repeat function.
⇒page 24
Change type of track information.
⇒page 22
For playlist selection.
⇒page 23
Scroll track information.
⇒page 22
SCANMIXREPEATINFOPLAYLISTSCROLL
A5
EJECT
sound_system_2_EN Seite 20 Mittwoch, 3. März 2010 6:03 18
Page 22 of 43
Audio mode21
If the CD is not removed within 10 seconds, it is retracted again for safety
reasons.
Error messages on the screen
A reading error is indicated by ERROR in the title bar.
An error message in the bottom line of the screen indicates the possible
cause of the error.
Note
Uneven road surfaces and strong vibrations may cause the CD to jump.
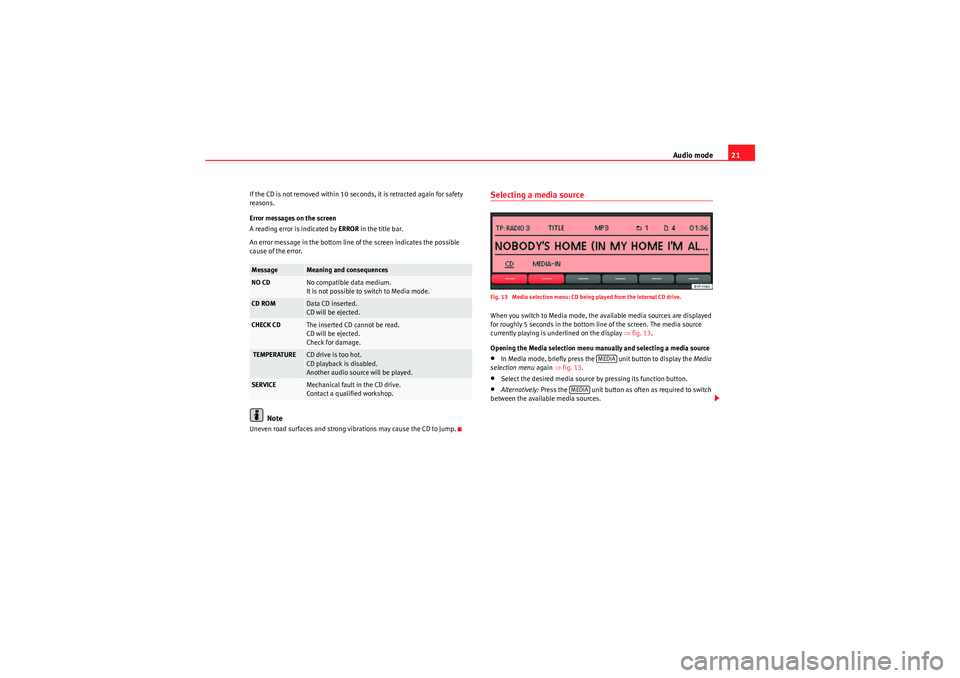
Selecting a media sourceFig. 13 Media selection menu: CD being played from the internal CD drive.When you switch to Media mode, the available media sources are displayed
for roughly 5 seconds in the bottom line of the screen. The media source
currently playing is underlined on the display ⇒fig. 13 .
Opening the Media selection menu manually and selecting a media source•In Media mode, briefly press the unit button to display the Media
selection menu again ⇒fig. 13.•Select the desired media source by pressing its function button.•Alternatively: Press the unit button as often as required to switch
between the available media sources.
Message
Meaning and consequences
NO CD
No compatible data medium.
It is not possible to switch to Media mode.
CD ROM
Data CD inserted.
CD will be ejected.
CHECK CD
The inserted CD cannot be read.
CD will be ejected.
Check for damage.
TEMPERATURE
CD drive is too hot.
CD playback is disabled.
Another audio source will be played.
SERVICE
Mechanical fault in the CD drive.
Contact a qualified workshop.
MEDIA
MEDIA
sound_system_2_EN Seite 21 Mittwoch, 3. März 2010 6:03 18
Page 23 of 43
Audio mode
22When a media source that has already been played is selected again, play-
back is resumed from the point that was last played. Exception: External audio
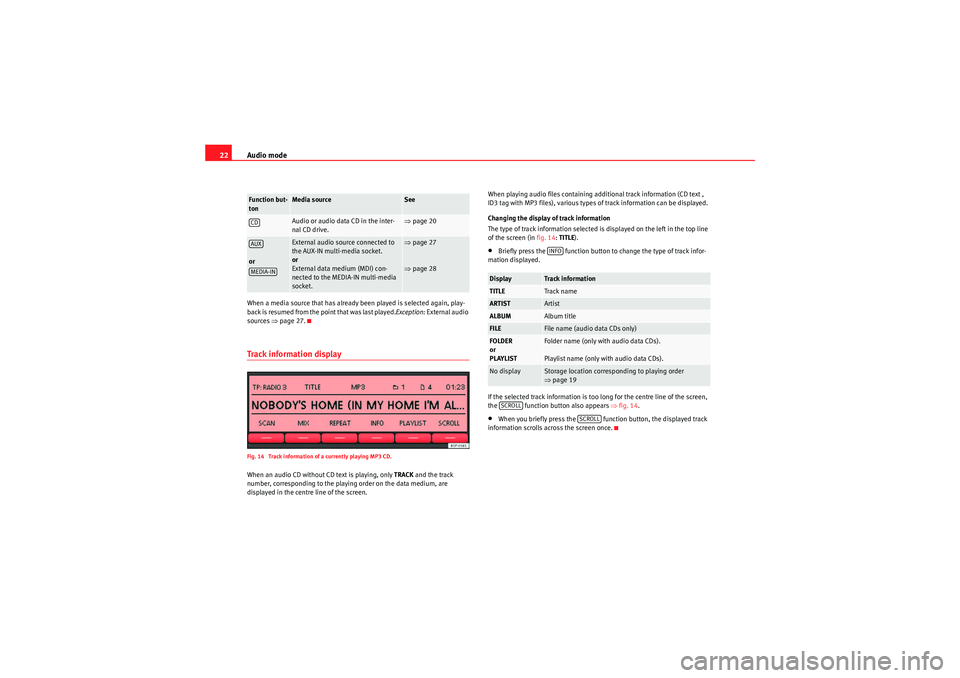
sources ⇒page 27.Track information displayFig. 14 Track information of a currently playing MP3 CD.When an audio CD without CD text is playing, only TRACK and the track
number, corresponding to the playing order on the data medium, are
displayed in the centre line of the screen. When playing audio files containing additional track information (CD text ,
ID3 tag with MP3 files), various types of track information can be displayed.
Changing the display of track information
The type of track information selected is displayed on the left in the top line
of the screen (in
fig. 14:TITLE).
•Briefly press the function button to change the type of track infor-
mation displayed.
If the selected track information is too long for the centre line of the screen,
the function button also appears ⇒ fig. 14.•When you briefly press the function button, the displayed track
information scrolls across the screen once.
Function but-
ton
Media source
See
Audio or audio data CD in the inter-
nal CD drive.
⇒ page 20
or
External audio source connected to
the AUX-IN multi-media socket.
or
External data medium (MDI) con-
nected to the MEDIA-IN multi-media
socket.
⇒page 27
⇒ page 28
CDAUXMEDIA-IN
Display
Track information
TITLE
Track name
ARTIST
Artist
ALBUM
Album title
FILE
File name (audio data CDs only)
FOLDER
or
PLAYLIST
Folder name (only with audio data CDs).
Playlist name (only with audio data CDs).
No display
Storage location corresponding to playing order
⇒page 19INFO
SCROLL
SCROLL
sound_system_2_EN Seite 22 Mittwoch, 3. März 2010 6:03 18
Page 24 of 43
Audio mode23
Changing track manuallyFig. 15 Display of the storage location when changing track in MP3 mode.Start Media mode.
You can browse through the tracks of the CD that is currently playing.
Refer to the information on the playing order of audio data CDs ⇒page 19.
Browsing tracks
Press the rocker switch ⇒page 8, fig. 1 to the left or
right. You can also change track by turning the setting knob
⇒page 8, fig. 1 .
Changing folder in audio data CD mode
•Press the rocker switch ⇒page 8, fig. 1 to the right or left
to switch to the first track of the next or previous folder.
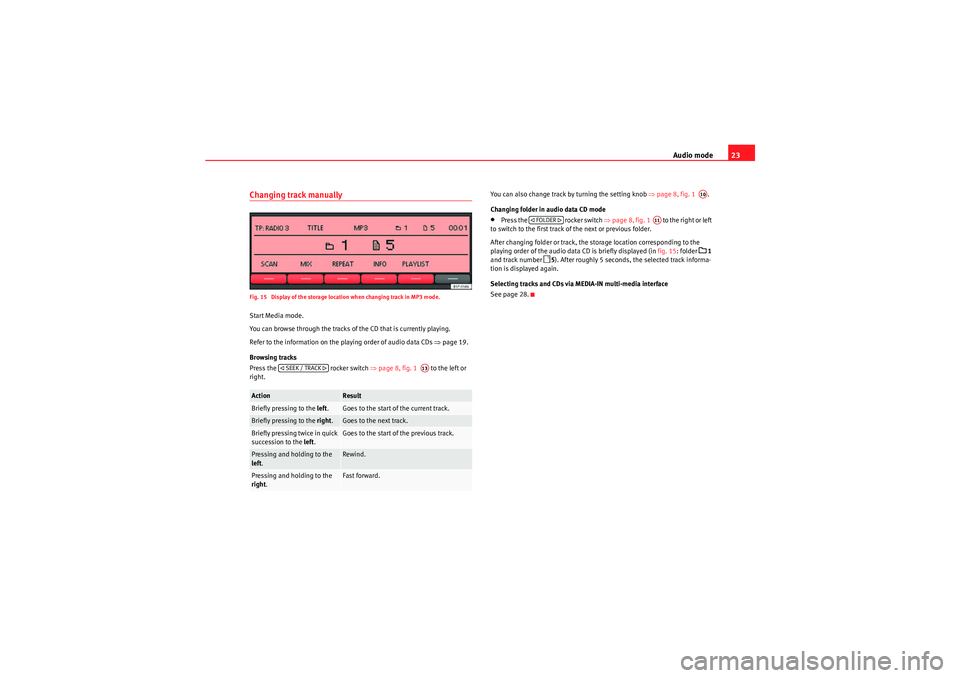
After changing folder or track, the storage location corresponding to the
playing order of the audio data CD is briefly displayed (in fig. 15: folder
1
and track number
5 ). After roughly 5 seconds, the selected track informa-
tion is displayed again.
Selecting tracks and CDs via MEDIA-IN multi-media interface
See page 28.
Action
Result
Briefly pressing to the left.
Goes to the start of the current track.
Briefly pressing to the right.
Goes to the next track.
Briefly pressing twice in quick
succession to the left.
Goes to the start of the previous track.
Pressing and holding to the
left.
Rewind.
Pressing and holding to the
right .
Fast forward.
SEEK / TRACK
A13
A10
FOLDER
A11
sound_system_2_EN Seite 23 Mittwoch, 3. März 2010 6:03 18
Page 25 of 43

Audio mode
24Changing playback mode (SCAN, MIX, REPEAT)Fig. 16 MEDIA main menu: random play from active folder (MIX FLD).
For some audio sources, a selected playback mode can be restricted to the
current folder or applied to the entire data medium.
Starting and stopping the playback mode
The active playback mode is indicated by an underlined function button (in
fig. 16: MIX).
Function
Function button
Picture source
Action
Display
Result
Scan function
Audio data CD
or MDI
a)
Pressing once.
Only the tracks of the current folder will be
played for 10 seconds each.
Pressing twice.
or
All tracks on the current CD or the connected data
medium (MDI) will be played for 10 seconds
each.
Audio CD
Pressing once.
All tracks on the current CD will be played for 10
seconds each.
Alternatively: Briefly press the setting knob ⇒ page 8, fig. 1 to start or stop the scan function.
Random play-
back
Audio data CD
or MDI
a)
Pressing once.
Only the tracks of the current folder will be
played in random order.
Pressing twice.
or
All tracks on the current CD or the connected data
medium (MDI) will be played in random order.
Audio CD
Pressing once.
All tracks on the current CD will be played in ran-
dom order.
SCAN
SCAN FLDSCAN CDSCAN ALLSCAN CD
A10
MIX
MIX FLDMIX CDMIX ALLMIX CD
sound_system_2_EN Seite 24 Mittwoch, 3. März 2010 6:03 18
Page 26 of 43

Audio mode25
The scan function starts with the next track and ends automatically when all
tracks of the selected folder or selected CD have been scanned.
The random playback and repeat functions remain active for the corre-
sponding media source until closed for that source.Repeat function
Audio data CD
or MDI
a)
Pressing once.
At the end of the current folder, its tracks will be
played again.
Audio CD
Pressing once.
At the end of the current audio CD, its tracks will
be played again.
Press the , or function button again to stop the current playback mode at the track currently playing.a)Data medium (MDI) connected to the MEDIA-IN multi-media interface ⇒page 28.Function
Function button
Picture source
Action
Display
Result
REPEAT
RPT FLDRPT CD
SCAN
MIX
RPT ...
sound_system_2_EN Seite 25 Mittwoch, 3. März 2010 6:03 18
Page 27 of 43
Audio mode
26AUX mode* (external audio sources)IntroductionThe external audio sources described here can only be played over the
vehicle speakers, but cannot be controlled via the radio system.
Before connecting or playing an external audio source, turn down the base
volume on the radio system ⇒page 11.
Additional information:•Safety notes
⇒ page 6
•System overview ⇒page 8•Media mode ⇒page 17•Settings menus ⇒page 33Note
Please read and observe the external audio source manufacturer operating
manual.
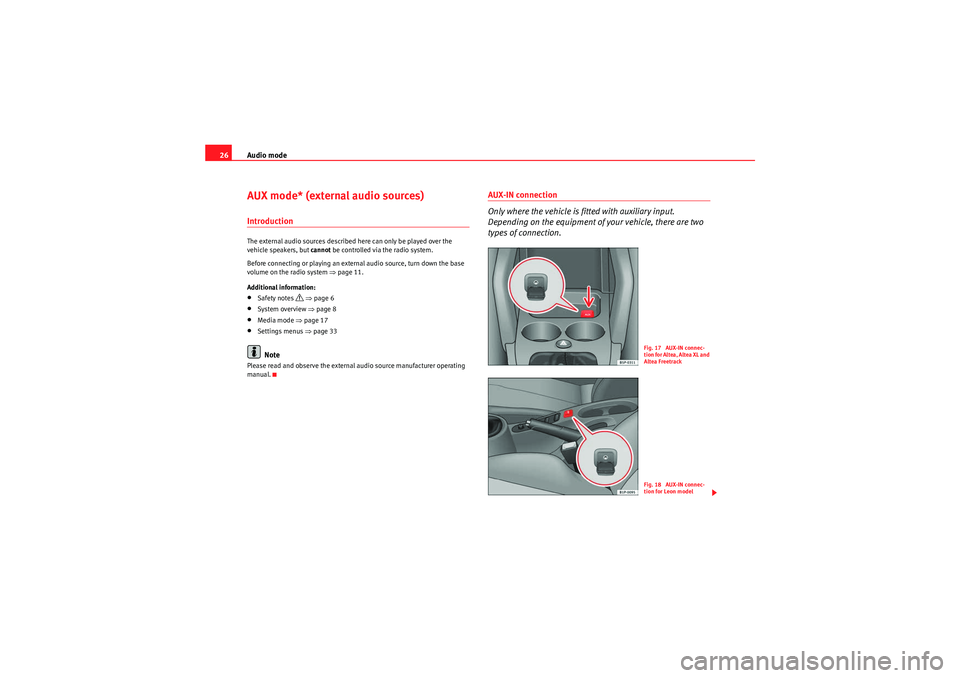
AUX-IN connection
Only where the vehicle is fitted with auxiliary input.
Depending on the equipment of your vehicle, there are two
types of connection.
Fig. 17 AUX-IN connec-
tion for Altea, Altea XL and
Altea FreetrackFig. 18 AUX-IN connec-
tion for Leon model
sound_system_2_EN Seite 26 Mittwoch, 3. März 2010 6:03 18
Page 28 of 43
Audio mode27
AUX-IN* connection
A JACK
1) audio adaptor is required.
Connect the portable audio player (MP3, Walkman, CD, etc. ) to the AUX-IN
connector, ensuring that the jack fits perfectly. Folders, tracks... are managed
from the connected device.
To listen to the audio from the portable device, press the MEDIA button on the
radio.
The USB connection takes priority over AUX-IN inputs. A device connected to
the AUX-IN input can only be heard when there is no other device connected
to the USB port. ⇒page 28
The audio source of the devices connected in the MEDIA-IN device ⇒page 28
(USB as AUX-IN) takes priority over those connected in the RSE. Where both
options are available, make sure that there is nothing connected in the
M E D I A - I N * co n n e c t i o ns w h e n yo u wi s h to l is te n t o t h e a u d i o s o u r ce o f t h e R S E
in the car. (See Rear Seat Entertainment manual).Note
Keep in mind that if you change temporarily to a different source without stop-
ping the playback on the portable device, when you go back to the auxiliary
source using the menu displayed with the button, it will not continue
to play at the point where you left it.AUX-IN operationThe AUX-IN multi-media socket can only be used with a 3.5 mm jack plug.
An external audio source connected to the socket is indicated by AUX in the
Media selection menu . If
AUX is not displayed, AUX must be activated in the SETUP menu ⇒ page 34.
Connecting an external audio source to the AUX-IN multi-media socket
•Connect the audio source to the AUX-IN multi-media socket.•Start playback on the external audio source.•Open the Media selection menu and select the function button
⇒ page 21.
The output volume of a connected external audio source should be adjusted
to the volume of the other audio sources ⇒page 36.
Information on operating an external audio source connected to the AUX-IN
multi-media socket
Vehicles with MEDIA-IN multi-media interface
See page 28.Note
Interference noise may be heard if the external audio source is powered from
the vehicle's 12-volt socket.
1)The cable is not supplied.
MEDIA
Action
Result
Selection of another audio source on
the radio system.
The external audio source continues
to run in the background.
Stopping playback on the external
audio source or disconnecting the
plug from the AUX-IN multi-media
socket.
The radio system remains in the AUX
menu.
AUX
sound_system_2_EN Seite 27 Mittwoch, 3. März 2010 6:03 18
Page 29 of 43
Audio mode
28MEDIA-IN multi-media interface*IntroductionThe supported file formats listed below are collectively referred to in this
manual as “audio files”.
Audio files on an external data medium connected to the MEDIA-IN multi-
media interface can be played and controlled via the radio system.
Where this manual refers to external data media, this means USB mass
storage devices containing supported audio files, such as MP3 players,
iPods
® and USB sticks. External data media are displayed as MDI (Media
Device Interface) on the radio system.
The MEDIA-IN multi-media interface supplies the usual USB voltage of 5 volts.
Additional information:
•Safety notes
⇒ page 6
•System overview ⇒page 8•Media mode ⇒page 17•Settings menus ⇒page 33
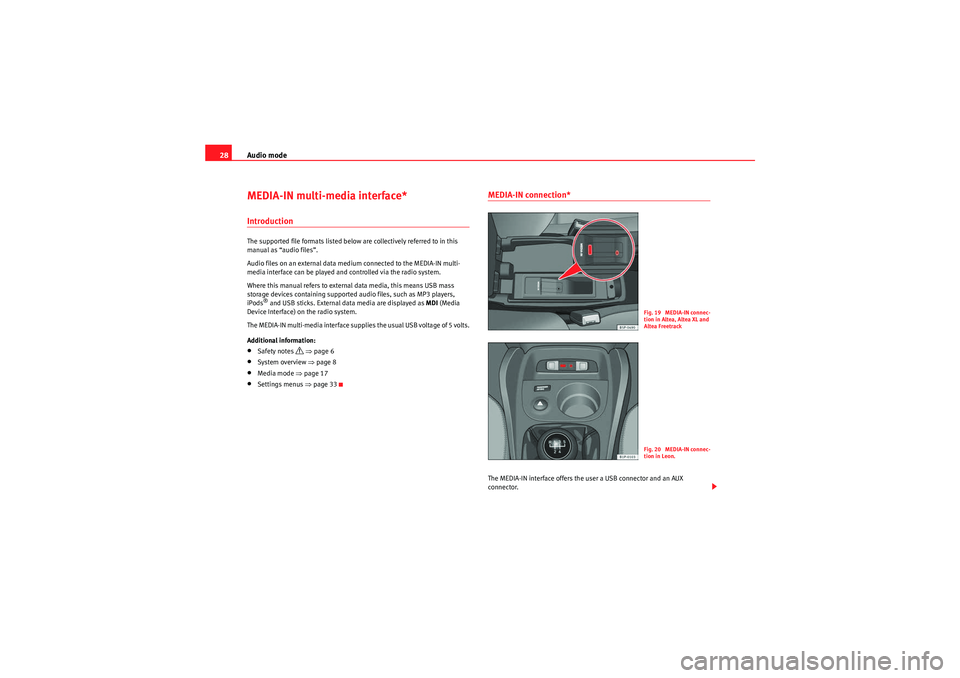
MEDIA-IN connection*The MEDIA-IN interface offers the user a USB connector and an AUX
connector.
F ig. 19 ME DIA-IN connec-
tion in Altea, Altea XL and
Altea FreetrackF ig. 20 ME DIA-IN connec-
tion in Leon.
sound_system_2_EN Seite 28 Mittwoch, 3. März 2010 6:03 18
Page 30 of 43
Audio mode29
This operation mode permits any of the following elements to be connected:•USB mode: A storage device with USB connection. The connection is
directly done into the USB port.•iPod® mode: To connect an iPod device, an adapter cable or device is
required (SEAT brand), depending on the vehicle. This cable/device is
connected to the iPod at one end and has USB and audio JACK
2) connections
at the other end.
•Auxiliary connection mode: A portable audio player device (MP3,
Walkman, CD, etc...). Connection is through a JACK-JACK audio adapter
2)
⇒ page 26.
Insert a device in the MEDIA-IN* connections
Insert the necessary connectors in the USB/ auxiliary/ iPod® connections,
depending on the equipment to be connected ( USB, iPod®, MP3, Walkman,
etc...), making sure that the pins are correctly connected.
A USB or iPod® device is controlled through the radio controls.
A por table device with audio output is directly controlled from the equipment
connected.
Selecting the source connected
See page 21.
Note
•iPod® is a registered trademark of Apple Computer, Inc.•If you are not in USB/iPod® mode (e.g. in FM) when the button is
pressed, the last selected source will start to play (where available).•Consult the list of compatible iPods with your Authorised Service
Centre.
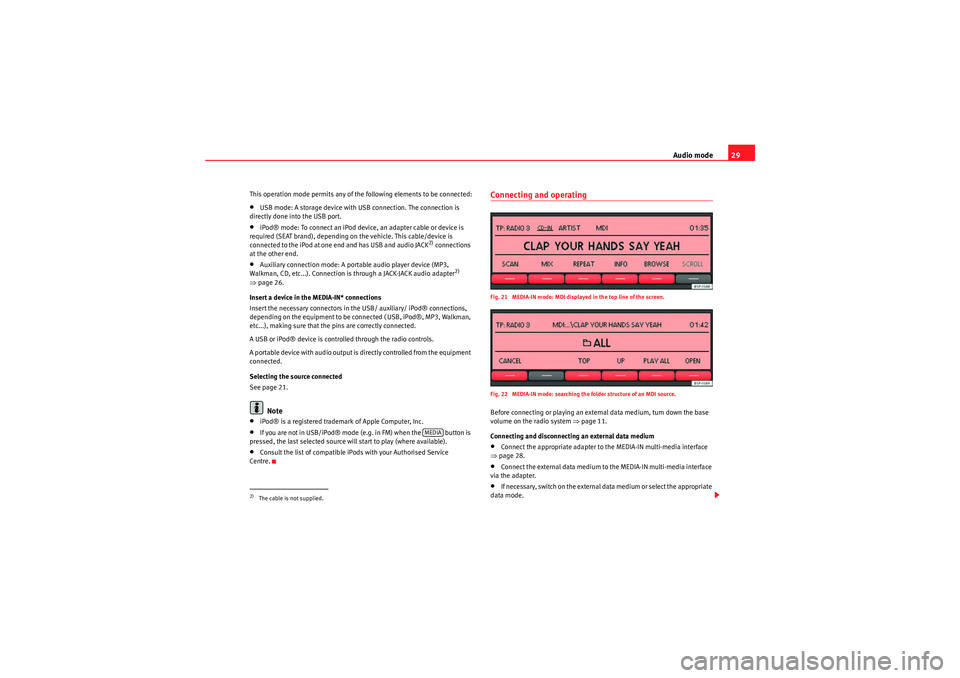
Connecting and operatingFig. 21 MEDIA-IN mode: MDI displayed in the top line of the screen.
Fig. 22 MEDIA-IN mode: searching the folder structure of an MDI source.Before connecting or playing an external data medium, turn down the base
volume on the radio system ⇒page 11.
Connecting and disconnecting an external data medium•Connect the appropriate adapter to the MEDIA-IN multi-media interface
⇒ page 28.•Connect the external data medium to the MEDIA-IN multi-media interface
via the adapter.•I f n e ce ssa r y, s w i tch o n t h e e x te r na l d a t a m e d i u m o r s e l e c t t h e a p p r o p r i a t e
data mode.
2)The cable is not supplied.
MEDIA
sound_system_2_EN Seite 29 Mittwoch, 3. März 2010 6:03 18