led Seat Leon 5D 2013 Owner's Guide
[x] Cancel search | Manufacturer: SEAT, Model Year: 2013, Model line: Leon 5D, Model: Seat Leon 5D 2013Pages: 339, PDF Size: 4.8 MB
Page 73 of 339
71
Instruments and warning/control lamps
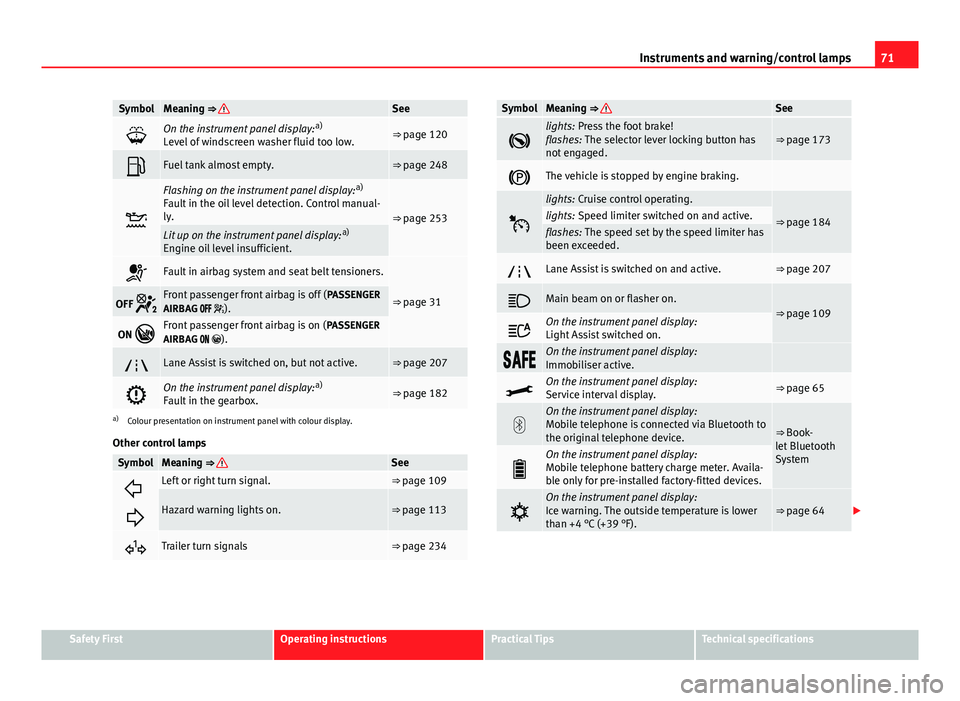
SymbolMeaning ⇒ See
On the instrument panel display: a)
Level of windscreen washer fluid too low.⇒ page 120
Fuel tank almost empty.⇒ page 248
Flashing on the instrument panel display: a)
Fault in the oil level detection. Control manual-
ly.
⇒ page 253Lit up on the instrument panel display: a)
Engine oil level insufficient.
Fault in airbag system and seat belt tensioners.
⇒ page 31OFF Front passenger front airbag is off ( PASSENGER
AIRBAG ).
ON Front passenger front airbag is on ( PASSENGER
AIRBAG ).
Lane Assist is switched on, but not active.⇒ page 207
On the instrument panel display: a)
Fault in the gearbox.⇒ page 182
a) Colour presentation on instrument panel with colour display.
Other control lamps
SymbolMeaning ⇒ See
Left or right turn signal.⇒ page 109
Hazard warning lights on.⇒ page 113
Trailer turn signals⇒ page 234
SymbolMeaning ⇒ See
lights: Press the foot brake!
flashes: The selector lever locking button has
not engaged.⇒ page 173
The vehicle is stopped by engine braking.
lights: Cruise control operating.
⇒ page 184lights: Speed limiter switched on and active.flashes: The speed set by the speed limiter has
been exceeded.
Lane Assist is switched on and active.⇒ page 207
Main beam on or flasher on.⇒ page 109
On the instrument panel display:
Light Assist switched on.
On the instrument panel display:
Immobiliser active.
On the instrument panel display:
Service interval display.⇒ page 65
On the instrument panel display:
Mobile telephone is connected via Bluetooth to
the original telephone device.
⇒ Book-
let Bluetooth
System
On the instrument panel display:
Mobile telephone battery charge meter. Availa-
ble only for pre-installed factory-fitted devices.
On the instrument panel display:
Ice warning. The outside temperature is lower
than +4 °C (+39 °F).⇒ page 64
Safety FirstOperating instructionsPractical TipsTechnical specifications
Page 78 of 339

76Driver information system
Multifunction display memory
The multifunction display is equipped with three memories that work auto-
matically: MFD from departure, MFD from refuelling, MFD total calculation.
On the screen display, you can read which memory is currently displayed.
To change between memories with the ignition on and the memory shown,
press the button
on the windscreen wiper lever or you can also
change between memories using the button on the multifunction steer-
ing wheel.
Menueffect
MFD from de-
parture
Display and storage of the values for the journey and the
consumption from when the ignition is switched on to
when it is switched off.
If the journey is continued in less than 2 hours after the ig-
nition is switched off, the new data is added to the data al-
ready stored in the memory. The memory will automatically
be deleted if the journey is interrupted for more than two
hours.
MFD from re-
fuellingDisplay and storage of the values for the journey and the
consumption. By refuelling, the memory will be erased au-
tomatically.
MFD total cal-
culation
The memory records the values for a specific number of
partial trips, up to a total of 19 hours and 59 minutes or 99
hours and 59 minutes, or 1999.9 km (or miles) or 9999 km
(or miles), depending on the model of instrument panel.
On reaching either of these limits a)
, the memory is auto-
matically erased and starts to count from 0 again.
a) It varies according to the type of instrument panel fitted.
Erasing a memory manually
● Select the memory that you wish to erase.
● Press and hold the button
on the windscreen wiper lever or the
button on the multifunction steering wheel for about 2 seconds. Personalising the displays
In the Easy Connect system you can adjust which of the possible displays of
the MFD can be shown on the instrument panel display with the button
and the function button Setup ⇒ page 79.
DisplaysMenueffect
Current fuel con-
sumptionThe current fuel consumption display operates through-
out the journey, in litres/100 km; and with the engine
running and the vehicle stopped, in litres/hour.
Average fuel con-
sumption
After turning on the ignition, average fuel consumption
in litres/100 km will be shown after travelling approxi-
mately 100 metres. Otherwise horizontal lines are dis-
played. The value shown is updated approximately ev-
ery 5 seconds.
Operating range
Approximate distance in km that can still be travelled
with the fuel remaining in the tank, assuming the same
style of driving is maintained. This is calculated using
the current fuel consumption.
Journey durationThis indicates the hours (h) and minutes (min) since
the ignition was switched on.
Distance coveredDistance covered in km (m) after switching on the igni-
tion.
CNG quality
Whenever you refuel, an automatic check is run on the
quality of the natural gas and is displayed after the ig-
nition is switched on. The indication is given as a per-
centage of between 70 % and 100 %. The greater the
percentage, the lower the consumption.
Average speed
The average speed will be shown after a distance of ap-
proximately 100 metres has been travelled. Otherwise
horizontal lines are displayed. The value shown is up-
dated approximately every 5 seconds.
Digital display of
speedCurrent speed displayed in digital format.
Page 86 of 339
84Introduction to the Easy Connect system*
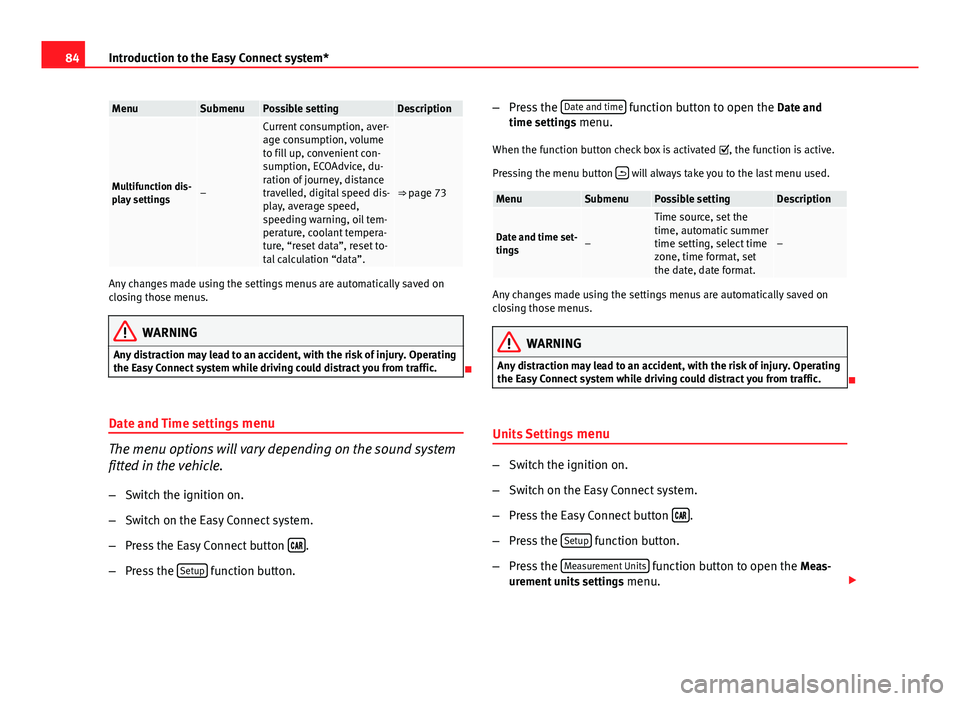
MenuSubmenuPossible settingDescription
Multifunction dis-
play settings–
Current consumption, aver-
age consumption, volume
to fill up, convenient con-
sumption, ECOAdvice, du-
ration of journey, distance
travelled, digital speed dis-
play, average speed,
speeding warning, oil tem-
perature, coolant tempera-
ture, “reset data”, reset to-
tal calculation “data”.
⇒ page 73
Any changes made using the settings menus are automatically saved on
closing those menus.
WARNING
Any distraction may lead to an accident, with the risk of injury. Operating
the Easy Connect system while driving could distract you from traffic.
Date and Time settings menu
The menu options will vary depending on the sound system
fitted in the vehicle.
– Switch the ignition on.
– Switch on the Easy Connect system.
– Press the Easy Connect button
.
– Press the Setup
function button. –
Press the Date and time
function button to open the Date and
time settings menu.
When the function button check box is activated , the function is active.
Pressing the menu button
will always take you to the last menu used.
MenuSubmenuPossible settingDescription
Date and time set-
tings–
Time source, set the
time, automatic summer
time setting, select time
zone, time format, set
the date, date format.
–
Any changes made using the settings menus are automatically saved on
closing those menus.
WARNING
Any distraction may lead to an accident, with the risk of injury. Operating
the Easy Connect system while driving could distract you from traffic.
Units Settings menu
–Switch the ignition on.
– Switch on the Easy Connect system.
– Press the Easy Connect button
.
– Press the Setup
function button.
– Press the Measurement Units
function button to open the Meas-
urement units settings menu.
Page 90 of 339
88Opening and closing
To deactivate the alarm, press the button
on the remote control key, or
switch on the ignition. After a certain time, the alarm will automatically
switch off.
Switch off the vehicle interior monitoring and tow-away protection if you
wish to prevent the alarm from being triggered accidentally ⇒ page 97.
Turn signals
The turn signals will flash twice when the vehicle is unlocked and once
when the vehicle is locked.
If the signals do not flash, this indicates that one of the doors, the rear lid or
the bonnet is not closed correctly.
Accidental lock-out
The central locking system prevents you from being locked out of the vehi-
cle in the following situations:
● If the driver door is open, the vehicle cannot be locked with the central
locking switch ⇒ page 94.
Lock the vehicle with the remote control key, when all the doors and the rear
lid have been closed. This prevents the accidental locking of the vehicle.
WARNING
Do not leave anyone (especially children) in the vehicle if it is locked from
the outside and the anti-theft security system* is enabled, as the doors
and windows cannot then be opened from the inside. Locked doors could
delay assistance in an emergency, potentially putting lives at risk.
Note
● Never leave any valuable items in the vehicle unattended. Even a locked
vehicle is not a safe.
● If the diode on the driver door sill lights up for about 30 seconds when
the vehicle is locked, the central locking system or anti-theft alarm* is not
working properly. You should have the fault repaired at a SEAT Official Serv-
ice or specialised workshop.
● The vehicle interior monitoring of the anti-theft alarm* system will only
function as intended if the windows and the sunroof* are closed.
Page 94 of 339
92Opening and closing
Remote unlocking/Locking
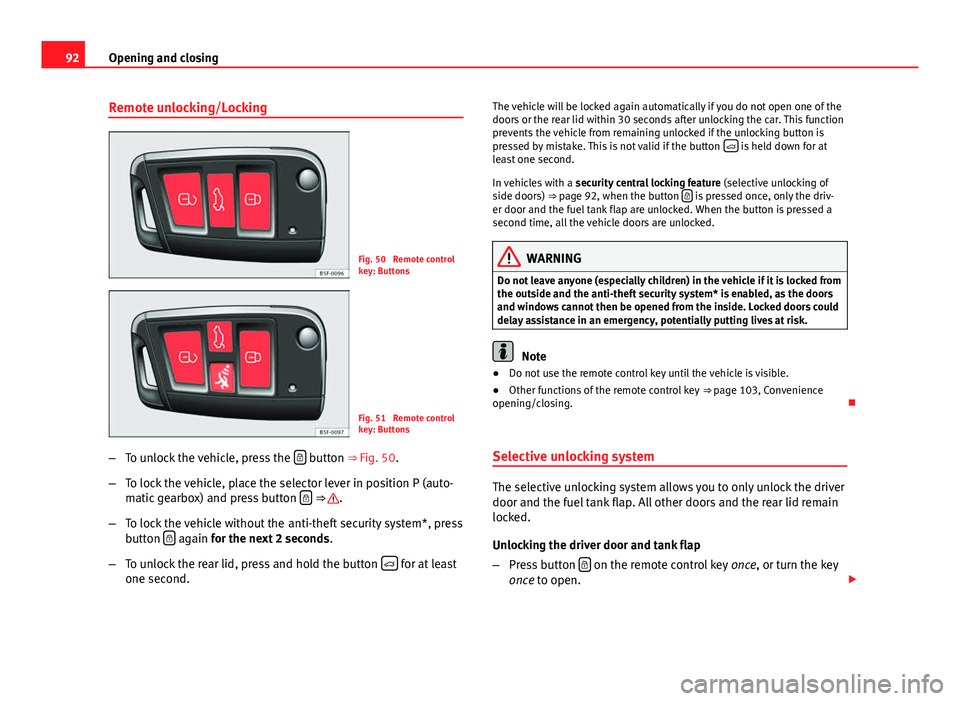
Fig. 50 Remote control
key: Buttons
Fig. 51 Remote control
key: Buttons
– To unlock the vehicle, press the
button ⇒ Fig. 50.
– To lock the vehicle, place the selector lever in position P (auto-
matic gearbox) and press button
⇒ .
– To lock the vehicle without the anti-theft security system*, press
button
again
for the next 2 seconds
.
– To unlock the rear lid, press and hold the button
for at least
one second. The vehicle will be locked again automatically if you do not open one of the
doors or the rear lid within 30 seconds after unlocking the car. This function
prevents the vehicle from remaining unlocked if the unlocking button is
pressed by mistake. This is not valid if the button
is held down for at
least one second.
In vehicles with a security central locking feature (selective unlocking of
side doors) ⇒ page 92, when the button
is pressed once, only the driv-
er door and the fuel tank flap are unlocked. When the button is pressed a
second time, all the vehicle doors are unlocked.
WARNING
Do not leave anyone (especially children) in the vehicle if it is locked from
the outside and the anti-theft security system* is enabled, as the doors
and windows cannot then be opened from the inside. Locked doors could
delay assistance in an emergency, potentially putting lives at risk.
Note
● Do not use the remote control key until the vehicle is visible.
● Other functions of the remote control key ⇒ page 103, Convenience
opening/closing.
Selective unlocking system
The selective unlocking system allows you to only unlock the driver
door and the fuel tank flap. All other doors and the rear lid remain
locked.
Unlocking the driver door and tank flap
– Press button
on the remote control key
once, or turn the key
once to open.
Page 95 of 339
93
Opening and closing
Unlocking all the doors, the rear lid and the tank flap
simultaneously.
– Within 5 seconds, press button
on the remote control key
twice, or turn the key to open twice within 5 seconds.
The anti-theft security system* and the anti-theft alarm* are immediately
disabled if you unlock only the driver door, without unlocking the other
doors.
In vehicles with Easy Connect*, you can programme the security central
locking system directly ⇒ page 93.
Programming the central locking system
You can use Easy Connect* to select which doors are unlocked with
the central locking system. Using the radio or the Easy Connect*
system, you can select whether the vehicle automatically closes
with the “Auto Lock” programme at speeds of more than 15 km/h
(10 mph).
Programming the unlocking of the doors (vehicles with Easy
Connect)
– Select: control button Systems or Vehicle systems > Vehicle set-
tings > Central locking > Unlocking doors.
Programming the Auto Lock (vehicles with radio)
– Select: SETUP
button > control button
Central locking > Locking
while driving. Programming the Auto Lock (vehicles with Easy Connect)
–
Select: control button Systems or Vehicle systems > Vehicle set-
tings > Locking while driving.
Unlocking the doors - You can programme the system to unlock all the doors
or only the driver door when you unlock the vehicle. In all the options, the
fuel tank flap is also unlocked.
With the setting, Driver, all the doors and the rear lid are unlocked if button
on the remote control key is pressed twice.
With this setting, you can continue to unlock all the vehicle doors. To do so,
press button
on the remote control key
twice. Or, in vehicles with a con-
ventional key, turn the key to open in the door lock twice within 2 seconds.
If the button
is pressed, all the vehicle doors are locked. At the same
time, a confirmation signal is heard 1)
.
Auto Lock/Locking while driving - If you select on, all the vehicle doors are
locked at speeds above 15 km/h (10 mph).
1)
This function is not available on all export versions.
Safety FirstOperating instructionsPractical TipsTechnical specifications
Page 96 of 339
94Opening and closing
Central locking switch
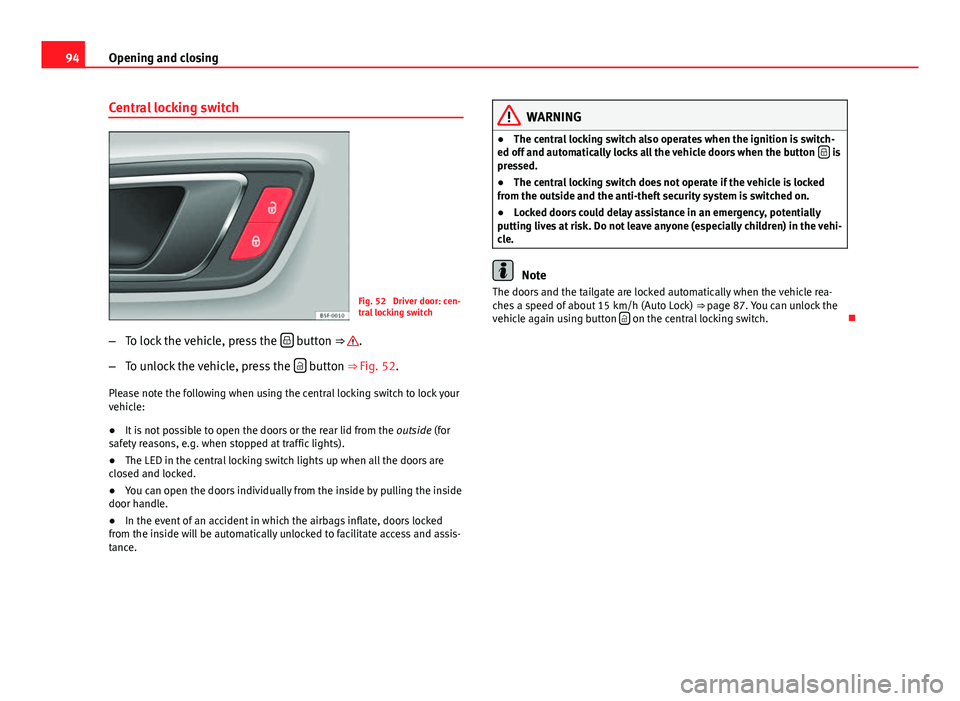
Fig. 52 Driver door: cen-
tral locking switch
– To lock the vehicle, press the
button ⇒ .
– To unlock the vehicle, press the
button ⇒ Fig. 52.
Please note the following when using the central locking switch to lock your
vehicle:
● It is not possible to open the doors or the rear lid from the outside (for
safety reasons, e.g. when stopped at traffic lights).
● The LED in the central locking switch lights up when all the doors are
closed and locked.
● You can open the doors individually from the inside by pulling the inside
door handle.
● In the event of an accident in which the airbags inflate, doors locked
from the inside will be automatically unlocked to facilitate access and assis-
tance.
WARNING
● The central locking switch also operates when the ignition is switch-
ed off and automatically locks all the vehicle doors when the button
is
pressed.
● The central locking switch does not operate if the vehicle is locked
from the outside and the anti-theft security system is switched on.
● Locked doors could delay assistance in an emergency, potentially
putting lives at risk. Do not leave anyone (especially children) in the vehi-
cle.
Note
The doors and the tailgate are locked automatically when the vehicle rea-
ches a speed of about 15 km/h (Auto Lock) ⇒ page 87. You can unlock the
vehicle again using button
on the central locking switch.
Page 100 of 339
98Opening and closing
WARNING
Do not leave anyone (especially children) in the vehicle if it is locked from
the outside and the anti-theft security system* is enabled, as the doors
and windows cannot then be opened from the inside. Locked doors could
delay assistance in an emergency, potentially putting lives at risk.
Emergency locking and unlocking Introduction
The doors, rear lid and panoramic tilting sunroof can be locked manually
and partially opened, for example if the key or the central locking is dam-
aged.
Additional information and warnings:
● Vehicle key set ⇒ page 89
● Central locking and locking system ⇒ page 87
● Rear lid ⇒ page 100
WARNING
Opening and closing doors carelessly can cause serious injury.
● If the vehicle is locked from outside, the doors and windows cannot
be opened from the inside.
● Never leave children or disabled people alone in the car. They could
be trapped in the car in an emergency and will not be able to get them-
selves to safety.
● Depending on the time of the year, temperatures inside a locked and
closed vehicle can be extremely high or extremely low resulting in seri-
ous injuries and illness or even death, particularly for young children.
WARNING
Getting in the way of the doors and the rear lid is dangerous and can lead
to serious injury.
● Open and close the doors and the rear lid only when there is nobody
in the way.
CAUTION
When opening and closing in an emergency, carefully disassemble compo-
nents and then reassemble them carefully to avoid damage to the vehicle.
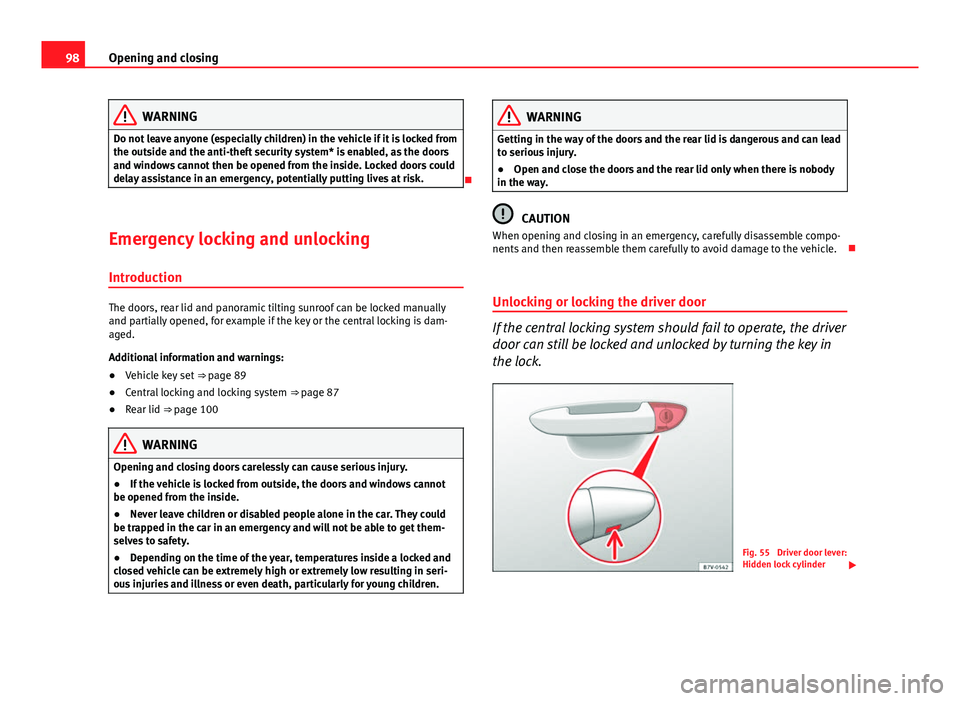
Unlocking or locking the driver door
If the central locking system should fail to operate, the driver
door can still be locked and unlocked by turning the key in
the lock.
Fig. 55 Driver door lever:
Hidden lock cylinder
Page 105 of 339

103
Opening and closing
WARNING (Continued)
● Always take the vehicle key with you when you leave the vehicle.
● Never leave children or disabled persons in the vehicle, particularly if
they have access to the keys. The misuse of the keys, for example, by
children, may result in serious injury and accident.
● The engine may accidentally be started and be out of control.
● If the ignition is switched on, the electric equipment could be activa-
ted with risk of injury, for example, in the electric windows.
● The doors can be locked using the remote control key. This could be-
come an obstacle for assistance in an emergency situation.
● Always take the key with you when you leave the vehicle.
● The electric windows will work until the ignition has been switched
off and one of the front doors has been opened.
● If necessary, use the safety switch to disable the rear electric win-
dows. Make sure that they have been disabled.
Note
If the window is not able to close because it is stiff or because of an ob-
struction, the window will automatically open again ⇒ page 104. If this
happens, check why the window could not be closed before attempting to
close it again.
Convenience opening/closing
Use the convenience opening/closing function to easily open/
close all the windows and the sliding/tilting sunroof* from the out-
side. Convenience open function
–
Press and hold button
on the remote control key until all the
windows and the sliding/tilting sunroof* have reached the de-
sired position, or
– First unlock the vehicle using button
on the remote control
key and then keep the key in the driver door lock until all the
windows and the sliding/tilting sunroof* have reached the re-
quired position.
Convenience close function
– Press and hold button
on the remote control key until all the
windows and the sliding/tilting sunroof* are closed ⇒ , or
– Keep the key in the driver door in the "lock" position until all the
windows and the sliding/tilting sunroof* are closed.
Programming convenience opening in the Easy Connect*
– Select: function button CAR
> control button
Vehicle systems* >
Vehicle settings > Central locking > Open the window by holding
button down or > Front window on/off or Sunroof on/off*
WARNING
● Take care when closing the sliding/tilting sunroof* and windows.
There is a risk of suffering injury.
● For safety reasons, you should only use the remote control open and
close functions within about 2 metres of the vehicle. To avoid injuries, al-
ways keep an eye on the windows and the sliding/tilting sunroof* when
pressing the button to close them. The windows stop moving as soon as
the button is released.
Safety FirstOperating instructionsPractical TipsTechnical specifications
Page 108 of 339
106Opening and closing
Panoramic sliding sunroof*
Introduction
Additional information and warnings:
● SEAT information system ⇒ page 73
● Central locking and locking system ⇒ page 87
WARNING
Careless or uncontrolled use of the panoramic sliding sunroof can cause
serious injuries.
● Only open or close the panoramic sliding sunroof when nobody is in
the way of its travel.
● Always take all the keys with you whenever you leave the vehicle.
● Never leave children or disabled persons in the vehicle, particularly if
they have access to the keys. Uncontrolled use of the key could lock the
vehicle, start the engine, turn on the ignition and operate the panoramic
sliding sunroof.
● The panoramic sliding sunroof can be operated for up to about ten mi-
nutes after the ignition has been switched off, provided the driver door
and the front passenger door are not opened.
Note
In case of a fault in the operation of the panoramic sliding sunroof, the anti-
trap function will not operate correctly. Visit a specialised workshop. Opening or closing the panoramic sliding sunroof
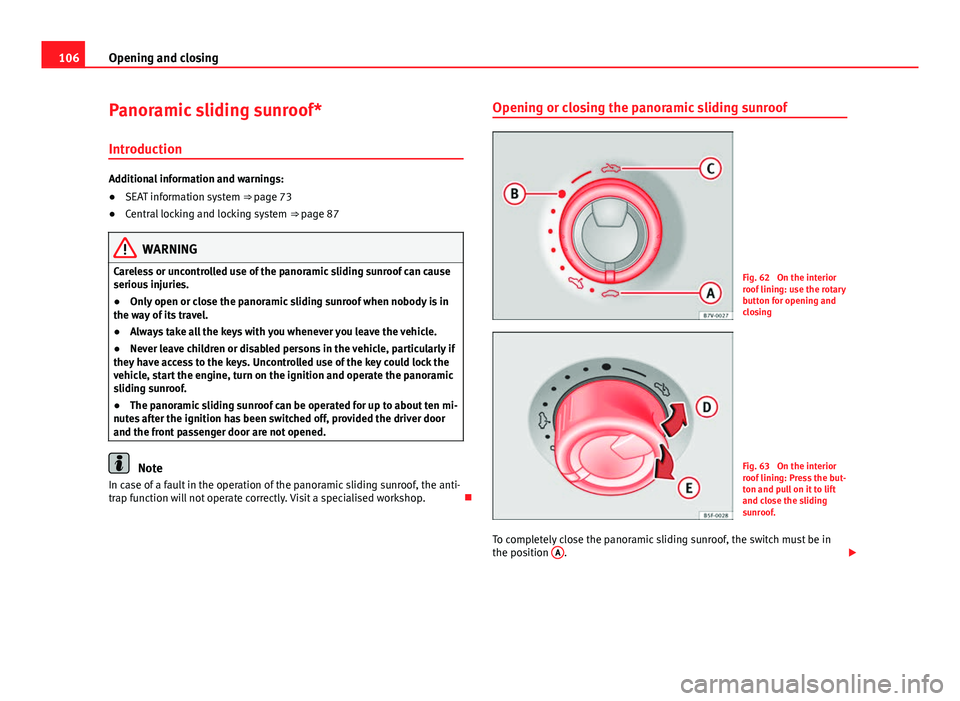
Fig. 62 On the interior
roof lining: use the rotary
button for opening and
closing
Fig. 63 On the interior
roof lining: Press the but-
ton and pull on it to lift
and close the sliding
sunroof.
To completely close the panoramic sliding sunroof, the switch must be in
the position A
.