led Seat Leon 5D 2013 Workshop Manual
[x] Cancel search | Manufacturer: SEAT, Model Year: 2013, Model line: Leon 5D, Model: Seat Leon 5D 2013Pages: 339, PDF Size: 4.8 MB
Page 182 of 339
180Driving
flash slowly depending on whether or not the vehicle has a driver
information system* 1)
.
– When the engine is running, switch off the traction control
(ASR) 1)
2)
.
– Move the selector lever to position “S” or tiptronic, or select the
driving mode Sport from the SEAT Drive Mode* ⇒ page 211.
– Press the brake pedal firmly with your left foot and hold it down
for at least one second.
– With your right foot, press the accelerator down to the full throt-
tle or kick-down position. The engine speed will stabilise at ap-
prox. 3200 rpm (petrol engine) or approx. 2000 rpm (diesel en-
gine).
– Take your left foot off the brake pedal.
WARNING
● Always adapt your driving style to the traffic conditions.
● Only use the “Launch control programme” when road and traffic con-
ditions permit, and make sure the way in which you drive and accelerate
the vehicle does not inconvenience or endanger other road users.
WARNING (Continued)
● Make sure that the ESC remains switched on. Please note that when
the ASR and ESC are deactivated, the wheels may start to spin, causing
the vehicle to lose grip. Risk of accident!
● After putting the vehicle into gear, the “sport” mode of the ESC
should be deactivated again by briefly pressing the
OFF
button.
Note
● After using the “Launch control programme”, the gearbox temperature
may have increased considerably. In this case, the programme could be dis-
abled for several minutes. The programme can be used again after the cool-
ing phase.
● Accelerating with the “Launch control programme” places a heavy load
on all parts of the vehicle. This can result in increased wear and tear.
Inertia mode
The inertia mode enables the kinetic energy of the vehicle to be
harnessed enabling certain stretches to be driven without using
the accelerator. This enables fuel to be saved. Use the inertia mode
to “let the vehicle roll” before, for example, arriving in a town.
Switching on inertia mode
Important: selector lever must be in position D, gradients below
12 %.
1)
On vehicles with the driver information system, the ESC lamp lights up permanently and
the corresponding text message Stability control deactivated (temporary) appears on the in-
strument panel to indicate the deactivation status.
2) Vehicles without driver information system: the warning lamp flashes slowly/Vehicles with
driver information system: the warning lamp stays on.
Page 183 of 339
181
Driving
– Select Eco mode ⇒ page 211 once in SEAT Drive Mode*.
– Take your foot off the accelerator.
The driver message Inertia will be displayed. At speeds higher
than 20 km/h (12 mph), the gearbox will automatically disengage
and the vehicle will roll freely, without the effect of the engine
brake. While the vehicle rolls, the engine runs at idling speed.
Stopping inertia mode
– Press the brake or the accelerator pedal.
To make use of the braking force and switch off the engine again,
simply press the brake pedal briefly.
Applying both the inertia mode (= prolonged section with less energy) and
the switching off using inertia (= shorter section without the need for fuel)
facilitates improved fuel consumption and emission balance.
WARNING
● If the inertia mode has been switched on, take into account, when ap-
proaching an obstacle and releasing the accelerator pedal, that the vehi-
cle will not decelerate in the usual manner: risk of accident!
● When using inertia mode while travelling down hills, the vehicle can
increase speed: risk of accident!
● If other users drive your vehicle, warn them about inertia mode.
Note
● Inertia mode is only available in eco driving mode (SEAT Drive Mode*).
● The driver message Inertia is only displayed with the current consump-
tion. In inertia mode the gear will no longer be displayed (for example: “E”
will appear in place of “E7”).
● On downhill sections with gradients above 15 %, the inertia mode will
automatically be switched off temporarily.
Backup programme
A backup programme is in place if a fault should occur in the
control system.
If all the positions of the selector lever are shown over a light background
on the instrument panel display, there is a system fault and the automatic
gearbox will operate in with the backup programme. When the backup pro-
gramme is activated, it is possible to drive the vehicle, however, at low
speeds and within a selected range of gears. In some cases driving in re-
verse gear may not be possible .
CAUTION
If the gearbox operates with the backup programme, take the vehicle to a
specialised workshop and have the fault repaired without delay.
Clutch
Clutch overheated! Stop the vehicle!
The clutch has overheated and could be damaged. In order to prevent the
temperature from increasing again and so that the clutch is cooled, stop the
Safety FirstOperating instructionsPractical TipsTechnical specifications
Page 184 of 339
182Driving
vehicle and wait for the gearbox to cool down with the selector lever in posi-
tion P and the engine running at idling speed. If the warning does not
switch off, do not continue driving. Seek specialist assistance. Failure to do
so could cause considerable damage to the gearbox. When the warning
switches off, the fault should be corrected by a specialised workshop with-
out delay.
Faults in the gearbox
Gearbox: Fault! Stop the vehicle and place the lever in the position P.
There is a fault in the gearbox. Stop the vehicle in a safe place and do not
continue driving. Seek specialist assistance. Overheated clutch! Stop the vehicle!
The clutch has overheated and could be damaged. Stop the vehicle and
wait for the gearbox to cool with the engine at idling speed and the selector
lever in position P. When the warning lamp and the driver message switch
off, have the fault corrected by a specialised workshop without delay. If the
warning lamp and the driver message do not switch off, do not continue
driving. Seek specialist assistance. Gearbox: System fault! You may continue driving.
Have the fault corrected by a specialised workshop without delay. Gearbox: System fault! You can continue driving with restrictions. Re-
verse gear disabled.
Take the vehicle to a specialised workshop and have the fault repaired with-
out delay. Gearbox: System fault! You can continue driving in D until switching off
the engine Stop the vehicle in a safe place well away from moving traffic. Seek special-
ist assistance.
Gearbox: too hot. Adapt your driving accordingly
Continue driving at moderate speeds. When the warning lamp switches off,
you can continue driving in a normal manner. Gearbox: press the brake and engage a gear again.
If the fault was caused by a gearbox with a high temperature, this driver
message will be displayed when the gearbox has cooled again.
Manual release of the selector lever
The selector lever can be released manually if the electrical
power supply should fail.
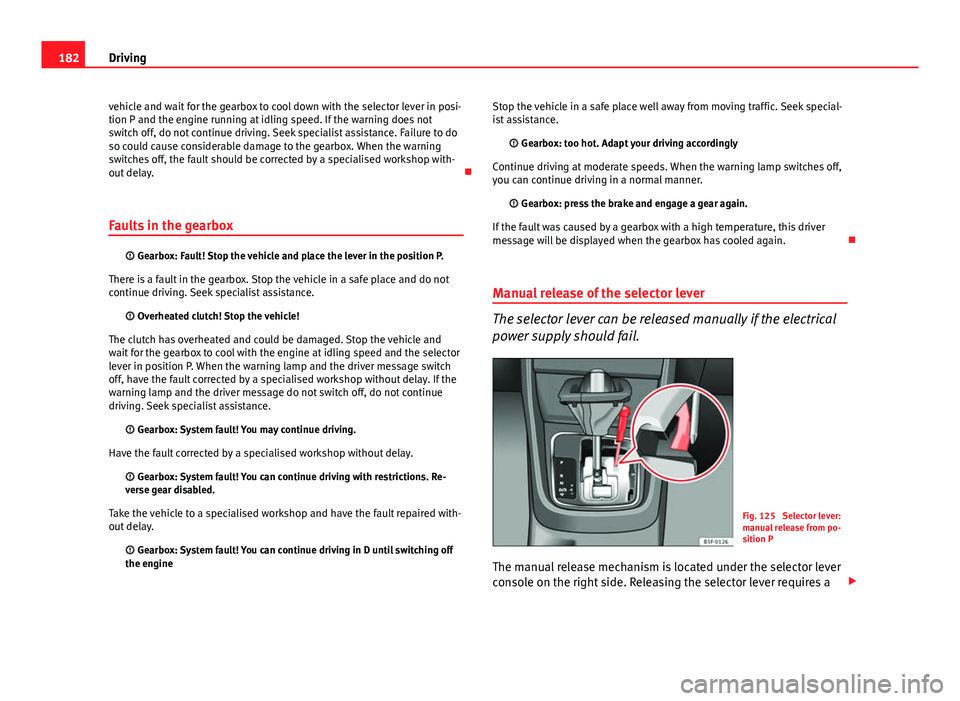
Fig. 125 Selector lever:
manual release from po-
sition P
The manual release mechanism is located under the selector lever
console on the right side. Releasing the selector lever requires a
Page 192 of 339
190Driver assistance systems
WARNING (Continued)
● If the vehicle continues to move following a driver intervention re-
quest, apply the foot brake.
● If the instrument panel display shows a driver intervention request,
adjust the distance yourself.
● The driver must be ready to accelerate or brake by him- or herself at
any time.
CAUTION
If you have the impression that the radar sensor is damaged, disconnect the
ACC. This will prevent possible damage. In this case have it adjusted.
● A radar sensor repair requires specialist knowledge and special tools.
SEAT recommends visiting a SEAT dealership for this.
Note
● If the ACC does not operate as described in this chapter, do not use it
until it has been checked by a specialised workshop. SEAT recommends vis-
iting a SEAT dealership for this.
● The maximum speed with the ACC switched on is limited to 160 km/h
(100 mph).
● When the ACC is switched on, strange noises may be heard during auto-
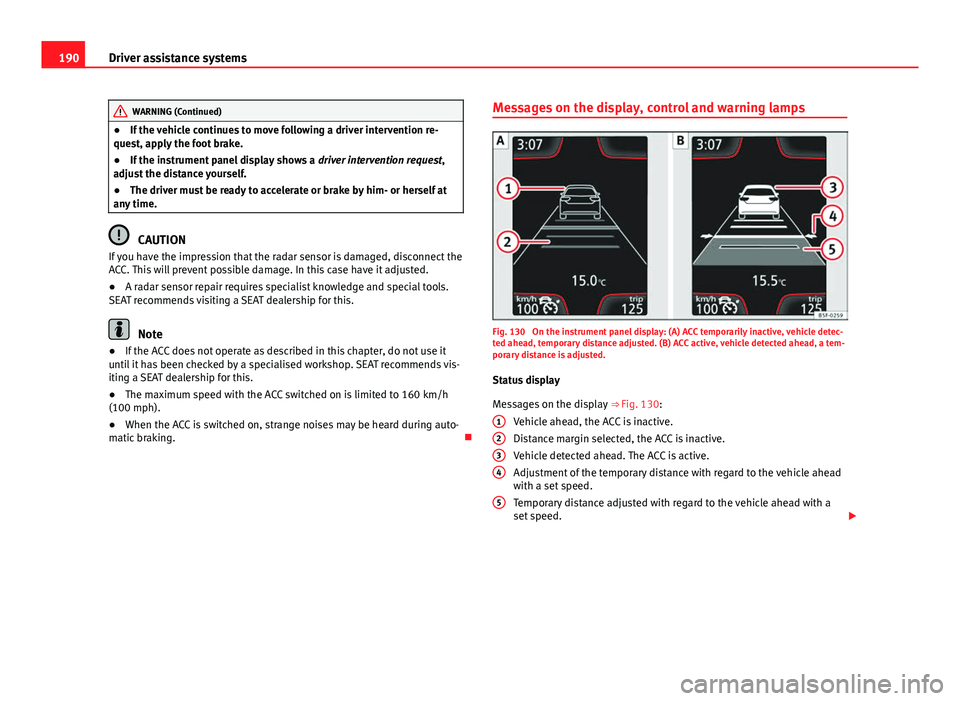
matic braking. Messages on the display, control and warning lampsFig. 130 On the instrument panel display: (A) ACC temporarily inactive, vehicle detec-
ted ahead, temporary distance adjusted. (B) ACC active, vehicle detected ahead, a tem-
porary distance is adjusted.
Status display
Messages on the display ⇒ Fig. 130:
Vehicle ahead, the ACC is inactive.
Distance margin selected, the ACC is inactive.
Vehicle detected ahead. The ACC is active.
Adjustment of the temporary distance with regard to the vehicle ahead
with a set speed.
Temporary distance adjusted with regard to the vehicle ahead with a
set speed.
1
234
5
Page 194 of 339
192Driver assistance systems
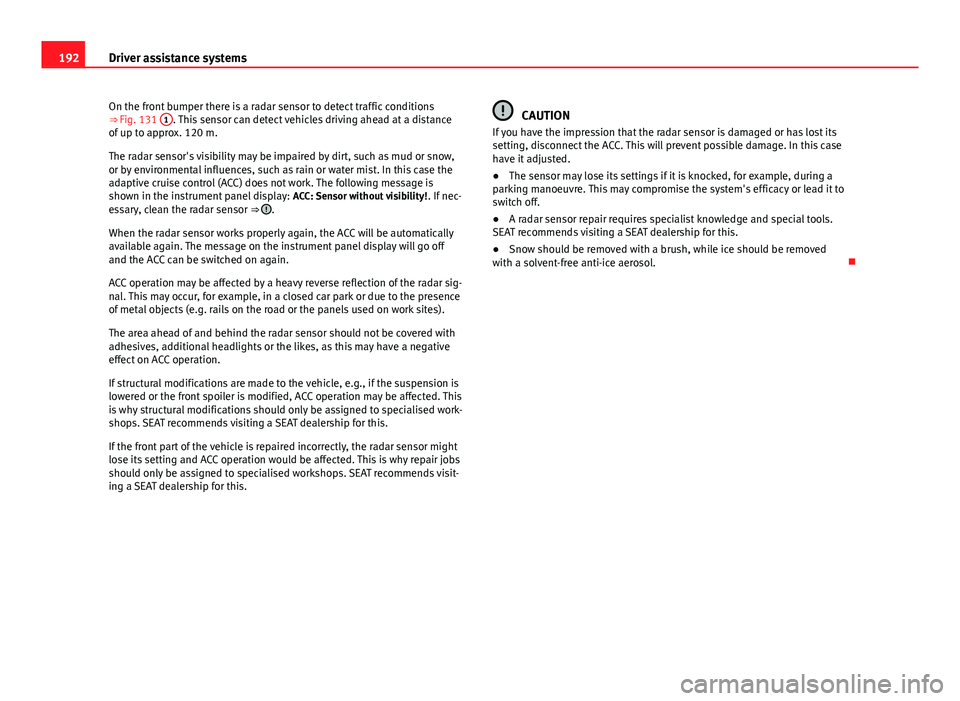
On the front bumper there is a radar sensor to detect traffic conditions
⇒ Fig. 131 1
. This sensor can detect vehicles driving ahead at a distance
of up to approx. 120 m.
The radar sensor's visibility may be impaired by dirt, such as mud or snow,
or by environmental influences, such as rain or water mist. In this case the
adaptive cruise control (ACC) does not work. The following message is
shown in the instrument panel display: ACC: Sensor without visibility!. If nec-
essary, clean the radar sensor ⇒
.
When the radar sensor works properly again, the ACC will be automatically
available again. The message on the instrument panel display will go off
and the ACC can be switched on again.
ACC operation may be affected by a heavy reverse reflection of the radar sig-
nal. This may occur, for example, in a closed car park or due to the presence
of metal objects (e.g. rails on the road or the panels used on work sites).
The area ahead of and behind the radar sensor should not be covered with
adhesives, additional headlights or the likes, as this may have a negative
effect on ACC operation.
If structural modifications are made to the vehicle, e.g., if the suspension is
lowered or the front spoiler is modified, ACC operation may be affected. This
is why structural modifications should only be assigned to specialised work-
shops. SEAT recommends visiting a SEAT dealership for this.
If the front part of the vehicle is repaired incorrectly, the radar sensor might
lose its setting and ACC operation would be affected. This is why repair jobs
should only be assigned to specialised workshops. SEAT recommends visit-
ing a SEAT dealership for this.
CAUTION
If you have the impression that the radar sensor is damaged or has lost its
setting, disconnect the ACC. This will prevent possible damage. In this case
have it adjusted.
● The sensor may lose its settings if it is knocked, for example, during a
parking manoeuvre. This may compromise the system's efficacy or lead it to
switch off.
● A radar sensor repair requires specialist knowledge and special tools.
SEAT recommends visiting a SEAT dealership for this.
● Snow should be removed with a brush, while ice should be removed
with a solvent-free anti-ice aerosol.
Page 195 of 339
193
Driver assistance systems
Using the adaptive cruise control (ACC)
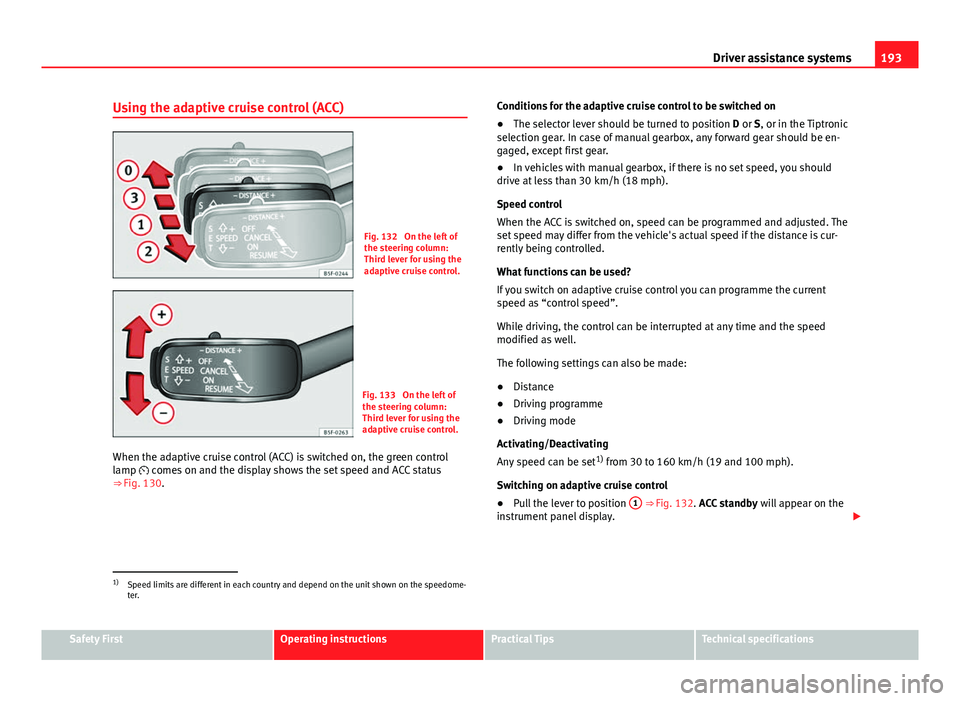
Fig. 132 On the left of
the steering column:
Third lever for using the
adaptive cruise control.
Fig. 133 On the left of
the steering column:
Third lever for using the
adaptive cruise control.
When the adaptive cruise control (ACC) is switched on, the green control
lamp comes on and the display shows the set speed and ACC status
⇒ Fig. 130. Conditions for the adaptive cruise control to be switched on
●
The selector lever should be turned to position D or S, or in the Tiptronic
selection gear. In case of manual gearbox, any forward gear should be en-
gaged, except first gear.
● In vehicles with manual gearbox, if there is no set speed, you should
drive at less than 30 km/h (18 mph).
Speed control
When the ACC is switched on, speed can be programmed and adjusted. The
set speed may differ from the vehicle's actual speed if the distance is cur-
rently being controlled.
What functions can be used?
If you switch on adaptive cruise control you can programme the current
speed as “control speed”.
While driving, the control can be interrupted at any time and the speed
modified as well.
The following settings can also be made:
● Distance
● Driving programme
● Driving mode
Activating/Deactivating
Any speed can be set 1)
from 30 to 160 km/h (19 and 100 mph).
Switching on adaptive cruise control
● Pull the lever to position 1
⇒ Fig. 132. ACC standby
will appear on the
instrument panel display.
1)
Speed limits are different in each country and depend on the unit shown on the speedome-
ter.
Safety FirstOperating instructionsPractical TipsTechnical specifications
Page 197 of 339
195
Driver assistance systems
WARNING (Continued)
● “Stepping” on the accelerator may lead the ACC not to intervene to
brake. Acceleration by the driver takes priority over action by the active
cruise control.
● Always be prepared to use the brakes to halt the vehicle!
● Observe the provisions of the country in question regarding the mini-
mum obligatory distance between vehicles.
Note
● The stored speed is erased when the ignition or the ACC are switched
off.
● When the traction control system (ASR) is switched off or the ESC is acti-
vated in Sport* (⇒ page 79) mode, the ACC is switched off automatically.
● In vehicles with Start-Stop system, the engine switches off automatically
during the ACC halt phase and restarts automatically to begin driving.
Vehicles with an automatic gearbox
If the vehicle is equipped with automatic gearbox, the Adaptive Cruise Con-
trol (ACC) may brake it until it stops completely if the vehicle ahead stops.
The ACC will be available for a few seconds. The vehicle will restart autono-
mously if the vehicle ahead moves (assistant in line of traffic).
Disconnection criteria
The ACC will switch off if the driver steps on the brake pedal or the driver
door is opened. If the vehicle ahead stops for more than 3 seconds, the ACC will also switch
off for safety reasons.
In this case the driver should take over and apply the
foot brake.
In the latter case, when the ACC is switched off with the vehicle stationary,
the vehicle must be stopped by applying the foot brake; since the car, with
a gear engaged, even at idle speed, might move.
Restart the ACC manually.
The ACC can be switched on again by turning the lever to position 2
⇒ Fig. 134.
WARNING
Your vehicle can start up even if there is an obstacle between your own
and the one ahead. Risk of accident!
CAUTION
● If your vehicle with adaptive cruise control failed to start as expected,
even if the ACC available 1)
message is shown to the driver, you can start off
by briefly stepping on the accelerator.
● The Start-Stop system acts as usual when driving with adaptive cruise
control.
1)
Not available for the versions of some countries.
Safety FirstOperating instructionsPractical TipsTechnical specifications
Page 207 of 339
205
Driver assistance systems
● A radar sensor repair requires specialist knowledge and special tools.
SEAT recommends visiting a SEAT dealership for this.
● Snow should be removed with a brush, while ice should be removed
with a solvent-free anti-ice aerosol.
Handling the Front Assist Monitoring system
The Front Assist Monitoring system is activated whenever the ignition is
switched on.
When the Front Assist is switched off, so are the pre-warning function and
distance warning.
SEAT recommends that the Front Assist always be activated. Exceptions
⇒ page 205, Temporarily switching off the Front Assist Monitoring System
in the following situations.
Switching the Front Assist warning system on and off
With the ignition on, the Front Assist can be switched on and off as follows:
● Select the corresponding menu option using the button for the driver as-
sist systems ⇒ page 75.
● OR: switch the Easy Connect system on or off using the button
and
the function buttons and Driver Assist ⇒ page 80
Switching the pre-warning function on or off
The pre-warning function can be switched on or off on the Easy Connect sys-
tem using the button
and the function buttons and Driver Assist⇒
page 80.
The system maintains the setting the next time the ignition is switched on.
SEAT recommends that the pre-warning function always be switched on. Switching distance warning on or off
If the safety distance with the vehicle ahead is exceeded, the instrument
panel display shows the relevant warning. In such an eventuality, increase
the safety distance
⇒ table on page 203.
The distance warning can be switched on or off on the Easy Connect system
using the button
and the function buttons and Driver Assist⇒ page 80.
The system maintains the setting the next time the ignition is switched on.
SEAT recommends that the distance warning always be switched on.
Temporarily switching off the Front Assist Monitoring
System in the following situations
The Front Assist Monitoring System should be switched off in the following
situations due to the system's limitations ⇒ :
● When the vehicle is being towed.
● When the vehicle is on a roller test bed.
● When the radar sensor is damaged.
● If the radar sensor takes a big knock, for example, in a rear-end colli-
sion.
● If it intervenes several times unnecessarily.
● If the radar sensor is covered temporarily by an accessory such as an ad-
ditional headlight or the like.
● When the vehicle is to be loaded on a lorry, a ferry or train.
Safety FirstOperating instructionsPractical TipsTechnical specifications
Page 210 of 339
208Driver assistance systems
WARNING
The intelligent technology in the Lane Assist system cannot change the
limits imposed by the laws of physics and by the very nature of the sys-
tem. Careless or uncontrolled use of the Lane Assist system may cause
accidents and injury. The system is not a replacement for driver aware-
ness.
● Always adapt your speed and the distance to the vehicles ahead in
line with visibility, weather conditions, the condition of the road and the
traffic situation.
● Always keep your hands on the steering wheel so it can be turned at
any time.
● The Lane Assist system does not detect all road markings. The road
surfaces, road structures or objects in poor condition can be incorrectly
detected as road markings under certain circumstances by the Lane As-
sist system. In such situations, switch the Lane Assist system off imme-
diately.
● Please observe the indications on the instrument panel and act as is
necessary.
● Always pay attention to the vehicle's surroundings.
● When the area of vision of the camera becomes dirty, covered or is
damaged, the Lane Assist system function can be affected.
CAUTION
In order to avoid influencing the operation of the system, the following
points must be taken into account:
● Regularly clean the area of vision of the camera and keep it in a clean
state, without snow or ice.
● Do not cover the area of vision of the camera.
● Check that the area of vision of the windscreen camera is not damaged.
Note
● The Lane Assist system has been exclusively developed for driving on
paved roads only.
● If the Lane Assist system does not work as described in this chapter, do
not use it and contact a specialised workshop.
● If there is a fault in the system, have it checked by a specialised work-
shop.
Page 212 of 339
210Driver assistance systems
Note
Failure to heed the control lamps and text messages when they appear may
result in faults in the vehicle.
Operating mode
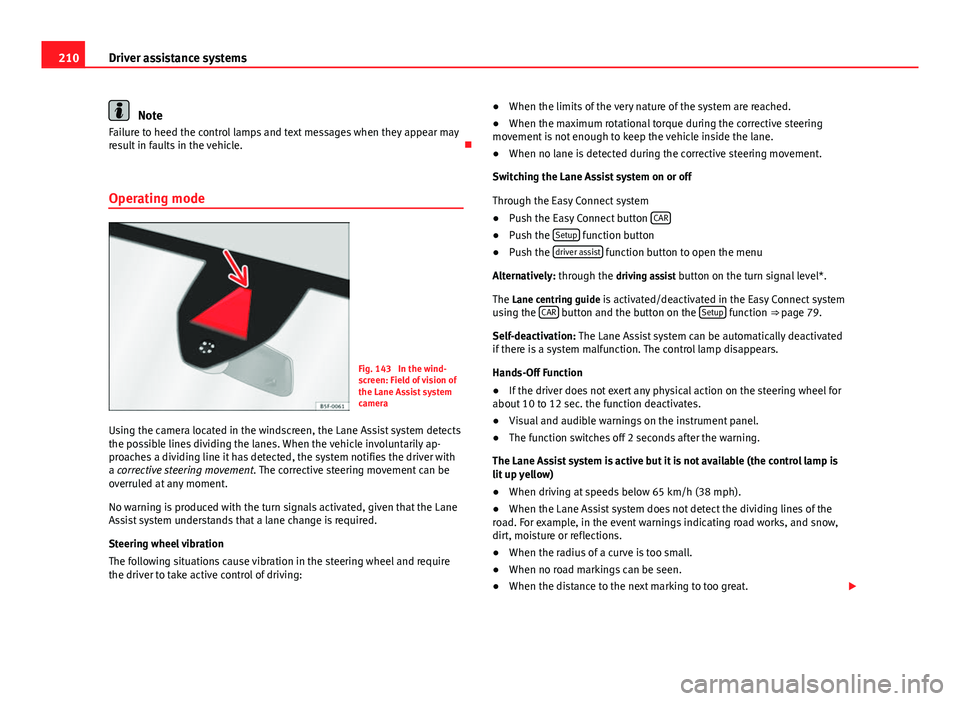
Fig. 143 In the wind-
screen: Field of vision of
the Lane Assist system
camera
Using the camera located in the windscreen, the Lane Assist system detects
the possible lines dividing the lanes. When the vehicle involuntarily ap-
proaches a dividing line it has detected, the system notifies the driver with
a corrective steering movement . The corrective steering movement can be
overruled at any moment.
No warning is produced with the turn signals activated, given that the Lane
Assist system understands that a lane change is required.
Steering wheel vibration
The following situations cause vibration in the steering wheel and require
the driver to take active control of driving: ●
When the limits of the very nature of the system are reached.
● When the maximum rotational torque during the corrective steering
movement is not enough to keep the vehicle inside the lane.
● When no lane is detected during the corrective steering movement.
Switching the Lane Assist system on or off
Through the Easy Connect system
● Push the Easy Connect button CAR
●
Push the Setup function button
● Push the driver assist function button to open the menu
Alternatively: through the driving assist button on the turn signal level*. The Lane centring guide is activated/deactivated in the Easy Connect system
using the CAR
button and the button on the Setup function ⇒ page 79.
Self-deactivation: The Lane Assist system can be automatically deactivated
if there is a system malfunction. The control lamp disappears.
Hands-Off Function
● If the driver does not exert any physical action on the steering wheel for
about 10 to 12 sec. the function deactivates.
● Visual and audible warnings on the instrument panel.
● The function switches off 2 seconds after the warning.
The Lane Assist system is active but it is not available (the control lamp is
lit up yellow)
● When driving at speeds below 65 km/h (38 mph).
● When the Lane Assist system does not detect the dividing lines of the
road. For example, in the event warnings indicating road works, and snow,
dirt, moisture or reflections.
● When the radius of a curve is too small.
● When no road markings can be seen.
● When the distance to the next marking to too great.