change time Seat Leon 5D 2014 MEDIA SYSTEM PLUS - NAVI SYSTEM
[x] Cancel search | Manufacturer: SEAT, Model Year: 2014, Model line: Leon 5D, Model: Seat Leon 5D 2014Pages: 64, PDF Size: 1.71 MB
Page 25 of 64
Audio mode
If you do not remove the CD in the following
10 seconds, it will be drawn back in for safety
reasons, without changing to CD mode.
Unreadable or defective CD
If the data on the inserted CD cannot be read
or the CD is damaged, the corresponding in-
dication will be shown on the screen.
Depending on the unit, when a CD cannot be
read it will retry three times, ejecting and re-
inserting the CD, before showing the indica-
tion. Note
● Uneven road surfaces and strong vibrations
may cause the CD to jump.
● If the interior temperature of the unit is too
high, it will not accept or play any more CDs.
● If, after having inserted several CDs, the in-
dication CD drive error still appears, contact a
s pec
ialist workshop. Inserting and removing memory cards
Inserting a memory card
If a memory card cannot be inserted, make
sure it is positioned correctly and is compati-
ble with the unit.
Playback starts automatically if supported
audio files are stored on the memory card. Insert a compatible memory card by pushing
it into the memory card slot with the cut-off
corner first facing
upwards until it locks in
› ›
› Fig. 20.
Remo
ving a memory card
The memory card inserted must be prepared
before it is ejected.
● Press the infotainment button MENU ; then,
press Setup to open the menu
System set-
tin g
s.
● Press the function button
Remove SD card 1 safely or
Remove SD card 2 safely .
After ejecting the memory card, the function
button will be shown in grey.
● Press the memory card inserted. The mem-
ory card “jumps” to the eject position.
● Remove the memory card.
Unreadable memory card
If you insert a memory card containing data
that cannot be read, the unit will not change
to memory card mode after loading.
It will show the indication: There are no playa-
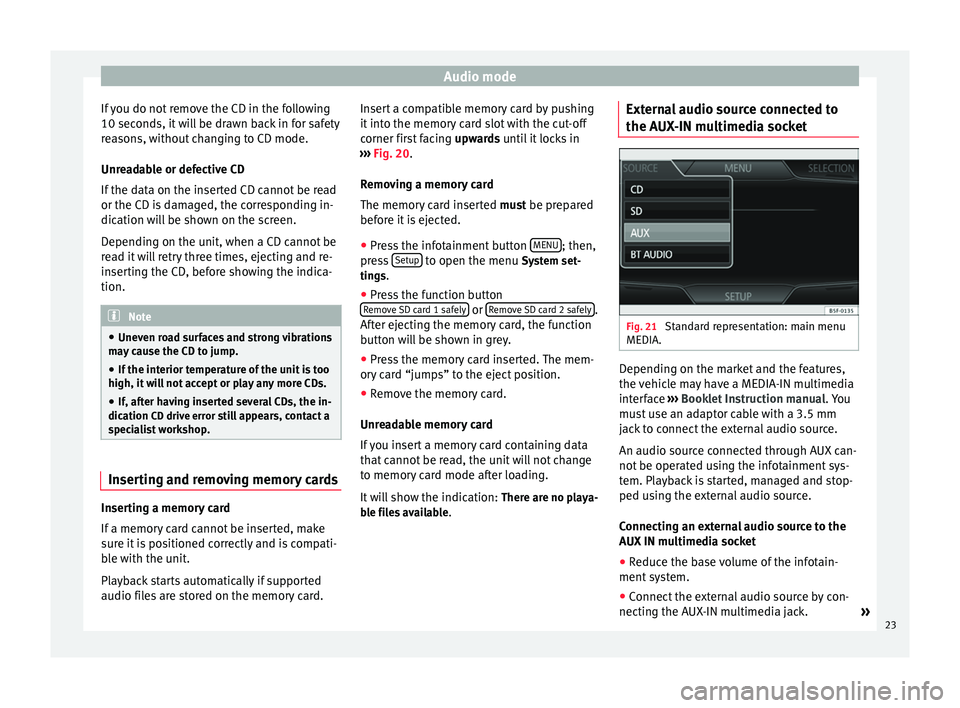
ble files available . External audio source connected to
the AUX-IN multimedia socket
Fig. 21
Standard representation: main menu
MEDIA. Depending on the market and the features,
the vehicle may have a MEDIA-IN multimedia
interface
›››
Booklet Instruction manual. You
must use an adaptor cable with a 3.5 mm
jack to connect the external audio source.
An audio source connected through AUX can-
not be operated using the infotainment sys-
tem. Playback is started, managed and stop-
ped using the external audio source.
Connecting an external audio source to the
AUX IN multimedia socket
● Reduce the base volume of the infotain-
ment system.
● Connect the external audio source by con-
necting the AUX-IN multimedia jack. »
23
Page 26 of 64
Audio mode
● Start playback of the external audio source.
● In the main MEDIA
menu, press the SOURC E›››
Fig. 21 function button and A
UX .
The output volume
of
the c
onnected external
audio source should be adjusted to the vol-
ume of the other audio sources ››› page 54.
Things to note when operating an external
audio source using the AUX-IN multimedia
ActionEffect
Selection of another audio
source on the radio-navi-
gation system.The external audio source
continues to run in the
background.
Stopping playback on the
external audio source.The infotainment system
remains in the AUX menu.
Disconnecting the plug
from the AUX-IN multime-
dia socket.The infotainment system
changes, and plays the
last media source that was
active. Note
● Please read and observe the external audio
source manufacturer operating manual.
● Interference noise may be heard if the ex-
ternal audio source is powered from the 12-
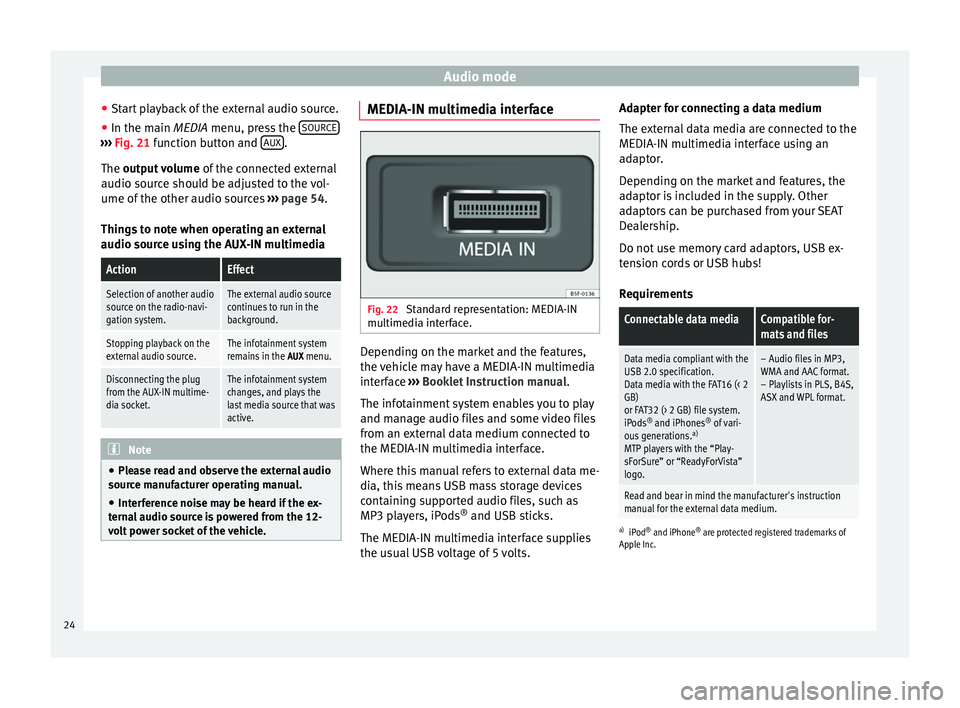
volt power socket of the vehicle. MEDIA-IN multimedia interface
Fig. 22
Standard representation: MEDIA-IN
multimedia interface. Depending on the market and the features,
the vehicle may have a MEDIA-IN multimedia
interface
›››
Booklet Instruction manual.
The infotainment system enables you to play
and manage audio files and some video files
from an external data medium connected to
the MEDIA-IN multimedia interface.
Where this manual refers to external data me-
dia, this means USB mass storage devices
containing supported audio files, such as
MP3 players, iPods ®
and USB sticks.
The MEDIA-IN multimedia interface supplies
the usual USB voltage of 5 volts. Adapter for connecting a data medium
The external data media are connected to the
MEDIA-IN multimedia interface using an
adaptor.
Depending on the market and features, the
adaptor is included in the supply. Other
adaptors can be purchased from your SEAT
Dealership.
Do not use memory card adaptors, USB ex-
tension cords or USB hubs!
Requirements
Connectable data mediaCompatible for-
mats and files
Data media compliant with the
USB 2.0 specification.
Data media with the FAT16 (< 2
GB)
or FAT32 (> 2 GB) file system.
iPods ®
and iPhones ®
of vari-
ous generations. a)
MTP players with the “Play-
sForSure” or “ReadyForVista”
logo.– Audio files in MP3,
WMA and AAC format.
– Playlists in PLS, B4S,
ASX and WPL format.
Read and bear in mind the manufacturer's instruction
manual for the external data medium.
a) iPod ®
and iPhone ®
are protected registered trademarks of
Apple Inc.
24
Page 29 of 64
Audio mode
Media players with the AVRCP Bluetooth pro-
file, the playback of the Bluetooth audio
source can be started and stopped automati-
cally when changing to Bluetooth audio
mode, or to another audio source. In addi-
tion, it is possible to view or change the track
via the infotainment system. Note
Due to the large number of different Blue-
tooth audio sources available, it is not possi-
ble to guarantee fault-free operation of all
functions described here. Note
● Deactivate the service and warning sounds
of a connected Bluetooth audio source (for
example, the key tones of the mobile phone)
to avoid interference noise and anomalies in
the operation.
● Depending on the external player connec-
ted, the response time of the system can
vary.
● To ensure your BT player works correctly,
check the compatibility lists first. Changing tracks in the main menu
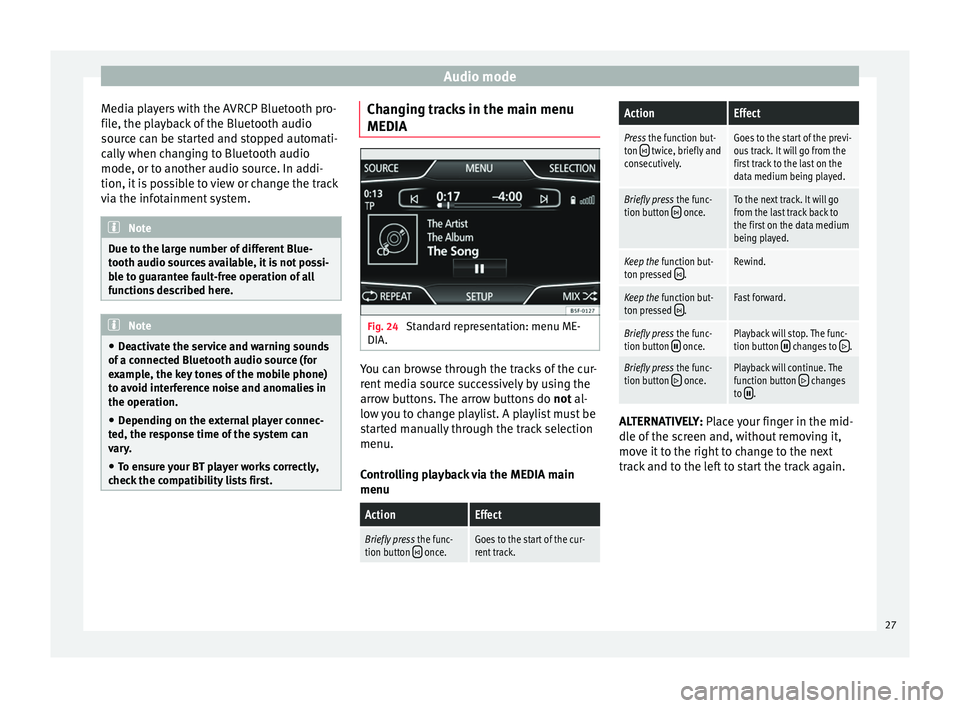
MEDIA
Fig. 24
Standard representation: menu ME-
DIA. You can browse through the tracks of the cur-
rent media source successively by using the
arrow buttons. The arrow buttons do
not al-
lo w
you to change playlist. A playlist must be
started manually through the track selection
menu.
Controlling playback via the MEDIA main
menu
ActionEffect
Briefly press the func-
tion button once.Goes to the start of the cur-
rent track.
ActionEffect
Press the function but-
ton twice, briefly and
consecutively.Goes to the start of the previ-
ous track. It will go from the
first track to the last on the
data medium being played.
Briefly press the func-
tion button once.To the next track. It will go
from the last track back to
the first on the data medium
being played.
Keep the function but-
ton pressed .Rewind.
Keep the function but-
ton pressed .Fast forward.
Briefly press the func-
tion button once.Playback will stop. The func-
tion button changes to .
Briefly press the func-
tion button once.Playback will continue. The
function button changes
to . ALTERNATIVELY:
Place your finger in the mid-
dl e of
the screen and, without removing it,
move it to the right to change to the next
track and to the left to start the track again.
27
Page 31 of 64
Navigation
Navigation Introduction and operation of
the navigation system Introduction General information
The current position of the vehicle is deter-
mined through the GPS satellite system
(Global Positioning System). Sensors in the
vehicle measure distances driven. With the
detailed material stored in the map, and ac-
cording to the traffic news stored, all the val-
ues obtained are compared. Similarly, the
traffic reports are taken into account to calcu-
late the route (dynamic navigation
››› page 35 ). With all the data available, the
n av
igation system calculates the optimum
route to the destination.
The destination is defined by entering an ad-
dress or a point of interest, e.g. a petrol sta-
tion or hotel.
Spoken instructions and visual guidance on
the navigation unit and the combi-instrument
direct you to your destination.
Depending on the country, some infotain-
ment system functions can no longer be se-
lected when the vehicle is travelling above a
certain speed. This is not an operational er- ror; it is to comply with the legal require-
ments.
Limitations during navigation Possible errors during navigation
When the navigation system cannot receive
data from the GPS satellites (dense tree foli-
age, underground parking areas), it is possi-
ble to proceed with navigation using the sys-
tem of vehicle sensors.
For the navigator to work properly, navigation
should begin when the signal is received
from the satellite.
In areas that are not or only partially digitised
on the data medium (e.g. insufficient defini-
tion of one-way streets and road categories),
the navigation system will still attempt to
provide route guidance.
If navigation data are unavailable or incom-
plete, the navigation system may be unable
to determine the exact vehicle position. As a
result, the navigation may not be as exact as
usual.
Area of navigation and validity of the
navigation data
Roads and streets are subject to constant
change (e.g. new roads, changes to street
names and house numbers). After some
time, navigation data will no longer be up-to-date. This may lead to inaccurate or incorrect
route guidance.
Current navigation data media and versions
for other countries are available from SEAT
dealerships.
Note
The user must pay attention to the road
signs, which take precedence over those
shown on the screen. Use navigation data from a memory
card
Memory cards containing updated navigation
data can be obtained from SEAT dealerships.
●
Insert the memory card ›››
page 23 .
● Do not remove the memory card while test-
ing. Wait for the testing icon to disappear.
If the inserted memory card contains valid
navigation data, the following message ap-
pears: “The source contains a valid naviga-
tion database”. It is now possible to navigate
with the memory card data. When the memo-
ry card is no longer needed by the hardware,
it will be prepared for removal ›››
page 23.
»
29
Page 35 of 64
NavigationFunction button: effect
Congestion ahead: blocks the section ahead (from 0.2 to
10 km) of the route underway to, for example, avoid con-
gestion. To unblock, press the function button Route
and then, Cancel congestion. My destinations (destination memory)
●
Press the My destinations button in the main
navigation menu ››› Fig. 27.
● Sel ect
the desired function button ( Store
position , Destinations and contacts
or Home
address ).
1. Store current position
● Press the function button Store position , to
store the position indicated as a target flag in
the Destination memory
.
To save the stored position
permanently,
change the name of the position in the desti-
nation memory . Otherwise the stored position
will be overwritten the next time a flagged
destination is stored.
In the following data entry mask you can
modify the name. To save the destination,
press the function button .
2. Destinations and contacts
Press the function button Options in the
menu of Destinations and contacts
.
Function button: effect
Last destinations: shows the destinations for which gui-
ded navigation has already been started.
Destination memory: Display of the destinations stored
manually and imported vCards ››› page 38.
Favourites list: display of the destinations stored as fa-
vourites.
Contacts: display of the entries in the telephone book
with addresses stored. 3. Home address
Only one address or position can be stored
as the home address at any one time. The
stored home address can be edited or over-
written.
If there is a private address already stored,
the guided navigation to this address will be-
gin.
If you have not yet stored any private ad-
dress, you can assign one.
Assigning a home address for the first time:
Position: press to save your current position as a
private address. Address
: press to enter the private address man-
ually.
Editing the address
You can edit the private address in the menu Navi-
gation setup ››› page 37. Points of interest (POI)
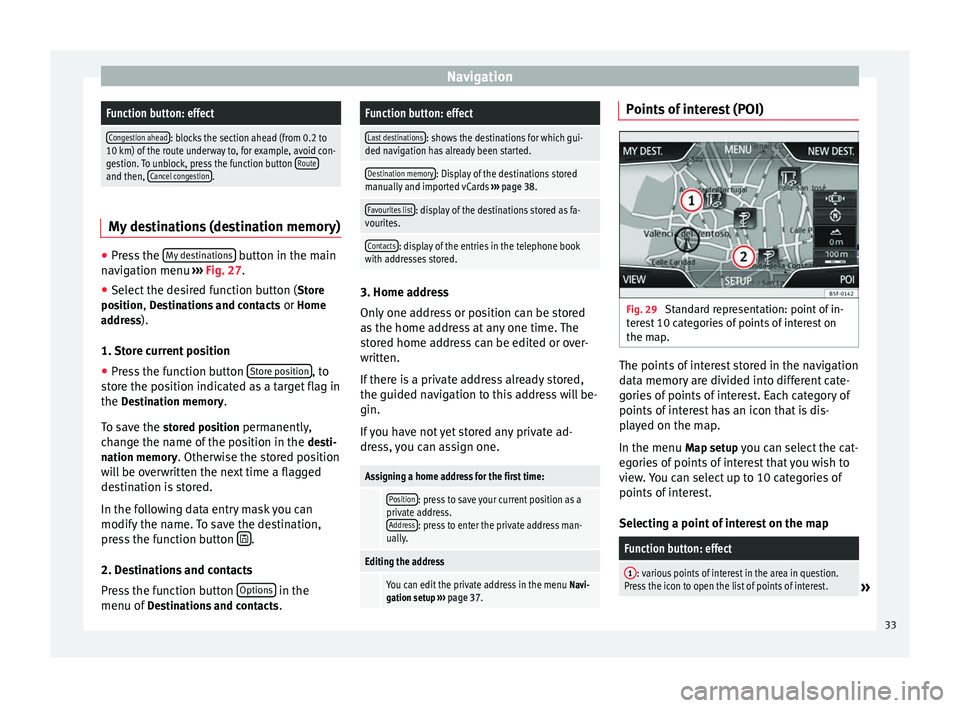
Fig. 29
Standard representation: point of in-
terest 10 categories of points of interest on
the map. The points of interest stored in the navigation
data memory are divided into different cate-
gories of points of interest. Each category of
points of interest has an icon that is dis-
played on the map.
In the menu
Map setup
you can select the cat-
egories of points of interest that you wish to
view. You can select up to 10 categories of
points of interest.
Selecting a point of interest on the map
Function button: effect
1: various points of interest in the area in question.
Press the icon to open the list of points of interest.» 33
Page 37 of 64
Navigation
To hide the split screen, press the function
button x or the infotainment button
NAV .
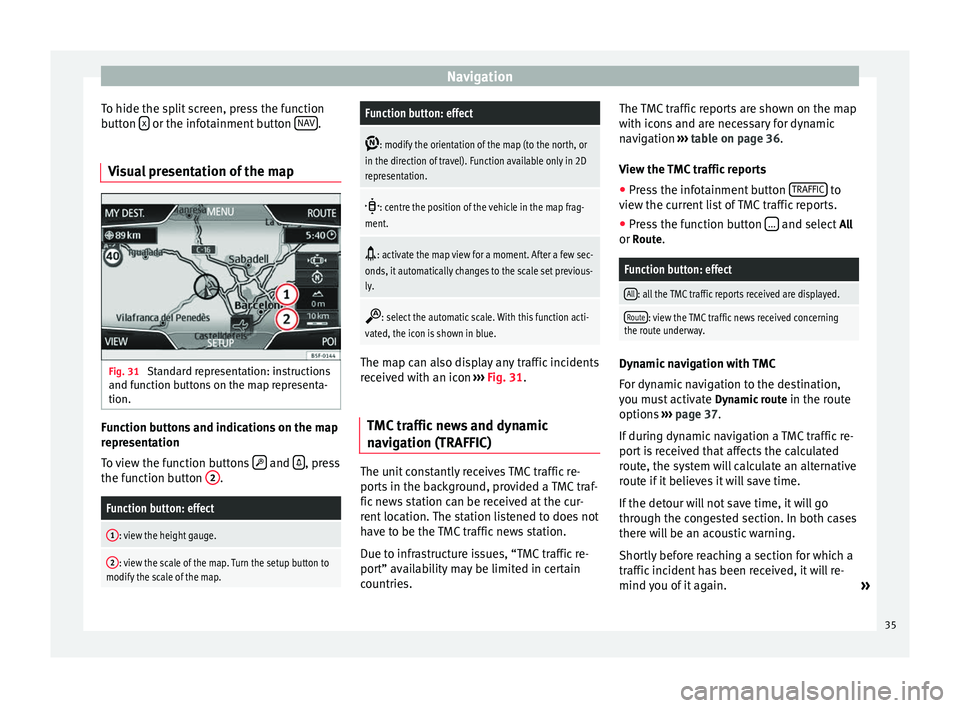
Visual presentation of the map Fig. 31
Standard representation: instructions
and function buttons on the map representa-
tion. Function buttons and indications on the map
representation
To view the function buttons
and
, press
the function button 2 .Function button: effect
1: view the height gauge.
2: view the scale of the map. Turn the setup button to
modify the scale of the map.
Function button: effect
: modify the orientation of the map (to the north, or
in the direction of travel). Function available only in 2D
representation.
: centre the position of the vehicle in the map frag-
ment.
: activate the map view for a moment. After a few sec-
onds, it automatically changes to the scale set previous-
ly.
: select the automatic scale. With this function acti-
vated, the icon is shown in blue. The map can also display any traffic incidents
received with an icon
››› Fig. 31 .
TMC tr
affic news and dynamic
navigation (TRAFFIC) The unit constantly receives TMC traffic re-
ports in the background, provided a TMC traf-
fic news station can be received at the cur-
rent location. The station listened to does not
have to be the TMC traffic news station.
Due to infrastructure issues, “TMC traffic re-
port” availability may be limited in certain
countries.The TMC traffic reports are shown on the map
with icons and are necessary for dynamic
navigation
››› table on page 36 .
V iew the
TMC traffic reports
● Press the infotainment button TRAFFIC to
view the current list of TMC traffic reports.
● Press the function button ... and select
All
or Route.
Function button: effect
All: all the TMC traffic reports received are displayed.
Route: view the TMC traffic news received concerning
the route underway. Dynamic navigation with TMC
For dynamic navigation to the destination,
you must activate
Dynamic route
in the route
options ›››
page 37 .
If durin
g dynamic navigation a TMC traffic re-
port is received that affects the calculated
route, the system will calculate an alternative
route if it believes it will save time.
If the detour will not save time, it will go
through the congested section. In both cases
there will be an acoustic warning.
Shortly before reaching a section for which a
traffic incident has been received, it will re-
mind you of it again. »
35
Page 41 of 64
CAR menu
CAR menu Introduction to managing the
CAR menu Car menu By pressing the “CAR” infotainment button
you will access the main menu with the fol-
lowing options:
● VIEW
● MINIPLAYER (Radio and Media function)
● PREVIOUS-NEXT (to change screen)
● SETUP ›››
Booklet Instruction Manual,
chapter System setup (CAR)
With the function button View you can access
the following information:
● DRIVING DATA
● ECO
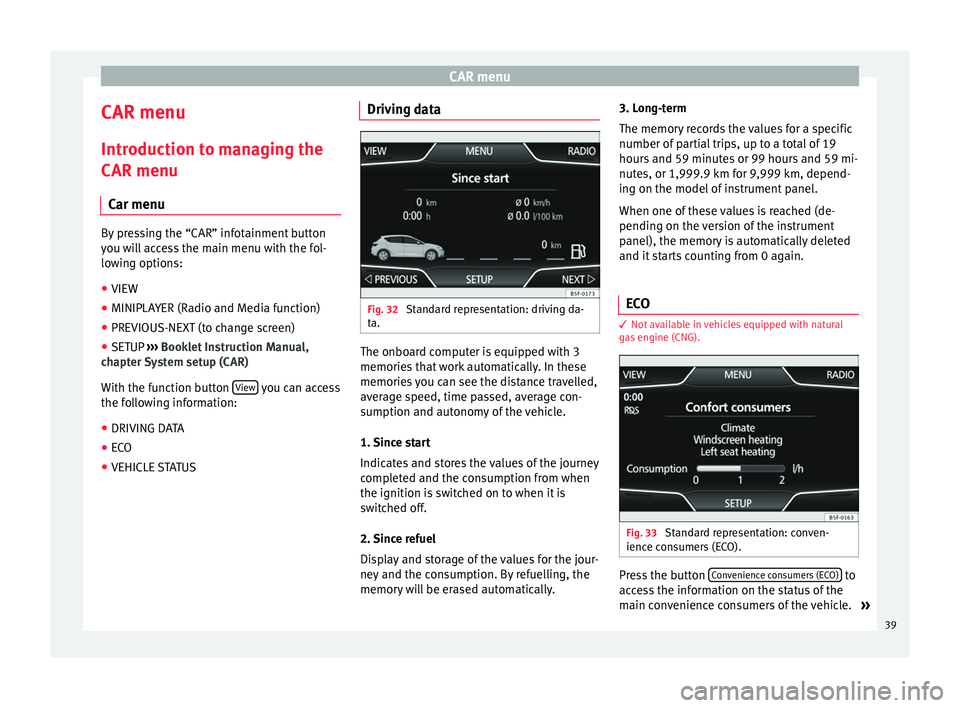
● VEHICLE STATUS Driving data
Fig. 32
Standard representation: driving da-
ta. The onboard computer is equipped with 3
memories that work automatically. In these
memories you can see the distance travelled,
average speed, time passed, average con-
sumption and autonomy of the vehicle.
1. Since start
Indicates and stores the values of the journey
completed and the consumption from when
the ignition is switched on to when it is
switched off.
2. Since refuel
Display and storage of the values for the jour-
ney and the consumption. By refuelling, the
memory will be erased automatically.3. Long-term
The memory records the values for a specific
number of partial trips, up to a total of 19
hours and 59 minutes or 99 hours and 59 mi-
nutes, or 1,999.9 km for 9,999 km, depend-
ing on the model of instrument panel.
When one of these values is reached (de-
pending on the version of the instrument
panel), the memory is automatically deleted
and it starts counting from 0 again.
ECO 3
Not available in vehicles equipped with natural
gas engine (CNG). Fig. 33
Standard representation: conven-
ience consumers (ECO). Press the button
Convenience consumers (ECO) to
access the information on the status of the
main convenience consumers of the vehicle. »
39
Page 46 of 64
Telephone management (PHONE)
If a connection has already been established,
some mobile telephones with Bluetooth are
recognised and a connection is established
with them automatically when the ignition is
switched on. For this purpose, the mobile
phone and its Bluetooth must be connected,
and all the live Bluetooth connections with
other devices must be closed.
The Bluetooth wireless connection is free.
Bluetooth R
is a registered trademark of Blue-
tooth ®
SIG, Inc.
Bluetooth ®
profiles
When you connect a mobile phone to the tel-
ephone manager, the data exchange is
through one of the 2 Bluetooth profiles.
● Hands-free Bluetooth profile (HFP): If a mo-
b i
le phone is connected to the telephone
manager through the HFP, calls can be made
wirelessly through the hands-free device.
● Advanced audio profile (A2DP): Bluetooth
profile for transmitting audio signals with
stereo quality.
Voice control Many radio, media, telephone and navigation
functions may be activated through voice
commands. The voice control of the infotainment system
is only available for the language that has
been selected in system settings
››› page 53 .
V oic
e control settings ››› page 54.
When voice control is activated, you can
choose what text and icons take on the col-
our of the different functions:
● Red (RADIO and MEDIA) ››› page 45 and
››› page 45
● Green (PHONE) ››› page 46
● Blue (NAV) ››› page 46
Start and stop the voice control
● To activate the voice control, briefly press
the button on the multi-function steering
wheel . It can also be activated with the
VOICE button in the MIB.
● When voice control is activated, a rising
signal will sound and a menu containing the
main commands will be displayed (the menu
will be displayed if this option ››› page 54 is
activated in the voice control settings). The
spoken instructions will guide you through
the following “dialogue”.
● Pronounce the desired order and follow the
instructions of the “dialogue”. A function can
often be activated with different spoken com-
mands. In case of doubt, try to give a com-
mand. ●
When an action is carried out (e.g. calling a
contact), the voice control automatically de-
activates and must be reactivated when nee-
ded again. There are certain commands after
which the voice control does not end and
waits with What do you wish to do now? .
● To manually end voice control, keep the
button pressed on the multi-function steering
wheel until you hear the corresponding con-
firmation (falling sound), or press the but-
ton on the di
splay. You can also press the
VOICE button twice to deactivate voice con-
trol. (Voice control is deactivated in the fol-
lowing ways: by briefly pressing the VOICE
button or Command on the steering wheel
twice; or by pressing VOICE or Command on
the steering wheel for a few moments, and
touching the screen or any button on the ra-
dio).
Help with voice control
The first time you use the voice control, listen
to the Help.
● Press the function button .
● Give the “
Help” command in the language
established in the System setting, and follow
the dialogue instructions.
Operation during the dialogue
While the infotainment system transmits a
spoken indication, the display will show the
symbol .
44
Page 51 of 64
Telephone management (PHONE)Redial but-
tonPress the button and the last number
dialled will be shown on the display. To
make a connection press the button
again
.
Call voice
mailbox Keep button number 1 pressed for ap-
proximately 2 seconds or press the button.
If you still have not saved the voice mail
number, enter the number and confirm it
with OK
.
A phone number that has already been
stored can be modified in the User pro-
file settings ››› page 51 menu.
Activating voice control
Enter a na-
tional dial-
ling codeWhen you enter a country code, instead
of the two first digits (for example,
“00”), you can enter the “+” symbol.
Keep the function button pressed
0
for
about 2 seconds to add the + symbol.
Breakdown
service call
Press the function button to obtain help
in the event of breakdown. For this the
network of SEAT dealerships is available
to you with their Mobile Service.
Information
call Press the function button to obtain infor-
mation on the SEAT brand and the addi-
tional services contracted related to traf-
fic and travel. Note
Breakdown service and information calls can
incur an additional cost on your telephone
bill. Phonebook (contacts) menu
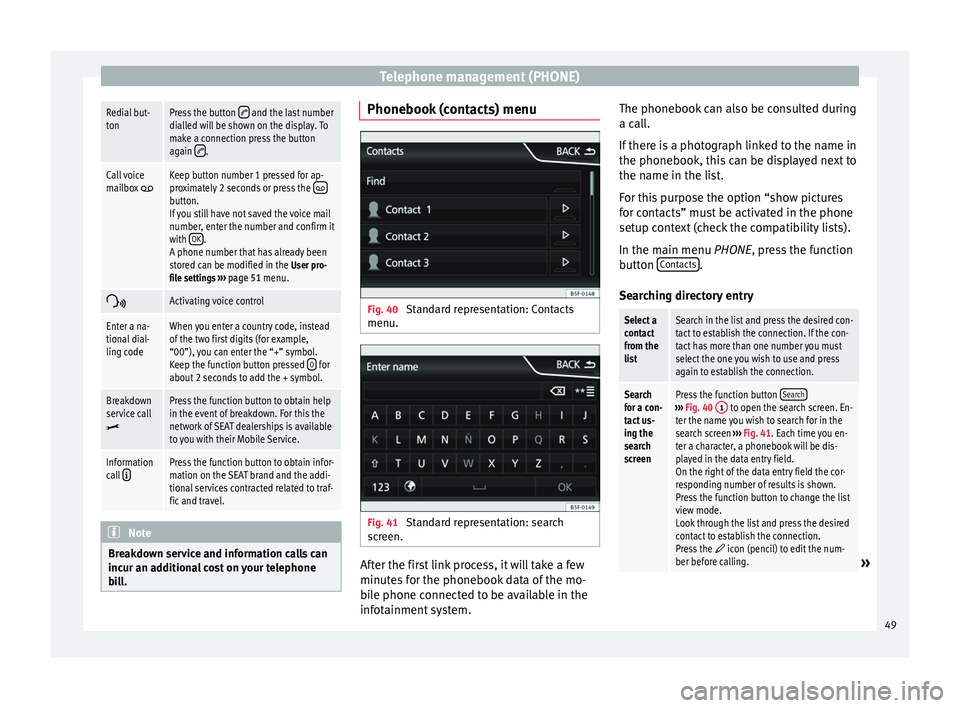
Fig. 40
Standard representation: Contacts
menu. Fig. 41
Standard representation: search
screen. After the first link process, it will take a few
minutes for the phonebook data of the mo-
bile phone connected to be available in the
infotainment system.The phonebook can also be consulted during
a call.
If there is a photograph linked to the name in
the phonebook, this can be displayed next to
the name in the list.
For this purpose the option “show pictures
for contacts” must be activated in the phone
setup context (check the compatibility lists).
In the main menu
PHONE
, press the function
b
utton Contacts .
Searching directory entry
Select a
contact
from the
listSearch in the list and press the desired con-
tact to establish the connection. If the con-
tact has more than one number you must
select the one you wish to use and press
again to establish the connection.
Search
for a con-
tact us-
ing the
search
screenPress the function button Search›››
Fig. 40 1 to open the search screen. En-
ter the name you wish to search for in the
search screen ››› Fig. 41. Each time you en-
ter a character, a phonebook will be dis-
played in the data entry field.
On the right of the data entry field the cor-
responding number of results is shown.
Press the function button to change the list
view mode.
Look through the list and press the desired
contact to establish the connection.
Press the
icon (pencil) to edit the num-
ber before calling.» 49
Page 55 of 64
Setup
Setup
Menu and system setting
(SETUP) Introduction Depending on the country, the device and
the features of the vehicle, some settings
may be different.
Activating the main menu.
● Press the infotainment button MENU to
open the main menu System setup (SETUP).
● Press the function button SETUP to access
the system setup.
Menu and system setup (SETUP) Activating the main menu.
● Press the infotainment button MENU to
open the main menu System setup (SETUP)
.
● Press the function button SETUP to access
the system setup.Function button: effect
Sound setup: adjust volume and sound setup
››› page 54.
Screen: complete the touch screen setting ››› page 53.
Function button: effect
Date and time: ››› Booklet Instruction Manual, chap-
ter System setup (CAR)
Idioma/Language: set the desired language for the texts
and announcements.
Keyboard: select the desired keyboard (ABC or QWERTY).
Additional keyboard languages: select an additional lan-
guage for the keyboard.
Units: ››› Booklet Instruction Manual, chapter System
setup (CAR)
Voice control: adjust the voice control setup ››› page 54.
Safely remove SD card 1, Safely remove SD card 2: eject the de-
sired memory card from the system. After ejecting the
memory card, the function button will be shown in grey.
Safely remove the USB data medium: eject the USB data medi-
um from the system.
Factory settings: ››› page 54.
Bluetooth: adjust the Bluetooth setup ››› page 51.
System information: indication of the system information
(device number, hardware and software version).
Copyright Note
For all the infotainment systems to work
properly, it is important to set the correct
time and date in the vehicle. Screen settings
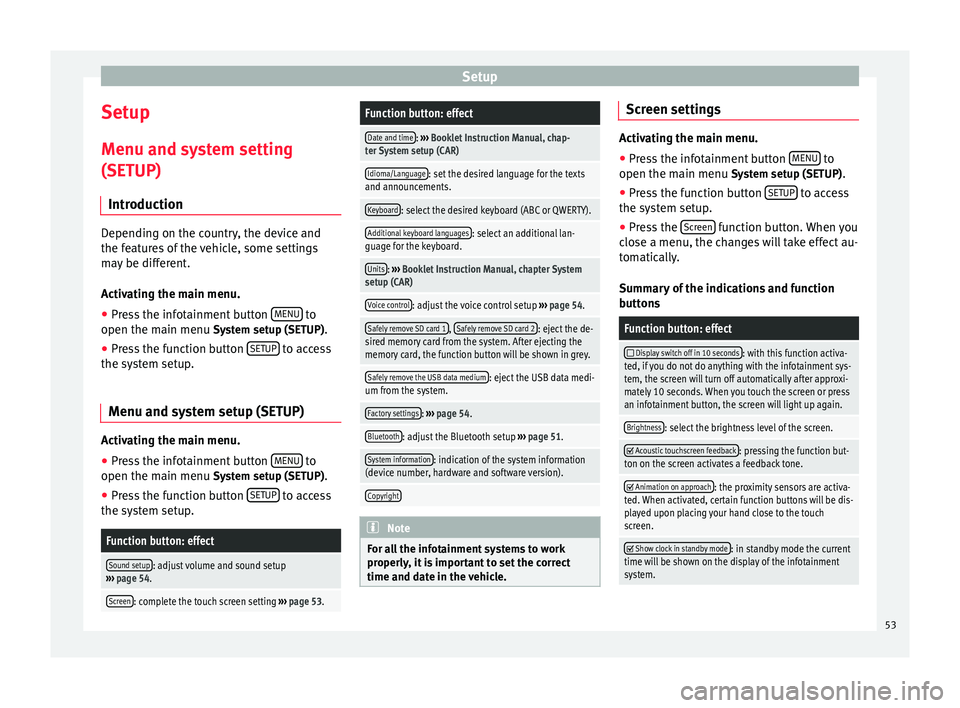
Activating the main menu.
●
Press the infotainment button MENU to
open the main menu System setup (SETUP).
● Pr e
ss the function button SETUP to access
the system setup.
● Press the Screen function button. When you
close a menu, the changes will take effect au-
tomatically.
Summary of the indications and function
buttons
Function button: effect
Display switch off in 10 seconds: with this function activa-
ted, if you do not do anything with the infotainment sys-
tem, the screen will turn off automatically after approxi-
mately 10 seconds. When you touch the screen or press
an infotainment button, the screen will light up again.
Brightness: select the brightness level of the screen.
Acoustic touchscreen feedback: pressing the function but-
ton on the screen activates a feedback tone.
Animation on approach: the proximity sensors are activa-
ted. When activated, certain function buttons will be dis-
played upon placing your hand close to the touch
screen.
Show clock in standby mode: in standby mode the current
time will be shown on the display of the infotainment
system. 53