technical specifications Seat Mii 2013 User Guide
[x] Cancel search | Manufacturer: SEAT, Model Year: 2013, Model line: Mii, Model: Seat Mii 2013Pages: 306, PDF Size: 4.3 MB
Page 27 of 306
25
Before starting the engine
Prior to a journey... Before starting the engine
Tips for driving
Introduction
Depending upon how you expect to use your vehicle, it may a good idea to
protect the engine from below. A guard underneath the engine may help to
reduce the risk of damage to the lower part of the vehicle and the oil sump
when driving over kerbs, or along dirt tracks or rough roads... Before instal-
lation, SEAT recommends going to a SEAT dealership.
Additional information and warnings:
● Ensure you are correctly seated ⇒ page 47
● Transporting ⇒ page 95
● Starting, changing gears, parking ⇒ page 119
● Ecological driving ⇒ page 144
● Notes for the user ⇒ page 233
WARNING
Driving under the influence of alcohol, drugs, medication or narcotics
may result in severe accidents and even loss of life.
● Alcohol, drugs, medication and narcotics may significantly alter per-
ception, affect reaction times and safety while driving, which could result
in the loss of control of the vehicle.
Journey preparations and safe driving
Check list
For your own safety, for the safety of passengers in the car, and for that of
other road users, the following should be checked before and during each
journey
⇒
:
Check that the lights and turn signals operate correctly.
Check the tyre pressures (
⇒ page 210) and level of fuel
(⇒ page 171).
Ensure there is good visibility through all the windows.
Make sure that all objects and bags in the storage compartments, in
the luggage compartment and, where applicable, on the roof, are se-
curely fastened
⇒ page 95.
Ensure there is nothing obstructing the free passage of the foot ped-
als.
Use child retention systems appropriate for the child's body weight
and height
⇒ page 74.
Correctly adjust front seat, head rests and rear-view mirrors to suit
your height
⇒ page 47, ⇒ page 93.
Wear close-fitting shoes which do not prevent you from using the
pedals correctly.
The driver's floor mat should be fixed to the floor, leaving the pedal
area unobstructed.
Before starting out, ensure you are correctly seated and remain in
this position throughout the journey. This applies to all passengers
in the vehicle
⇒ page 47.
Vehicle diagramPrior to a journey...While drivingCare, cleaning and mainte-
nanceIf and whenTechnical specifications
Page 28 of 306
26Before starting the engine
Check list (Continued)
Correctly fasten your seat belt before starting to drive and keep it se-
curely fastened throughout the journey. This applies to all
passengers in the vehicle
⇒ page 56.
Never carry more passengers than the number of available seats and
seat belts in your vehicle.
Never drive with impaired faculties (for example, due to medication,
alcohol or drugs).
Do not allow yourself to be distracted from the traffic, for example, to
reset or switch on a menu, by other passengers or to answer a phone
call.
Always try to adapt the speed of the vehicle and your style of driving
to the condition of the ground or the road and to weather and traffic
conditions.
Observe the highway code and speed limits.
On long journeys, rest at regular intervals (at least every 2 hours).
If carrying animals, make sure they are correctly restrained in accord-
ance with their weight and size.
WARNING
Always observe traffic regulations and speed limits and try to anticipate
traffic movements. Correctly anticipating traffic situations may mean the
difference between arriving safe and sound at your destination or having
a serious accident.
Note
Regular servicing of your vehicle not only helps to keep it in good working
order but also helps to ensure road safety. Therefore, please ensure the ve-
hicle is taken for service as indicated in the Maintenance Programme. If the
vehicle is subjected to hard use, it may require certain maintenance work
before the next service date. Hard use may involve frequent driving in traffic
jams or driving in dusty areas. For further information, please refer to a SEAT
dealership or a specialised workshop.
Driving abroad
Check list
In some countries, certain safety regulations and requirements are in force
relating to exhaust gas emissions, which differ from the technical character-
istics of the vehicle. Before travelling abroad, SEAT recommends you con-
sult a SEAT dealership about the legal requirements and the following
points:
Does the vehicle need technical modifications for driving abroad, for
example, adjustment of the headlamps?
Does the vehicle have all the tools, diagnostics equipment and
spare parts required for inspections and repairs?
Are there any SEAT dealers in the destination country?
For petrol vehicles: Is unleaded petrol available at the right octane
rating?
Are a suitable engine oil (
⇒ page 185) and other engine fluids com-
plying with SEAT specifications available in the destination country?
Does the Portable Navigation System (supplied by SEAT) function
⇒
page 222 in the destination country with the available navigation
information?
Are special tyres required in the destination country?
Page 29 of 306
27
Before starting the engine
CAUTION
SEAT does not accept liability for any damage to the vehicle due to the use
of a lower quality fuel, an inadequate service or the non-availability of genu-
ine spare parts.
Driving along flooded roadways
To prevent damage to the vehicle when driving through water, for example,
along a flooded road, please observe the following:
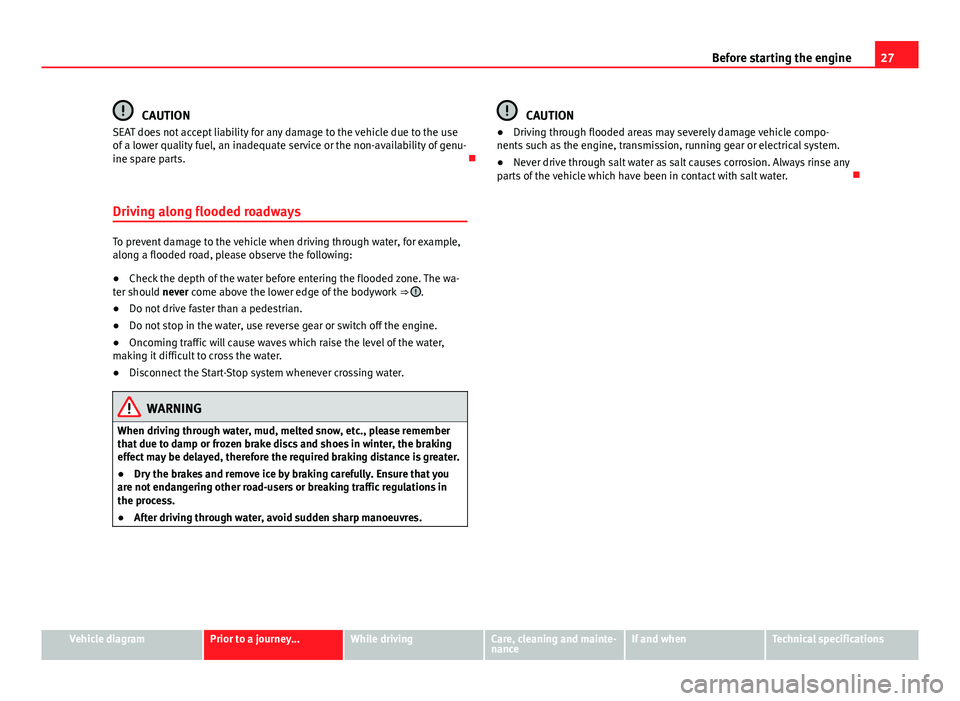
● Check the depth of the water before entering the flooded zone. The wa-
ter should never come above the lower edge of the bodywork ⇒
.
● Do not drive faster than a pedestrian.
● Do not stop in the water, use reverse gear or switch off the engine.
● Oncoming traffic will cause waves which raise the level of the water,
making it difficult to cross the water.
● Disconnect the Start-Stop system whenever crossing water.
WARNING
When driving through water, mud, melted snow, etc., please remember
that due to damp or frozen brake discs and shoes in winter, the braking
effect may be delayed, therefore the required braking distance is greater.
● Dry the brakes and remove ice by braking carefully. Ensure that you
are not endangering other road-users or breaking traffic regulations in
the process.
● After driving through water, avoid sudden sharp manoeuvres.
CAUTION
● Driving through flooded areas may severely damage vehicle compo-
nents such as the engine, transmission, running gear or electrical system.
● Never drive through salt water as salt causes corrosion. Always rinse any
parts of the vehicle which have been in contact with salt water.
Vehicle diagramPrior to a journey...While drivingCare, cleaning and mainte-
nanceIf and whenTechnical specifications
Page 31 of 306
29
Opening and closing
Remote control vehicle key*
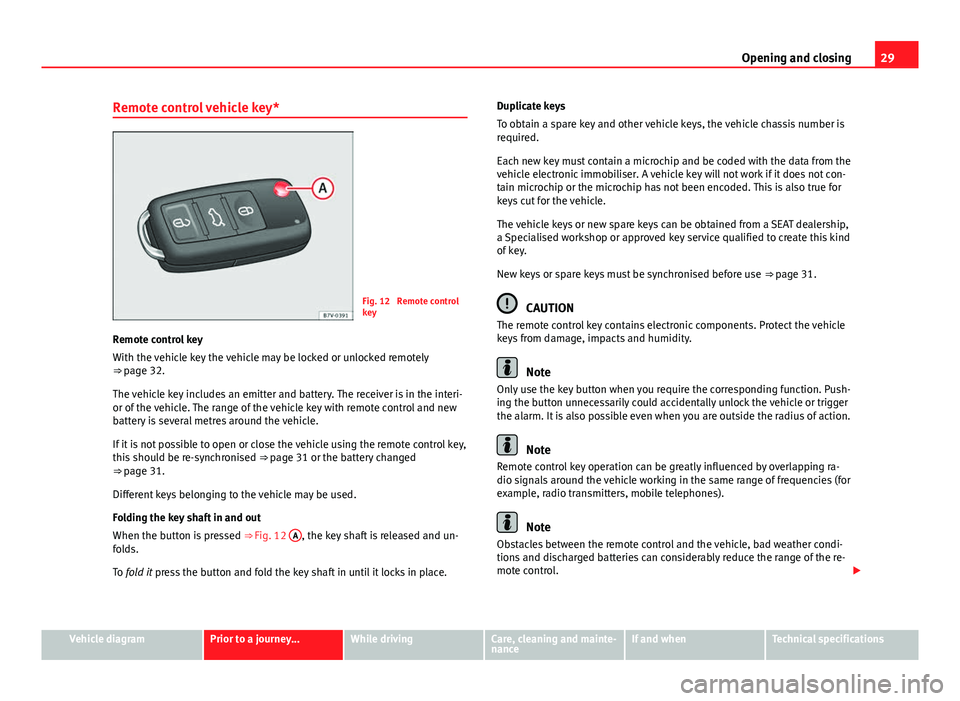
Fig. 12 Remote control
key
Remote control key
With the vehicle key the vehicle may be locked or unlocked remotely
⇒ page 32.
The vehicle key includes an emitter and battery. The receiver is in the interi-
or of the vehicle. The range of the vehicle key with remote control and new
battery is several metres around the vehicle.
If it is not possible to open or close the vehicle using the remote control key,
this should be re-synchronised ⇒ page 31 or the battery changed
⇒ page 31.
Different keys belonging to the vehicle may be used.
Folding the key shaft in and out
When the button is pressed ⇒ Fig. 12 A
, the key shaft is released and un-
folds.
To fold it press the button and fold the key shaft in until it locks in place. Duplicate keys
To obtain a spare key and other vehicle keys, the vehicle chassis number is
required.
Each new key must contain a microchip and be coded with the data from the
vehicle electronic immobiliser. A vehicle key will not work if it does not con-
tain microchip or the microchip has not been encoded. This is also true for
keys cut for the vehicle.
The vehicle keys or new spare keys can be obtained from a SEAT dealership,
a Specialised workshop or approved key service qualified to create this kind
of key.
New keys or spare keys must be synchronised before use
⇒ page 31.
CAUTION
The remote control key contains electronic components. Protect the vehicle
keys from damage, impacts and humidity.
Note
Only use the key button when you require the corresponding function. Push-
ing the button unnecessarily could accidentally unlock the vehicle or trigger
the alarm. It is also possible even when you are outside the radius of action.
Note
Remote control key operation can be greatly influenced by overlapping ra-
dio signals around the vehicle working in the same range of frequencies (for
example, radio transmitters, mobile telephones).
Note
Obstacles between the remote control and the vehicle, bad weather condi-
tions and discharged batteries can considerably reduce the range of the re-
mote control.
Vehicle diagramPrior to a journey...While drivingCare, cleaning and mainte-
nanceIf and whenTechnical specifications
Page 33 of 306
31
Opening and closing
Changing the battery
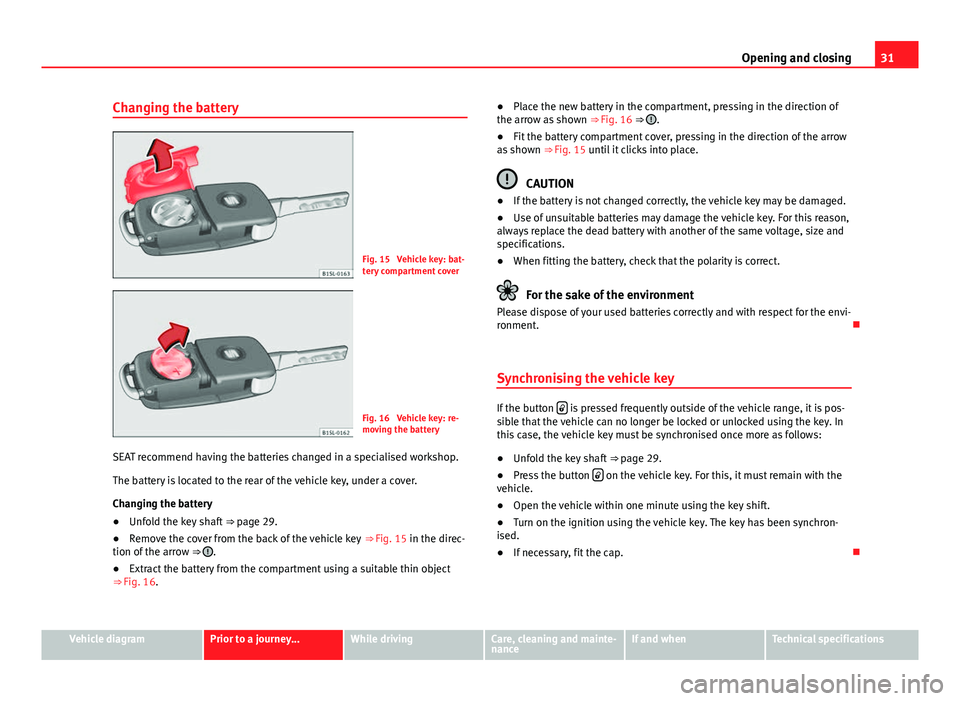
Fig. 15 Vehicle key: bat-
tery compartment cover
Fig. 16 Vehicle key: re-
moving the battery
SEAT recommend having the batteries changed in a specialised workshop.
The battery is located to the rear of the vehicle key, under a cover.
Changing the battery
● Unfold the key shaft
⇒ page 29.
● Remove the cover from the back of the vehicle key
⇒ Fig. 15 in the direc-
tion of the arrow ⇒
.
● Extract the battery from the compartment using a suitable thin object
⇒ Fig. 16. ●
Place the new battery in the compartment, pressing in the direction of
the arrow as shown ⇒ Fig. 16 ⇒
.
● Fit the battery compartment cover, pressing in the direction of the arrow
as shown ⇒ Fig. 15 until it clicks into place.
CAUTION
● If the battery is not changed correctly, the vehicle key may be damaged.
● Use of unsuitable batteries may damage the vehicle key. For this reason,
always replace the dead battery with another of the same voltage, size and
specifications.
● When fitting the battery, check that the polarity is correct.
For the sake of the environment
Please dispose of your used batteries correctly and with respect for the envi-
ronment.
Synchronising the vehicle key
If the button is pressed frequently outside of the vehicle range, it is pos-
sible that the vehicle can no longer be locked or unlocked using the key. In
this case, the vehicle key must be synchronised once more as follows:
● Unfold the key shaft
⇒ page 29.
● Press the button
on the vehicle key. For this, it must remain with the
vehicle.
● Open the vehicle within one minute using the key shift.
● Turn on the ignition using the vehicle key. The key has been synchron-
ised.
● If necessary, fit the cap.
Vehicle diagramPrior to a journey...While drivingCare, cleaning and mainte-
nanceIf and whenTechnical specifications
Page 35 of 306
33
Opening and closing
effectNecessary operationsLock the vehicle, by
pushing the central
locking button:– Turn off the ignition and turn it on again.
– Push the central locking button .
Use the key to lock the
vehicle:– Turn off the ignition and turn it on again.
OR: Remove the key from the ignition.
– Open any door just once.
– Lock the vehicle with the key.
Note
If the buttons of the vehicle key are pressed ⇒ page 28 or one of the central
locking buttons ⇒ Fig. 19 is pressed repeatedly in short succession, the
central locking briefly disconnects as protection against overloading. In this
case, the vehicle remains unlocked for about. 30 seconds. If no doors or the
rear lid are opened during this time, the vehicle will subsequently become
locked automatically.
Locking and unlocking the vehicle from the exterior
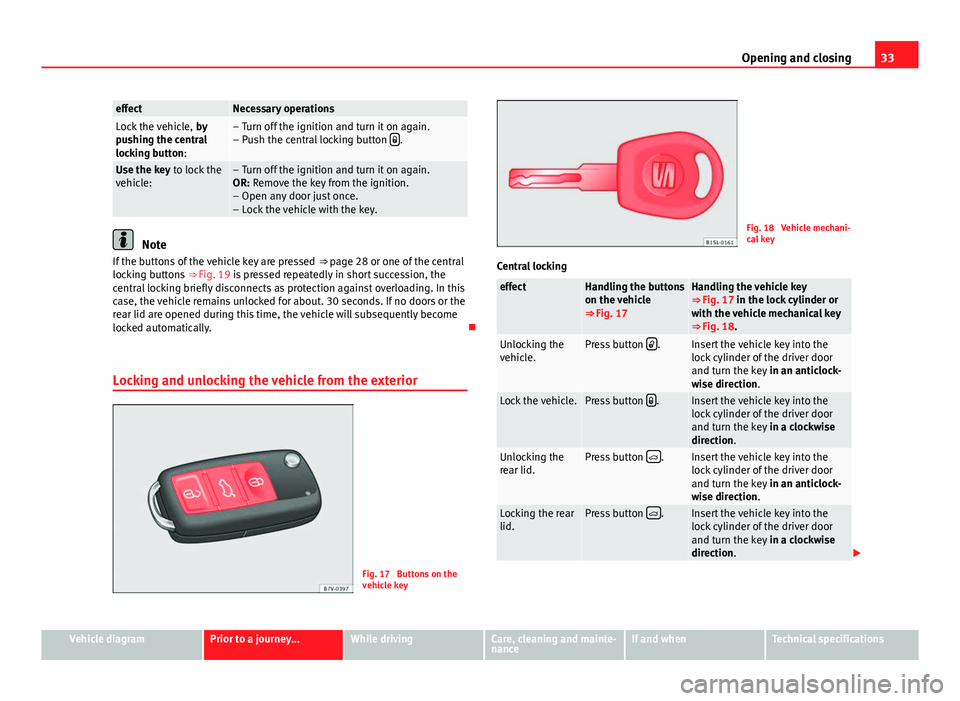
Fig. 17 Buttons on the
vehicle key
Fig. 18 Vehicle mechani-
cal key
Central locking
effectHandling the buttons
on the vehicle
⇒ Fig. 17Handling the vehicle key
⇒ Fig. 17 in the lock cylinder or
with the vehicle mechanical key
⇒ Fig. 18.
Unlocking the
vehicle.Press button .Insert the vehicle key into the
lock cylinder of the driver door
and turn the key
in an anticlock-
wise direction.
Lock the vehicle.Press button .Insert the vehicle key into the
lock cylinder of the driver door
and turn the key
in a clockwise
direction.
Unlocking the
rear lid.Press button .Insert the vehicle key into the
lock cylinder of the driver door
and turn the key
in an anticlock-
wise direction.
Locking the rear
lid.Press button .Insert the vehicle key into the
lock cylinder of the driver door
and turn the key
in a clockwise
direction.
Vehicle diagramPrior to a journey...While drivingCare, cleaning and mainte-
nanceIf and whenTechnical specifications
Page 37 of 306
35
Opening and closing
Central locking
Push the button ⇒ Fig. 19:
Unlocking the vehicle.
Lock the vehicle.
The central locking button is still operative when the ignition is switched off.
If the vehicle has been locked with the vehicle key, the central locking but-
ton does not operate.
Please note the following when you use the central locking button to lock
your vehicle:
● The deadlock will not activate ⇒ page 35.
● It will not be possible to open the doors or the rear lid from the outside
this may offer extra safety, when stopped at traffic lights for example.
● The doors can be opened and unlocked individually from the inside by
pulling the inside door handle. If necessary, pull the door release lever
twice.
● The driver door cannot be locked when it is still open. This avoids lock-
ing the vehicle key inside the vehicle when there is nobody inside.
Mechanical locking
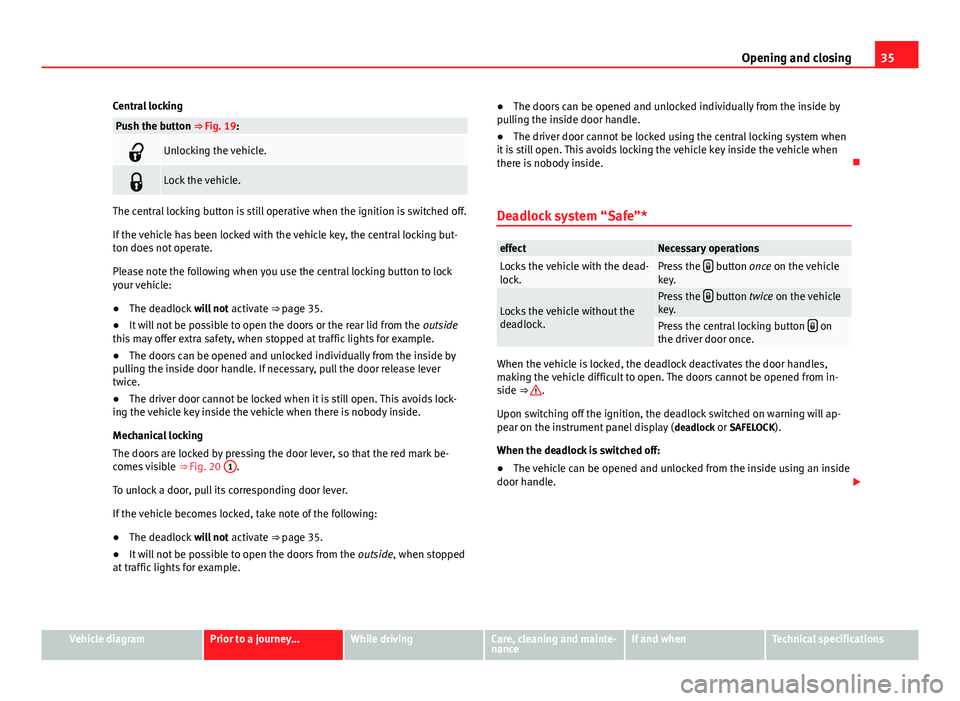
The doors are locked by pressing the door lever, so that the red mark be-
comes visible ⇒ Fig. 20 1
.
To unlock a door, pull its corresponding door lever.
If the vehicle becomes locked, take note of the following:
● The deadlock will not activate ⇒ page 35.
● It will not be possible to open the doors from the outside, when stopped
at traffic lights for example. ●
The doors can be opened and unlocked individually from the inside by
pulling the inside door handle.
● The driver door cannot be locked using the central locking system when
it is still open. This avoids locking the vehicle key inside the vehicle when
there is nobody inside.
Deadlock system “Safe”*
effectNecessary operationsLocks the vehicle with the dead-
lock.Press the button once on the vehicle
key.
Locks the vehicle without the
deadlock.Press the button twice on the vehicle
key.
Press the central locking button on
the driver door once.
When the vehicle is locked, the deadlock deactivates the door handles,
making the vehicle difficult to open. The doors cannot be opened from in-
side ⇒
.
Upon switching off the ignition, the deadlock switched on warning will ap-
pear on the instrument panel display ( deadlock or SAFELOCK).
When the deadlock is switched off:
● The vehicle can be opened and unlocked from the inside using an inside
door handle.
Vehicle diagramPrior to a journey...While drivingCare, cleaning and mainte-
nanceIf and whenTechnical specifications
Page 39 of 306
37
Opening and closing
Doors Introduction
Additional information and warnings:
● Vehicle key set ⇒ page 28
● Central locking and locking system ⇒ page 32
● Emergency locking and unlocking ⇒ page 244
WARNING
If a door is not correctly closed, it could open unexpectedly when driving
and cause serious injuries.
● Always stop immediately and close the door.
● When closing, ensure that the door has closed correctly. A closed
door should be flush with the corresponding parts of the bodywork.
● Open and close doors only when nobody is in the way of the door.
WARNING
A door held open by its retainer could be blown closed by the wind or
close if the vehicle is on a hill causing injury.
● When opening and closing doors, always use the door handle.
Note
On the display of the SEAT Portable System (supplied by SEAT), ⇒ page 222
can be seen if at least one vehicle door has been left open or is not correctly
closed. Childproof lock
The childproof lock prevents the rear doors from being
opened from the inside. This system prevents minors from
opening a door accidentally while the vehicle is running.
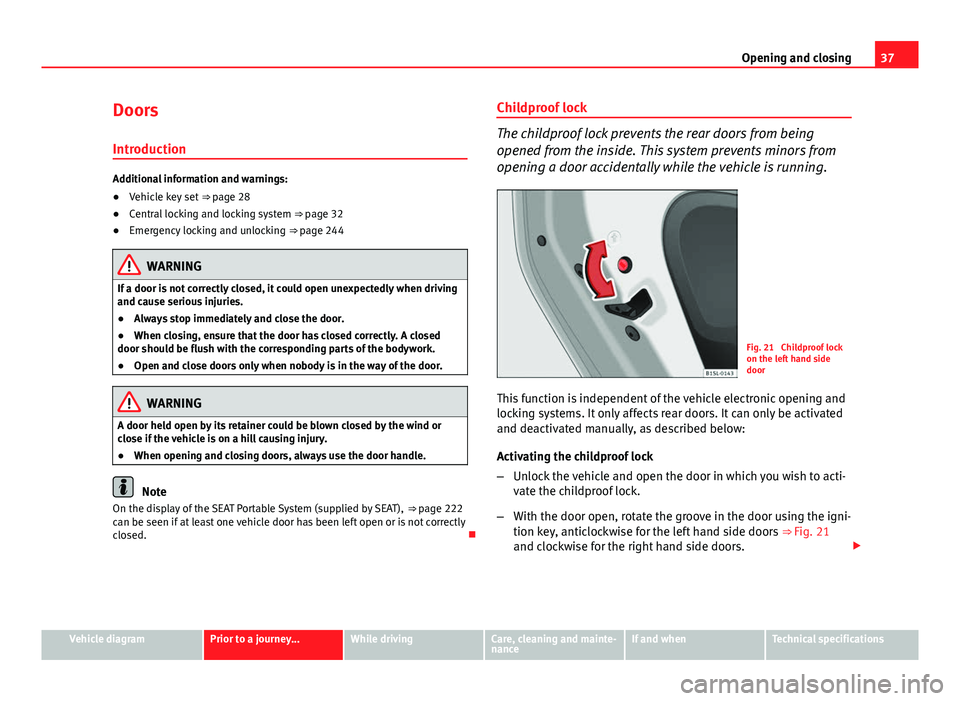
Fig. 21 Childproof lock
on the left hand side
door
This function is independent of the vehicle electronic opening and
locking systems. It only affects rear doors. It can only be activated
and deactivated manually, as described below:
Activating the childproof lock
– Unlock the vehicle and open the door in which you wish to acti-
vate the childproof lock.
– With the door open, rotate the groove in the door using the igni-
tion key, anticlockwise for the left hand side doors ⇒ Fig. 21
and clockwise for the right hand side doors.
Vehicle diagramPrior to a journey...While drivingCare, cleaning and mainte-
nanceIf and whenTechnical specifications
Page 41 of 306
39
Opening and closing
Rear lid
Introduction
Additional information and warnings:
● Exterior detail ⇒ page 6
● Central locking ⇒ page 32
● Transporting ⇒ page 95
● Emergency locking and unlocking ⇒ page 244
WARNING
Careless and unsuitable locking, opening and closing of the rear lid can
cause accidents and serious injury.
● Open and close the rear lid only when nobody is in the way.
● Do not close the rear lid by pushing it down with your hand on the
rear window. The rear window could break and cause injury.
● Ensure the rear lid is locked after closing, otherwise, it may open un-
expectedly while driving. A closed rear lid should be flush with the corre-
sponding parts of the bodywork.
● Always keep the rear lid closed while driving to avoid toxic gases en-
tering the vehicle interior.
● Do not open the rear lid when there is a load installed, for example a
carrier system. Likewise, the rear lid cannot be opened when a load is at-
tached to it, for example bicycles. An open rear lid could close itself if
there is an additional weight on it. If necessary, press down on the rear
lid and remove the load.
● Close and lock both the rear lid and all the other doors when you are
not using the vehicle. Ensure that nobody remains inside the vehicle.
WARNING (Continued)
● Never allow children to play inside or around the vehicle without su-
pervision, especially if the rear lid is open. Children could enter the lug-
gage compartment, close the rear lid and become trapped. Depending on
the time of the year, temperatures inside a locked and closed vehicle can
be extremely high or extremely low resulting in serious injuries and ill-
ness or even death, particularly for young children.
● Never leave children or disabled people alone in the vehicle. If the ve-
hicle key or the central locking button is used, they may be locked in the
vehicle.
CAUTION
Before opening the rear lid, ensure that there is sufficient free space to
open and close it, for example if you are in a garage.
Note
On the display of the Portable Navigation System (supplied by SEAT)
⇒ page 222 can be seen if the rear lid has been left open or is not correctly
shut.
Vehicle diagramPrior to a journey...While drivingCare, cleaning and mainte-
nanceIf and whenTechnical specifications
Page 43 of 306
41
Opening and closing
Closing the rear lid
● Grab the handgrip inside the rear lid ⇒ Fig. 23 (arrow).
● Push the rear lid downwards until it locks into place in the lock.
● Ensure that it is correctly closed by pulling on it firmly.
Locking the rear lid with central locking*
If the vehicle is unlocked and no doors or the rear lid are opened during
about. 30 seconds, it will automatically lock again. This function prevents
the vehicle from remaining unlocked if the unlocking button is pressed by
mistake.
Locking is only possible when the rear lid is correctly and fully closed.
● The rear lid is also locked by a central locking.
● If the vehicle rear lid is locked or unlocked using the
button, when it
is closed once more it will lock automatically.
● A closed but not locked rear lid will lock automatically at a speed above
about 9 km/h (6 mph).
Locking the rear lid with the vehicle mechanical key
Locking is only possible when the rear lid is correctly and fully closed.
● Insert the vehicle key into the lock cylinder of the driver door and turn
the key in a clockwise direction ⇒ page 32.
WARNING
Unsuitable or careless closing and locking of the rear lid could cause se-
rious injuries.
● Never allow children to play inside or around the vehicle without su-
pervision, especially if the rear lid is open. Children could enter the lug-
gage compartment, close the rear lid and become trapped. A locked vehi-
cle can be subjected to extremely high and low temperatures, depending
on the time of year, thus causing serious injuries/illness and even death.
Note
Before closing the rear lid, make sure that the key has not been left inside
the luggage compartment.
Vehicle diagramPrior to a journey...While drivingCare, cleaning and mainte-
nanceIf and whenTechnical specifications