technical specifications Seat Mii 2013 Repair Manual
[x] Cancel search | Manufacturer: SEAT, Model Year: 2013, Model line: Mii, Model: Seat Mii 2013Pages: 306, PDF Size: 4.3 MB
Page 125 of 306
123
Starting, changing gears, parking
The electronic immobilizer will be activated again automatically as soon as
you remove the key from the ignition lock.
For this reason, the vehicle can only be used with a genuine SEAT key with
the correct code. Coded keys can be obtained from SEAT dealerships
⇒ page 28.
If an unauthorised key is used, the signal appears on the instrument
panel display. The vehicle cannot be started in this case
Note
The correct operation of the vehicle is only guaranteed when original SEAT
keys are used.
Vehicle diagramPrior to a journey...While drivingCare, cleaning and mainte-
nanceIf and whenTechnical specifications
Page 127 of 306
125
Starting, changing gears, parking
Warning and control lamps
If lit upPossible causeSolution
(red)Fault in the automatic gear-
box.
Do not drive on!
Seek professional advice. Fail-
ure to do so could result in
considerable damage to the
transmission ⇒ page 132.
(yellow)
In the automatic gearbox
the gears can engage incor-
rectly.
Switch the ignition on and off.
When the control lamp does
not light up, find the nearest
specialised workshop and
have the automatic gearbox
checked.
The automatic gearbox
overheats temporarily.
Let the transmission cool with
the gearbox lever in the posi-
tion . When the control lamp
does not light up, find the
nearest specialised workshop
and have the automatic gear-
box checked.
If lit upPossible causeSolution
Place the automatic gear-
box lever in the position
and do not press the brake
pedal.Press the brake pedal to select
a gear range.
Together with the yellow
control lamp for the temper-
ature of the transmission
: the automatic gearbox
overheats.
Press brake pedal and let the
transmission cool. Avoid
pressing the accelerator.
When the control lamp does
not light up, find the nearest
specialised workshop and
have the automatic gearbox
checked.
Together with the turn sig-
nal display in the instru-
ment panel display: the au-
tomatic gearbox lever is not
in the position , indication
to start the engine.
Move the gearbox lever to the
position and start the en-
gine.
Vehicle diagramPrior to a journey...While drivingCare, cleaning and mainte-
nanceIf and whenTechnical specifications
Page 129 of 306
127
Starting, changing gears, parking
Pedals
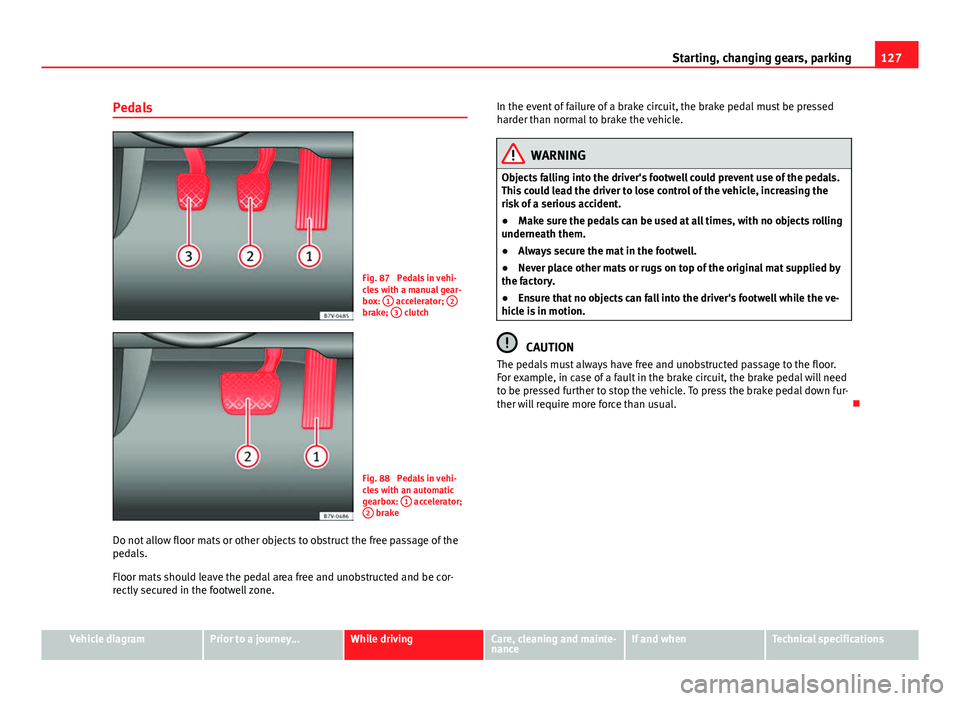
Fig. 87 Pedals in vehi-
cles with a manual gear-
box: 1
accelerator; 2brake; 3 clutch
Fig. 88 Pedals in vehi-
cles with an automatic
gearbox: 1
accelerator;
2 brake
Do not allow floor mats or other objects to obstruct the free passage of the
pedals.
Floor mats should leave the pedal area free and unobstructed and be cor-
rectly secured in the footwell zone. In the event of failure of a brake circuit, the brake pedal must be pressed
harder than normal to brake the vehicle.
WARNING
Objects falling into the driver's footwell could prevent use of the pedals.
This could lead the driver to lose control of the vehicle, increasing the
risk of a serious accident.
● Make sure the pedals can be used at all times, with no objects rolling
underneath them.
● Always secure the mat in the footwell.
● Never place other mats or rugs on top of the original mat supplied by
the factory.
● Ensure that no objects can fall into the driver's footwell while the ve-
hicle is in motion.
CAUTION
The pedals must always have free and unobstructed passage to the floor.
For example, in case of a fault in the brake circuit, the brake pedal will need
to be pressed further to stop the vehicle. To press the brake pedal down fur-
ther will require more force than usual.
Vehicle diagramPrior to a journey...While drivingCare, cleaning and mainte-
nanceIf and whenTechnical specifications
Page 131 of 306
129
Starting, changing gears, parking
● When changing gear, always make sure the clutch pedal is pushed right
to the floor.
● Never hold the vehicle on the clutch on hills.
Automatic gearbox: engaging a gear
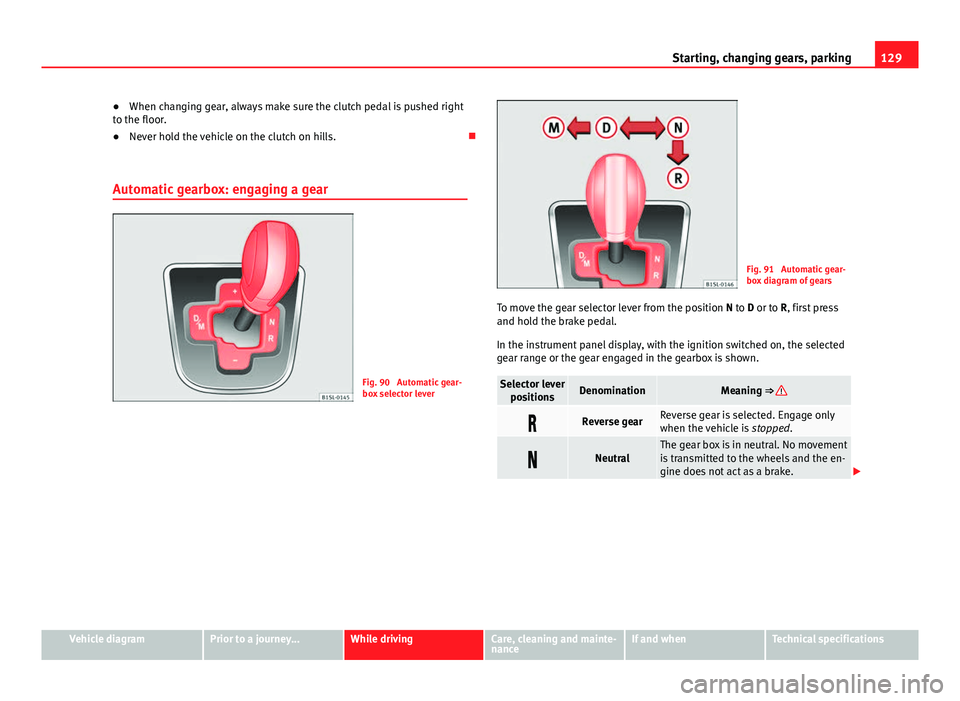
Fig. 90 Automatic gear-
box selector lever
Fig. 91 Automatic gear-
box diagram of gears
To move the gear selector lever from the position N to D or to R, first press
and hold the brake pedal.
In the instrument panel display, with the ignition switched on, the selected
gear range or the gear engaged in the gearbox is shown.
Selector lever positionsDenominationMeaning ⇒
Reverse gearReverse gear is selected. Engage only
when the vehicle is stopped.
NeutralThe gear box is in neutral. No movement
is transmitted to the wheels and the en-
gine does not act as a brake.
Vehicle diagramPrior to a journey...While drivingCare, cleaning and mainte-
nanceIf and whenTechnical specifications
Page 133 of 306
131
Starting, changing gears, parking
Using Tiptronic
● Place the lever in the position D to the left on the Tiptronic shift gate M
⇒
in Automatic gearbox: engaging a gear on page 130.
● Press the lever forwards + or backwards – to move up or down a gear
⇒ Fig. 92.
● Place the lever back to the position M to the left on the Tiptronic shift
gate, to leave Tiptronic mode ⇒
in Automatic gearbox: engaging a gear
on page 130.
With the lever in the position D, and pressing forwards +
or backwards –the Tiptronic programme can be selected
M.
CAUTION
● When accelerating, the gearbox automatically shifts up into the next
gear shortly before the maximum engine speed is reached.
● When reducing speed manually, the gear box only shifts gear when the
engine can no longer exceed the maximum engine speed.
Driving with an automatic gearbox
The gearbox changes gear ratios automatically as the vehicle moves.
Driving down hills
The steeper the gradient, the lower the gear you will need to select. The low-
est gears increase the engine braking work. Never go down hills with the se-
lector lever in neutral N.
● You should reduce speed accordingly.
● Place the lever in the position D to the left on the Tiptronic shift gate M
⇒ page 130.
● Gently pull the selector lever back –
to change down a gear. Starting when going up a slope
The steeper the gradient, the lower the gear you will need.
When stopping on a slope with a gear range engaged, the vehicle must be
prevented from rolling backwards by always pressing the brake pedal or
pulling the handbrake lever up. When starting, release the brake pedal or
the handbrake ⇒
.
Kick-down
The kickdown system provides maximum acceleration when the gear selec-
tor lever is in the position D, or in the Tiptronic position M.
When the accelerator pedal is pressed right down, the automatic gearbox
will shift down to a lower gear, depending on road speed and engine speed.
This takes advantage of the maximum acceleration of the vehicle ⇒
.
When the accelerator is pressed to the floor, the automatic gearbox shifts to
the next gear only after the engine reaches the specified maximum engine
speed.
WARNING
Rapid acceleration can cause loss of traction and skidding, especially on
slippery ground. This could cause loss of control of the vehicle resulting
in an accident and serious injury.
● Always adapt your driving style to suit the flow of traffic.
● Only use the kick-down function or rapid acceleration if visibility,
weather, road and traffic conditions so permit.
● Never put other road users in danger by accelerating or with your
driving style.
CAUTION
If you stop on a hill with a gear range engaged, do not try to prevent the
vehicle from rolling back by pressing on the accelerator. Otherwise, the au-
tomatic gearbox may overheat causing damage.
Vehicle diagramPrior to a journey...While drivingCare, cleaning and mainte-
nanceIf and whenTechnical specifications
Page 135 of 306
133
Starting, changing gears, parking
For the sake of the environment
Selecting the most appropriate gear for the situation will help you to save
fuel.
Note
The recommended gear display is switched off when the clutch pedal is
pressed.
Note
On the display of the Portable Navigation System (supplied by SEAT)
⇒ page 222 the recommended gear can also be seen.
Vehicle diagramPrior to a journey...While drivingCare, cleaning and mainte-
nanceIf and whenTechnical specifications
Page 137 of 306
135
Starting, changing gears, parking
Warning and control lamps
lights upPossible cause ⇒ Solution
Handbrake applied.⇒ page 136.
Fault in the brake system Do not drive on!
Seek professional advice
⇒ page 138.
Brake fluid level inadequate. Do not drive on!
Check brake fluid level
⇒ page 142.
Together with the ABS control
lamp : ABS and EBV do not
function. Do not drive on!
Seek professional advice
⇒ page 138.
ESC* disconnected by system.Switching the ignition on and off
If necessary, drive for a short dis-
tance.
Fault in ESC*.Contact a specialised workshop.
Together with the ABS control
lamp : Fault in ABS.Contact a specialised workshop.
The vehicle can be braked with-
out ABS.
The battery has been recon-
nected.⇒ page 193.
Traction Control faulty or
switched off by the system.Contact a specialised workshop.
Together with the ESC* control
lamp : Fault in ABS.Contact a specialised workshop.
The vehicle can be braked with-
out ABS.
Together with the warning
lamp : ABS and EBV do not
function. Do not drive on!
Seek professional advice
⇒ page 138.
flash- esPossible causeSolution
ESC* or ASR regulating.Take your foot off the accelerator.
Adjust your driving style to the
road conditions.
Traction Control regulator oper-
ating.Take your foot off the accelerator.
Adjust your driving style to the
road conditions.
Several warning and control lamps should light up for a few seconds when
the ignition is switched on, signalling that the function is being verified.
They will switch off after a few seconds.
WARNING
If the warning lamps are ignored, the vehicle may stall in traffic, or may
cause accidents and severe injuries.
● Never ignore the warning lamps.
● Stop the vehicle safely as soon as possible.
WARNING
Driving with brakes in bad condition could result in a serious accident.
● If the brake warning lamp does not go out, or if it lights up when
driving, the brake fluid level in the reservoir is too low or there is a fault
in the brake system. Obtain professional assistance immediately
⇒ page 141, Brake fluid.
● If the brake warning lamp lights up together with the ABS warning
lamp , the regulation function of the ABS could be malfunctioning. As a
result, the rear wheels can lock relatively easily when braking. If the rear
wheels lock this could result in loss of vehicle control! If possible, reduce
Vehicle diagramPrior to a journey...While drivingCare, cleaning and mainte-
nanceIf and whenTechnical specifications
Page 139 of 306
137
Starting, changing gears, parking
To park the vehicle
Complete operations only in the sequence given.
● Park the vehicle on a suitable surface ⇒
.
● Press and hold the brake pedal until the vehicle comes to a standstill.
● Apply the handbrake firmly ⇒ page 136.
● For an automatic gearbox, move the selector lever to position P.
● Switch off the engine and release the brake pedal.
● Remove the key from the ignition.
● If necessary, turn the steering wheel slightly to lock the steering.
● With a manual gearbox, engage the 1st gear on flat ground and slopes,
or even the reverse gear on hills, and release the clutch pedal.
● Ensure that all passengers leave the vehicle, especially children.
● When leaving the vehicle, take all keys with you.
● Lock the vehicle.
Additional information for steep slopes and hills
Before switching off the engine, rotate the steering wheel so that if the vehi-
cle should move then it will be held by the kerb.
● On slopes, turn the front wheels so that they are against the edge of the
kerb.
● Uphill, turn the wheels towards the centre of the road.
WARNING
The components of the exhaust system reach very high temperatures.
This could cause a fire and considerable damage.
● Always park your vehicle so that no part of the exhaust system can
come in contact with flammable materials (such as wood, leaves, spilled
fuel, dried grass, etc).
CAUTION
● Special care should be taken when parking in areas with high kerbs or
fixed barriers. Objects protruding from the ground may damage the bumper
or other parts of the vehicle during manoeuvres. To avoid damage, stop be-
fore the wheels touched the barrier or kerb.
● Special attention is required when driving through entrances, over
ramps, kerbs or other objects. The vehicle underbody, bumpers, mudguards
and running gear, and the engine and exhaust system could be damaged as
you drive over these objects.
Information about the brakes
For the first 200 to 300 km (120 to 190 mph), the new brake pads have not
yet reached their maximum braking capacity, and need to be “run in” first
⇒
. The slightly reduced braking effect can be compensated for by in-
creasing pressure on the brake pedal. While running in, the full braking dis-
tance or emergency braking distance is larger then when the brake pads
have been run in. While running in, avoid full power braking or situations
requiring braking performance. For example, in heavy traffic.
The rate of wear of the brake pads depends to a great extent on the condi-
tions in which the vehicle is used and the way the vehicle is driven. If the
vehicle is used frequently in city traffic or for short trips or driven sport style,
visit a specialised workshop regularly, more frequently than advised in the
Maintenance Programme, to have the bake pads checked.
If you drive with wet brakes, for example, after crossing areas of water, in
heavy rainfall or even after washing the car, the effect of the brakes is less-
ened as the brake discs are wet or even frozen (in winter). At higher speed,
dry the brakes as quickly as possible by braking gently several times. Only
do this without endangering vehicles behind you or any other road users
⇒
.
Vehicle diagramPrior to a journey...While drivingCare, cleaning and mainte-
nanceIf and whenTechnical specifications
Page 141 of 306
139
Starting, changing gears, parking
WARNING
Driving without the brake servo may significantly increase the braking
distance and result in a severe accident.
● Never allow the vehicle to move forwards when the engine is switched
off.
● If the brake servo does not operate or the vehicle must be towed,
then the brake pedal will have to be pressed with more force given that
the braking distance will be increased when the brake servo does not op-
erate.
CAUTION
● Never make the brakes slip by pressing the pedal gently, if it is not really
necessary to brake. Continuously pressing on the brake pedal will heat the
brakes. This could significantly reduce braking power, increase braking dis-
tance or even result in the total failure of the brake system.
● Reduce speed or reduce the gear when faced with steep and long
slopes. This allows you to use the engine braking effect and to reduce the
strain on the brake system. Otherwise, the brakes may overheat and fail.
Only use the brakes to reduce speed or to stop.
Note
Make use, when having the front brake pads checked, and have the rear
pads checked also. The thickness of the brake pads should be checked vis-
ually and regularly, by looking through the openings in the wheel rims or
from underneath the vehicle. If necessary, remove the wheels to check them
thoroughly. SEAT recommends visiting a Technical Service. Brake assist systems
The assisted braking systems ESC*, ABS, EBV, BAS, ASR, TC and EDL only
operate when the ignition is switched on. They contribute significantly to in-
creasing active safety.
Electronic Stability Programme (ESP)*
ESC* reduces the risk of skidding and increases the vehicle stability by
braking individual wheels under specific driving conditions. ESC* detects
critical handling situations, such as understeer, oversteer and wheelspin on
the driven wheels. The system stabilises the vehicle by braking individual
wheels or by reducing the engine torque.
The ESC* has limits. It is important to realise that the ESC* is also subject to
the laws of physics. ESC* will not be able to deal with all situations with
which drivers may be faced. For example, if the road surface changes sud-
denly then ESC* will not be useful in all cases. If the vehicle suddenly enters
a section covered by water, mud or snow then ESC* will not provide assis-
tance in the same way as on dry ground. If the vehicle loses its grip on the
ground and moves on a film of water (“aquaplaning”), the ESC* will not be
able to assist the driver to control the vehicle due to the loss of adherence
with the road surface preventing braking and steering. If the vehicle is driv-
en through series of bends at high speed, the ESC* will not always be as
effective: the vehicle reaction to aggressive driving is not the same as at re-
duced speeds.
Adjust your speed and driving style to suit visibility, and weather, road and
traffic conditions. ESC* cannot push the limits of the laws of physics; im-
prove the transmission available or maintain the vehicle on the road if a
lack of driver attention creates an inevitable situation. Otherwise, ESC* as-
sists in maintaining vehicle control in extreme situations and uses the
movements of the steering made by the driver to maintain the vehicle mov-
ing in the desired direction. If the vehicle is driven at such a speed that it
will leave the road before ESC* can intervene then the system cannot pro-
vide assistance.
Vehicle diagramPrior to a journey...While drivingCare, cleaning and mainte-
nanceIf and whenTechnical specifications
Page 143 of 306
141
Starting, changing gears, parking
WARNING (Continued)
● Even though brake assist systems are extremely effective and help
control the vehicle in difficult situations, remember that the vehicle sta-
bility depends on tyre grip.
● When accelerating on a slippery surface, for example on ice and
snow, press the accelerator carefully. The wheels can still slip even with
brake assist systems resulting in loss of vehicle control.
WARNING
The effectiveness of the ESC* can be considerably reduced if other com-
ponents and systems affecting driving dynamics are not maintained or
are not functioning correctly. This includes, among others, brakes, tyres
and other systems already mentioned.
● Remember that changing and fitting other components to the vehicle
can affect operation of the ABS, BAS, ASR TC, EDL and ESC*.
● Changes to the vehicle suspension or using unapproved wheel/tyre
combinations can affect operation of the ABS, BAS, ASR, TC, EDL and
ESC* and their effectiveness.
● Likewise, the effectiveness of ESC* depends on the use of suitable
tyres ⇒ page 210.
Note
To ensure that the ESC*, ASR and TC work properly, all four wheels must be
fitted with identical tyres. Any differences in the rolling radius of the tyres
can cause the system to reduce engine power when this is not desired.
Note
If a malfunction should occur in the ABS, the ESC*, ASR, TC and EDL will al-
so be affected.
Note
Noises may be heard while any of the above systems are operating.
Brake fluid
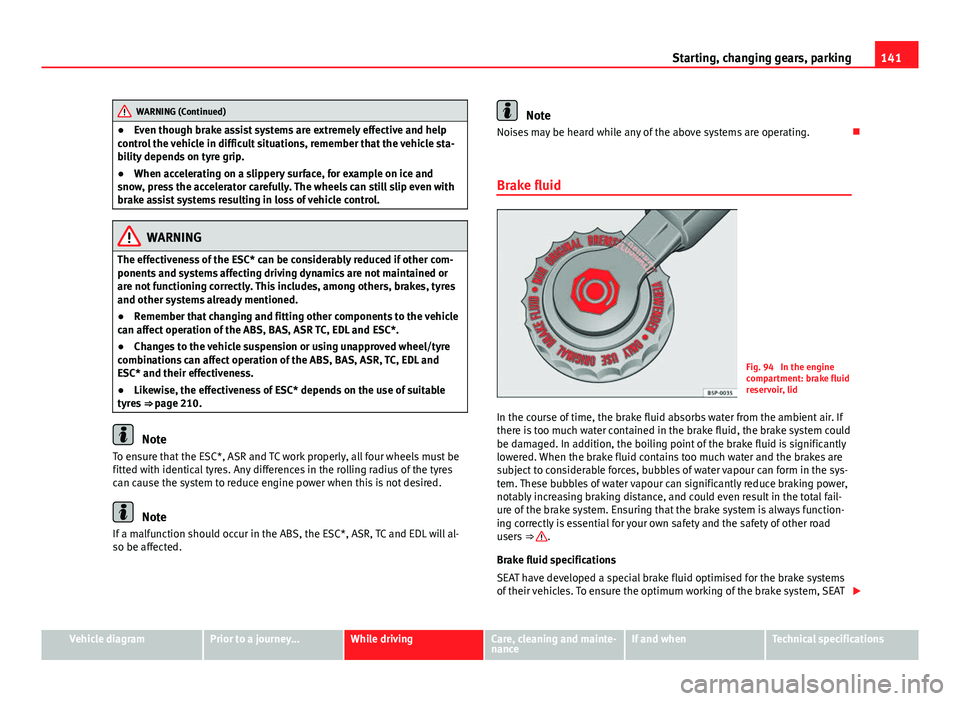
Fig. 94 In the engine
compartment: brake fluid
reservoir, lid
In the course of time, the brake fluid absorbs water from the ambient air. If
there is too much water contained in the brake fluid, the brake system could
be damaged. In addition, the boiling point of the brake fluid is significantly
lowered. When the brake fluid contains too much water and the brakes are
subject to considerable forces, bubbles of water vapour can form in the sys-
tem. These bubbles of water vapour can significantly reduce braking power,
notably increasing braking distance, and could even result in the total fail-
ure of the brake system. Ensuring that the brake system is always function-
ing correctly is essential for your own safety and the safety of other road
users ⇒
.
Brake fluid specifications
SEAT have developed a special brake fluid optimised for the brake systems
of their vehicles. To ensure the optimum working of the brake system, SEAT
Vehicle diagramPrior to a journey...While drivingCare, cleaning and mainte-
nanceIf and whenTechnical specifications