technical specifications Seat Mii 2013 Owner's manual
[x] Cancel search | Manufacturer: SEAT, Model Year: 2013, Model line: Mii, Model: Seat Mii 2013Pages: 306, PDF Size: 4.3 MB
Page 201 of 306
199
Vehicle care and maintenance
CAUTION
To prevent damage to the vehicle, please observe the following before en-
tering an automatic car wash :
● Compare the distance between the vehicle wheels and the distance be-
tween the guide-rails of the car wash to prevent damage to the wheels and
tyres!
● Switch off the rain sensor before taking the vehicle to an automatic car
wash.
● Compare the height and width of your vehicle with the available height
and width when entering and driving through the car wash.
● Fold in exterior mirrors Electrically retractable exterior mirrors must not
be folded in or out by hand. Always use the electrical power control.
● To avoid damaging the bonnet paintwork, rest the windscreen wipers on
the windscreen after drying the wiper blades. Do not let them fall!
● Lock the rear lid to prevent it from opening unexpectedly while inside
the car wash.
Washing the vehicle with high pressure cleaning apparatus
When cleaning the vehicle with a high-pressure cleaner, always follow the
operating instructions for the equipment. Pay special attention to the re-
quired pressure of the jet and the distance between the jet and the vehicle
⇒
.
Keep a suitable distance from soft materials, such as rubber hoses or insu-
lating material, and from the parking distance warning system sensors. The
sensors of the parking distance warning system are situated on the rear
bumper ⇒
.
Do not use a nozzle that sprays the water out in a direct stream or one that
has a rotating jet for forcing off dirt ⇒
.
WARNING
The incorrect use of high pressure cleaning equipment could result in
permanent damage, visible or invisible, to the tyres or other materials.
This could result in a serious accident.
● Ensure there is a suitable distance between the nozzle and the tyres.
● Never wash tyres with a concentrated jet or so-called “dirt blasters”.
Even at large spraying distances and short cleaning times, you may dam-
age the tyres.
WARNING
After the vehicle has been washed, the braking effect will be reduced
(and the braking distance increased) due to moisture (and ice in winter)
on the brakes.
● Dry the brakes and remove ice by braking carefully. Ensure that you
are not endangering other road-users or breaking traffic regulations in
the process.
CAUTION
● The temperature of the water must not be above +60 °C (+140 °F).
● To avoid damage to the paintwork, do not wash the vehicle in full sun.
● To ensure that the system functions well, the sensors located on the
bumper must be kept clean and free from ice. When cleaning with pressure
hoses and steam cleaners, the sensors should be sprayed only briefly. A
distance of 10 cm between the sensors and the steam / hose nozzle must
be observed.
● Do not use a high pressure cleaner to remove ice or snow from windows
● Washing the vehicle in low temperatures: When washing the vehicle
with a hose, do not direct water into the lock cylinders or the gaps around
the doors, rear lid, or sunroof. Locks and seals could freeze!
Vehicle diagramPrior to a journey...While drivingCare, cleaning and mainte-
nanceIf and whenTechnical specifications
Page 203 of 306
201
Vehicle care and maintenance
Cleaning and changing windscreen wiper blades
Fig. 119 Changing the
front wiper blades
Fig. 120 Changing the
rear wiper blade
The windscreen wiper blades are supplied as standard with a layer of graph-
ite. This layer is responsible for ensuring that the wipe is silent. If the graph-
ite layer is damaged, the noise of the water as it is wiped across the wind-
screen will be louder. Check the condition of the wiper blades regularly.
If the wipers scrape
across the glass they should be changed if they are damaged, or cleaned if
they are dirty ⇒
.
Damaged wiper blades should be replaced immediately. Wiper blades are
available from specialised workshops.
Lifting and unfolding the wiper arms
The wiper arm may only be lifted at the point where it is fastened to the
blade.
For windscreen wipers, please note: the wiper should be in service position
before unfolding it ⇒ page 89.
Cleaning windscreen wiper blades
● Lifting and unfolding the wiper arms.
● Use a soft cloth to remove dust and dirt from the windscreen wiper
blades.
● If the blades are very dirty, a sponge or damp cloth may be used ⇒
.
Changing the windscreen wiper blades
● Lifting and unfolding the wiper arms.
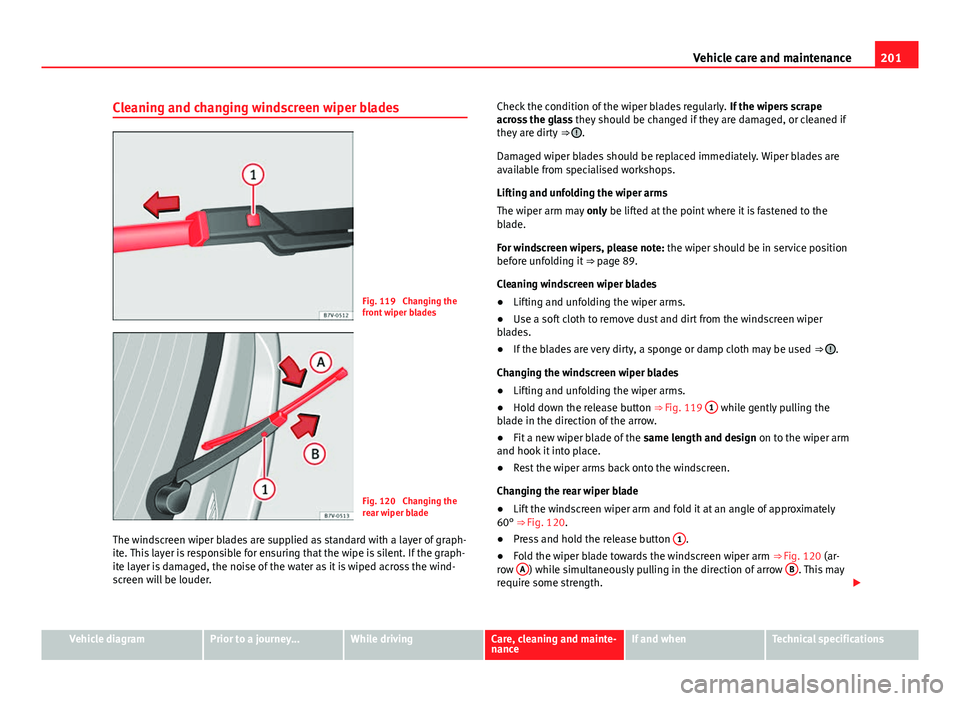
● Hold down the release button ⇒ Fig. 119 1
while gently pulling the
blade in the direction of the arrow.
● Fit a new wiper blade of the same length and design on to the wiper arm
and hook it into place.
● Rest the wiper arms back onto the windscreen.
Changing the rear wiper blade
● Lift the windscreen wiper arm and fold it at an angle of approximately
60° ⇒ Fig. 120.
● Press and hold the release button 1
.
● Fold the wiper blade towards the windscreen wiper arm ⇒ Fig. 120 (ar-
row A
) while simultaneously pulling in the direction of arrow B. This may
require some strength.
Vehicle diagramPrior to a journey...While drivingCare, cleaning and mainte-
nanceIf and whenTechnical specifications
Page 205 of 306
203
Vehicle care and maintenance
● Do not polish dirty surfaces.
● Do not use products containing solvents.
● Do not use hard wax.
CAUTION
Chrome hub caps or wheel covers may have been painted additionally. Do
not treat them with aluminium or chrome wax products, nor chrome or alu-
minium polish. Instead, use commercial paint wax or polish.
Cleaning wheels
Cleaning steel wheels
Use an industrial cleaner to remove brake dust. Therefore, clean wheels reg-
ularly with a separate sponge.
Any damage to the paint on steel wheels should be touched up before the
metal starts to rust.
Caring for and cleaning alloy wheels
Remove road salt and brake dust by washing the wheels approximately
once a fortnight. Use an acid free detergent to clean the wheel rims. SEAT
recommends treating the wheel rims thoroughly with a hard wax about
once every three months.
It is important to remove road salt and brake dust by washing the wheels at
regular intervals, otherwise the finish will be impaired.
Always use an acid-free detergent for alloy wheel rims. Car polish or other
abrasive agents should not be used for maintaining the rims.
If the protective coating on the paint has been damaged (for example, hit by
a stone), it should be repaired immediately. Caring for rubber seals
The rubber seals on doors, windows, etc., remain flexible, provide a better
seal and last longer if they are regularly treated with a product specifically
designed for use on rubber.
Before applying the product, use a soft cloth to remove dust and dirt from
the rubber seals.
De-icing the door lock cylinder
To de-ice the lock cylinders, SEAT recommend the use of genuine SEAT spray
with lubricating and anti-corrosive properties.
CAUTION
The use of products containing degreasing agents to de-ice the locks may
rust the lock cylinder.
Protection of vehicle undercarriage
The vehicle underbody is coated to protect it from chemical and mechanical
damage. The protective coat on the undercarriage may wear through use
while driving. Therefore, SEAT recommends that the protective coating on
the undercarriage and on the running gear should be regularly checked, and
repaired if necessary.
Vehicle diagramPrior to a journey...While drivingCare, cleaning and mainte-
nanceIf and whenTechnical specifications
Page 207 of 306
205
Vehicle care and maintenance
Caring for and cleaning the vehicle interior
Introduction
The dye from many items of modern clothing (e.g. dark jeans) is not always
solid enough. Seat upholstery (material and leather), especially when light-
coloured, may visibly discolour if the dye comes out of clothing (even when
used correctly). This is not an upholstery defect but indicates that the dye in
the item of clothing is not solid enough.
Additional information and warnings:
● Caring for and cleaning the vehicle exterior ⇒ page 197
● Accessories, parts replacement, repairs and modifications ⇒ page 222
WARNING
Car-care products may be toxic and hazardous. If car care products are
not suitable or are used inappropriately, this could result in accident, se-
rious injury, burns or intoxication.
● Car care products must always be stored in the original container
which should be kept closed.
● Observe information provided by the manufacturer.
● To prevent confusion, never store car care products in empty food
cans, bottles or other containers.
● Keep all care products out of reach of children.
● Harmful vapours may be produced when using car care products.
Therefore, care products should only be used in well-ventilated spaces or
in the open air.
● Never use fuel, turpentine, engine oil, acetone or any other volatile
liquid to wash, clean or care for the vehicle. These are toxic and highly
flammable.
WARNING
Inappropriate care and cleaning of vehicle components may effect the ve-
hicle safety equipment, increasing the risk of severe injury.
● Vehicle components should only be cleaned and maintained in ac-
cordance with the manufacturer's instructions.
● Only use approved or recommended care products.
CAUTION
● Cleaning products which contain solvents will damage the material.
● To avoid damage, stubborn stains should be removed by a specialised
workshop.
Note
Suitable vehicle care products are available from your Technical Service.
Vehicle diagramPrior to a journey...While drivingCare, cleaning and mainte-
nanceIf and whenTechnical specifications
Page 209 of 306
207
Vehicle care and maintenance
Type of stainCleaning the vehicleWater-based stains ,
e.g. coffee or fruit
juice.– Use a sponge and wipe with a solution of water
and wool wash.
– Dry with a dry, absorbent cloth.
Persistent stains ,
e.g. chocolate or
make-up.– Apply a washing paste a)
directly to the stain and
allow it to work.
– Apply clean water using a sponge or damp cloth to
remove the cleaning product deposits.
– Dry with a dry absorbent cloth.
Grease-based
stains, e.g. oil or lip-
stick.– Apply neutral soap or cleaning paste a)
and allow it
to work.
– Remove dissolved grease or colour particles with
an absorbent cloth.
– Then apply clean water. Take care not to soak the
upholstery.
a) Bile soap can be used as a cleaning paste.
CAUTION
Brushes should only be used to clean the mats and floor mat! Other surfa-
ces may be damaged if a brush is used.
CAUTION
Do not use steam cleaning equipment, as the dirt becomes more encrusted
in the material when steam is applied.
CAUTION
Never use brushes for cleaning damp material as they could damage the
surface. Cleaning storage compartments, drinks holders and
ashtray
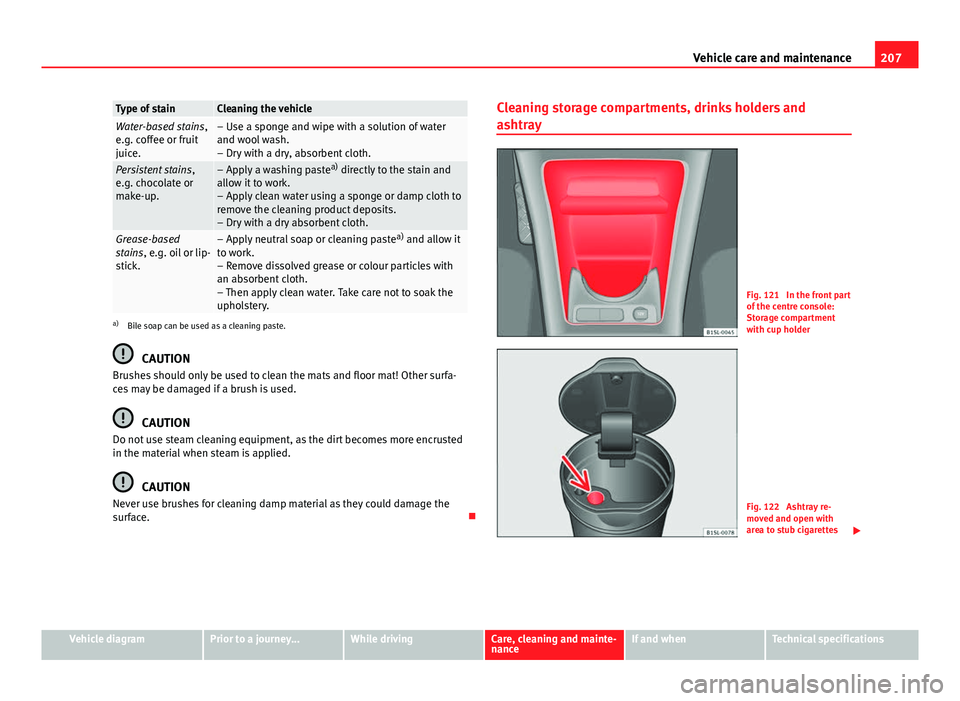
Fig. 121 In the front part
of the centre console:
Storage compartment
with cup holder
Fig. 122 Ashtray re-
moved and open with
area to stub cigarettes
Vehicle diagramPrior to a journey...While drivingCare, cleaning and mainte-
nanceIf and whenTechnical specifications
Page 211 of 306
209
Vehicle care and maintenance
WARNING (Continued)
● Seat belts should be completely dry before retracting. Damp could
damage the belt retractor so that it is does not operate correctly.
● Do not allow liquids or foreign bodies to enter the buckle fastenings.
This could damage the buckles and seat belts.
● Never attempt to repair, modify or remove a seat belt yourself.
● Always have damaged seatbelts replaced immediately by seat belts
approved for the vehicle in question by SEAT. Seat belts which have been
worn in an accident and stretched must be replaced by a specialised
workshop. Renewal may be necessary even if there is no apparent dam-
age. The belt anchorage should also be checked.
Vehicle diagramPrior to a journey...While drivingCare, cleaning and mainte-
nanceIf and whenTechnical specifications
Page 213 of 306
211
Vehicle care and maintenance
About your tyres and wheels
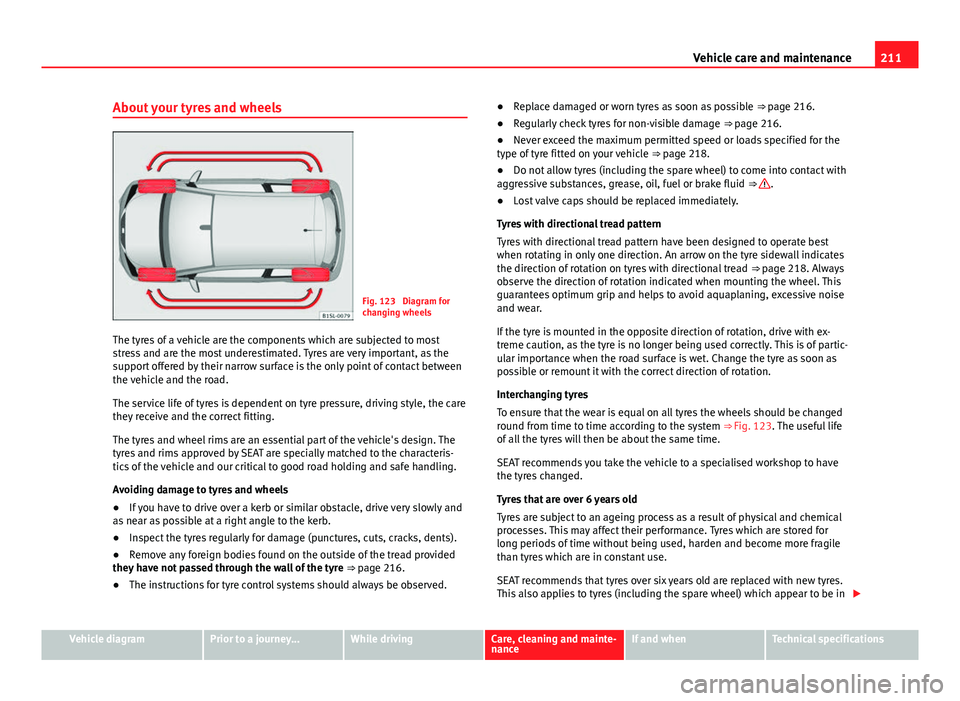
Fig. 123 Diagram for
changing wheels
The tyres of a vehicle are the components which are subjected to most
stress and are the most underestimated. Tyres are very important, as the
support offered by their narrow surface is the only point of contact between
the vehicle and the road.
The service life of tyres is dependent on tyre pressure, driving style, the care
they receive and the correct fitting.
The tyres and wheel rims are an essential part of the vehicle's design. The
tyres and rims approved by SEAT are specially matched to the characteris-
tics of the vehicle and our critical to good road holding and safe handling.
Avoiding damage to tyres and wheels
● If you have to drive over a kerb or similar obstacle, drive very slowly and
as near as possible at a right angle to the kerb.
● Inspect the tyres regularly for damage (punctures, cuts, cracks, dents).
● Remove any foreign bodies found on the outside of the tread provided
they have not passed through the wall of the tyre
⇒ page 216.
● The instructions for tyre control systems should always be observed. ●
Replace damaged or worn tyres as soon as possible ⇒ page 216.
● Regularly check tyres for non-visible damage ⇒ page 216.
● Never exceed the maximum permitted speed or loads specified for the
type of tyre fitted on your vehicle ⇒ page 218.
● Do not allow tyres (including the spare wheel) to come into contact with
aggressive substances, grease, oil, fuel or brake fluid ⇒
.
● Lost valve caps should be replaced immediately.
Tyres with directional tread pattern
Tyres with directional tread pattern have been designed to operate best
when rotating in only one direction. An arrow on the tyre sidewall indicates
the direction of rotation on tyres with directional tread ⇒ page 218. Always
observe the direction of rotation indicated when mounting the wheel. This
guarantees optimum grip and helps to avoid aquaplaning, excessive noise
and wear.
If the tyre is mounted in the opposite direction of rotation, drive with ex-
treme caution, as the tyre is no longer being used correctly. This is of partic-
ular importance when the road surface is wet. Change the tyre as soon as
possible or remount it with the correct direction of rotation.
Interchanging tyres
To ensure that the wear is equal on all tyres the wheels should be changed
round from time to time according to the system ⇒ Fig. 123. The useful life
of all the tyres will then be about the same time.
SEAT recommends you take the vehicle to a specialised workshop to have
the tyres changed.
Tyres that are over 6 years old
Tyres are subject to an ageing process as a result of physical and chemical
processes. This may affect their performance. Tyres which are stored for
long periods of time without being used, harden and become more fragile
than tyres which are in constant use.
SEAT recommends that tyres over six years old are replaced with new tyres.
This also applies to tyres (including the spare wheel) which appear to be in
Vehicle diagramPrior to a journey...While drivingCare, cleaning and mainte-
nanceIf and whenTechnical specifications
Page 215 of 306
213
Vehicle care and maintenance
WARNING
The use of worn or damaged wheel rims could make driving more danger-
ous and result in serious accidents and damage.
● Only wheel rims which have been approved for use with your vehicle
should be used.
● Inspect wheel rims regularly for damage and replace as required.
WARNING
If the bolted joints of wheel rims with bolted ring trims are not correctly
tightened or loosened, this could result in serious accident.
● Never loosen the bolted joints of wheel rims with bolted ring trims.
● Any work relating to wheel rims with bolted rims should be carried
out at specialised workshop. SEAT recommends visiting a Technical Serv-
ice.
Replacement of new tyres and wheel rims
New tyres
● When tyres are new, drive with extreme caution for the first 600 km
(400 miles), as all tyres need to be run-in. Tyres which have not been run-in
do not have such good grip ⇒
or braking capacity ⇒ .
● All four wheels must be fitted with radial tyres of the same type, size
(rolling circumference) and the same tread pattern.
● The tread depth of new tyres may vary, according to the type and make
of tyre and the tread pattern. Replacing tyres
●
Where possible, always replace both wheels on an axle (both wheels on
the front axle or both wheels on the rear axle) ⇒
.
● Only replace used tyres with those authorised by SEAT for the corre-
sponding type vehicle. Pay special attention to size, diameter, and maxi-
mum load and speed capacity.
● Never use tyres which are larger than SEAT approved tyres. If the tyres
are too big, they may knock or rub against the chassis or other components,
resulting in damage.
WARNING
New tyres do not give maximum grip and will not have reached their max-
imum braking capacity to start with, and therefore need running in.
● To prevent accidents and major damage, extreme caution should be
taken for the first 600 km (400 miles).
WARNING
There should be adequate space between the tyres and the vehicle in ac-
cordance with the vehicle design. If this is not the case, the tyres may
rub against parts of the running gear, chassis or brake lines, leading to
faults in the brake system or to tread detachment, and the risk of burst
tyres.
● The true tyre dimension should not be greater than the dimensions of
tyres manufactured and approved by SEAT and should not rub against
parts of the vehicle.
Note
Although tyres may be shown as being the same size, the true dimensions
of different types of tyre may vary with respect to the nominal size, or tread
patterns may be different.
Vehicle diagramPrior to a journey...While drivingCare, cleaning and mainte-
nanceIf and whenTechnical specifications
Page 217 of 306
215
Vehicle care and maintenance
Checking tyre pressures
Check tyre pressures only when the vehicle has not been driven for more
than a few kilometres at low speeds in the past three hours.
● The tyre pressures should be checked regularly, and only when the tyres
are cold. Always check all tyres, including the spare wheel. Tyre pressures
should be checked more often in colder regions, and only when the vehicle
has not been driven recently. Always use a correctly-operating tyre gauge.
● Adjust tyre pressures to the loads carried in the vehicle.
● After adjusting the tyre pressure, check that the caps are properly
screwed.
The spare wheel or temporary spare wheel must be at the maximum pres-
sure specified.
WARNING
If tyre pressures are too high or too low, the tyre may deflate or burst
suddenly while driving. This could result in a serious accident.
● If the tyre pressure is too low, the tyres could overheat, resulting in
tread detachment or even burst tyres.
● When driving at high speeds and/or fully loaded, the tyre could sud-
denly overheat, burst or be subject to tread detachment, with the resul-
tant loss of control of the vehicle.
● Tyre pressures which are too high or too low reduce the service life of
the tyre, affecting the vehicle's performance.
● Tyre pressures should be checked regularly, at least once a month
and before long journeys.
● Adjust the pressures of all the tyres to the vehicle load.
● Never deflate excess pressure from hot tyres.
CAUTION
● Take care not to tilt the manometer when placing it on the valve. Other-
wise, the valve may be damaged.
● To avoid damage to the valves, always replace valve caps correctly.
Check that the caps are identical to the standard caps and have been cor-
rectly tightened.
For the sake of the environment
Under-inflated tyres will increase the fuel consumption.
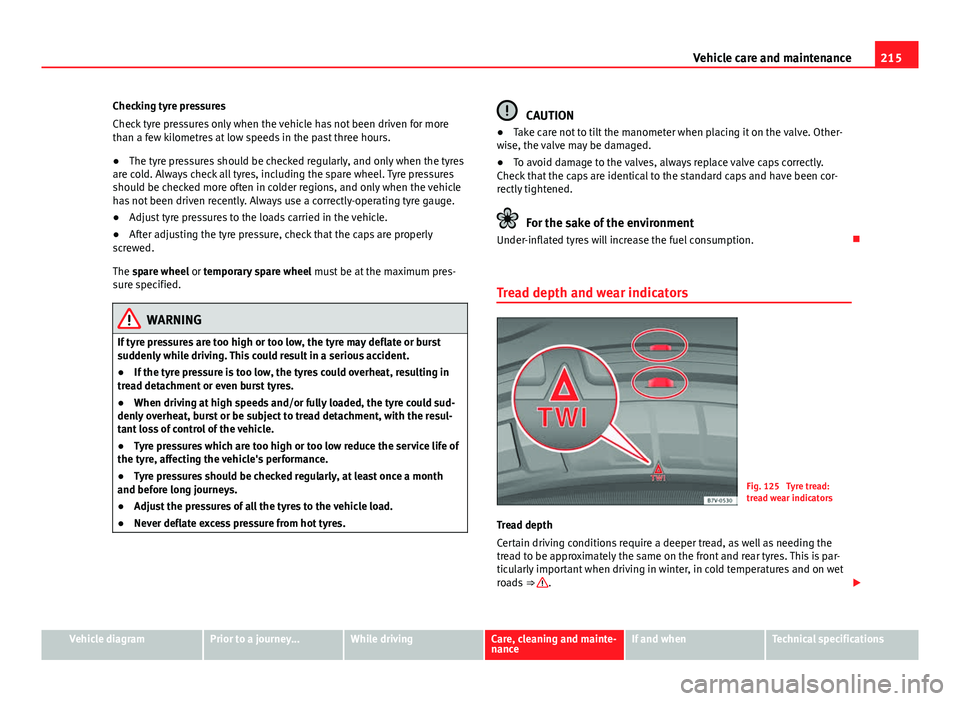
Tread depth and wear indicators
Fig. 125 Tyre tread:
tread wear indicators
Tread depth
Certain driving conditions require a deeper tread, as well as needing the
tread to be approximately the same on the front and rear tyres. This is par-
ticularly important when driving in winter, in cold temperatures and on wet
roads ⇒
.
Vehicle diagramPrior to a journey...While drivingCare, cleaning and mainte-
nanceIf and whenTechnical specifications
Page 219 of 306
217
Vehicle care and maintenance
Running gear settings : an incorrectly positioned running gear increases the
wear of tyres and affects your safety while driving. If tyres wear too quickly,
have the wheel alignment checked at a specialised workshop.
WARNING
If you notice unusual vibration or the car pulls to one side while driving,
this may indicate that one of the tyres is damaged.
● Reduce speed immediately and stop, while observing the highway
code.
● Check the wheels and tyres for damage.
● Never carry on driving on worn tyres or wheels. Request qualified as-
sistance immediately.
● If there is no visible exterior damage, drive slowly and carefully to the
nearest specialised workshop and have the vehicle checked.
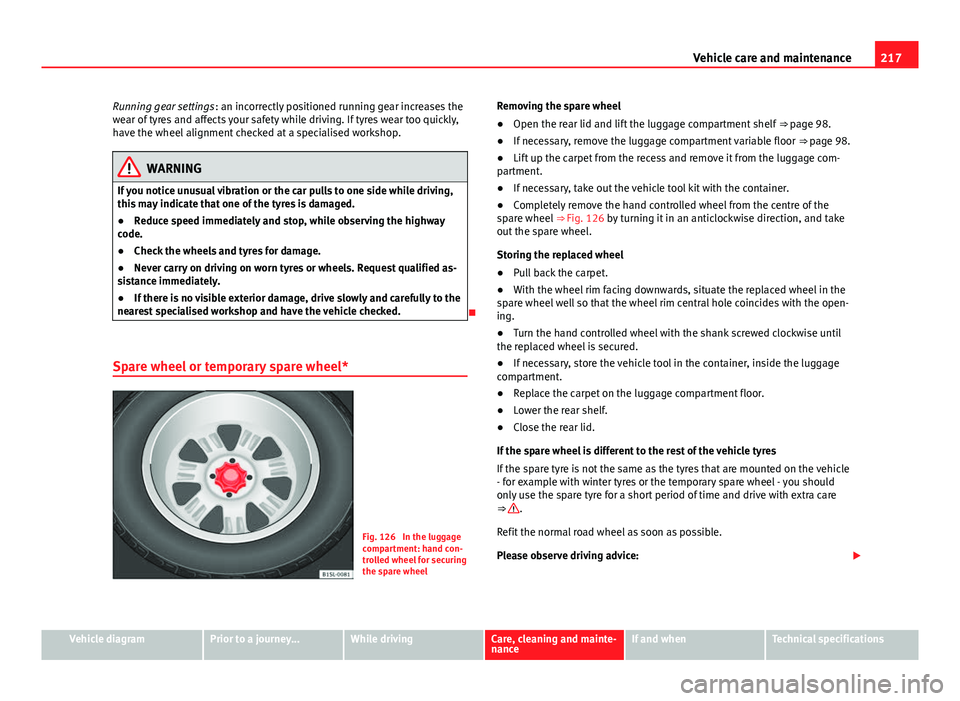
Spare wheel or temporary spare wheel*
Fig. 126 In the luggage
compartment: hand con-
trolled wheel for securing
the spare wheel Removing the spare wheel
●
Open the rear lid and lift the luggage compartment shelf ⇒ page 98.
● If necessary, remove the luggage compartment variable floor ⇒ page 98.
● Lift up the carpet from the recess and remove it from the luggage com-
partment.
● If necessary, take out the vehicle tool kit with the container.
● Completely remove the hand controlled wheel from the centre of the
spare wheel ⇒ Fig. 126 by turning it in an anticlockwise direction, and take
out the spare wheel.
Storing the replaced wheel
● Pull back the carpet.
● With the wheel rim facing downwards, situate the replaced wheel in the
spare wheel well so that the wheel rim central hole coincides with the open-
ing.
● Turn the hand controlled wheel with the shank screwed clockwise until
the replaced wheel is secured.
● If necessary, store the vehicle tool in the container, inside the luggage
compartment.
● Replace the carpet on the luggage compartment floor.
● Lower the rear shelf.
● Close the rear lid.
If the spare wheel is different to the rest of the vehicle tyres
If the spare tyre is not the same as the tyres that are mounted on the vehicle
- for example with winter tyres or the temporary spare wheel - you should
only use the spare tyre for a short period of time and drive with extra care
⇒
.
Refit the normal road wheel as soon as possible.
Please observe driving advice:
Vehicle diagramPrior to a journey...While drivingCare, cleaning and mainte-
nanceIf and whenTechnical specifications