audio Seat Toledo 2005 RADIO-NAVIGATION MFD2
[x] Cancel search | Manufacturer: SEAT, Model Year: 2005, Model line: Toledo, Model: Seat Toledo 2005Pages: 50, PDF Size: 2.89 MB
Page 5 of 50
Quick Reference Guide
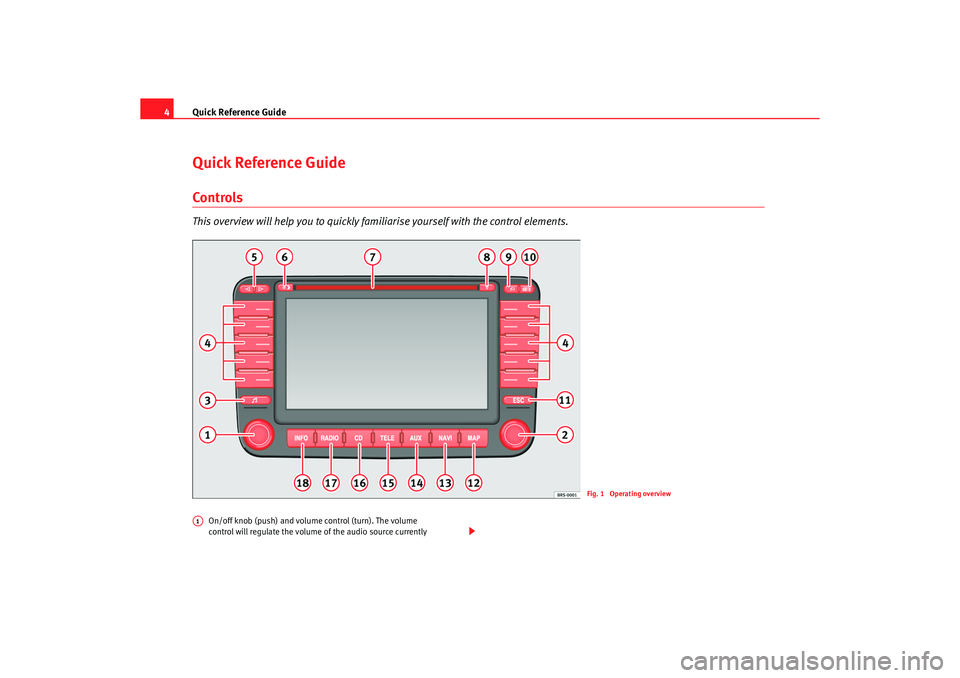
4Quick Reference GuideControlsThis overview will help you to quickly fami liarise yourself with the control elements.
On/off knob (push) and volume control (turn). The volu me
control will regulate the volume of the audio source curre ntly
Fig. 1 Operating overview
A1
radionaving Seite 4 Mittwo
ch, 30. März 2005 12:26 12
Page 6 of 50
Quick Reference Guide5
selected. A column will indicate the volume level. The volume o f
a telephone conversation can also be regulated using the
volume control.
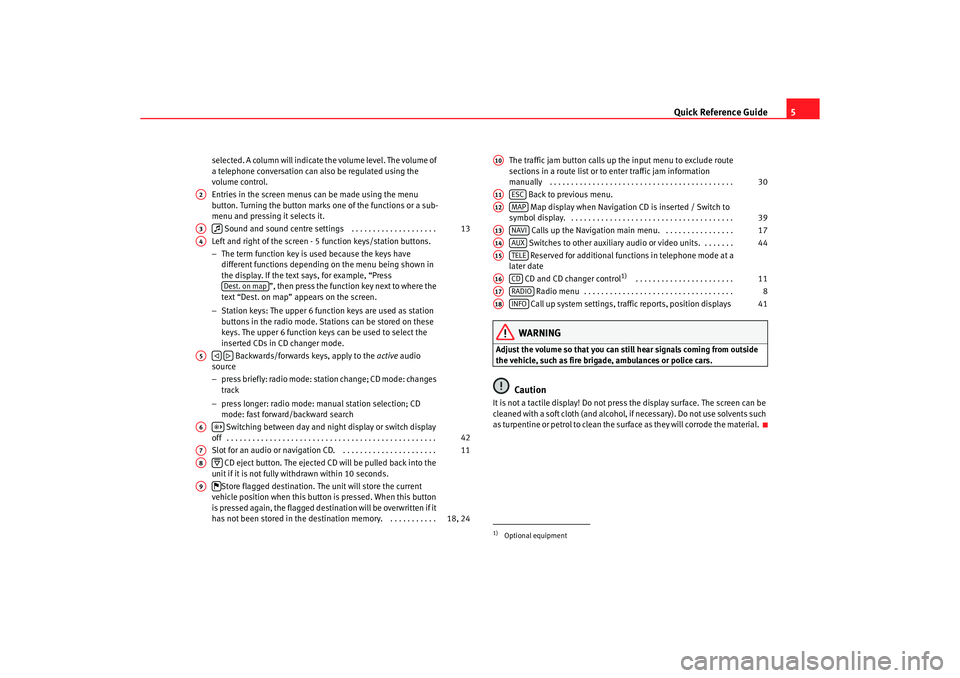
Entries in the screen menus can be made using the menu
button. Turning the button marks one of the function s or a sub-
menu and pressing it selects it.
Sound and sound centre settings . . . . . . . . . . . . . . . . . . . .
Left and right of the screen - 5 function keys/station butt ons.
− The term function key is used because the keys have
different functions depending on the menu being shown in
the display. If the text says, for example, “Press ”, then press the function key next to where the
text “Dest. on map” appears on the screen.
− Station keys: The upper 6 function keys are used as station
buttons in the radio mode. Stations can be stored on th ese
keys. The upper 6 function keys can be used to se lect the
inserted CDs in CD changer mode.
Backwards/forwards keys, apply to the active audio
source
− press briefly: radio mode: station change; CD mode: c hanges
track
− press longer: radio mode: manual station selection; CD
mode: fast forward/backward search
Switching between day and night display or switc h display
off . . . . . . . . . . . . . . . . . . . . . . . . . . . . . . . . . . . . . . . . . . . . . . . . .
Slot for an audio or navigation CD. . . . . . . . . . . . . . . . . . . . . . .
CD eject button. The ejected CD will be pulled back i nto the
unit if it is not fully withdrawn within 10 second s.
Store flagged destination. The unit will store the current
vehicle position when this button is pressed. When th is button
is pressed again, the flagged destination will be overwri tten if it
has not been stored in the destin ation memory. . . . . . . . . . . . The traffic jam button calls up the input menu to exclude route
sections in a route list or to enter traffic jam info rmation
manually . . . . . . . . . . . . . . . . . . . . . . . . . . . . . . . . . . . . . . . . . . .
Back to previous menu.
Map display when Navigation CD is inserted / Switch to
symbol display. . . . . . . . . . . . . . . . . . . . . . . . . . . . . . . . . . . . . . .
Calls up the Navigation main menu. . . . . . . . . . . . . . . . .
Switches to other auxiliary audio or video units. . . . . . . .
Reserved for additional functions in telephone mode at a
later date
CD and CD changer control
1)
. . . . . . . . . . . . . . . . . . . . . . .
Radio menu . . . . . . . . . . . . . . . . . . . . . . . . . . . . . . . . . . .
Call up system settings, traffic reports, position displays
WARNING
Adjust the volume so that you can still hear signals c oming from outside
the vehicle, such as fire brigade, ambulances or polic e cars.
Caution
It is not a tactile display! Do not press the display surface. The screen can be
cleaned with a soft cloth (and alcohol, if necessary). Do not use solvents such
as turpentine or petrol to clean the surface as they will c orrode the material.
A2A3
13
A4
Dest. on map
A5
A6
42
A7
11
A8
A9
18, 24
1)Optional equipmentA10
30
A11
ESC
A12
MAP
39
A13
NAVI
17
A14
AUX
44
A15
TELE
A16
CD
11
A17
RADIO
8
A18
INFO
41
radionaving Seite 5 Mittwo
ch, 30. März 2005 12:26 12
Page 7 of 50
Quick Reference Guide
6Display elements on the screenThis section describes the el ements seen in the display.
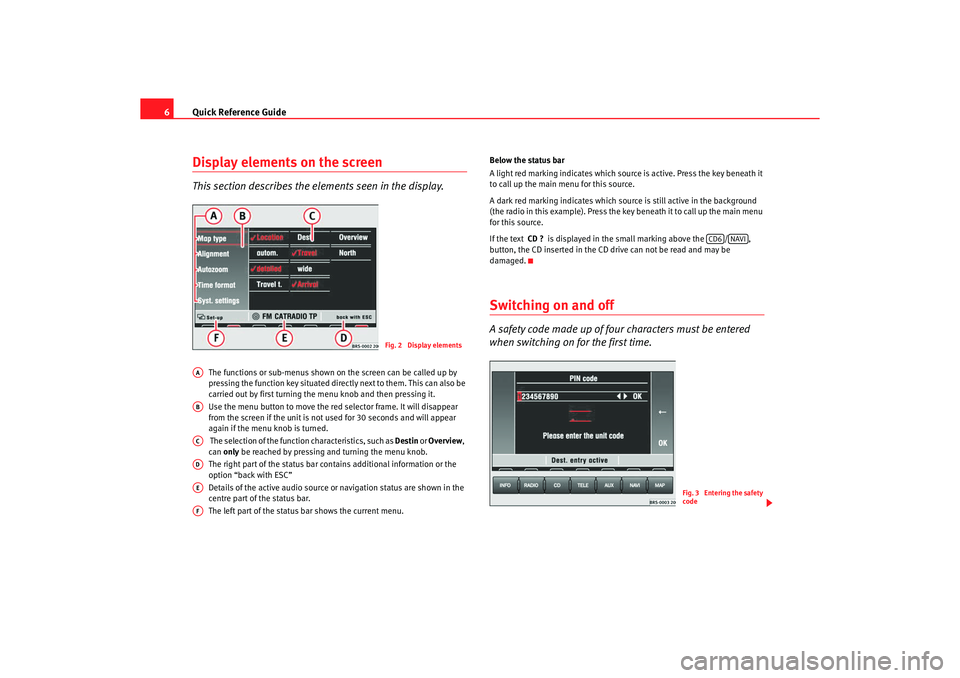
The functions or sub-menus shown on the screen can be called up by
pressing the function key situated directly next to th em. This can also be
carried out by first turning the menu knob and then pr essing it.
Use the menu button to move the red selector frame. It w ill disappear
from the screen if the unit is not used for 30 seconds and will appear
again if the menu knob is turned.
The selection of the function characteristics, such as Destin
or
Overview ,
can only be reached by pressing and turning the menu knob .
The right part of the status bar contains additional inf ormation or the
option “back with ESC”
Details of the active audio source or navigation st atus are shown in the
centre part of the status bar.
The left part of the status bar shows the current menu. Below the status bar
A light red marking indicates which source is active. Press t
he key beneath it
to call up the main menu for this source.
A dark red marking indicates which source is still active in the background
(the radio in this example). Press the ke y beneath it to call up the main menu
for this source.
If the text CD ? is displayed in the small marking above the / ,
button, the CD inserted in the CD drive can not be re ad and may be
damaged.
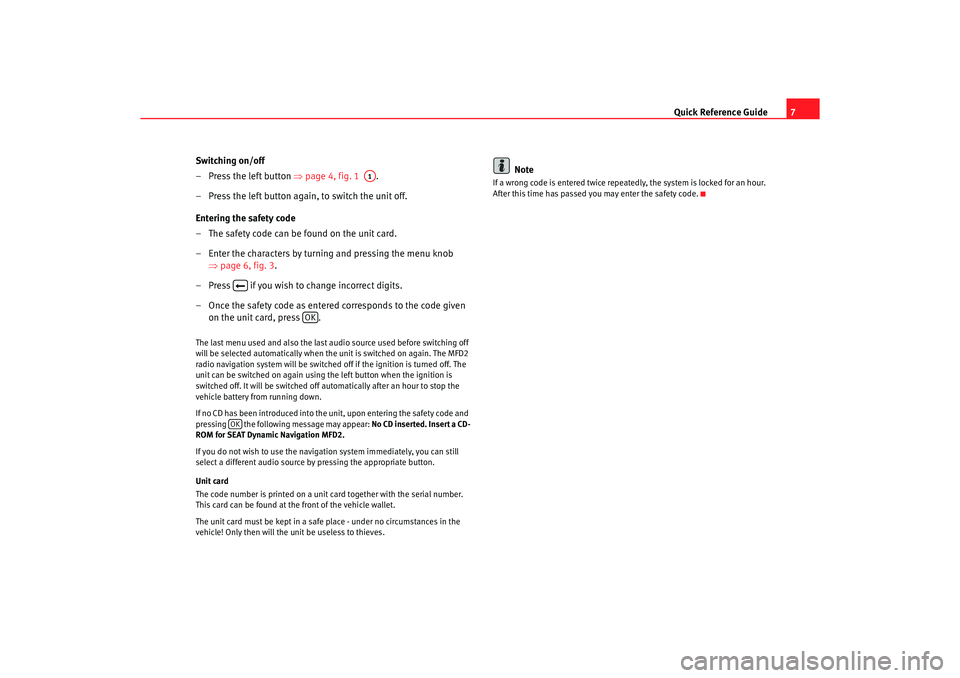
Switching on and offA safety code made up of four characters must be entered
when switching on for the first time.
Fig. 2 Display elements
AAABACADAEAF
CD6
NAVI
Fig. 3 Entering the safety
code
radionaving Seite 6 Mittwo ch, 30. März 2005 12:26 12
Page 8 of 50
Quick Reference Guide7
Switching on/off
– Press the left button ⇒page 4, fig. 1 .
– Press the left button again, to switch the unit off.
Entering the safety code
– The safety code can be found on the unit card.
– Enter the characters by turning and pressing the menu knob ⇒page 6, fig. 3 .
– Press if you wish to change incorrect digits.
– Once the safety code as entere d corresponds to the code given
on the unit card, press .
The last menu used and also the last audio source used before switching off
will be selected automatically when the unit is swi tched on again. The MFD2
radio navigation system will be switched off if the igni tion is turned off. The
unit can be switched on again using the left button w hen the ignition is
switched off. It will be switched off automatically aft er an hour to stop the
vehicle battery from running down.
If no CD has been introduced into the unit, upon entering th e safety code and
pressing the following message may appear: No CD inserted. Insert a CD-
ROM for SEAT Dynamic Navigation MFD2.
If you do not wish to use the navigation system immedi ately, you can still
select a different audio source by pressing the ap propriate button.
Unit card
The code number is printed on a unit card together with the serial number.
This card can be found at the front of the vehicle wallet.
The unit card must be kept in a safe place - under no ci rcumstances in the
vehicle! Only then will the unit be useless to thieves .
Note
If a wrong code is entered twice repeatedly, the system i s locked for an hour.
After this time has passed you may enter the safety code.
A1
OK
OK
radionaving Seite 7 Mittwo ch, 30. März 2005 12:26 12
Page 12 of 50
Radio / CD / Sound11
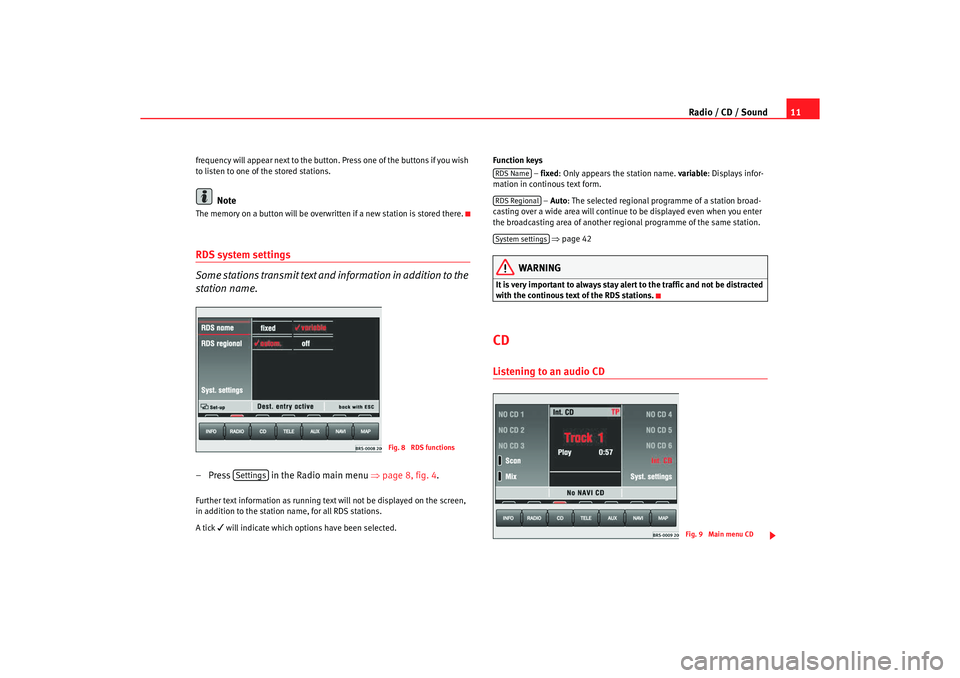
frequency will appear next to the button. Press one of the buttons if you wish
to listen to one of the stored stations.
Note
The memory on a button will be overwr itten if a new station is stored there.RDS system settings
Some stations transmit text and information in addition to the
station name.– Press in the Radio main menu ⇒
page 8, fig. 4 .Further text information as running text will not be displayed on the screen,
in addition to the station name, for all RDS stations .
A tick
will indicate which options have been selected. Function keys
– fixed : Only appears the station name. variable
: Displays infor-
mation in continous text form.
– Auto : The selected regional programme of a station broa d-
casting over a wide area will continue to be displayed ev en when you enter
the broadcasting area of another regional progr amme of the same station.
⇒ page 42
WARNING
It is very important to always stay alert to the traffic and not b e distracted
with the continous text of the RDS stations.CDListening to an audio CD
Fig. 8 RDS functions
Settings
RDS NameRDS RegionalSystem settings
Fig. 9 Main menu CD
radionaving Seite 11 Mittwoch, 30. März 2005 12 :26 12
Page 13 of 50
Radio / CD / Sound
12
Listening to a CD
– Press the ⇒
page 4, fig. 1 button. If a CD is already in the
player, the last played track will be selected, otherwis e the
following will appear briefly on the screen: “No Audio CD”.
– Insert a standard 12 cm audio CD. The play function will s tart
automatically.
Playing the previous or next track
– Press button or briefly .
Fast forward/reverse
– Press and hold button or .
Ejecting a CD
– Press ⇒
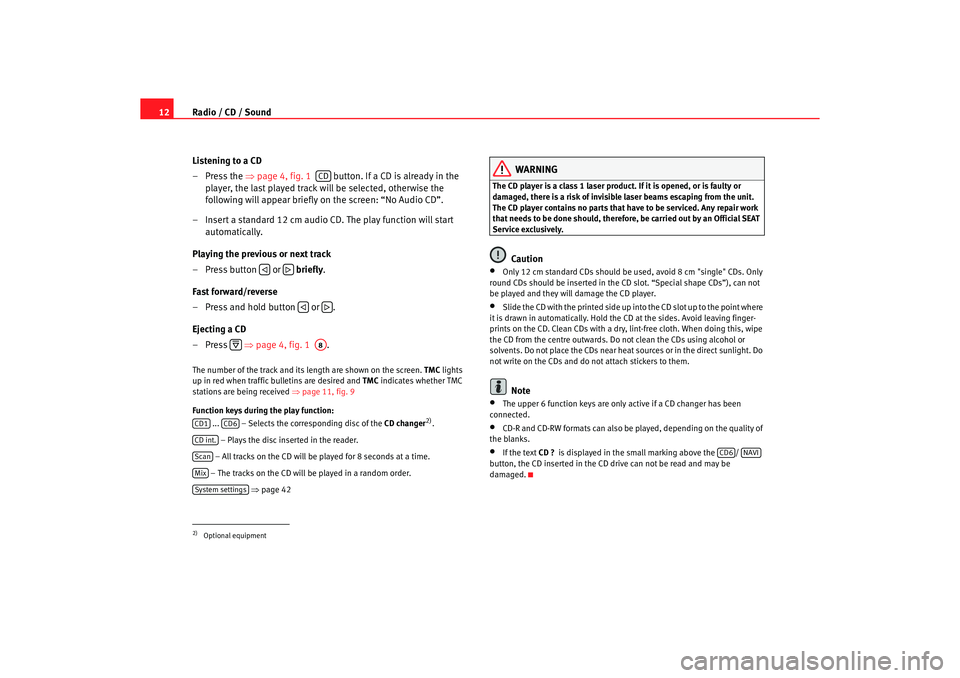
page 4, fig. 1 .The number of the track and its length are shown on the screen.
TMC
lights
up in red when traffic bulletins are desired and TMC
indicates whether TMC
stations are being received ⇒page 11, fig. 9
Function keys during the play function: ... – Selects the corresponding disc of the CD changer
2).
– Plays the disc inserted in the reader.
– All tracks on the CD will be played for 8 seconds at a time.
– The tracks on the CD will be played in a random order .
⇒ page 42
WARNING
The CD player is a class 1 laser product. If it is opened, or i s faulty or
damaged, there is a risk of invisible laser beams escapin g from the unit.
The CD player contains no parts that have to be servic ed. Any repair work
that needs to be done should, therefor e, be carried out by an Official SEAT
Service exclusively.
Caution
•
Only 12 cm standard CDs should be used, avoid 8 cm "single" CDs. Only
round CDs should be inserted in the CD slot. “Spe cial shape CDs”), can not
be played and they will damage the CD player.
•
Slide the CD with the printed side up into the CD slot up t o the point where
it is drawn in automatically. Hold the CD at the sides. A void leaving finger-
prints on the CD. Clean CDs with a dry, lint-free cloth. When doing this, wipe
the CD from the centre outwards. Do not clean the CDs u sing alcohol or
solvents. Do not place the CDs near heat sources or in the direct sunlight. Do
not write on the CDs and do not attach stickers to them.Note
•
The upper 6 function keys are only active if a CD chan ger has been
connected.
•
CD-R and CD-RW formats can also be played, dependi ng on the quality of
the blanks.
•
If the text CD ?
is displayed in the small marking above the /
button, the CD inserted in the CD drive can not be read and may be
damaged.
2)Optional equipment
CD
A8
CD1
CD6
CD int.ScanMixSystem settings
CD6
NAVI
radionaving Seite 12 Mittwoch, 30. März 2005 12 :26 12
Page 15 of 50
Radio / CD / Sound
14
– Press the button ⇒
page 4, fig. 1 to open the Sound main
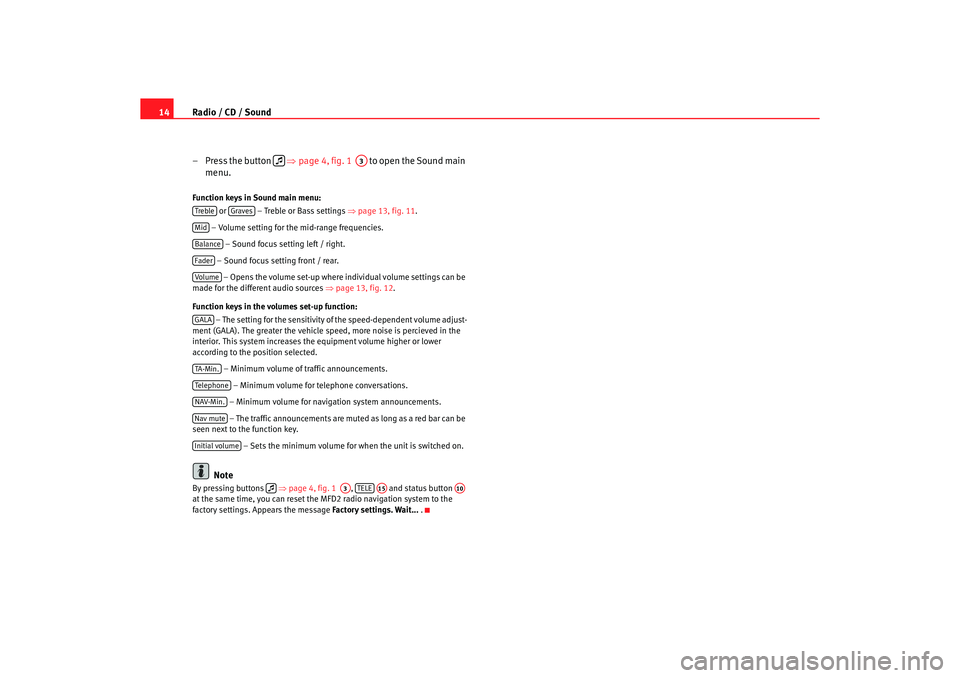
menu.Function keys in Sound main menu:
or – Treble or Bass settings ⇒
page 13, fig. 11 .
– Volume setting for the mid-range frequencies. – Sound focus setting left / right.
– Sound focus setting front / rear. – Opens the volume set-up where in dividual volume settings can be
made for the different audio sources ⇒
page 13, fig. 12 .
Function keys in the volumes set-up function: – The setting for the sensitivity of the speed-dependent v olume adjust-
ment (GALA). The greater the vehicle speed, more noise i s percieved in the
interior. This system increases the equipment volume h igher or lower
according to the position selected.
– Minimum volume of traffic announcements.
– Minimum volume for telephone conversations.
– Minimum volume for naviga tion system announcements.
– The traffic announcements are mu ted as long as a red bar can be
seen next to the function key.
– Sets the minimum volume for when the unit is switched on.
Note
By pressing buttons ⇒ page 4, fig. 1 , and status button
at the same time, you can reset the MFD2 radio na vigation system to the
factory settings. Appears the message Factory settings. Wait...
.
A3
Treble
Graves
MidBalanceFaderVolum eGALATA -M in .Tel ep h on eNAV-Min.Nav muteInitial volume
A3
TELE
A15
A10
radionaving Seite 14 Mittwoch, 30. März 2005 12 :26 12
Page 42 of 50
Information and system settings41
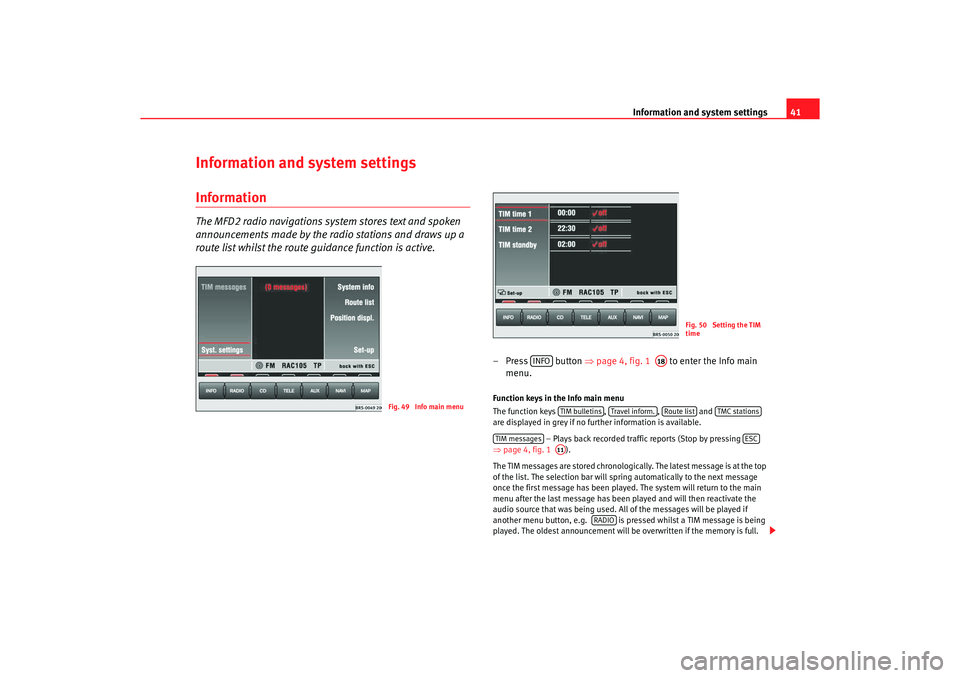
Information and system settingsInformation The MFD2 radio navigations syst
em stores text and spoken
announcements made by the radio stations and draws up a
route list whilst the route guidance function is active.
– Press button ⇒
page 4, fig. 1 to enter the Info main
menu. Function keys in the Info main menu
The function keys ,
, and
are displayed in grey if no further information is available.
– Plays back recorded traffic reports (Stop by pressing
⇒ page 4, fig. 1 ).
The TIM messages are stored chronologically. The latest me ssage is at the top
of the list. The selection bar will spring automatica lly to the next message
once the first message has been played. The sys tem will return to the main
menu after the last message has been played and will th en reactivate the
audio source that was being used. All of the mes sages will be played if
another menu button, e.g. is pressed whilst a TIM message is being
played. The oldest announce ment will be overwritten if the memory is full.
Fig. 49 Info main menu
Fig. 50 Setting the TIM
time
INFO
A18
TIM bulletins
Travel infor m.
Route list
TMC stations
TIM messages
ESC
A11
RADIO
radionaving Seite 41 Mittwoch, 30. März 2005 12 :26 12
Page 45 of 50
External units
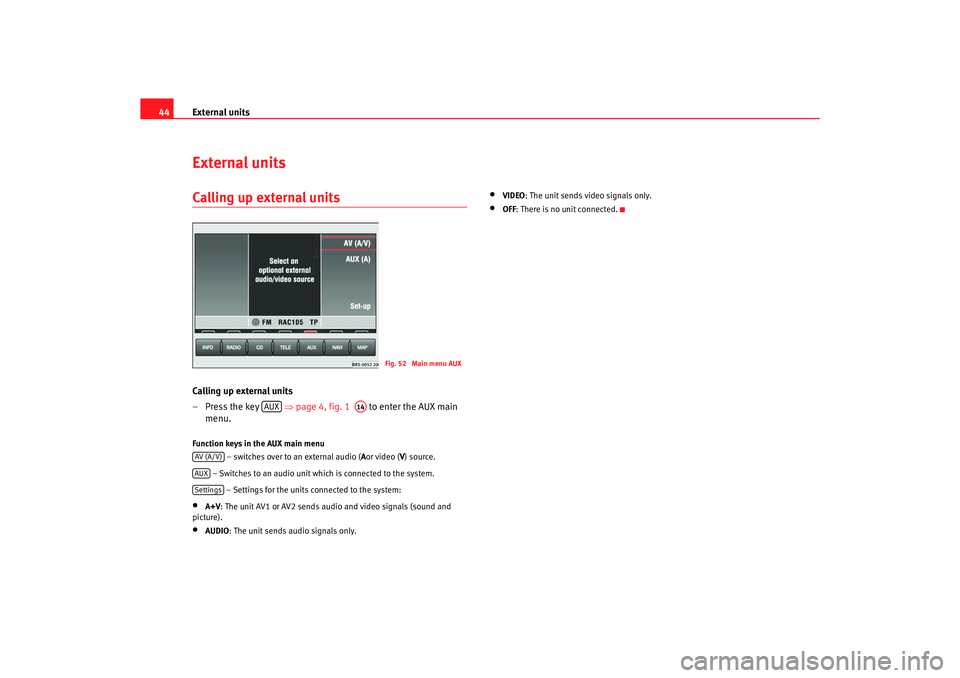
44External unitsCalling up external unitsCalling up external units
– Press the key ⇒page 4, fig. 1 to enter the AUX main
menu.Function keys in the AUX main menu
– switches over to an external audio ( A
or video ( V
) source.
– Switches to an audio unit which is connected to the syste m.
– Settings for the units connected to the system:•
A+V : The unit AV1 or AV2 sends audio and video sign als (sound and
picture).
•
AUDIO : The unit sends audio signals only.
•
VIDEO: The unit sends video signals only.
•
OFF
: There is no unit connected.
Fig. 52 Main menu AUX
AUX
A14
AV (A/V)AUXSettings
radionaving Seite 44 Mittwoch, 30. März 2005 12 :26 12