CD player Seat Toledo 2008 RADIO-NAVIGATION
[x] Cancel search | Manufacturer: SEAT, Model Year: 2008, Model line: Toledo, Model: Seat Toledo 2008Pages: 96, PDF Size: 3.72 MB
Page 2 of 96
Contents1
ContentsGeneral information
. . . . . . . . . . . . . . . .
Quick Reference Guide
. . . . . . . . . . . .
Equipment diagram
. . . . . . . . . . . . . . . . . . . . . . .
Operation whilst the vehicle is in motion
. . .
Switching on or off
. . . . . . . . . . . . . . . . . . . . . . . .
General usage notes
. . . . . . . . . . . . . . . . . . . . . .
About this operating manual
. . . . . . . . . . . . . .
Resetting the unit to the factory settings
. . .
Sound and volume settings
. . . . . . . . . . . . . . .
RADIO function selection buttonRadio mode
. . . . . . . . . . . . . . . . . . . . . . . . . . . . . .
Traffic news monitoring TP (Traffic
Programme)
. . . . . . . . . . . . . . . . . . . . . . . . . . . . . .
MEDIA function selection buttonNotes and requirements
. . . . . . . . . . . . . . . . . .
MEDIA main menu
. . . . . . . . . . . . . . . . . . . . . . . .
Inserting a media source
. . . . . . . . . . . . . . . . . .
Opening and operating media sources
. . . . .
MEDIA-IN multi-media interface (MDI)
. . . . . .
Important information for operating CD
players
. . . . . . . . . . . . . . . . . . . . . . . . . . . . . . . . . . .
NAV (navigation system) function
selection button
. . . . . . . . . . . . . . . . . . . .
Introduction
. . . . . . . . . . . . . . . . . . . . . . . . . . . . . .
Navigation data media: CD and memory
cards
. . . . . . . . . . . . . . . . . . . . . . . . . . . . . . . . . . . .
Navigation main menu
. . . . . . . . . . . . . . . . . . . .
Input windows
. . . . . . . . . . . . . . . . . . . . . . . . . . . .
Destination entry
. . . . . . . . . . . . . . . . . . . . . . . . .
Destination memory
. . . . . . . . . . . . . . . . . . . . . .
Route guidance
. . . . . . . . . . . . . . . . . . . . . . . . . . .
TRAF function selection button
. .
Displaying TMC traffic reports
. . . . . . . . . . . . .
System settings
. . . . . . . . . . . . . . . . . . . . .
Overview
. . . . . . . . . . . . . . . . . . . . . . . . . . . . . . . . .
Anti-theft coding
. . . . . . . . . . . . . . . . . . . .
Entering the PIN
. . . . . . . . . . . . . . . . . . . . . . . . . .
Index
. . . . . . . . . . . . . . . . . . . . . . . . . . . . . . . . . .
2
3
3
6
6
7
10
11
12
14
14
23
25
25
28
29
34
41
45 47
47
49
52
54
58
65
73
84
84
86
86
88
88
89
media_system_ingles.book Seite 1
Donnerstag, 5. Februar 2009 3:31 15
Page 5 of 96
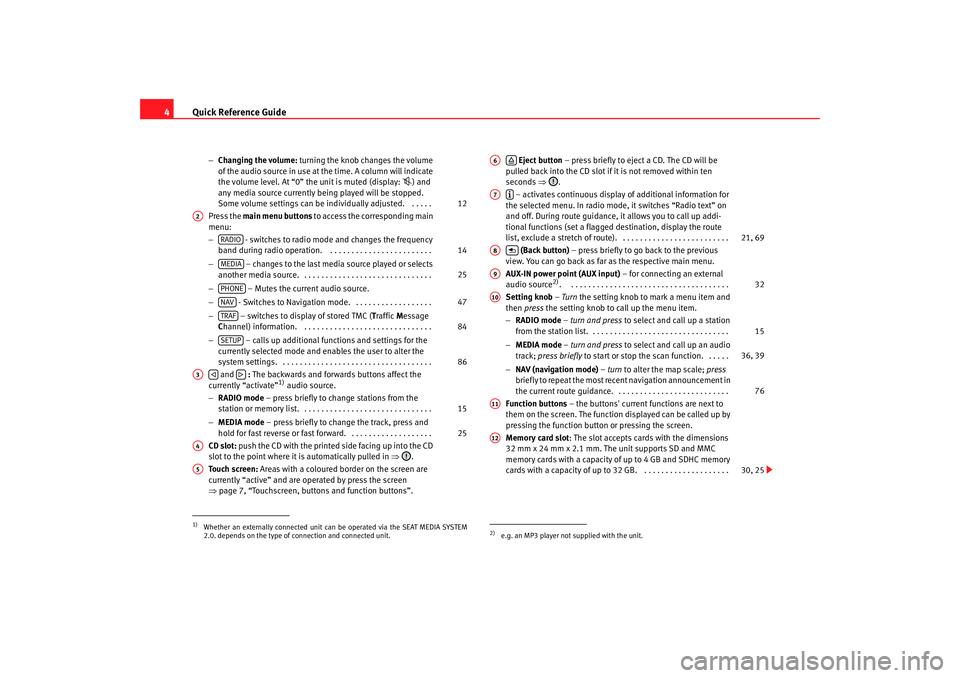
Quick Reference Guide
4
− Changing the volume: turning the knob changes the volume
of the audio source in use at the time. A column will indicate
the volume level. At “0” the unit is muted (display:
) and
any media source currently being played will be stopped.
Some volume settings can be in dividually adjusted. . . . . .
Press the main menu buttons to access the corresponding main
menu:
− - switches to radio mode and changes the frequency
band during radio operation. . . . . . . . . . . . . . . . . . . . . . . . .
− – changes to the last media source played or selects
another media source. . . . . . . . . . . . . . . . . . . . . . . . . . . . . . .
− – Mutes the current audio source.
− - Switches to Navigation mode. . . . . . . . . . . . . . . . . . .
− – switches to display of stored TMC ( Traffic Message
C hannel) information. . . . . . . . . . . . . . . . . . . . . . . . . . . . . . .
− – calls up additional functions and settings for the
currently selected mode and en ables the user to alter the
system settings. . . . . . . . . . . . . . . . . . . . . . . . . . . . . . . . . . . .
and : The backwards and forwards buttons affect the
currently “activate”
1) audio source.
− RADIO mode – press briefly to change stations from the
station or memory list. . . . . . . . . . . . . . . . . . . . . . . . . . . . . . .
− MEDIA mode – press briefly to change the track, press and
hold for fast reverse or fast forward. . . . . . . . . . . . . . . . . . . .
CD slot: push the CD with the printed side facing up into the CD
slot to the point where it is automatically pulled in ⇒.
Touch screen: Areas with a coloured border on the screen are
currently “active” and are operated by press the screen
⇒ page 7, “Touchscreen, buttons and function buttons”.
Eject button – press briefly to eject a CD. The CD will be
pulled back into the CD slot if it is not removed within ten
seconds ⇒.
– activates continuous display of additional information for
the selected menu. In radio mode, it switches “Radio text” on
and off. During route guidance, it allows you to call up addi-
tional functions (set a flagged destination, display the route
list, exclude a stretch of route). . . . . . . . . . . . . . . . . . . . . . . . . .
(Back button) – press briefly to go back to the previous
view. You can go back as far as the respective main menu.
AUX-IN power point (AUX input) – for connecting an external
audio source
2). . . . . . . . . . . . . . . . . . . . . . . . . . . . . . . . . . . . . .
Setting knob – Turn the setting knob to mark a menu item and
then press the setting knob to call up the menu item.
− RADIO mode – turn and press to select and call up a station
from the station list. . . . . . . . . . . . . . . . . . . . . . . . . . . . . . . . .
− MEDIA mode – turn and press to select and call up an audio
track; press briefly to start or stop the scan function. . . . . .
− NAV (navigation mode) – turn to alter the map scale; press
briefly to repeat the most recent navigation announcement in
the current route guidance. . . . . . . . . . . . . . . . . . . . . . . . . . .
Function buttons – the buttons' current functions are next to
them on the screen. The function displayed can be called up by
pressing the function button or pressing the screen.
Memory card slot : The slot accepts cards with the dimensions
32 mm x 24 mm x 2.1 mm. The unit supports SD and MMC
memory cards with a capacity of up to 4 GB and SDHC memory
cards with a capacity of up to 32 GB. . . . . . . . . . . . . . . . . . . . .
1)Whether an externally connected unit can be operated via the SEAT MEDIA SYSTEM
2.0. depends on the type of connection and connected unit.
12
A2
RADIO
14
MEDIA
25
PHONENAV
47
TRAF
84
SETUP
86
A3
15
25
A4A5
2)e.g. an MP3 player not supplied with the unit.A6
A7
21, 69
A8
A9
32
A10
15
36, 39
76
A11A12
30, 25
media_system_ingles.book Seite 4 Donnerstag, 5. Februar 2009 3:31 15
Page 29 of 96
MEDIA function selection button
28MEDIA main menuOverview
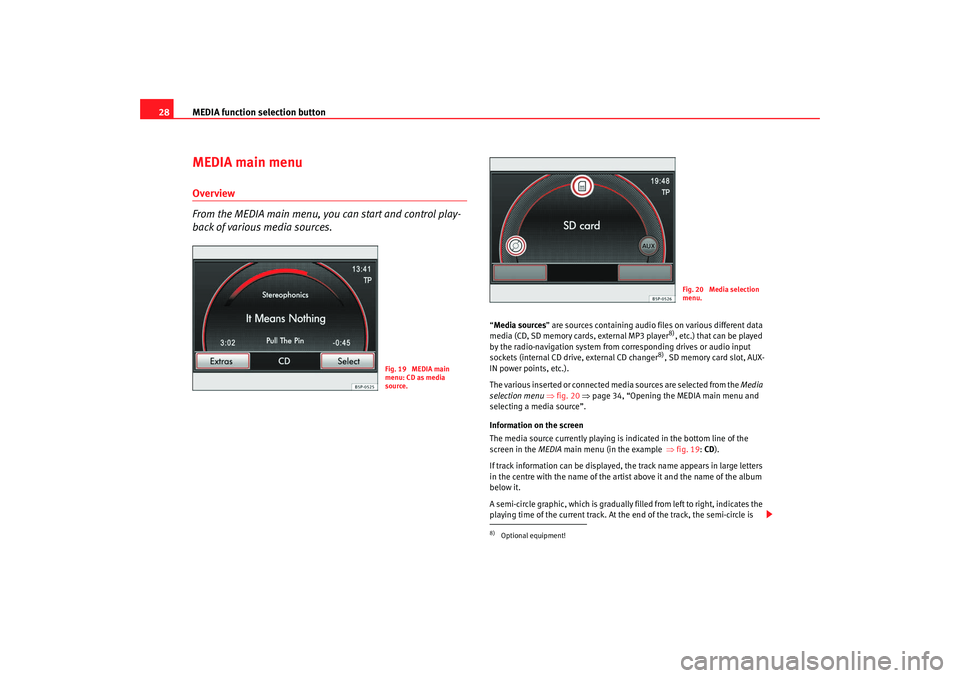
From the MEDIA main menu, you can start and control play-
back of various media sources.
“ Media sources ” are sources containing audio files on various different data
media (CD, SD memory cards, external MP3 player
8), etc.) that can be played
by the radio-navigation system from corresponding drives or audio input
sockets (internal CD drive, external CD changer
8), SD memory card slot, AUX-
IN power points, etc.).
The various inserted or connected media sources are selected from the Media
selection menu ⇒fig. 20 ⇒page 34, “Opening the MEDIA main menu and
selecting a media source”.
Information on the screen
The media source currently playing is indicated in the bottom line of the
screen in the MEDIA main menu (in the example ⇒fig. 19 : CD ).
If track information can be displayed, the track name appears in large letters
in the centre with the name of the artist above it and the name of the album
below it.
A semi-circle graphic, which is gradually filled from left to right, indicates the
playing time of the current track. At the end of the track, the semi-circle is
Fig. 19 MEDIA main
menu: CD as media
source.
8)Optional equipment!
Fig. 20 Media selection
menu.
media_system_ingles.book Seite 28 Donnerstag, 5. Februar 2009 3:31 15
Page 31 of 96
MEDIA function selection button
30
Inserting a CD
– Push the CD with the printed side facing up into the CD slot to the point where it is automatically pulled in ⇒. Playback starts
automatically except in the following case: ⇒page 26, “Data
medium cannot be read”.
Ejecting a CD
– Press to move the CD in the internal CD drive to the eject posi- tion.
– Remove the CD.If a CD cannot be read, immediately after it is inserted it will be ejected again
and then automatically drawn in again to start another attempt to read it. If
the CD still cannot be read after the third attempt, a message inform the user
will appear on the screen. When you confirm the message, the CD will be
ejected.
If a CD is not removed from the eject position within 10 seconds, it is retracted
again to prevent damage and must then be ejected manually.
The media source being played is displayed in the bottom line of the screen
in the MEDIA main menu ⇒page 29, fig. 21.
To reselect a CD that is already in the CD drive ⇒page 34, “Opening the
MEDIA main menu and selecting a media source”.
WARNING
Refer to the notes on using CD players ⇒ page 45.
Caution
•
Inserting a new CD while an inserted CD is being ejected can destroy the
CD drive in the unit. You must wait until the CD is ejected before trying to
insert a new CD.
•
Refer to the additional notes on handling CDs ⇒page 45.Note
•
Refer to the notes on requirements for data media, folders and playlists
⇒ page 25.
•
Uneven road surfaces and strong vibrations may cause the CD to jump.
The CD play function should be switched off in this case.
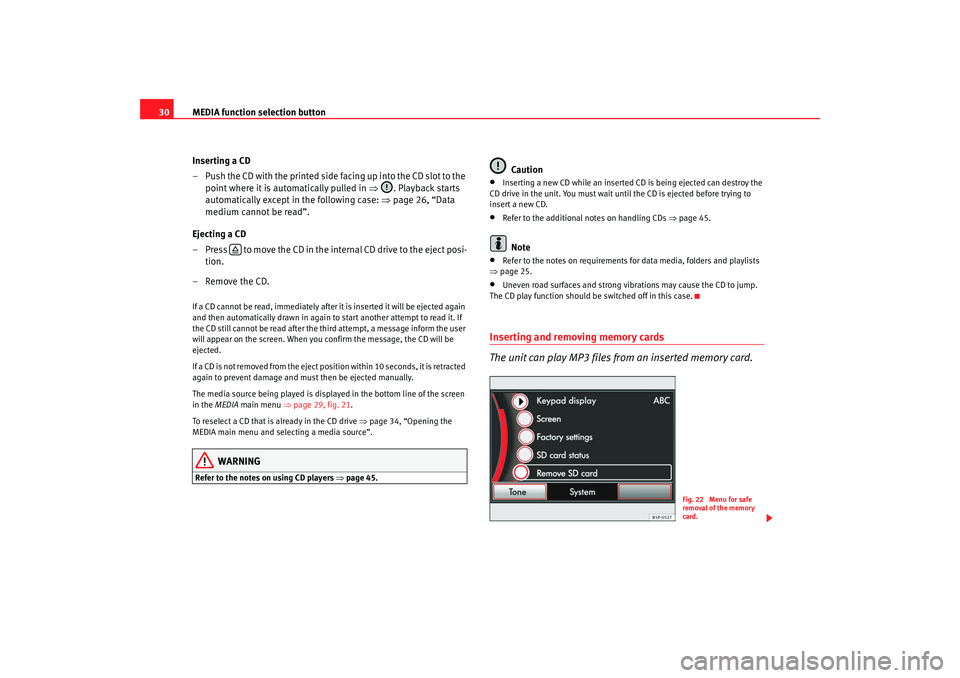
Inserting and removing memory cards
The unit can play MP3 files from an inserted memory card.
Fig. 22 Menu for safe
removal of the memory
card.
media_system_ingles.book Seite 30 Donnerstag, 5. Februar 2009 3:31 15
Page 33 of 96
MEDIA function selection button
32•
Never remove a memory card while data from a navigation CD are being
copied to it ⇒ page 50, “Copying process”.Note
Refer to the notes on requirements for data media, folders and playlists
⇒page 25.Connecting an external audio source to the AUX-IN socket
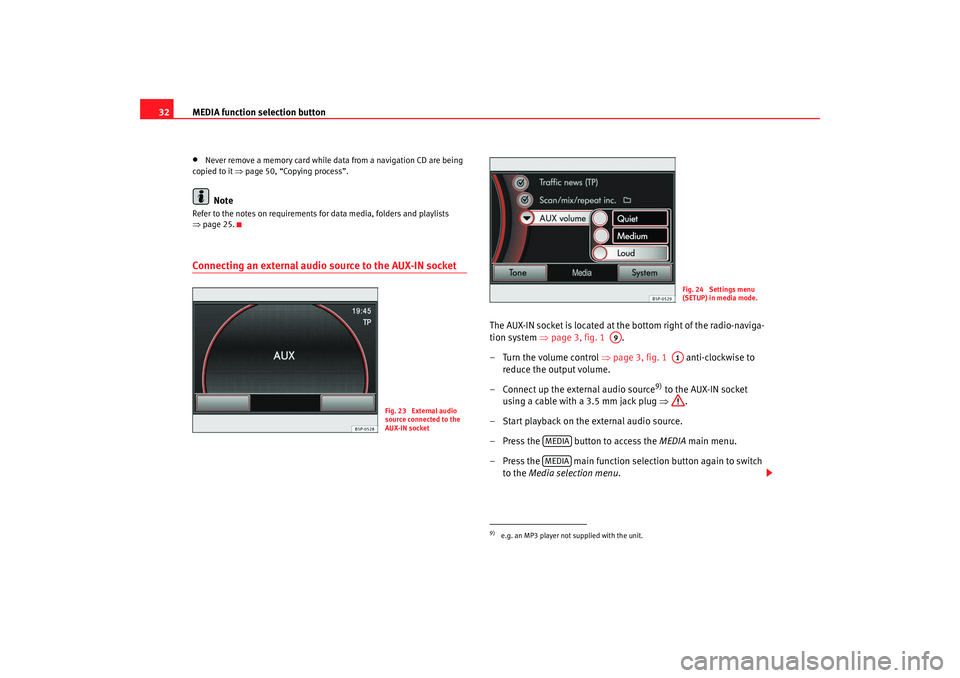
The AUX-IN socket is located at the bottom right of the radio-naviga-
tion system ⇒page 3, fig. 1 .
– Turn the volume control ⇒page 3, fig. 1 anti-clockwise to
reduce the output volume.
– Connect up the external audio source
9) to the AUX-IN socket
using a cable with a 3.5 mm jack plug ⇒.
– Start playback on the external audio source.
– Press the button to access the MEDIA main menu.
– Press the main function selection button again to switch to the Media selection menu .
Fig. 23 External audio
source connected to the
AUX-IN socket
9)e.g. an MP3 player not supplied with the unit.
Fig. 24 Settings menu
(SETUP) in media mode.
A9
A1
MEDIAMEDIA
media_system_ingles.book Seite 32 Donnerstag, 5. Februar 2009 3:31 15
Page 36 of 96
MEDIA function selection button35
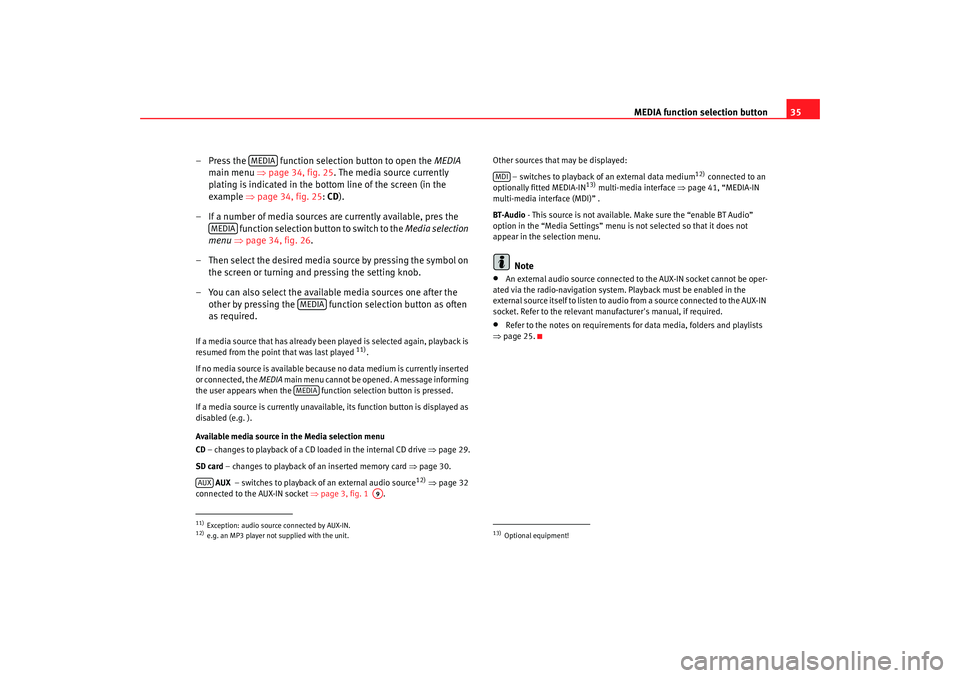
– Press the function selection button to open the MEDIA
main menu ⇒ page 34, fig. 25 . The media source currently
plating is indicated in the bottom line of the screen (in the
example ⇒page 34, fig. 25 : CD ).
– If a number of media sources are currently available, pres the function selection button to switch to the Media selection
menu ⇒page 34, fig. 26 .
– Then select the desired media source by pressing the symbol on the screen or turning and pressing the setting knob.
– You can also select the available media sources one after the other by pressing the function selection button as often
as required.
If a media source that has already been played is selected again, playback is
resumed from the point that was last played
11).
If no media source is available becaus e no data medium is currently inserted
or connected, the MEDIA main menu cannot be opened. A message informing
the user appears when the functi on selection button is pressed.
If a media source is currently unavailable, its function button is displayed as
disabled (e.g. ).
Available media source in the Media selection menu
CD – changes to playback of a CD loaded in the internal CD drive ⇒page 29.
SD card – changes to playback of an inserted memory card ⇒page 30.
AUX – switches to playback of an external audio source
12) ⇒ page 32
connected to the AUX-IN socket ⇒page 3, fig. 1 . Other sources that may be displayed:
– switches to playback of an external data medium
12) connected to an
optionally fitted MEDIA-IN
13) multi-media interface ⇒page 41, “MEDIA-IN
multi-media interface (MDI)” .
BT-Audio - This source is not available. Make sure the “enable BT Audio”
option in the “Media Settings” menu is not selected so that it does not
appear in the selection menu.
Note
•
An external audio source connected to the AUX-IN socket cannot be oper-
ated via the radio-navigation system. Playback must be enabled in the
external source itself to listen to audio from a source connected to the AUX-IN
socket. Refer to the relevant manufacturer's manual, if required.
•
Refer to the notes on requirements for data media, folders and playlists
⇒ page 25.
11)Exception: audio source connected by AUX-IN.12)e.g. an MP3 player not supplied with the unit.
MEDIA
MEDIA
MEDIAMEDIA
AUX
A9
13)Optional equipment!MDI
media_system_ingles.book Seite 35 Donnerstag, 5. Februar 2009 3:31 15
Page 42 of 96
MEDIA function selection button41
MEDIA-IN multi-media interface (MDI)Description
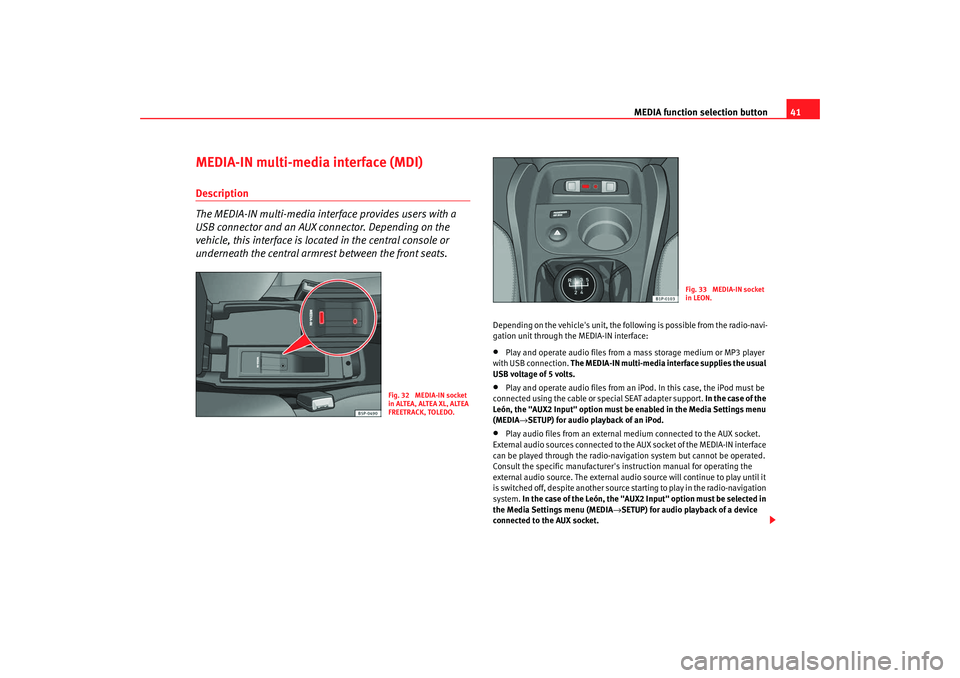
The MEDIA-IN multi-media interface provides users with a
USB connector and an AUX connector. Depending on the
vehicle, this interface is located in the central console or
underneath the central armrest between the front seats.
Depending on the vehicle's unit, the following is possible from the radio-navi-
gation unit through the MEDIA-IN interface:•
Play and operate audio files from a mass storage medium or MP3 player
with USB connection. The MEDIA-IN multi-media interface supplies the usual
USB voltage of 5 volts.
•
Play and operate audio files from an iPod. In this case, the iPod must be
connected using the cable or special SEAT adapter support. In the case of the
León, the "AUX2 Input" option must be enabled in the Media Settings menu
(MEDIA →SETUP) for audio playback of an iPod.
•
Play audio files from an external medium connected to the AUX socket.
External audio sources connected to the AUX socket of the MEDIA-IN interface
can be played through the radio-navigation system but cannot be operated.
Consult the specific manufacturer's instruction manual for operating the
external audio source. The external audio source will continue to play until it
is switched off, despite another source starting to play in the radio-navigation
system. In the case of the León, the "AUX2 Input" option must be selected in
the Media Settings menu (MEDIA →SETUP) for audio playback of a device
connected to the AUX socket.
Fig. 32 MEDIA-IN socket
in ALTEA, ALTEA XL, ALTEA
FREETRACK, TOLEDO.
Fig. 33 MEDIA-IN socket
in LEON.
media_system_ingles.book Seite 41 Donnerstag, 5. Februar 2009 3:31 15
Page 43 of 96
MEDIA function selection button
42•
If the vehicle is equipped with a Rear Seat Entertainment system, audio
from a portable multi-media device connected to the AUX RSE socket can be
played through the radio-navigation system. To play audio from a device
connected to this socket, enable the "AUX2 Input" option in the Media
Settings menu (MEDIA →SETUP) . Make sure no other multi-media device or
audio cable is connected to the MEDIA-IN interface, as these take playback
priority over the AUX2 input. Refer to the Rear Seat Entertainment system
manual for further information.
WARNING
The risk of injury during a sudden braking manoeuvre or in an accident is
increased if the glove compartment cover or armrest is open.•
Always keep the glove compartment and armrest closed while the
vehicle is in motion.WARNING
Loose objects inside the vehicle may obst ruct the driver and lead to serious
injuries.•
The external audio data medium must never be placed on the instru-
ment panel. A sudden driving manoeuvre could cause the device to be flung
through the vehicle interior and injure occupants.
•
The external audio source must never be placed close to an airbag. If an
airbag is triggered, the device could be flung towards the compartment and
injure the vehicle passengers.
•
Occupants must not have the data medium in their hands or placed on
their legs while the vehicle is in motion. A sudden driving manoeuvre could
cause the device to be flung through the vehicle interior and injure occu-
pants.
•
The wires connecting the external data medium must be arranged so
they do not obstruct you when driving.
Note
•
Only audio files readable through th e MEDIA-IN socket will be displayed
and played. Where a medium connected contains damaged files or files in
unreadable formats, these will not be displayed.
•
USB connection takes priority over the MEDIA-IN interface AUX socket.
Either of these, or an iPod adapter where applicable, takes priority over the
AUX RSE socket. Therefore, to play audio from a medium connected to the
AUX RSE socket, make sure there is no device or cable connected to the
MEDIA-IN interface.
•
You can disconnect the connection with the external medium whenever
required without losing data, independent to the indications of the external
data media.
External data media requirements •
The unit only supports external data media and USB mass storage devices
that comply with the USB 2.0 specifications.
•
External data media must use a FAT file system, either FAT16 (< 2 GB) or
FAT32 (> 2 GB) (FAT: File Allocation Table)
•
In the case of MTP players (Media Transfer Protocol), which have the
“PlaysForSure” or “ReadyForVista” logo, factors such as the battery status
and the quantity of data may affect the way these devices respond to commu-
nication via the MEDIA-IN multi-media in terface. It may take several minutes
before the MTP player is ready to play.
•
When playing files from large hard drive memories with many files and
complex file structures (a large numbe r of folders and subfolders, non-play-
able files, etc.), there may be delays in the reading of audio files. The
connected device may also affect the unit's response time.
•
The folder structure on the external data medium should not have more
than eight folder levels. A folder should not contain more than 1000 items.
media_system_ingles.book Seite 42 Donnerstag, 5. Februar 2009 3:31 15
Page 44 of 96
MEDIA function selection button43
•
USB extension cables and USB hubs may not be used to connect up an
external data medium.
•
If a data medium is divided into several partitions, only the first partition
with compatible audio files will be used.
•
The unit does not support memory card adapters and these may lead to
malfunctions.
•
Malfunctions may occur if the software on an external MP3 player has
been updated with a manufacturer's firmware guarantee.
•
It may be necessary to switch on the eternal data medium or select the
appropriate data mode.
•
Please refer to the respective manufact urer's manual for instructions on
the operation of the external data medium.
Supported file formats The operation and performance of the playable file formats on the unit are the
same as for MP3 compressed audio files and are therefore not described
separately here.•
The radio-navigation system can play and control audio files of the
formats MP3, WMA, OGG Vorbis and AAC from an external data medium.
•
The unit supports playlists in the formats PLS, B4S, ASX and WPL.
•
The unit cannot play WMA audio files (Windows Media Audio) that are
copyright protected by the DRM process (Digital Rights Management).
•
In general, no copyright protected files can be played (e.g. M4P).
•
It is not possible to play files in 3GP format or “WMA lossless” files.
Note that there are no MP3 files stored in a playlist. A playlist only determines
a certain playing order. If a playlist cannot be played, check that the “relative
paths” are correct, i.e. that the MP3 files on the data medium are actually
stored at the locations referenced by the playlist.
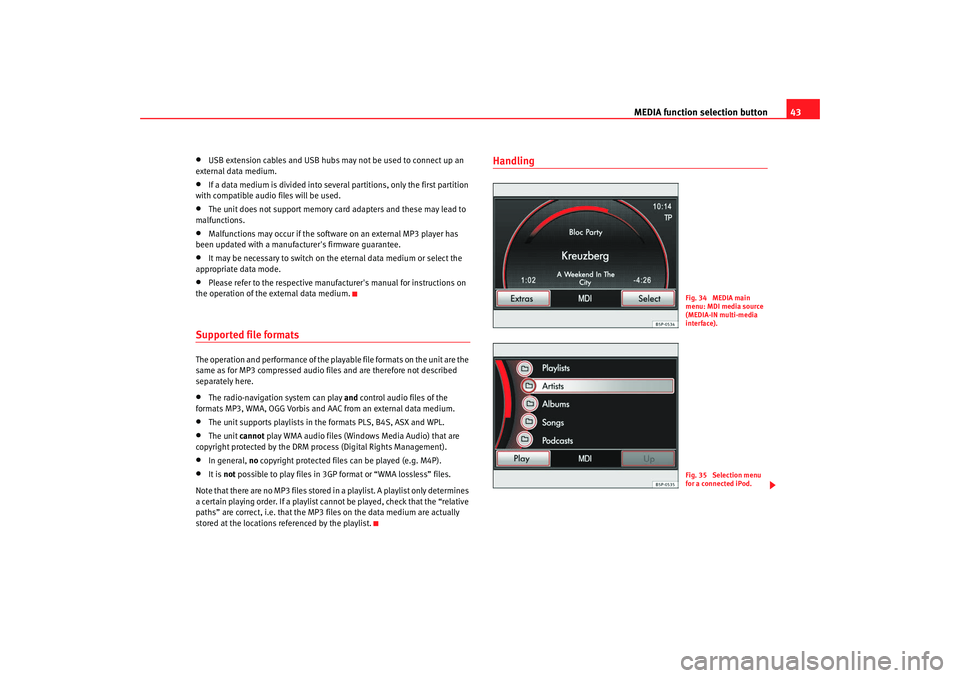
Handling
Fig. 34 MEDIA main
menu: MDI media source
(MEDIA-IN multi-media
interface).Fig. 35 Selection menu
for a connected iPod.
media_system_ingles.book Seite 43 Donnerstag, 5. Februar 2009 3:31 15
Page 45 of 96
MEDIA function selection button
44
Connecting a mass storage device or MP3 player with USB
connection
– Connect the device to the USB connector of the MEDIA-IN inter-face.
– If necessary, start playback on the external medium.
Connecting an iPod
– Connect the iPod using the cable or special SEAT adapter support.
– In the case of the León, the "AUX2 Input" option must be enabled in the Media Settings menu (MEDIA →SETUP) for audio playback
of an iPod.
Connecting an external medium to the AUX socket
– Connect the medium to the AUX socket of the MEDIA-IN interface using the appropriate cable.
– In the case of the León, the "AUX2 Input" option must be selected in the Media Settings menu (MEDIA →SETUP) for audio playback
of a device connected to the AUX socket.
Handling via the radio-navigation system
– Press the “MEDIA” function selection button to open the MEDIA main menu.
– Press the “MEDIA" function selection button again if the main menu is not directly opened.
– Select the “MDI” source from the MEDIA main menu. – Further operation of the external data medium-
USB or iPod-
(changing track, selecting tracks and playback modes such as
scan and random play) is described in the appropriate chapters
of this manual - “Opening and operating media sources”.
– If an iPod is connected to the MEDIA-IN multi-media interface, a special iPod selection menu opens at the highest selection level,
allowing you to call up the iPod specific directories.
iPod
The selection menu for controlling a connected iPod always has the same
structure and can be operated in the usual way. Other aspects of operation
are the same as for a media source with MP3 files inserted into the radio-navi-
gation system.
Direct operation of the connected iPod is disabled while it is connected to the
multi-media interface.
When an iPod is connected, it is possible to adjust the input volume of the
multi-media interface.
Pressing the function sel ection button opens the Media settings
menu. There you can adjust the input volume by pressing the
function button, similar to the adjustment of the ⇒ page 33,
“Adjusting the output volume”.
Error messages and anomalies
The following error message may appear on the screen after an external data
medium is connected to the unit.
If the message “ Device is not supported” appears, then the external data
medium cannot be operated with the radio-navigation system or the adapter
cable used is not suitable. Check whether you are using the correct adapter
cable or, if possible, update the software of the external data medium and the
MEDIA-IN multi-media interface.
SETUP
MDI volume
AUX volume
media_system_ingles.book Seite 44 Donnerstag, 5. Februar 2009 3:31 15