start stop button Seat Toledo 2008 RADIO-NAVIGATION
[x] Cancel search | Manufacturer: SEAT, Model Year: 2008, Model line: Toledo, Model: Seat Toledo 2008Pages: 96, PDF Size: 3.72 MB
Page 5 of 96
Quick Reference Guide
4
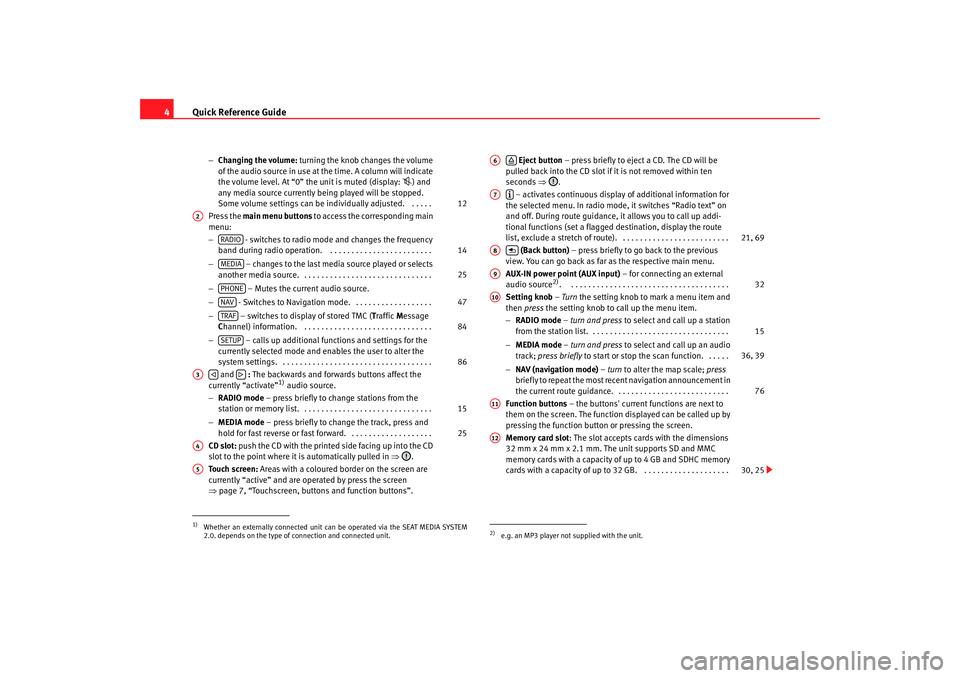
− Changing the volume: turning the knob changes the volume
of the audio source in use at the time. A column will indicate
the volume level. At “0” the unit is muted (display:
) and
any media source currently being played will be stopped.
Some volume settings can be in dividually adjusted. . . . . .
Press the main menu buttons to access the corresponding main
menu:
− - switches to radio mode and changes the frequency
band during radio operation. . . . . . . . . . . . . . . . . . . . . . . . .
− – changes to the last media source played or selects
another media source. . . . . . . . . . . . . . . . . . . . . . . . . . . . . . .
− – Mutes the current audio source.
− - Switches to Navigation mode. . . . . . . . . . . . . . . . . . .
− – switches to display of stored TMC ( Traffic Message
C hannel) information. . . . . . . . . . . . . . . . . . . . . . . . . . . . . . .
− – calls up additional functions and settings for the
currently selected mode and en ables the user to alter the
system settings. . . . . . . . . . . . . . . . . . . . . . . . . . . . . . . . . . . .
and : The backwards and forwards buttons affect the
currently “activate”
1) audio source.
− RADIO mode – press briefly to change stations from the
station or memory list. . . . . . . . . . . . . . . . . . . . . . . . . . . . . . .
− MEDIA mode – press briefly to change the track, press and
hold for fast reverse or fast forward. . . . . . . . . . . . . . . . . . . .
CD slot: push the CD with the printed side facing up into the CD
slot to the point where it is automatically pulled in ⇒.
Touch screen: Areas with a coloured border on the screen are
currently “active” and are operated by press the screen
⇒ page 7, “Touchscreen, buttons and function buttons”.
Eject button – press briefly to eject a CD. The CD will be
pulled back into the CD slot if it is not removed within ten
seconds ⇒.
– activates continuous display of additional information for
the selected menu. In radio mode, it switches “Radio text” on
and off. During route guidance, it allows you to call up addi-
tional functions (set a flagged destination, display the route
list, exclude a stretch of route). . . . . . . . . . . . . . . . . . . . . . . . . .
(Back button) – press briefly to go back to the previous
view. You can go back as far as the respective main menu.
AUX-IN power point (AUX input) – for connecting an external
audio source
2). . . . . . . . . . . . . . . . . . . . . . . . . . . . . . . . . . . . . .
Setting knob – Turn the setting knob to mark a menu item and
then press the setting knob to call up the menu item.
− RADIO mode – turn and press to select and call up a station
from the station list. . . . . . . . . . . . . . . . . . . . . . . . . . . . . . . . .
− MEDIA mode – turn and press to select and call up an audio
track; press briefly to start or stop the scan function. . . . . .
− NAV (navigation mode) – turn to alter the map scale; press
briefly to repeat the most recent navigation announcement in
the current route guidance. . . . . . . . . . . . . . . . . . . . . . . . . . .
Function buttons – the buttons' current functions are next to
them on the screen. The function displayed can be called up by
pressing the function button or pressing the screen.
Memory card slot : The slot accepts cards with the dimensions
32 mm x 24 mm x 2.1 mm. The unit supports SD and MMC
memory cards with a capacity of up to 4 GB and SDHC memory
cards with a capacity of up to 32 GB. . . . . . . . . . . . . . . . . . . . .
1)Whether an externally connected unit can be operated via the SEAT MEDIA SYSTEM
2.0. depends on the type of connection and connected unit.
12
A2
RADIO
14
MEDIA
25
PHONENAV
47
TRAF
84
SETUP
86
A3
15
25
A4A5
2)e.g. an MP3 player not supplied with the unit.A6
A7
21, 69
A8
A9
32
A10
15
36, 39
76
A11A12
30, 25
media_system_ingles.book Seite 4 Donnerstag, 5. Februar 2009 3:31 15
Page 9 of 96
Quick Reference Guide
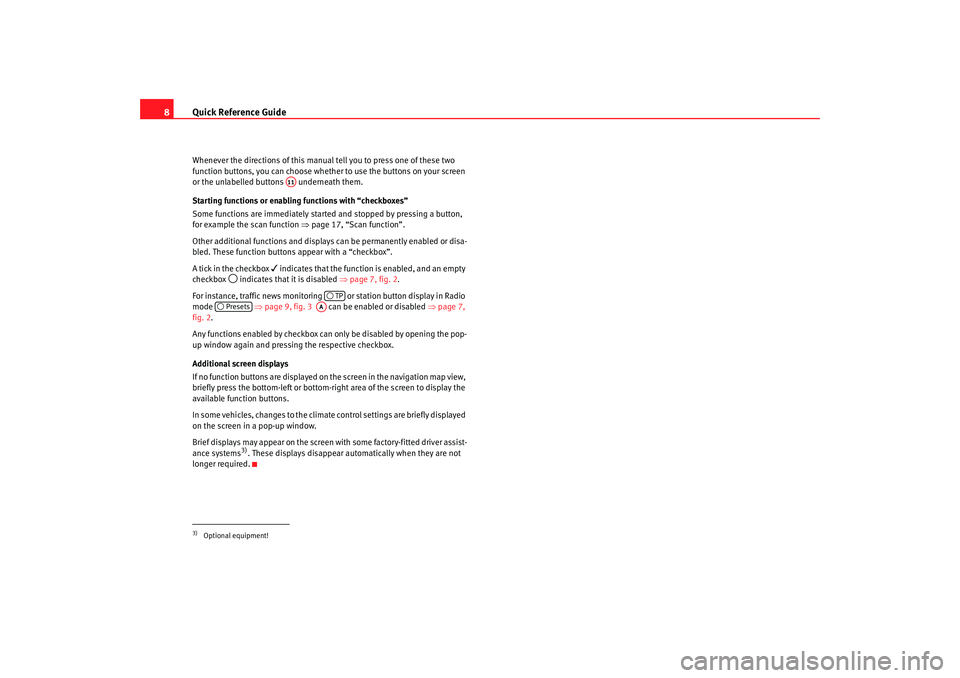
8Whenever the directions of this manual tell you to press one of these two
function buttons, you can choose whether to use the buttons on your screen
or the unlabelled buttons underneath them.
Starting functions or enabling functions with “checkboxes”
Some functions are immediately started and stopped by pressing a button,
for example the scan function ⇒page 17, “Scan function”.
Other additional functions and displays can be permanently enabled or disa-
bled. These function buttons appear with a “checkbox”.
A tick in the checkbox
indicates that the function is enabled, and an empty
checkbox
indicates that it is disabled ⇒page 7, fig. 2 .
For instance, traffic news monitoring or station button display in Radio
mode ⇒page 9, fig. 3 can be enabled or disabled ⇒page 7,
fig. 2 .
Any functions enabled by checkbox can only be disabled by opening the pop-
up window again and pressing the respective checkbox.
Additional screen displays
If no function buttons are displayed on the screen in the navigation map view,
briefly press the bottom-left or bottom-right area of the screen to display the
available function buttons.
In some vehicles, changes to the climate control settings are briefly displayed
on the screen in a pop-up window.
Brief displays may appear on the screen with some factory-fitted driver assist-
ance systems3). These displays disappear automatically when they are not
longer required.
3)Optional equipment!
A11
TP
Presets
AA
media_system_ingles.book Seite 8 Donnerstag, 5. Februar 2009 3:31 15
Page 18 of 96
RADIO function selection button17
Scan function
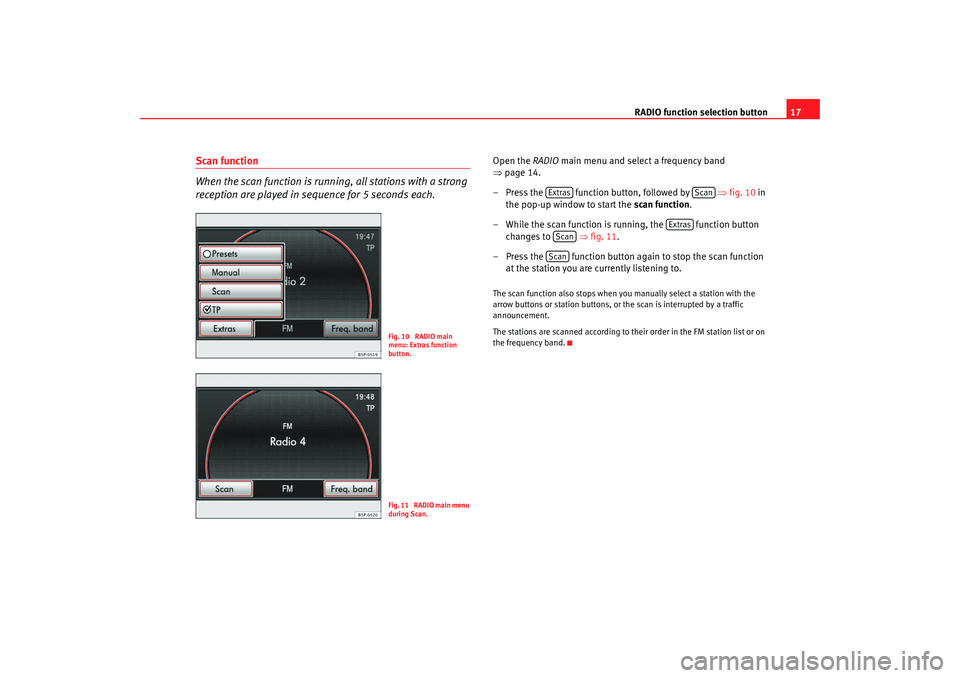
When the scan function is running, all stations with a strong
reception are played in sequence for 5 seconds each.
Open the RADIO main menu and select a frequency band
⇒ page 14.
– Press the function button, followed by ⇒fig. 10 in
the pop-up window to start the scan function.
– While the scan function is running, the function button changes to ⇒fig. 11 .
– Press the function button again to stop the scan function at the station you are currently listening to.The scan function also stops when y ou manually select a station with the
arrow buttons or station buttons, or the scan is interrupted by a traffic
announcement.
The stations are scanned according to their order in the FM station list or on
the frequency band.
Fig. 10 RADIO main
menu: Extras function
button.Fig. 11 RADIO main menu
during Scan.
Extras
Scan
Extras
ScanScan
media_system_ingles.book Seite 17 Donnerstag, 5. Februar 2009 3:31 15
Page 25 of 96
RADIO function selection button
24Traffic announcements will interrupt the active audio mode. The radio will
switch to the traffic news station for the duration of the traffic announcement.
The media mode will be paused for the duration of the traffic announcement.
If no TP station can be received at any time, e.g. because radio reception is
generally poor, then No TP is displayed instead of TP. Keep in mind that in
covered garages, tunnels, areas with tall buildings or mountains, the radio
signal may encounter interference, perhaps even being lost completely.
On the AM frequency band, traffic news monitoring with the traffic news func-
tion is not possible. No TP is displayed permanently.
EON (Enhanced Other Network)
If the selected radio station does not broadcast its own traffic news, but does
support EON (Enhanced Other Network), the unit will temporarily switch over
to play traffic announcements from a corresponding traffic news station as
they are broadcast. This happens only when the traffic news function is
switched on and the corresponding traffic news station can be received.
If this is the case, pressing the button will not make the unit switch to a
traffic news station. The traffic news function remains active and TP is
displayed.
Search function and traffic news monitoring
If traffic news monitoring is switched on in FM mode, you will only be offered
traffic news stations when carrying out a station search with the arrow
buttons ⇒ page 15 or using the scan function ⇒page 17.
While the unit is in FM mode and the traffic news function is switched on, if
you select via the station buttons or manually tune to a radio station that does
not support the traffic news function, the text NO TP will flash on the display
for three seconds. NO TP is then displayed permanently. The unit will remain
tuned to the selected station. Only when you switch to media mode will the
unit automatically retune in the background to the next receivable traffic
news station and TP will appear again on the display.
In FM mode , the text NO TP will flash for three seconds when the reception of
the selected traffic news station is completely lost. NO TP is then displayed permanently. If you start the automatic station search with the arrow buttons
⇒
page 15, the unit searches for the next traffic news station it can receive.
In media mode the unit will automatically retune in the background to the
next receivable traffic news station when the selected traffic news station can
no longer be received.
Incoming traffic announcement
A pop-up window opens ⇒page 23, fig. 18 while a traffic announcement is
being played.
If you wish to stop the traffic announcement, press the function
button in the pop-up window. The traffic station function remains active and
plays the next traffic bulletin receiv ed. Press the function button to
fully deactivate the TP function.
The unit switches to a predefined volume for the duration of the traffic
announcement. You can adjust the predefined volume in the sound settings
main menu ⇒ page 12. During a traffic announcement, you can alter the
predefined volume with the volume control ⇒page 3, fig. 1 .
TP
Cancel
TP off
A1
media_system_ingles.book Seite 24 Donnerstag, 5. Februar 2009 3:31 15
Page 34 of 96
MEDIA function selection button33
– Then select , as described ⇒page 34. The external audio
source will now be played over the vehicle speakers ⇒page 32,
fig. 23 .
– You can adjust the output volume with the volume control ⇒page 3, fig. 1 . See also ⇒page 33, “Adjusting the output
volume”.
It is only possible to play the sound output of an external audio source
connected to the AUX-IN socket via the radio-navigation system and the
vehicle speakers. The external audio source cannot be controlled via the
radio-navigation system. Consult the specific manufacturer's instruction
manual for operating the external audio source.
You can select another audio source on the radio-navigation system at any
time. The external audio source will continue to play until it is switched off.
Please not that the unit does not automatically switch back to the previously
played media source when the external audio source stops. The radio-naviga-
tion system will remain in the AUX menu ⇒page 32, fig. 23 and another
audio source must be selected manually.
When the plug is disconnected from the AUX-IN socket, the previously
selected media source will be automatically started.
You require a 3.5 mm jack plug for the AUX-IN socket. If the external audio
source does not have this plug, an adapter must be used.
Adjusting the output volume
You can adjust the output volume at which the external audio source is played
using the volume control on the radio-navigation system ⇒page 3, fig. 1
.
You can also adjust the input volume on the AUX-IN socket between three
levels. In media mode, press the button to open the Media settings
menu ⇒page 32, fig. 24 . Then press the and select the
desired input volume in the pop-up window ⇒. To adjust the output volume to that of
the external audio source and prevent
distortion, carry out the following steps.
If the sound from the external audio source is too quiet, first increase the
external audio source's output volume
10). If this is not sufficient or the output
volume of the external audio source cannot be adjusted (e.g. with a line-out
connection), go to the Media settings menu and adjust the to
or ).
If an external audio source is played too loudly or its sound is distorted, first
lower the external audio source's output vo lume. If that is not sufficient or not
possible, you must reduce the input volume ( or
).
WARNING
Please observe the safety warnings on the use of external audio sources
⇒ page 34.
Caution
Before adjusting the input volume level, it is important to turn down the
volume on the radio-navigation system to prevent damage to the vehicle
speakers that may be caused by excessively loud or distorted playback.
Note
If the external audio source is connected to the vehicle's 12-volt power point
via an adapter, this may cause soun d interference during operations
depending on the type of adapter used.
AUX
A1
A1
SETUP
AUX volume
10)Please refer to the manufactur er's manual for directions.
AUX volume
Medium
Loud
AUX volume
Medium
Quiet
media_system_ingles.book Seite 33 Donnerstag, 5. Februar 2009 3:31 15
Page 39 of 96
MEDIA function selection button
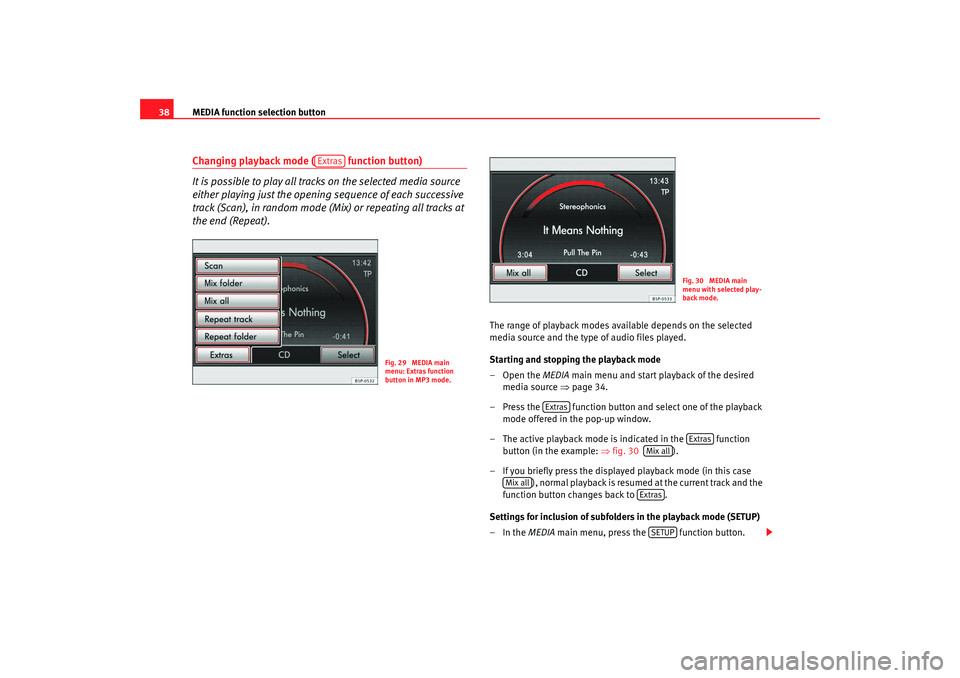
38Changing playback mode ( function button)
It is possible to play all tracks on the selected media source
either playing just the opening sequence of each successive
track (Scan), in random mode (Mix) or repeating all tracks at
the end (Repeat).
The range of playback modes available depends on the selected
media source and the type of audio files played.
Starting and stopping the playback mode
–Open the MEDIA main menu and start playback of the desired
media source ⇒page 34.
– Press the function button and select one of the playback mode offered in the pop-up window.
– The active playback mode is indicated in the function button (in the example: ⇒fig. 30 ).
– If you briefly press the displayed playback mode (in this case ) , n o r ma l p la yba ck is r esu m e d a t t h e cu r r e n t tra ck a n d t h e
function button changes back to .
Settings for inclusion of subfolders in the playback mode (SETUP)
–In the MEDIA main menu, press the function button.
Extras
Fig. 29 MEDIA main
menu: Extras function
button in MP3 mode.
Fig. 30 MEDIA main
menu with selected play-
back mode.
Extras
Extras
Mix all
Mix all
Extras
SETUP
media_system_ingles.book Seite 38 Donnerstag, 5. Februar 2009 3:31 15
Page 40 of 96
MEDIA function selection button39
– Tick the checkbox in the function button if
you wish to include the current folder's subfolders in the selected
playback mode.
To include subfolders, this setting must be enabled before the playback
mode is selected.
Please also note the following points concerning selectable playback modes
⇒ page 40, “Playing order of files and folders”.
Scan
When scan is switched on, the track of the current folder (with its subfolders
depending on the settings) or the current media source are played in
sequence for 10 seconds each. Automatic playback commences with the
following track.
Alternatively, you can also start and stop the scan function by briefly pressing
the setting knob ⇒page 3, fig. 1 .
Mix (random play)
Random play remains activate for the corresponding media source until it is
closed for that source.
Mix (audio CD): The tracks on the currently playing audio CD will be played in
random order.
Mix folder (MP3 mode): The tracks contained in the currently playing folder
and in its subfolders depending on the settings will be played in random
order.
Mix all (MP3 mode): All tracks on the currently playing media source will be
played in random order ⇒page 38, fig. 30 .
Repeat
The repeat function remains active for the corresponding media source until
it is closed for that source. Repeat track
: When the current track has been played, it will be repeated until
this function is switched off.
Repeat folder (MP3 mode): The playback of all tracks contained in the
currently playing folder and in its subfolders depending on the settings will
be repeated.
Scan/mix/repeat inc
A10
media_system_ingles.book Seite 39 Donnerstag, 5. Februar 2009 3:31 15
Page 65 of 96
NAV (navigation system) function selection button
64
Entering a keyword
– The point of interest search window allows free text input ⇒page 55. Make sure the keyword you enter is spelt correctly.
– For example, you can enter part of a name as the keyword (e.g. “Eagle”).
– Starting from the defined search area centre, the navigation data medium is then searched for matching destinations. Matching
destinations are those which have the keyword in the name of
the point of interest (e.g. Spread Eagle Hotel) or in its address
(e.g. Eagle Avenue).
– Press to start searching with the keyword you have entered.
Starting the search
– The search radius is displayed and gradually enlarged.
– Any matching points of interest found are displayed in a list.
– The search is continued up to a maximum radius of roughly
75 km from the defined search area centre. Pressing ends
the search at the displayed radius.
– When the search is ended, the function button changes to ⇒ page 63, fig. 52 .
– A message appears to inform the user if no matching point of interest was found.
Selecting a point of interest from the list
– Press an item from the list of points of interest found to immedi- ately start route guidance to its address. – To search the list, turn the setting knob
⇒page 3, fig. 1 . The
list items will be marked one after the other ⇒page 63, fig. 52 .
– If you press the function button, a window opens with a detailed view of the marked entry.
– Press in the detailed view to start route guidance to the displayed address ⇒ page 73.
Press the function button in the list view or detailed view to store the
marked or displayed address in the destination memory ⇒page 67.
The distances and directions given in the list of the points of interest found
refer to the route as the crow flies ⇒page 62, fig. 49 .
Search
Stop
Details
A10
Details
StartStore
media_system_ingles.book Seite 64 Donnerstag, 5. Februar 2009 3:31 15
Page 74 of 96
NAV (navigation system) function selection button 73
Route guidanceOverviewWhen route guidance is started, the route is calculated in accordance with the
selected route options ⇒page 74.
In the case of very long journeys, it may take up to a minute to calculate the
route. A progress bar is displayed during route calculation. With navigation
from a CD, route calculation takes considerably longer than with navigation
from a memory card ⇒page 49.
When the calculation is complete, the display automatically switches to the
map view. You will now be guided to your chosen destination by announce-
ments and visual recommendations ⇒page 76.
After route guidance to a destination has been started, it is possible to enter
one additional stopover destination, which you will be guided to before
heading for the final destination ⇒page 73.
You can call up information on the next destination you are heading to and a
list of the route sections of yo ur current journey (route list) ⇒page 79.
You can manually exclude individual rout e sections in the route list from your
journey, for instance, in response to r eported traffic congestion. The route will
then be recalculated ⇒page 79.
If dynamic route guidance is enabled in the route options, traffic reports
received via TMC will be taken into account in the calculation of the route. If
traffic congestion is reported on the route, a new route will be calculated
automatically if the navigation system determines that this will save time
⇒ page 80.
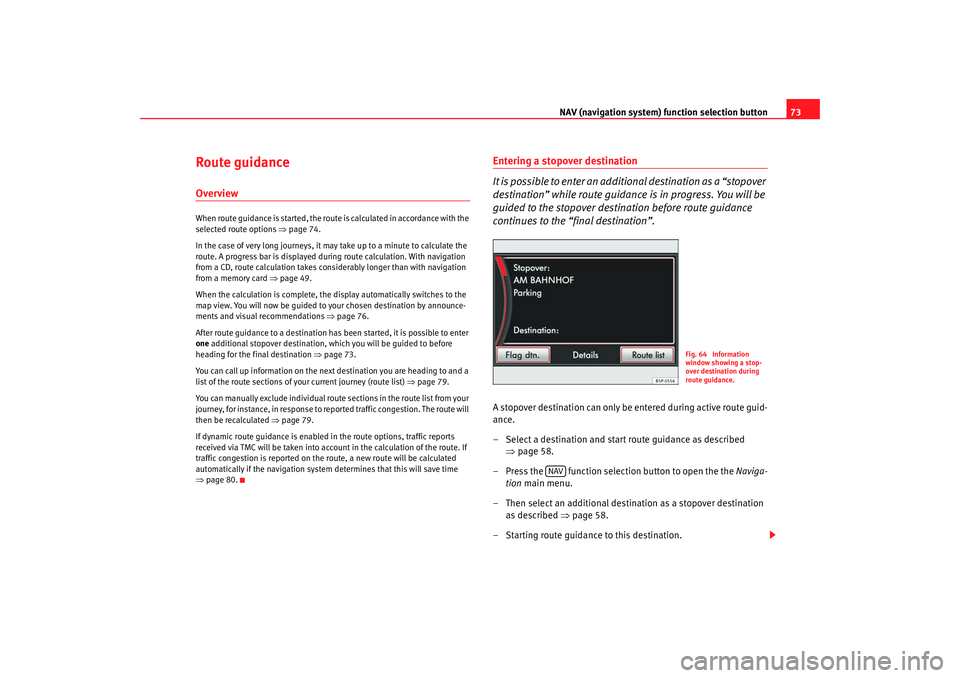
Entering a stopover destination
It is possible to enter an additional destination as a “stopover
destination” while route guidance is in progress. You will be
guided to the stopover destination before route guidance
continues to the “final destination”.A stopover destination can only be entered during active route guid-
ance.
– Select a destination and start route guidance as described
⇒page 58.
– Press the function selection button to open the the Naviga-
tion main menu.
– Then select an additional destination as a stopover destination as described ⇒page 58.
– Starting route guidance to this destination.
Fig. 64 Information
window showing a stop-
over destination during
route guidance.
NAV
media_system_ingles.book Seite 73 Donnerstag, 5. Februar 2009 3:31 15
Page 75 of 96
NAV (navigation system) function selection button
74
– Then press if you wish to navigate to the newly entered destination as a stopover destination during the current route
guidance.
– Press if you would like to cancel the current route guid- ance and start a new route guidance to the newly entered desti-
nation instead.The stopover destination, which is entered while route guidance is in
progress, is always taken as the first destination to which to navigate. The
final destination is always the destination to which route guidance is first
started. Enter the final destination and stopover destination in this order.
A route guidance can only have one final destination and one stopover desti-
nation. The final and stopover destination can be viewed in the information
window ⇒page 73, fig. 64 .
A navigation announcement informs you when you have reached the stop-
over destination. After a few seconds, ro ute guidance is resumed to the final
destination. You can then enter a new stopover destination to head to before
navigating to the final destination.
If you enter an additional destination before reaching your previously defined
stopover destination, you must then decide whether to replace the old stop-
over destination with the newly entered destination. If you press the
function button, the current route guidance is completely cancelled and a
new route guidance will be started “o nly” to the newly entered destination.
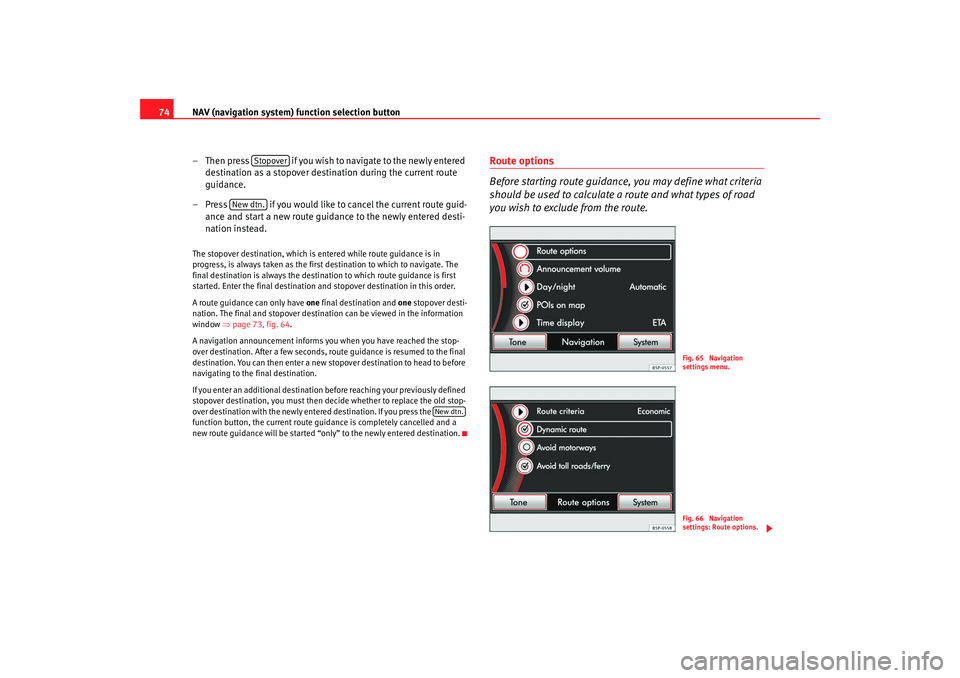
Route options
Before starting route guidance, you may define what criteria
should be used to calculate a route and what types of road
you wish to exclude from the route.
Stopover
New dtn.
New dtn.
Fig. 65 Navigation
settings menu.Fig. 66 Navigation
settings: Route options.
media_system_ingles.book Seite 74 Donnerstag, 5. Februar 2009 3:31 15