Seat Toledo 2013 Repair Manual
Manufacturer: SEAT, Model Year: 2013, Model line: Toledo, Model: Seat Toledo 2013Pages: 258, PDF Size: 3.94 MB
Page 61 of 258
59
Controls and displays
Trip counter*
Daily trip counter (trip)
The daily trip counter indicates the journey that has been covered since the
last time the function was reset in 100 metre sections.
In order to reset the daily distance covered keep the button 6
⇒ Fig. 31
⇒ page 57 pressed down.
Odometer
The odometer indicates the total number of kilometres (or mileage) that the
vehicle has covered until now.
Fault indication
In the event of a fault in the informative display the word Error will appear
permanently. Please take the vehicle to a specialised Technical Service to
solve this fault.
Note
In vehicles equipped with an informative display, if the indicator of the sec-
ond speed in mph or in kph are activated respectively, this speed will be
displayed in place of the odometer.
Service interval display*
Service interval display
Before reaching the service interval, when the ignition is switched on the
key symbol appears on the screen for several seconds together with the
indication of the number of kilometres (miles) remaining. The number of
days remaining until the service inspection is indicated simultaneously.
The informative display indicates:
Service in … km (miles) or… days. The indication of kilometres (miles) or time remaining until the inspection
reduces in intervals of 100km (miles) or 1 day.
If the service interval is reached, when the ignition is switched on the key
symbol
appears flashing on the screen together with the word Service.
The informative display indicates: Service now!
Indication of number of kilometres (miles) or time remaining until the
service inspection
The number of kilometres (miles) or time remaining until the service inspec-
tion can always be displayed when the ignition is switched on by pressing
the button 5
⇒ Fig. 31 ⇒
page 57.
The key symbol and indication of the number of kilometres (miles) re-
maining appear on the display for several seconds. The number of days re-
maining until the service inspection is indicated simultaneously.
In vehicles equipped with an informative display this information can be ac-
cessed from the menu, Settings ⇒ page 67.
Resetting service interval display
The service interval display can be reset only after a service message or pre-
warning has been displayed in the general instrument panel display.
It is advisable to visit a Technical Service to reset the display.
The specialised Technical Service:
● resets the display memory after performing the following inspection
● stores the information in the Maintenance Programme
● places a sticker on the side of the instrument panel in the driver area in-
dicating the date of the next inspection
The service intervals display can be reset by pressing the button, 6
⇒ Fig. 31 ⇒
page 57.
Safety FirstOperating instructionsPractical TipsTechnical specifications
Page 62 of 258
60Controls and displays
In vehicles equipped with an informative display the service interval display
can be reset from the menu, Settings ⇒ page 67.
CAUTION
We advise against resetting the service interval display yourself, given that
this action could cause an imbalance in the service intervals, and as a re-
sult, faults in the vehicle.
Note
● Never reset the display between service intervals as this could lead to
erroneous indications.
● After disconnecting the battery of the vehicle, the service interval dis-
play values remain stored.
● If the general instrument panel is changed after a repair, the correct val-
ues must be input in the service interval display. This operation is carried
out by a specialised service.
● After resetting the display with flexible service intervals, the information
will be indicated in the same way as vehicles with fixed service intervals.
Therefore, we recommend that a SEAT Authorised Service resets the service
interval display, who will do so correctly using diagnostics equipment.
● For more detailed information please consult the Maintenance Pro-
gramme.
Digital clock
The clock is set using the buttons 5 to 6
⇒ Fig. 31
⇒ page 57.
Select the indication you want to change with button 5
and make the ad-
justment with button 6.
In vehicles equipped with an informative display this can be reset from the
menu, Time ⇒ page 67. Recommended gear display
Fig. 32 Recommended
gear display
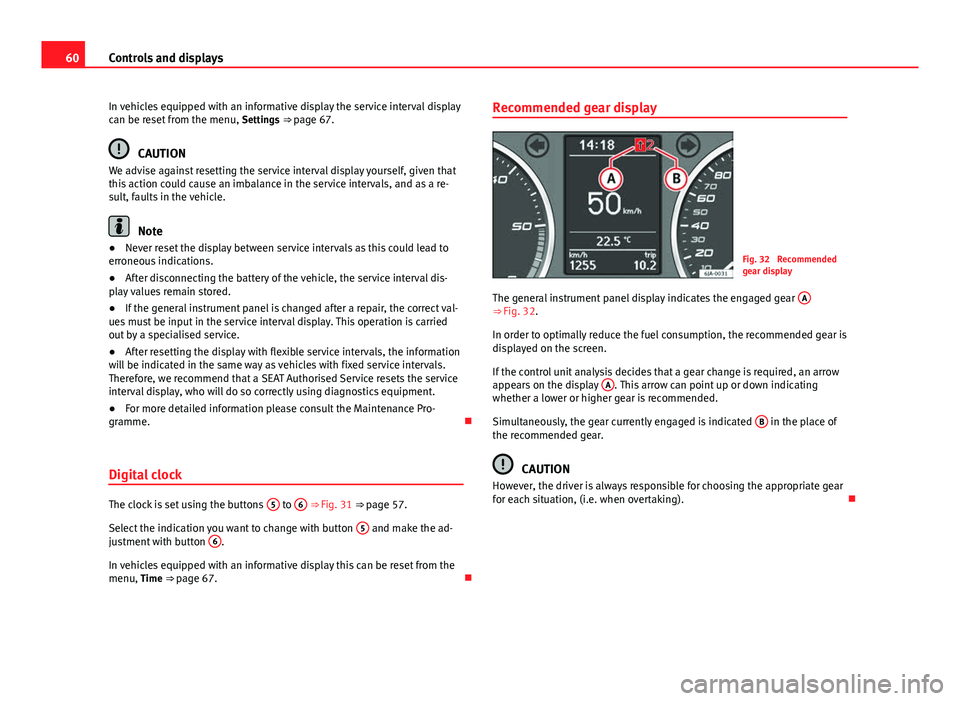
The general instrument panel display indicates the engaged gear A
⇒ Fig. 32.
In order to optimally reduce the fuel consumption, the recommended gear is
displayed on the screen.
If the control unit analysis decides that a gear change is required, an arrow
appears on the display A
. This arrow can point up or down indicating
whether a lower or higher gear is recommended.
Simultaneously, the gear currently engaged is indicated B
in the place of
the recommended gear.
CAUTION
However, the driver is always responsible for choosing the appropriate gear
for each situation, (i.e. when overtaking).
Page 63 of 258

61
Controls and displays
Multi-function display* (on board computer)
Introduction
The multifunction display can only be operated when the ignition is switch-
ed on. When the ignition is switched on the last function selected before it
was switched off is displayed.
The multifunction display data is shown on the screen ⇒ Fig. 33
⇒ page 61.
In vehicles fitted with an informative display ⇒ page 66 the system can be
adjusted so that certain data is not shown.
WARNING
● Always keep your attention on driving! As the driver, you have the full
responsibility for the safety of traffic.
● Do not rely only on the outside temperature indicator to verify wheth-
er the road surface is frozen. This is because with an outside temperature
of +4 °C (+39 °F) ice can generate on the road - Warning of frozen road
surface!
Note
● Models for certain countries can show the values in imperial units.
● If the second speed in mph (km/h) is displayed, the current speed in
km/h (mph) is not displayed on the screen. Memory
Fig. 33 Multifunction
display
The multifunction display has two automatic memories. The selected mem-
ory is displayed on the screen ⇒ Fig. 33.
The current journey data (memory 1) is always displayed when the number
1 appears on the display. When number 2 appears on the display, the total
distance travelled is shown (memory 2).
The memory is selected depending on the equipment:
● by pressing the lever's B
button briefly
⇒ Fig. 34 ⇒ page 62, or else
● briefly pressing the right thumbwheel of the multifunction steering
wheel 1
⇒
Fig. 35.
Current journey memory (memory 1)
The current journey memory collects data from the moment the ignition is
switched on until it is switched off. If the journey is continued within two
hours of switching off the ignition, the new values will be added to the ex-
isting trip recorder memory. The memory will automatically be deleted if the
journey is interrupted for more than two hours.
Total distance travelled memory (memory 2)
The total distance travelled memory collects journey data from any number
of individual journeys up to a maximum of 19 hours and 59 minutes and
Safety FirstOperating instructionsPractical TipsTechnical specifications
Page 64 of 258
62Controls and displays
1999 km (miles) or until 99 hours and 59 minutes and 9999 km (miles) in
cars with an informative display. The memory will automatically be deleted
if one of the named values is reached, resetting the data collected.
Unlike the current journey memory, this memory is not deleted, even when
the ignition is switched off for more than two hours.
Note
After disconnecting the battery, all the values stored in the memories 1 and
2 are deleted.
Operation
Fig. 34 Multifunction
display: controls
Fig. 35 Multifunction
steering wheel: controls
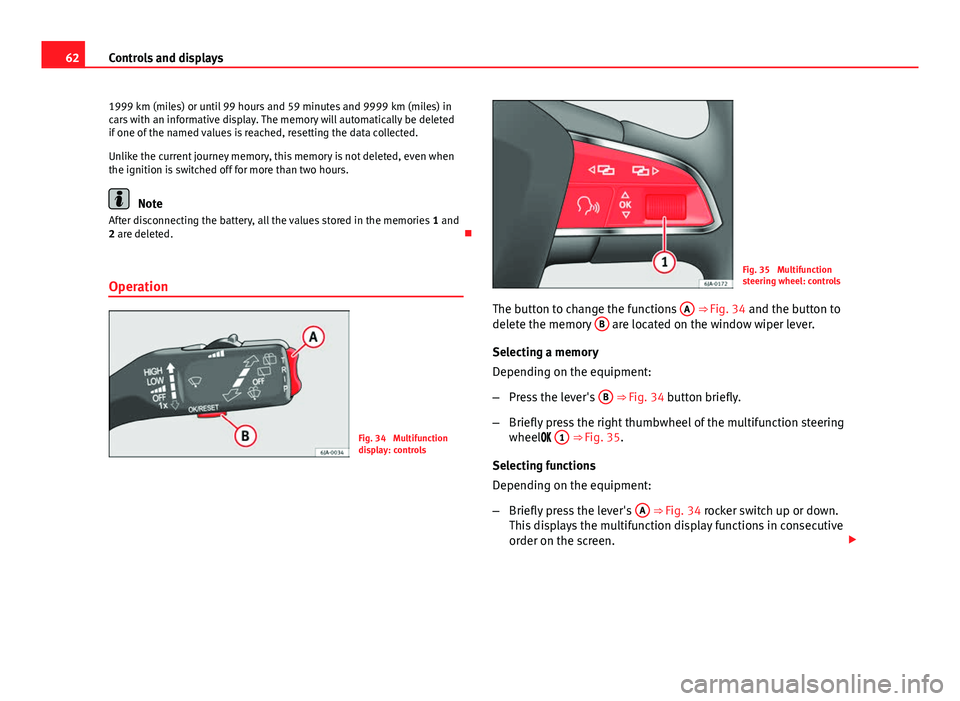
The button to change the functions A
⇒ Fig. 34 and the button to
delete the memory B are located on the window wiper lever.
Selecting a memory
Depending on the equipment:
– Press the lever's B
⇒ Fig. 34 button briefly.
– Briefly press the right thumbwheel of the multifunction steering
wheel 1
⇒
Fig. 35.
Selecting functions
Depending on the equipment:
– Briefly press the lever's A
⇒ Fig. 34 rocker switch up or down.
This displays the multifunction display functions in consecutive
order on the screen.
Page 65 of 258

63
Controls and displays
– Turn the right thumbwheel of the multifunction steering wheel
1
⇒ Fig. 35. This displays the multifunction display functions
in consecutive order on the screen.
Resetting
– Select the required memory.
Depending on the equipment:
– Press and hold the lever's B
⇒ Fig. 34 button.
– Press and hold the right thumbwheel of the multifunction steer-
ing wheel 1
⇒
Fig. 35.
This will reset the following values of the selected memory:
● the average fuel consumption
● journey distance covered
● average speed
● duration of the journey
Multifunction display data
Outside temperature
The display indicates the outside temperature.
At temperatures below +4 °C (+39 °F), the snowflake symbol is also dis-
played (frozen road surface warning symbol) and an audible warning is giv-
en. Pressing the lever's rocker switch A
⇒ Fig. 34 or turning the right thumbwheel of the steering wheel
1
⇒ Fig. 35 shows the last displayed
function.
Journey duration
The display shows the time you have covered since the memory was last re-
set. If you wish to measure the duration of a journey from a specific mo-
ment, the memory must be deleted ⇒ page 62.
The maximum time indicated by the two memories is 19 hours 59 minutes
or 99 hours and 59 minutes for vehicles fitted with an informative display.
The memory is reset if this value is exceeded.
Current fuel consumption
The current fuel consumption is indicated on the display in litres/100km
(miles) 1)
. You can adapt your driving style to the required consumption with
the assistance of this indicator.
The consumption is displayed in litres per hour while the vehicle is stopped
or at idling speed 2)
.
Average fuel consumption
The display shows the average fuel consumption in litres/100km (miles) 1)
calculated since the memory was last reset ⇒ page 61.
If you wish to measure the average fuel consumption from a specific period,
the memory must first be deleted ⇒ page 62. While driving the first 300 m
after deleting the memory this value is not shown on the display.
The value is updated regularly while the vehicle is in motion.
1)
The indication of consumption is given in kms (miles)/litres in models for certain countries.
2) The indication of the consumption when the vehicle is stationary is given in - -.- kms/litre
in models for certain countries.
Safety FirstOperating instructionsPractical TipsTechnical specifications
Page 66 of 258
64Controls and displays
Operating range
The approximate operating range is indicated in kilometres (miles) on the
display. It shows how far the vehicle can travel with the available fuel using
the same driving conditions as a reference.
The operating range is calculated in sections of 10 kilometres (miles). When
the fuel gauge enters the reserve zone, the operating range is displayed in
sections of 5 kilometres (miles).
The operating range is calculated based on the fuel consumption during the
last 50 kilometres (miles). The operating range increases when driving in a
more economical manner.
When the memory is reset (after disconnecting the battery), the operating
range is calculated with a 10 litres per 100 km (miles) consumption and ad-
justs to represent the current driving style.
Distance
The display shows the distance you have covered since the memory was last
reset ⇒ page 61. If you wish to measure the duration of a journey from a
specific moment, the memory must be deleted ⇒ page 62.
The maximum value for both memories is 1999 km (miles), or 9999 km
(miles) in vehicles fitted with an informative display. The memory is reset if
this value is exceeded.
Average speed
The display shows the average speed in km/h (mph) calculated from the
last time the memory was reset ⇒ page 61. If you wish to measure the aver-
age speed from a specific period, the memory must first be deleted
⇒ page 62.
While driving the first 300 m after deleting the memory this value is not
shown on the display.
The value is updated regularly while the vehicle is in motion. Driving speed
The current driving speed, the same as indicated on the speedometer, is
shown on the display
3
⇒ Fig. 31 ⇒
page 57.
Oil temperature
If the oil temperature is lower than +50 °C (+122 °F) or if a fault appears on
the oil temperature control, in place of the temperature indication, the – –.–
sign is shown.
Speed warning
Adjust the speed limit while the vehicle is stopped
Depending on the equipment:
– Press the lever's button A
⇒ Fig. 34 to select
Speed warning.
– Press the lever's button B
to activate the possibility of adjust-
ing the speed limit.
– Press the lever's button A
to select the required speed limit,
e.g. 50 km/h. The speed can be adjusted in 5 km/h intervals.
– Press the lever's button B
to confirm the selected speed limit
or wait several seconds until the adjustment is automatically
stored.
or
– Turn the right thumbwheel of the multifunction steering wheel
1
⇒ Fig. 35 and select Speed warning.
– Press the thumbwheel of the multifunction steering wheel to ac-
tivate the possibility of adjusting the speed limit.
Page 67 of 258

65
Controls and displays
– Turn the thumbwheel of the multifunction steering wheel to set
the required speed, for example 50 km/h. The speed can be ad-
justed in 5 km/h intervals.
– Press the thumbwheel of the multifunction steering wheel to
confirm the selected speed limit or wait several seconds until
the adjustment is automatically stored.
Adjust the speed limit while driving
Depending on the equipment:
– Press the lever's button A
⇒ Fig. 34 to select
Speed warning.
– Drive to the required speed, e.g. 50 km/h.
– Press the lever's button B
to set the current driving speed as
the speed limit. If you want to change the speed limit, this will
be regulated in 5 km/h (mph) intervals (e.g. the speed set at 47
km/h increases to 50 km/h or decreases to 45 km/h).
– Press the lever's button B
again to confirm the selected speed
limit or wait several seconds until the adjustment is automati-
cally stored.
or
– Turn the right thumbwheel of the multifunction steering wheel
1
⇒ Fig. 35 and select Speed warning.
– Drive to the required speed, e.g. 50 km/h.
– Press the thumbwheel of the multifunction steering wheel to
set the current driving speed as the speed limit. If you want to
change the speed limit, this will be regulated in 5 km/h (mph) intervals (e.g. the speed set at 47 km/h increases to 50 km/h
or decreases to 45 km/h).
– Press the thumbwheel of the multifunction steering wheel
again to confirm the selected speed limit or wait several sec-
onds until the adjustment is automatically stored.
Changing or resetting the speed limit
Depending on the equipment:
– Press the lever's button A
⇒ Fig. 34 to select
Speed warning.
– Press and hold the button B
to reset the speed limit.
– Press the button, B
again to activate the possibility of adjust-
ing the speed limit.
or
– Turn the right thumbwheel of the multifunction steering wheel
1
⇒ Fig. 35 and select Speed warning.
– Press and hold the thumbwheel of the multifunction steering
wheel to reset the speed limit.
– Press the thumbwheel of the multifunction steering wheel
again to activate the possibility of adjusting the speed limit.
If the indicated speed is exceeded at any time, an audible warning is given.
The message Speed warning appears simultaneously on the display with
the imputed speed limit.
The speed limit stays in the memory even after switching the ignition off
and on.
Safety FirstOperating instructionsPractical TipsTechnical specifications
Page 68 of 258
66Controls and displays
MAXI DOT* (Informative display)
Introduction
The informative display informs about the current operational status of your
vehicle. Additionally, the screen also displays the information for the radio,
the multifunction display, the telephone, the navigation system, the devices
connected to the MDI input and the automatic gearbox ⇒ page 146.
WARNING
Always keep your attention on driving! As the driver, you have the full re-
sponsibility for the safety of traffic.
Main menu
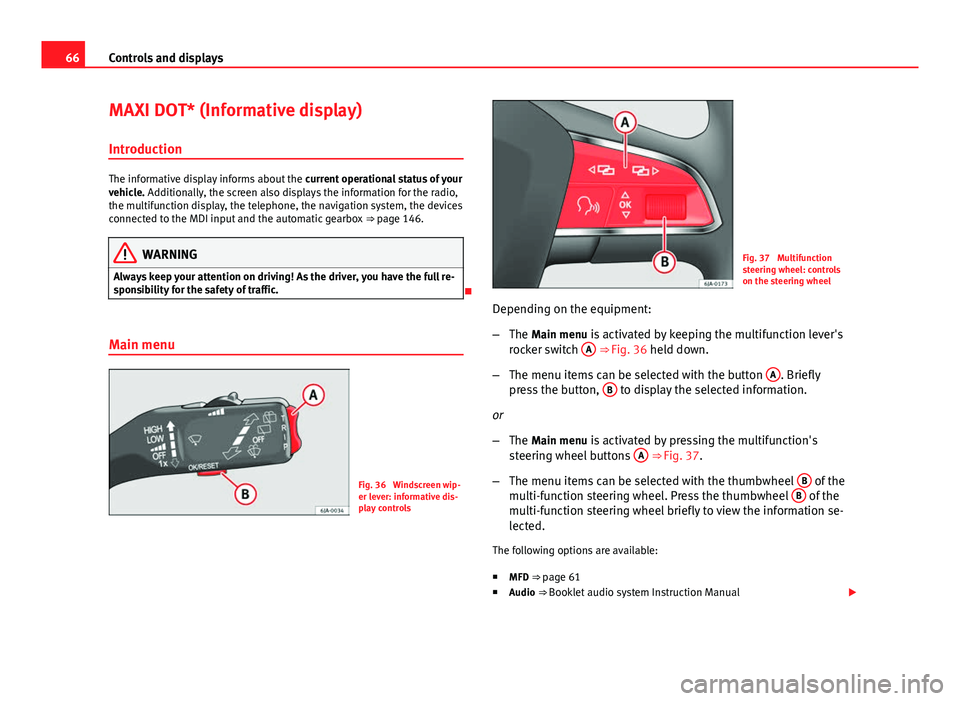
Fig. 36 Windscreen wip-
er lever: informative dis-
play controls
Fig. 37 Multifunction
steering wheel: controls
on the steering wheel
Depending on the equipment:
– The Main menu is activated by keeping the multifunction lever's
rocker switch A
⇒ Fig. 36 held down.
– The menu items can be selected with the button A
. Briefly
press the button, B to display the selected information.
or
– The Main menu is activated by pressing the multifunction's
steering wheel buttons A
⇒ Fig. 37.
– The menu items can be selected with the thumbwheel B
of the
multi-function steering wheel. Press the thumbwheel B of the
multi-function steering wheel briefly to view the information se-
lected.
The following options are available:
■ MFD ⇒ page 61
■ Audio ⇒ Booklet audio system Instruction Manual
Page 69 of 258
67
Controls and displays
■ Navigation ⇒ Booklet Navigation system Instruction Manual
■ Telephone ⇒ Booklet Bluetooth system Instruction Manual
■ Vehicle status ⇒ page 68
■ Settings ⇒ page 67
The Audio and Navigation options are only displayed when these factory-fit-
ted systems are switched on.
Note
● If the multifunction display is not operated during 10 seconds, the menu
automatically returns to one of the superior levels.
Settings
You can make certain adjustments using the informative display. The cur-
rent values are displayed directly in their respective places above or below
the line.
The following items can be selected: ■ Language
■ MFD data
■ Time
■ Winter tyres
■ Units
■ Second speed
■ Inspec. Service
■ Factory settings
■ Back
Select the option Back to return to the superior menu level. Language
Here the language used to display the warning and information texts can be
selected.
MFD data
Here certain data shown on the multifunction display can be switched on or
off.
Time
In this menu you can set, the time, the display format (24 or 12 hours) and
changes from winter to summer time.
Winter tyres
The speed at which an audible warning is given can be adjusted here. This
function can be used with winter tyres, whose maximum permitted speed is
lower than the maximum speed of the vehicle.
When exceeding the maximum speed the following is shown on the display:
Winter tyres max speed … km/h … (mph)
Units
The units of measure for temperature, consumption and journey distances
can be set here.
Second speed
The second speed can be activated/deactivated in mph or km/h respective-
ly here.
Inspection Service
Here you can choose to display the kilometres (miles) and days remaining
until the next service, and reset the service interval display.
Factory settings
Select Factory setting to reset the values of the informative display to their
factory settings.
Safety FirstOperating instructionsPractical TipsTechnical specifications
Page 70 of 258
68Controls and displays
Door, rear lid or bonnet open indicator
If at least one of the doors, rear lid or bonnet is open, a symbol is shown on
the informative display indicating that the door, rear lid or bonnet con-
cerned is open.
An audible warning is also given simultaneously if the vehicle is being driv-
en at a speed of above 6 km/h (4 mph).
Auto-check system
Vehicle status
When the ignition is switched on, some vehicle functions such as the condi-
tion of its systems are automatically checked.
The warning messages about eventual faults in addition to other informa-
tion is displayed on the informative display. This information is displayed
together with their respective symbols on the informative display or by
warning lamps that light up on the general instrument panel ⇒ page 69.
The option, Vehicle status, appears in the menu when at least one warning
message is present. The first of the warnings given is displayed upon se-
lecting this option. If there is more than one message present, this is dis-
played on the screen, i.e. 1/3. This means that the warning currently dis- played is the first of a total of three.
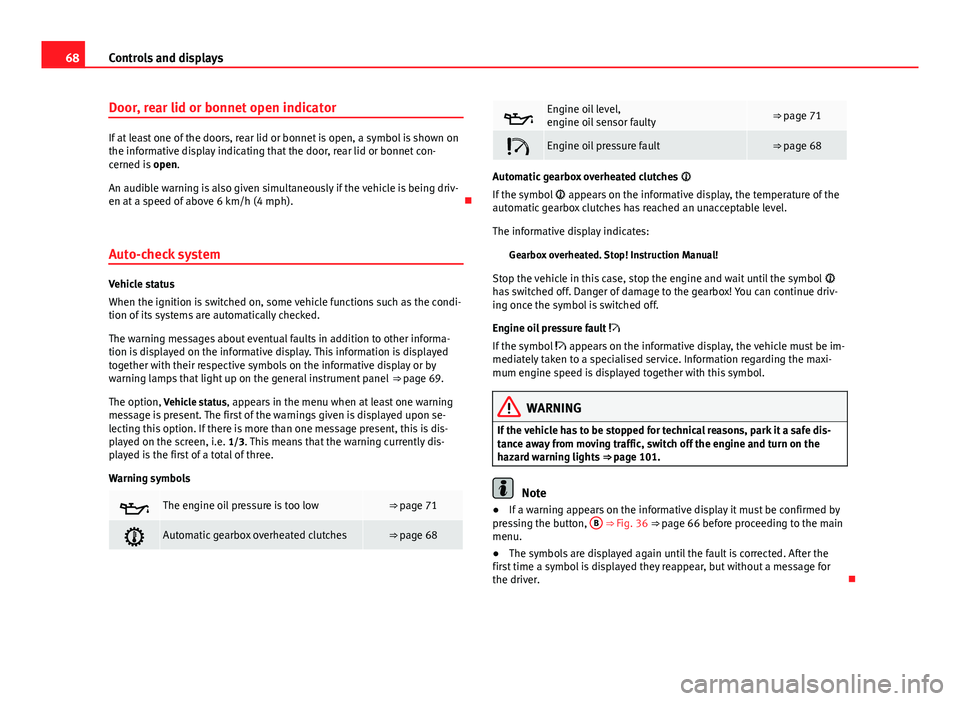
Warning symbols
The engine oil pressure is too low⇒ page 71
Automatic gearbox overheated clutches⇒ page 68
Engine oil level,
engine oil sensor faulty⇒ page 71
Engine oil pressure fault⇒ page 68
Automatic gearbox overheated clutches
If the symbol appears on the informative display, the temperature of the
automatic gearbox clutches has reached an unacceptable level.
The informative display indicates:
Gearbox overheated. Stop! Instruction Manual!
Stop the vehicle in this case, stop the engine and wait until the symbol
has switched off. Danger of damage to the gearbox! You can continue driv-
ing once the symbol is switched off.
Engine oil pressure fault
If the symbol appears on the informative display, the vehicle must be im-
mediately taken to a specialised service. Information regarding the maxi-
mum engine speed is displayed together with this symbol.
WARNING
If the vehicle has to be stopped for technical reasons, park it a safe dis-
tance away from moving traffic, switch off the engine and turn on the
hazard warning lights ⇒ page 101.
Note
● If a warning appears on the informative display it must be confirmed by
pressing the button, B
⇒ Fig. 36 ⇒
page 66 before proceeding to the main
menu.
● The symbols are displayed again until the fault is corrected. After the
first time a symbol is displayed they reappear, but without a message for
the driver.