battery SKODA CITIGO 2012 1.G User Guide
[x] Cancel search | Manufacturer: SKODA, Model Year: 2012, Model line: CITIGO, Model: SKODA CITIGO 2012 1.GPages: 157, PDF Size: 3.9 MB
Page 34 of 157
Headlight flasher
› Pull the lever towards the steering wheel (spring-tensioned position) in the di-
rection of arrow D
» Fig. 25 - the main beam and warning light
in the instru-
ment cluster come on. CAUTION
Only use the main beam or the headlight flasher if other road users will not be
dazzled. Note
■ The turn signal system only operates when the ignition is switched on. The cor-
responding warning light or in the instrument cluster also flashes.
■ The turn signal is automatically cancelled after negotiating a curve.
■ An acoustic warning signal will sound when the driver's door is opened if the
lever is not in the middle position after removing the ignition key from the igni-
tion lock. The acoustic warning signal will stop just as soon as the driver's door is
closed. ÐInterior light
Interior light - Version 1
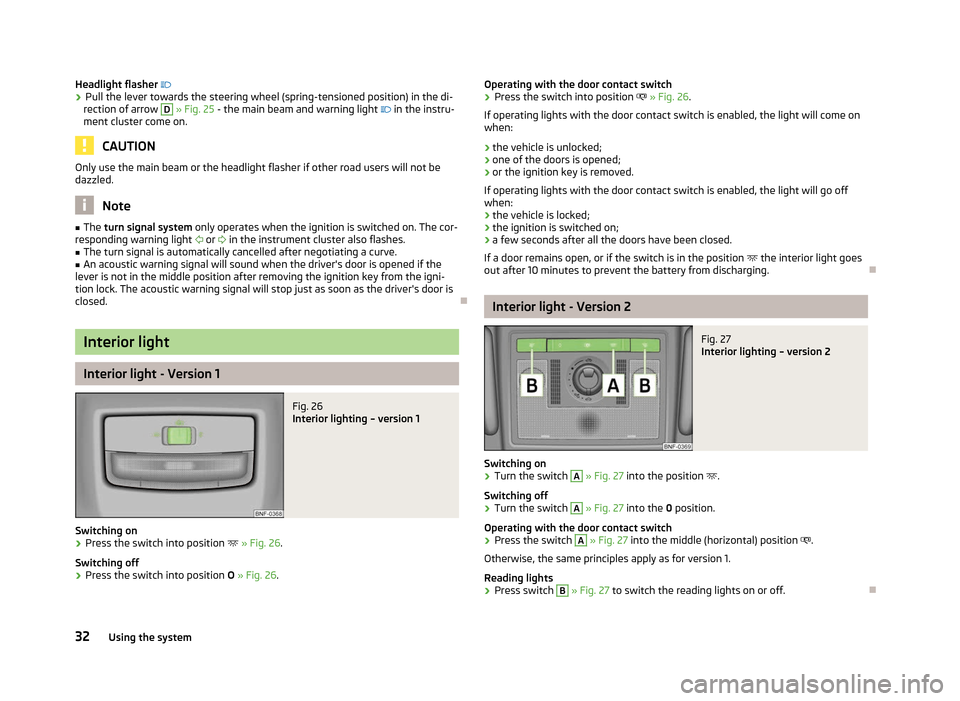
Fig. 26
Interior lighting – version 1
Switching on
› Press the switch into position
» Fig. 26.
Switching off
› Press the switch into position
O » Fig. 26. Operating with the door contact switch
› Press the switch into position
» Fig. 26.
If operating lights with the door contact switch is enabled, the light will come on
when:
› the vehicle is unlocked;
› one of the doors is opened;
› or the ignition key is removed.
If operating lights with the door contact switch is enabled, the light will go off
when:
› the vehicle is locked;
› the ignition is switched on;
› a few seconds after all the doors have been closed.
If a door remains open, or if the switch is in the position the interior light goes
out after 10
minutes to prevent the battery from discharging. Ð Interior light - Version 2
Fig. 27
Interior lighting – version 2
Switching on
› Turn the switch A
» Fig. 27
into the position .
Switching off
› Turn the switch A
» Fig. 27
into the 0 position.
Operating with the door contact switch
› Press the switch A
»
Fig. 27 into the middle (horizontal) position
.
Otherwise, the same principles apply as for version 1.
Reading lights
› Press switch B
» Fig. 27 to switch the reading lights on or off.
Ð
32 Using the system
Page 48 of 157
Cigarette lighter, 12-volt power socket
Cigarette lighter
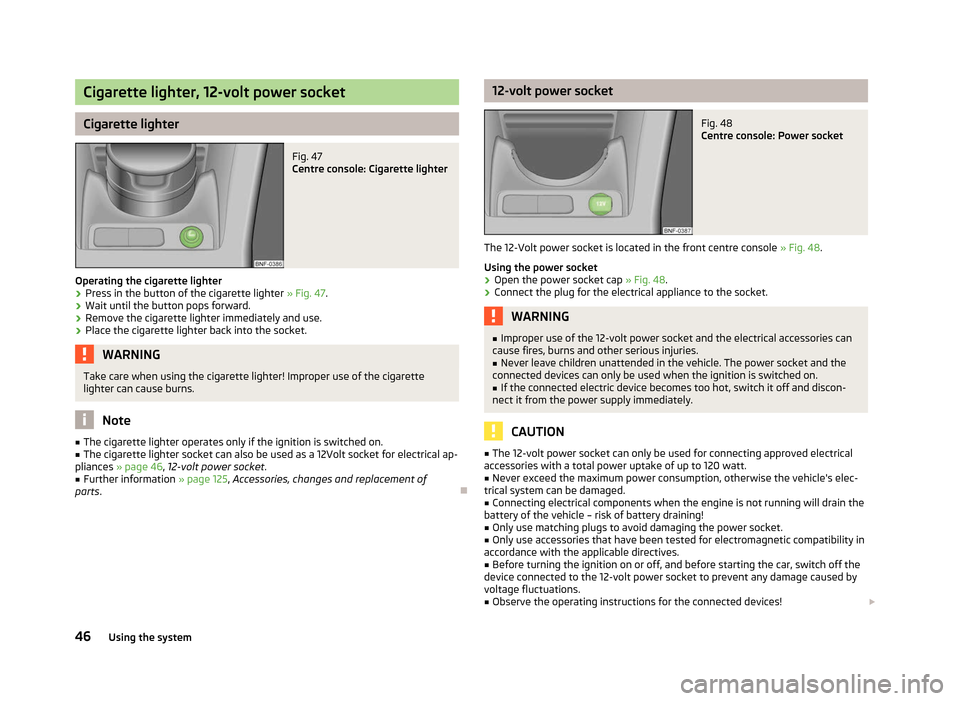
Fig. 47
Centre console: Cigarette lighter
Operating the cigarette lighter › Press in the button of the cigarette lighter
» Fig. 47.
› Wait until the button pops forward.
› Remove the cigarette lighter immediately and use.
› Place the cigarette lighter back into the socket. WARNING
Take care when using the cigarette lighter! Improper use of the cigarette
lighter can cause burns. Note
■ The cigarette lighter operates only if the ignition is switched on.
■ The cigarette lighter socket can also be used as a 12Volt socket for electrical ap-
pliances » page 46 , 12-volt power socket.
■ Further information » page 125, Accessories, changes and replacement of
parts. Ð 12-volt power socket
Fig. 48
Centre console: Power socket
The 12-Volt power socket is located in the front centre console » Fig. 48.
Using the power socket
› Open the power socket cap
» Fig. 48.
› Connect the plug for the electrical appliance to the socket. WARNING
■ Improper use of the 12-volt power socket and the electrical accessories can
cause fires, burns and other serious injuries.
■ Never leave children unattended in the vehicle. The power socket and the
connected devices can only be used when the ignition is switched on.
■ If the connected electric device becomes too hot, switch it off and discon-
nect it from the power supply immediately. CAUTION
■ The 12-volt power socket can only be used for connecting approved electrical
accessories with a total power uptake of up to 120
watt.
■ Never exceed the maximum power consumption, otherwise the vehicle's elec-
trical system can be damaged.
■ Connecting electrical components when the engine is not running will drain the
battery of the vehicle – risk of battery draining!
■ Only use matching plugs to avoid damaging the power socket.
■ Only use accessories that have been tested for electromagnetic compatibility in
accordance with the applicable directives. ■ Before turning the ignition on or off, and before starting the car, switch off the
device connected to the 12-volt power socket to prevent any damage caused by
voltage fluctuations.
■ Observe the operating instructions for the connected devices! £
46 Using the system
Page 58 of 157
Starting-off and Driving
Starting and stopping the engine
ä
Introduction
This chapter contains information on the following subjects:
Adjusting the steering wheel position 57
Electromechanical power steering 57
Electronic immobiliser 57
Ignition lock 58
Starting engine 58
Switching the engine off 58
WARNING
■ Never adjust the steering wheel when the vehicle is moving only when the
vehicle is stationary!
■ Maintain a distance of 25 cm B
to the steering wheel
» Fig. 62 on page 57.
Not maintaining this minimum distance will mean that the airbag system will
not be able to properly protect you – hazard! ■ The lever for adjusting the steering wheel must be locked whilst driving so
that the position of the steering wheel cannot accidently change during the
journey – risk of accident! ■ If the steering wheel is adjusted further towards the head, the protection
provided by the driver airbag in the event of an accident is reduced. Check
that the steering wheel is aligned to the chest. ■ When driving, hold the steering wheel with both hands firmly on the outer
edge in the 9
o'clock and 3 o'clock position. Never hold the steering wheel in
the 12 o'clock position or in any other way (e.g. in the middle or inner edge of
the steering wheel). In such cases, you could injure the arms, hands and head
when the driver airbag is deployed. ■ When driving, the ignition key must always be in the position 2
» Fig. 63 on
page 58
(ignition switched on) without the engine running. This position is
indicated by the warning lights coming on. If this is not the case, it could result
in unexpected locking of the steering wheel – risk of accident! WARNING (Continued)
■ Only pull the ignition key from the ignition lock when the vehicle has come
to a complete stop (by applying the handbrake). Otherwise the steering wheel
could block – risk of accident!
■ When leaving the vehicle, the ignition must always be removed. This is par-
ticularly important if children are left in the vehicle. Otherwise the children
could, for example, start the engine – risk of accident or injury!
■ Never leave the engine running in unventilated or closed rooms. The ex-
haust gases of the engine contain besides the odorless and colourless carbon
monoxide a poisonous gas – hazard! Carbon monoxide can cause uncon-
sciousness and death. ■ Never leave the vehicle unattended with the engine running.
■ Never switch off the engine before the vehicle is stationary – risk of acci-
dent! CAUTION
■ The starter may only be operated (ignition key position 3
» page 58), if the
engine is not running. The starter or engine can be damaged if the starter is acti-
vated when the engine is running. ■ Let go of the ignition key as soon as the engine starts otherwise the starter
could be damaged. ■ Avoid high engine revolutions, full throttle and high engine loads as long as the
engine has not yet reached its operating temperature – risk of damaging the en-
gine!
■ Do not tow start the engine - danger of damaging the engine! On vehicles with
a catalytic converter, unburnt fuel may get into the catalytic converter where it
may ignite. This in turn may damage the catalytic converter. The battery from an-
other vehicle can be used as a jump-start aid » page 134, Jump-starting .
■ Do not switch the engine off immediately at the end of your journey after the
engine has been operated over a prolonged period at high loads but leave it to
run at an idling speed for about 1
minute. This prevents any possible accumulation
of heat when the engine is switched off. For the sake of the environment
Do not warm up the engine while the vehicle is stationary. If possible, start your
journey as soon as the engine has started. Through this the engine reaches its
operating temperature more rapidly and the pollutant emissions are lower. £
56 Using the system
Page 67 of 157
Briefly press the rocker button B
into the position RES
to resume the stored
speed after the clutch or brake pedal is released. ÐSwitching off the cruise control system completely
First read and observe the introductory information and safety warn-
ings on page 63.
›
Turn the switch A
» Fig. 68
on page 64 » page 64 into the OFF position. ÐSTART/STOP
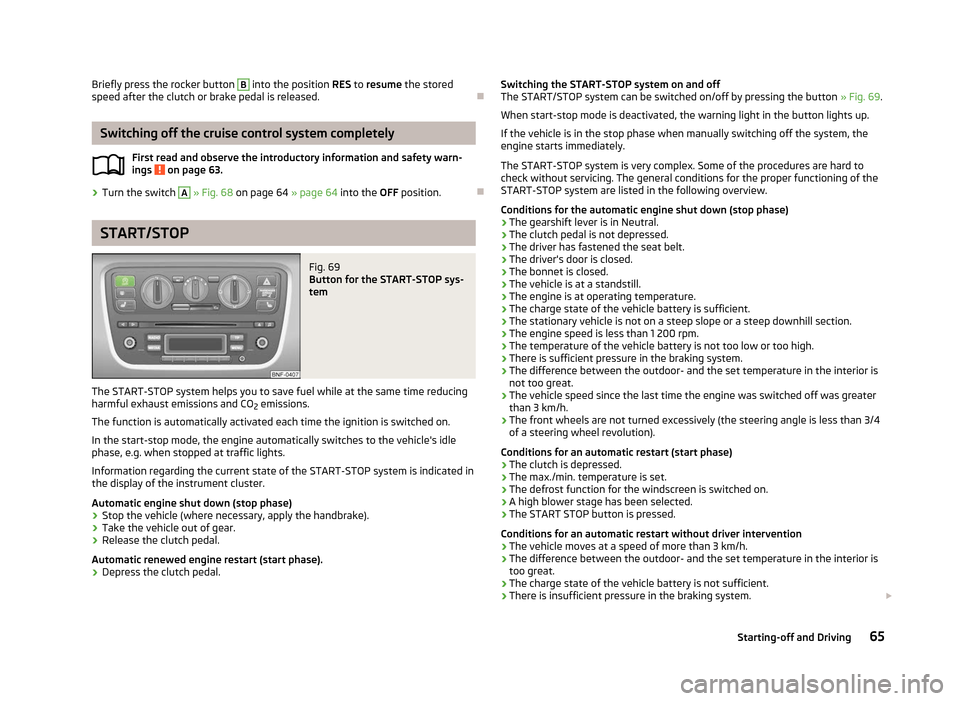
Fig. 69
Button for the START-STOP sys-
tem
The START-STOP system helps you to save fuel while at the same time reducing
harmful exhaust emissions and CO 2 emissions.
The function is automatically activated each time the ignition is switched on.
In the start-stop mode, the engine automatically switches to the vehicle's idle
phase, e.g. when stopped at traffic lights.
Information regarding the current state of the
START-STOP system is indicated in
the display of the instrument cluster.
Automatic engine shut down (stop phase)
› Stop the vehicle (where necessary, apply the handbrake).
› Take the vehicle out of gear.
› Release the clutch pedal.
Automatic renewed engine restart (start phase).
› Depress the clutch pedal.
ä
Switching the START-STOP system on and off
The START/STOP
system can be switched on/off by pressing the button » Fig. 69.
When start-stop mode is deactivated, the warning light in the button lights up.
If the vehicle is in the stop phase when manually switching off the system, the
engine starts immediately.
The START-STOP system is very complex. Some of the procedures are hard to
check without servicing. The general conditions for the proper functioning of the
START-STOP system are listed in the following overview.
Conditions for the automatic engine shut down (stop phase)
› The gearshift lever is in Neutral.
› The clutch pedal is not depressed.
› The driver has fastened the seat belt.
› The driver's door is closed.
› The bonnet is closed.
› The vehicle is at a standstill.
› The engine is at operating temperature.
› The charge state of the vehicle battery is sufficient.
› The stationary vehicle is not on a steep slope or a steep downhill section.
› The engine speed is less than 1 200 rpm.
› The temperature of the vehicle battery is not too low or too high.
› There is sufficient pressure in the braking system.
› The difference between the outdoor- and the set temperature in the interior is
not too great.
› The vehicle speed since the last time the engine was switched off was greater
than 3 km/h.
› The front wheels are not turned excessively (the steering angle is less than 3/4
of a steering wheel revolution).
Conditions for an automatic restart (start phase)
› The clutch is depressed.
› The max./min. temperature is set.
› The defrost function for the windscreen is switched on.
› A high blower stage has been selected.
› The START STOP button is pressed.
Conditions for an automatic restart without driver intervention
› The vehicle moves at a speed of more than 3 km/h.
› The difference between the outdoor- and the set temperature in the interior is
too great.
› The charge state of the vehicle battery is not sufficient.
› There is insufficient pressure in the braking system.
£
65
Starting-off and Driving
Page 68 of 157
WARNING
■ The brake servo unit and power steering only operate if the engine is run-
ning.
■ Never let the vehicle roll with the engine switched off. CAUTION
If the START-STOP system is used at very high outside temperatures over a very
long period of time, the vehicle battery can be damaged. Note
■ Changes to the outdoor temperature can have an effect on the internal temper-
ature of the vehicle battery even after several hours. If the vehicle remains out-
doors for a long time in minus temperatures or in direct sunlight, it can take sev-
eral hours until the internal temperature of the vehicle battery reaches a suitable
temperature for proper operation of the
START STOP system.
■ In some instances it may be necessary to start the engine manually with the ig-
nition key (e.g. when the seat belt is not inserted or the driver's door is opened in
Stop mode for more than approx. 30 seconds). ÐCity Safe Drive
ä
Introduction Fig. 70
Laser sensor/detection range This chapter contains information on the following subjects:
Switching the
City Safe Drive on and off 67
Laser sensor 68
Special driving situations 68
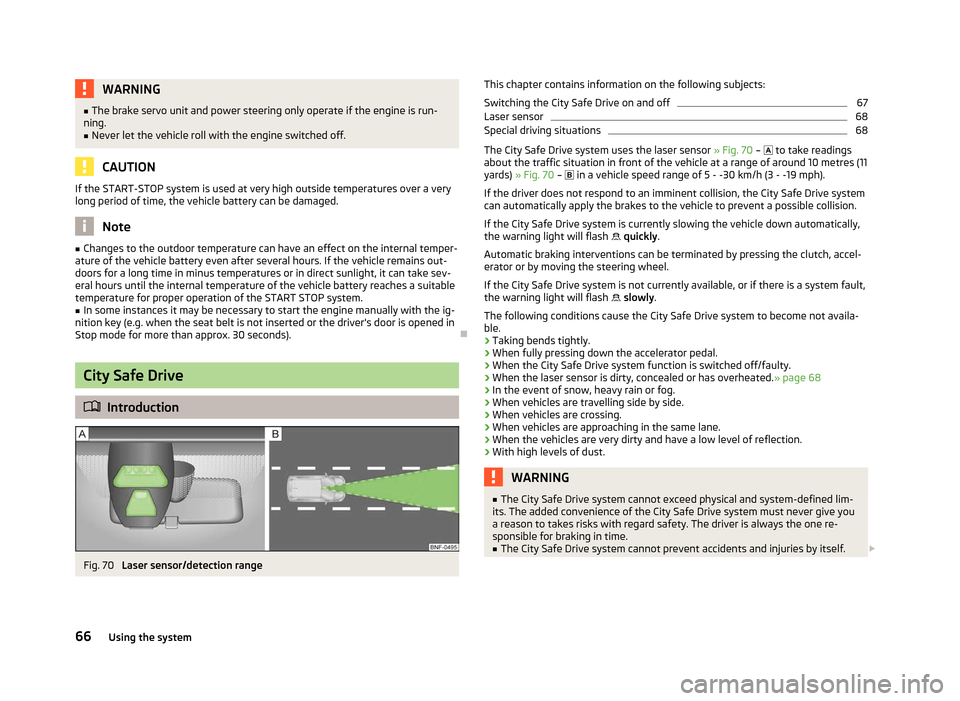
The City Safe Drive system uses the laser sensor » Fig. 70 – to take readings
about the traffic situation in front of the vehicle at a range of around 10 metres (11
yards) » Fig. 70 – in a vehicle speed range of 5 - -30
km/h (3 - -19 mph).
If the driver does not respond to an imminent collision, the City Safe Drive system
can automatically apply the brakes to the vehicle to prevent a possible collision.
If the City Safe Drive system is currently slowing the vehicle down automatically,
the warning light will flash quickly .
Automatic braking interventions can be terminated by pressing the clutch, accel-
erator or by moving the steering wheel.
If the City Safe Drive system is not currently available, or if there is a system fault,
the warning light will flash slowly .
The following conditions cause the City Safe Drive system to become not availa-
ble.
› Taking bends tightly.
› When fully pressing down the accelerator pedal.
› When the City Safe Drive system function is switched off/faulty.
› When the laser sensor is dirty, concealed or has overheated.
» page 68
› In the event of snow, heavy rain or fog.
› When vehicles are travelling side by side.
› When vehicles are crossing.
› When vehicles are approaching in the same lane.
› When the vehicles are very dirty and have a low level of reflection.
› With high levels of dust. WARNING
■ The
City Safe Drive system cannot exceed physical and system-defined lim-
its. The added convenience of the City Safe Drive system must never give you
a reason to takes risks with regard safety. The driver is always the one re-
sponsible for braking in time.
■ The City Safe Drive system cannot prevent accidents and injuries by itself. £
66 Using the system
Page 111 of 157
WARNING
■ Never open the bonnet if you can see steam or coolant flowing out of the
engine compartment – risk of scalding! Wait until the steam or coolant has
stopped escaping.
■ Turn off the engine and withdraw the ignition key.
■ If the vehicle is fitted with a manual gearbox, move the gearshift lever into
Neutral, or if the vehicle is fitted with an automatic gearbox, move the selec-
tor lever into position P .
■ Firmly apply the handbrake.
■ Allow the engine to cool.
■ For safety reasons, the bonnet must always be properly closed when driving.
This is why after closing the bonnet, the lock must always be checked to en-
sure it has engaged properly. ■ If you notice that the lock is not properly engaged while driving, stop the ve-
hicle immediately and close the bonnet – risk of an accident!
■ Keep children clear of the engine compartment.
■ Do not touch any hot engine parts – risk of burns!
■ Never spill fluids on the hot engine. Such fluids (e.g. the antifreeze con-
tained in the coolant) may ignite!
■ Avoid short circuits in the electrical system – particularly on the vehicle's
battery.
■ Never touch the radiator fan while the engine is still warm. The fan might
suddenly start running! ■ Never open the end cover of the coolant expansion reservoir while the en-
gine is still warm. The cooling system is pressurized! ■ When opening the end cover of the coolant expansion reservoir, cover it
with a cloth to protect your face, hands and arms from hot steam or hot cool-
ant.
■ Do not leave any items such as cloths or tools in the engine compartment.
■ If you wish to work under the vehicle, you must secure the vehicle from roll-
ing away and support it with suitable supporting blocks: the car jack is not
sufficient for this – risk of injury! WARNING (Continued)
■ If any inspection work has to be carried out when the engine is running,
there is an additional risk from rotating parts (e.g. V-belt, alternator, radiator
fan) and the high-voltage ignition system. The following must also be ob-
served: ■Never touch the electric wiring on the ignition system.
■ Always make sure that no jewellery, loose clothing or long hair can get
caught in rotating engine parts – hazard! Always remove any jewellery, tie
back long hair and wear tight fitting clothing before completing any work.
■ Additionally, the following warning instructions must be observed if work
has to be carried out on the fuel or electrical system. ■Always disconnect the vehicle battery from the electrical system.
■ Do not smoke.
■ Never work near open flames.
■ Always have a functioning fire extinguisher nearby. CAUTION
Always top up using the correct specification of fluids. This may result in major
operating problems and also vehicle damage! For the sake of the environment
In view of the environmentally friendly disposal of fluids, the specials tools and
knowledge required for such work, we recommend that fluids are changed by a
Škoda
Service Partner as part of the inspection service. Note
■ If you have any questions regarding the fluids, visit a
ŠKODA Service Partner.
■ Fluids with the correct specifications can be purchased from ŠKODA Original Ac-
cessories. Ð
109
Inspecting and replenishing
Page 112 of 157
Opening and closing the bonnet
Fig. 97
Unlocking the bonnet Fig. 98
Securing the bonnet
First read and observe the introductory information and safety warn-
ings on page 108.
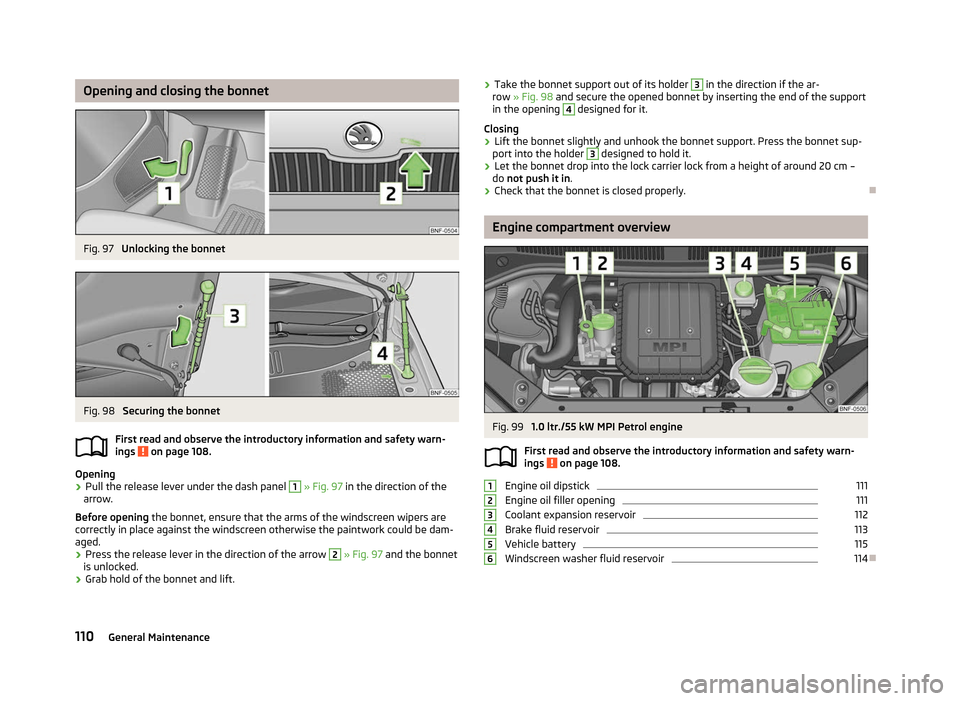
Opening
›
Pull the release lever under the dash panel 1
» Fig. 97 in the direction of the
arrow.
Before opening the bonnet, ensure that the arms of the windscreen wipers are
correctly in place against the windscreen otherwise the paintwork could be dam-
aged.
› Press the release lever in the direction of the arrow 2
» Fig. 97 and the bonnet
is unlocked.
› Grab hold of the bonnet and lift.
ä ›
Take the bonnet support out of its holder 3
in the direction if the ar-
row » Fig. 98 and secure the opened bonnet by inserting the end of the support
in the opening 4
designed for it.
Closing
› Lift the bonnet slightly and unhook the bonnet support. Press the bonnet sup-
port into the holder 3
designed to hold it.
› Let the bonnet drop into the lock carrier lock from a height of around 20
cm –
do not push it in .
› Check that the bonnet is closed properly. Ð Engine compartment overview
Fig. 99
1.0 ltr./55 kW MPI Petrol engine
First read and observe the introductory information and safety warn-
ings on page 108.
Engine oil dipstick 111
Engine oil filler opening 111
Coolant expansion reservoir 112
Brake fluid reservoir 113
Vehicle battery 115
Windscreen washer fluid reservoir 114
Ð
ä 1
2
3
4
5
6
110
General Maintenance
Page 117 of 157
Vehicle battery
ä
Introduction
This chapter contains information on the following subjects:
Checking the battery electrolyte level 116
Operation in winter 117
Charging a vehicle battery 117
Disconnecting and reconnecting the vehicle battery 117
Replacing the vehicle battery 117
Automatic load deactivation 118
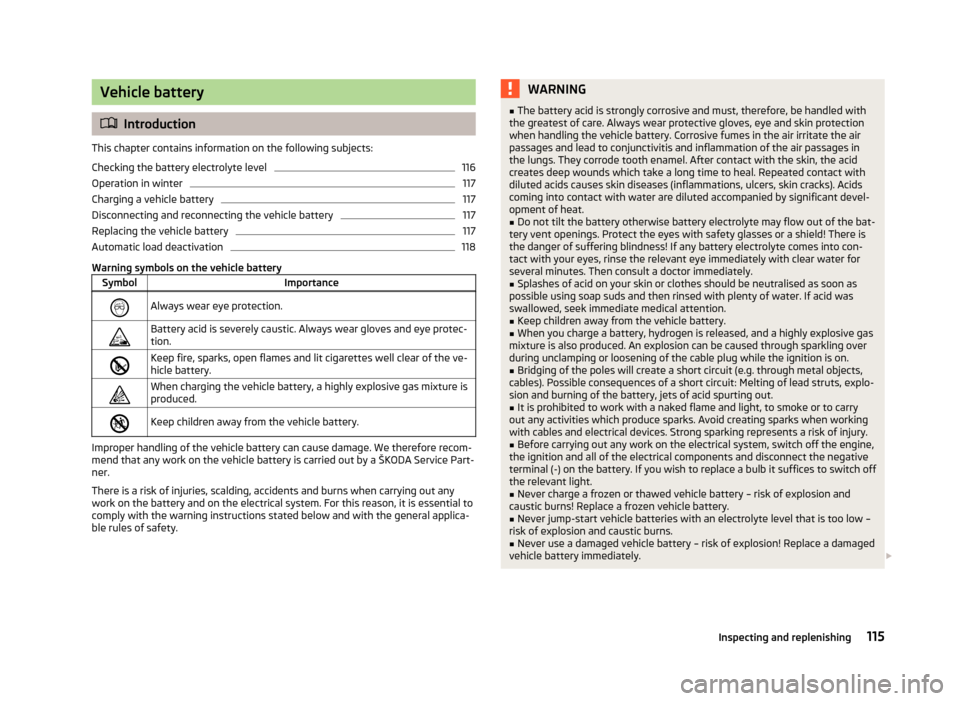
Warning symbols on the vehicle battery Symbol Importance
Always wear eye protection.
Battery acid is severely caustic. Always wear gloves and eye protec-
tion.
Keep fire, sparks, open flames and lit cigarettes well clear of the ve-
hicle battery.
When charging the vehicle battery, a highly explosive gas mixture is
produced.
Keep children away from the vehicle battery. Improper handling of the vehicle battery can cause damage. We therefore recom-
mend that any work on the vehicle battery is carried out by a
ŠKODA Service Part-
ner.
There is a risk of injuries, scalding, accidents and burns when carrying out any
work on the battery and on the electrical system. For this reason, it is essential to
comply with the warning instructions stated below and with the general applica-
ble rules of safety. WARNING
■ The battery acid is strongly corrosive and must, therefore, be handled with
the greatest of care. Always wear protective gloves, eye and skin protection
when handling the vehicle battery. Corrosive fumes in the air irritate the air
passages and lead to conjunctivitis and inflammation of the air passages in
the lungs. They corrode tooth enamel. After contact with the skin, the acid
creates deep wounds which take a long time to heal. Repeated contact with
diluted acids causes skin diseases (inflammations, ulcers, skin cracks). Acids
coming into contact with water are diluted accompanied by significant devel-
opment of heat.
■ Do not tilt the battery otherwise battery electrolyte may flow out of the bat-
tery vent openings. Protect the eyes with safety glasses or a shield! There is
the danger of suffering blindness! If any battery electrolyte comes into con-
tact with your eyes, rinse the relevant eye immediately with clear water for
several minutes. Then consult a doctor immediately.
■ Splashes of acid on your skin or clothes should be neutralised as soon as
possible using soap suds and then rinsed with plenty of water. If acid was
swallowed, seek immediate medical attention.
■ Keep children away from the vehicle battery.
■ When you charge a battery, hydrogen is released, and a highly explosive gas
mixture is also produced. An explosion can be caused through sparkling over
during unclamping or loosening of the cable plug while the ignition is on.
■ Bridging of the poles will create a short circuit (e.g. through metal objects,
cables). Possible consequences of a short circuit: Melting of lead struts, explo-
sion and burning of the battery, jets of acid spurting out.
■ It is prohibited to work with a naked flame and light, to smoke or to carry
out any activities which produce sparks. Avoid creating sparks when working
with cables and electrical devices. Strong sparking represents a risk of injury. ■ Before carrying out any work on the electrical system, switch off the engine,
the ignition and all of the electrical components and disconnect the negative
terminal
(-) on the battery. If you wish to replace a bulb it suffices to switch off
the relevant light. ■ Never charge a frozen or thawed vehicle battery – risk of explosion and
caustic burns! Replace a frozen vehicle battery. ■ Never jump-start vehicle batteries with an electrolyte level that is too low –
risk of explosion and caustic burns. ■ Never use a damaged vehicle battery – risk of explosion! Replace a damaged
vehicle battery immediately. £
115
Inspecting and replenishing
Page 118 of 157
CAUTION
■ The vehicle battery must only be disconnected if the ignition is switched off,
otherwise the vehicle's electrical system (electronic components) can be dam-
aged. When disconnecting the battery from the electrical system, first of all dis-
connect the negative terminal
(-) of the battery. Then disconnect the positive ter-
minal (+).
■ When connecting the battery to the electrical system, first connect the positive
terminal (+) of the battery. Then connect the negative terminal
(-). Under no cir-
cumstances must the battery cables be connected incorrectly – risk of a cable fire.
■ Ensure that battery acid does not come into contact with the bodywork – risk of
damage to the paintwork.
■ Do not place the battery in direct daylight in order to protect the vehicle battery
housing from the effects of ultra-violet light.
■ If the vehicle has not been driven for more than 3 to 4 weeks, the battery will
discharge. This is because certain electrical components consume electricity (e.
g.
control units) also in idle state. Prevent the battery from discharging by discon-
necting the battery's negative terminal or continuously charging the battery with
a very low charging current.
■ If the vehicle is frequently used for making short trips, the vehicle battery will
not have time to charge up sufficiently and may discharge. For the sake of the environment
A vehicle battery that has been removed is a special type of hazardous waste.
These must be disposed of in accordance with national legal regulations. Note
You should replace batteries older than 5 years. Ð Checking the battery electrolyte level
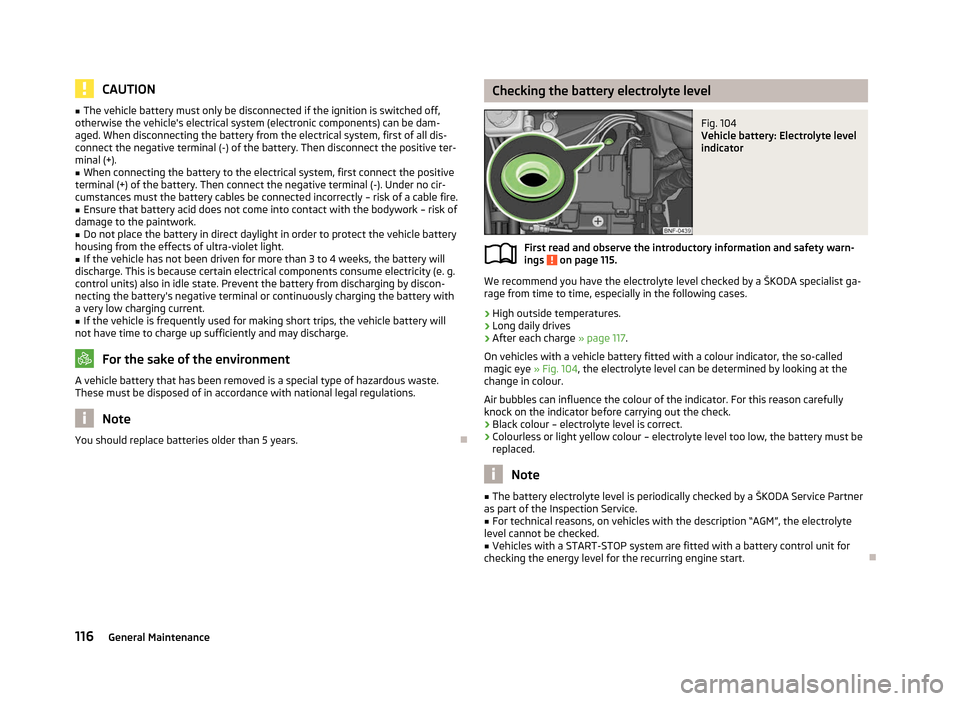
Fig. 104
Vehicle battery: Electrolyte level
indicator
First read and observe the introductory information and safety warn-
ings on page 115.
We recommend you have the electrolyte level checked by a ŠKODA specialist ga-
rage from time to time, especially in the following cases.
› High outside temperatures.
› Long daily drives
› After each charge
» page 117.
On vehicles with a vehicle battery fitted with a colour indicator, the so-called
magic eye » Fig. 104 , the electrolyte level can be determined by looking at the
change in colour.
Air bubbles can influence the colour of the indicator. For this reason carefully
knock on the indicator before carrying out the check.
› Black colour – electrolyte level is correct.
› Colourless or light yellow colour – electrolyte level too low, the battery must be
replaced. Note
■ The battery electrolyte level is periodically checked by a
ŠKODA Service Partner
as part of the Inspection Service. ■ For technical reasons, on vehicles with the description “AGM”, the electrolyte
level cannot be checked. ■ Vehicles with a START-STOP system are fitted with a battery control unit for
checking the energy level for the recurring engine start. Ð
ä
116 General Maintenance
Page 119 of 157
Operation in winter
First read and observe the introductory information and safety warn-
ings on page 115.
At low temperatures, the vehicle battery only has part of the initial power output
that it has at normal temperatures.
A discharged vehicle battery may already freeze at temperatures just below 0
°C.
We therefore recommend that you have the battery checked and, if necessary, re-
charged by a ŠKODA Service Partner before the start of the winter.
ÐCharging a vehicle battery
First read and observe the introductory information and safety warn-
ings on page 115.
A properly charged vehicle battery is essential for reliably starting the engine.
›
Switch off the ignition and all of the electrical components.
› Only for “quick-charging”: Disconnect both battery cables (first of all “negative”,
then “positive”).
› Attach the terminal clamps of the charger to the battery terminals (red =
“posi-
tive
”, black = “negative”).
› Only now plug the mains cable of the charger into the power socket and switch
on the device.
› When charging is completed: Switch off the charger and remove the mains ca-
ble from the power socket.
› Only then disconnect the charger's terminal clamps.
› Reconnect the cables to the battery, if necessary (first of all
“positive”, then
“negative
”).
It is not normally necessary to disconnect the cables of the battery if you re-
charge the vehicle battery using low amperages (as for example from a mini-
charger). Refer to the instructions of the charger manufacturer.
A charging current of 0.1 multiple of the total vehicle battery capacity (or lower)
must be used until full charging is achieved.
It is, however, necessary to disconnect both cables before charging the battery
with high amperages, so-called “ quick-charging”.
ä
ä “Quick-charging” the vehicle battery is
dangerous
and requires a special charger
and specialist knowledge. We therefore recommend having the quick charging of
vehicle batteries undertaken by a ŠKODA specialist garage.
The vent plugs of the vehicle battery should not be opened for charging. CAUTION
On vehicles with the START/STOP system, the pole terminal of the charger must
not be connected directly to the negative terminal of the vehicle battery, but only
to the engine earth » page 136, Jump-starting in vehicles with the
START-STOP
system . Ð Disconnecting and reconnecting the vehicle battery
First read and observe the introductory information and safety warn-
ings on page 115.
On disconnecting and reconnecting the vehicle battery the following functions
are initially deactivated or are no longer able to operate fault-free:
Operation Operating measure
Enter radio code number » Radio manual
Setting the clock » page 12
Data in the multifunction display are deleted. » page 11 Note
We recommend having the vehicle checked by a ŠKODA Service Partner to ensure
the full functionality of all electrical systems. Ð Replacing the vehicle battery
First read and observe the introductory information and safety warn-
ings on page 115.
When replacing a battery, the new vehicle battery must have the same capacity,
voltage, amperage and be the same size. Suitable types of vehicle batteries can
be purchased from a
ŠKODA Service Partner. £
ä
ä
117
Inspecting and replenishing