power steering SKODA FABIA 2010 2.G / 5J Owner's Manual
[x] Cancel search | Manufacturer: SKODA, Model Year: 2010, Model line: FABIA, Model: SKODA FABIA 2010 2.G / 5JPages: 244, PDF Size: 29.53 MB
Page 4 of 244
Contents3
Using the system
Safety
Driving Tips
General Maintenance
Breakdown assistance
Technical Data
ContentsLayout of this Owner's Manual
(explanations)
. . . . . . . . . . . . . . . . . . . . . . . . . .
Using the system
. . . . . . . . . . . . . . . . . . . . . .
Cockpit
. . . . . . . . . . . . . . . . . . . . . . . . . . . . . . . . . . . . . . . .
General view . . . . . . . . . . . . . . . . . . . . . . . . . . . . . . . . .
Quick Reference Guide
. . . . . . . . . . . . . . . . . . . . . . .
Basic functions and important information . . . . .
Instruments and warning lights
. . . . . . . . . . . . . . .
Overview of the instrument cluster . . . . . . . . . . . . .
Engine revolutions counter . . . . . . . . . . . . . . . . . . . .
Speedometer . . . . . . . . . . . . . . . . . . . . . . . . . . . . . . . .
Coolant temperature gauge* . . . . . . . . . . . . . . . . . .
Fuel gauge* . . . . . . . . . . . . . . . . . . . . . . . . . . . . . . . . . .
Counter for distance driven . . . . . . . . . . . . . . . . . . .
Service Interval Display . . . . . . . . . . . . . . . . . . . . . . .
Digital clock . . . . . . . . . . . . . . . . . . . . . . . . . . . . . . . . . .
Shift recommendation for changing gears* . . . . .
Multi-functional indicator (onboard computer)*
MAXI DOT display (information display)* . . . . . . .
Auto Check Control . . . . . . . . . . . . . . . . . . . . . . . . . . .
Warning lights . . . . . . . . . . . . . . . . . . . . . . . . . . . . . . . .
Unlocking and locking
. . . . . . . . . . . . . . . . . . . . . . . .
Key . . . . . . . . . . . . . . . . . . . . . . . . . . . . . . . . . . . . . . . . . .
Locking / Unlocking . . . . . . . . . . . . . . . . . . . . . . . . . . .
Child safety lock . . . . . . . . . . . . . . . . . . . . . . . . . . . . . .
Central locking system* . . . . . . . . . . . . . . . . . . . . . . .
Remote control* . . . . . . . . . . . . . . . . . . . . . . . . . . . . . .
Anti-theft alarm system* . . . . . . . . . . . . . . . . . . . . . .
Interior monitor* and Towing protection monitoring*
Electrical power windows* . . . . . . . . . . . . . . . . . . . .
Electric sliding/tilting roof* . . . . . . . . . . . . . . . . . . . .
Lights and Visibility
. . . . . . . . . . . . . . . . . . . . . . . . . . . .
Lights . . . . . . . . . . . . . . . . . . . . . . . . . . . . . . . . . . . . . . . .
Interior lighting . . . . . . . . . . . . . . . . . . . . . . . . . . . . . . .
Visibility . . . . . . . . . . . . . . . . . . . . . . . . . . . . . . . . . . . . . .
Windshield wiper and wash system . . . . . . . . . . . . .
Rear mirror . . . . . . . . . . . . . . . . . . . . . . . . . . . . . . . . . . .
Seats and Storage
. . . . . . . . . . . . . . . . . . . . . . . . . . . . . .
Front seats . . . . . . . . . . . . . . . . . . . . . . . . . . . . . . . . . . . .
Head restraints . . . . . . . . . . . . . . . . . . . . . . . . . . . . . . . .
Heating the front seats* . . . . . . . . . . . . . . . . . . . . . . .
Rear seats . . . . . . . . . . . . . . . . . . . . . . . . . . . . . . . . . . . .
Pedals . . . . . . . . . . . . . . . . . . . . . . . . . . . . . . . . . . . . . . . .
luggage compartment . . . . . . . . . . . . . . . . . . . . . . . . .
Variable loading floor in the luggage compartment*
(Combi) . . . . . . . . . . . . . . . . . . . . . . . . . . . . . . . . . . . . . .
Net partition* (Combi) . . . . . . . . . . . . . . . . . . . . . . . .
Bicycle holder in the luggage compartment* . . . .
The roof rack* . . . . . . . . . . . . . . . . . . . . . . . . . . . . . . . .
Front cup holder . . . . . . . . . . . . . . . . . . . . . . . . . . . . . .
Rear cup holder* . . . . . . . . . . . . . . . . . . . . . . . . . . . . . .
Parking ticket holder . . . . . . . . . . . . . . . . . . . . . . . . . . .
Ashtray* . . . . . . . . . . . . . . . . . . . . . . . . . . . . . . . . . . . . . .
Cigarette lighter* and power sockets* . . . . . . . . . .
Storage compartments . . . . . . . . . . . . . . . . . . . . . . . .
Heating and air conditioning system
. . . . . . . . . .
Air outlet vents . . . . . . . . . . . . . . . . . . . . . . . . . . . . . . . .
Recirculated air mode . . . . . . . . . . . . . . . . . . . . . . . . .
Heating . . . . . . . . . . . . . . . . . . . . . . . . . . . . . . . . . . . . . .
Climatic (semi-automatic air conditioning system)*
Climatronic* (automatic air conditioning) . . . . . . .
Starting-off and Driving
. . . . . . . . . . . . . . . . . . . . . . .
Setting steering wheel position . . . . . . . . . . . . . . . . .
Ignition lock . . . . . . . . . . . . . . . . . . . . . . . . . . . . . . . . . .
Starting the engine . . . . . . . . . . . . . . . . . . . . . . . . . . . .
Switching off the engine . . . . . . . . . . . . . . . . . . . . . . .Shifting (manual gearbox) . . . . . . . . . . . . . . . . . . . . .
Handbrake . . . . . . . . . . . . . . . . . . . . . . . . . . . . . . . . . . .
Parking aid* . . . . . . . . . . . . . . . . . . . . . . . . . . . . . . . . . .
Cruise control system (CCS)* . . . . . . . . . . . . . . . . . .
“START-STOP”* . . . . . . . . . . . . . . . . . . . . . . . . . . . . . . .
Automatic gearbox
. . . . . . . . . . . . . . . . . . . . . . . . . . . .
Automatic gearbox* . . . . . . . . . . . . . . . . . . . . . . . . . .
Communication
. . . . . . . . . . . . . . . . . . . . . . . . . . . . . . .
Multifunction steering wheel* . . . . . . . . . . . . . . . . .
Universal telephone preinstallation GSM II* . . . . .
Voice control . . . . . . . . . . . . . . . . . . . . . . . . . . . . . . . . .
Music playback via Bluetooth® . . . . . . . . . . . . . . . .
Inputs AUX-IN* and MDI* . . . . . . . . . . . . . . . . . . . . .
Safety
. . . . . . . . . . . . . . . . . . . . . . . . . . . . . . . . . . . . . . .
Passive Safety
. . . . . . . . . . . . . . . . . . . . . . . . . . . . . . . . .
Basic information . . . . . . . . . . . . . . . . . . . . . . . . . . . . .
Correct seated position . . . . . . . . . . . . . . . . . . . . . . .
Seat belts
. . . . . . . . . . . . . . . . . . . . . . . . . . . . . . . . . . . . . .
Why seat belts? . . . . . . . . . . . . . . . . . . . . . . . . . . . . . . .
The physical principle of a frontal collision . . . . . .
Important safety information regarding the use of seat
belts . . . . . . . . . . . . . . . . . . . . . . . . . . . . . . . . . . . . . . . . .
How are seat belts correctly fastened? . . . . . . . . . .
Belt tensioner . . . . . . . . . . . . . . . . . . . . . . . . . . . . . . . .
Airbag system
. . . . . . . . . . . . . . . . . . . . . . . . . . . . . . . . .
Description of the airbag system . . . . . . . . . . . . . . .
Front airbags . . . . . . . . . . . . . . . . . . . . . . . . . . . . . . . . .
Side airbags* . . . . . . . . . . . . . . . . . . . . . . . . . . . . . . . . .
Head airbags* . . . . . . . . . . . . . . . . . . . . . . . . . . . . . . . .
Deactivating airbags . . . . . . . . . . . . . . . . . . . . . . . . . .
67991010151515161616171718181922232635353636374142434446
48485354555759596061616363676870727373747474758080808183868989899091
92929394959898104104105110111111113113113114117117117118119120122122123125127128
s3j8.a.book Page 3 Tuesday, April 20, 2010 1:10 PM
Page 5 of 244
Contents 4
Transporting children safely
. . . . . . . . . . . . . . . . . .
What you should know about transporting children!
Child seat . . . . . . . . . . . . . . . . . . . . . . . . . . . . . . . . . . . .
Attaching a child seat using the “ISOFIX” system*
Attaching child seat using the “Top Tether” system
Driving Tips
. . . . . . . . . . . . . . . . . . . . . . . . . . . . . .
Intelligent Technology
. . . . . . . . . . . . . . . . . . . . . . . .
Electronic stability programme (ESP)* . . . . . . . . . .
Brakes . . . . . . . . . . . . . . . . . . . . . . . . . . . . . . . . . . . . . . .
Brake booster . . . . . . . . . . . . . . . . . . . . . . . . . . . . . . . .
Antilock brake system (ABS) . . . . . . . . . . . . . . . . . . .
Brake Assist* . . . . . . . . . . . . . . . . . . . . . . . . . . . . . . . . .
Uphill Start Assist* . . . . . . . . . . . . . . . . . . . . . . . . . . . .
Electrohydraulic power steering . . . . . . . . . . . . . . .
Tyre pressure monitoring system* . . . . . . . . . . . . . .
Diesel particle filter* (diesel engine) . . . . . . . . . . . .
Driving and the Environment
. . . . . . . . . . . . . . . . .
The first 1 500 kilometres and then afterwards . .
Catalytic converter . . . . . . . . . . . . . . . . . . . . . . . . . . . .
Driving in an economical and environmentally
conscious manner . . . . . . . . . . . . . . . . . . . . . . . . . . . .
Environmental compatibility . . . . . . . . . . . . . . . . . . .
Motoring abroad . . . . . . . . . . . . . . . . . . . . . . . . . . . . .
Avoiding damage to your vehicle . . . . . . . . . . . . . .
Driving through bodies of water on roads . . . . . . .
Towing a trailer
. . . . . . . . . . . . . . . . . . . . . . . . . . . . . . . .
Towing a trailer . . . . . . . . . . . . . . . . . . . . . . . . . . . . . . .
General Maintenance
. . . . . . . . . . . . . . .
Taking care of your vehicle and cleaning the
vehicle
. . . . . . . . . . . . . . . . . . . . . . . . . . . . . . . . . . . . . . . . .
General . . . . . . . . . . . . . . . . . . . . . . . . . . . . . . . . . . . . . .
Care of the exterior of vehicle . . . . . . . . . . . . . . . . . .
Care of the interior of vehicle . . . . . . . . . . . . . . . . . .
Fuel
. . . . . . . . . . . . . . . . . . . . . . . . . . . . . . . . . . . . . . . . . . . .
Petrol . . . . . . . . . . . . . . . . . . . . . . . . . . . . . . . . . . . . . . . .
Diesel . . . . . . . . . . . . . . . . . . . . . . . . . . . . . . . . . . . . . . . .
Refuelling . . . . . . . . . . . . . . . . . . . . . . . . . . . . . . . . . . . .
Inspecting and replenishing
. . . . . . . . . . . . . . . . . . .
Engine compartment . . . . . . . . . . . . . . . . . . . . . . . . . .
Engine oil . . . . . . . . . . . . . . . . . . . . . . . . . . . . . . . . . . . . .
Cooling system . . . . . . . . . . . . . . . . . . . . . . . . . . . . . . .
Brake fluid . . . . . . . . . . . . . . . . . . . . . . . . . . . . . . . . . . . .
Battery . . . . . . . . . . . . . . . . . . . . . . . . . . . . . . . . . . . . . . .
Windshield washer system . . . . . . . . . . . . . . . . . . . . .
Wheels and Tyres
. . . . . . . . . . . . . . . . . . . . . . . . . . . . . .
Wheels . . . . . . . . . . . . . . . . . . . . . . . . . . . . . . . . . . . . . . .
Accessories, changes and replacement of partsAccessories and replacement parts . . . . . . . . . . . . .
Technical changes . . . . . . . . . . . . . . . . . . . . . . . . . . . . .
Vehicles of category N1 . . . . . . . . . . . . . . . . . . . . . . . .Breakdown assistance
. . . . . . . . . . . . . .
Breakdown assistance
. . . . . . . . . . . . . . . . . . . . . . . . .
First-aid box* and Warning triangle* . . . . . . . . . . . .
Fire extinguisher* . . . . . . . . . . . . . . . . . . . . . . . . . . . . .
Vehicle tool kit . . . . . . . . . . . . . . . . . . . . . . . . . . . . . . . .
Tyre repair kit . . . . . . . . . . . . . . . . . . . . . . . . . . . . . . . . .
Spare wheel* . . . . . . . . . . . . . . . . . . . . . . . . . . . . . . . . .
Changing a wheel . . . . . . . . . . . . . . . . . . . . . . . . . . . . .
Jump-starting . . . . . . . . . . . . . . . . . . . . . . . . . . . . . . . . .
Tow-starting and towing vehicle . . . . . . . . . . . . . . . .
Fuses and light bulbs
. . . . . . . . . . . . . . . . . . . . . . . . . .
Electric fuses . . . . . . . . . . . . . . . . . . . . . . . . . . . . . . . . . .
Bulbs . . . . . . . . . . . . . . . . . . . . . . . . . . . . . . . . . . . . . . . . .
Technical Data
. . . . . . . . . . . . . . . . . . . . . . . . . .
Technical Data
. . . . . . . . . . . . . . . . . . . . . . . . . . . . . . . .
General information . . . . . . . . . . . . . . . . . . . . . . . . . .
Used abbreviations . . . . . . . . . . . . . . . . . . . . . . . . . . .
Performances . . . . . . . . . . . . . . . . . . . . . . . . . . . . . . . .
Weight . . . . . . . . . . . . . . . . . . . . . . . . . . . . . . . . . . . . . . .
Identification details . . . . . . . . . . . . . . . . . . . . . . . . . .
Fuel consumption according to the ECE standards and
EU guidelines . . . . . . . . . . . . . . . . . . . . . . . . . . . . . . . .
Dimensions . . . . . . . . . . . . . . . . . . . . . . . . . . . . . . . . . .
Engine oil specifications . . . . . . . . . . . . . . . . . . . . . . .
1.2 ltr./44 kW - EU 5 . . . . . . . . . . . . . . . . . . . . . . . . . . .
1.2 ltr./51 kW - EU 5/EU 2 DDK . . . . . . . . . . . . . . . . .
1.2 ltr./63 kW TSI - EU 5 . . . . . . . . . . . . . . . . . . . . . . .
1.2 ltr./77 kW TSI - EU 5 . . . . . . . . . . . . . . . . . . . . . . .
1.4 ltr./63 kW - EU 5 . . . . . . . . . . . . . . . . . . . . . . . . . . .
1,6 l/77 kW - EU 4, EU 2 DDK . . . . . . . . . . . . . . . . . .
1.4 ltr./132 kW TSI - EU 5 . . . . . . . . . . . . . . . . . . . . . .
1.2 ltr./55 kW TDI CR DPF - EU5 . . . . . . . . . . . . . . . .
1.6 ltr./55 kW TDI CR - EU°5 . . . . . . . . . . . . . . . . . . .
1.6 ltr./66 kW TDI CR - EU°5 . . . . . . . . . . . . . . . . . . .
1.6 ltr./77 kW TDI CR - EU°5 . . . . . . . . . . . . . . . . . . .
Index
. . . . . . . . . . . . . . . . . . . . . . . . . . . . . . . . . . . . . . . .
130130132135136137137137139140140141141141142143145145146146149150150151152152155155155155159
162162162163165165167169171172176178178184184184184185185185185185186186187190192195195200
207207207207207207207208209210212214216218220222224226228230232235
s3j8.a.book Page 4 Tuesday, April 20, 2010 1:10 PM
Page 10 of 244
Cockpit
9
Using the system
Safety
Driving Tips
General Maintenance
Breakdown assistance
Technical Data
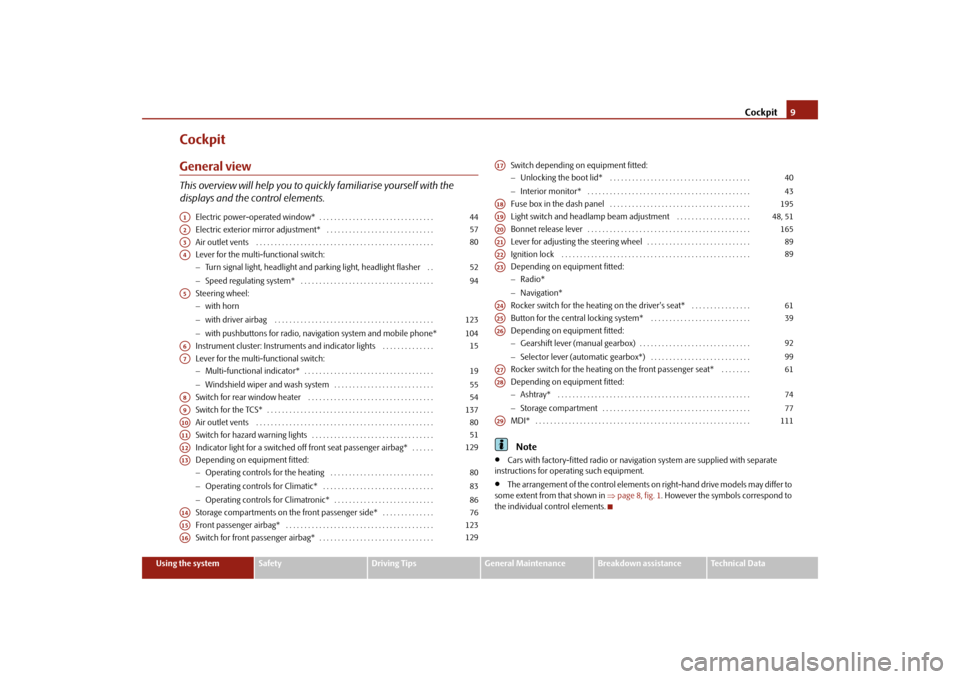
CockpitGeneral viewThis overview will help you to quic
kly familiarise yourself with the
displays and the control elements.
Electric power-operated window* . . . . . . . . . . . . . . . . . . . . . . . . . . . . . . . Electric exterior mirror adjustment* . . . . . . . . . . . . . . . . . . . . . . . . . . . . . Air outlet vents . . . . . . . . . . . . . . . . . . . . . . . . . . . . . . . . . . . . . . . . . . . . . . . . Lever for the multi-functional switch: Turn signal light, headlight and parking light, headlight flasher . . Speed regulating system* . . . . . . . . . . . . . . . . . . . . . . . . . . . . . . . . . . . . Steering wheel: with horn with driver airbag . . . . . . . . . . . . . . . . . . . . . . . . . . . . . . . . . . . . . . . . . . . with pushbuttons for radio, navi
gation system and mobile phone*
Instrument cluster: Instruments and indicator lights . . . . . . . . . . . . . . Lever for the multi-functional switch: Multi-functional indicator* . . . . . . . . . . . . . . . . . . . . . . . . . . . . . . . . . . . Windshield wiper and wash system . . . . . . . . . . . . . . . . . . . . . . . . . . . Switch for rear window heater . . . . . . . . . . . . . . . . . . . . . . . . . . . . . . . . . . Switch for the TCS* . . . . . . . . . . . . . . . . . . . . . . . . . . . . . . . . . . . . . . . . . . . . . Air outlet vents . . . . . . . . . . . . . . . . . . . . . . . . . . . . . . . . . . . . . . . . . . . . . . . .Switch for hazard warning lights . . . . . . . . . . . . . . . . . . . . . . . . . . . . . . . . . Indicator light for a switched off front seat passenger airbag* . . . . . . Depending on equipment fitted: Operating controls for the heating . . . . . . . . . . . . . . . . . . . . . . . . . . . . Operating controls for Climatic* . . . . . . . . . . . . . . . . . . . . . . . . . . . . . . Operating controls for Climatronic* . . . . . . . . . . . . . . . . . . . . . . . . . . . Storage compartments on the front passenger side* . . . . . . . . . . . . . .Front passenger airbag* . . . . . . . . . . . . . . . . . . . . . . . . . . . . . . . . . . . . . . . . Switch for front passenger airbag* . . . . . . . . . . . . . . . . . . . . . . . . . . . . . . .
Switch depending on equipment fitted: Unlocking the boot lid* . . . . . . . . . . . . . . . . . . . . . . . . . . . . . . . . . . . . . . Interior monitor* . . . . . . . . . . . . . . . . . . . . . . . . . . . . . . . . . . . . . . . . . . . . Fuse box in the dash panel . . . . . . . . . . . . . . . . . . . . . . . . . . . . . . . . . . . . . . Light switch and headlamp beam adjustment . . . . . . . . . . . . . . . . . . . .Bonnet release lever . . . . . . . . . . . . . . . . . . . . . . . . . . . . . . . . . . . . . . . . . . . . Lever for adjusting the steering wheel . . . . . . . . . . . . . . . . . . . . . . . . . . . . Ignition lock . . . . . . . . . . . . . . . . . . . . . . . . . . . . . . . . . . . . . . . . . . . . . . . . . . .Depending on equipment fitted: Radio* Navigation* Rocker switch for the heating on the driver's seat* . . . . . . . . . . . . . . . .Button for the central locking system* . . . . . . . . . . . . . . . . . . . . . . . . . . . Depending on equipment fitted: Gearshift lever (manual gearbox) . . . . . . . . . . . . . . . . . . . . . . . . . . . . . . Selector lever (automatic gearbox*) . . . . . . . . . . . . . . . . . . . . . . . . . . . Rocker switch for the heating on the front passenger seat* . . . . . . . . Depending on equipment fitted: Ashtray* . . . . . . . . . . . . . . . . . . . . . . . . . . . . . . . . . . . . . . . . . . . . . . . . . . . . Storage compartment . . . . . . . . . . . . . . . . . . . . . . . . . . . . . . . . . . . . . . . . MDI* . . . . . . . . . . . . . . . . . . . . . . . . . . . . . . . . . . . . . . . . . . . . . . . . . . . . . . . . . .Note
Cars with factory-fitted radio or naviga
tion system are supplied with separate
instructions for operating such equipment.
The arrangement of the control elements on right-hand drive models may differ to
some extent from that shown in
page 8, fig. 1
. However the symbols correspond to
the individual control elements.
A1
44
A2
57
A3
80
A4
5294
A5
123104
A6
15
A7
1955
A8
54
A9
137
A10
80
A11
51
A12
129
A13
808386
A14
76
A15
123
A16
129
A17
4043
A18
195
A19
48, 51
A20
165
A21
89
A22
89
A23A24
61
A25
39
A26
9299
A27
61
A28
7477
A29
111
s3j8.a.book Page 9 Tuesday, April 20, 2010 1:10 PM
Page 27 of 244
Instruments and warning lights
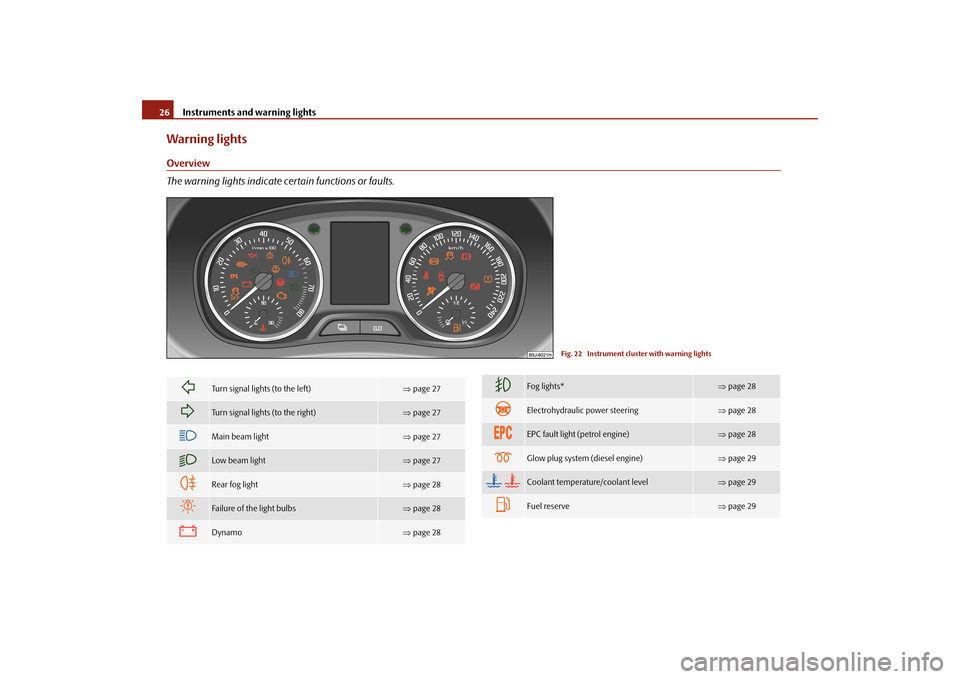
26Warning lightsOverview The warning lights indicate certain functions or faults.
Fig. 22 Instrument cluster with warning lights
Turn signal lights (to the left)
page 27
Turn signal lights (to the right)
page 27
Main beam light
page 27
Low beam light
page 27
Rear fog light
page 28
Failure of the light bulbs
page 28
Dynamo
page 28
Fog lights*
page 28
Electrohydraulic power steering
page 28
EPC fault light (petrol engine)
page 28
Glow plug system (diesel engine)
page 29
Coolant temperature/coolant level
page 29
Fuel reserve
page 29
s3j8.a.book Page 26 Tuesday, April 20, 2010 1:10 PM
Page 29 of 244
Instruments and warning lights
28Rear fog light
The warning light
comes on when the rear fog lights are operating
page 50.
Bulb failure
The warning light
comes on if a bulb is faulty:
up to 2 seconds after the ignition is switched on;
when switching on the defective light bulb.
The following text e.g will be disp
layed in the information display*:
Check front right dipped beam!
The rear side lights and the licence plate li
ghting require several light bulbs. The indi-
cator light
only lights up if all light bulbs of
the licence plate lighting or the parking
light (in one rear light unit) are defective. Check regularly the function of the light bulbs.Alternator
The warning light
comes on after the ignition has
been switched on. It should go
out after the engine has started. If the warning light does not go out after
the engine has started, or comes on when
driving, drive to the nearest specialist garage. The vehicle battery will be discharged in this case so switch off all non-
essential electrical components.
Caution
If the warning light
comes on when driving and in addition the warning light
(cooling system fault) also comes on in di
splay, you must then stop the car immedi-
ately and switch the engine off - risk of engine damage!Fog lights*
The warning light
comes on when the fog lights are operating
page 50.
Electrohydraulic power steering
The warning light
comes on for a few seconds when the ignition is switched on.
If the warning light after switching on the ignition or when driving lights up continu- ously, a fault exists in the electrohydraulic power steering. The power steering operates with reduced steering assist or is completely without function. Further information
page 141.
WARNING
Contact your specialist
garage if the power steering is defective.
Note
If the yellow warning light
goes out after starting the engine again and a short
drive, it is not necessary to visit a specialist garage.
If the battery has been di
sconnected and reconnected, the yellow warning light
comes on after switching on the ignition. Th
e warning light must go out after driving a
short distance.
There is no power-assisted steering su
pport when the vehicle is being towed
without the engine running or when the power-assisted steering is defect. The vehicle is fully steerable however. There is however increased force required to turn the steering wheel.EPC fault light
(petrol engine)
The
(Electronic Power Control) warning light comes on for a few seconds when the
ignition is switched on. If the warning light
flashes after starting the engine
or flashes while driving, a fault
exists in the engine control system. The en
gine management system selects an emer-
gency programme which enables you to drive to the nearest specialist garage by adopting a gentle style of driving. The following text will be displayed in the information display*:
Engine fault: Workshop!
s3j8.a.book Page 28 Tuesday, April 20, 2010 1:10 PM
Page 73 of 244
Seats and Storage
72– If it is necessary, the position of the bicy
cles in the vehicle can be additionally recti-
fied.
WARNING
When transporting passengers and objects, which require the seats to be
folded forwards, ensure the safety of the passengers being transported.
Place the bicycles in the bicycle carrier in such a position that no collision
between the steering arm and
the rear window can occur.
The roof rack*DescriptionPay attention to the following points if you wish to transport luggage or other items on the roof of your vehicle:
A special roof luggage rack system was de
veloped for the vehicle, that is why you
should only use a roof luggage rack which has been released for use by Škoda Auto.
The base carrier is the basis for a comple
te roof luggage rack system. Separate
additional holders are required for safety reasons for transporting luggage, bikes, surf- boards, skis and boats.
The basic version of the roof luggage rack
system and further components can be
obtained from Škoda original accessories.
Caution
If you use other roof rack systems or if the
roof bars are not properly fitted, then any
damage which may result to your car is no
t covered by the warranty agreements. It is
therefore essential to pay attention to the fitting instructions supplied with the roof luggage rack system.
On models fitted with a power sliding/tilting roof, ensure that the opened
sliding/tilting roof does not strike any items of luggage transported on the roof.
Ensure that the opened boot lid does not collide with the roof load.
For the sake of the environment
The increased aerodynamic drag resu
lts in a higher fuel consumption.
Note
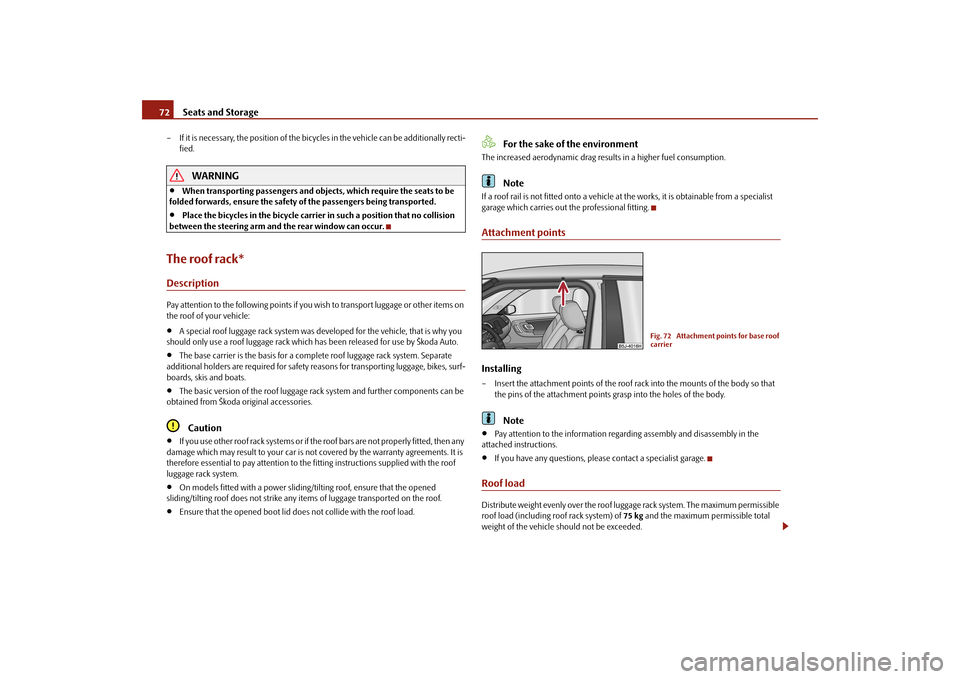
If a roof rail is not fitted onto a vehicle at the works, it is obtainable from a specialist garage which carries out the professional fitting.Attachment pointsInstalling– Insert the attachment points of the roof rack into the mounts of the body so that
the pins of the attachment points grasp into the holes of the body.Note
Pay attention to the information regarding assembly and disassembly in the
attached instructions.
If you have any questions, plea
se contact a specialist garage.
Roof loadDistribute weight evenly over the roof lu
ggage rack system. The maximum permissible
roof load (including roof rack system) of
75 kg
and the maximum
permissible total
weight of the vehicle should not be exceeded.
Fig. 72 Attachment points for base roof carrier
s3j8.a.book Page 72 Tuesday, April 20, 2010 1:10 PM
Page 91 of 244
Starting-off and Driving
90
You should not switch on any major elec
trical components during the heating
period otherwise
the vehicle battery will
be drained unnecessarily.
- start engine Applies to all models: Position
To lock the steering
, with the ignition key withdrawn, turn the steering wheel until the
steering locking pin is heard to
engage. You should always lock the steering as a general
rule if you leave your vehicle. This acts as
a deterrent against possible theft of your
vehicle
.
Position
Move the steering wheel back and forward a little if the ignition key cannot, or cannot easily be turned into this position, in order to release the steering lock. Position
The engine is started in this position. At th
e same time switched on low beam or main
beam or other electrical components wi
th major power consumption are briefly
switched off. The ignition key moves back into position when one releases the key. The ignition key must be turned back into
position each time before starting the
engine again. The starter repeat lock in th
e ignition lock prevents the starter being
engaged when the engine is r
unning and thus getting damaged.
WARNING
When driving, the ignition key must always be in the position (ignition
switched on) without the engine running. This position is indicated by the warning lights coming on. If this is not the case, it could result in unexpected locking of the steering wh
eel - risk of accident!
Do not withdraw the ignition key from the lock until the vehicle has come to
a stop. The steering lock can engage
immediately - risk of accident!
Always withdraw the ignition key if you are going to leave the vehicle, even
for a short time. This is particularly important if children are left in the vehicle. The children might otherwise start the en
gine or operate electrical equipment
(e.g. power windows) - risk of injury!
Starting the engineGeneral You can only start the engine only using an original ignition key.
Place the gearshift lever into neutral (or
place the selector lever to the position
P or
N in the case of an automatic gearbox) and put on the handbrake firmly before starting the engine.
The clutch pedal should be fully depressed when starting the engine - the starter
then only has to crank the engine.
Let go of the key as soon as the engine starts otherwise there may be damage to
the starter. The engine running noises may louder at first be louder for a short time after starting the cold engine until oil pressure can be
built up in the hydraulic valve clearance
compensation. This is quite normal and is not an operating problem. If the engine does not start ... You can use the battery of anothe
r vehicle as a jump-start aid
page 190.
It is only possible to tow-start vehicles fi
tted with a manual gearbox. The tow-starting
distance must not be more than 50 metres
page 193.
WARNING
Never run the engine in non ventilated
or enclosed areas. The exhaust gases
of the engine contain besides the odorless and colourless carbon monoxide a poisonous gas - hazard! Carbon mono
xide can cause unconsciousness and
death.
Never leave your vehicle unattended with the engine running.Caution
The starter may only be operated (ignitio
n key position ), if the engine is not
running. If the starter is imme
diately operated after switchin
g off the engine, the starter
or the engine can be damaged.
A3
A1A2A3
A2
A1
A2
A3
s3j8.a.book Page 90 Tuesday, April 20, 2010 1:10 PM
Page 98 of 244
Starting-off and Driving
97
Using the system
Safety
Driving Tips
General Maintenance
Breakdown assistance
Technical Data
Messages in the instrument cluster (valid for vehicles without information display*)
WARNING
If the engine is switched off, neit
her the brake booster nor the electrohy-
draulic power steering operates.
Never let the vehicle roll wi
th the engine switched off.
Caution
If the “START-STOP” system is used at very
high outside temperatures over a longer
period of time, the vehicl
e battery can be damaged.
Note
A change in ambient temperature can affect the temperature inside the battery
with several hours delay. For example, if
the vehicle is standing outside for a long
period of time at a temperature below freezi
ng, or vice versa under
direct sunlight, it
may take several hours until the temperat
ure inside the battery reaches the appro-
priate temperature for the START-STOP system.
In some cases, it is necessary to manually start the engine using the key (for
example, if the driver's seat belt is not fastened or if the driver door is open for a period of more than 30 seconds during the stop
phase). Pay attention to the relevant
messages in the instrument cluster.
If the Climatronic* is switched into the automatic mode, this may in certain circum-
stances prevent the automatic engine shut down.
ERROR START STOP FEHLER START STOP
Error in the START-STOP system
ENGINE MUST RUN MOTORLAUF NOETIG
Automatic engine shut down is not possible
START STOP ACTIVE START STOP AKTIV
Automatic engine shut down (stop phase)
SWITCH OFF IGNITION ZUENDUNG AUSSCHALTEN
Switch off the ignition
START ENGINE MANUALLYMOTOR MANUELL STARTEN
Start the engine manu- ally
s3j8.a.book Page 97 Tuesday, April 20, 2010 1:10 PM
Page 106 of 244
Communication
105
Using the system
Safety
Driving Tips
General Maintenance
Breakdown assistance
Technical Data
The buttons apply for the respective operating mode of the current radio or navigation system.
Note
The loudspeakers in the vehicle are matched to a power output of the radio and
navigation system of 4x 20°W.
For the equipment sound system*, the loudspeakers are matched to a power
output of the amplifier of 4x40°W + 6x20 W.Mobile phones and tw
o-way radio systems
The installation of a mobile phone and two-way radio system in a vehicle should be carried out by a specialist garage. Mobile phones send and receive radio wave
s during a conversation as well as in
standby mode. Radio waves can be harmful
to the human body if their frequency
exceeds certain limit values. Škoda Auto permits the operation of mobile
phones and two-way radio systems with
a professionally installed external aerial and a maximum transmission power of up to 10 watts. It is essential that you inform a specialist garage about the possibilites to assemble and operate mobile phones and two-way radio sets which have a power output of more than 10 W. They will inform you which technical possibilities exist for retrofitting mobile phones. When using a mobille phone inside the vehicl
e, which is not inserted into the phone
adapter, and thus has no connection to the
external aerial, the electromagnetic radia-
tion can exceed the current limit value. We therefore recommend to operate a mobile phone in the vehicle only when it is conne
cted to an external aerial via the phone
adapter. This improves the quality of the connection. Operation of mobile phones or two-way ra
dio systems may interfere with functioning
of the electronic systems of your vehicle. The reasons for this may be:
no external aerial,
external aerial incorrectly installed,
transmission power gr
eater than 10 watts.
WARNING
If a mobile phone or a two-way radio
system is operated in the vehicle
without using a special external aerial
or an external aerial which has been
incorrectly installed, this can increase
the strength of the electromagnetic field
in the interior of the vehicle.
Please concentrate fully at
all times on your driving!
You must not install two-way radio systems, mobile phones or mounts on
the covers of the airbags or within the immediate deployment range of airbags. This might result in injuries to the
occupants in the event of an accident.
Never leave a mobile phone on a seat, on
the dash panel or in another area,
from which it can be thrown during a sudden braking manoeuver, an accident or a collision. In this case, the occupants of the vehicle might be injured.
Note
Observe the country-specific regulations for the use of mobile phones in vehicles.Universal telephone preinstallation GSM II*IntroductionThe universal telephone preinstallation GSM
II is a built-in “hands-free system”, it
provides a voice operated convenience mode via the multifunction steering wheel* or the navigation system*. All communication between a telephone and
the hands-free system of your vehicle
can only be established with the help of the Bluetooth
® technology. The adapter*
serves only for charging the telephone and fo
r transmitting the signal to the external
aerial of the vehicle.
a)On vehicles which are equipped with the universal telephone prei
nstallation GSM II, pressing the button only allows to operate
the telephone.
A1
s3j8.a.book Page 105 Tuesday, April 20, 2010 1:10 PM
Page 141 of 244
Intelligent Technology
140
Low brake fluid level An insufficient level of brake fluid may result in problems in the brake system. The level of the brake fluid is monitored electronically
page 32, “Brake system
”.
WARNING
Only apply the brakes for the purpose of
drying and cleaning the brake discs
if the traffic conditions permit this. Do not place any other road users in jeop-ardy.
When retrospectively mounting a front spoiler, solid wheel hubs etc. one
must ensure that the air supply to the
front wheel brakes is not reduced other-
wise the braking system could run too hot.
Allow for the fact that new brake pads
do not achieve their full braking effi-
ciency until approximately
200 kilometres. New brake pads must be first “run
in” before they develop their optimal friction force. You can, however, compen- sate for this slightly reduced braking force by increasing the pressure on the brake pedal. This guideline also applie
s to any new brake pads installed at a
future date.
Caution
Never allow the brakes to rub by applying sl
ight pressure if you do not wish to brake
the vehicle. This causes the br
akes to overheat and can also result in a longer braking
distance and excessive wear.
Before negotiating a steep downhill sectio
n, please reduce your speed and shift
down into the next lower gear (manual gear
box) or select a lower driving stage (auto-
matic gearbox). This enables
you to make full use of the braking power of the vehicle
and reduces the strain on the brakes. Any ad
ditional braking should be done intermit-
tently, not continuously.
Note
The brake light flashes automatically in case
of an emergency braking at speeds greater
than 60 km/h or with the intervention of th
e ABS, which lasts longer than 1.5 seconds.
After the speed was reduced below 10 km/h or the vehicle was stopped, the brake light stops flashing and the hazard warning light system switches on. The hazard warning light system is switched off automatically
after accelerating
or driving off again.
Brake boosterThe brake booster boosts the pressure whic
h you generate with the brake pedal. The
necessary pressure is only genera
ted when the engine is running.
WARNING
Never switch off the engine befo
re the vehicle is stationary.
The brake booster only operates when the engine is running. Greater phys-
ical effort for braking is required when en
gine is switched off.
Because if you do
not stop as normal, this can cause an accident and severe injuries.Antilock brake system (ABS)ABS prevents the wheels locking when braking.General The ABS contributes significan
tly to enhancing the active
safety of your vehicle.
Compared to a vehicle not fitted with the ABS brake system, you are able to retain optimal steering ability even during a full br
ake application on a slippery road surface
because the wheels do not lock up. You must not expect, however, that the braking distance will be shorter under all circumstances as a result of the ABS. The
braking distance for example on gravel and
fresh snow, when you should anyway be driv
ing slowly and cautiously, will be longer.
Operating principle As soon as the vehicle speed has increased to about 20 km/hour an automatic test procedure is conducted during which you wi
ll be able to hear a pumping noise for
about 1 second. The brake pressure will be reduced on a wheel which is rotating at a speed which is too low for the speed of the vehicle and tending
to lock. This control
cycle is noticeable
from a
pulsating movement of the brake pedal
which is accomp
anied by noises.
This is consciously intended to provide the driver with the information that the wheels are tending to lock (ABS control range). You must always keep the brake pedal depressed to enable the ABS to optimally control the brake application in this braking range. Never interrupt the application of the brakes!
s3j8.a.book Page 140 Tuesday, April 20, 2010 1:10 PM