roof SKODA FABIA 2010 2.G / 5J Owner's Manual
[x] Cancel search | Manufacturer: SKODA, Model Year: 2010, Model line: FABIA, Model: SKODA FABIA 2010 2.G / 5JPages: 244, PDF Size: 29.53 MB
Page 3 of 244
Introduction 2
On-board literature
The on-board literature for your vehicle consists of this “Owner's Manual”
as well as a “Service schedule” and a “Help on the road”. There can also be
a variety of other additional operating manuals and instructions on-board
(e.g. an operating manual for the radio) depending on the vehicle model and
equipment.
If one of the publications listed above is missing, please contact a specialist
garage immediately, where one will be glad to assist you in such matters.
One should note that the details given in the vehicle's papers always
take precedence over those in the Owner's Manual.
Owner's Manual
This Owner's Manual describes the current scope of equipment. Certain
items of equipment listed are only installed later on and only envisaged for
particular markets. The illustrations can differ in minor details from your
vehicle; they are only intended for general information.
In addition to information regarding all the controls and equipment, the
Owner's Manual also contains important information regarding care and
operation for your safety and also to retain the value of your vehicle. To
provide you with valuable tips and aids. You will learn how you can operate
your vehicle safely, economically and in an environmentally conscious
way.
For safety reasons, please also pay attention to the information on
accessories, modifications and replacement of parts page 184.
The other chapters of the Owner's Manual are also important, however, for
proper treatment of your car - in addition to regular care and maintenance -
helps to retain its value and in many cases is also one of the conditions for
possible warranty claims.
The Service schedule
contains:
Vehicle data;
Service intervals;
Overview of the service work;
Service proof;
Confirmation of mobility warranty (only valid in certain countries);
important information on the warranty.
The confirmations of the carried out service work are one of the conditions
for possible warranty claims.
Please always present the Service schedule when you take your car to a
specialist garage.
If the Service schedule is missing or worn, please contact the specialist
garage where your car is serviced regularly. You will receive a duplicate, in
which the previously carried out service work are confirmed.
Help on the road
Contains the most important telephone numbers in individual countries as
well as the addresses and telephone numbers of Škoda importers.
s3j8.a.book Page 2 Tuesday, April 20, 2010 1:10 PM
Page 4 of 244
Contents3
Using the system
Safety
Driving Tips
General Maintenance
Breakdown assistance
Technical Data
ContentsLayout of this Owner's Manual
(explanations)
. . . . . . . . . . . . . . . . . . . . . . . . . .
Using the system
. . . . . . . . . . . . . . . . . . . . . .
Cockpit
. . . . . . . . . . . . . . . . . . . . . . . . . . . . . . . . . . . . . . . .
General view . . . . . . . . . . . . . . . . . . . . . . . . . . . . . . . . .
Quick Reference Guide
. . . . . . . . . . . . . . . . . . . . . . .
Basic functions and important information . . . . .
Instruments and warning lights
. . . . . . . . . . . . . . .
Overview of the instrument cluster . . . . . . . . . . . . .
Engine revolutions counter . . . . . . . . . . . . . . . . . . . .
Speedometer . . . . . . . . . . . . . . . . . . . . . . . . . . . . . . . .
Coolant temperature gauge* . . . . . . . . . . . . . . . . . .
Fuel gauge* . . . . . . . . . . . . . . . . . . . . . . . . . . . . . . . . . .
Counter for distance driven . . . . . . . . . . . . . . . . . . .
Service Interval Display . . . . . . . . . . . . . . . . . . . . . . .
Digital clock . . . . . . . . . . . . . . . . . . . . . . . . . . . . . . . . . .
Shift recommendation for changing gears* . . . . .
Multi-functional indicator (onboard computer)*
MAXI DOT display (information display)* . . . . . . .
Auto Check Control . . . . . . . . . . . . . . . . . . . . . . . . . . .
Warning lights . . . . . . . . . . . . . . . . . . . . . . . . . . . . . . . .
Unlocking and locking
. . . . . . . . . . . . . . . . . . . . . . . .
Key . . . . . . . . . . . . . . . . . . . . . . . . . . . . . . . . . . . . . . . . . .
Locking / Unlocking . . . . . . . . . . . . . . . . . . . . . . . . . . .
Child safety lock . . . . . . . . . . . . . . . . . . . . . . . . . . . . . .
Central locking system* . . . . . . . . . . . . . . . . . . . . . . .
Remote control* . . . . . . . . . . . . . . . . . . . . . . . . . . . . . .
Anti-theft alarm system* . . . . . . . . . . . . . . . . . . . . . .
Interior monitor* and Towing protection monitoring*
Electrical power windows* . . . . . . . . . . . . . . . . . . . .
Electric sliding/tilting roof* . . . . . . . . . . . . . . . . . . . .
Lights and Visibility
. . . . . . . . . . . . . . . . . . . . . . . . . . . .
Lights . . . . . . . . . . . . . . . . . . . . . . . . . . . . . . . . . . . . . . . .
Interior lighting . . . . . . . . . . . . . . . . . . . . . . . . . . . . . . .
Visibility . . . . . . . . . . . . . . . . . . . . . . . . . . . . . . . . . . . . . .
Windshield wiper and wash system . . . . . . . . . . . . .
Rear mirror . . . . . . . . . . . . . . . . . . . . . . . . . . . . . . . . . . .
Seats and Storage
. . . . . . . . . . . . . . . . . . . . . . . . . . . . . .
Front seats . . . . . . . . . . . . . . . . . . . . . . . . . . . . . . . . . . . .
Head restraints . . . . . . . . . . . . . . . . . . . . . . . . . . . . . . . .
Heating the front seats* . . . . . . . . . . . . . . . . . . . . . . .
Rear seats . . . . . . . . . . . . . . . . . . . . . . . . . . . . . . . . . . . .
Pedals . . . . . . . . . . . . . . . . . . . . . . . . . . . . . . . . . . . . . . . .
luggage compartment . . . . . . . . . . . . . . . . . . . . . . . . .
Variable loading floor in the luggage compartment*
(Combi) . . . . . . . . . . . . . . . . . . . . . . . . . . . . . . . . . . . . . .
Net partition* (Combi) . . . . . . . . . . . . . . . . . . . . . . . .
Bicycle holder in the luggage compartment* . . . .
The roof rack* . . . . . . . . . . . . . . . . . . . . . . . . . . . . . . . .
Front cup holder . . . . . . . . . . . . . . . . . . . . . . . . . . . . . .
Rear cup holder* . . . . . . . . . . . . . . . . . . . . . . . . . . . . . .
Parking ticket holder . . . . . . . . . . . . . . . . . . . . . . . . . . .
Ashtray* . . . . . . . . . . . . . . . . . . . . . . . . . . . . . . . . . . . . . .
Cigarette lighter* and power sockets* . . . . . . . . . .
Storage compartments . . . . . . . . . . . . . . . . . . . . . . . .
Heating and air conditioning system
. . . . . . . . . .
Air outlet vents . . . . . . . . . . . . . . . . . . . . . . . . . . . . . . . .
Recirculated air mode . . . . . . . . . . . . . . . . . . . . . . . . .
Heating . . . . . . . . . . . . . . . . . . . . . . . . . . . . . . . . . . . . . .
Climatic (semi-automatic air conditioning system)*
Climatronic* (automatic air conditioning) . . . . . . .
Starting-off and Driving
. . . . . . . . . . . . . . . . . . . . . . .
Setting steering wheel position . . . . . . . . . . . . . . . . .
Ignition lock . . . . . . . . . . . . . . . . . . . . . . . . . . . . . . . . . .
Starting the engine . . . . . . . . . . . . . . . . . . . . . . . . . . . .
Switching off the engine . . . . . . . . . . . . . . . . . . . . . . .Shifting (manual gearbox) . . . . . . . . . . . . . . . . . . . . .
Handbrake . . . . . . . . . . . . . . . . . . . . . . . . . . . . . . . . . . .
Parking aid* . . . . . . . . . . . . . . . . . . . . . . . . . . . . . . . . . .
Cruise control system (CCS)* . . . . . . . . . . . . . . . . . .
“START-STOP”* . . . . . . . . . . . . . . . . . . . . . . . . . . . . . . .
Automatic gearbox
. . . . . . . . . . . . . . . . . . . . . . . . . . . .
Automatic gearbox* . . . . . . . . . . . . . . . . . . . . . . . . . .
Communication
. . . . . . . . . . . . . . . . . . . . . . . . . . . . . . .
Multifunction steering wheel* . . . . . . . . . . . . . . . . .
Universal telephone preinstallation GSM II* . . . . .
Voice control . . . . . . . . . . . . . . . . . . . . . . . . . . . . . . . . .
Music playback via Bluetooth® . . . . . . . . . . . . . . . .
Inputs AUX-IN* and MDI* . . . . . . . . . . . . . . . . . . . . .
Safety
. . . . . . . . . . . . . . . . . . . . . . . . . . . . . . . . . . . . . . .
Passive Safety
. . . . . . . . . . . . . . . . . . . . . . . . . . . . . . . . .
Basic information . . . . . . . . . . . . . . . . . . . . . . . . . . . . .
Correct seated position . . . . . . . . . . . . . . . . . . . . . . .
Seat belts
. . . . . . . . . . . . . . . . . . . . . . . . . . . . . . . . . . . . . .
Why seat belts? . . . . . . . . . . . . . . . . . . . . . . . . . . . . . . .
The physical principle of a frontal collision . . . . . .
Important safety information regarding the use of seat
belts . . . . . . . . . . . . . . . . . . . . . . . . . . . . . . . . . . . . . . . . .
How are seat belts correctly fastened? . . . . . . . . . .
Belt tensioner . . . . . . . . . . . . . . . . . . . . . . . . . . . . . . . .
Airbag system
. . . . . . . . . . . . . . . . . . . . . . . . . . . . . . . . .
Description of the airbag system . . . . . . . . . . . . . . .
Front airbags . . . . . . . . . . . . . . . . . . . . . . . . . . . . . . . . .
Side airbags* . . . . . . . . . . . . . . . . . . . . . . . . . . . . . . . . .
Head airbags* . . . . . . . . . . . . . . . . . . . . . . . . . . . . . . . .
Deactivating airbags . . . . . . . . . . . . . . . . . . . . . . . . . .
67991010151515161616171718181922232635353636374142434446
48485354555759596061616363676870727373747474758080808183868989899091
92929394959898104104105110111111113113113114117117117118119120122122123125127128
s3j8.a.book Page 3 Tuesday, April 20, 2010 1:10 PM
Page 40 of 244
Unlocking and locking
39
Using the system
Safety
Driving Tips
General Maintenance
Breakdown assistance
Technical Data
All the doors and the boot lid are locked.
The switched on interior lights go out over the door contact.
The windows and the electric sliding/tilting roof* close provided the key is
held
in
the lock position.
The safe securing system is activated immediately.
The indicator light in the driver door begins flashing.Note
The opened front doors cannot be unlocked. It
must be locked separately after closing
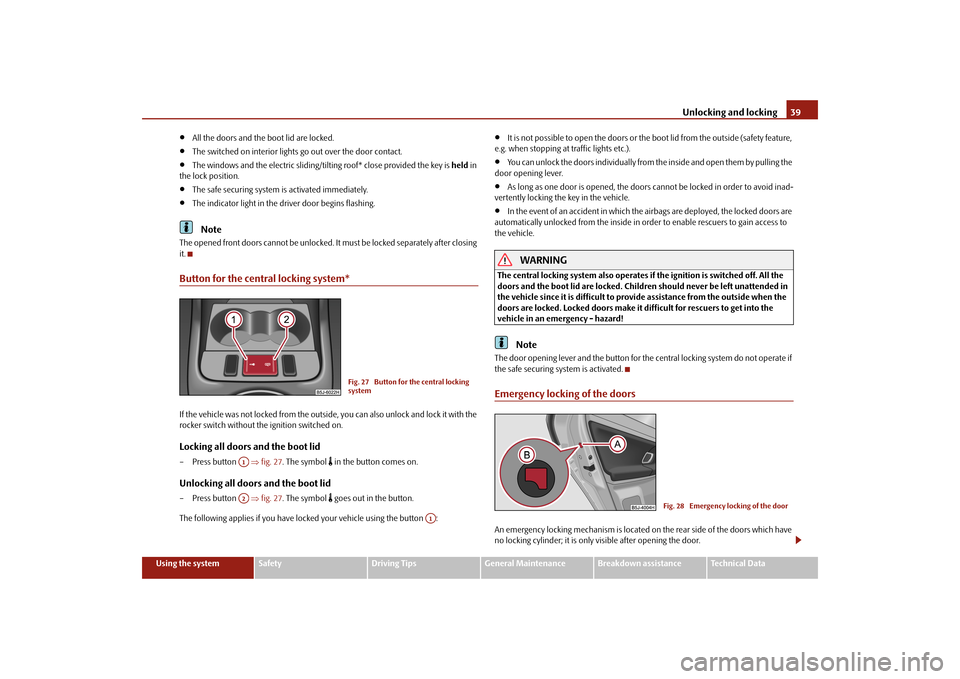
it.Button for the central locking system*If the vehicle was not locked from the outsid
e, you can also unlock and lock it with the
rocker switch without th
e ignition switched on.
Locking all doors and the boot lid– Press button
fig. 27
. The symbol
in the button comes on.
Unlocking all doors and the boot lid– Press button
fig. 27
. The symbol
goes out in the button.
The following applies if
you have locked your vehicle using the button :
It is not possible to open the doors or the boot lid from the outside (safety feature,
e.g. when stopping at
traffic lights etc.).
You can unlock the doors individually from
the inside and open them by pulling the
door opening lever.
As long as one door is opened, the doors cannot be locked in order to avoid inad-
vertently locking the key in the vehicle.
In the event of an accident in which the airbags are deployed, the locked doors are
automatically unlocked from the inside in orde
r to enable rescuers to gain access to
the vehicle.
WARNING
The central locking system al
so operates if the ignition is switched off. All the
doors and the boot lid are locked. Children should never be left unattended in the vehicle since it is difficult to prov
ide assistance from the outside when the
doors are locked. Locked doors make it difficult for rescuers to get into the vehicle in an emergency - hazard!
Note
The door opening lever and the button for the central locking system do not operate if the safe securing system is activated.Emergency locking of the doorsAn emergency locking mechanism is located on
the rear side of the doors which have
no locking cylinder; it is only
visible after opening the door.
Fig. 27 Button for the central locking system
A1A2
A1
Fig. 28 Emergency locking of the door
s3j8.a.book Page 39 Tuesday, April 20, 2010 1:10 PM
Page 44 of 244
Unlocking and locking
43
Using the system
Safety
Driving Tips
General Maintenance
Breakdown assistance
Technical Data
A drop in voltage of the on-board power supply.
An alarm is immediately triggered if either of the two battery terminals is disconnected while the anti-theft alarm system is activated. How is the alarm switched off? You switch the alarm off if you unlock the vehi
cle with the radio remote control or if you
switch the ignition on.
Note
The working life of the alarm siren is 5 years. More detailed information is available
by a specialist garage.
Before leaving the car, check that all the doors, windows and the electric
sliding/tilting roof* are properly closed in order to ensure that the anti-theft alarm system is fully operational.
Coding of the radio remote control and th
e receiver unit precludes the use of the
radio remote control from other vehicles.Interior monitor* and Towi
ng protection monitoring*
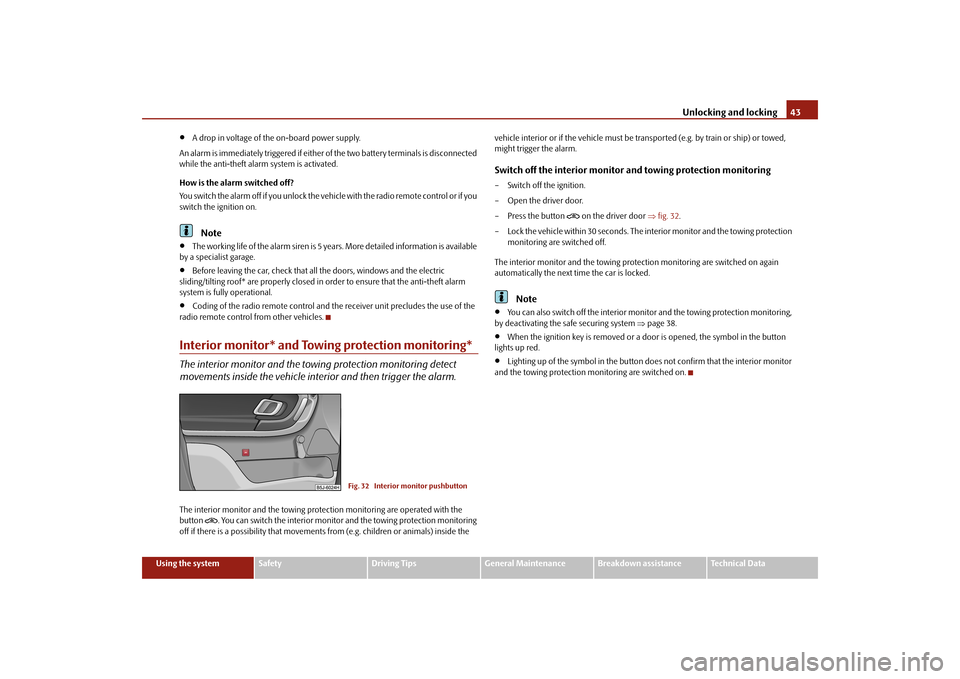
The interior monitor and the towing protection monitoring detect movements inside the vehicle interior and then trigger the alarm.The interior monitor and the towing protec
tion monitoring are operated with the
button
. You can switch the interior monitor
and the towing protection monitoring
off if there is a possibility that movements from (e.g. children or animals) inside the
vehicle interior or if the vehi
cle must be transported (e.g. by train or ship) or towed,
might trigger the alarm.Switch off the interior monitor and towing protection monitoring– Switch off the ignition. – Open the driver door.– Press the button
on the driver door
fig. 32
.
– Lock the vehicle within 30 seconds. The in
terior monitor and the towing protection
monitoring are switched off.
The interior monitor and the towing protec
tion monitoring are switched on again
automatically the next ti
me the car is locked.
Note
You can also switch off the interior moni
tor and the towing protection monitoring,
by deactivating the sa
fe securing system
page 38.
When the ignition key is removed or a door is opened, the symbol in the button
lights up red.
Lighting up of the symbol in the button
does not confirm that the interior monitor
and the towing protection mo
nitoring are switched on.
Fig. 32 Interior monitor pushbutton
s3j8.a.book Page 43 Tuesday, April 20, 2010 1:10 PM
Page 46 of 244
Unlocking and locking
45
Using the system
Safety
Driving Tips
General Maintenance
Breakdown assistance
Technical Data
After switching the ignition off, it is still possible to open or close the windows for a
further 10 minutes. The power windows are
switched off completely once you open
the driver or front passenger door.
When driving always use the existing he
ating, air conditioning and ventilation
system for ventilating the interior of the vehicle. If the windows are opened, dust as well as other dirt can get into the vehicle
and in addition the wind noise is more at
certain speeds.Force limiter of the power windowsThe electrically operated power windows are fitted with a force limiter. It reduces the risk of bruises or injuries when closing the windows. If there is an obstacle, the closing process is stopped and the window goes down by several centimeters. If the obstacle prevents the window from being closed during the next 10 seconds, the closing process is interrupted once agai
n and the window goes down by several
centimeters. You must try to close the window once agai
n within 10 seconds after the window has
gone down twice, even if the obstacle was not yet removed, the closing process is stopped. During this time it is not poss
ible to automatically
close the window. The
force limiter is still switched on. The force limiter is only switched off, if yo
u attempt to close the window within the next
10 seconds -
the window closes now with full strength!
If you wait longer than 10 seconds, the force limiter is switched on again.
WARNING
You should take particular care when closing the windows! You may otherwise suffer severe injuries as a result of getting an arm, for example, jammed in the window!Window convenience operationYou can open and close the electrically po
wered windows as follows when unlocking
and locking the vehicle (only close the sliding/tilting roof):
Opening a window– Hold the key in the locking cylinder of the
driver's door in the
unlock position or
press the unlock button of the radio re
mote control until all the windows are
opened.
Closing a window– Hold the key in the locking cylinder of the driver's door in the lock position or press
the lock button of the radio remote co
ntrol until all the windows are closed.
You can interrupt the opening or closing
operation of the windows immediately by
releasing the key or the lock button.
WARNING
The system is fitted with a force limiter
page 45. If there is an obstacle, the
closing process is stopped and the window goes down by several centimeters. You should then take particular care when closing the windows! You may otherwise suffer severe injuries as a re
sult of getting an arm, for example,
jammed in the window!Operational faultsElectrically operated powe
r windows do not operate
If the battery of the car has been disconnect
ed and then reconnected, the electrically
operated power windows do not operate. Th
e system must be activated. Proceed as
follows in order to re-establish the function:
Switch on the ignition,
slightly pull on the upper edge of the rele
vant button and hold it until the window
is closed,
release the switch,
you must pull the respective switch again in upward direction for approx. 3
seconds.
s3j8.a.book Page 45 Tuesday, April 20, 2010 1:10 PM
Page 47 of 244
Unlocking and locking
46Operation in winter Ice accumulating on the surface of the wi
ndows during the winter may result in a
greater resistance when closing the windows and the window may stop and go down several centimetres Proceed as follows to close the window fully:
Switch on the ignition,
slightly pull on the upper edge of the rele
vant button and hold it until the window
is closed,
if the window goes down/stops, repeat th
e cycle (it is necessary to put the force
limiter out of operation
page 45 - now the window closes with full force!).
WARNING
The system is fitted with a force limiter
page 45. If there is an obstacle, the
closing process is stopped and the window
goes down by several centimeters.
You should then take particular care when closing the windows! You may otherwise suffer severe injuries as a re
sult of getting an arm, for example,
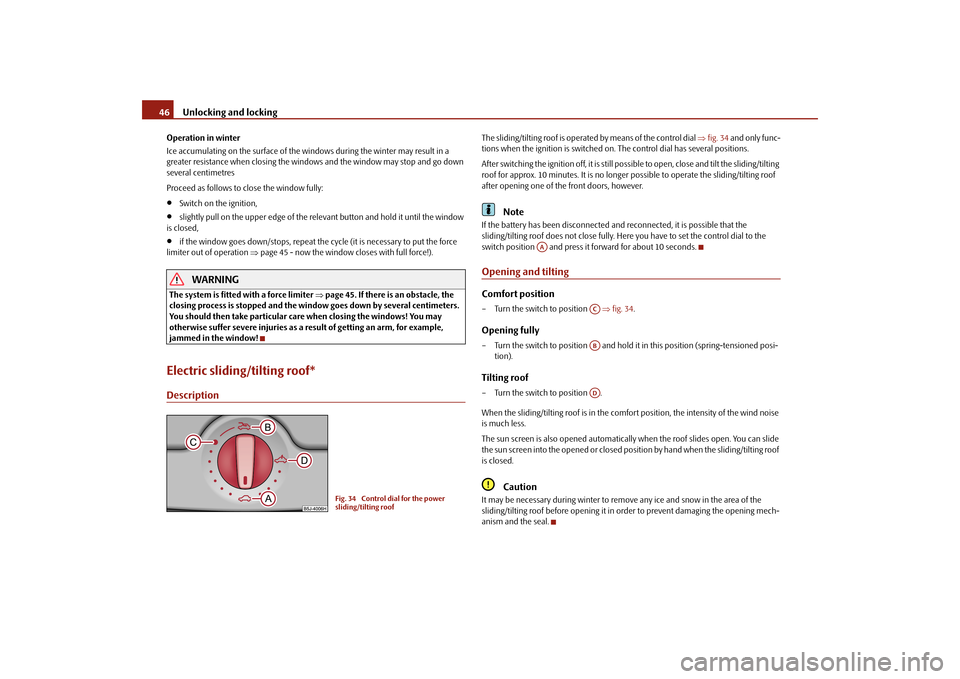
jammed in the window!Electric sliding/tilting roof*Description
The sliding/tilting roof is operated by means of the control dial
fig. 34
and only func-
tions when the ignition is switched on. The control dial has several positions. After switching the ignition off, it is still poss
ible to open, close and
tilt the sliding/tilting
roof for approx. 10 minutes. It is no longer possible to operate the sliding/tilting roof after opening one of the front doors, however.
Note
If the battery has been disc
onnected and reconnected, it is possible that the
sliding/tilting roof does not close fully. He
re you have to set the control dial to the
switch position and press it forward for about 10 seconds.Opening and tiltingComfort position– Turn the switch to position
fig. 34
.
Opening fully– Turn the switch to position and hold it
in this position (spring-tensioned posi-
tion).
Tilting roof– Turn the switch to position . When the sliding/tilting roof is in the comfort position, the intensity of the wind noise is much less. The sun screen is also opened automatically when the roof slides open. You can slide the sun screen into the opened or closed position by hand when the sliding/tilting roof is closed.
Caution
It may be necessary during winter to remove any ice and snow in the area of the sliding/tilting roof before opening it in
order to prevent damaging the opening mech-
anism and the seal.
Fig. 34 Control dial for the power sliding/tilting roof
AA
ACABAD
s3j8.a.book Page 46 Tuesday, April 20, 2010 1:10 PM
Page 48 of 244
Unlocking and locking
47
Using the system
Safety
Driving Tips
General Maintenance
Breakdown assistance
Technical Data
ClosingSliding closed/closing the sliding/tilting roof– Turn the switch to position
page 46, fig. 34
.
Safety closing The sliding/tilting roof is fitted with a force limiter. The sliding/tilting roof stops and moves back several centimetres when it ca
nnot be closed because there is something
in the way (e.g. ice). You can close the sliding/tilting roof completely without force limiter by pressing the sw
itch to the position
page 46, fig. 34
at the front for as
long as it takes for the sliding/
tilting roof to close completely
.
WARNING
Close the sliding/tilting roof carefully - risk of injury!Convenience operationYou can also close an open sliding/tilting roof from the outside. – Hold the key in the locking cylinder of the dr
iver's door in the lo
ck position or press
the lock button of the remote control unt
il the sliding/tilting roof is closed.
The closing operation stops when one re
leases the key or the lock button.
Note
The force limiter also operates for convenience closing.
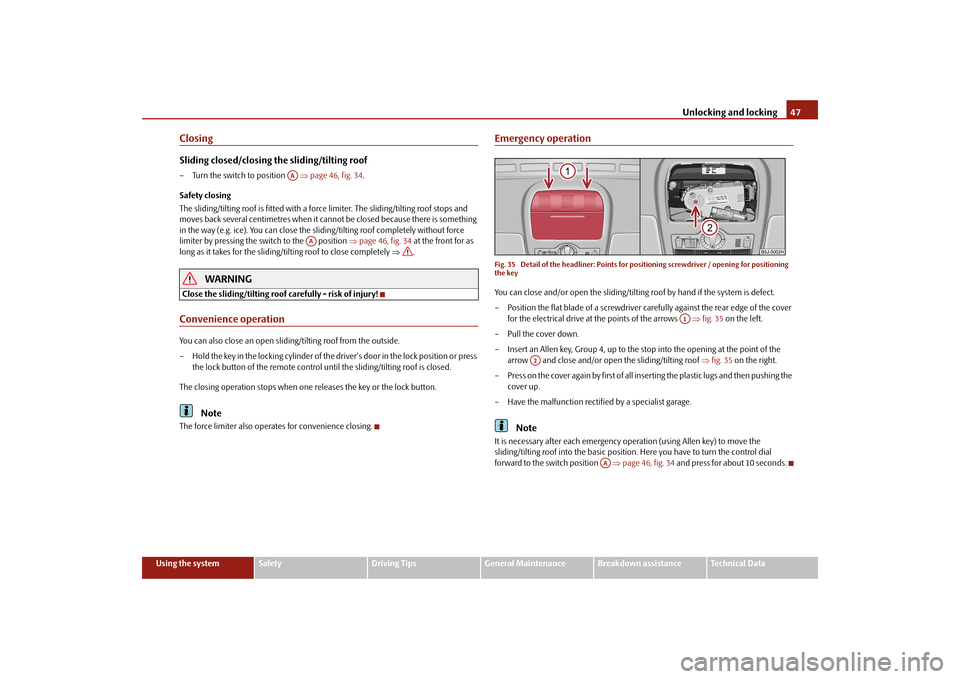
Emergency operationFig. 35 Detail of the headliner: Points for
positioning screwdriver / opening for positioning
the keyYou can close and/or open the sliding/tiltin
g roof by hand if the system is defect.
– Position the flat blade of a screwdriver carefully against the rear edge of the cover
for the electrical drive at the points of the arrows
fig. 35
on the left.
–Pull the cover down.– Insert an Allen key, Group 4, up to the stop into the opening at the point of the
arrow and close and/or open
the sliding/tilting roof
fig. 35
on the right.
– Press on the cover again by first of all in
serting the plastic lugs and then pushing the
cover up.
– Have the malfunction rectified by a specialist garage.
Note
It is necessary after each emergency op
eration (using Allen key) to move the
sliding/tilting roof into the basic position
. Here you have to tu
rn the control dial
forward to the switch position
page 46, fig. 34
and press for about 10 seconds.
AA
AA
A1
A2
AA
s3j8.a.book Page 47 Tuesday, April 20, 2010 1:10 PM
Page 54 of 244
Lights and Visibility
53
Using the system
Safety
Driving Tips
General Maintenance
Breakdown assistance
Technical Data
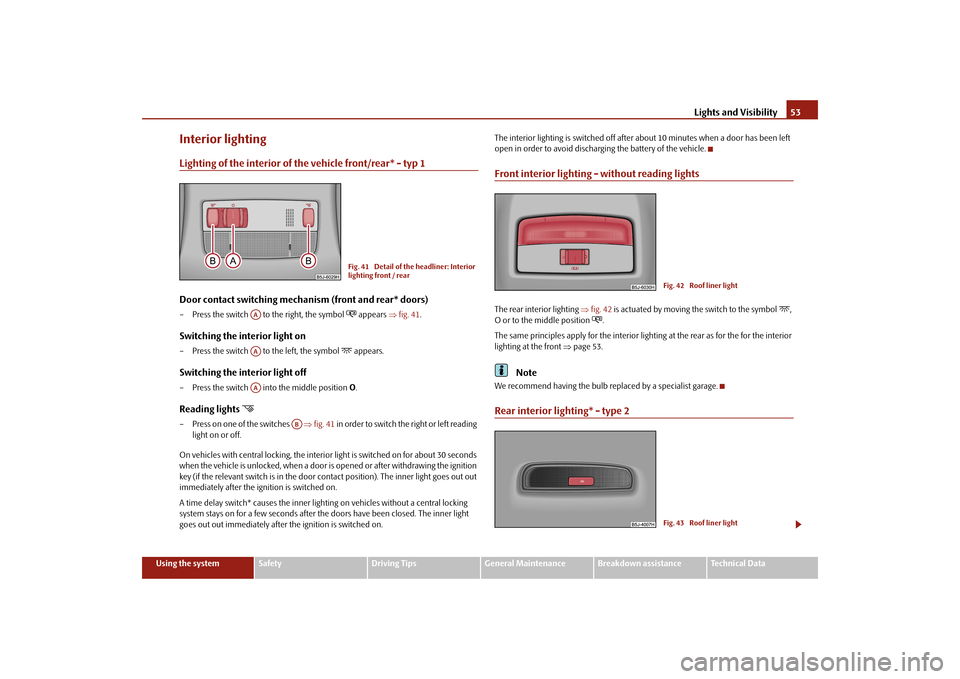
Interior lightingLighting of the interior of the vehicle front/rear* - typ 1Door contact switching mechanism (front and rear* doors)– Press the switch to the right, the symbol
appears
fig. 41
.
Switching the interior light on– Press the switch to the left, the symbol
appears.
Switching the interior light off– Press the switch into
the middle position
O.
Reading lights
– Press on one of the switches
fig. 41
in order to switch the right or left reading
light on or off.
On vehicles with central locking, the interi
or light is switched on for about 30 seconds
when the vehicle is unlocked, when a door is
opened or after withdrawing the ignition
key (if the relevant switch is in the door co
ntact position). The inner light goes out out
immediately after the ignition is switched on. A time delay switch* causes
the inner lighting on vehicl
es without a central locking
system stays on for a few seconds after the doors have been closed. The inner light goes out out immediately after the ignition is switched on.
The interior lighting is switched off after
about 10 minutes when a door has been left
open in order to avoid discharg
ing the battery of the vehicle.
Front interior lighting - without reading lightsThe rear interior lighting
fig. 42
is actuated by moving the switch to the symbol
,
O or to the middle position
.
The same principles apply for th
e interior lighting at the rear as for the for the interior
lighting at the front
page 53.
Note
We recommend having the bulb re
placed by a specialist garage.
Rear interior lighting* - type 2
Fig. 41 Detail of the headliner: Interior lighting front / rear
AAAAAA
AB
Fig. 42 Roof liner lightFig. 43 Roof liner light
s3j8.a.book Page 53 Tuesday, April 20, 2010 1:10 PM
Page 73 of 244
Seats and Storage
72– If it is necessary, the position of the bicy
cles in the vehicle can be additionally recti-
fied.
WARNING
When transporting passengers and objects, which require the seats to be
folded forwards, ensure the safety of the passengers being transported.
Place the bicycles in the bicycle carrier in such a position that no collision
between the steering arm and
the rear window can occur.
The roof rack*DescriptionPay attention to the following points if you wish to transport luggage or other items on the roof of your vehicle:
A special roof luggage rack system was de
veloped for the vehicle, that is why you
should only use a roof luggage rack which has been released for use by Škoda Auto.
The base carrier is the basis for a comple
te roof luggage rack system. Separate
additional holders are required for safety reasons for transporting luggage, bikes, surf- boards, skis and boats.
The basic version of the roof luggage rack
system and further components can be
obtained from Škoda original accessories.
Caution
If you use other roof rack systems or if the
roof bars are not properly fitted, then any
damage which may result to your car is no
t covered by the warranty agreements. It is
therefore essential to pay attention to the fitting instructions supplied with the roof luggage rack system.
On models fitted with a power sliding/tilting roof, ensure that the opened
sliding/tilting roof does not strike any items of luggage transported on the roof.
Ensure that the opened boot lid does not collide with the roof load.
For the sake of the environment
The increased aerodynamic drag resu
lts in a higher fuel consumption.
Note
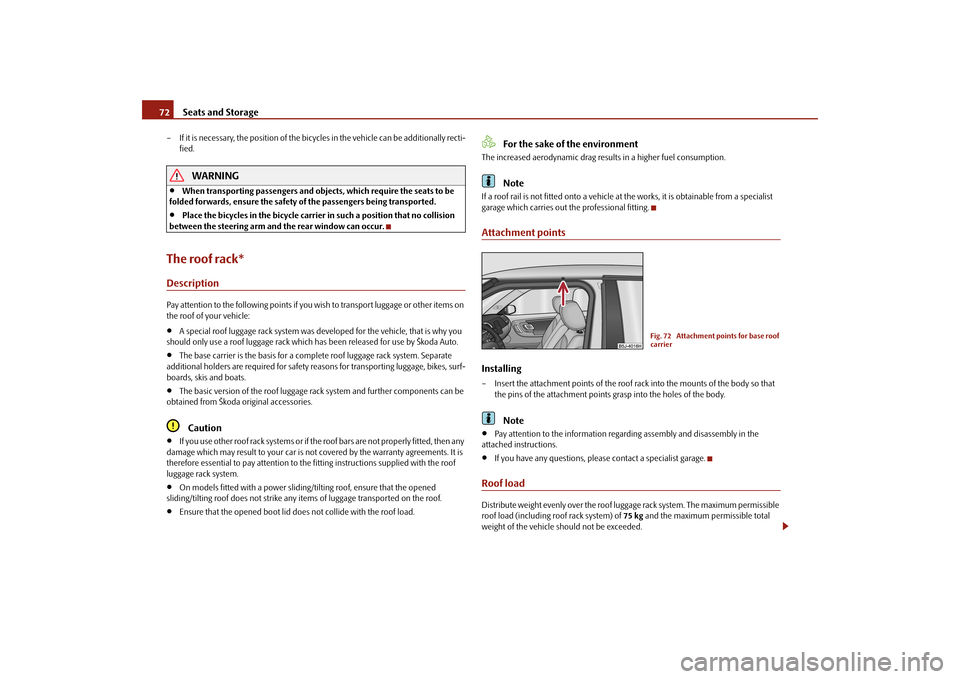
If a roof rail is not fitted onto a vehicle at the works, it is obtainable from a specialist garage which carries out the professional fitting.Attachment pointsInstalling– Insert the attachment points of the roof rack into the mounts of the body so that
the pins of the attachment points grasp into the holes of the body.Note
Pay attention to the information regarding assembly and disassembly in the
attached instructions.
If you have any questions, plea
se contact a specialist garage.
Roof loadDistribute weight evenly over the roof lu
ggage rack system. The maximum permissible
roof load (including roof rack system) of
75 kg
and the maximum
permissible total
weight of the vehicle should not be exceeded.
Fig. 72 Attachment points for base roof carrier
s3j8.a.book Page 72 Tuesday, April 20, 2010 1:10 PM
Page 74 of 244
Seats and Storage
73
Using the system
Safety
Driving Tips
General Maintenance
Breakdown assistance
Technical Data
You cannot make full use of the permissible ro
of load if you use a roof luggage rack
system with a lower load carrying capacity
. The load transported on the roof luggage
rack system must not exceed the weight limit which is stated in the fitting instructions.
WARNING
The items which you transport on the roof bar system must be reliably
attached - risk of accident!
You must on no account exceed the pe
rmissible roof load, the permissible
axle loads and the permissible gross weight
of your vehicle - risk of accident!
Please note that the handling properties of your vehicle change when you
transport heavy or bulky items on the roof bar system as a result of the displacement of the centre of gravity an
d the increased wind attack area - risk
of accident! You must absolutely adapt your style of driving and the speed of the vehicle to the sp
ecific circumstances.
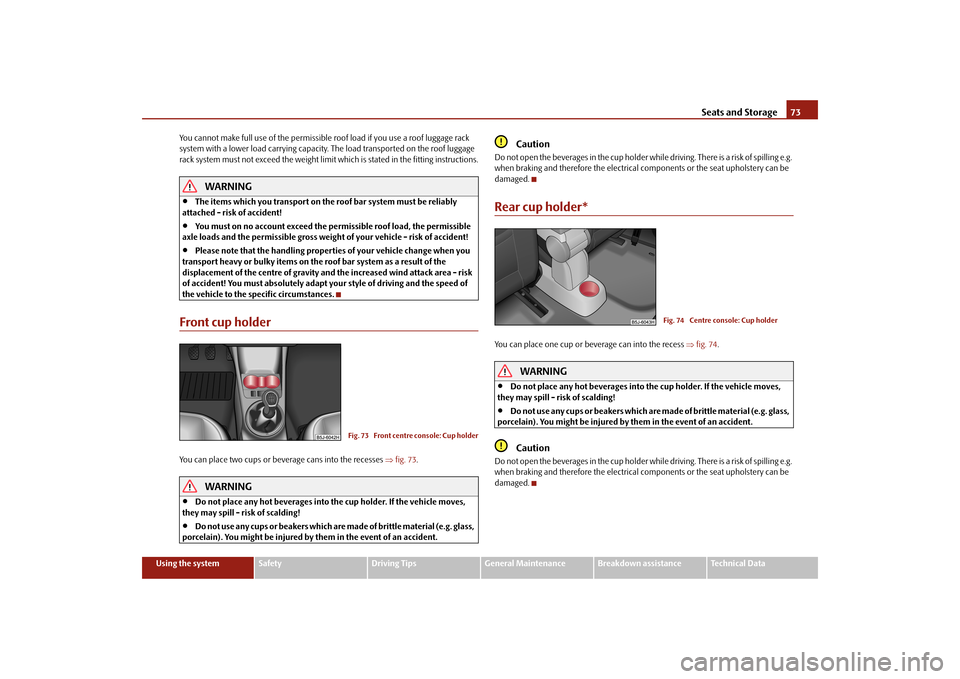
Front cup holderYou can place two cups or beverage cans into the recesses
fig. 73
.
WARNING
Do not place any hot beverages into th
e cup holder. If the vehicle moves,
they may spill - risk of scalding!
Do not use any cups or beakers which are
made of brittle material (e.g. glass,
porcelain). You might be injured by them in the event of an accident.
Caution
Do not open the beverages in the cup holder whil
e driving. There is a risk of spilling e.g.
when braking and therefore the electrical components or the seat upholstery can be damaged.Rear cup holder*You can place one cup or beverage can into the recess
fig. 74
.
WARNING
Do not place any hot beverages into th
e cup holder. If the vehicle moves,
they may spill - risk of scalding!
Do not use any cups or beakers which are
made of brittle material (e.g. glass,
porcelain). You might be injured by
them in the event of an accident.
Caution
Do not open the beverages in the cup holder whil
e driving. There is a risk of spilling e.g.
when braking and therefore the electrical components or the seat upholstery can be damaged.
Fig. 73 Front centre console: Cup holder
Fig. 74 Centre console: Cup holder
s3j8.a.book Page 73 Tuesday, April 20, 2010 1:10 PM