stop start SKODA FABIA 2014 3.G / NJ Operating Instruction Manual
[x] Cancel search | Manufacturer: SKODA, Model Year: 2014, Model line: FABIA, Model: SKODA FABIA 2014 3.G / NJPages: 216, PDF Size: 30.9 MB
Page 5 of 216
Downloaded from www.Manualslib.com manuals search engine Table of Contents
Board literature4
Notes
5
Structure and more information about the
Operating Instructions
6
Abbreviations
Safety
Passive Safety
8
General information
8
Correct and safe seated position
8
Seat belts
11
Wearing seat belts
11
Inertia reel and belt pre-tensioners
13
Airbag system
14
Description of the airbag system
14
Airbag overview
15
Deactivating airbags
18
Transporting children safely
20
Child seat
20
Fastening systems
22
Operation
Cockpit
26
Overview
25
Instruments and warning lights
27
Instrument cluster
27
Warning lights
31
Information system
39
Driver information system
39
Driving data (Multifunction display)
40
MAXI DOT display
42Service interval display46SmartGate47
Unlocking and opening
49
Unlocking and locking
49
Anti-theft alarm system
54
Tailgate
55
Window operations
56
Lights and visibility
59
Lights
59
Interior lights
64
Visibility
65
Windscreen wipers and washers
66
Rear mirror
68
Seats and headrests
70
Seats and headrests
70
Seat features
71
Transporting and practical equipment
74
Useful equipment
74
Luggage compartment
83
Variable loading floor in the luggage
compartment
88
Bicycle carrier in the luggage compartment
90
Roof rack
93
Heating and air conditioning
94
Heating, ventilation, cooling
94
Driving
Starting-off and driving
100
Starting and stopping the engine using the
key
100
Starting and stopping the engine at the push
of the button
102
START-STOPsystem
104
Brakes and parking
106
Manual gear shifting and pedals
107Automatic transmission108Running-in and economical driving111
Avoiding damage to your vehicle
113
Assist systems
114
Braking and stabilisation systems
114
Parking assistance (ParkPilot)
116
Speed control system
118
Speed limiter
120
Front Assistant
122
Fatigue detection
125
Tyre pressure monitoring
125
Hitch and trailer
127
Hitch
127
Trailer
132
General Maintenance
Care and maintenance
136
Services, modifications and technical
alterations
136
Washing vehicle
139
Cleaning vehicle exterior
140
Interior care
144
Inspecting and replenishing
147
Fuel
147
Engine compartment
149
Engine oil
152
Coolant
154
Brake fluid
155
Vehicle battery
156
Wheels
160
Tyres and rims
160
Winter use
1642Table of Contents
Page 29 of 216
Downloaded from www.Manualslib.com manuals search engine Operation
Cockpit
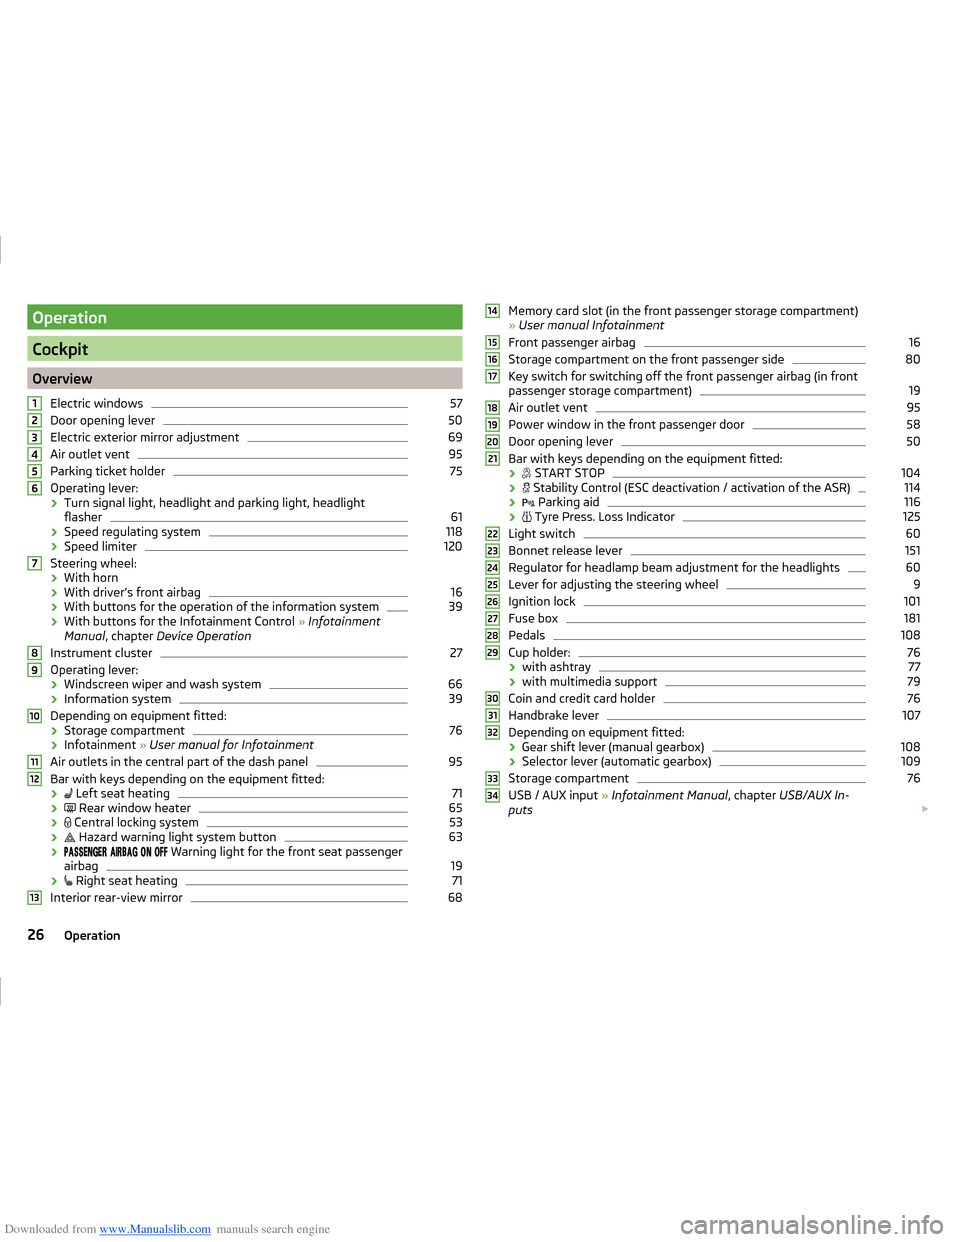
OverviewElectric windows
57
Door opening lever
50
Electric exterior mirror adjustment
69
Air outlet vent
95
Parking ticket holder
75
Operating lever:
› Turn signal light, headlight and parking light, headlight
flasher
61
› Speed regulating system
118
›Speed limiter
120
Steering wheel:
› With horn
› With driver’s front airbag
16
›With buttons for the operation of the information system
39
›With buttons for the Infotainment Control
» Infotainment
Manual , chapter Device Operation
Instrument cluster
27
Operating lever: › Windscreen wiper and wash system
66
›Information system
39
Depending on equipment fitted:
› Storage compartment
76
›Infotainment
» User manual for Infotainment
Air outlets in the central part of the dash panel
95
Bar with keys depending on the equipment fitted: ›
Left seat heating
71
›
Rear window heater
65
›
Central locking system
53
›
Hazard warning light system button
63
›
Warning light for the front seat passenger
airbag
19
›
Right seat heating
71
Interior rear-view mirror
6812345678910111213Memory card slot (in the front passenger storage compartment)
» User manual Infotainment
Front passenger airbag16
Storage compartment on the front passenger side
80
Key switch for switching off the front passenger airbag (in front
passenger storage compartment)
19
Air outlet vent
95
Power window in the front passenger door
58
Door opening lever
50
Bar with keys depending on the equipment fitted:
›
START STOP
104
›
Stability Control (ESC deactivation / activation of the ASR)
114
›
Parking aid
116
›
Tyre Press. Loss Indicator
125
Light switch
60
Bonnet release lever
151
Regulator for headlamp beam adjustment for the headlights
60
Lever for adjusting the steering wheel
9
Ignition lock
101
Fuse box
181
Pedals
108
Cup holder:
76
› with ashtray
77
›with multimedia support
79
Coin and credit card holder
76
Handbrake lever
107
Depending on equipment fitted:
› Gear shift lever (manual gearbox)
108
›Selector lever (automatic gearbox)
109
Storage compartment
76
USB / AUX input
» Infotainment Manual , chapter USB/AUX In-
puts
14151617181920212223242526272829303132333426Operation
Page 34 of 216
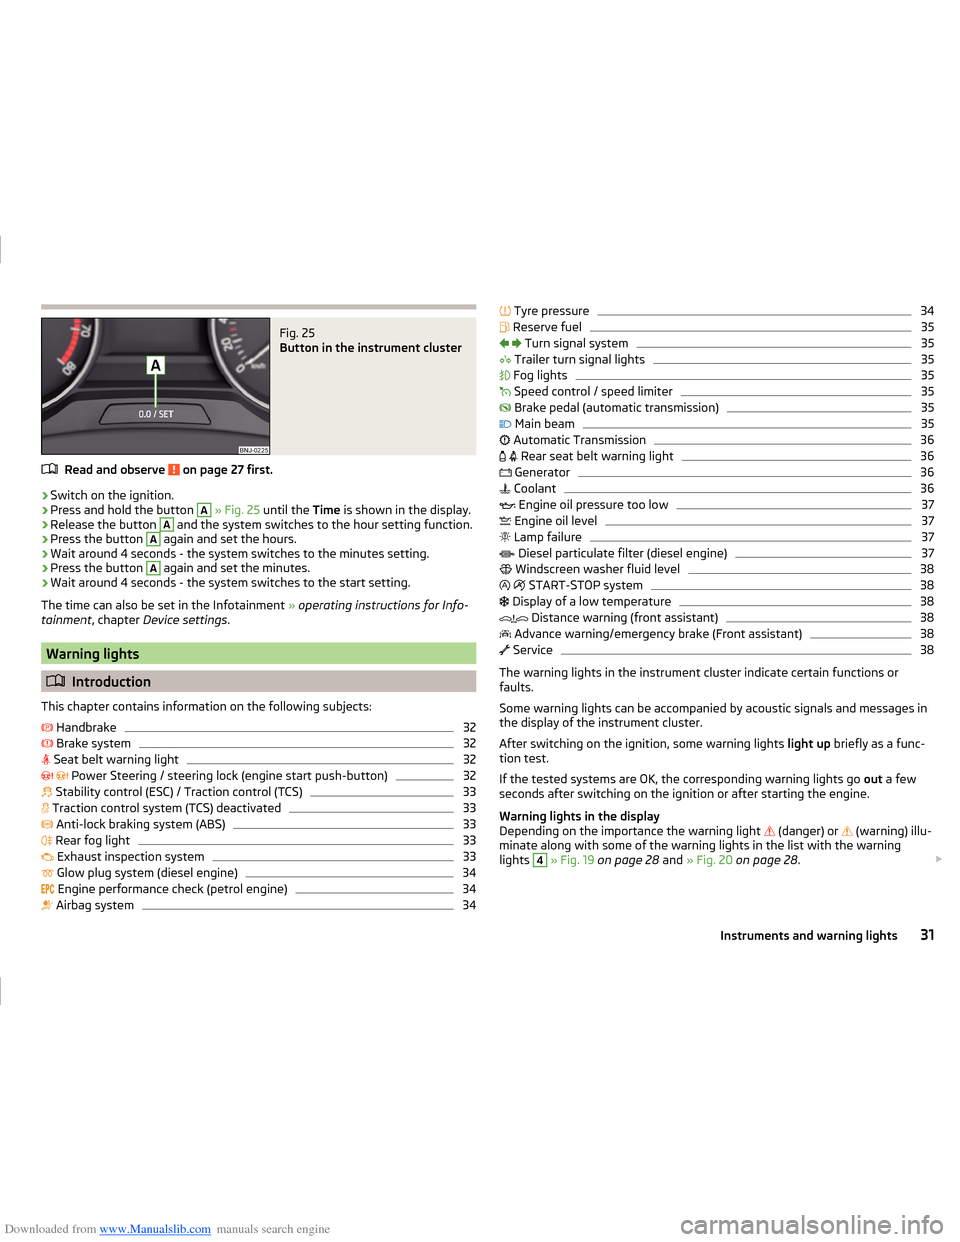
Downloaded from www.Manualslib.com manuals search engine Fig. 25
Button in the instrument cluster
Read and observe on page 27 first.
›
Switch on the ignition.
›
Press and hold the button
A
» Fig. 25 until the Time is shown in the display.
›
Release the button
A
and the system switches to the hour setting function.
›
Press the button
A
again and set the hours.
›
Wait around 4 seconds - the system switches to the minutes setting.
›
Press the button
A
again and set the minutes.
›
Wait around 4 seconds - the system switches to the start setting.
The time can also be set in the Infotainment » operating instructions for Info-
tainment , chapter Device settings .
Warning lights
Introduction
This chapter contains information on the following subjects:
Handbrake
32
Brake system
32
Seat belt warning light
32
Power Steering / steering lock (engine start push-button)
32
Stability control (ESC) / Traction control (TCS)
33
Traction control system (TCS) deactivated
33
Anti-lock braking system (ABS)
33
Rear fog light
33
Exhaust inspection system
33
Glow plug system (diesel engine)
34
Engine performance check (petrol engine)
34
Airbag system
34
Tyre pressure34 Reserve fuel35
Turn signal system
35
Trailer turn signal lights
35
Fog lights
35
Speed control / speed limiter
35
Brake pedal (automatic transmission)
35
Main beam
35
Automatic Transmission
36
Rear seat belt warning light
36
Generator
36
Coolant
36
Engine oil pressure too low
37
Engine oil level
37
Lamp failure
37
Diesel particulate filter (diesel engine)
37
Windscreen washer fluid level
38
START-STOP system
38
Display of a low temperature
38
Distance warning (front assistant)
38
Advance warning/emergency brake (Front assistant)
38
Service
38
The warning lights in the instrument cluster indicate certain functions or
faults.
Some warning lights can be accompanied by acoustic signals and messages in
the display of the instrument cluster.
After switching on the ignition, some warning lights light up briefly as a func-
tion test.
If the tested systems are OK, the corresponding warning lights go out a few
seconds after switching on the ignition or after starting the engine.
Warning lights in the display
Depending on the importance the warning light (danger) or
(warning) illu-
minate along with some of the warning lights in the list with the warning
lights
4
» Fig. 19 on page 28 and » Fig. 20 on page 28 .
31Instruments and warning lights
Page 35 of 216
Downloaded from www.Manualslib.com manuals search engine WARNING■Ignoring illuminated indicator lights and related messages or instructions
in the instrument cluster display may lead to serious personal injury or
damage to the vehicle.■
If you have to stop for technical reasons, then park the vehicle at a safe
distance from the traffic, switch off the engine and activate the hazard
warning lights system » page 63. The warning triangle must be set up at
the prescribed distance - observe the national legal provisions when doing
so.
■
The engine compartment of your car is a hazardous area. While working in
the engine compartment, be sure to observe the following warnings
» page 149 , Engine compartment .
Handbrake
Read and observe
on page 32 first.
illuminates - the hand brake is applied.
An acoustic signal will sound if you drive the vehicle above 5 km/h while the
handbrake is still on.
Release the handbrake!
RELEASE HANDBRAKE
Brake system
Read and observe
on page 32 first.
illuminates - the brake fluid level in the braking system is too low.
Brake fluid: owner's manual!
BRAKE FLUID PLEASE CHECK
›
Stop the vehicle, switch off the engine, and check the level of the brake fluid.
WARNING■ If warning light illuminates simultaneously with warning light
» page 33 , Anti-lock braking system (ABS) , do not continue your
journey! Seek help from a specialist garage.■
A fault to the ABS system or the braking system can increase the vehi-
cle's braking distance – there is a risk of an accident occurring!
Seat belt warning light
Read and observe
on page 32 first.
illuminates - the driver or front passenger has not fastened the seat belt.
At a speed of more than approximately 30 km/h the warning light
flashes
and an audible warning sounds at a time.
If the seat belt is not fastened by the driver or front passenger during the next
approx. 2 seconds, the warning signal is deactivated and the warning light
lights up permanently.
Power Steering / steering lock (engine start push-button)
Read and observe
on page 32 first.
Fault in the power steering
illuminates - this indicates a complete failure of the power steering and the
steering assist has failed (significantly higher steering forces).
illuminates - this indicates a partial failure of the power steering and the
steering forces can be greater.
Seek help from a specialist garage.
Steering lock defective (engine start push-button)
An audible signal sounds as a warning.
flashes
Steering lock faulty. Stop!
STOP VEHICLE STEERING FAULTY
Park the vehicle, and
stop driving . After switching off the ignition, it is no
longer possible to lock the steering, to activate the electrical components (e.g.
Infotainment etc.), to switch on the ignition again and to start the engine. Seek
help from a specialist garage.
flashes
Steering lock: workshop!
STEERING WORKSHOP
Seek help from a specialist garage.
Steering lock not unlocked (engine start push-button)
flashes
Move the steering wheel!
MOVE STEERING WHEEL 32Operation
Page 37 of 216
Downloaded from www.Manualslib.com manuals search engine Seek help from a specialist garage.
Glow plug system (diesel engine)Read and observe
on page 32 first.
flashes - there is a fault in the engine management system. The system
makes possible operation emergency mode - there may be a noticeable reduc-
tion in engine performance.
There is a fault in the glow plug system if the warning light
does not come
on or illuminates continuously.
Seek help from a specialist garage.
Engine performance check (petrol engine)
Read and observe
on page 32 first.
illuminates - there is a fault in the engine management system. The system
makes possible operation emergency mode - there may be a noticeable reduc-
tion in engine performance.
Seek help from a specialist garage.
Airbag system
Read and observe
on page 32 first.
System fault
illuminates - there is a fault in the airbag system.
Error: airbag
AIRBAG ERROR
Seek help from a specialist garage.
The front passenger airbag has been disabled with the key switch
Illuminates for around 4 seconds after the ignition has been switched on;
in the letters
in the middle of the dash panel illumi-
nates after switching on the ignition » page 19.
One of the airbags or a belt tensioner has been disabled by the diagnostic
tool
illuminates for approximately 4 seconds after the ignition is switched on
and then flashes again for approximately 12 seconds.
Airbag/ belt tensioner deactivated.
AIRBAG/ BELT TENSIONER OFFWARNINGIf a fault in the airbag system occurs, there is a risk of the system not being
triggered in the event of an accident! Therefore, this must be checked im-
mediately by a specialized garage.
Tyre pressure
Read and observe
on page 32 first.
Change of tyre pressure values
illuminates - in one of the tyres there was a pressure change.
An audible signal sounds as a warning.
›
Immediately reduce speed and avoid sudden steering and braking manoeu-
vres.
›
Stop the vehicle, turn the ignition off and check the tyres and their inflation
pressure » page 161 .
›
Correct the tyre pressure, if necessary or replace the affected wheel
» page 168 or use the repair kit » page 172.
›
Store the tyre pressure values in the system » page 126.
System fault
flashes for approximately 1 minute and remains lit - there may be a fault in
the tyre pressure monitoring system.
›
Stop the vehicle, turn the ignition off and start the engine again.
If the warning light flashes again after the engine has started, there is a
system error.
Seek help from a specialist garage.
Disconnecting the vehicle battery
If the vehicle's battery has been disconnected and reconnected, the indicator
light comes on after switching on the ignition.
The warning light should go out after driving a short distance.
If, after a short drive, the indicator light does not go out, there is a system er-
ror.
Seek help from a specialist garage.
34Operation
Page 41 of 216
Downloaded from www.Manualslib.com manuals search engine WARNING■Always adjust the speed and driving style to the actual weather, road, ter-
rain and traffic conditions. The recommendations indicated by the warning
light must not tempt you to disregard the national regulations for road traf-
fic.■
The diesel particulate filter reaches very high temperatures - there is a
fire hazard and serious injury could be caused. Therefore, never stop the
vehicle at places where the underside of your vehicle can come into contact
with flammable materials such as dry grass, undergrowth, leaves, spilled
fuel or such like.
CAUTION
■ As long as the warning light illuminates, one must take into account an
increased fuel consumption and a power reduction of the engine.■
Using diesel fuel with increased sulphur content can significantly reduce the
service life of the diesel particle filter. A ŠKODA Partner will be able to tell you
which countries use diesel fuel with increased sulphur content.
Note
We encourage you to avoid constant short journeys. This will improve the com-
bustion process of the soot particles in the diesel particulate filter.
Windscreen washer fluid level
Read and observe
on page 32 first.
illuminates - the windscreen washer fluid level is too low.
Add washer fluid!
WASHER FLUID PLEASE TOP UP
›
Fill up the windscreen washer fluid.
START-STOP system
Read and observe
on page 32 first.
The warning lights
indicates the state of the START STOP system
» page 104 , START-STOPsystem .
Display of a low temperature
Read and observe
on page 32 first.
illuminates - the outside temperature is below +4° C.
WARNINGEven at temperatures around +4 °C, black ice may still be on the road sur-
face! Do not only rely upon the information given on the outside tempera-
ture display that there is no ice on the road.
Distance warning (front assistant)
Read and observe
on page 32 first.
illuminates - the safe distance to the vehicle in front is below the mini-
mum.
The warning light is only shown in the MAXI DOTdisplay.
Information on the Front Assistant system » page 122.
Advance warning/emergency brake (Front assistant)
Read and observe
on page 32 first.
illuminates - the system has recognized the risk of a collision or automati-
cally triggered an emergency braking manoeuvre.
Information on the Front Assistant system » page 122.
Service
Read and observe
on page 32 first.
illuminates - note regarding a due service appointment
» page 46, Service
interval display .
38Operation
Page 52 of 216
Downloaded from www.Manualslib.com manuals search engine Unlocking and opening
Unlocking and locking
Introduction
This chapter contains information on the following subjects:
Locking/unlocking using the key via the lock cylinder
50
Unlocking/locking with the remote control key
50
Opening/closing the door
50
Unlocking / locking - KESSY
51
SafeLock
52
Individual settings
52
Locking/unlocking the vehicle with the central locking button
53
Child safety lock
53
Malfunctions
53
Your car is equipped with a central locking system.
The central locking system allows you to lock and unlock all doors, the fuel fill-
er flap and boot lid at the same time.
Depending on the equipment configuration, the following is true after
unlocking
› The turn signal lights flash twice as confirmation that the vehicle has been
unlocked.
› The doors, the boot lid and the fuel filler flap are unlocked.
› The interior light, which is switched by the door contact, comes on.
› The SafeLock system is switched off.
› The warning icon in the driver door stops flashing.
› The anti-theft alarm system is deactivated.
If you unlock the vehicle and do not open a door or the boot lid within the next
45 seconds, the vehicle will lock again automatically and the SafeLock system
or anti-theft alarm system will be switched on. This function is intended to
prevent the car being unlocked unintentionally.
Depending on the equipment configuration, the following is true after
locking
› The turn signal lights flash once as confirmation that the vehicle has been
locked.
› The doors, the boot lid and the fuel filler flap are locked.
›The interior light switched by the door contact goes off.
› The SafeLock system is switched on.
› The warning light in the driver door begins flashing.
› The anti-theft alarm system is activated.
If the doors or the boot lid remain open after the vehicle doors have been
locked, the turn signal lights do not flash until they have been closed.WARNING■ Never leave the key in the vehicle when you exit the vehicle. Unauthor-
ized persons, such as children, for example, could lock the car, turn on the
ignition or start the engine - danger of injury and accidents!■
When leaving the vehicle, never leave people who are not completely in-
dependent, such as children, unattended in the vehicle. The children might,
for example, release the handbrake or take the vehicle out of gear. The ve-
hicle could then start to move – risk of accident! These individuals would
possibly not be able to leave the vehicle on their own or to help them-
selves. At very high or very low temperatures can be fatal!
CAUTION
■ Each key contains electronic components; therefore it must be protected
against moisture and severe shocks.■
Keep the groove of the keys absolutely clean. Impurities (textile fibres, dust,
etc.) impair the function of the locking cylinder and ignition lock.
■
The battery must be replaced if the central locking or anti-theft alarm system
does react to the remote control at less than approx. 3 metres away
» page 177 .
■
Always check that the vehicle is locked before leaving it.
■
If the driver's door has been opened, the vehicle cannot be locked.
Note
In the event of an accident in which the airbags are deployed, the locked doors
are automatically unlocked in order to enable rescuers to gain access to the
vehicle.49Unlocking and opening
Page 58 of 216
Downloaded from www.Manualslib.com manuals search engine Interior monitor and towing protectionFig. 40
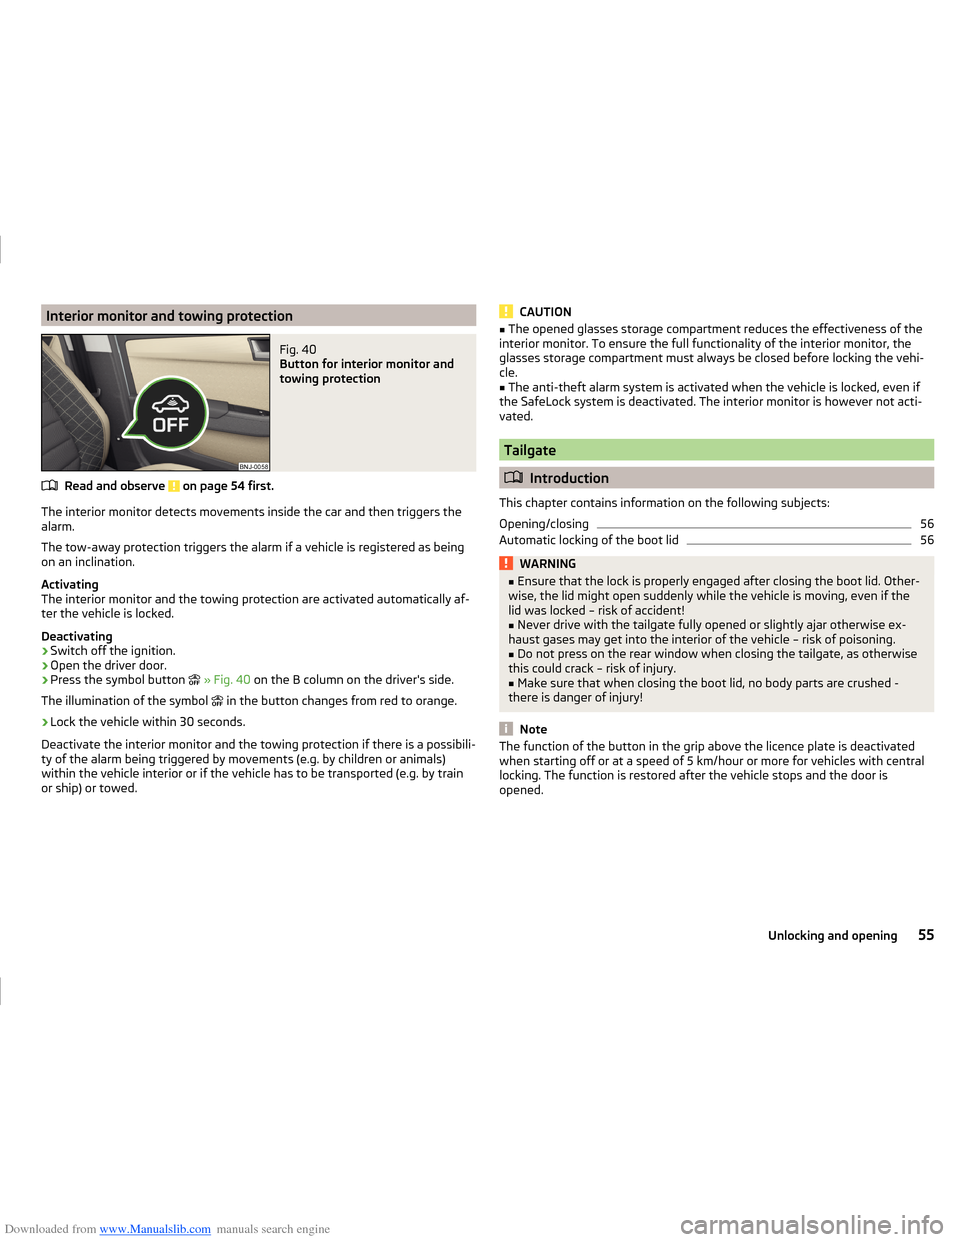
Button for interior monitor and
towing protection
Read and observe on page 54 first.
The interior monitor detects movements inside the car and then triggers the
alarm.
The tow-away protection triggers the alarm if a vehicle is registered as being
on an inclination.
Activating
The interior monitor and the towing protection are activated automatically af-
ter the vehicle is locked.
Deactivating
›
Switch off the ignition.
›
Open the driver door.
›
Press the symbol button
» Fig. 40 on the B column on the driver's side.
The illumination of the symbol in the button changes from red to orange.
›
Lock the vehicle within 30 seconds.
Deactivate the interior monitor and the towing protection if there is a possibili-
ty of the alarm being triggered by movements (e.g. by children or animals)
within the vehicle interior or if the vehicle has to be transported (e.g. by train
or ship) or towed.
CAUTION■ The opened glasses storage compartment reduces the effectiveness of the
interior monitor. To ensure the full functionality of the interior monitor, the
glasses storage compartment must always be closed before locking the vehi-
cle.■
The anti-theft alarm system is activated when the vehicle is locked, even if
the SafeLock system is deactivated. The interior monitor is however not acti-
vated.
Tailgate
Introduction
This chapter contains information on the following subjects:
Opening/closing
56
Automatic locking of the boot lid
56WARNING■ Ensure that the lock is properly engaged after closing the boot lid. Other-
wise, the lid might open suddenly while the vehicle is moving, even if the
lid was locked – risk of accident!■
Never drive with the tailgate fully opened or slightly ajar otherwise ex-
haust gases may get into the interior of the vehicle – risk of poisoning.
■
Do not press on the rear window when closing the tailgate, as otherwise
this could crack – risk of injury.
■
Make sure that when closing the boot lid, no body parts are crushed -
there is danger of injury!
Note
The function of the button in the grip above the licence plate is deactivated
when starting off or at a speed of 5 km/hour or more for vehicles with central
locking. The function is restored after the vehicle stops and the door is
opened.55Unlocking and opening
Page 74 of 216
Downloaded from www.Manualslib.com manuals search engine Move down›Press the locking button A in the direction of the arrow 2 and hold
» Fig. 59 .›
Push the headrest in the direction of arrow
3
.
WARNINGWith seats occupied, the respective head rests must be correctly set (may
not be in the bottom position) - there is a risk of fatal injury!
Note
■ The middle rear headrest is only adjustable in two positions.■For the sports seats, the headrests are integrated into the front seat backr-
ests. This headrest cannot be adjusted in height.
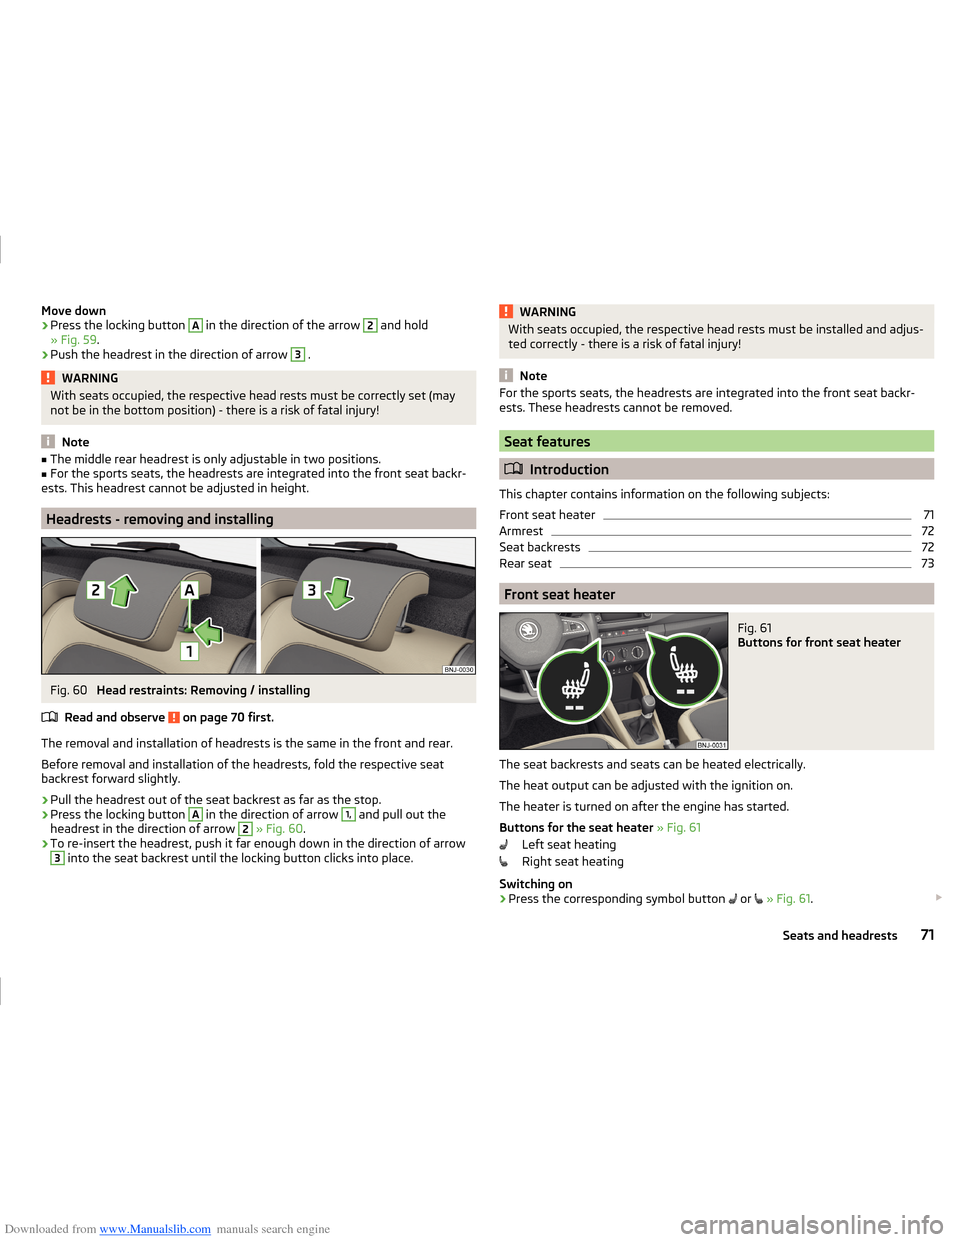
Headrests - removing and installing
Fig. 60
Head restraints: Removing / installing
Read and observe
on page 70 first.
The removal and installation of headrests is the same in the front and rear.
Before removal and installation of the headrests, fold the respective seat
backrest forward slightly.
›
Pull the headrest out of the seat backrest as far as the stop.
›
Press the locking button
A
in the direction of arrow
1,
and pull out the
headrest in the direction of arrow
2
» Fig. 60 .
›
To re-insert the headrest, push it far enough down in the direction of arrow
3
into the seat backrest until the locking button clicks into place.
WARNINGWith seats occupied, the respective head rests must be installed and adjus-
ted correctly - there is a risk of fatal injury!
Note
For the sports seats, the headrests are integrated into the front seat backr-
ests. These headrests cannot be removed.
Seat features
Introduction
This chapter contains information on the following subjects:
Front seat heater
71
Armrest
72
Seat backrests
72
Rear seat
73
Front seat heater
Fig. 61
Buttons for front seat heater
The seat backrests and seats can be heated electrically.
The heat output can be adjusted with the ignition on.
The heater is turned on after the engine has started.
Buttons for the seat heater » Fig. 61
Left seat heating
Right seat heating
Switching on
›
Press the corresponding symbol button
or
» Fig. 61 .
71Seats and headrests
Page 80 of 216
Downloaded from www.Manualslib.com manuals search engine CAUTIONDo not leave open beverage containers in the cup holder during the journey.
There is a risk of spilling e.g. when braking which may cause damage to the
electrical components or seat upholstery.
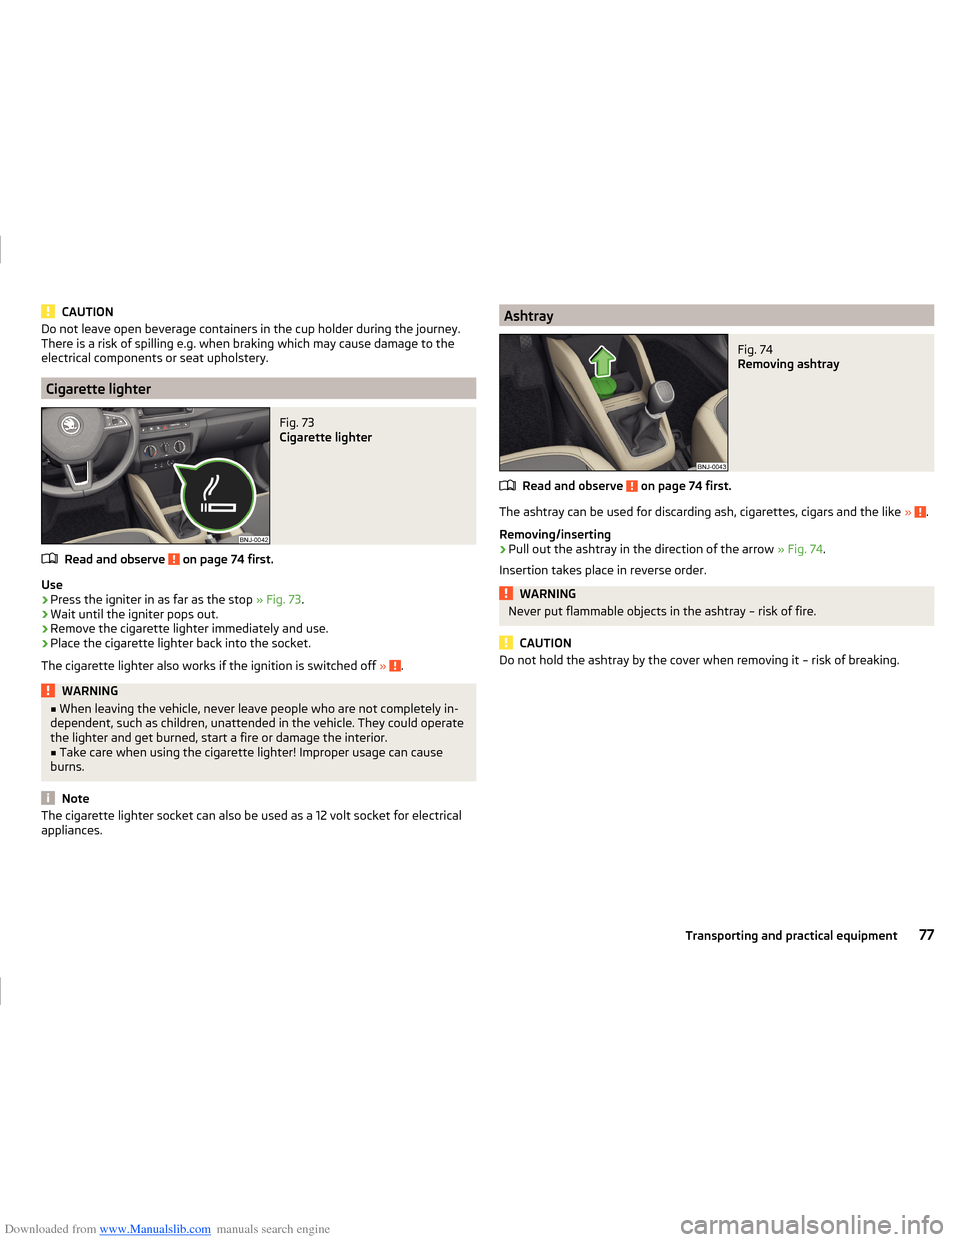
Cigarette lighter
Fig. 73
Cigarette lighter
Read and observe on page 74 first.
Use
›
Press the igniter in as far as the stop » Fig. 73.
›
Wait until the igniter pops out.
›
Remove the cigarette lighter immediately and use.
›
Place the cigarette lighter back into the socket.
The cigarette lighter also works if the ignition is switched off »
.
WARNING■
When leaving the vehicle, never leave people who are not completely in-
dependent, such as children, unattended in the vehicle. They could operate
the lighter and get burned, start a fire or damage the interior.■
Take care when using the cigarette lighter! Improper usage can cause
burns.
Note
The cigarette lighter socket can also be used as a 12 volt socket for electrical
appliances.AshtrayFig. 74
Removing ashtray
Read and observe on page 74 first.
The ashtray can be used for discarding ash, cigarettes, cigars and the like » .
Removing/inserting
›
Pull out the ashtray in the direction of the arrow » Fig. 74.
Insertion takes place in reverse order.
WARNINGNever put flammable objects in the ashtray – risk of fire.
CAUTION
Do not hold the ashtray by the cover when removing it – risk of breaking.77Transporting and practical equipment