ESP SKODA KODIAQ 2016 1.G Workshop Manual
[x] Cancel search | Manufacturer: SKODA, Model Year: 2016, Model line: KODIAQ, Model: SKODA KODIAQ 2016 1.GPages: 344, PDF Size: 58.96 MB
Page 180 of 344
Navigation
Introductory information
Navigation - function sequence
Applies to Infotainment Columbus, Amundsen.
Route guidance is started as follows.
›
Search for/ enter a new destination or Select one of the stored destinations.
›
Confirm the route calculation in the destination details or if necessary, adjust
the route options.
›
Select the preferred route type, if this is requested by Infotainment.
A route calculation occurs and route guidance starts.
The route guidance is provided by graphical driving recommendations and nav. announcements.
The is an option to add additional destinations during route guidance, or to
adapt the route.
If a traffic radio station is available, information concerning traffic delays is
evaluated by Infotainment and, if necessary, an alternative route is offered.
If you deviate from the route, then a new route calculation is carried out.
GPS satellite signal
Infotainment uses the GPS (Global Positioning System) satellite signal for
route guidance.
Outside the range of the GPS satellite signal (e.g. in dense vegetation, in tun-
nels, parking garages, etc.), Infotainment navigates only with restrictions using
vehicle sensors.
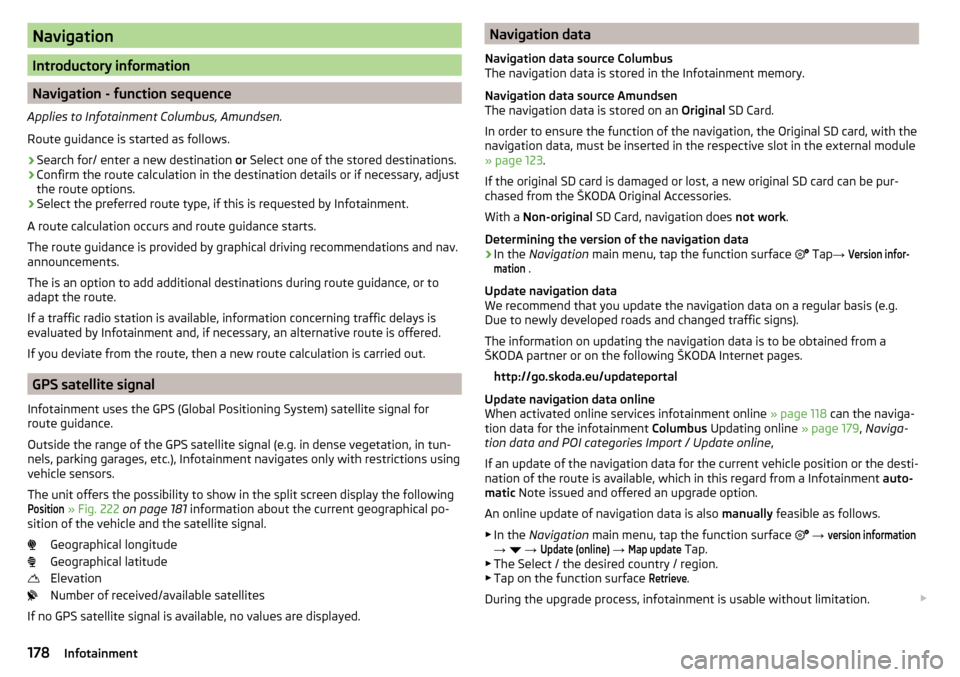
The unit offers the possibility to show in the split screen display the following
Position
» Fig. 222 on page 181 information about the current geographical po-
sition of the vehicle and the satellite signal.
Geographical longitude
Geographical latitude
Elevation
Number of received/available satellites
If no GPS satellite signal is available, no values are displayed.
Navigation data
Navigation data source Columbus
The navigation data is stored in the Infotainment memory.
Navigation data source Amundsen
The navigation data is stored on an Original SD Card.
In order to ensure the function of the navigation, the Original SD card, with the
navigation data, must be inserted in the respective slot in the external module
» page 123 .
If the original SD card is damaged or lost, a new original SD card can be pur-
chased from the ŠKODA Original Accessories.
With a Non-original SD Card, navigation does not work .
Determining the version of the navigation data›
In the Navigation main menu, tap the function surface
Tap
→
Version infor-mation
.
Update navigation data
We recommend that you update the navigation data on a regular basis (e.g.
Due to newly developed roads and changed traffic signs).
The information on updating the navigation data is to be obtained from a
ŠKODA partner or on the following ŠKODA Internet pages.
http://go.skoda.eu/updateportal
Update navigation data online
When activated online services infotainment online » page 118 can the naviga-
tion data for the infotainment Columbus Updating online » page 179, Naviga-
tion data and POI categories Import / Update online ,
If an update of the navigation data for the current vehicle position or the desti-
nation of the route is available, which in this regard from a Infotainment auto-
matic Note issued and offered an upgrade option.
An online update of navigation data is also manually feasible as follows.
▶ In the Navigation main menu, tap the function surface
→
version information
→
→
Update (online)
→
Map update
Tap.
▶ The Select / the desired country / region.
▶ Tap on the function surface
Retrieve
.
During the upgrade process, infotainment is usable without limitation.
178Infotainment
Page 183 of 344
Google Street View™
control indicator
The Google Street View ™
Display can be controlled in one of two ways.OperationActionMoving the display in the de-
sired directionPressing the function area » Fig. 221 - Change the direction of viewDrag your finger over the screen in the re-
quired directionIncrease / decrease the displayTurning the knob left / right
Completion of the display
Pressing the function area or. Turning the knob to the left at maximum
display
The orientation of the Google Street View ™
Indicator with respect to the cardi-
nal points by means of the symbol 1)
.
Note
■ In the Google Earth ™
Display is possible no insertion of the symbols of the POI
categories.■
When driving through a tunnel changes the 3D representation of the Google
Earth ™
Card automatically in the 2D display.
■
The speed of Google Earth ™
- as Google Street View ™
Indicator depends on
the Internet connection speed.
additional window
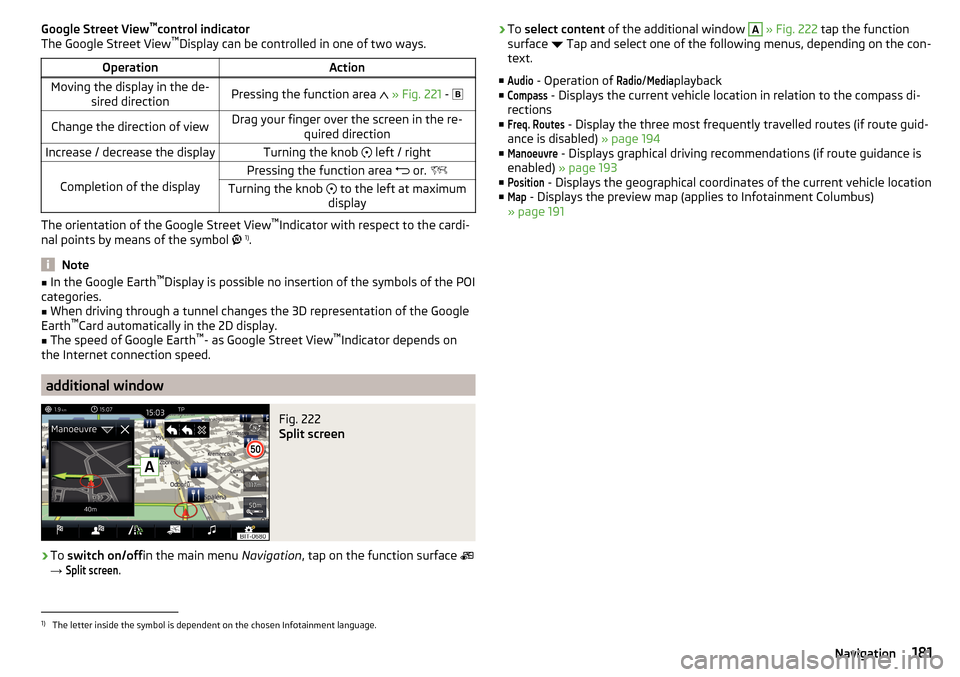
Fig. 222
Split screen
›
To switch on/off in the main menu Navigation, tap on the function surface
→
Split screen
.
› To
select content of the additional window A » Fig. 222 tap the function
surface Tap and select one of the following menus, depending on the con-
text.
■Audio
- Operation of
Radio
/
Media
playback
■
Compass
- Displays the current vehicle location in relation to the compass di-
rections
■
Freq. Routes
- Display the three most frequently travelled routes (if route guid-
ance is disabled) » page 194
■
Manoeuvre
- Displays graphical driving recommendations (if route guidance is
enabled) » page 193
■
Position
- Displays the geographical coordinates of the current vehicle location
■
Map
- Displays the preview map (applies to Infotainment Columbus)
» page 191
1)
The letter inside the symbol is dependent on the chosen Infotainment language.
181Navigation
Page 184 of 344
Search for destination and enter
Search POI destination /
Fig. 223
Destination search: Main menu / list of visited destinations
Fig. 224
Search goal line: Main menu / list of visited destinations
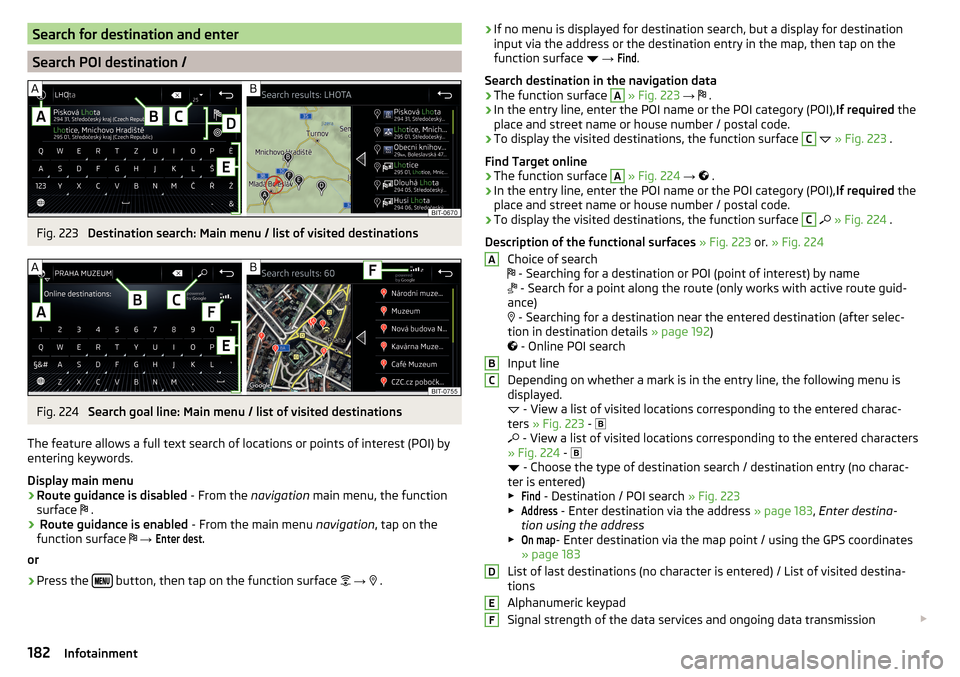
The feature allows a full text search of locations or points of interest (POI) by
entering keywords.
Display main menu
›
Route guidance is disabled - From the navigation main menu, the function
surface .
›
Route guidance is enabled
- From the main menu navigation, tap on the
function surface
→
Enter dest.
or
›
Press the button, then tap on the function surface
→
.
› If no menu is displayed for destination search, but a display for destination
input via the address or the destination entry in the map, then tap on the
function surface
→ Find
.
Search destination in the navigation data
›
The function surface
A
» Fig. 223 →
.
›
In the entry line, enter the POI name or the POI category (POI),
If required the
place and street name or house number / postal code.
›
To display the visited destinations, the function surface
C
» Fig. 223 .
Find Target online
›
The function surface
A
» Fig. 224 →
.
›
In the entry line, enter the POI name or the POI category (POI), If required the
place and street name or house number / postal code.
›
To display the visited destinations, the function surface
C
» Fig. 224 .
Description of the functional surfaces » Fig. 223 or. » Fig. 224
Choice of search
- Searching for a destination or POI (point of interest) by name
- Search for a point along the route (only works with active route guid-
ance)
- Searching for a destination near the entered destination (after selec-
tion in destination details » page 192)
- Online POI search
Input line
Depending on whether a mark is in the entry line, the following menu is
displayed.
- View a list of visited locations corresponding to the entered charac-
ters » Fig. 223 -
- View a list of visited locations corresponding to the entered characters
» Fig. 224 -
- Choose the type of destination search / destination entry (no charac-
ter is entered)
▶
Find
- Destination / POI search » Fig. 223
▶
Address
- Enter destination via the address » page 183, Enter destina-
tion using the address
▶
On map
- Enter destination via the map point / using the GPS coordinates
» page 183
List of last destinations (no character is entered) / List of visited destina-
tions
Alphanumeric keypad
Signal strength of the data services and ongoing data transmission
ABCDEF182Infotainment
Page 197 of 344

›In the
Navigation main menu, tap the function surface Tap → Route details.
A route destination
In the route plan, the following information is displayed at the destina-
tion » Fig. 242 -
.
Area with function surfaces
Destination information Estimated time of arrival at destination / remaining driving time to desti-
nation 1)
Remaining distance to the destination
Chosen route type (economic, fastest, shortest)
Current vehicle position (address / GPS coordinates)
The display of the arrival time or the remaining driving time can be adjusted as
follows.
▶ In the Navigation main menu, tap the function surface
→ Advanced settings
→
Time display:
Tap.
Several route destinations
In the route plan, the following information is displayed at the respective des-
tinations » Fig. 242 -
.
Area with function surfaces
Stopover (with sequential number)
Final destination
Estimated time of arrival at destination / stopover
Driving distance to destination / stopover
Change destinations with each other
Delete the destination
Continuation of the route guidance from the selected target (previous
waypoints are skipped)
Display the destination details » page 192
Insert destination into the route ▶ In the area
A
Enter dest.
Tap the function surface and enter a new destina-
tion.
▶ Or: Tap on the area
A
the function surface
destinations
and select an object in
the list of stored destinations.
AB CDAEach additional destination is added to the list as the first subsequent destina-
tion route.
Change positions of destinations with each other
▶ The relevant function surface
and move the destination to the desired po-
sition.
With destinations on the route already reached the note Dest. reached
is dis-
played below the destination name. It is not possible to change the position of
these destinations with each other.
Store route ▶ In the area
A
, tap the function surface
Save
.
▶ Save the edited route as a new route or replace the existing saved route.
The route is stored in the route list » page 196.
Stop route guidance
▶ In the area
A
, tap the function surface
stop
.
Route change in the map
Only valid for Infotainment Columbus.
Fig. 243
Route change in the map / route transit point
A route in which no waypoints are contained, can be changed during route
guidance by adding a transit point.
Add a transit point
›
In the Navigation main menu, tap the function surface
→
Change route in map
.
1)
If the time of arrival to the final destination or remaining travelling time greater than 24 hours,
is dis-
played inside the symbol.
195Navigation
Page 202 of 344

Detail of the traffic reportFig. 249
Detail of traffic message: TMC source / online source
The display of a traffic report details is dependent on whether the respective
traffic message TMC source » Fig. 249 -
or the online source
» Fig. 249 -
underlying.
›
To display this, select the desired traffic report from the list of traffic reports.
›
Or: Tip on the traffic obstruction icon in the map.
Depending on the context, the following information and functional surfaces
are displayed » Fig. 249.
Map of the affected location
Description of the traffic obstruction Reception timing and information relating to the traffic report provider
(is ŠKODA Connect the provider, it is an online traffic report)
Symbol of the traffic obstruction
Length of the traffic obstruction
available Google Street View ™
-Display » page 180
Dynamic route
Infotainment allows an evaluation of the traffic reports received during the
route guidance. In fulfilling the following conditions, a bypass route is calcula-
ted, and the appropriate announcement is issued.
The dynamic route function is turned on.The traffic congestion included in the traffic information is on the route.
The traffic obstruction will be evaluated by Infotainment as of great im-
portance.
ABCDE› To
switch on/off in the main menu Navigation, tap on the function surface
→ Route options
→
Dynamic route
.
enter / remove traffic conditions on your route manually
If a traffic obstruction is detected during route guidance (e.g. traffic jam), this
traffic obstruction be manually entered into the route.
After entering, Infotainment calculates and provides an alternative route.
Enter traffic obstruction
›
In the Navigation main menu, tap the function surface
→
Congestion ahead
.
›
Adjust the length of the traffic obstruction.
The traffic obstruction will be displayed in red in the map to the right along the
route.
Remove traffic obstruction
The traffic obstruction is removed from the route after completion of the route
guidance or can manually be removed as follows.
›
In the Navigation main menu, tap the function surface
→
Cancel "congest.ahead"
.
200Infotainment
Page 208 of 344
Brakes and Parking
Introduction
This chapter contains information on the following subjects:
Electric parking brake
206
Auto Hold function
207
Parking
208
The wear of the brake pads is dependent on the operating conditions and driv-
ing style. Under difficult conditions (e.g. urban, sporty driving style) the condi-
tion of the brakes should also be checked by a specialist garage between the
service intervals.
The performance of the brakes can be delayed if the brakes are damp, iced up
in winter or if covered in a layer of salt . The brakes are cleaned and dried by
applying the brakes several times »
.
Corrosion on the brake discs and dirt on the brake pads occur if the vehicle has
been parked for a long period and if you do not make much use of the braking
system. The brakes are cleaned by applying the brakes several times »
.
Before travelling a long distance with a steep gradient , reduce speed and
shift into the next lowest gear. As a result, the braking effect of the engine will
be used, reducing the load on the brakes. If you do have to brake, this should
be carried out at intervals.
Emergency braking display - when an emergency braking is performed, the
automatic flashing of the brake lights are used to alert the traffic behind.
New brake pads must first be “worn in” because these do not initially have the
best possible braking effect. Drive especially carefully for the first 200 km or
so.
A too low brake fluid level can cause faults in the braking system , the warn-
ing light illuminates in the instrument cluster
» page 35,
Brake system
. If
the warning light does not illuminate and an extended stopping distance is re-
quired, then driving should be adapted according to the unknown cause of
fault and restricted braking effect - seek the assistance of a specialist garage
immediately.
The brake booster increases the pressure generated with the brake pedal. The
brake booster only operates when the engine is running.
WARNING■ Greater physical effort is required for braking when the engine is switch-
ed off – risk of accident!■
During the braking procedure on a vehicle with manual transmission,
when the vehicle is in gear and at low revs, press the clutch pedal. Other-
wise, the functionality of the brake system may be impaired – risk of acci-
dent!
■
Do not press the brake pedal if braking is now required. This causes the
brakes to overheat and can also result in a longer braking distance and ex-
cessive wear - risk of accident!
■
Braking for the purpose of drying and cleaning the brake discs should be
carried out only if the traffic conditions permit. Do not place any other road
users in jeopardy.
■
Recommendations for new brake pads have to be observed.
■
When stopping and parking, the parking brake should always be on, oth-
erwise the vehicle could move off - there is the risk of an accident!
■
If a front spoiler, full wheel trim, etc. is mounted retrospectively, it must
be ensured that the air supply to the front wheel brakes is not reduced.
Otherwise, the functionality of the brake system may be impaired – risk of
accident!
Electric parking brake
Fig. 255
Parking brake button
206Driving
Page 211 of 344
CAUTIONWhen stopping on a slope, never try to hold the vehicle using the clutch and
the accelerator pedal – There is risk of damage to the clutch.
Manual gear changing
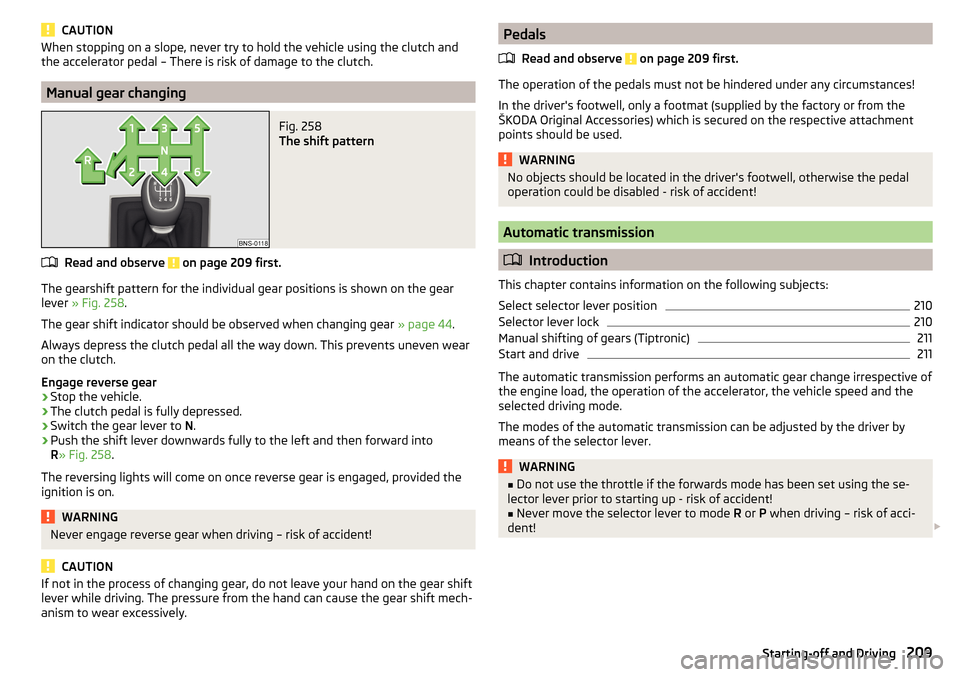
Fig. 258
The shift pattern
Read and observe on page 209 first.
The gearshift pattern for the individual gear positions is shown on the gear
lever » Fig. 258 .
The gear shift indicator should be observed when changing gear » page 44.
Always depress the clutch pedal all the way down. This prevents uneven wear
on the clutch.
Engage reverse gear
›
Stop the vehicle.
›
The clutch pedal is fully depressed.
›
Switch the gear lever to N.
›
Push the shift lever downwards fully to the left and then forward into
R » Fig. 258 .
The reversing lights will come on once reverse gear is engaged, provided the
ignition is on.
WARNINGNever engage reverse gear when driving – risk of accident!
CAUTION
If not in the process of changing gear, do not leave your hand on the gear shift
lever while driving. The pressure from the hand can cause the gear shift mech-
anism to wear excessively.Pedals
Read and observe
on page 209 first.
The operation of the pedals must not be hindered under any circumstances!
In the driver's footwell, only a footmat (supplied by the factory or from the
ŠKODA Original Accessories) which is secured on the respective attachment
points should be used.
WARNINGNo objects should be located in the driver's footwell, otherwise the pedal
operation could be disabled - risk of accident!
Automatic transmission
Introduction
This chapter contains information on the following subjects:
Select selector lever position
210
Selector lever lock
210
Manual shifting of gears (Tiptronic)
211
Start and drive
211
The automatic transmission performs an automatic gear change irrespective of
the engine load, the operation of the accelerator, the vehicle speed and the
selected driving mode.
The modes of the automatic transmission can be adjusted by the driver by
means of the selector lever.
WARNING■ Do not use the throttle if the forwards mode has been set using the se-
lector lever prior to starting up - risk of accident!■
Never move the selector lever to mode R or P when driving – risk of acci-
dent!
209Starting-off and Driving
Page 215 of 344

DriveGreen functionFig. 262
Display in Infotainment screen
The DriveGreen function (hereinafter referred to as DriveGreen) evaluates the
driving efficiency based on the information respecting the driving style.
DriveGreen can be displayed on Infotainment screen in the menu
→
→
DriveGreen
.
A
driving liquid display
With the driving is fluid, the display is located in the middle (near the green
dot). When accelerating, the display moves down, and upwards when braking.
B
“Green leaf”
The greener the leaf, the more economic the driving style. With less economi-
cal driving, the leaf is presented without any green colouring or it can be com-
pletely hidden.
C
bar graph
The higher the green bars, the more economical the driving style. Each bar
shows the driving efficiency in 5-second steps, the current bar is on the left.
D
scoring (0 - 100)
The higher the indicated value, the more economical the driving style. When
you tap the function surface
D
, a detailed assessment showing the driving ef-
ficiency during the last 30 minutes is displayed.
If the trip lasts less than 30 minutes from the start, then the overview will add the assessment from the previous journey (the bars are shown in dark green).
E
the average fuel consumption from the start
When you tap the
E
function surface, a detailed overview of the average fuel
consumption during the last 30 minutes is shown.
If the trip lasts less than 30 minutes from the start, then the overview will add the overview of the average fuel consumption from the previous journey (the
bars are shown in dark green).F
symbols
The display may show the following four symbols, which give information on
the current driving style.
Economical driving style
The current speed has a negative effect on fuel consumption.
The journey does not take place in a free-flowing manner, avoid unneces-
sary acceleration and braking
Recommended gear
Tips for economical driving
Tap on the
B
leave to display tips for economical driving.
Note
When resetting the single-trip memory “from start”; the average consumptionE, the driving assessment D, and the diagram C are also reset.
Avoiding damage to your vehicle
Introduction
This chapter contains information on the following subjects:
Driving Tips
213
Driving through water
214
Driving Tips
Only drive on such roads and in such terrain that match the vehicle parameters
» page 313 , Technical data as well as your driving skills.
The driver is always responsible for deciding whether the vehicle can handle
travelling in the given terrain.
When travelling off paved roads, we recommend activating OFF ROAD mode
» page 218 .
213Starting-off and Driving
Page 217 of 344
Assist systems
General information
Introduction
This chapter contains information on the following subjects:
Radar sensor
215WARNING■ The assistance systems only serve to support the driver and do not re-
lieve the driver of the responsibility for driving the vehicle.■
The increased safety provision, as well as the increased occupant protec-
tion provided by the assistance systems must not tempt you to take risks -
risk of accident!
■
Adjust the speed and driving style to the current visibility, weather, road
and traffic conditions.
■
The assistance systems have physical and system-related limitations. For
this reason, the driver may experience some undesired or delayed system
responses in certain situations. You should therefore always be alert and
ready to intervene!
■
Only enable, disable or set the assistance systems when you have the car
fully under control, in every traffic situation - risk of accident!
Radar sensor
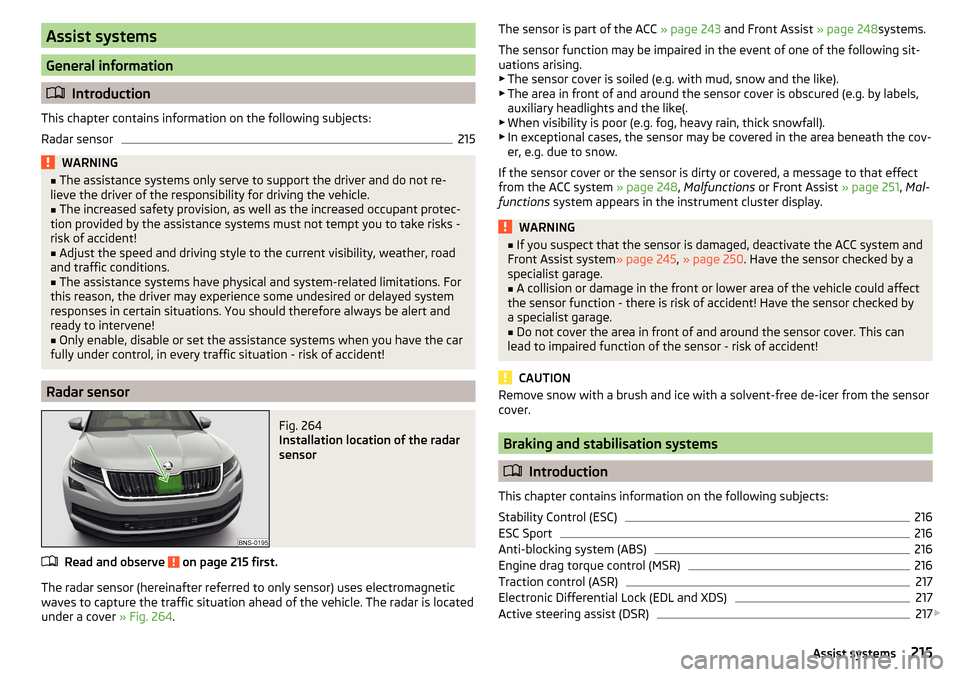
Fig. 264
Installation location of the radar
sensor
Read and observe on page 215 first.
The radar sensor (hereinafter referred to only sensor) uses electromagnetic
waves to capture the traffic situation ahead of the vehicle. The radar is located
under a cover » Fig. 264.
The sensor is part of the ACC » page 243 and Front Assist » page 248systems.
The sensor function may be impaired in the event of one of the following sit-
uations arising. ▶ The sensor cover is soiled (e.g. with mud, snow and the like).
▶ The area in front of and around the sensor cover is obscured (e.g. by labels,
auxiliary headlights and the like(.
▶ When visibility is poor (e.g. fog, heavy rain, thick snowfall).
▶ In exceptional cases, the sensor may be covered in the area beneath the cov-
er, e.g. due to snow.
If the sensor cover or the sensor is dirty or covered, a message to that effect
from the ACC system » page 248, Malfunctions or Front Assist » page 251, Mal-
functions system appears in the instrument cluster display.WARNING■
If you suspect that the sensor is damaged, deactivate the ACC system and
Front Assist system » page 245, » page 250 . Have the sensor checked by a
specialist garage.■
A collision or damage in the front or lower area of the vehicle could affect
the sensor function - there is risk of accident! Have the sensor checked by
a specialist garage.
■
Do not cover the area in front of and around the sensor cover. This can
lead to impaired function of the sensor - risk of accident!
CAUTION
Remove snow with a brush and ice with a solvent-free de-icer from the sensor
cover.
Braking and stabilisation systems
Introduction
This chapter contains information on the following subjects:
Stability Control (ESC)
216
ESC Sport
216
Anti-blocking system (ABS)
216
Engine drag torque control (MSR)
216
Traction control (ASR)
217
Electronic Differential Lock (EDL and XDS)
217
Active steering assist (DSR)
217
215Assist systems
Page 219 of 344
Traction control (ASR)Read and observe
on page 216 first.
The ASR prevents spinning of the drive wheels. TCS reduces the drive powertransmitted to the wheels in the case of slipping wheels. Thus, for example,
driving on road surfaces with low grip is made easier.
During a TCS intervention, the indicator light
flashes in the instrument clus-
ter.
Deactivation
›
Press the
» Fig. 265 on page 216 button.
›
or: On Infotainment, press the button
→ the function surface
→
ESCsystem:
→
ASR off
Tap.
With deactivation the warning light lights up in the instrument cluster
and
an appropriate message is displayed in the instrument cluster.
Activation
›
Press the
» Fig. 265 on page 216 button.
›
or: On Infotainment, press the button
→ the function surface
→
ESCsystem:
→
Activated
Tap.
With activation the warning light
is
extinguished and an appropriate mes-
sage is displayed in the instrument cluster.
The TCS should normally always be enabled. The system should be deactivated
only in the following situations, for example. ▶ When driving with snow chains.
▶ When driving in deep snow or on a very loose surface.
▶ When it is necessary to “rock” a car free when it has become stuck.
Electronic Differential Lock (EDL and XDS)
Read and observe
on page 216 first.
EDL prevents the turning of the respective wheel of the driven axle. EDL
brakes the spinning wheel, if necessary, and transmits the driving force to the
other driving wheel. Driving becomes easier on road surfaces with different
traction under each wheel of the driven axle.
EDL switches off automatically to avoid excessive heat generation on the
brake of the wheel being braked. Once the brakes have cooled down, there is
an automatic re-activation of EDL.
XDS is an extension to the electronic differential lock (EDL). XDS does not re-
spond to the relieved inner curve wheel of the driven axle in the case of fast
cornering.
By applying braking force to the relieved wheel, spinning is prevented by the
XDS. This has a positive effect on the driving stability and steerability of the
vehicle.
Active steering assist (DSR)
Read and observe
on page 216 first.
In critical situations, the DSR provides the driver with a steering recommenda-tion in order to stabilise the vehicle. DSR is activated, for example, on the right
and left vehicle side when braking sharply on different road surfaces.
Brake Assist (HBA)
Read and observe
on page 216 first.
The HBA increases the braking effect and helps to reduce the braking dis-
tance.
The HBA is activated by very quick operation of the brake pedal. In order to
achieve the shortest possible braking distance, the brake pedal must be ap-
plied firmly until the vehicle has come to a standstill.
The HBA function is automatically deactivated when the brake pedal is re-
leased.
Hill Start Assist (HHC)
Read and observe
on page 216 first.
When driving on slopes, HHC allows you to move your foot from the brake ped-al to the accelerator pedal without the vehicle rolling downhill on its own.
The vehicle is braked by the system for about 2 seconds after releasing the
brake pedal.
The HHC is active on gradients upwards of 5 % if the driver door is closed. HHC
is only ever active on slopes when in forward or reverse start off.
217Assist systems