ESP SKODA OCTAVIA 2005 1.G / (1U) User Guide
[x] Cancel search | Manufacturer: SKODA, Model Year: 2005, Model line: OCTAVIA, Model: SKODA OCTAVIA 2005 1.G / (1U)Pages: 315, PDF Size: 11.8 MB
Page 68 of 315
Lights and Visibility67
Using the systemSafetyDriving TipsGeneral MaintenanceBreakdown assistanceTechnical Data
Instrument lighting*
You can adjust the brightness of the instrument lighting.
Instrument lighting
– Switch on the light.
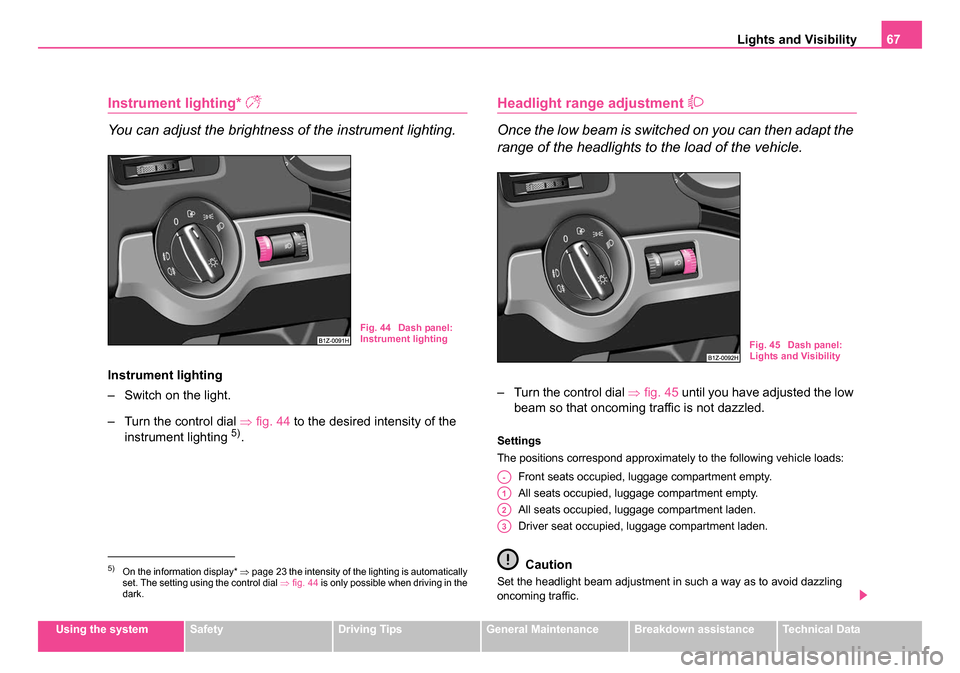
– Turn the control dial ⇒fig. 44 to the desired intensity of the
instrument lighting
5).
Headlight range adjustment
Once the low beam is switched on you can then adapt the
range of the headlights to the load of the vehicle.
– Turn the control dial ⇒fig. 45 until you have adjusted the low
beam so that oncoming traffic is not dazzled.
Settings
The positions correspond approximately to the following vehicle loads:
Front seats occupied, luggage compartment empty.
All seats occupied, luggage compartment empty.
All seats occupied, luggage compartment laden.
Driver seat occupied, luggage compartment laden.
Caution
Set the headlight beam adjustment in such a way as to avoid dazzling
oncoming traffic.5)On the information display* ⇒page 23 the intensity of the lighting is automatically
set. The setting using the control dial ⇒fig. 44 is only possible when driving in the
dark.
Fig. 44 Dash panel:
Instrument lighting
Fig. 45 Dash panel:
Lights and Visibility
A-
A1
A2
A3
s24s.book Page 67 Thursday, November 24, 2005 12:27 PM
Page 70 of 315
Lights and Visibility69
Using the systemSafetyDriving TipsGeneral MaintenanceBreakdown assistanceTechnical Data
The turn signal and main beam lever perform the following func-
tions:
Right
and left turn signal light
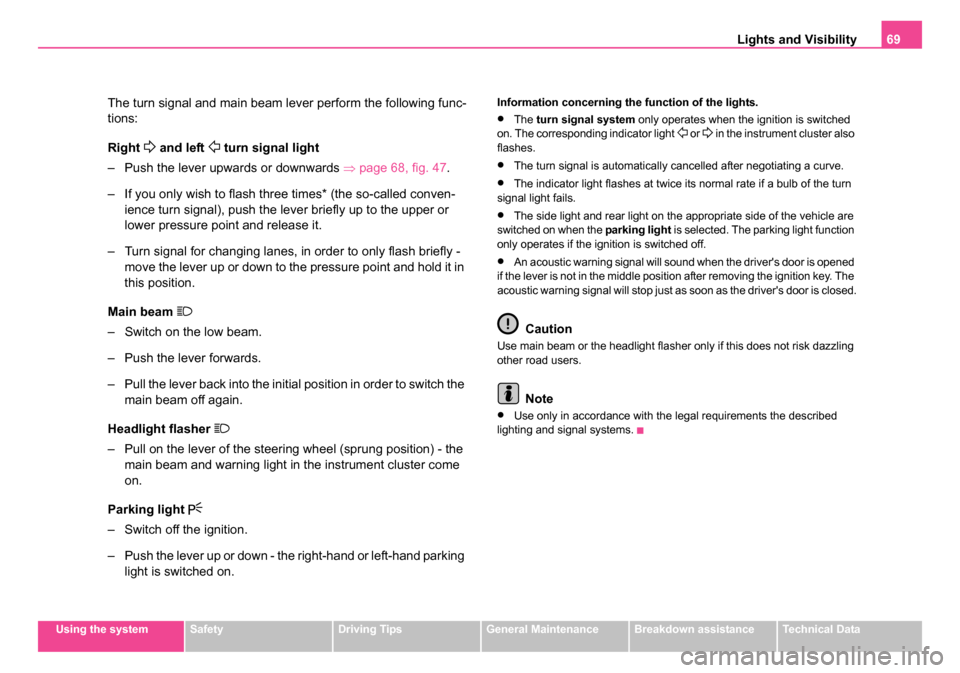
– Push the lever upwards or downwards ⇒page 68, fig. 47 .
– If you only wish to flash three times* (the so-called conven- ience turn signal), push the lever briefly up to the upper or
lower pressure point and release it.
– Turn signal for changing lanes, in order to only flash briefly - move the lever up or down to the pressure point and hold it in
this position.
Main beam
– Switch on the low beam.
– Push the lever forwards.
– Pull the lever back into the initial position in order to switch the main beam off again.
Headlight flasher
– Pull on the lever of the steering wheel (sprung position) - the main beam and warning light in the instrument cluster come
on.
Parking light
– Switch off the ignition.
– Push the lever up or down - the right-hand or left-hand parking light is switched on.
Information concerning the function of the lights.
•The turn signal system only operates when the ignition is switched
on. The corresponding indicator light or in the instrument cluster also
flashes.
•The turn signal is automatically cancelled after negotiating a curve.
•The indicator light flashes at twice its normal rate if a bulb of the turn
signal light fails.
•The side light and rear light on the appropriate side of the vehicle are
switched on when the parking light is selected. The parking light function
only operates if the ignition is switched off.
•An acoustic warning signal will sound when the driver's door is opened
if the lever is not in the middle position after removing the ignition key. The
acoustic warning signal will stop just as soon as the driver's door is closed.
Caution
Use main beam or the headlight flasher only if this does not risk dazzling
other road users.
Note
•Use only in accordance with the legal requirements the described
lighting and signal systems.
s24s.book Page 69 Thursday, November 24, 2005 12:27 PM
Page 71 of 315
Lights and Visibility
70
Interior lighting
Front interior lighting and lighting of storage
compartment on front passenger side
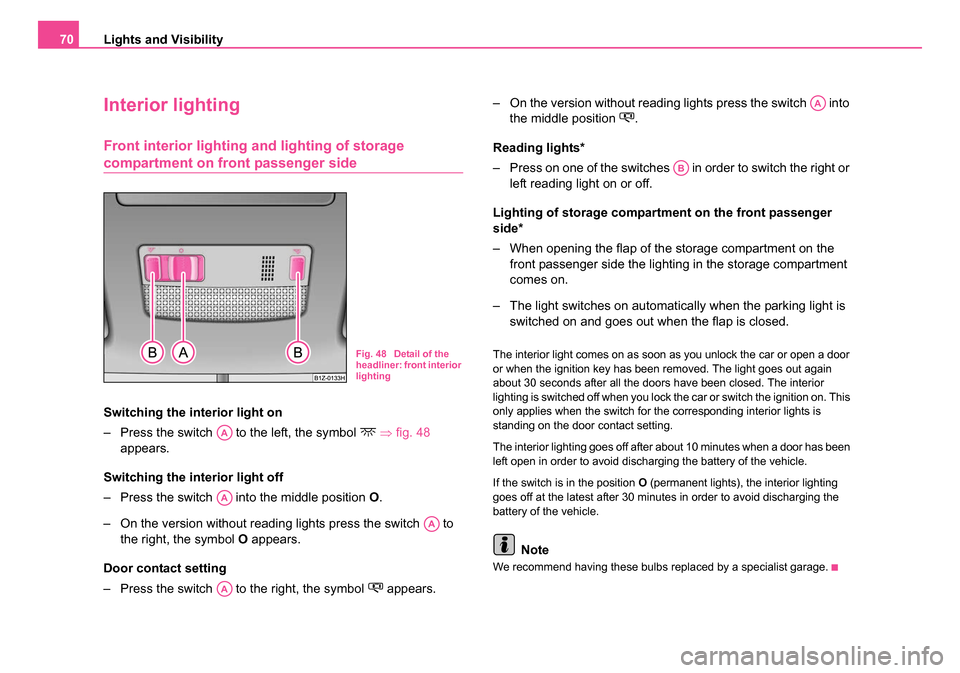
Switching the interior light on
– Press the switch to the left, the symbol
⇒ fig. 48
appears.
Switching the interior light off
– Press the switch into the middle position O.
– On the version without reading lights press the switch to the right, the symbol O appears.
Door contact setting
– Press the switch to the right, the symbol
appears. – On the version without reading lights press the switch into
the middle position
.
Reading lights*
– Press on one of the switches in order to switch the right or left reading light on or off.
Lighting of storage compartm ent on the front passenger
side*
– When opening the flap of the storage compartment on the front passenger side the lighting in the storage compartment
comes on.
– The light switches on automatically when the parking light is switched on and goes out when the flap is closed.
The interior light comes on as soon as you unlock the car or open a door
or when the ignition key has been removed. The light goes out again
about 30 seconds after all the doors have been closed. The interior
lighting is switched off when you lock the car or switch the ignition on. This
only applies when the switch for the corresponding interior lights is
standing on the door contact setting.
The interior lighting goes off after about 10 minutes when a door has been
left open in order to avoid discharging the battery of the vehicle.
If the switch is in the position O (permanent lights), the interior lighting
goes off at the latest after 30 minutes in order to avoid discharging the
battery of the vehicle.
Note
We recommend having these bulbs replaced by a specialist garage.
Fig. 48 Detail of the
headliner: front interior
lighting
AA
AA
AA
AA
AA
AB
s24s.book Page 70 Thursday, November 24, 2005 12:27 PM
Page 77 of 315
Lights and Visibility
76
Automatic wipe/wash for the rear window pane*
– Press the lever from the steering wheel forward into the sprung position , the wash system sprays immediately, the
windscreen wiper starts wiping a little later. As long as you
hold the lever in this position, the wiper operates as well as the
wash system.
– Letting go of the lever will cause the windscreen wash system to stop and the wiper to continue for another 2 - 3 wiper
strokes (depending on the period of spraying of the wind-
screen). The lever will stay in position after releasing it .
Switching windscreen wipers off
– Move the lever back into its home position .
After the windscreen wiper switches off for the second time or the ignition
switches off for the fifth time, the rest position of the windscreen wiper
changes - this counteracts an early fatigue of the wiper rubbers.
The windscreen wipers and the wash system only operate if the ignition is
switched on and the bonnet is closed.
If the intermittent wipe is switched on, the intervals are also controlled
depending on speed.
The rain sensor* automatically regulates the break between the individual
wiper strokes depending on the intensity of the rain.
The rear window will be wiped again if the front window wipers are on
when reverse gear is selected.
The windscreen washer nozzles are heated* when the ignition is switched
on.
Top up with wash liquid ⇒page 262. Winter position
If the windscreen wipers are in rest position, they cannot be folded out
from the windscreen. For this reason we recommend adjusting the wind-
screen wipers in winter so that they can be folded out from the windscreen
easily. You can set this rest position as follows:
•Switch on the windscreen wipers.
•Switch off the ignition. The windscreen wipers remain in the position in
which they were when switching off the ignition.
You can also use the service position ⇒page 77 as a winter position.
WARNING
•Properly maintained windscreen wiper blades are essential for
clear visibility and safe driving ⇒page 77, “Replacing wiper blades
for the windscreen wipers”.
•Do not use the windscreen washer system at low temperatures,
without heating the windscreen beforehand. Otherwise the window
cleaner could freeze on the windscreen and restrict the view to the
front.
•The rain sensor only operates as a support. The driver is not
released from the responsibility to set the function of the wind-
screen wipers manually depending on the visibility conditions.
Caution
In frosty weather, please first of all check whether the windscreen wiper
blades are not frozen to the windscreen before switching them on.
Switching on windscreen wipers when the blades are frozen to the wind-
screen may result in damage both to the blades and the motor of the wind-
screen wipers!
A7
A6
A0
s24s.book Page 76 Thursday, November 24, 2005 12:27 PM
Page 86 of 315
Seats and Stowage85
Using the systemSafetyDriving TipsGeneral MaintenanceBreakdown assistanceTechnical Data
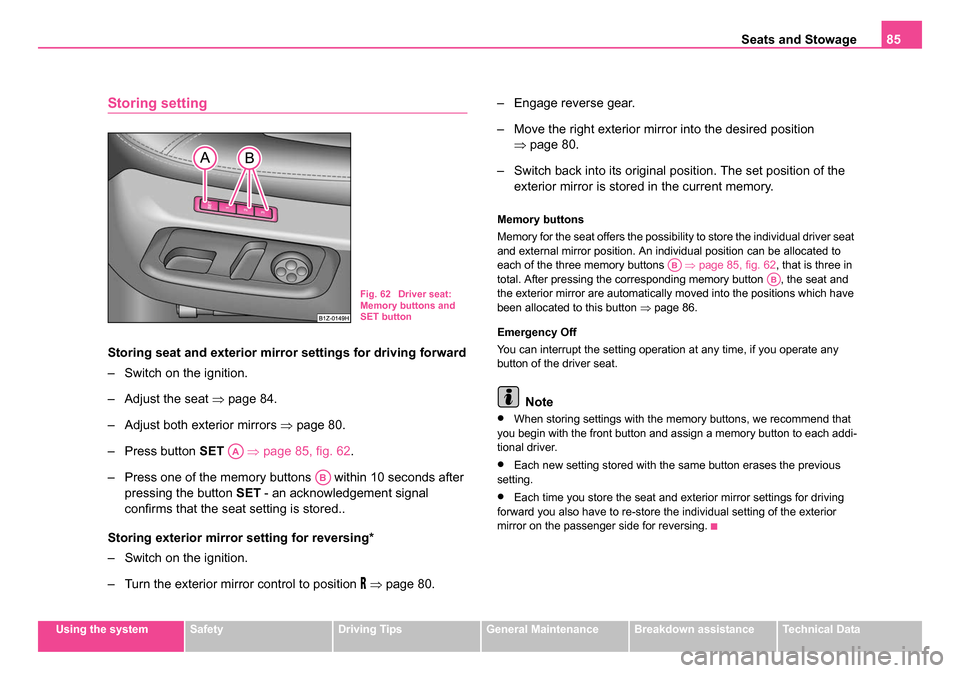
Storing setting
Storing seat and exterior mirror settings for driving forward
– Switch on the ignition.
– Adjust the seat ⇒page 84.
– Adjust both exterior mirrors ⇒page 80.
– Press button SET ⇒page 85, fig. 62 .
– Press one of the memory buttons within 10 seconds after pressing the button SET - an acknowledgement signal
confirms that the seat setting is stored..
Storing exterior mirror setting for reversing*
– Switch on the ignition.
– Turn the exterior mirror control to position
⇒ page 80. – Engage reverse gear.
– Move the right exterior mirror into the desired position
⇒page 80.
– Switch back into its original position. The set position of the exterior mirror is stored in the current memory.
Memory buttons
Memory for the seat offers the possibility to store the individual driver seat
and external mirror position. An individual position can be allocated to
each of the three memory buttons ⇒page 85, fig. 62 , that is three in
total. After pressing the corresponding memory button , the seat and
the exterior mirror are automatically moved into the positions which have
been allocated to this button ⇒page 86.
Emergency Off
You can interrupt the setting operation at any time, if you operate any
button of the driver seat.
Note
•When storing settings with the memory buttons, we recommend that
you begin with the front button and assign a memory button to each addi-
tional driver.
•Each new setting stored with the same button erases the previous
setting.
•Each time you store the seat and exterior mirror settings for driving
forward you also have to re-store the individual setting of the exterior
mirror on the passenger side for reversing.
Fig. 62 Driver seat:
Memory buttons and
SET button
AA
AB
ABAB
s24s.book Page 85 Thursday, November 24, 2005 12:27 PM
Page 126 of 315
Heating and air conditioning system 125
Using the systemSafetyDriving TipsGeneral MaintenanceBreakdown assistanceTechnical Data
•The used air streams out through the air removal openings in the
luggage compartment.
•If the cooling system has not been switched on for a lengthy period,
odours may be produced at the evaporator because of deposits. Switch
the cooling system on at least once a month for approximately 5 minutes
at the highest blower stage - also during the cold season of the year - in
order to remove such odours. Also open a window for a short time.
•Please refer to the information regarding recirculated air mode
⇒ page 126.
Set Climatic
Recommended settings of Climatic controls for the respective operating
modes:
Defrosting the windscreen and side windows
•Put the control dial ⇒page 124, fig. 119 to the temperature selected
as usual by you (we recommend 22 °C); Climatic puts automatically the
heating to maximum power, until the temperature selected by you is
achieved
•Blower switch in position 3
•Turn the air distribution control into the position
•Open air outlet vents 3 ⇒ page 127, fig. 120 and point towards the side
window
•Close the air outlet vents 4
Keeping windscreen and side windows demisted
We recommend that you use the following setting in cases where the
windows are misted up more than usual (e.g. when it is raining):
Blower switch in position 2
Turn the air distribution control into the position
Open air outlet vents 3 and point towards the side window
Close the air outlet vents 4
Switch on the cooling system by pressing button
Warming up the inside of the vehicle as rapidly as possible
•Put the control dial to the temperature selected as usual by you (we
recommend 22 °C); Climatic puts au tomatically the heating to maximum
power, until the temperature selected by you is achieved
•Blower switch in position 3
•Turn the air distribution control into the position
•Open the air outlet vents 3 and 4
•We recommend briefly pressing button air recirculation mode. The
windows can steam up in this position however.
Heating the vehicle to a comfortable temperature
We recommend the following setting once the windows are no longer
misted up and the desired teperature has been reached:
•Control dial at the desired heat temperature
•Blower switch in position 2 or 3
•Turn the air distribution control into the position
•Open the air outlet vents 3
•Close the air outlet vents 4
•Set the air distribution regulator as required between positions
and , if the windscreen gets misted up again.
Cooling down the inside of the vehicle as rapidly as possible
•Close all windows and the sliding/tilting roof
•Put the control dial to the temperature selected as usual by you (we
recommend 22 °C); Climatic puts au tomatically the heating to maximum
power, until the temperature selected by you is achieved.
AA
AB
AC
AB
AC
A1
AA
AB
AC
A3
AA
AB
AC
AC
AA
s24s.book Page 125 Thursday, November 24, 2005 12:27 PM
Page 133 of 315
Heating and air conditioning system
132
Recirculated air mode
In recirculated air mode air is sucked out of the interior of
the vehicle and then fed back into the interior.
Recirculated air mode prevents polluted air outside the vehicle
from getting into the vehicle, for example when driving through a
tunnel or when standing in a traffic jam.
Switching recircul ated air mode on
– Press the button - the warning light lights up in the button.
Switching recirculat ed air mode off
– Press again the button or the button - the warning light in the button goes out.
WARNING
You should not leave recirculated air mode on over a longer period
of time. “Stale air” may result in fatigue in the driver and passen-
gers, reduce attention levels and also cause the windows to mist
up. The risk of having an accident increases. Switch recirculated
air mode off as soon as the windows begin misting up.
Note
If the windscreen mists up, press the button ⇒page 130, fig. 122 .
After the windscreen has been demisted, press the button .
Setting temperature
You can separate the interior temperature for the left and right
side separately.
– You can set the temperature for both sides after switching on the ignition with the control dial .
– If you wish to set the temperature for the right side, turn the control dial .
If the temperature for the right side was set via the control dial , it can
no longer be set via the control dial - temperature for both sides. This
is only possible if you press the button for about 2 seconds.
You can set the interior temperature between +16 °C (60 °F) and +29.5
°C (85 °F). The interior temperature is regulated automatically within this
range. If you select the temperature below +16 °C (60 °F), “LO” appears
in the display. If you select the temperature higher than +29.5 °C (85 °F),
“HI” appears in the display. In both limit positions the Climatronic operates
at maximum cooling or heating capacity, respectively. The temperature is
not controlled in this case.
Lengthy and uneven distribution of the air flow out of the vents (in partic-
ular at the leg area) and large differences in temperature, for example
when getting out of the vehicle, can result in chills in sensitive persons.
Controlling blower
There are a total of seven blower stages available.
The Climatronic system controls the blower stages automatically
in line with the interior temperature. You can also, however,
adapt the blower stages manually to suit your particular needs.
AUTO
A9AUTO
A7
A11
A11A7AUTO
s24s.book Page 132 Thursday, November 24, 2005 12:27 PM
Page 134 of 315
Heating and air conditioning system 133
Using the systemSafetyDriving TipsGeneral MaintenanceBreakdown assistanceTechnical Data
– Turn the control dial ⇒page 130, fig. 122 to the left (reduce
blower speed) or right (increase blower speed).
Switch off the blowers, the Climatronic is switched off and on the displays
appears OFF.
The set blower speed is displayed above the control dial when the
respective number of warning lights come on.
WARNING
•The “stale” air may result in fatigue, divert your attention and
also cause the windows to mist up. The risk of having an accident
increases.
•Do not switch the Climatronic system off for longer than neces-
sary.
•Switch the Climatronic system on as soon as the windows mist
up.
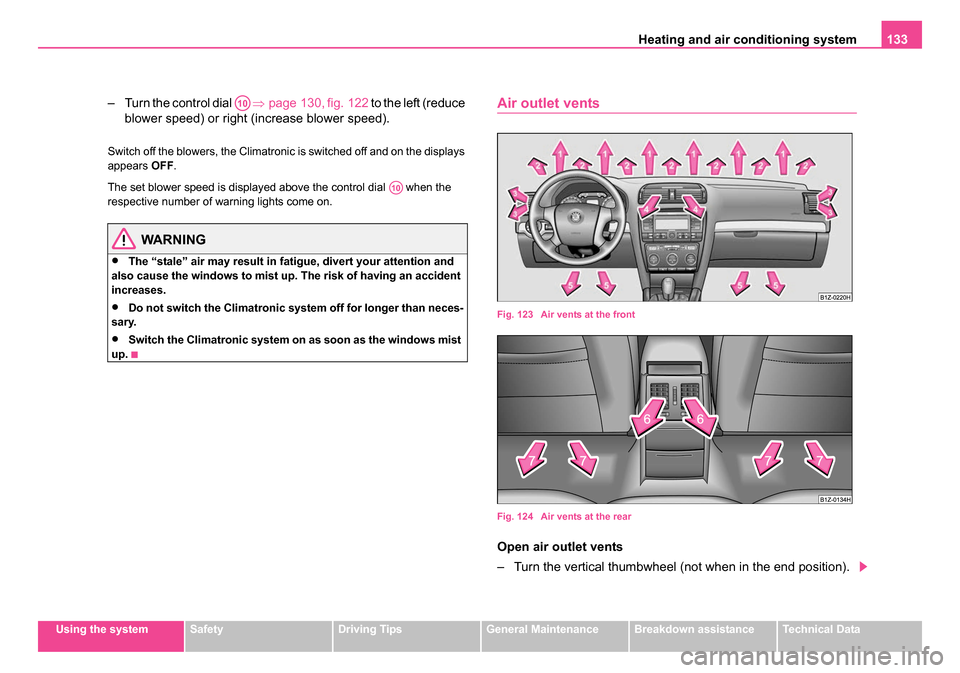
Air outlet vents
Fig. 123 Air vents at the front
Fig. 124 Air vents at the rear
Open air outlet vents
– Turn the vertical thumbwheel (not when in the end position).
A10
A10
s24s.book Page 133 Thursday, November 24, 2005 12:27 PM
Page 145 of 315
Starting-off and Driving
144
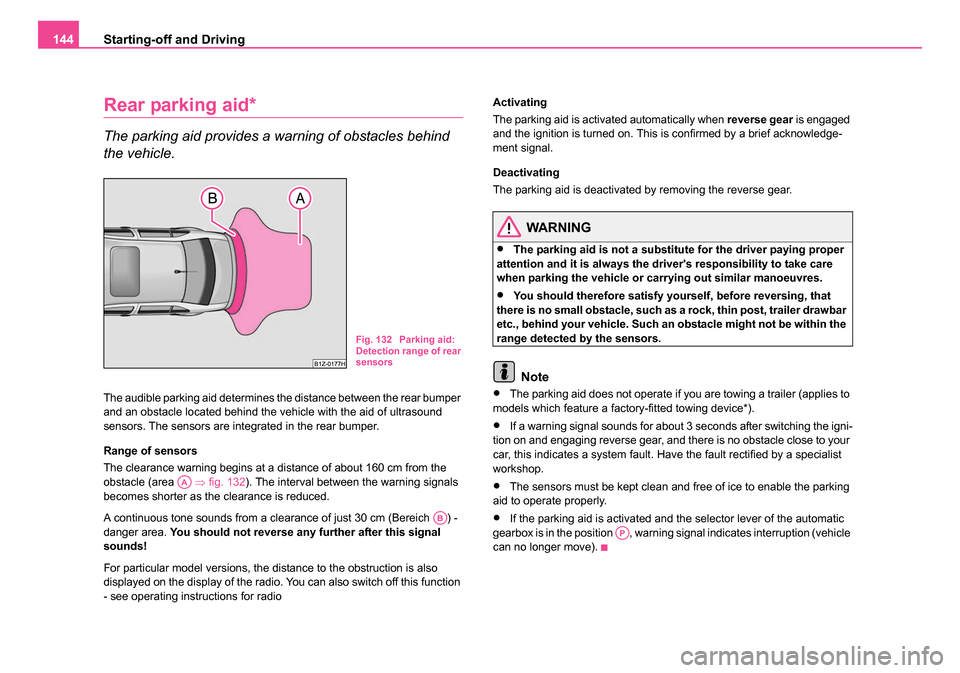
Rear parking aid*
The parking aid provides a warning of obstacles behind
the vehicle.
The audible parking aid determines the distance between the rear bumper
and an obstacle located behind the vehicle with the aid of ultrasound
sensors. The sensors are integrated in the rear bumper.
Range of sensors
The clearance warning begins at a distance of about 160 cm from the
obstacle (area ⇒ fig. 132). The interval between the warning signals
becomes shorter as the clearance is reduced.
A continuous tone sounds from a clearance of just 30 cm (Bereich ) -
danger area. You should not reverse any further after this signal
sounds!
For particular model versions, the distance to the obstruction is also
displayed on the display of the radio. You can also switch off this function
- see operating instructions for radio Activating
The parking aid is activated automatically when
reverse gear is engaged
and the ignition is turned on. This is confirmed by a brief acknowledge-
ment signal.
Deactivating
The parking aid is deactivated by removing the reverse gear.
WARNING
•The parking aid is not a substitute for the driver paying proper
attention and it is always the driver's responsibility to take care
when parking the vehicle or carrying out similar manoeuvres.
•You should therefore satisfy yourself, before reversing, that
there is no small obstacle, such as a rock, thin post, trailer drawbar
etc., behind your vehicle. Such an obstacle might not be within the
range detected by the sensors.
Note
•The parking aid does not operate if you are towing a trailer (applies to
models which feature a factory-fitted towing device*).
•If a warning signal sounds for about 3 seconds after switching the igni-
tion on and engaging reverse gear, and there is no obstacle close to your
car, this indicates a system fault. Have the fault rectified by a specialist
workshop.
•The sensors must be kept clean and free of ice to enable the parking
aid to operate properly.
•If the parking aid is activated and the selector lever of the automatic
gearbox is in the position , warning signal indicates interruption (vehicle
can no longer move).
Fig. 132 Parking aid:
Detection range of rear
sensors
AA
AB
AP
s24s.book Page 144 Thursday, November 24, 2005 12:27 PM
Page 146 of 315

Starting-off and Driving145
Using the systemSafetyDriving TipsGeneral MaintenanceBreakdown assistanceTechnical Data
Front and rear parking aid*
The parking aid provides a warning of obstacles in front
and behind the vehicle.
The audible parking aid determines the distance between the front or rear
bumper and an obstacle with the aid of ultrasound sensors. The sensors
are integrated in the front and rear bumper. The signal tones for the front
parking aid sound higher than for the rear parking aid.
Range of sensors
The distance warning begins at a distance of about 120 cm from the
obstacle in front of the vehicle (area ⇒fig. 134 ) and about 160 cm from
the obstacle behind the vehicle (area ⇒page 144, fig. 132 ). The
interval between the warning signals becomes shorter as the clearance is
reduced.
A continuous tone sounds from a clearance of just 30 cm (Bereich ) -
danger area. You should not reverse any further after this signal
sounds!
Your vehicle can be equipped with a radio which shows on its display the
distance of the vehicle to the obstacle. You can also switch off this func-
tion - see operating instructions for radio
Activating
The parking aid is activated when the reverse gear is engaged and the
ignition is turned on or by pressing the button ⇒fig. 133 - the symbol
lights up in the button. The activation is confirmed by a brief acknowledge-
ment signal.
Deactivating
The parking aid is deactivated after pressing the button
⇒ fig. 133 or at
a speed of more than 15 km/h - the symbol in the button is no longer
illuminated.
WARNING
•The parking aid is not a substitute for the driver paying proper
attention and it is always the driver's responsibility to take care
when reversing the vehicle or carrying out similar manoeuvres.
Fig. 133 Activating the
parking aid
Fig. 134 Parking aid:
Detection range of the
front sensors
AAAA
AB
s24s.book Page 145 Thursday, November 24, 2005 12:27 PM