light SKODA OCTAVIA 2012 2.G / (1Z) Repair Manual
[x] Cancel search | Manufacturer: SKODA, Model Year: 2012, Model line: OCTAVIA, Model: SKODA OCTAVIA 2012 2.G / (1Z)Pages: 222, PDF Size: 13.52 MB
Page 93 of 222
CAUTIONThe radio remote control comprises electronic components and must therefore be
protected against water, severe impacts and direct sunlight.
Replacing the battery in the remote control
First read and observe the introductory information and safety warn-
ings
on page 88.
If the indicator light
C
» Fig. 88 on page 90on the radio remote control indicates
a weak or discharged battery, it must be replaced.
The battery is located under a cover
B
» Fig. 88 on page 90 on the back of the
radio remote control.
›
Insert a flat, blunt object, such as a coin, into the gap of the battery cover.
›
Turn the cover against the direction of the arrow up to the mark to open the cover.
›
Replace the battery.
›
Return the battery cover.
›
Turn the cover in the direction of the arrow up to the initial marking, engage.
When replacing the battery, pay attention to the correct polarity.
The replacement battery must have the same specification as the original battery.
For the sake of the environment
Dispose of the used battery in accordance with national legal provisions.
91Heating and air conditioning system
Page 94 of 222
Starting-off and Driving
Starting and stopping the engine
Introduction
This chapter contains information on the following subjects:
Adjusting the steering wheel position
93
Power steering
93
Electronic immobiliser
93
Ignition lock
94
Starting engine
94
Switching the engine off
94
Starting and stopping the engine on vehicles with the KESSY system » page 95.
WARNING■
Never adjust the steering wheel when the vehicle is moving only when the
vehicle is stationary!■
Maintain a distance of 25 cm
1
to the steering wheel » Fig. 89 on page 93
– . Not maintaining this minimum distance will mean that the airbag system
will not be able to properly protect you – hazard!
■
The lever for adjusting the steering wheel must be locked whilst driving so
that the position of the steering wheel cannot accidently change during the journey – risk of accident!
■
If the steering wheel is adjusted further towards the head, the protection
provided by the driver airbag in the event of an accident is reduced. Check
that the steering wheel is aligned to the chest.
■
When driving, hold the steering wheel with both hands firmly on the outer
edge in the 9 o'clock and 3 o'clock position. Never hold the steering wheel in
the 12 o'clock position or in any other way (e.g. in the middle or inner edge of the steering wheel). In such cases, you could injure the arms, hands and head
when the driver airbag is deployed.
WARNING (Continued)■ When driving, the ignition key must always be in the position 2 » Fig. 90 on
page 94 (ignition switched on) without the engine running. This position is
indicated by the warning lights coming on. If this is not the case, it could result
in unexpected locking of the steering wheel – risk of accident!■
Only pull the ignition key from the ignition lock when the vehicle has come
to a complete stop (by applying the handbrake). Otherwise the steering wheel
could block – risk of accident!
■
When leaving the vehicle, the ignition must always be removed. This is par-
ticularly important if children are left in the vehicle. Otherwise the children
could, for example, start the engine – risk of accident or injury!
■
Never leave the engine running in unventilated or closed rooms. The ex-
haust gases of the engine contain besides the odorless and colourless carbon
monoxide a poisonous gas – hazard! Carbon monoxide can cause uncon-
sciousness and death.
■
Never leave the vehicle unattended with the engine running.
■
Never switch off the engine before the vehicle is stationary – risk of acci-
dent!
CAUTION
■ The starter may only be operated (ignition key position 3 » Fig. 90 on
page 94), if the engine is not running. The starter or engine can be damaged if
the starter is activated when the engine is running.■
Avoid high engine revolutions, full throttle and high engine loads as long as the
engine has not yet reached its operating temperature – risk of damaging the en-
gine!
■
Do not tow start the engine - danger of damaging the engine! On vehicles with
a catalytic converter, unburnt fuel may get into the catalytic converter where it
may ignite. This in turn may damage the catalytic converter. The battery from an- other vehicle can be used as a jump-start aid » page 195.
■
Do not switch the engine off immediately at the end of your journey after the
engine has been operated over a prolonged period at high loads but leave it to
run at an idling speed for about 1 minute. This prevents any possible accumulation of heat when the engine is switched off.
For the sake of the environment
Do not warm up the engine while the vehicle is stationary. If possible, start your
journey as soon as the engine has started. Through this the engine reaches its
operating temperature more rapidly and the pollutant emissions are lower. 92Using the system
Page 96 of 222
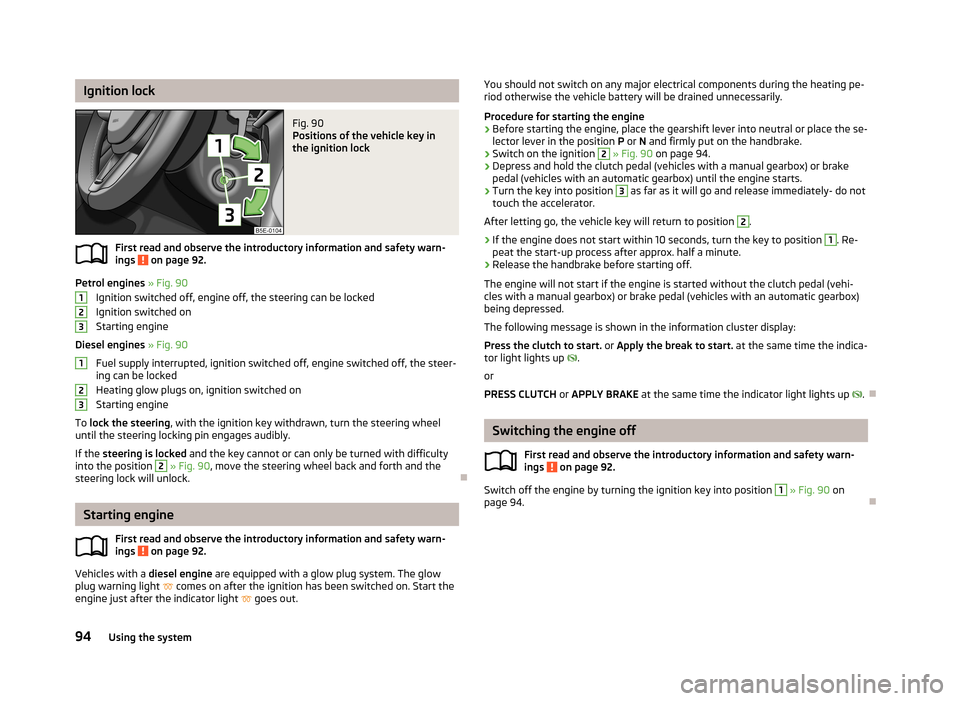
Ignition lockFig. 90
Positions of the vehicle key in
the ignition lock
First read and observe the introductory information and safety warn-
ings on page 92.
Petrol engines » Fig. 90
Ignition switched off, engine off, the steering can be locked
Ignition switched on Starting engine
Diesel engines » Fig. 90
Fuel supply interrupted, ignition switched off, engine switched off, the steer-
ing can be locked
Heating glow plugs on, ignition switched on
Starting engine
To lock the steering , with the ignition key withdrawn, turn the steering wheel
until the steering locking pin engages audibly.
If the steering is locked and the key cannot or can only be turned with difficulty
into the position
2
» Fig. 90 , move the steering wheel back and forth and the
steering lock will unlock.
Starting engine
First read and observe the introductory information and safety warn-ings
on page 92.
Vehicles with a diesel engine are equipped with a glow plug system. The glow
plug warning light
comes on after the ignition has been switched on. Start the
engine just after the indicator light
goes out.
123123You should not switch on any major electrical components during the heating pe-
riod otherwise the vehicle battery will be drained unnecessarily.
Procedure for starting the engine›
Before starting the engine, place the gearshift lever into neutral or place the se-
lector lever in the position P or N and firmly put on the handbrake.
›
Switch on the ignition
2
» Fig. 90 on page 94.
›
Depress and hold the clutch pedal (vehicles with a manual gearbox) or brake
pedal (vehicles with an automatic gearbox) until the engine starts.
›
Turn the key into position
3
as far as it will go and release immediately- do not
touch the accelerator.
After letting go, the vehicle key will return to position
2
.
›
If the engine does not start within 10 seconds, turn the key to position
1
. Re-
peat the start-up process after approx. half a minute.
›
Release the handbrake before starting off.
The engine will not start if the engine is started without the clutch pedal (vehi- cles with a manual gearbox) or brake pedal (vehicles with an automatic gearbox)
being depressed.
The following message is shown in the information cluster display:
Press the clutch to start. or Apply the break to start. at the same time the indica-
tor light lights up
.
or
PRESS CLUTCH or APPLY BRAKE at the same time the indicator light lights up
.
Switching the engine off
First read and observe the introductory information and safety warn-ings
on page 92.
Switch off the engine by turning the ignition key into position
1
» Fig. 90 on
page 94.
94Using the system
Page 97 of 222
KESSY system
Introduction
This chapter contains information on the following subjects:
Unlocking and locking the steering
95
Switching on the ignition
96
Switching off the ignition
96
Emergency ignition shutoff system
96
Starting engine
96
Emergency start-up of the engine
97
Switching the engine off
97
The KESSY system makes it possible to switch the ignition on/off and to start/
stop the engine without actively using the key.
A key must be in the vehicle to unlock the steering, switch on the steering andstart the vehicle.
WARNING■ Never switch off the ignition while driving, as the power steering and brake
booster will no longer operate - risk of accident!■
Never leave the keys in the vehicle, if leaving children unattended in the ve-
hicle. Otherwise the children could start the engine - risk of accident!
Note
■ After pressing the starter button while the steering is locked, the steering is un-
locked, the electrical components are activated (e.g. Infotainment, etc.) and the ignition is switched on.■
If you do not leave the vehicle after locking the steering and wish to unlock the
steering again, press the starter button. At the same time, electrical components
are activated (e.g. Infotainment etc.) and the ignition is switched on.
■
The KESSY system is protected against inadvertently switching off the engine
while driving, this means that the engine can only be switched off in an emergen-
cy » page 96 .
■
The steering is not unlocked or locked if the starter button is repeatedly press-
ed at short intervals.
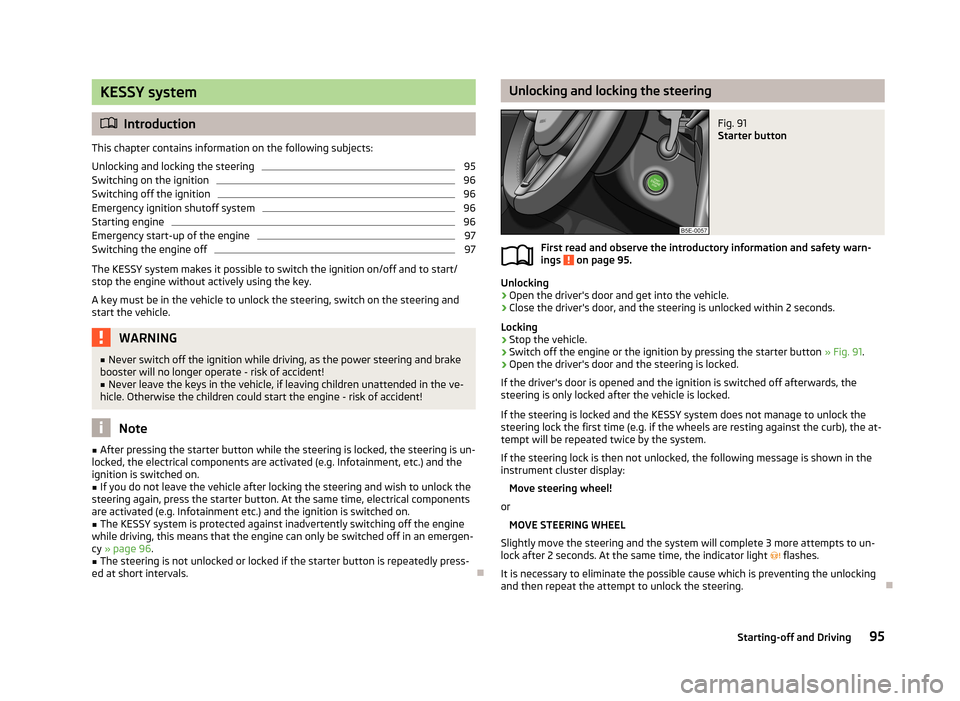
Unlocking and locking the steeringFig. 91
Starter button
First read and observe the introductory information and safety warn-
ings on page 95.
Unlocking
›
Open the driver's door and get into the vehicle.
›
Close the driver's door, and the steering is unlocked within 2 seconds.
Locking
›
Stop the vehicle.
›
Switch off the engine or the ignition by pressing the starter button » Fig. 91.
›
Open the driver's door and the steering is locked.
If the driver's door is opened and the ignition is switched off afterwards, the steering is only locked after the vehicle is locked.
If the steering is locked and the KESSY system does not manage to unlock the steering lock the first time (e.g. if the wheels are resting against the curb), the at-
tempt will be repeated twice by the system.
If the steering lock is then not unlocked, the following message is shown in the
instrument cluster display:
Move steering wheel!
or MOVE STEERING WHEEL
Slightly move the steering and the system will complete 3 more attempts to un-
lock after 2 seconds. At the same time, the indicator light
flashes.
It is necessary to eliminate the possible cause which is preventing the unlocking
and then repeat the attempt to unlock the steering.
95Starting-off and Driving
Page 98 of 222
Switching on the ignitionFirst read and observe the introductory information and safety warn-
ings
on page 95.
The steering must be unlocked to switch on the ignition.
›
Briefly press the starter button » Fig. 91 on page 95 and the ignition is switched
on.
If the ignition is switched on and the driver's door is opened, the following mes-
sage appears in the instrument cluster display:
Ignition on!
or IGNITION STILL ON
Switching off the ignition
First read and observe the introductory information and safety warn-ings
on page 95.
›
Briefly press the starter button » Fig. 91 on page 95 and the ignition is switched
off.
The ignition can be switched off up to a speed of 2 km/h.
On vehicles fitted with a manual gearbox, the clutch pedal must not be depressed after switching off the ignition otherwise the system would try to start.
On vehicles fitted with an automatic gearbox, the selector lever must be in theposition P or N and the brake pedal must not be depressed.
Emergency ignition shutoff system
First read and observe the introductory information and safety warn-
ings
on page 95.
In an emergency, it is possible to switch off the ignition even at speeds greater than 2 km/h, by using the "emergency ignition shutoff system".
›
Press the starter button » Fig. 91 on page 95 for longer than 1 second or twice
within 1 second.
Starting engine
First read and observe the introductory information and safety warn-ings
on page 95.
Maintain the clutch pedal depressed when starting vehicles fitted with a manualgearbox. On vehicles with an automatic gearbox, place the selector lever in posi-
tion P or N and depress the brake pedal until the engine starts.
The engine will not start if the engine is started without the clutch pedal (vehi- cles with a manual gearbox) or brake pedal (vehicles with an automatic gearbox) being depressed.
The following message is shown in the information cluster display: Press the clutch to start. or Apply the break to start. at the same time the indica-
tor light lights up
.
or
PRESS CLUTCH or APPLY BRAKE at the same time the indicator light lights up
.
Petrol engines
›
Briefly press the starter button » Fig. 91 on page 95 - the engine fires up.
Diesel engines
›
Briefly press the starter button - the engine starts after the indicator light
goes out.
The diesel engine can also be started by pressing the starter button, the ignition
is switched on and the glow plug warning light
illuminates. Wait until the glow
plug warning light goes out and then press and hold the starter button until the
engine starts.
96Using the system
Page 100 of 222
WARNING■Greater physical effort for braking is required when the engine is switched
off – risk of accident!■
During the braking procedure on a vehicle with manual transmission, when
the vehicle is in gear and at low revs, press the clutch pedal. If you fail to do
so, the functionality of the brake booster can be impaired – risk of accident!
■
If a front spoiler, full wheel trim, etc. is mounted retrospectively, it must be
ensured that the air supply to the front wheel brakes is not reduced. The front
brakes may overheat which can have a negative impact on the functioning of
the braking system - risk of accident!
CAUTION
■ Observe the recommendations on the new brake pads » page 100.■Never let the brakes slip with light pressure on the pedal if braking is not neces-
sary. This causes the brakes to overheat and can also result in a longer braking distance and excessive wear.
Note
■ If the brakes are applied in full and the control unit for the braking system con-
siders the situation to be dangerous for the following traffic, the brake light
flashes automatically. After the speed was reduced below around 10 km/h or the vehicle was stopped, the brake light stops flashing and the hazard warning light
system switches on. The hazard warning light system is switched off automatical-
ly after accelerating or driving off again.■
Before negotiating a steep downhill section, reduce the speed, shift down into
the next lower gear (manual gearbox) or select a lower drive position (automatic
gearbox). As a result, the braking effect of the engine will be used, reducing the
load on the brakes. Any additional braking should be completed intermittently, not continuously.
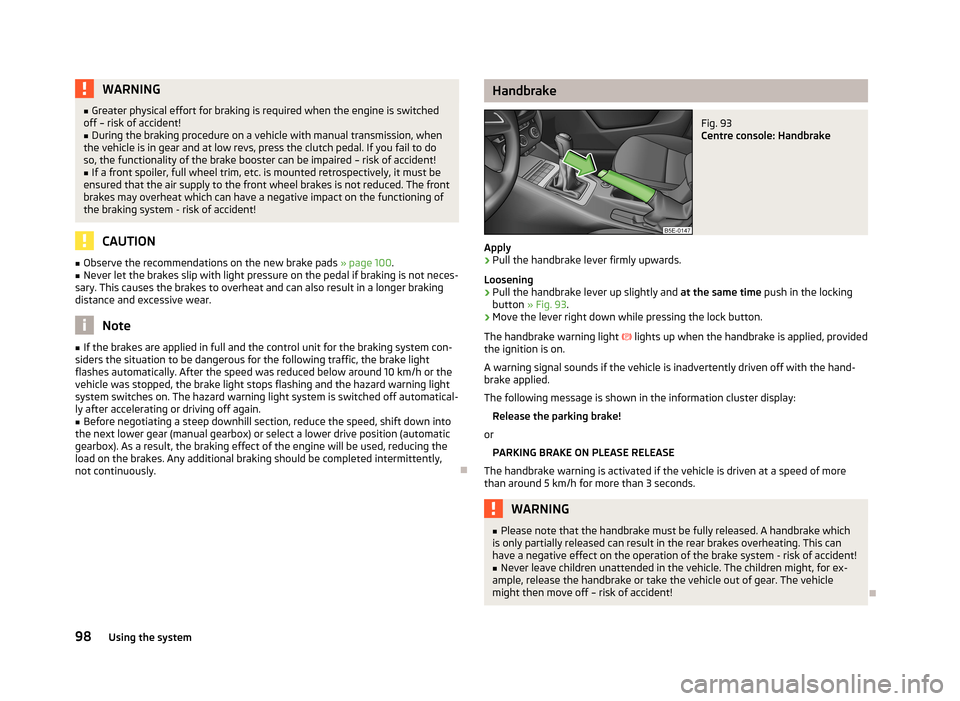
HandbrakeFig. 93
Centre console: Handbrake
Apply
›
Pull the handbrake lever firmly upwards.
Loosening
›
Pull the handbrake lever up slightly and at the same time push in the locking
button » Fig. 93 .
›
Move the lever right down while pressing the lock button.
The handbrake warning light
lights up when the handbrake is applied, provided
the ignition is on.
A warning signal sounds if the vehicle is inadvertently driven off with the hand-
brake applied.
The following message is shown in the information cluster display:
Release the parking brake!
or
PARKING BRAKE ON PLEASE RELEASE
The handbrake warning is activated if the vehicle is driven at a speed of more than around 5 km/h for more than 3 seconds.
WARNING■ Please note that the handbrake must be fully released. A handbrake which
is only partially released can result in the rear brakes overheating. This can
have a negative effect on the operation of the brake system - risk of accident!■
Never leave children unattended in the vehicle. The children might, for ex-
ample, release the handbrake or take the vehicle out of gear. The vehicle
might then move off – risk of accident!
98Using the system
Page 101 of 222

ShiftingFig. 94
Gearshift pattern of 5 gear or
6 gear manual gearbox
Always depress the clutch pedal all the way down. This prevents uneven wear on the clutch.
Observe the recommended gear » page 21.
Only engage reverse gear when the vehicle is stationary. Depress the clutch pedal
and hold it fully depressed. Wait a moment before reverse gear is engaged to avoid any shift noises.
The reversing lights will come on once reverse gear is engaged, provided the igni- tion is on.
WARNINGNever engage reverse gear when driving – risk of accident!
Note
If not in the process of changing gear, do not leave your hand on the gearshift
lever while driving. The pressure from the hand can cause the gearshift mecha-
nism to wear excessively.
Pedals
The operation of the pedals must not be hindered under any circumstances! In the driver's footwell, only a footmat, which is attached to the two correspond-
ing attachment points, may be used.
Only use footmats from the range of ŠKODA Original Accessories, which are fitted to two attachment points.WARNINGNo objects are allowed in the driver's footwell – risk of obstruction or limita-
tion in operating the pedal!
99Starting-off and Driving
Page 103 of 222
WARNING■In view of the high temperatures which can be produced in the catalytic con-
verter, the vehicle should be parked in such a way that the catalytic converter
cannot come into contact with easily flammable materials under the vehicle –
risk of fire!■
Never use additional underbody protection or anti-corrosion agents for ex-
haust pipes, catalytic converters or heat shields – risk of fire!
CAUTION
■ Never drive until the fuel tank is completely empty! The irregular supply of fuel
can cause misfiring, which can result in considerable damage to parts of the en-
gine and exhaust system.■
Just filling the tank with leaded petrol once will damage the exhaust system!
Economical and environmentally friendly driving
Introductory information
The technical requirements for low fuel usage and economic efficiency of the ve- hicle have already been built into the vehicle at the works. ŠKODA places a partic-
ular emphasis on minimising negative effects on the environment.
It is necessary to take note of the guidelines given in this chapter in order to
make best use of these characteristics and to maintain their effectiveness.
Your fuel consumption, any pollution of the environmental and the wear-and-tear
to the engine, brakes and tyres, depend essentially on three factors:
› your personal style of driving;
› the conditions under which your vehicle is operated;
› technical aspects.
The fuel economy by can be improved by 10 -15 % by always looking ahead and
driving in an economical way.
Fuel consumption is also be influenced by external factors which are beyond the
driver's control. Consumption increases during the winter or under difficult condi-
tions, on poor roads, etc.
Fuel consumption can vary considerably from the manufacturer's data, as a result
of outside temperatures, the weather and driving style.
The optimal engine speed should be obtained when accelerating, in order to
avoid a high fuel consumption and resonance of the vehicle.
Looking ahead when driving
A vehicle's highest fuel consumption occurs when accelerating, therefore unnec-
essary accelerating and braking should be avoided. If looking ahead when driving, less braking and consequently less accelerating are required.
If possible, let your vehicle coast to a stop, or use the engine brake, if you can see that the next set of traffic lights is on red, for example.
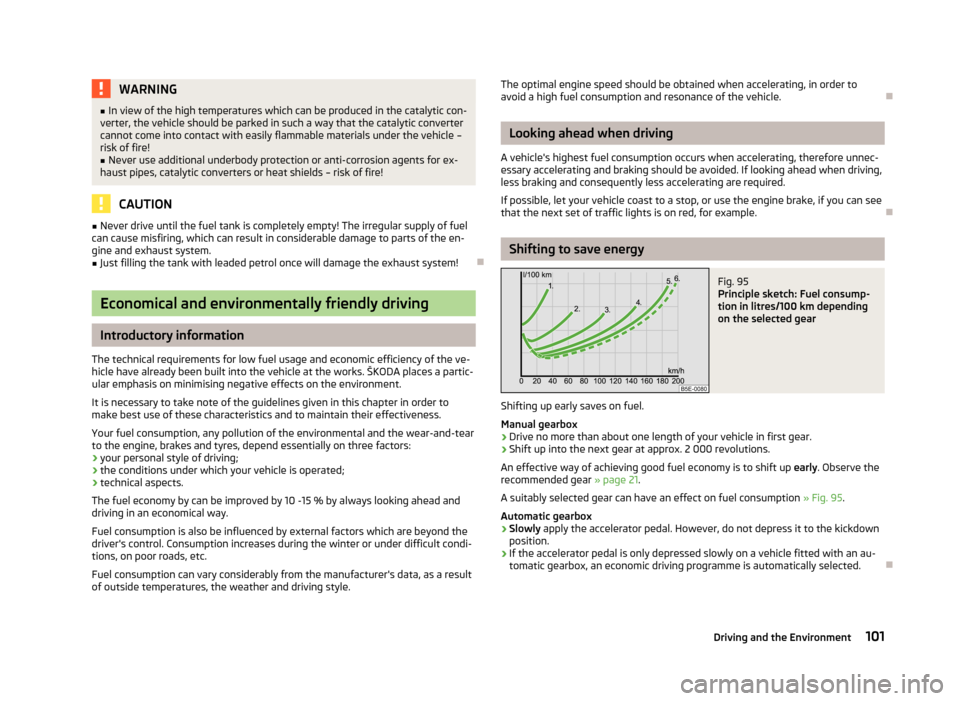
Shifting to save energy
Fig. 95
Principle sketch: Fuel consump-
tion in litres/100 km depending
on the selected gear
Shifting up early saves on fuel.
Manual gearbox › Drive no more than about one length of your vehicle in first gear.
› Shift up into the next gear at approx. 2 000 revolutions.
An effective way of achieving good fuel economy is to shift up early. Observe the
recommended gear » page 21.
A suitably selected gear can have an effect on fuel consumption » Fig. 95.
Automatic gearbox › Slowly
apply the accelerator pedal. However, do not depress it to the kickdown
position.
› If the accelerator pedal is only depressed slowly on a vehicle fitted with an au-
tomatic gearbox, an economic driving programme is automatically selected.
101Driving and the Environment
Page 104 of 222
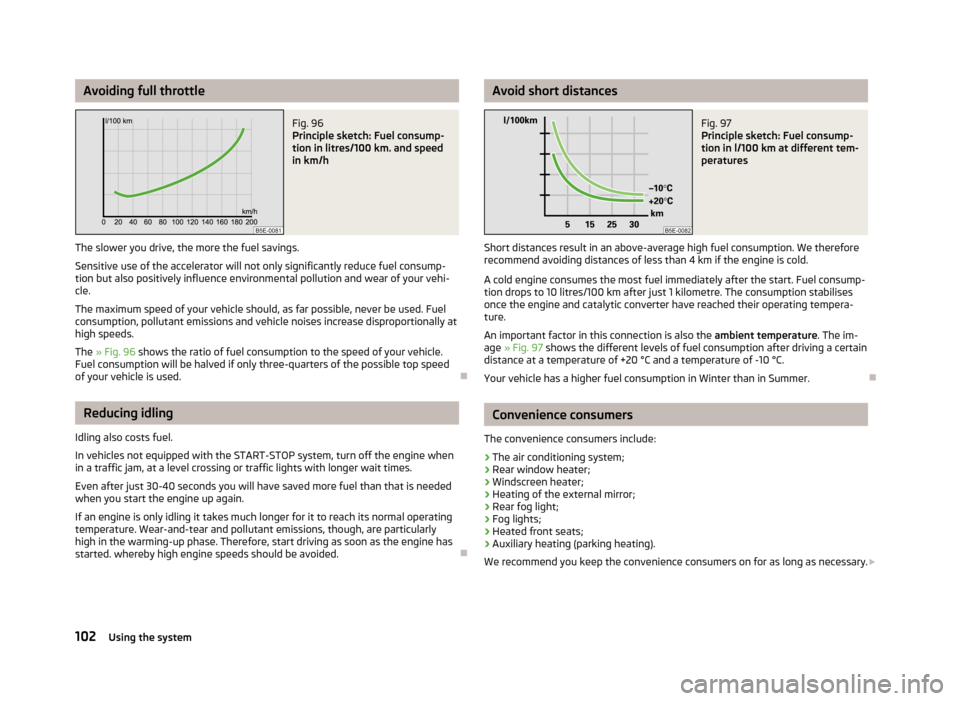
Avoiding full throttleFig. 96
Principle sketch: Fuel consump-
tion in litres/100 km. and speed
in km/h
The slower you drive, the more the fuel savings.
Sensitive use of the accelerator will not only significantly reduce fuel consump- tion but also positively influence environmental pollution and wear of your vehi-
cle.
The maximum speed of your vehicle should, as far possible, never be used. Fuel
consumption, pollutant emissions and vehicle noises increase disproportionally at
high speeds.
The » Fig. 96 shows the ratio of fuel consumption to the speed of your vehicle.
Fuel consumption will be halved if only three-quarters of the possible top speed
of your vehicle is used.
Reducing idling
Idling also costs fuel.
In vehicles not equipped with the START-STOP system, turn off the engine when
in a traffic jam, at a level crossing or traffic lights with longer wait times.
Even after just 30-40 seconds you will have saved more fuel than that is needed
when you start the engine up again.
If an engine is only idling it takes much longer for it to reach its normal operating
temperature. Wear-and-tear and pollutant emissions, though, are particularly
high in the warming-up phase. Therefore, start driving as soon as the engine has
started. whereby high engine speeds should be avoided.
Avoid short distancesFig. 97
Principle sketch: Fuel consump-
tion in l/100 km at different tem-
peratures
Short distances result in an above-average high fuel consumption. We therefore recommend avoiding distances of less than 4 km if the engine is cold.
A cold engine consumes the most fuel immediately after the start. Fuel consump- tion drops to 10 litres/100 km after just 1 kilometre. The consumption stabilises once the engine and catalytic converter have reached their operating tempera-
ture.
An important factor in this connection is also the ambient temperature. The im-
age » Fig. 97 shows the different levels of fuel consumption after driving a certain
distance at a temperature of +20 °C and a temperature of -10 °C.
Your vehicle has a higher fuel consumption in Winter than in Summer.
Convenience consumers
The convenience consumers include:
› The air conditioning system;
› Rear window heater;
› Windscreen heater;
› Heating of the external mirror;
› Rear fog light;
› Fog lights;
› Heated front seats;
› Auxiliary heating (parking heating).
We recommend you keep the convenience consumers on for as long as necessary.
102Using the system
Page 106 of 222
›No cadmium.
› No asbestos.
› Reduction in the “vaporisation” of plastics.
Manufacture › Solvent-free cavity protection.
› Solvent-free protection of the vehicle for transportation from the production
plant to the customer.
› The use of solvent-free adhesives.
› No CFCs used in the production process.
› Without use of mercury.
› Use of water-soluble paints.
Trade-in and recycling of old cars
ŠKODA meets the requirements of the brand and its products with regard to pro-
tecting the environment and the preserving resources. All new ŠKODA vehicles
can be utilized up to 95 % and always 1)
be returned.
In a lot of countries sufficient trade-in networks have been created, where you can trade-in your vehicle. After you trade-in your vehicle, you will receive a confir-
mation stating the recycling in accordance with environmental regulations.
Note
Detailed information about the trade-in and recycling of old cars is available from
a ŠKODA Partner.
Driving abroad
Introductory information
In certain countries it is also possible that the ŠKODA Partner network is limited
or has not been established yet. This is the reason why procuring certain spare
parts may be somewhat complicated and specialist garages may only be able to
make limited repairs.
ŠKODA in the Czech Republic and its importers are happy to provide information
about technical aspects of the vehicle, required maintenance work and possibili- ties for getting repairs done.
Unleaded petrol
A vehicle fitted with a petrol engine must always be refuelled with unleaded pet- rol » page 168 . Information regarding the locations of filling stations that offer
unleaded petrol is, for example, provided by the automobile associations.
Headlights
The low beam of your headlights is set asymmetrically. It illuminates the side of the road on which the vehicle is being driven to a greater extent.
When driving in countries in which the traffic drives on the other side of the roadthan in your home country, the asymmetrical low beam may dazzle oncoming
drivers. To prevent oncoming traffic from being dazzled, the headlights must be
adjusted by a ŠKODA Partner.
Headlights with Xenon lights are adjusted in the menu of the information dis-
play » operating instructions for Infotainment , chapter Setting vehicle systems
(CAR button) .
Note
Further information on adjusting the headlights is available from a ŠKODA Part-
ner.
Driving through water on the street
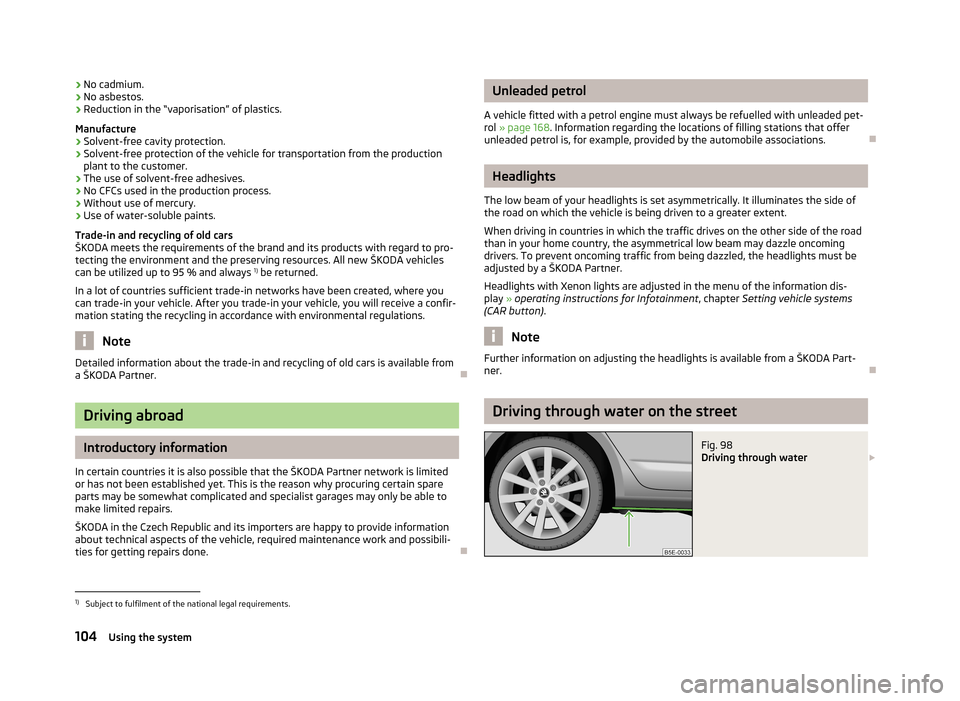
Fig. 98
Driving through water
1)
Subject to fulfilment of the national legal requirements.
104Using the system