check engine light SKODA OCTAVIA 2012 3.G / (5E) User Guide
[x] Cancel search | Manufacturer: SKODA, Model Year: 2012, Model line: OCTAVIA, Model: SKODA OCTAVIA 2012 3.G / (5E)Pages: 222, PDF Size: 13.52 MB
Page 112 of 222
Driving with a trailerFig. 104
Swivel out the 13-pin power
socket
›
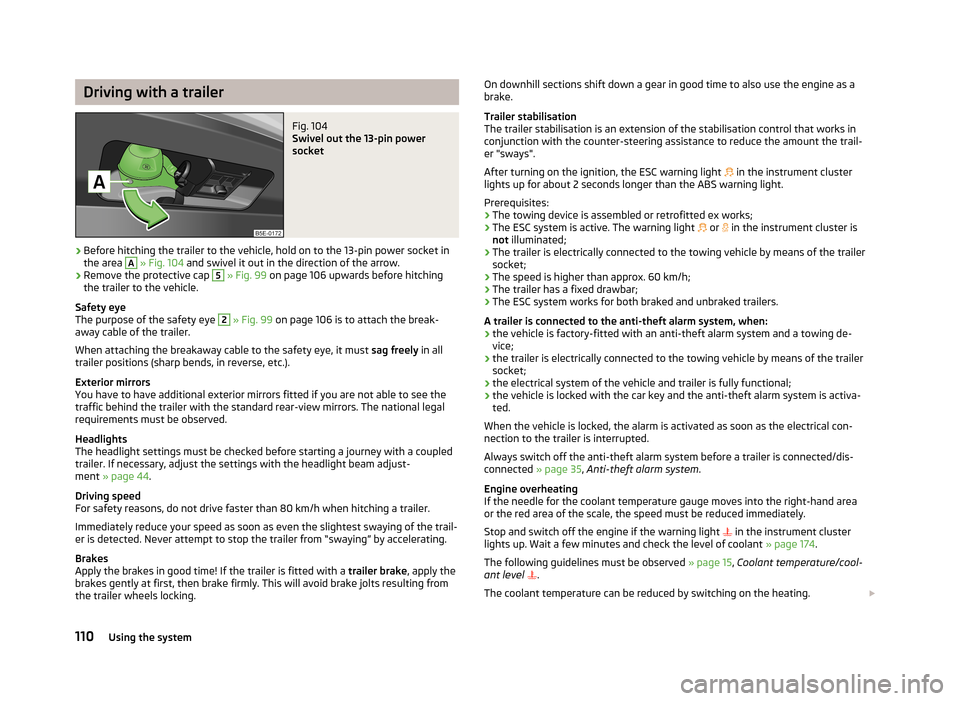
Before hitching the trailer to the vehicle, hold on to the 13-pin power socket in the area
A
» Fig. 104 and swivel it out in the direction of the arrow.
›
Remove the protective cap
5
» Fig. 99 on page 106 upwards before hitching
the trailer to the vehicle.
Safety eye
The purpose of the safety eye
2
» Fig. 99 on page 106 is to attach the break-
away cable of the trailer.
When attaching the breakaway cable to the safety eye, it must sag freely in all
trailer positions (sharp bends, in reverse, etc.).
Exterior mirrors
You have to have additional exterior mirrors fitted if you are not able to see the
traffic behind the trailer with the standard rear-view mirrors. The national legal
requirements must be observed.
Headlights
The headlight settings must be checked before starting a journey with a coupled
trailer. If necessary, adjust the settings with the headlight beam adjust-
ment » page 44 .
Driving speed
For safety reasons, do not drive faster than 80 km/h when hitching a trailer.
Immediately reduce your speed as soon as even the slightest swaying of the trail- er is detected. Never attempt to stop the trailer from “swaying” by accelerating.
Brakes
Apply the brakes in good time! If the trailer is fitted with a trailer brake, apply the
brakes gently at first, then brake firmly. This will avoid brake jolts resulting from
the trailer wheels locking.
On downhill sections shift down a gear in good time to also use the engine as a
brake.
Trailer stabilisation
The trailer stabilisation is an extension of the stabilisation control that works in
conjunction with the counter-steering assistance to reduce the amount the trail-
er "sways".
After turning on the ignition, the ESC warning light in the instrument cluster
lights up for about 2 seconds longer than the ABS warning light.
Prerequisites: › The towing device is assembled or retrofitted ex works;
› The ESC system is active. The warning light
or in the instrument cluster is
not illuminated;
› The trailer is electrically connected to the towing vehicle by means of the trailer
socket;
› The speed is higher than approx. 60 km/h;
› The trailer has a fixed drawbar;
› The ESC system works for both braked and unbraked trailers.
A trailer is connected to the anti-theft alarm system, when: › the vehicle is factory-fitted with an anti-theft alarm system and a towing de-
vice;
› the trailer is electrically connected to the towing vehicle by means of the trailer
socket;
› the electrical system of the vehicle and trailer is fully functional;
› the vehicle is locked with the car key and the anti-theft alarm system is activa-
ted.
When the vehicle is locked, the alarm is activated as soon as the electrical con-
nection to the trailer is interrupted.
Always switch off the anti-theft alarm system before a trailer is connected/dis- connected » page 35, Anti-theft alarm system .
Engine overheating
If the needle for the coolant temperature gauge moves into the right-hand area or the red area of the scale, the speed must be reduced immediately.
Stop and switch off the engine if the warning light
in the instrument cluster
lights up. Wait a few minutes and check the level of coolant » page 174.
The following guidelines must be observed » page 15, Coolant temperature/cool-
ant level
.
The coolant temperature can be reduced by switching on the heating. 110Using the system
Page 125 of 222
The automatic start procedure takes place again. The warning light goes out.
Further information on automatic transmission Engine shut down takes place when the selector lever is in positions P, D/S , N
and in Tiptronic mode.
When the selector lever is in position P the engine remains shut down after you
release the brake pedal. Start the engine by pressing the gas pedal or by choosing
a different gear and releasing the brake pedal.
If the selector lever is moved into position R during the STOP phase , the engine
will re-start.
To prevent the engine from starting unintentionally when selecting the position
R , switch rapidly from the position D/S to position P.
The system detects a movement of the vehicle due to the large steering angle or
when the selector lever is moved into position R (e.g. when parking) - no auto-
matic engine shutdown takes place.
The type of braking procedure can influence whether the STOP phase takes place
or not. No STOP phase takes place when the vehicle is moving at low speed (e.g.
during a traffic jam or when tuning) and remains stationary after pressing the
brake pedal lightly. Engine shutdown takes place if you press the brake pedal
down with more force.
Operational conditions of the system
Fig. 114
Instrument cluster display: En-
gine shut down is not currently
available
First read and observe the introductory information and safety warn- ings on page 121.
The START-STOP system is very complex. Some of the procedures are hard to
check without servicing.
No engine shut down is carried out
Before each STOP phase, the system checks whether certain conditions have
been met. No engine shut down takes place in the following situations.
› The engine has not reached the minimum temperature for START STOP mode.
› The temperature inside the vehicle has not reached the desired temperature
set in the air-conditioning system/heating.
› The external temperature is very low/high.
› The windscreen heater is switched on
» page 52.
› The intensive windscreen heater (Climatronic)
» page 86 or windscreen heater/
ventilation is switched on with the maximum air temperature setting (manual
air conditioning system) » page 85.
› The parking aid/Park Assist is switched on.
› The charge state of the vehicle battery is too low.
› The stationary vehicle is on a steep slope or a steep downhill section.
› The idling speed is too high.
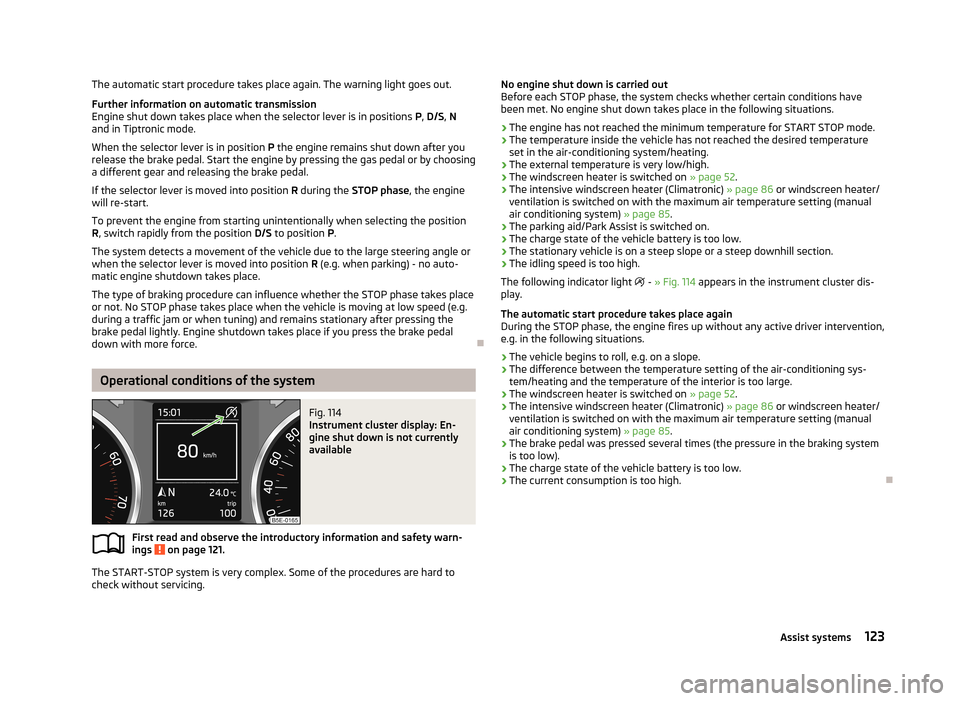
The following indicator light
- » Fig. 114 appears in the instrument cluster dis-
play.
The automatic start procedure takes place again
During the STOP phase, the engine fires up without any active driver intervention,
e.g. in the following situations.
› The vehicle begins to roll, e.g. on a slope.
› The difference between the temperature setting of the air-conditioning sys-
tem/heating and the temperature of the interior is too large.
› The windscreen heater is switched on
» page 52.
› The intensive windscreen heater (Climatronic)
» page 86 or windscreen heater/
ventilation is switched on with the maximum air temperature setting (manual
air conditioning system) » page 85.
› The brake pedal was pressed several times (the pressure in the braking system
is too low).
› The charge state of the vehicle battery is too low.
› The current consumption is too high.
123Assist systems
Page 170 of 222
›Hold the fuel filler cap on the fuel filler tube with one hand and lock it by turn-
ing the vehicle key to the right and remove the key.›
Close the fuel filler flap until it clicks into place.
›
Check that the fuel filler flap is closed properly.
Incorrect refuelling guard on vehicles with diesel engines The fuel filler tube on vehicles with diesel engines has been fitted with a incor-
rect refuelling guard » Fig. 145. This guard means it is only possible to refuel with
the diesel pump nozzle.
If the diesel pump nozzle does not sit directly in the fuel filler tube, move it to and fro with slight pressure to insert it correctly.
CAUTION
■ The fuel tank is full just as soon as the pump nozzle switches off for the first
time, provided the nozzle has been operated properly. Do not continue filling the fuel tank otherwise the expansion volume is filled up.■
Before refuelling, switch off the auxiliary heating system (auxiliary heating and
ventilation).
■
Be careful when filling diesel fuel from the spare canister - danger of contami-
nating the body.
Note
The fuel tank has a capacity of about 50 litres, containing a reserve of approx.
7 litres .
Unleaded petrol
First read and observe the introductory information and safety warn-
ings
on page 167.
Your vehicle can only be operated with unleaded fuel that complies with the
standard EN 228 (in Germany: standard DIN 51626-1 or E10 for unleaded fuel with
an octane rating of 95 RON and 91 RON or DIN 51626-2 or E5 for unleaded fuel
with the octane rating 95 RON and 98 RON).
Prescribed fuel – unleaded fuel 95/91 RON Use unleaded fuel with the octane rating 95 RON. Unleaded petrol 91 RON can al-
so be used but results in a slight loss in performance.
Prescribed fuel – unleaded petrol min. 95 RONUse unleaded fuel with the octane rating 95 RON.
In case of necessity, you can refuel with petrol with the octane rating 91 RON if
petrol with the octane rating 95 RON is not available.
Even in the event of an emergency, petrol of a lower octane number than 91 RON
must not be used, otherwise the engine can be severely damaged!
Unleaded petrol with higher octane number
Unleaded petrol that has a higher octane number than that required by the en-
gine can be used without limitations.
On vehicles with prescribed unleaded petrol 95/91 RON, the use of petrol with a
higher octane number than 95 RON does not result in a noticeable power in-
crease or a lower fuel consumption.
On vehicles using prescribed unleaded petrol of min. 95 RON, the use of petrol
with a higher octane number than 95 RON can increase the power and reduce
fuel consumption.
Prescribed fuel – unleaded petrol 98/(95) RON
Use unleaded fuel with the octane rating 98 RON. Unleaded petrol 95 RON can
also be used but results in a slight loss in performance.
In case of necessity, you can refuel with petrol with the octane rating 91 RON of
unleaded fuel with octane rating 98 RON or 95 RON is not available.
Even in the event of an emergency, petrol of a lower octane number than 91 RON
must not be used, otherwise the engine can be severely damaged!
Fuel additives
Only use unleaded petrol, which complies with the standard EN 228 (in Germany:
standard DIN 51626-1 or E10 for unleaded fuel with an octane rating of 95 RON and 91 RON or DIN 51626-2 or E5 for unleaded fuel with an octane rating of
95 RON and 98 RON), as these meet all of the requirements for fault-free engine operation. We therefore recommend that no fuel additives are used.
CAUTION
■ All ŠKODA vehicles with petrol engines must only be operated with unleaded
petrol. Just filling the tank with leaded petrol once will damage the exhaust sys-
tem!■
If, in an emergency, the vehicle has to be refuelled with petrol of a lower octane
number than the one prescribed, the journey must only be continued at medium
engine speeds and a low engine load. Driving at high engine revs or a high engine
load can severely damage the engine! Refuel using petrol of the prescribed oc-
tane number as soon as possible.
168General Maintenance
Page 174 of 222
Engine compartment overviewFig. 148
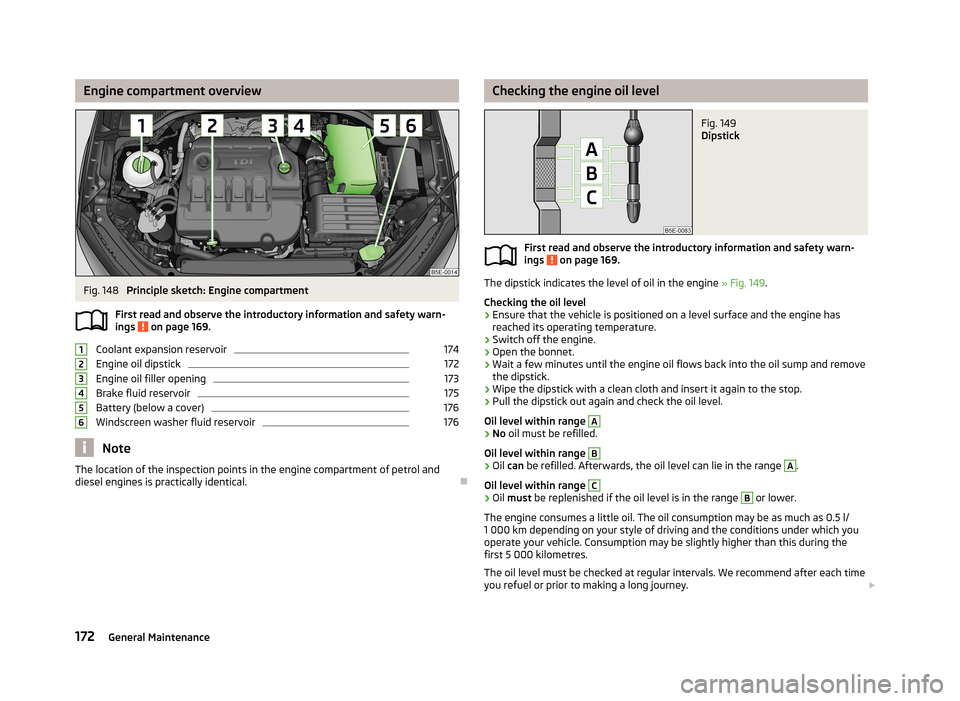
Principle sketch: Engine compartment
First read and observe the introductory information and safety warn- ings
on page 169.
Coolant expansion reservoir
174
Engine oil dipstick
172
Engine oil filler opening
173
Brake fluid reservoir
175
Battery (below a cover)
176
Windscreen washer fluid reservoir
176
Note
The location of the inspection points in the engine compartment of petrol and
diesel engines is practically identical.
123456Checking the engine oil levelFig. 149
Dipstick
First read and observe the introductory information and safety warn- ings on page 169.
The dipstick indicates the level of oil in the engine » Fig. 149.
Checking the oil level
›
Ensure that the vehicle is positioned on a level surface and the engine has reached its operating temperature.
›
Switch off the engine.
›
Open the bonnet.
›
Wait a few minutes until the engine oil flows back into the oil sump and remove
the dipstick.
›
Wipe the dipstick with a clean cloth and insert it again to the stop.
›
Pull the dipstick out again and check the oil level.
Oil level within range
A›
No oil must be refilled.
Oil level within range
B›
Oil can be refilled. Afterwards, the oil level can lie in the range
A
.
Oil level within range
C›
Oil must be replenished if the oil level is in the range
B
or lower.
The engine consumes a little oil. The oil consumption may be as much as 0.5 l/ 1 000 km depending on your style of driving and the conditions under which you
operate your vehicle. Consumption may be slightly higher than this during the
first 5 000 kilometres.
The oil level must be checked at regular intervals. We recommend after each time
you refuel or prior to making a long journey.
172General Maintenance
Page 175 of 222
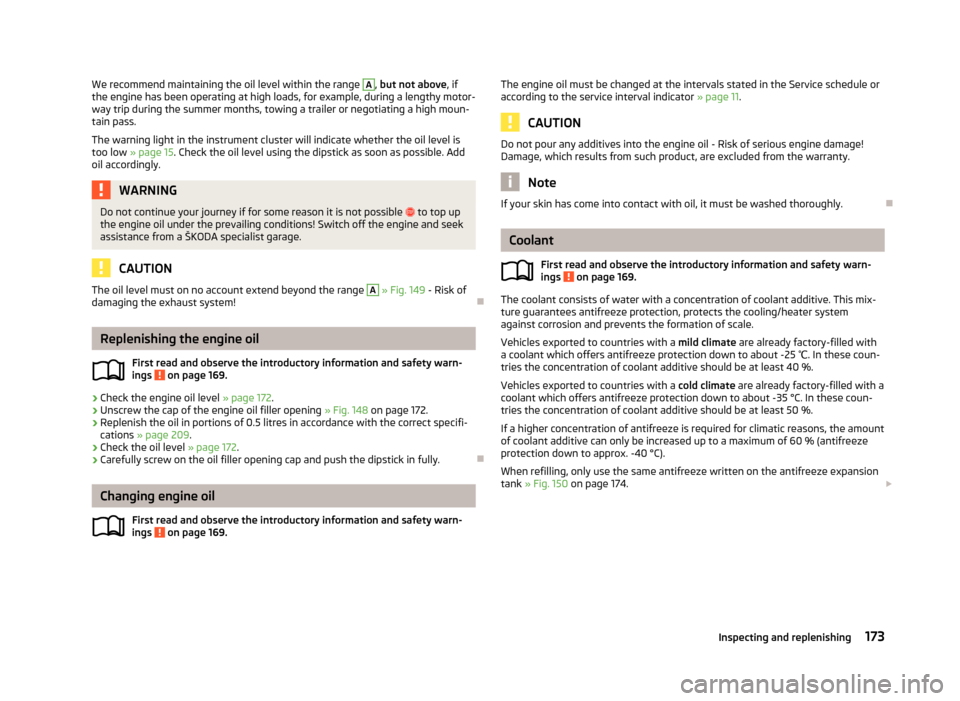
We recommend maintaining the oil level within the range A, but not above , if
the engine has been operating at high loads, for example, during a lengthy motor-
way trip during the summer months, towing a trailer or negotiating a high moun- tain pass.
The warning light in the instrument cluster will indicate whether the oil level is too low » page 15 . Check the oil level using the dipstick as soon as possible. Add
oil accordingly.WARNINGDo not continue your journey if for some reason it is not possible to top up
the engine oil under the prevailing conditions! Switch off the engine and seek
assistance from a ŠKODA specialist garage.
CAUTION
The oil level must on no account extend beyond the range A » Fig. 149 - Risk of
damaging the exhaust system!
Replenishing the engine oil
First read and observe the introductory information and safety warn-
ings
on page 169.
›
Check the engine oil level » page 172.
›
Unscrew the cap of the engine oil filler opening » Fig. 148 on page 172.
›
Replenish the oil in portions of 0.5 litres in accordance with the correct specifi-
cations » page 209 .
›
Check the oil level » page 172.
›
Carefully screw on the oil filler opening cap and push the dipstick in fully.
Changing engine oil
First read and observe the introductory information and safety warn-
ings
on page 169.
The engine oil must be changed at the intervals stated in the Service schedule or
according to the service interval indicator » page 11.
CAUTION
Do not pour any additives into the engine oil - Risk of serious engine damage!
Damage, which results from such product, are excluded from the warranty.
Note
If your skin has come into contact with oil, it must be washed thoroughly.
Coolant
First read and observe the introductory information and safety warn-ings
on page 169.
The coolant consists of water with a concentration of coolant additive. This mix-
ture guarantees antifreeze protection, protects the cooling/heater system
against corrosion and prevents the formation of scale.
Vehicles exported to countries with a mild climate are already factory-filled with
a coolant which offers antifreeze protection down to about -25 ℃. In these coun-
tries the concentration of coolant additive should be at least 40 %.
Vehicles exported to countries with a cold climate are already factory-filled with a
coolant which offers antifreeze protection down to about -35 °C. In these coun-
tries the concentration of coolant additive should be at least 50 %.
If a higher concentration of antifreeze is required for climatic reasons, the amount
of coolant additive can only be increased up to a maximum of 60 % (antifreeze
protection down to approx. -40 °C).
When refilling, only use the same antifreeze written on the antifreeze expansion tank » Fig. 150 on page 174.
173Inspecting and replenishing
Page 176 of 222
Coolant capacity1)Petrol enginesCapacities (in litres)1.2 ltr./63 kW TSI8.91.4 ltr./103 kW TSI10.21.8 ltr./132 kW TSI7.8Diesel enginesCapacities (in litres)1.6 ltr./77 kW TDI CR8.42.0 l/110 kW TDI CR - MG/DSG11,6 / 11,9
CAUTION
■
The amount of coolant additive in the coolant must never be allowed to be less
than 40 %.■
Over 60 % of coolant additive in the coolant reduces the antifreeze protection
and coolant effectiveness.
■
Other coolant additives that do not comply with the correct specifications can
above all significantly reduce the anticorrosion effect.
■
Any faults resulting from corrosion may cause a loss of coolant and can conse-
quently result in major engine damage!
Checking the coolant level
Fig. 150
Engine compartment: Coolant
expansion reservoir
First read and observe the introductory information and safety warn-
ings on page 169.
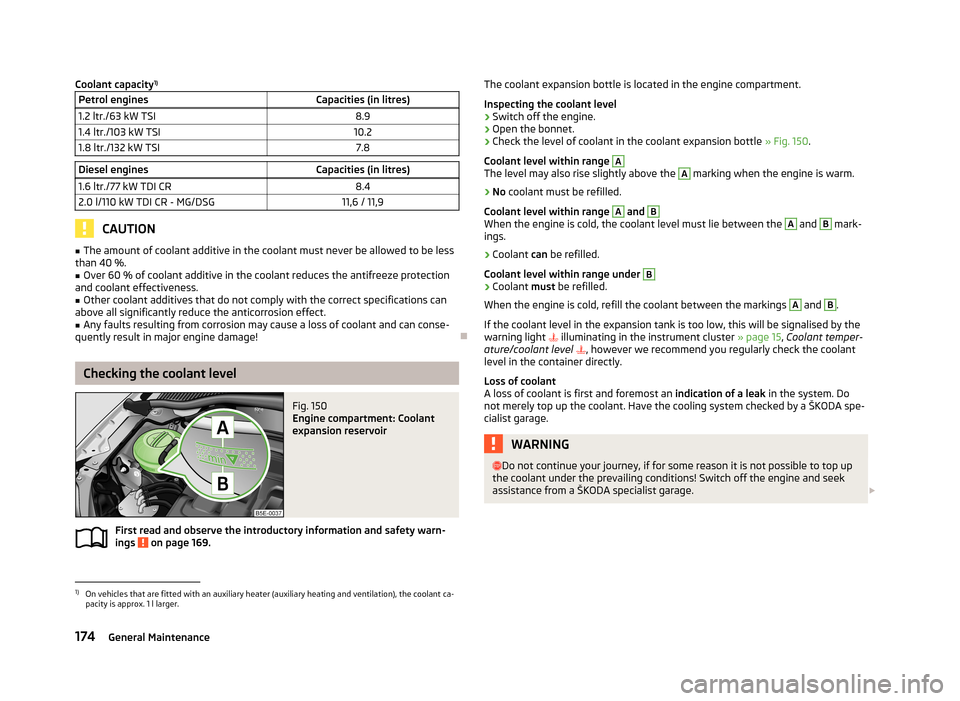
The coolant expansion bottle is located in the engine compartment.
Inspecting the coolant level›
Switch off the engine.
›
Open the bonnet.
›
Check the level of coolant in the coolant expansion bottle » Fig. 150.
Coolant level within range
A
The level may also rise slightly above the
A
marking when the engine is warm.
›
No coolant must be refilled.
Coolant level within range
A
and
B
When the engine is cold, the coolant level must lie between the
A
and
B
mark-
ings.
›
Coolant can be refilled.
Coolant level within range under
B›
Coolant must be refilled.
When the engine is cold, refill the coolant between the markings
A
and
B
.
If the coolant level in the expansion tank is too low, this will be signalised by the warning light
illuminating in the instrument cluster » page 15, Coolant temper-
ature/coolant level
, however we recommend you regularly check the coolant
level in the container directly.
Loss of coolant
A loss of coolant is first and foremost an indication of a leak in the system. Do
not merely top up the coolant. Have the cooling system checked by a ŠKODA spe- cialist garage.
WARNING Do not continue your journey, if for some reason it is not possible to top up
the coolant under the prevailing conditions! Switch off the engine and seek
assistance from a ŠKODA specialist garage. 1)
On vehicles that are fitted with an auxiliary heater (auxiliary heating and ventilation), the coolant ca-
pacity is approx. 1 l larger.
174General Maintenance
Page 177 of 222
CAUTION■Do not fill the coolant above the mark A » Fig. 150 .■If a fault causes the engine to overheat, we recommend visiting a ŠKODA Part-
ner, otherwise serious engine damage may occur.
Replenishing the coolant
First read and observe the introductory information and safety warn-ings
on page 169.
Only refill with new coolant.
›
Switch off the engine.
›
Allow the engine to cool.
›
Place a cloth over the cap of the coolant expansion reservoir and unscrew the
cap carefully .
›
Replenish the coolant.
›
Turn the cap until it clicks into place.
Do not use an alternative additive if the specified coolant is not available in an emergency. In this case, just use water and have the correct mixing ratio of water
and the coolant additive restored by a ŠKODA specialist garage as soon as possi-
ble.
Radiator fan
First read and observe the introductory information and safety warn-
ings
on page 169.
After switching off the ignition, the fan can intermittently continue to operate for
approx. 10 minutes.
The radiator fan is powered by an electric motor. Operation is controlled accord-
ing to the temperature of the coolant.
Checking the brake fluidFig. 151
Engine compartment: Brake fluid
reservoir
First read and observe the introductory information and safety warn-
ings on page 169.
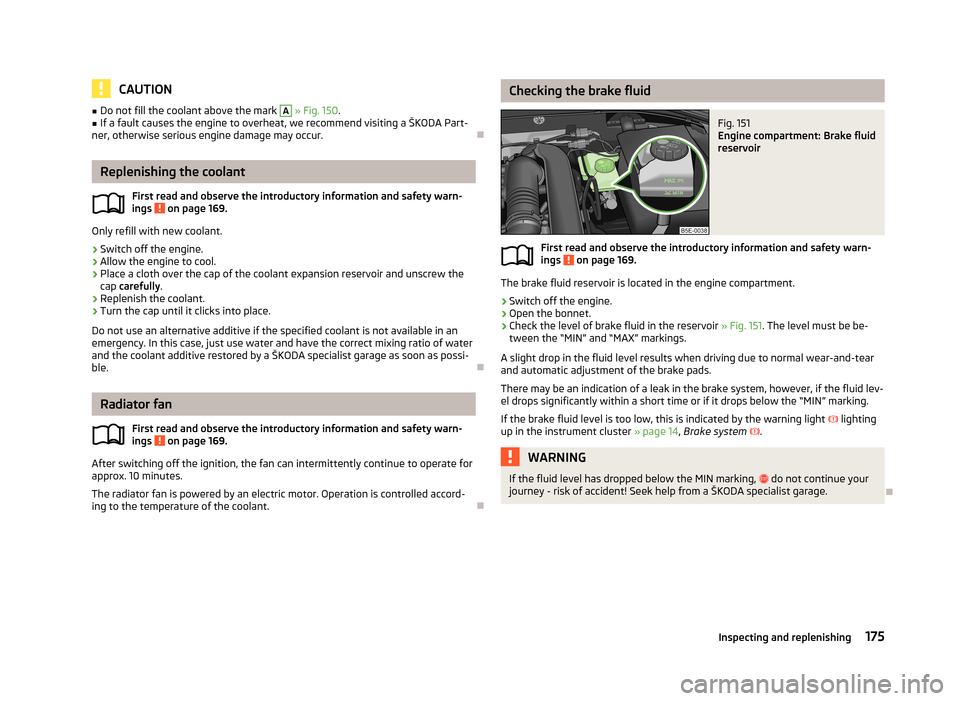
The brake fluid reservoir is located in the engine compartment.
›
Switch off the engine.
›
Open the bonnet.
›
Check the level of brake fluid in the reservoir » Fig. 151. The level must be be-
tween the “MIN” and “MAX” markings.
A slight drop in the fluid level results when driving due to normal wear-and-tear and automatic adjustment of the brake pads.
There may be an indication of a leak in the brake system, however, if the fluid lev-
el drops significantly within a short time or if it drops below the “MIN” marking.
If the brake fluid level is too low, this is indicated by the warning light
lighting
up in the instrument cluster » page 14, Brake system
.
WARNINGIf the fluid level has dropped below the MIN marking, do not continue your
journey - risk of accident! Seek help from a ŠKODA specialist garage.
175Inspecting and replenishing
Page 178 of 222
Brake fluid changeFirst read and observe the introductory information and safety warn-
ings
on page 169.
Brake fluid absorbs moisture. Over time it therefore absorbs moisture from the
environment.
Excessive water in the brake fluid may be the cause of corrosion in the brake sys-
tem.
The water content lowers the boiling point of the brake fluid.
The brake fluid must comply with the following standards or specifications: › VW 50114;
› FMVSS 116 DOT4.
WARNINGDo not use used brake fluid - the function of the brake system may be im-
paired - risk of accident!
CAUTION
Brake fluid damages the paintwork of the vehicle.
Note
The brake fluid is replaced as part of a proscribed Inspection service carried out by
a ŠKODA Partner.
Windscreen washer system
Fig. 152
Engine compartment: Wind-
screen washer fluid reservoirFirst read and observe the introductory information and safety warn-
ings on page 169.
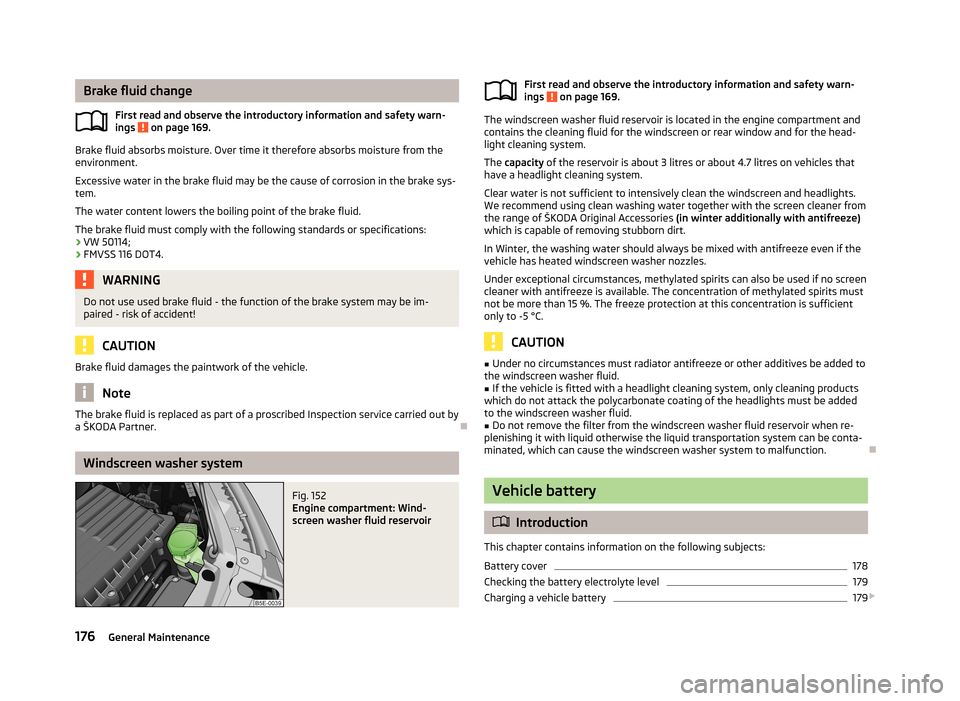
The windscreen washer fluid reservoir is located in the engine compartment and
contains the cleaning fluid for the windscreen or rear window and for the head-
light cleaning system.
The capacity of the reservoir is about 3 litres or about 4.7 litres on vehicles that
have a headlight cleaning system.
Clear water is not sufficient to intensively clean the windscreen and headlights.
We recommend using clean washing water together with the screen cleaner from
the range of ŠKODA Original Accessories (in winter additionally with antifreeze)
which is capable of removing stubborn dirt.
In Winter, the washing water should always be mixed with antifreeze even if the
vehicle has heated windscreen washer nozzles.
Under exceptional circumstances, methylated spirits can also be used if no screen
cleaner with antifreeze is available. The concentration of methylated spirits must
not be more than 15 %. The freeze protection at this concentration is sufficient
only to -5 °C.
CAUTION
■ Under no circumstances must radiator antifreeze or other additives be added to
the windscreen washer fluid.■
If the vehicle is fitted with a headlight cleaning system, only cleaning products
which do not attack the polycarbonate coating of the headlights must be added
to the windscreen washer fluid.
■
Do not remove the filter from the windscreen washer fluid reservoir when re-
plenishing it with liquid otherwise the liquid transportation system can be conta-
minated, which can cause the windscreen washer system to malfunction.
Vehicle battery
Introduction
This chapter contains information on the following subjects:
Battery cover
178
Checking the battery electrolyte level
179
Charging a vehicle battery
179
176General Maintenance
Page 181 of 222

Checking the battery electrolyte levelFig. 154
Vehicle battery: Electrolyte level
indicator
First read and observe the introductory information and safety warn-
ings on page 176.
On vehicles with a vehicle battery fitted with a colour indicator, the so-called magic eye » Fig. 154, the electrolyte level can be determined by looking at the
change in colour.
Air bubbles can influence the colour of the indicator. For this reason carefully
knock on the indicator before carrying out the check.
› Black colour – electrolyte level is correct.
› Colourless or light yellow colour – electrolyte level too low, the battery must be
replaced.
For technical reasons, on vehicles with the description “AGM”, the electrolyte lev- el cannot be checked.
Vehicles with a START-STOP system are fitted with a battery control unit for checking the energy level for the recurring engine start.
We recommend you have the electrolyte level checked by a ŠKODA specialist ga-
rage from time to time, especially in the following cases.
› High external temperatures.
› Longer day trips.
› After each charge.
Winter time
The vehicle battery only has a proportion of the starting power in lower tempera- tures. A discharged vehicle battery may already freeze at temperatures just be-
low 0 °C .
We therefore recommend that you have the battery checked and, if necessary, re-
charged by a ŠKODA Partner before the start of the winter.
NoteThe battery electrolyte level is periodically checked by a ŠKODA Partner as part of
the Inspection Service.
Charging a vehicle battery
First read and observe the introductory information and safety warn-ings
on page 176.
A properly charged vehicle battery is essential for reliably starting the engine.
›
Switch off the ignition and all of the electrical components.
›
Only when performing a “quick-charge”, disconnect both battery cables (first of
all “negative”, then “positive”).
›
Attach the terminal clamps of the charger to the battery terminals (red = “posi-
tive”, black = “negative”).
›
Plug the mains cable of the charger into the power socket and switch on thedevice.
›
After charging has been successful: Switch off the charger and remove themains cable from the power socket.
›
Only then disconnect the charger's terminal clamps.
›
Reconnect the cables to the battery (first of all “positive”, then “negative”).
It is not necessary to disconnect the cables of the battery if you recharge the ve- hicle battery using low amperages (for example from a mini-charger). Refer to the
instructions of the charger manufacturer .
A charging current of 0.1 multiple of the total vehicle battery capacity (or lower) must be used until full charging is achieved.
It is necessary to disconnect both cables before charging the battery with high
amperages, so-called “ quick-charging”.
The vent plugs of the vehicle battery should not be opened for charging.
Replacing the vehicle battery
When replacing a battery, the new vehicle battery must have the same capacity,
voltage, amperage and be the same size. Suitable types of vehicle batteries can
be purchased from a ŠKODA Partner.
We recommend that the battery is replaced by a ŠKODA Partner, where the new
vehicle battery will be installed properly and the original battery will be disposed
of in accordance with national regulations.
179Inspecting and replenishing
Page 182 of 222

WARNING“Quick-charging” the vehicle battery is dangerous and requires a special
charger and specialist knowledge.
CAUTION
On vehicles with the START/STOP system, the pole terminal of the charger must
not be connected directly to the negative terminal of the vehicle battery, but only
to the engine earth » page 196, Jump-starting in vehicles with the START-STOP
system .
Note
We recommend having the quick charging of vehicle batteries undertaken by a
ŠKODA specialist garage.
Disconnecting and reconnecting the vehicle battery
First read and observe the introductory information and safety warn-ings
on page 176.
On disconnecting and reconnecting the vehicle battery the following functionsare initially deactivated or are no longer able to operate fault-free:
OperationOperating measureElectrical power window (operational faults)» page 41Enter the radio/navigation system code num-
ber» operating instructions for Info-
tainment radio or » operating in-
structions for Infotainment Navi-
gationSetting the clock» page 11Data in the multifunction display are deleted» page 22
Note
We recommend having the vehicle checked by a ŠKODA Partner to ensure the full
functionality of all electrical systems.
Automatic load deactivation
First read and observe the introductory information and safety warn-ings
on page 176.
The vehicle voltage control unit automatically prevents the battery from discharg-
ing when the bettery is subjected to heavy loads. This manifests itself by the fol-
lowing:
› The idling speed is raised to allow the generator to deliver more electricity to
the electrical system.
› Where appropriate large convenience consumers, e.g. seat heaters, rear win-
dow heaters, have their power limited or in case of emergency shut off com-pletely.
CAUTION
■ Despite such intervention by the vehicle electric system management, the vehi-
cle battery may be drained. For example, when the ignition is switched on a long
time with the engine turned off or the side or parking lights are turned on during longer parking.■
Consumers which are supplied via a 12 V socket can cause the vehicle battery to
discharge when the ignition is switched off.
Note
Driving comfort is not disrupted by any shutting off of consumers. Often the driv-
er is not aware of it having taken place.
180General Maintenance