sensor SKODA OCTAVIA 2013 3.G / (5E) Owner's Guide
[x] Cancel search | Manufacturer: SKODA, Model Year: 2013, Model line: OCTAVIA, Model: SKODA OCTAVIA 2013 3.G / (5E)Pages: 287, PDF Size: 18.55 MB
Page 159 of 287
The sensor function may be impaired in the events of one of the following.
› The sensor is covered by mud, snow or debris, for example.
› The sensor or its immediate surroundings are covered by other objects, for ex-
ample, a sticker is attached.
› When visibility is poor, (e.g. fog, heavy rain, thick snowfall).
If the sensor is dirty or does not have “visibility” for any other reason, the follow-
ing message appears in the instrument cluster display.
Front Assist: no sensor view.
Stop the car, switch off the engine and clean the sensor or eliminate the obstacle
causing the lack of“visibility”. Should Front Assist still be unavailable after the en-
gine is restarted, consult a specialist garage for help.WARNING■ If you suspect that the sensor is damaged, deactivate Front Assist. Have the
sensor checked by a specialist garage.■
The sensor can become misaligned by collisions or by damage to the front of
the vehicle, the wheel arch or the underside of the vehicle. This can lead to
impaired function of the Front Assist function - risk of accidents! If this is the
case, have the sensor checked by a specialist garage.
■
Any improperly carried out work to the front of the vehicle may cause the
sensor to become misaligned. We therefore recommend only having these
modifications and technical alterations carried out by a specialist garage. Please also observed the instructions in » page 200, Service work, adjust-
ments and technical alterations .
■
The area in front of and around the sensor must not be covered with stick-
ers, additional lights or similar items. This can lead to impaired function of the
sensor - risk of accidents!
WARNINGThe sensor may not be able to distinguish all objects correctly under certain
circumstances. You should therefore not use Front Assist in the following ca-
ses - risk of accidents!■
When driving through places where metal objects (such as metal buildings,
railroad tracks, etc.) can be found.
■
When driving through very divided and enclosed spaces (such as large-ca-
pacity garages, car ferries and the like.)
CAUTIONRemove the snow with a brush and the ice with a solvent-free de-icer.
Operation
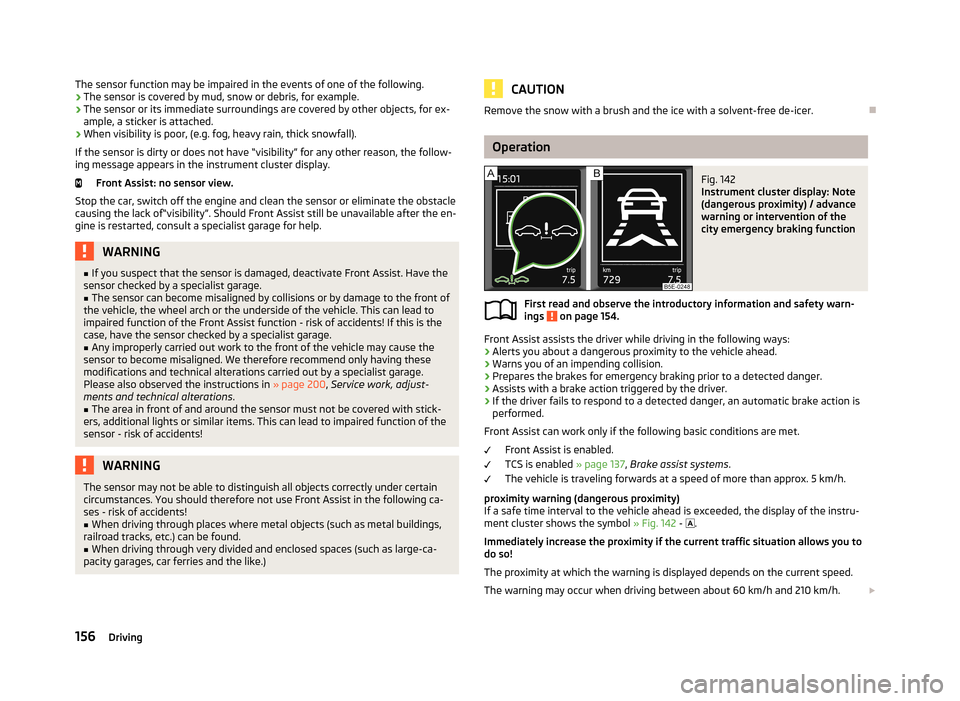
Fig. 142
Instrument cluster display: Note
(dangerous proximity) / advance
warning or intervention of the
city emergency braking function
First read and observe the introductory information and safety warn-
ings on page 154.
Front Assist assists the driver while driving in the following ways:
› Alerts you about a dangerous proximity to the vehicle ahead.
› Warns you of an impending collision.
› Prepares the brakes for emergency braking prior to a detected danger.
› Assists with a brake action triggered by the driver.
› If the driver fails to respond to a detected danger, an automatic brake action is
performed.
Front Assist can work only if the following basic conditions are met. Front Assist is enabled.
TCS is enabled » page 137, Brake assist systems .
The vehicle is traveling forwards at a speed of more than approx. 5 km/h.
proximity warning (dangerous proximity)
If a safe time interval to the vehicle ahead is exceeded, the display of the instru- ment cluster shows the symbol » Fig. 142 -
.
Immediately increase the proximity if the current traffic situation allows you to do so!
The proximity at which the warning is displayed depends on the current speed.
The warning may occur when driving between about 60 km/h and 210 km/h.
156Driving
Page 161 of 287
The emergency brake function is automatically activated or deactivated togetherwith the Front Assist system.
If the emergency brake function triggers an automatic brake action, the display of
the instrument cluster shows the symbol » Fig. 142 on page 156 - .WARNINGThe emergency brake function can slow down the vehicle to a complete
standstill. If the vehicle continues to roll forward after stopping, then it should
be stopped with the footbrake.
CAUTION
Automatic braking interventions by the emergency brake function can be termi-
nated by pressing the clutch or the accelerator, or by moving the steering wheel.
Note
If an automatic brake intervention is triggered by the emergency brake function,
the pressure in the brake system increases and the brake pedal cannot be oper-
ated with the normal pedal stroke.
Information messages
First read and observe the introductory information and safety warn-
ings
on page 154.
The messages and information are indicated in the instrument cluster display.
Front Assist: no sensor view.
The sensor is dirty or has no “visibility”. Stop the car, switch off the engine and clean the sensor or remove the obstacle causing the lack of “visibility” » Fig. 135
on page 149 . If the message appears again after starting the engine, the system
should be disabled » page 157. Seek help from a specialist garage.
Front Assist not available.
Stop the vehicle, switch off the engine and then start it again. If the message ap-
pears again after starting the engine, the system should be disabled » page 157.
Seek help from a specialist garage.
START-STOP
Introduction
This chapter contains information on the following subjects:
Starting/shutting down the engine
159
Operating conditions of the system
160
Manually activating/deactivating the system
160
Information messages
161
The START-STOP system helps you to save fuel while at the same time reducing
harmful exhaust emissions and CO 2 emissions.
The function is automatically activated each time the ignition is switched on.
In the start-stop mode, the engine automatically switches to the vehicle's idle phase, e.g. when stopped at traffic lights. The engine restarts automatically
where necessary.
Information about the current status of the system can be displayed in the Info-
tainment display » operating instructions for Infotainment , chapter Vehicle set-
tings (CAR button) .
The system can work only if the following basic conditions are met. The driver's door is closed.
The driver has fastened the seat belt. The bonnet is closed.
The driving speed was higher than 4 km.h after the last stop.
No trailer is coupled.
WARNING■ The brake servo unit and power steering only operate if the engine is run-
ning.■
Never let the vehicle roll with the engine switched off.
CAUTION
Always deactivate the START-STOPsystem before driving through wa-
ter » page 135 . 158Driving
Page 169 of 287
Warning lights in the instrument clusterIlluminatesDescriptionThe system is active, but not ready to intervene.The system is active and ready to intervene or is currently
intervening.
Information messages
First read and observe the introductory information and safety warn-
ings
on page 164.
The messages and information are indicated in the instrument cluster display.
Lane Assist not available. No sensor view.
The windscreen is dirty, iced over or misted up in the camera viewing range. Clean the windscreen or remove the obstacles.
Lane Assist currently not available.
The system has limited functionality due to a temporary error. Try to re-activate the machine.
Error: Lane Assist
A system error is present. Seek help from a specialist garage. Lane Assist: take over steering!
The system has detected that there are no hands on the steering wheel. In this
case, the Assist system is not ready to intervene. Place your hands on the steer-
ing wheel.
Traffic sign recognition
Introduction
This chapter contains information on the following subjects:
Function
166
Notifications and settings
167
Information messages
167WARNING■ Traffic sign detection only operates as a support. Real traffic signs always
have priority over electronic displays. The driver is always responsible for cor-
rectly assessing the traffic situation.■
Traffic signs may not be recognised at all by the system, or may be recog-
nised incorrectly. As a result, the traffic signs may not be displayed at all, or
the wrong one may appear.
■
Traffic sign recognition does not warn about exceeding the maximum per-
mitted speed nor does it adjust the driving speed to the maximum speed!
■
The display refers to the standard national speed units. For example, the
display is able top refer to km / h or mph.depending on the country.
Note
Traffic sign recognition is not available in all countries.
Function
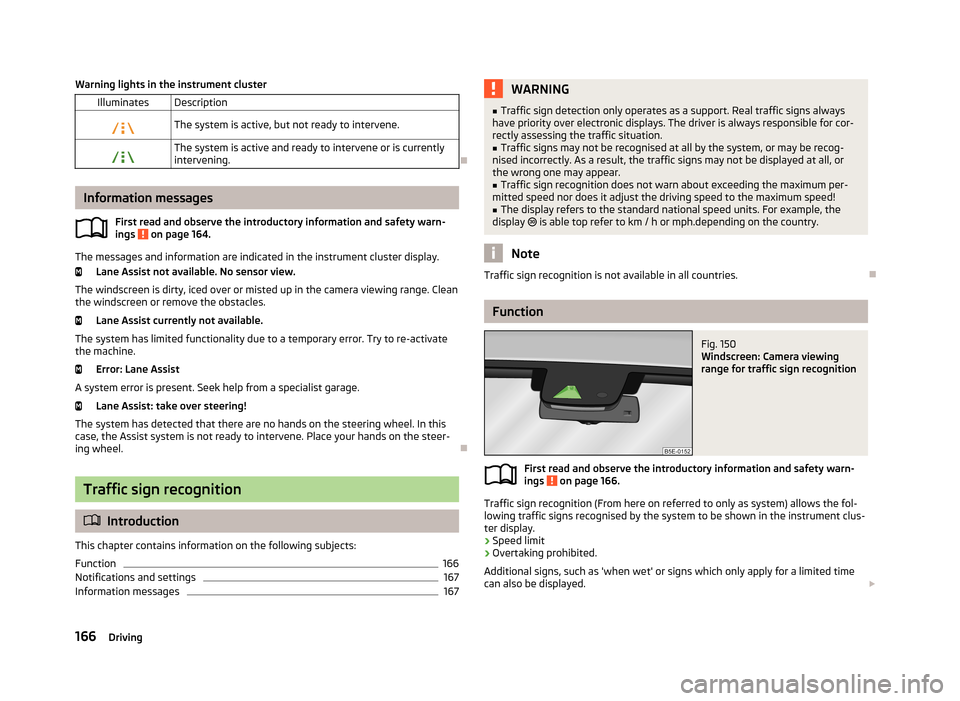
Fig. 150
Windscreen: Camera viewing
range for traffic sign recognition
First read and observe the introductory information and safety warn- ings on page 166.
Traffic sign recognition (From here on referred to only as system) allows the fol-
lowing traffic signs recognised by the system to be shown in the instrument clus-
ter display.
› Speed limit
› Overtaking prohibited.
Additional signs, such as 'when wet' or signs which only apply for a limited time
can also be displayed.
166Driving
Page 192 of 287
The load of the occupants is cushioned when plunging into the fully inflated air-
bag and the risk of injury to the entire upper body (chest, stomach and pelvis) is
reduced on the side facing the door.WARNINGObserve the following instructions for the proper seated position.■Your head should never be positioned in the deployment area of the side
airbag. You might suffer severe injuries in the event of an accident. This ap- plies in particular to children who are transported without using a suitable
child safety seat » page 195, Child safety and side airbag .■
There must not be any further persons, animals as well as objects posi-
tioned between the occupants and the deployment area of the airbag. No ac-
cessories, such as cup holders, should be attached to the doors.
■
If children adopt an incorrect seated position when travelling, they may be
exposed to an increased risk of injury in the event of an accident. This can re-
sult in serious injuries » page 193, Child seat .
WARNINGThe airbag control unit operates using pressure sensors located in the front
doors. For this reason, no adjustments may be carried out to the doors or door
panels (e.g. installation of additional loudspeakers). Resulting damage can have a negative impact on the function of the airbag system. Any work on thefront doors and door panels must be carried out by a specialist garage. The
following guidelines must be observed.■
Never drive with inner door panels removed.
■
Never drive if parts of the inner door panel have been removed and the re-
sulting openings have not been properly sealed.
■
Never drive if the loudspeakers in the doors have been removed, unless the
loudspeaker openings have been properly sealed.
■
Always make sure that the openings are covered or filled if additional loud-
speakers or other equipment parts have been installed in the inner door pan-
els.
■
Always have work carried out by a ŠKODA service partner or a professional
specialist garage.
WARNING■ Only hang light items of clothing on the hooks fitted in the vehicle. Never
leave any heavy or sharp-edged objects in the pockets of the items of cloth-
ing.■
Ensure that there are no excessive forces, such as violent knocks, kicks etc.,
impact on the backrests of the seats otherwise the system may be damaged.
The side airbags would not be deployed in such a case!
■
Any seat or protective covers which you fit to the driver or front passenger
seats must only be of the type expressly authorized by ŠKODA. In view of the
fact that the airbag inflates out of the backrest of the seat, use of non-ap-
proved seat or protective covers would considerably impair the protective
function of the side airbag.
■
Any damage to the original seat covers in the area of the side airbag module
must be repaired immediately by a specialist garage.
■
The airbag modules in the front seats must not display any damage, cracks
or deep scratches. It is not permissible to use force in order to open the mod-
ules.
Head airbags
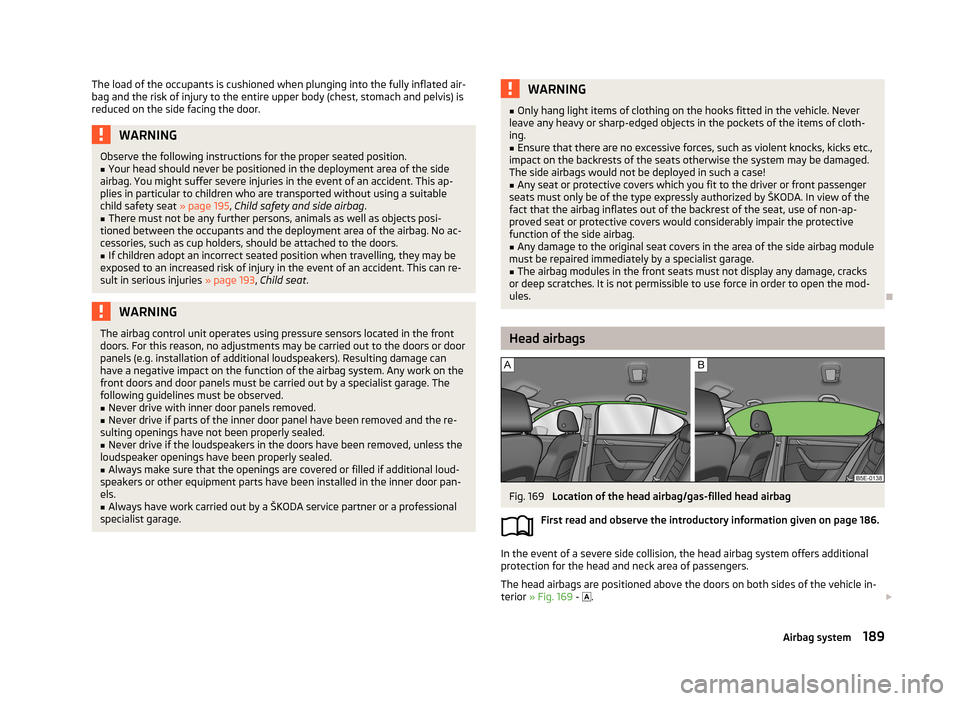
Fig. 169
Location of the head airbag/gas-filled head airbag
First read and observe the introductory information given on page 186.
In the event of a severe side collision, the head airbag system offers additional
protection for the head and neck area of passengers.
The head airbags are positioned above the doors on both sides of the vehicle in-terior » Fig. 169 -
.
189Airbag system
Page 193 of 287
In the event of a side collision the head airbag is deployed together with the rele-
vant side airbag and the front seat belt tensioner on the side of the car on which
the accident occurs.
When deployed, the airbag covers the window area of the front and rear doors, as well as the area of the door pillar » Fig. 169 - .
Head impact with interior parts is reduced by the inflated head airbag. The reduc- tion in any impact to the head and the resultant minimizing of any movements of
the head additionally reduce the risk of injuries to the neck area.
The head airbag also offers additional protection in the case of an offset impact by covering the front door pillar.WARNINGGeneral■There must not be any objects in the deployment area of the head airbags
which might prevent the airbags from inflating properly.■
Only hang light items of clothing on the hooks fitted in the vehicle. Never
leave any heavy or sharp-edged objects in the pockets of the items of cloth-
ing. Additionally, clothes hangers must not be used to hang up items of cloth-
ing.
■
The installation of impermissible accessories in the vicinity of the head air-
bags can considerably impair the protection offered by the head airbag in the
event of it being deployed. When the deployed head airbag is inflated, parts of
the accessories fitted could, conditions permitting, be thrown into the interior
of the car and injure the occupants » page 200.
■
The sun visors must not be swivelled towards the side windows in the de-
ployment area of the head airbags if any objects, such as ball-point pens, etc.
are attached to them. This might result in injuries to the occupants if the head
airbag is deployed.
■
There must no other persons (e.g. children) or animals between the passen-
ger and the deployment area of the head airbag. In addition, none of the occu-
pants should lean their head out of the window when driving, or extend their
arms and hands out of the window.
WARNINGThe airbag control unit operates using pressure sensors located in the front
doors. For this reason, no adjustments may be carried out to the doors or door
panels (e.g. installation of additional loudspeakers). Resulting damage can have a negative impact on the function of the airbag system. Any work on thefront doors and door panels must be carried out by a specialist garage. The
following guidelines must be observed.■
Never drive with inner door panels removed.
■
Never drive if parts of the inner door panel have been removed and the re-
sulting openings have not been properly sealed.
■
Never drive if the loudspeakers in the doors have been removed, unless the
loudspeaker openings have been properly sealed.
■
Always make sure that the openings are covered or filled if additional loud-
speakers or other equipment parts have been installed in the inner door pan-
els.
■
Always have work carried out by a ŠKODA service partner or a professional
specialist garage.
Note
In vehicles with head airbags, the word AIRBAG can be seen on the B column
cladding.
Deactivating airbags
Introduction
This chapter contains information on the following subjects:
Deactivating airbags
191
Deactivating the front passenger airbag
191
190Safety
Page 206 of 287
AirbagsFirst read and observe the introductory information and safety warn-
ings
on page 200.
The system components of the airbag system can be situated in the front bump-
er, doors, front seats, roof lining or body.
WARNINGAny work on the airbag system including the installation and removal of sys-
tem components due to other repair work (e.g. removal of the steering wheel) must only be carried out by a specialist garage.■
Modifications, repairs and technical alterations that have been carried out
unprofessionally can cause damage and operational faults, and can also seri-
ously impair the effectiveness of the airbag system – risk of accident and fatal
injury!
■
The airbag system must then be replaced if the airbag has been deployed.
Airbag modules cannot be repaired.
WARNINGObserve the following instructions for handling the airbag system.■It is prohibited to manipulate individual parts of the airbag system, as this
might result in the airbag being deployed.■
Never install any airbag parts into the vehicle that have been removed from
old cars or have been recycled.
■
Never install damaged airbag parts in the vehicle. The airbags may then not
be triggered properly or not at all in the event of an accident.
■
No modifications of any kind must be made to parts of the airbag system.
WARNING■ A change to the vehicle's wheel suspension, including the use of non-ap-
proved wheels and tire combinations, can alter the functioning of the airbag system - risk of accident and fatal injury!■
Never make any changes to the front bumper or the bodywork.
WARNINGThe airbag control unit operates using pressure sensors located in the front
doors. For this reason, no adjustments may be carried out to the doors or door
panels (e.g. installation of additional loudspeakers). Resulting damage can have a negative impact on the function of the airbag system. Any work on thefront doors and door panels must be carried out by a specialist garage. The
following guidelines must be observed.■
Never drive with inner door panels removed.
■
Never drive if parts of the inner door panel have been removed and the re-
sulting openings have not been properly sealed.
■
Never drive if the loudspeakers in the doors have been removed, unless the
loudspeaker openings have been properly sealed.
■
Always make sure that the openings are covered or filled if additional loud-
speakers or other equipment parts have been installed in the inner door pan-
els.
Washing your car
Introduction
This chapter contains information on the following subjects:
Washing by hand
204
Automatic car wash systems
204
Washing with a high-pressure cleaner
204
The best way to protect your vehicle against harmful environmental influences is frequent washing.
How often the vehicle should be washed depends, for example, on the following
factors.
› Frequency of use.
› Parking situation (garage, below trees, etc.).
› Season of the year.
› Weather conditions.
› Environmental influences.
203Vehicle care
Page 207 of 287
The longer insect residues, bird droppings, tree sap, road and industrial dust, tar,
soot particles, road salt and other aggressive deposits remain adhering to the
paintwork of your vehicle, the more detrimental their destructive effect can be.
High temperatures, such as those caused by intensive sun's rays, accentuate this
caustic effect.
It is essential to also thoroughly clean the underside of the vehicle at the end of
the winter.WARNING■ When washing your vehicle in the winter: Water and ice in the braking sys-
tem can affect the braking efficiency – risk of accident!■
Only wash the vehicle when the ignition is switched off – risk of accident!
CAUTION
Do not wash your vehicle in bright sunlight – risk of paint damage.
For the sake of the environment
Only wash the vehicle at washing bays intended for this purpose.
Washing by hand
First read and observe the introductory information and safety warn-
ings
on page 203.
Soak the dirt with plenty of water and rinse as well as possible.
Clean the vehicle with a soft sponge, a washing glove or a washing brush . Work
from the top to the bottom – starting with the roof.
Only use a car shampoo for stubborn dirt.
Wash out the sponge or washing glove thoroughly at short intervals.
Clean wheels, door sills and similar parts last. Use a second sponge for such
areas.
Give the vehicle a good rinse after washing it and dry it off using a chamois leath- er.
CAUTION■ When washing the car by hand, protect your hands and arms from sharp-edged
metal parts (e.g. when cleaning the underfloor, the inside of the wheel housings
or the wheel trims, etc.) - There is a risk of cuts!■
Only apply slight pressure when cleaning the vehicle's paintwork.
Automatic car wash systems
First read and observe the introductory information and safety warn-
ings
on page 203.
The usual precautionary measures must be taken before washing the vehicle in
an automatic car wash system (e.g. closing the windows and the sliding/tilting
roof etc.).
If your vehicle is fitted with any particular attached parts, such as a spoiler, roof
rack system, two-way radio aerial etc., it is best to consult the operator of the car
wash system beforehand.
After an automatic wash with wax treatment, the lips of the wipers should be cleaned with cleaning agents specially designed for the purpose, and then de-
greased.
WARNINGFold in the exterior mirrors to prevent damage before washing the vehicle in
an automatic car wash system. Never manually fold in electric exterior mirrors
- always use the electric controls.
Washing with a high-pressure cleaner
First read and observe the introductory information and safety warn-
ings
on page 203.
When washing the vehicle with a high-pressure cleaner, the instructions for use
of the equipment must be observed. This applies in particular to the pressure
used and to the spraying distance .
Maintain a sufficiently large distance to the parking aid sensors and soft materials
such as rubber hoses or insulation material.
204General Maintenance
Page 208 of 287
WARNINGNever use circular spray nozzles or dirt cutters!
CAUTION
■If washing the vehicle in the winter using a hose or high-pressure cleaner, en-
sure that the jet of water is not aimed directly at the locking cylinders or the
door/panel joints – risk of freezing!■
To avoid damaging the parking aid sensors while cleaning with high-pressure
cleaners or steam jets, the sensors must only be directly sprayed for short periods
while a minimum distance of 10 cm must be observed.
■
The temperature of the water used for cleaning must not exceed 60 °C – risk of
damaging the vehicle.
■
See also Washing cars with decorative films using a high-pressure clean-
er » page 206 .
Taking care of your vehicle exterior
Introduction
This chapter contains information on the following subjects:
Taking care of your vehicle's paintwork
205
Plastic parts
206
Rubber seals
206
Chrome parts
206
Decorative films
206
De-icing windows and exterior mirrors
207
Headlight lenses
207
Door lock cylinders
207
Cavity protection
208
Wheels
208
Underbody protection
208
Regular and proper care help to retain the efficiency and value of your vehicle. It
may also be one of the requirements for the acceptance of warranty claims relat- ing to corrosion damage and paint defects on the bodywork.
We recommend using care products from ŠKODA Original Accessories that areavailable from ŠKODA Partners. The instructions for use on the package must be
observed.WARNING■ Care products may be harmful to your health if not used according to the in-
structions.■
Always store vehicle care products safely, in particular out of the reach of
children – risk of poisoning!
■
Protect your hands and arms from sharp-edged metal parts when cleaning
the underfloor, the inside of the wheel housings or the wheel trims – risk of cuts!
CAUTION
■ Do not use any insect sponges, rough kitchen sponges or similar cleaning prod-
ucts – risk of damaging the paintwork surface.■
Cleaner that contain solvents can damage the material being cleaned.
For the sake of the environment
Used vehicle care product cans represent hazardous waste that is harmful to the
environment. These must be disposed of in accordance with national legal regula- tions.
Note
Due to the special tools and knowledge required, and to avoid any potential prob-
lems with the cleaning and care of your vehicle's exterior, we recommend that
the cleaning and care of your vehicle be carried out by a ŠKODA Service Partner.
Taking care of your vehicle's paintwork
First read and observe the introductory information and safety warn-ings
on page 205.
Minor paint damage such as scratches, scuffs or stone chips should be treated im-
mediately if possible, using touch-up pens or sprays .
205Vehicle care
Page 256 of 287
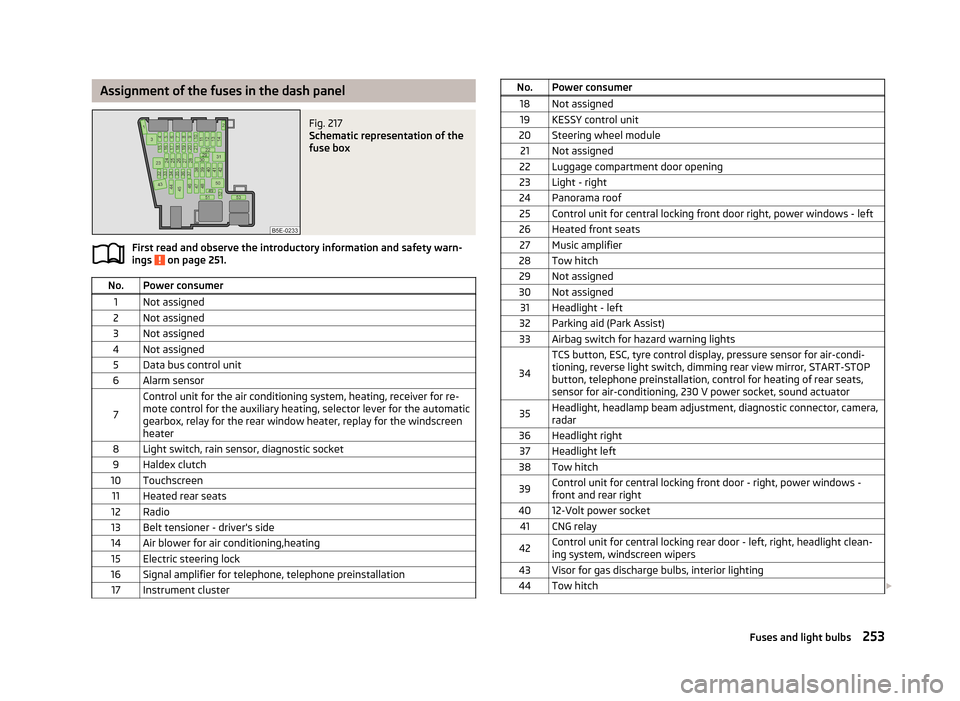
Assignment of the fuses in the dash panelFig. 217
Schematic representation of the
fuse box
First read and observe the introductory information and safety warn-
ings on page 251.
No.Power consumer1Not assigned2Not assigned3Not assigned4Not assigned5Data bus control unit6Alarm sensor
7
Control unit for the air conditioning system, heating, receiver for re-
mote control for the auxiliary heating, selector lever for the automatic gearbox, relay for the rear window heater, replay for the windscreenheater8Light switch, rain sensor, diagnostic socket9Haldex clutch10Touchscreen11Heated rear seats12Radio13Belt tensioner - driver's side14Air blower for air conditioning,heating15Electric steering lock16Signal amplifier for telephone, telephone preinstallation17Instrument clusterNo.Power consumer18Not assigned19KESSY control unit20Steering wheel module21Not assigned22Luggage compartment door opening23Light - right24Panorama roof25Control unit for central locking front door right, power windows - left26Heated front seats27Music amplifier28Tow hitch29Not assigned30Not assigned31Headlight - left32Parking aid (Park Assist)33Airbag switch for hazard warning lights
34
TCS button, ESC, tyre control display, pressure sensor for air-condi-tioning, reverse light switch, dimming rear view mirror, START-STOP
button, telephone preinstallation, control for heating of rear seats,
sensor for air-conditioning, 230 V power socket, sound actuator35Headlight, headlamp beam adjustment, diagnostic connector, camera,
radar36Headlight right37Headlight left38Tow hitch39Control unit for central locking front door - right, power windows - front and rear right4012-Volt power socket41CNG relay42Control unit for central locking rear door - left, right, headlight clean-ing system, windscreen wipers43Visor for gas discharge bulbs, interior lighting44Tow hitch 253Fuses and light bulbs
Page 257 of 287
No.Power consumer45Control unit for control of seat adjustment46230-Volt power socket47Rear window wiper48Not assigned49Coil on starter relay, clutch pedal switch50Not assigned51Belt tensioner - front passenger side52Not assigned53Relay for rear window heater
Fuses in the engine compartment
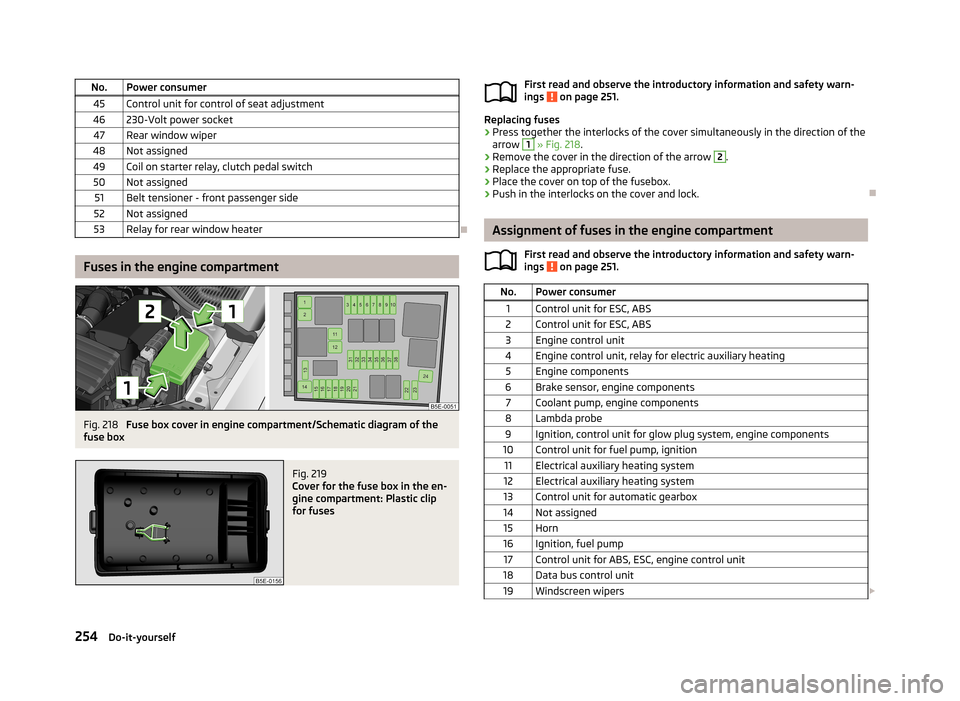
Fig. 218
Fuse box cover in engine compartment/Schematic diagram of the
fuse box
Fig. 219
Cover for the fuse box in the en-
gine compartment: Plastic clip
for fuses
First read and observe the introductory information and safety warn-
ings on page 251.
Replacing fuses
›
Press together the interlocks of the cover simultaneously in the direction of the
arrow
1
» Fig. 218 .
›
Remove the cover in the direction of the arrow
2
.
›
Replace the appropriate fuse.
›
Place the cover on top of the fusebox.
›
Push in the interlocks on the cover and lock.
Assignment of fuses in the engine compartment
First read and observe the introductory information and safety warn-ings
on page 251.
No.Power consumer1Control unit for ESC, ABS2Control unit for ESC, ABS3Engine control unit4Engine control unit, relay for electric auxiliary heating5Engine components6Brake sensor, engine components7Coolant pump, engine components8Lambda probe9Ignition, control unit for glow plug system, engine components10Control unit for fuel pump, ignition11Electrical auxiliary heating system12Electrical auxiliary heating system13Control unit for automatic gearbox14Not assigned15Horn16Ignition, fuel pump17Control unit for ABS, ESC, engine control unit18Data bus control unit19Windscreen wipers 254Do-it-yourself