SKODA OCTAVIA 2016 3.G / (5E) Owner's Manual
Manufacturer: SKODA, Model Year: 2016, Model line: OCTAVIA, Model: SKODA OCTAVIA 2016 3.G / (5E)Pages: 324, PDF Size: 48.85 MB
Page 111 of 324
WARNING■The auxiliary heating must never be operated in closed rooms (e.g. garag-
es) – risk of poisoning!■
The auxiliary heating must not be allowed to run during refuelling – risk
of fire.
■
The exhaust pipe of the auxiliary heating is located on the underside of
the vehicle. If you want to use the auxiliary heating, do not park the vehicle
in places where the exhaust fumes can come into contact with flammable
materials such as dry grass, undergrowth, leaves, spilled fuel etc. - There is
a risk of fire.
CAUTION
The air inlet in front of the windscreen must be free (e.g. of ice, snow or
leaves) to ensure that the auxiliary heating operates properly.
Note
■ The auxiliary heating only switches the blower on, if it has achieved a coolant
temperature of approx. 50 °C.■
In the engine compartment, water vapour may form during the operation of
the heater.
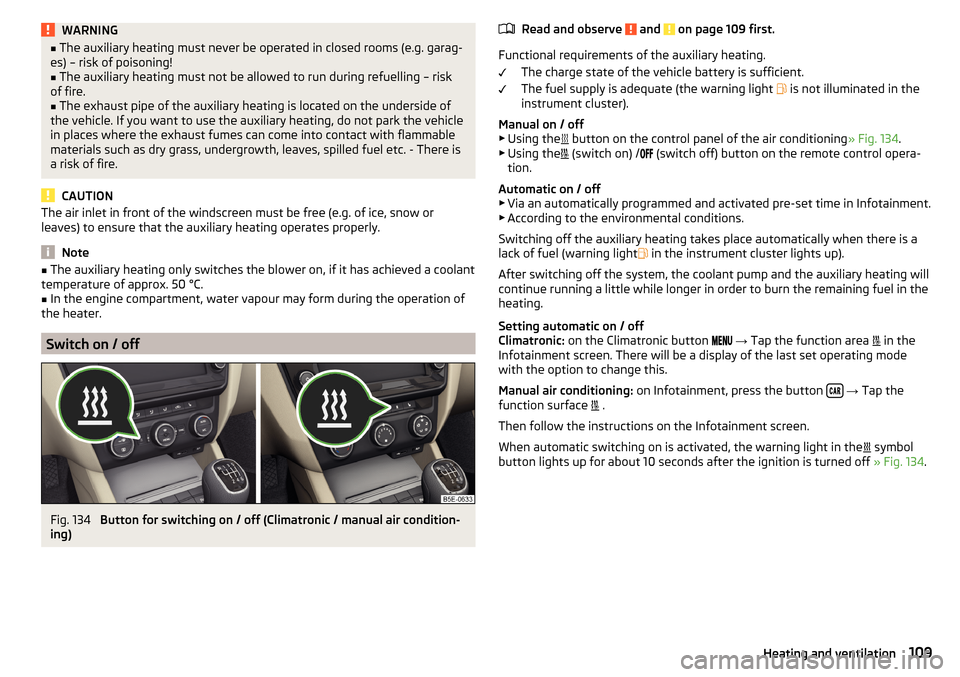
Switch on / off
Fig. 134
Button for switching on / off (Climatronic / manual air condition-
ing)
Read and observe and on page 109 first.
Functional requirements of the auxiliary heating.
The charge state of the vehicle battery is sufficient.
The fuel supply is adequate (the warning light
is not illuminated in the
instrument cluster).
Manual on / off ▶ Using the
button on the control panel of the air conditioning » Fig. 134.
▶ Using the
(switch on) /
(switch off) button on the remote control opera-
tion.
Automatic on / off ▶ Via an automatically programmed and activated pre-set time in Infotainment.
▶ According to the environmental conditions.
Switching off the auxiliary heating takes place automatically when there is a
lack of fuel (warning light in the instrument cluster lights up).
After switching off the system, the coolant pump and the auxiliary heating will
continue running a little while longer in order to burn the remaining fuel in the
heating.
Setting automatic on / off
Climatronic: on the Climatronic button
→ Tap the function area
in the
Infotainment screen. There will be a display of the last set operating mode
with the option to change this.
Manual air conditioning: on Infotainment, press the button
→ Tap the
function surface .
Then follow the instructions on the Infotainment screen.
When automatic switching on is activated, the warning light in the symbol
button lights up for about 10 seconds after the ignition is turned off » Fig. 134.
109Heating and ventilation
Page 112 of 324
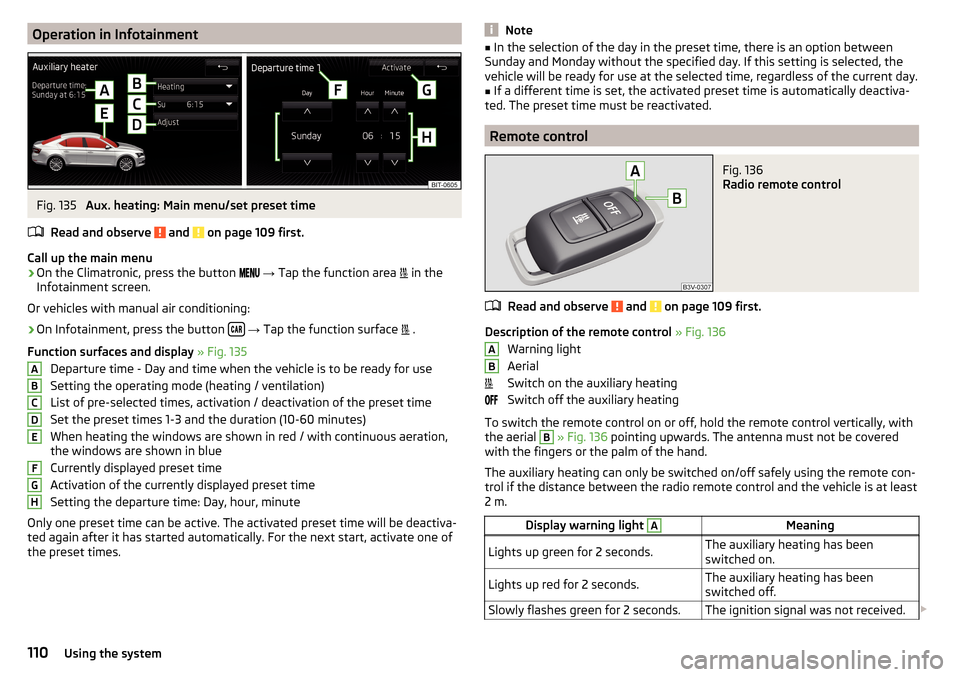
Operation in InfotainmentFig. 135
Aux. heating: Main menu/set preset time
Read and observe
and on page 109 first.
Call up the main menu
›
On the Climatronic, press the button
→ Tap the function area
in the
Infotainment screen.
Or vehicles with manual air conditioning:
›
On Infotainment, press the button
→ Tap the function surface
.
Function surfaces and display » Fig. 135
Departure time - Day and time when the vehicle is to be ready for use
Setting the operating mode (heating / ventilation)
List of pre-selected times, activation / deactivation of the preset time Set the preset times 1-3 and the duration (10-60 minutes)
When heating the windows are shown in red / with continuous aeration,
the windows are shown in blue
Currently displayed preset time
Activation of the currently displayed preset time
Setting the departure time: Day, hour, minute
Only one preset time can be active. The activated preset time will be deactiva-
ted again after it has started automatically. For the next start, activate one of
the preset times.
ABCDEFGHNote■ In the selection of the day in the preset time, there is an option between
Sunday and Monday without the specified day. If this setting is selected, the
vehicle will be ready for use at the selected time, regardless of the current day.■
If a different time is set, the activated preset time is automatically deactiva-
ted. The preset time must be reactivated.
Remote control
Fig. 136
Radio remote control
Read and observe and on page 109 first.
Description of the remote control » Fig. 136
Warning light
Aerial
Switch on the auxiliary heating
Switch off the auxiliary heating
To switch the remote control on or off, hold the remote control vertically, with the aerial
B
» Fig. 136 pointing upwards. The antenna must not be covered
with the fingers or the palm of the hand.
The auxiliary heating can only be switched on/off safely using the remote con-
trol if the distance between the radio remote control and the vehicle is at least
2 m.
Display warning light AMeaningLights up green for 2 seconds.The auxiliary heating has been
switched on.Lights up red for 2 seconds.The auxiliary heating has been
switched off.Slowly flashes green for 2 seconds.The ignition signal was not received. AB110Using the system
Page 113 of 324

Display warning light AMeaning
Quickly flashes green for 2 seconds.
The auxiliary heating is blocked, e.g.
because the tank is nearly empty or
there is a fault in the auxiliary heat-
ing.Flashes red for 2 seconds.The switch off signal was not re-
ceived.Lights up orange for 2 seconds, then
green or red.The battery is weak, however the
switching on or off signal was re-
ceived.Lights up orange for 2 seconds, then
flashes green or red.The battery is weak, however the
switching on or off signal was not re-
ceived.Flashes orange for 5 seconds.The battery is discharged, however
the switching on or off signal was not
received.
Replace the battery » page 275.
CAUTION
■
The remote control must be protected against moisture, severe shocks and
direct sunlight - Otherwise, there is a risk of damage to the remote control.■
The range of the remote control with a charged battery is a few hundred me-
tres (depending on obstructions between the remote control and the vehicle,
weather conditions, the battery condition etc.).
111Heating and ventilation
Page 114 of 324
Infotainment
Introductory information
Important information
Introduction to the subject
WARNING■Only use Infotainment in such a way that you have control of the vehicle
in every traffic situation (e.g. Do not write text messages while driving, do
not link or connect the telephone, do not work with the contact list, do not
enter any destinations, do not connect WLAN or SmartLink etc.)- Otherwise
there is a risk of an accident!■
Always route the connection cable of the external device such that is
does not restrict you when driving.
WARNING■ Adjust the volume to ensure that acoustic signals from outside the vehi-
cle, e.g. sirens from emergency vehicles, can be heard at all times.■
High volumes can cause hearing damage!
CAUTION
In some countries, some Infotainment functions can no longer be selected
when the vehicle is running faster than a certain speed. This is not a malfunc-
tion, but complies with the national legal regulations.
Mobile phones and applications
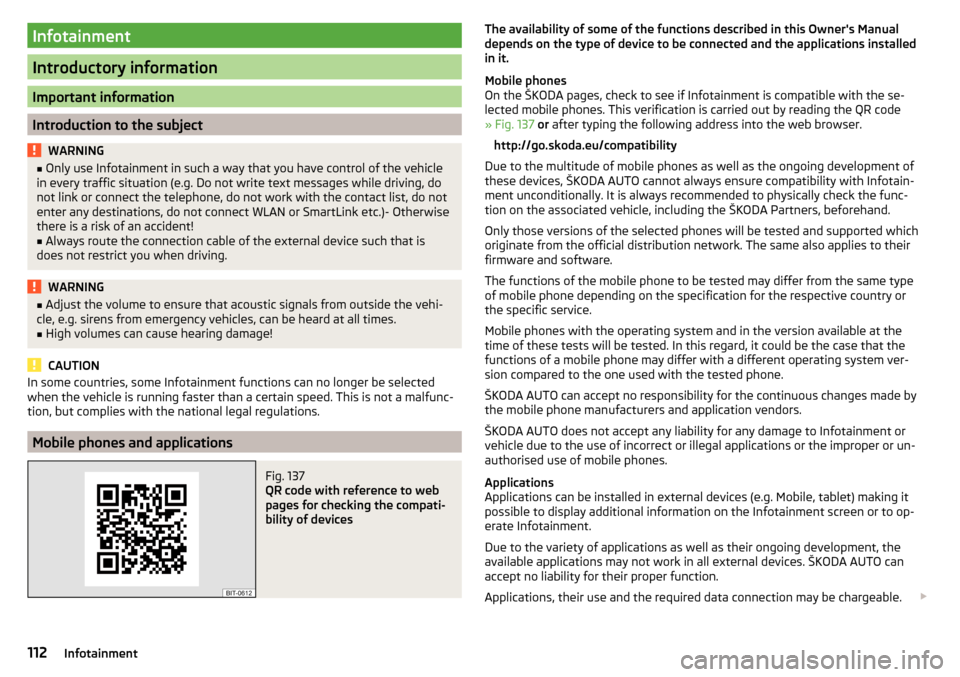
Fig. 137
QR code with reference to web
pages for checking the compati-
bility of devices
The availability of some of the functions described in this Owner's Manual
depends on the type of device to be connected and the applications installed
in it.
Mobile phones
On the ŠKODA pages, check to see if Infotainment is compatible with the se-
lected mobile phones. This verification is carried out by reading the QR code
» Fig. 137 or after typing the following address into the web browser.
http://go.skoda.eu/compatibility
Due to the multitude of mobile phones as well as the ongoing development of
these devices, ŠKODA AUTO cannot always ensure compatibility with Infotain-
ment unconditionally. It is always recommended to physically check the func-
tion on the associated vehicle, including the ŠKODA Partners, beforehand.
Only those versions of the selected phones will be tested and supported which
originate from the official distribution network. The same also applies to their
firmware and software.
The functions of the mobile phone to be tested may differ from the same type
of mobile phone depending on the specification for the respective country or
the specific service.
Mobile phones with the operating system and in the version available at the
time of these tests will be tested. In this regard, it could be the case that the
functions of a mobile phone may differ with a different operating system ver-
sion compared to the one used with the tested phone.
ŠKODA AUTO can accept no responsibility for the continuous changes made by
the mobile phone manufacturers and application vendors.
ŠKODA AUTO does not accept any liability for any damage to Infotainment or
vehicle due to the use of incorrect or illegal applications or the improper or un-
authorised use of mobile phones.
Applications
Applications can be installed in external devices (e.g. Mobile, tablet) making it possible to display additional information on the Infotainment screen or to op-
erate Infotainment.
Due to the variety of applications as well as their ongoing development, the
available applications may not work in all external devices. ŠKODA AUTO can
accept no liability for their proper function.
Applications, their use and the required data connection may be chargeable. 112Infotainment
Page 115 of 324
The range of available applications and their functionality is dependent on the
Infotainment model, vehicle and region.
The function of mobile applications can be influenced by the quality of the In- ternet connection.
Some applications are dependent on the availability of services that are provi-
ded by third parties.
Infotainment overview
Description - Infotainment Columbus
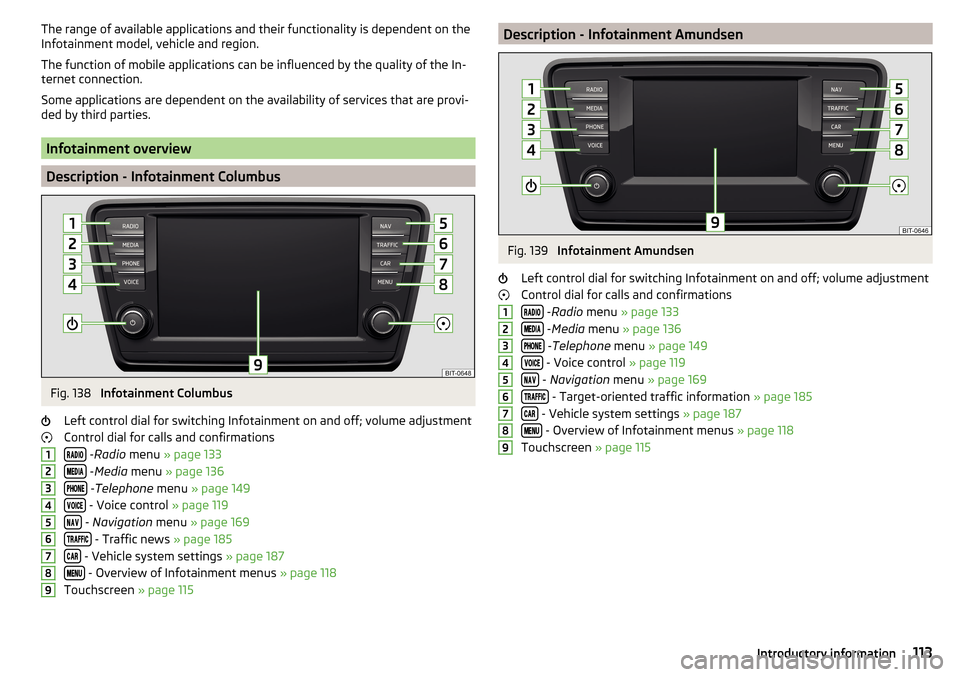
Fig. 138
Infotainment Columbus
Left control dial for switching Infotainment on and off; volume adjustment
Control dial for calls and confirmations
- Radio menu » page 133
- Media menu » page 136
- Telephone menu » page 149
- Voice control » page 119
- Navigation menu » page 169
- Traffic news » page 185
- Vehicle system settings » page 187
- Overview of Infotainment menus » page 118
Touchscreen » page 115
123456789Description - Infotainment AmundsenFig. 139
Infotainment Amundsen
Left control dial for switching Infotainment on and off; volume adjustment
Control dial for calls and confirmations
- Radio menu » page 133
- Media menu » page 136
- Telephone menu » page 149
- Voice control » page 119
- Navigation menu » page 169
- Target-oriented traffic information » page 185
- Vehicle system settings » page 187
- Overview of Infotainment menus » page 118
Touchscreen » page 115
123456789113Introductory information
Page 116 of 324
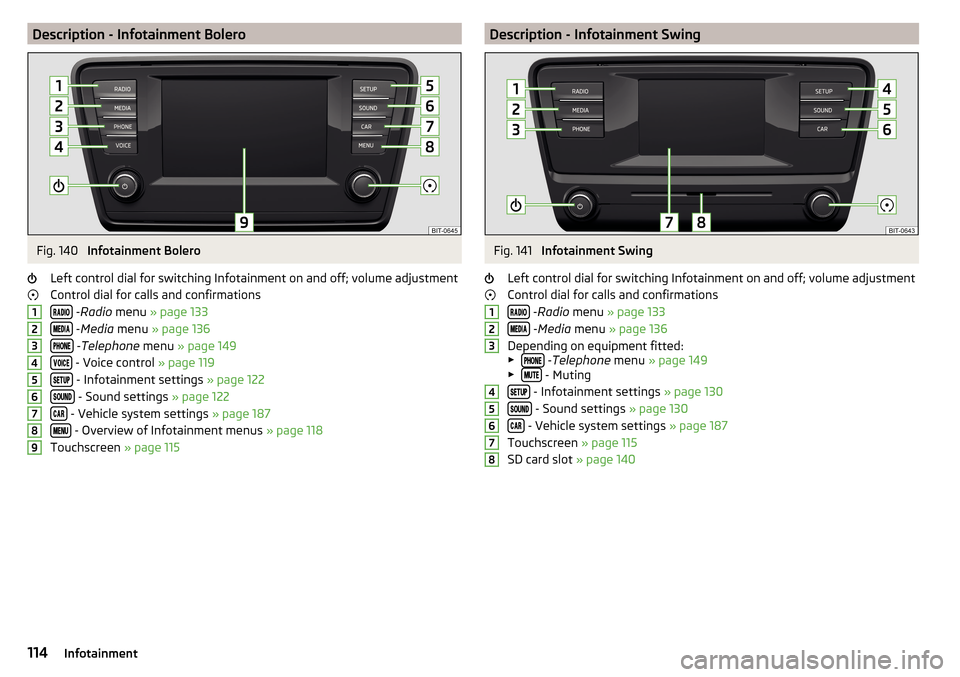
Description - Infotainment BoleroFig. 140
Infotainment Bolero
Left control dial for switching Infotainment on and off; volume adjustment
Control dial for calls and confirmations
- Radio menu » page 133
- Media menu » page 136
- Telephone menu » page 149
- Voice control » page 119
- Infotainment settings » page 122
- Sound settings » page 122
- Vehicle system settings » page 187
- Overview of Infotainment menus » page 118
Touchscreen » page 115
123456789Description - Infotainment SwingFig. 141
Infotainment Swing
Left control dial for switching Infotainment on and off; volume adjustment
Control dial for calls and confirmations
- Radio menu » page 133
- Media menu » page 136
Depending on equipment fitted:
▶
-Telephone menu » page 149
▶ - Muting
- Infotainment settings » page 130
- Sound settings » page 130
- Vehicle system settings » page 187
Touchscreen » page 115
SD card slot » page 140
12345678114Infotainment
Page 117 of 324

External moduleFig. 142
External Module: Infotainment Columbus with SIM card slot / In-
fotainment Columbus without a SIM card slot
Fig. 143
External Module: Infotainment Bolero / Infotainment Amundsen
The external module is located in the storage compartment on the front pas-
senger side.
SD1 card slot
SD2 card slot
- CD / DVD eject button
CD / DVD slot
SIM card slot
12345Touch screen
Applies to Infotainment Columbus, Amundsen, Bolero.
Infotainment is equipped with a touch screen which can be operated with a
light touch or swipe of a finger.
The brightness level of the screen can be set » page 123.
CAUTION
■
It is not possible to operate the screen with your fingernails or while wearing
gloves.■
To protect the screen, you can use a suitable screen protector for touch pads
that does not affect its functionality.
■
Dirt can be removed from the screen by using a soft cloth and, if necessary,
methylated spirits.
Touch screen
Applies to Infotainment Swing.
Infotainment is equipped with a touch screen that can be operated by light
finger pressure on the screen surface.
The brightness level of the screen can be set » page 130.
CAUTION
■
The screen can only be operated by a slight touch of a finger. If there is too
much pressure there is a risk of damage to the screen!■
To protect the screen, you can use a suitable screen protector for touch pads
that does not affect its functionality.
■
Dirt can be removed from the screen by using a soft cloth and, if necessary,
methylated spirits.
115Introductory information
Page 118 of 324

Infotainment operation
Infotainment operation
Operation principles and screen areas
Fig. 144
Infotainment Columbus, Amundsen, Bolero: Screen areas/ screen
display
Fig. 145
Infotainment Swing: Screen areas / screen display
Screen display description » Fig. 144 and » Fig. 145 .
Status line with time and outdoor temperature data and other information
Information and the operation of the current menu
Function surfaces of the current menu
Identification of the current menu
Return to the higher-level menu
Sliding regulator
ABCDEFMenu item with “Checkbox”
▶ - Function is switched on
▶ - Function is switched off
/
Open a sub menu of the menu item with the “pop-up window”
Function surfaces
The screen areas which confirm a function or a menu are called “ function sur-
faces ”.
▶ White text - the surface is active and thus selectable
▶ Grey text - the surface is inactive and therefore not selectable
▶ Green frame - currently selected surface
Selecting menu/menu item/function ▶ By moving your finger across the screen in the desired direction (applies to
Infotainment Columbus, Amundsen, Bolero).
▶ By tapping on the function surface or
» Fig. 145 (Applies to Infotainment
Swing).
▶ By turning the knob .
Confirm menu/menu item/function
▶ By tapping on the function surface.
▶ By pressing the knob .
Returning to higher-level menu ▶ By tapping on the function surface .
▶ By tapping on the screen outside of the “pop-up window”.
▶ By pressing the corresponding button next to the screen (e.g. in the menu
Media , by pressing the
button).
Select the menu item / function value ▶ - Selected menu item / function value
▶ - Deselected menu item / function value
Set value ▶ By pressing the function surface with one of the following symbols
.
▶ By touching or moving your finger over the scale.
▶ Turning the knob .
Note
Depending on the equipment fitted, Infotainment can be operated using the
buttons on the multifunction steering wheel. Further information » page 43.GH116Infotainment
Page 119 of 324

Operating the menusFig. 146
Operating the menus
Operating the menus » Fig. 146
Reduction / enlargement of the menu window Browse the menu- List entries Open / close the menu window
Close the menu window
Alphanumeric keyboard
Fig. 147
Example of the keyboard display
The alphanumeric keypad is used to enter for letters, numbers and characters.
Description of the alphanumeric keyboard » Fig. 147
Input line
Context-dependent: ▶ - Switch to capital letters
▶ - Switch to special characters
▶ - Switch to numbers
ABContext-dependent:
▶ - Switch to numbers
▶ - Switch to Latin letters
▶
- Switch to Cyrillic letters
- Display of visited entries (the number of visited entries is displayed in the
function surface)
Erase the entered characters
By holding the variants of each type are displayed.
Switching between keyboards with specific characters of the selected lan-
guages » page 123 or. » page 130
Enters a blank
Move the cursor within the input line to the left
Move the cursor within the input line to the right
Confirmation of the entered number
Search
While entering characters, a search is made for corresponding entries.
The entry such as a telephone contact to be searched for must be entered
along with the special characters (diacritics).
By tapping on the function surface A list of matching entries opens.
Switching Infotainment on / off
›
To
switch on/off Infotainment, press .
Automatic switch-on of Infotainment
If Infotainment was not turned off with the control switch
before the igni-
tion was turned off, it will automatically switch on after the ignition is switch-
ed on.
Automatic switch-off of Infotainment
If the vehicle key is pulled out of the ignition lock while Infotainment is switch-
ed on, Infotainment will switch off automatically.
If the vehicle is fitted with the starter button, Infotainment will switch off au-
tomatically after the engine is switched off and the door is opened.
With the ignition off, Infotainment will automatically turn off after about 30
minutes.
Infotainment turns off automatically under certain circumstances. Infotain-
ment informs of this via a text message on the Infotainment display.
C117Infotainment operation
Page 120 of 324
Restart of Infotainment
If Infotainment does not respond (if it “freezes”) This can be restarted by hold-
ing
for longer than 10 s.
Adjusting the volume
Every change in volume is displayed on the screen.
›
To increase the volume , turn the controller clockwise.
›
To
reduce volume , turn the controller anticlockwise.
›
To
mute , turn the controller to the left to 0.
›
or:
press the button (applies to Infotainment Swing).
The following symbol appears on the screen when the sound is muted .
If, at the time of muting, sound is played from the source in the Media menu,
then the playback is interrupted (pause) 1)
.
CAUTION
■ High volumes can cause sound resonance in the vehicle.■When changing or connecting an audio source, this may cause sudden
changes in volume. Reduce the volume before changing or connecting an au-
dio source.
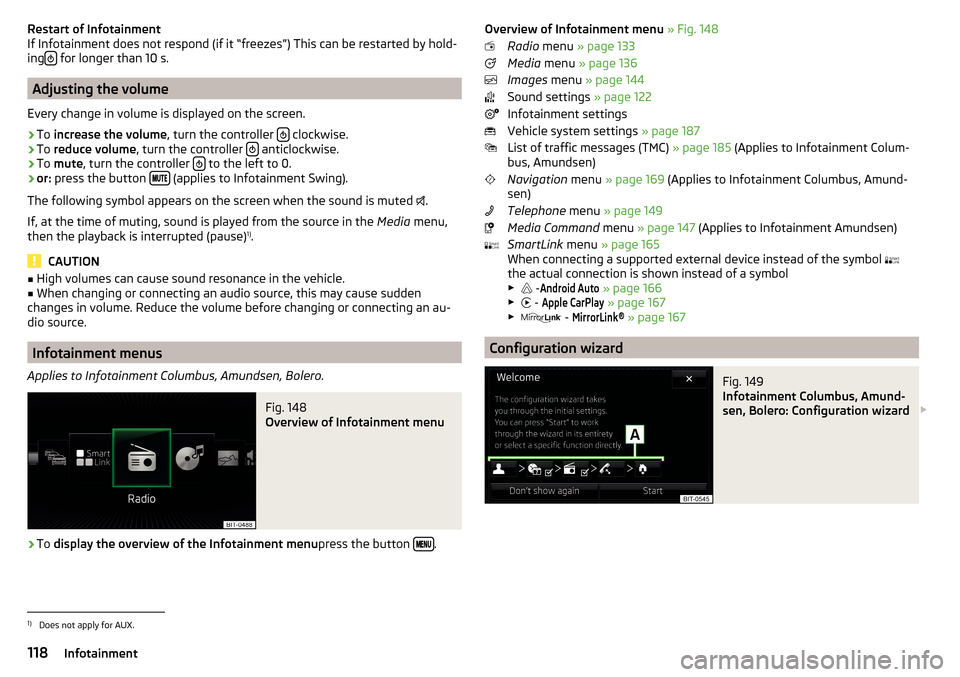
Infotainment menus
Applies to Infotainment Columbus, Amundsen, Bolero.
Fig. 148
Overview of Infotainment menu
›
To display the overview of the Infotainment menu press the button .
Overview of Infotainment menu
» Fig. 148
Radio menu » page 133
Media menu » page 136
Images menu » page 144
Sound settings » page 122
Infotainment settings
Vehicle system settings » page 187
List of traffic messages (TMC) » page 185 (Applies to Infotainment Colum-
bus, Amundsen)
Navigation menu » page 169 (Applies to Infotainment Columbus, Amund-
sen)
Telephone menu » page 149
Media Command menu » page 147 (Applies to Infotainment Amundsen)
SmartLink menu » page 165
When connecting a supported external device instead of the symbol
the actual connection is shown instead of a symbol ▶ -Android Auto
» page 166
▶ -
Apple CarPlay
» page 167
▶ -
MirrorLink®
» page 167
Configuration wizard
Fig. 149
Infotainment Columbus, Amund-
sen, Bolero: Configuration wizard
1)
Does not apply for AUX.
118Infotainment