ESP SKODA OCTAVIA TOUR 2010 2.G / (1Z) User Guide
[x] Cancel search | Manufacturer: SKODA, Model Year: 2010, Model line: OCTAVIA TOUR, Model: SKODA OCTAVIA TOUR 2010 2.G / (1Z)Pages: 199, PDF Size: 12.09 MB
Page 76 of 199
Heating and air conditioning system75
Using the system
Safety
Driving Tips
General Maintenance
Breakdown assistance
Technical Data
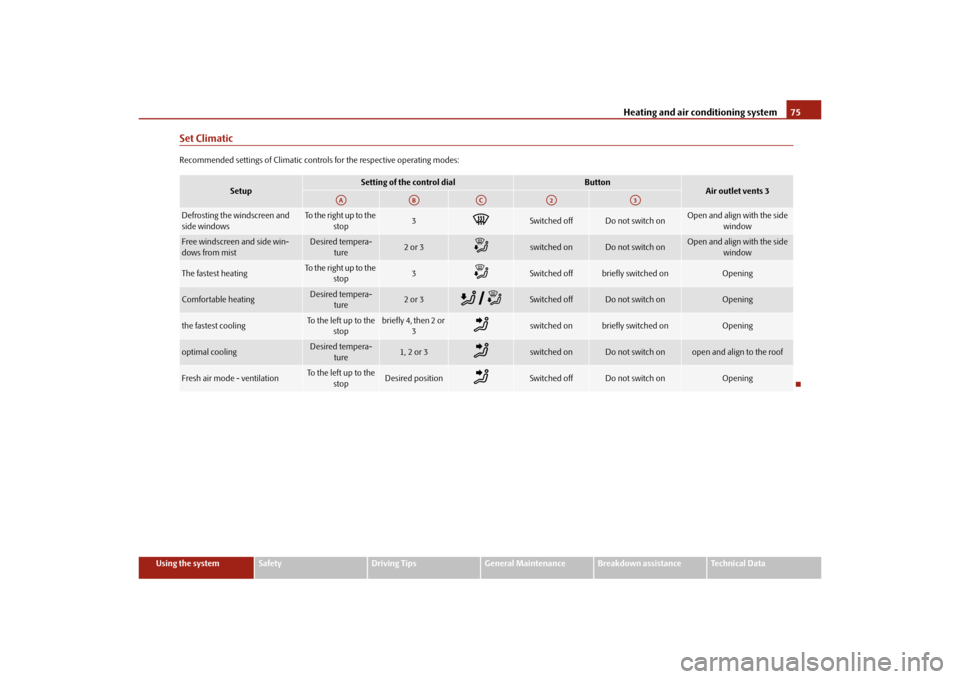
Set ClimaticRecommended settings of Climatic controls for the respective operating modes:
Setup
Setting of the control dial
Button
Air outlet vents 3
Defrosting the windscreen and
side windows
To the right up to the
stop
3
Switched off
Do not switch on
Open and align with the side window
Free windscreen and side win-
dows from mist
Desired tempera-ture
2 or 3
switched on
Do not switch on
Open and align with the side window
The fastest heating
To the right up to the stop
3
Switched off
briefly switched on
Opening
Comfortable heating
Desired tempera-
ture
2 or 3
Switched off
Do not switch on
Opening
the fastest cooling
To the left up to the stop
briefly4, then 2or 3
switched on
briefly switched on
Opening
optimal cooling
Desired tempera-ture
1, 2 or 3
switched on
Do not switch on
open and align to the roof
Fresh air mode - ventilation
To the left up to the
stop
Desired position
Switched off
Do not switch on
Opening
AA
AB
AC
A2
A3
s2bs.2.book Page 75 Monday, September 27, 2010 9:53 AM
Page 82 of 199
Starting-off and Driving81
Using the system
Safety
Driving Tips
General Maintenance
Breakdown assistance
Technical Data
WARNING
Please note that the handbrake must be fully released. A handbrake which
is only partially released can result in the rear brakes overheating which will
have a negative effect on the operation of the brake system - risk of accident! In
addition this can result in premature wear of the rear brake pads.
Never leave children unattended in the vehicle. Children might, for
example, release the handbrake or take the vehicle out of gear. The vehicle
might then move off - risk of accident!Caution
Each time the vehicle is parked, first of all apply the handbrake and then additionally
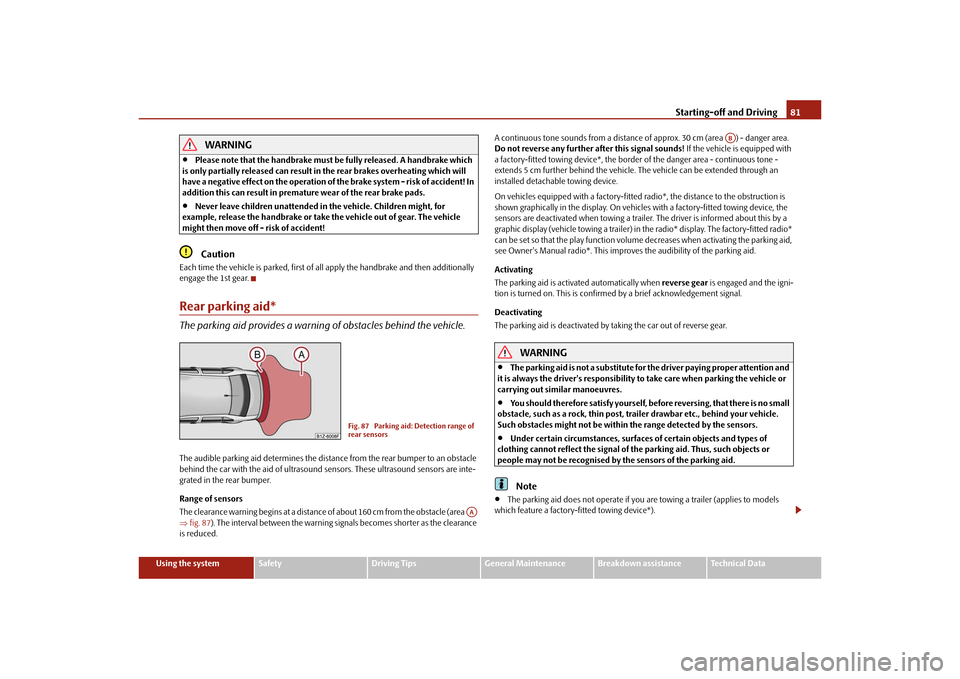
engage the 1st gear.Rear parking aid*The parking aid provides a warning of obstacles behind the vehicle.The audible parking aid determines the distan ce from the rear bumper to an obstacle
behind the car with the aid of ultrasound sensors. These ultrasound sensors are inte-
grated in the rear bumper.
Range of sensors
The clearance warning begins at a distance of about 160 cm from the obstacle (area
fig. 87 ). The interval between the warning signals becomes shorter as the clearance
is reduced. A continuous tone sounds from
a distance of approx. 30 cm (area ) - danger area.
Do not reverse any further after this signal sounds! If the vehicle is equipped with
a factory-fitted towing device*, the border of the danger area - continuous tone -
extends 5 cm further behind the vehicle. The vehicle can be extended through an
installed detachable towing device.
On vehicles equipped with a factory-fitted radio*, the distance to the obstruction is
shown graphically in the display. On vehicles with a factory-fitted towing device, the
sensors are deactivated when towing a traile r. The driver is informed about this by a
graphic display (vehicle towing a trailer) in the radio* display. The factory-fitted radio*
can be set so that the play function volume decreases when activating the parking aid,
see Owner's Manual radio*. This improves the audibility of the parking aid.
Activating
The parking aid is activated automatically when reverse gear is engaged and the igni-
tion is turned on. This is confirmed by a brief acknowledgement signal.
Deactivating
The parking aid is deactivated by ta king the car out of reverse gear.
WARNING
The parking aid is not a substitute for the driver paying proper attention and
it is always the driver's responsibility to take care when parking the vehicle or
carrying out similar manoeuvres.
You should therefore satisfy yourself, before reversing, that there is no small
obstacle, such as a rock, thin post, trai ler drawbar etc., behind your vehicle.
Such obstacles might not be within the range detected by the sensors.
Under certain circumstances, surfaces of certain objects and types of
clothing cannot reflect the signal of the parking aid. Thus, such objects or
people may not be recognised by the sensors of the parking aid.Note
The parking aid does not operate if you are towing a trailer (applies to models
which feature a factory-fitted towing device*).
Fig. 87 Parking aid: Detection range of
rear sensors
AA
AB
s2bs.2.book Page 81 Monday, September 27, 2010 9:53 AM
Page 86 of 199
Passive Safety85
Using the system
Safety
Driving Tips
General Maintenance
Breakdown assistance
Technical Data
SafetyPassive SafetyBasic informationDriving the safe way
Passive safety measures reduce the risk of injury in accident situations.In this section you will find important info rmation, tips and notes on the subject of
passive safety in your vehicle. We have combined everything here which you should
be familiar with, for example, regarding seat belts, airbags, child seats and safety of
children. It is therefore important, in partic ular, to comply with the notes and warnings
in this section for your own interest and in the interest of those travelling with you.
WARNING
This chapter contains important information on how to use the vehicle for
the driver and his occupants. You will find further information on safety, which
concerns you and those travelling with you, in the following chapters of this
Owner's Manual.
The complete on-board literature should always be in the vehicle. This
applies in particular, if you rent out or sell the vehicle.
Safety equipment
The safety equipment is part of the occupant protection and it can
reduce the risk of injuries in accident situations.“Do not put at risk” your safety and the safety of those travelling with you . In the event
of an accident, the safety equipment can redu ce the risk of injuries. The following list
contains part of the safety equipment in your vehicle:
Three-point seat belts for all the seats,
belt force limiter for front seats and outer rear seats*,
belt tensioner for front seats,
seat belt height adjuster for front seats,
front airbag for the driver and the front seat passenger*,
side airbags*,
head airbags*,
anchoring points for child seat using the “ISOFIX” system,
anchoring points for child seat using the “Top Tether” system,
head restraint adjustable for height,
adjustable steering column.
The specified safety equipment works togeth er, in order to optimally protect you and
those travelling with you in accident situat ions. The safety equipment does not protect
you or the people travelling with you, if you or your occupants adopt an incorrect
seated position or the equipment is not correctly adjusted or used.
For this reason you will be provided with information on why this equipment is very
important, how it protects you and the occupants, what should be observed when
using the equipment and how you and the peop le travelling with you can make full use
of the existing safety equipment. This Owner's Manual contains important warning
notes, which you and those travelling with you should pay attention to in order to
reduce a risk of injury.
Safety concerns everybody!
Before setting off
The driver is always fully responsibl e for his occupants and for the oper-
ating safety of the vehicle.For your own safety and the safety of the pe ople travelling with you, please pay atten-
tion to the following points before setting off:
Ensure that the lighting and the turn signal system are functioning properly.
Inspect the tyre inflation pressure.
s2bs.2.book Page 85 Monday, September 27, 2010 9:53 AM
Page 87 of 199
Passive Safety
86
Ensure that all the windows offer a good visibility to the outside.
Safely attach the items of luggage page 57, “Loading the luggage compartment”.
Ensure that no objects can obstruct the pedal.
Adjust the mirror, the front seat and the head restraint to match your body size.
Point out to your occupants that the head restraints must be adjusted to match
their body size.
Protect the children in suitable child seats with correctly fastened seat belts
page 103, “Transporting children safely”.
Adopt the correct seated position page 86, “Correct seated position”. Also
inform your occupants to adopt the correct seated position.
Fasten the seat belt correctly. Also inform your occupants to properly fasten the
seat belts page 91, “How are seat belts correctly fastened?”.
What influences the driving safety?
The driving safety is primarily determined by the style of driving and the
personal behaviour of all the occupants.The driver is fully responsible for himself an d his occupants. If your driving safety is
effected, you place yourself and the oncomi ng traffic at risk. Please refer to the
following guidelines.
Do not get distracted from concentrating on the traffic situation, e.g. by your occu-
pants or mobile phone calls.
Never drive when your driving ability is impaired, e.g. through medication, alcohol,
drugs.
Keep to the traffic regulations and the permissible speed limit.
Adjust the driving speed at all times to the road condition as well as to the traffic
and weather conditions.
Take regular breaks on long journe ys - at the latest every two hours.
Correct seated positionCorrect seated position for the driver
Correct seated position for the driver is important for safe and relaxed
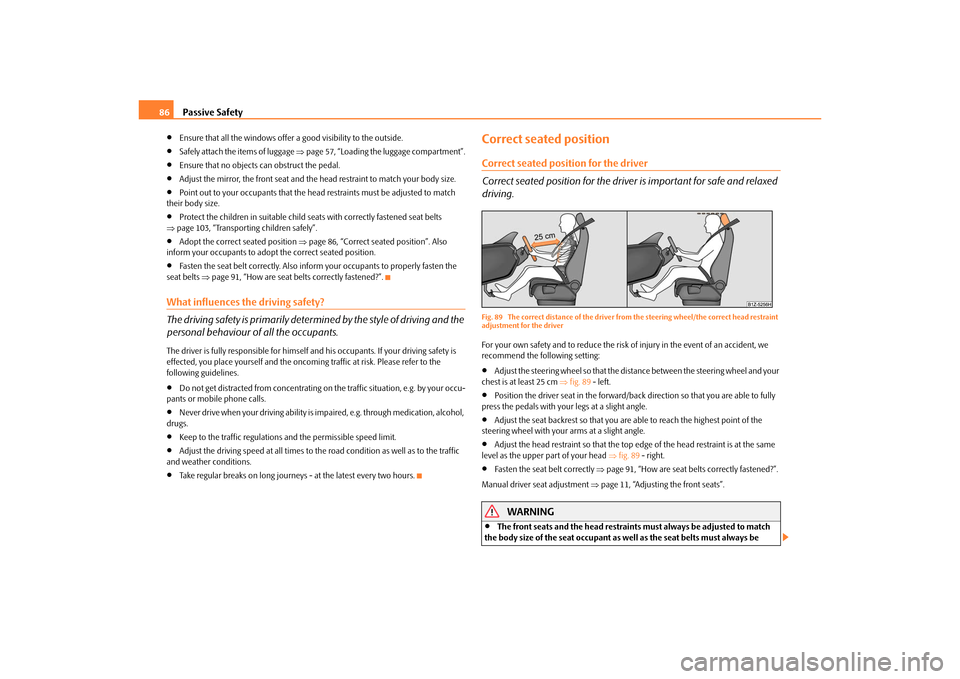
driving.Fig. 89 The correct distance of the driver fr om the steering wheel/the correct head restraint
adjustment for the driverFor your own safety and to reduce the risk of injury in the event of an accident, we
recommend the following setting:
Adjust the steering wheel so that the distance between the steering wheel and your
chest is at least 25 cm fig. 89 - left.
Position the driver seat in the forward/back direction so that you are able to fully
press the pedals with your legs at a slight angle.
Adjust the seat backrest so that you are able to reach the highest point of the
steering wheel with your arms at a slight angle.
Adjust the head restraint so that the top edge of the head restraint is at the same
level as the upper part of your head fig. 89 - right.
Fasten the seat belt correctly page 91, “How are seat belts correctly fastened?”.
Manual driver se at adjustment page 11, “Adjusting the front seats”.
WARNING
The front seats and the head restraints must always be adjusted to match
the body size of the seat occupant as well as the seat belts must always be
s2bs.2.book Page 86 Monday, September 27, 2010 9:53 AM
Page 89 of 199
Passive Safety
88
Keep your feet in the footwell at al l times while driving. Never place your
feet out of the window or on the seats. You will be exposed to increased risk of
injury if it becomes necessary to apply the brake or in the event of an accident.
If an airbag is deployed, you may suffer fatal injuries when adopting an incor-
rect seated position!
If the occupants on the rear seats are not sitting upright, the risk of injury is
increased due to incorrect routing of the seat belt.
Examples of an incorrect seated position
An incorrect seated position can lead to severe injuries or death for the
occupants.Seat belts offer their optimum protection only if the webbing of the seat belts is prop-
erly routed. Incorrect seated positions considerably reduce the protective functions of
the seat belts and therefore increase the risk of injury due to an incorrect routing of the
seat belt. The driver is fully responsible for himself and the occupants, in particular for
the children. Do not permit an occupant to adopt an incorrect seated position when
the car is moving.
The following list contains the examples of seated positions which are dangerous for
the occupants. This list is not complete, however we would like you to get familiar with
this subject.
Therefore, while the car is moving never:
stand up in the vehicle,
stand up on the seats,
kneel onto the seats,
tilt the seat backrest fully to the back,
lean against the dash panel,
lie on the rear seats,
only sit on the front area of the seat,
sit to the side,
lean out of the window,
put the feet out of the window,
put the feet on the dash panel,
put the feet on the seat upholstery,
occupy the footwell,
have the seat belt not fastened,
occupy the luggage compartment.
WARNING
If the occupant adopts an incorrect seated position, he is exposed to life-
threatening injuries, in case he is hit by a deployed airbag.
Before setting off, please adopt the correct seated position and do not
change this seated position while the car is moving. Also advise your occupants
to adopt the correct seated position and not to change this seated position
while the car is moving.
WARNING (continued)
s2bs.2.book Page 88 Monday, September 27, 2010 9:53 AM
Page 102 of 199
Airbag system101
Using the system
Safety
Driving Tips
General Maintenance
Breakdown assistance
Technical Data
being deployed. When the deployed head airbag is inflated, parts of the acces-
sories fitted may in certain circumstances be thrown into the interior of the car
and cause injuries to the occupants
page 157, “Accessories, changing and
replacing parts”.
Any work on the head airbag system including installing and removing
system components because of other repair work (e.g. removing headliner)
must only be carried out by a specialist garage.
Deactivating an airbagDeactivating airbags
If any airbags have been deactivated, switch them on again as soon as
possible so that they are able to again provide their proper protection.There is the technical means installed within your vehicle to switch off the front, side*
or head airbag* (take out of commission).
This is why you should have the deactivation of the airbags carried out by a specialist
garage.
On vehicles equipped with the switch for de activation of the airbags, you can deacti-
vate the front passenger airbag by means of this switch page 101.
Deactivation of airbags is envisaged only for particular instances, such as if:
you must in exceptional cases use a child seat on the front passenger seat where
the child has its back to the direction of tr avel of the vehicle (in some countries this
must be in the direction of travel due to other legal regulations applying) page 103,
“Important safety information regarding the use of child safety seats”,
you are not able to maintain the distan ce of at least 25 cm between middle of
steering wheel and chest, despite the driver seat being correctly adjusted,
special attachments are required in the ar ea of the steering wheel because of a
physical disability,
you have installed other seats (e.g. orthopaedic seats without side airbags). Monitoring the airbag system
The functionality of the airbag system is al
so monitored electronically when one airbag
has been switched off.
If the airbag was switched off using diagnostic equipment:
The warning light for the airbag system li ghts up for 4 seconds after switching on
the ignition and then flashes for 12 seconds afterwards in 2 second intervals.
Front passenger airbags switched off using the switch for front passenger
airbags* in storage compartmen t on the front passenger side:
the airbag indicator light in the instrume nt cluster comes on for about 4 seconds
each time the igniti on is switched on,
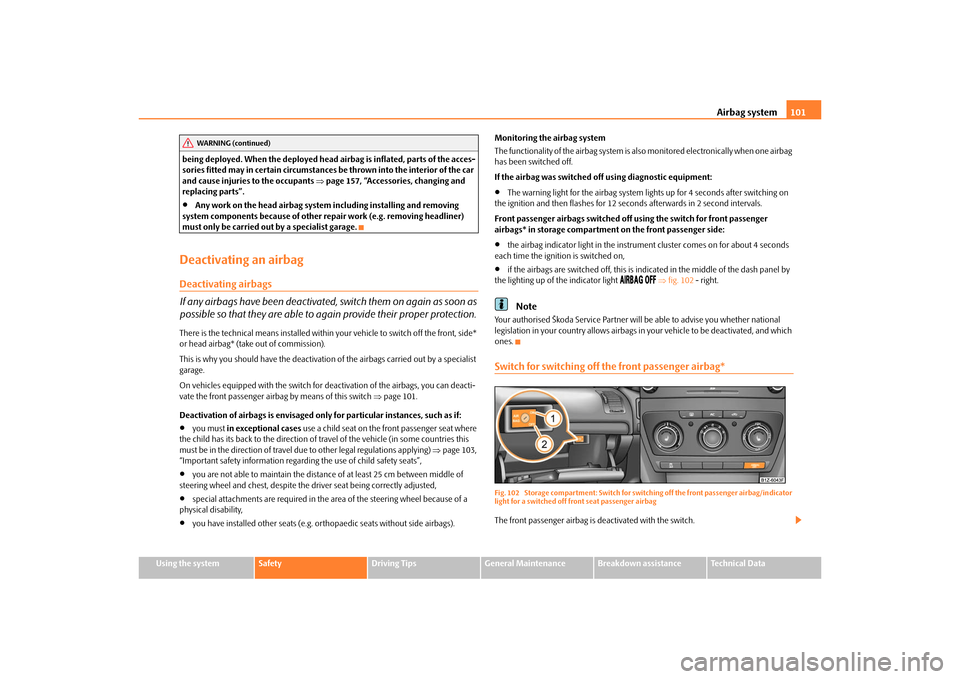
if the airbags are switched off, this is in dicated in the middle of the dash panel by
the lighting up of the indicator light
fig. 102 - right.
Note
Your authorised Škoda Service Partner will be able to advise you whether national
legislation in your country allows airbags in your vehicle to be deactivated, and which
ones.Switch for switching off the front passenger airbag*Fig. 102 Storage compartment: Switch for swit ching off the front passenger airbag/indicator
light for a switched off front seat passenger airbagThe front passenger airbag is deactivated with the switch.
WARNING (continued)
s2bs.2.book Page 101 Monday, September 27, 2010 9:53 AM
Page 103 of 199
Airbag system
102
Deactivating an airbag
– Switch off the ignition.
– Turn the switch for the front passenger airbag using the key in the position (OFF ) fig. 102 .
– Check whether the indicator light
in the middle of the dash panel lights
up when the ignition is switched on fig. 102 - right.
Switching on an airbag– Switch off the ignition.
– Turn the switch for the front passenger airbag using the key in the position ( ON)
fig. 102 .
– Check whether the indicator light
in the middle of the dash panel lights
up when the ignition is switched on fig. 102 - right.
The airbag should only be switched off under exceptional circumstances page 101.
Indicator light
(airbag switched off)
The indicator light for the front passenger ai rbag is located in the middle of the dash
panel fig. 102 - right.
If the front passenger airbag is switched off, the warning light for the front passenger
airbag switch-off comes on about 4 seco nds after the ignition is switched on.
There is a system fault presen t in the airbag switch off if the indicator light for the
front passenger airbag switch off flashes. Please have the car inspected immediately
by a specialist garage.
WARNING
The driver is responsible for whether th e front passenger airbag is switched
on or switched off.
Only switch off the front passenger airbag when the ignition is switched off!
Otherwise a fault can occur in the system for the front passenger airbag deacti-
vation.
If the warning light
(airbag switched off) flashes:
Front passenger airbag is not deployed in the event of an accident!
It is also important to have the system inspected without delay by a
specialist garage.
A2A1
WARNING (continued)
s2bs.2.book Page 102 Monday, September 27, 2010 9:53 AM
Page 110 of 199
Transporting children safely109
Using the system
Safety
Driving Tips
General Maintenance
Breakdown assistance
Technical Data
– Insert the mounting funnels onto the
locking eyes between the seat back-
rest and the seat cushion fig. 109 .
– Push the notched arms of the child seat in to the locking eyes in direction of arrow
, until they are heard to lock in place fig. 109 .
– Pull on both sides of the child seat!
One can mount a child safety seat using the “I SOFIX” system quickly, easily and reliably.
Please pay close attention to instructions from the manufacturer of the child safety
seat when installing and removing the seat.
Child seats fitted with the “ISOFIX” system can only be mounted and fixed in a vehicle
fitted with an “ISOFIX” system when these child seats have been released for this type
of vehicle according to the ECE-R 44 standard.
You can obtain child seats with the “ISOFIX” attachment system from specialist garages
who will also installed it as well.
Complete installation instructions are enclosed with the child safety seat.
WARNING
The locking eyes have just been deve loped for child safety seats which use
the “ISOFIX” system. You should therefore never attach other child safety seats,
seat belts or objects to the locking eyes - hazard!
Ask an authorised Škoda Service Part ner whether a child seat which you
bought for another vehicle is recommended for use in a Škoda before using an
“ISOFIX” system.
Certain child seats which use the “ISO FIX” system can be attached with
standard three-point seat belts. Please pay close attention to instructions from
the manufacturer of the child safety seat when installing and removing the seat.Note
Child seats which use the “ISOFIX” system are currently available for children
weighing from 9 up to 18 kg. This correspond s to an age range of from 9 months to 4
years.
The child seats can also be fitted with the “Top Tether” system page 109.
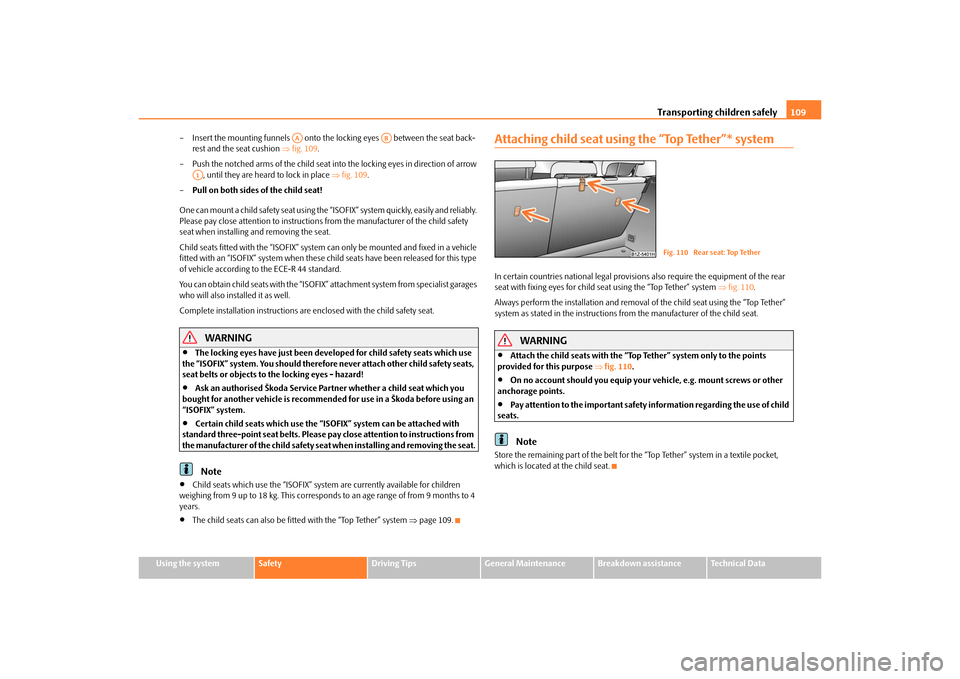
Attaching child seat using the “Top Tether”* systemIn certain countries national legal provisions also require the equipment of the rear
seat with fixing eyes for child seat using the “Top Tether” system fig. 110 .
Always perform the installation and removal of the child seat using the “Top Tether”
system as stated in the instructions from the manufacturer of the child seat.
WARNING
Attach the child seats with the “Top Tether” system only to the points
provided for this purpose fig. 110 .
On no account should you equip your vehicle, e.g. mount screws or other
anchorage points.
Pay attention to the important safety information regarding the use of child
seats.Note
Store the remaining part of the belt for the “Top Tether” system in a textile pocket,
which is located at the child seat.
AA
AB
A1
Fig. 110 Rear seat: Top Tether
s2bs.2.book Page 109 Monday, September 27, 2010 9:53 AM
Page 112 of 199
Intelligent Technology111
Using the system
Safety
Driving Tips
General Maintenance
Breakdown assistance
Technical Data
Driving TipsIntelligent TechnologyElectronic stability programme (ESP)*GeneralThe ESP aids you in maintaining control of your vehicle in situations in which the
vehicle is driving at its dynamic limits, such as entering a curve fast. The risk of skidding
is reduced and your vehicle thus offers greater driving stability depending on the
conditions of the road surface. The system operates at all speeds.
The following systems are integrated into the electronic stability programme:
Electronic Differential Lock (EDL),
Traction control system (TCS),
active driver-steering recommendation (DSR),
Antilock brake system (ABS),
Brake Assist,
Uphill-Start off-Assist.
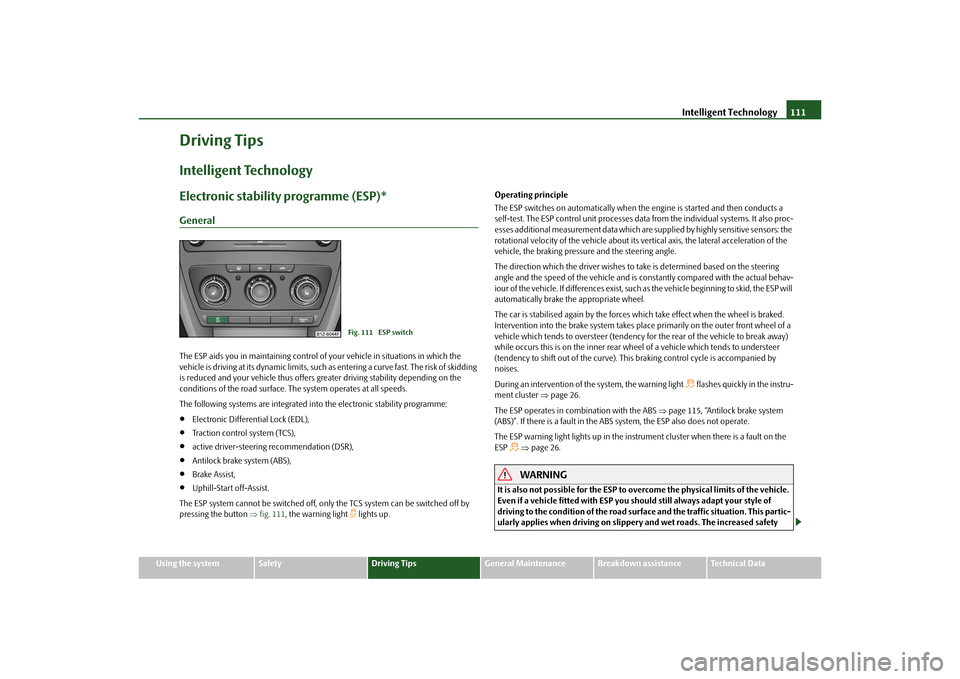
The ESP system cannot be switched off, only the TCS system can be switched off by
pressing the button fig. 111 , the warning light
lights up. Operating principle
The ESP switches on automatically when the engine is started and then conducts a
self-test. The ESP control unit processes data from the individual systems. It also proc-
esses additional measurement data which are supplied by highly sensitive sensors: the
rotational velocity of the vehicle about its ve
rtical axis, the lateral acceleration of the
vehicle, the braking pressure and the steering angle.
The direction which the driver wishes to take is determined based on the steering
angle and the speed of the vehicle and is co nstantly compared with the actual behav-
iour of the vehicle. If differences exist, such as the vehi cle beginning to skid, the ESP will
automatically brake the appropriate wheel.
The car is stabilised again by the forces wh ich take effect when the wheel is braked.
Intervention into the brake system takes place primarily on the outer front wheel of a
vehicle which tends to oversteer (tendency for the rear of the vehicle to break away)
while occurs this is on the inner rear wh eel of a vehicle which tends to understeer
(tendency to shift out of the curve). This braking control cycle is accompanied by
noises.
During an intervention of the system, the warning light
flashes quickly in the instru-
ment cluster page 26.
The ESP operates in combination with the ABS page 115, “Antilock brake system
(ABS)”. If there is a fault in the ABS system, the ESP also does not operate.
The ESP warning light lights up in the instrument cluster when there is a fault on the
ESP
page 26.WARNING
It is also not possible for the ESP to overcome the physical limits of the vehicle.
Even if a vehicle fitted with ESP you should still always adapt your style of
driving to the condition of the road surfac e and the traffic situation. This partic-
ularly applies when driving on slippery and wet roads. The increased safety
Fig. 111 ESP switch
s2bs.2.book Page 111 Monday, September 27, 2010 9:53 AM
Page 113 of 199
Intelligent Technology
112
offered must not tempt you to take greater risks than otherwise - risk of an acci-
dent!
Note
All four wheels must be fitted with the same tyres in order to achieve problem-free
operation of the ESP. Differing rolling circum ferences of the tyres can lead to an unde-
sirable reduction in the engine output.
Changes to vehicle (e.g. on engine, on th e brakes, on chassis or another combina-
tion of tyres and wheels) can influence the function of the ESP page 157, “Accesso-
ries, changing and replacing parts”.
Electronic Differential Lock (EDL)*
The electronic differential lock prev ents an individual wheel from slip-
ping.Models fitted with ESP ar e equipped with electronic differential lock (EDL).
General
The EDL makes it much easier, and sometimes at all possible, to start off, accelerate
and climb a steep hill when the conditions of the road surface are unfavourable.
Operating principle
The EDL is activated automaticall y, that is without any action on the part of the driver.
It monitors the speeds of the driven wheels with the aid of the ABS sensors. Should
only one drive wheel begin spinning on a slippery surface there will be an appreciable
difference in the speed of the driven wheels. The EDL function brakes the slipping
wheel and the differential transmits a greate r driving force to the other driven wheel.
This control process is also accompanied by noises.
Overheating of the brakes
The EDL switches off automatica lly if unusually severe stresses exist in order to avoid
excessive heat generation in the disc brake on the wheel which is being braked. The
vehicle can continue to be driven and has the same characteristics as a vehicle not
fitted with EDL. The EDL switches on again automatically
as soon as the brake has cooled down.
WARNING
Carefully depress the accelerator when accelerating on uniformly slippery
road surfaces, such as ice and snow. Th e driven wheels might still spin despite
the EDL and affect the stability of the vehicle - risk of an accident!
You should always adapt your style of driving to the condition of road
surface and to the traffic situation even when your vehicle is fitted with EDL.
The increased safety offered must not tempt you to take greater risks than
otherwise - risk of an accident!Note
If the ABS or ESP warning light comes on, this may also indicate a fault in the EDL.
Please have the vehicle inspected as soon as possible by a specialist garage.
Changes to vehicle (e.g. on engine, on the brakes, on chassis or another combina-
tion of tyres and wheels) can influence the function of the EDL page 157, “Accesso-
ries, changing and replacing parts”.
Traction control system (TCS)
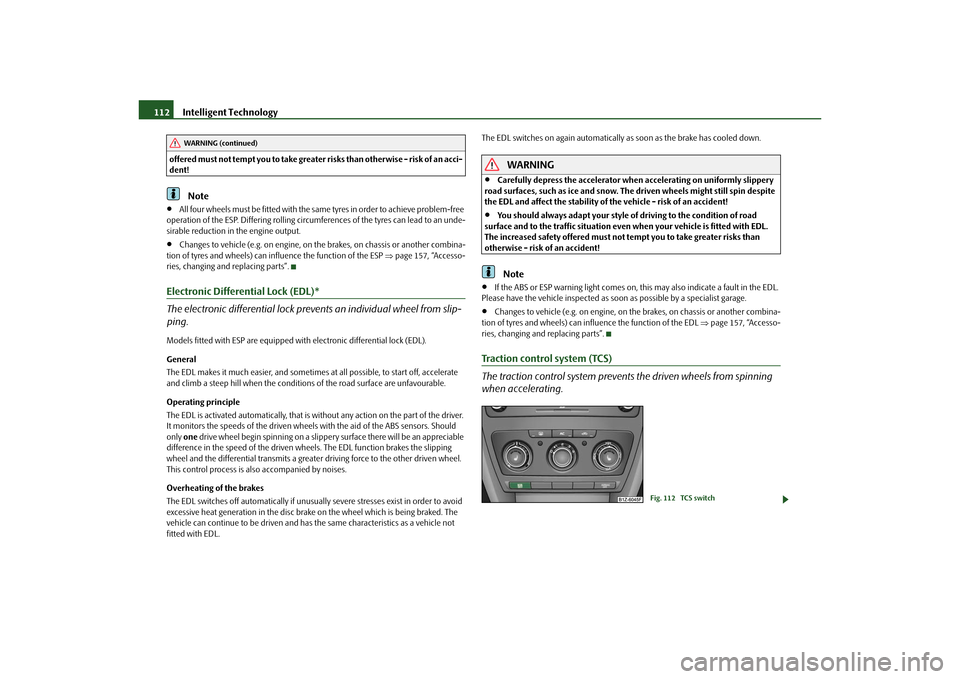
The traction control system prevents the driven wheels from spinning
when accelerating.
WARNING (continued)
Fig. 112 TCS switch
s2bs.2.book Page 112 Monday, September 27, 2010 9:53 AM