start stop button SKODA RAPID 2013 1.G Owner's Manual
[x] Cancel search | Manufacturer: SKODA, Model Year: 2013, Model line: RAPID, Model: SKODA RAPID 2013 1.GPages: 226, PDF Size: 15.16 MB
Page 12 of 226
Using the system
Cockpit
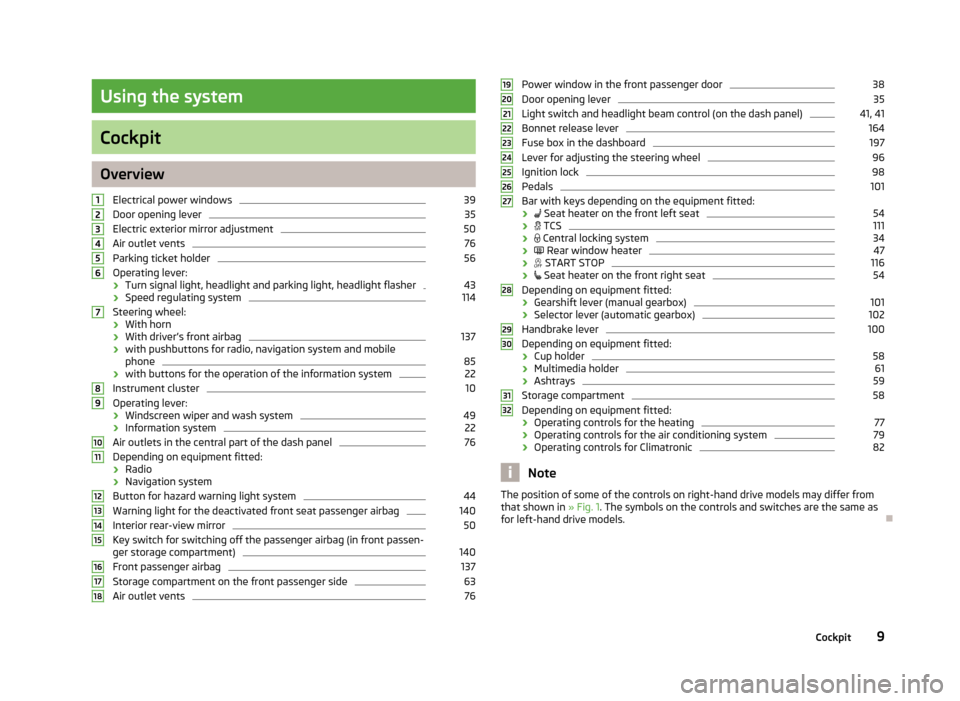
OverviewElectrical power windows
39
Door opening lever
35
Electric exterior mirror adjustment
50
Air outlet vents
76
Parking ticket holder
56
Operating lever:
› Turn signal light, headlight and parking light, headlight flasher
43
›
Speed regulating system
114
Steering wheel:
› With horn
› With driver’s front airbag
137
›with pushbuttons for radio, navigation system and mobile
phone
85
› with buttons for the operation of the information system
22
Instrument cluster
10
Operating lever:
› Windscreen wiper and wash system
49
›
Information system
22
Air outlets in the central part of the dash panel
76
Depending on equipment fitted:
› Radio
› Navigation system
Button for hazard warning light system
44
Warning light for the deactivated front seat passenger airbag
140
Interior rear-view mirror
50
Key switch for switching off the passenger airbag (in front passen-
ger storage compartment)
140
Front passenger airbag
137
Storage compartment on the front passenger side
63
Air outlet vents
76123456789101112131415161718Power window in the front passenger door38Door opening lever35
Light switch and headlight beam control (on the dash panel)
41, 41
Bonnet release lever
164
Fuse box in the dashboard
197
Lever for adjusting the steering wheel
96
Ignition lock
98
Pedals
101
Bar with keys depending on the equipment fitted:
›
Seat heater on the front left seat
54
›
TCS
111
›
Central locking system
34
›
Rear window heater
47
›
START STOP
116
›
Seat heater on the front right seat
54
Depending on equipment fitted:
› Gearshift lever (manual gearbox)
101
›Selector lever (automatic gearbox)
102
Handbrake lever
100
Depending on equipment fitted:
› Cup holder
58
›
Multimedia holder
61
›Ashtrays
59
Storage compartment
58
Depending on equipment fitted:
› Operating controls for the heating
77
›
Operating controls for the air conditioning system
79
›Operating controls for Climatronic
82
Note
The position of some of the controls on right-hand drive models may differ from
that shown in » Fig. 1. The symbols on the controls and switches are the same as
for left-hand drive models.19202122232425262728293031329Cockpit
Page 37 of 226
Switch-off display
The indicator light in the driver door flashes for about 2 seconds fast, goes out
and starts to flash at longer intervals after about 30 seconds.WARNINGIf the car is locked and the safe securing system activated, no people must re- main in the car as it will then not be possible to either unlock a door or open a
window from the inside. The locked doors make it more difficult for rescuers
to get into the vehicle in an emergency – risk to life!
Note
This function only applies to certain countries.
Individual settings
First read and observe the introductory information and safety warn-
ings
on page 31.
Opening a single door
This function makes it possible to only unlock the driver's door. The other doors
remain locked and are only unlocked when the command is repeated.
Automatic locking/unlocking
All doors are locked from a speed of around 15 km/h. The button in the handle of
the boot lid is deactivated.
If the ignition key is withdrawn, the car is then automatically unlocked again. In addition, it is possible for the driver or front passenger to unlock the car by press- ing the central locking button
.
The vehicle doors can be unlocked and opened at any time by pulling once on the door opening lever.
Note
Individual settings can be carried out in a specialist workshop.
Locking/unlocking the vehicle from the insideFig. 14
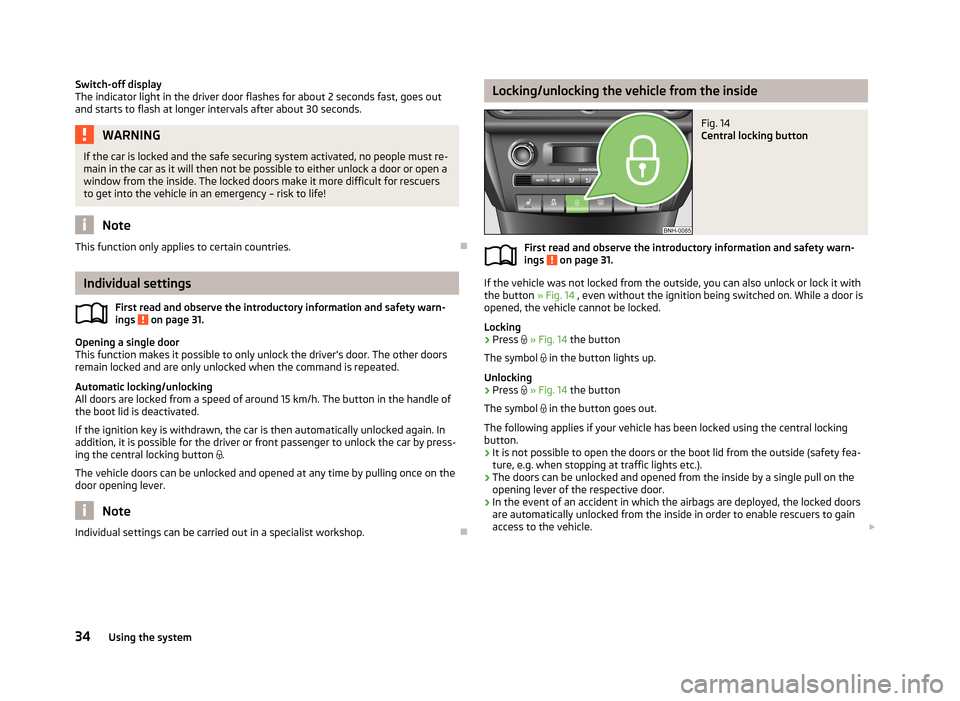
Central locking button
First read and observe the introductory information and safety warn-ings on page 31.
If the vehicle was not locked from the outside, you can also unlock or lock it with
the button » Fig. 14 , even without the ignition being switched on. While a door is
opened, the vehicle cannot be locked.
Locking
›
Press
» Fig. 14 the button
The symbol
in the button lights up.
Unlocking
›
Press
» Fig. 14 the button
The symbol
in the button goes out.
The following applies if your vehicle has been locked using the central locking button.
› It is not possible to open the doors or the boot lid from the outside (safety fea-
ture, e.g. when stopping at traffic lights etc.).
› The doors can be unlocked and opened from the inside by a single pull on the
opening lever of the respective door.
› In the event of an accident in which the airbags are deployed, the locked doors
are automatically unlocked from the inside in order to enable rescuers to gain access to the vehicle.
34Using the system
Page 40 of 226
Switching off›Switch off the ignition.›
Open the driver door.
›
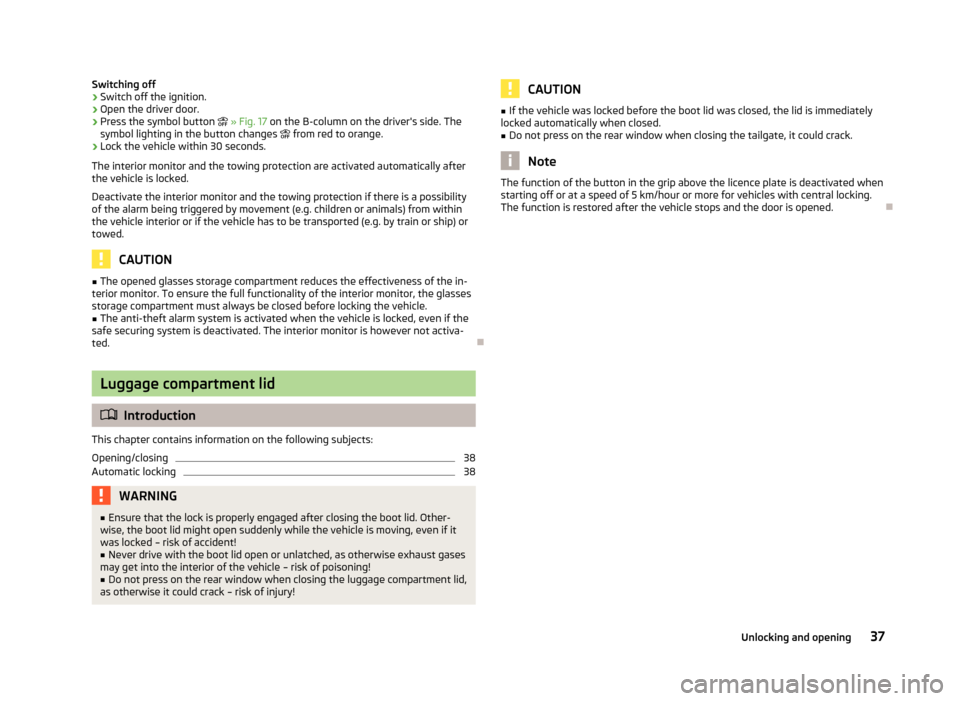
Press the symbol button » Fig. 17 on the B-column on the driver's side. The
symbol lighting in the button changes from red to orange.
›
Lock the vehicle within 30 seconds.
The interior monitor and the towing protection are activated automatically after
the vehicle is locked.
Deactivate the interior monitor and the towing protection if there is a possibility
of the alarm being triggered by movement (e.g. children or animals) from within
the vehicle interior or if the vehicle has to be transported (e.g. by train or ship) or
towed.
CAUTION
■ The opened glasses storage compartment reduces the effectiveness of the in-
terior monitor. To ensure the full functionality of the interior monitor, the glasses storage compartment must always be closed before locking the vehicle.■
The anti-theft alarm system is activated when the vehicle is locked, even if the
safe securing system is deactivated. The interior monitor is however not activa-
ted.
Luggage compartment lid
Introduction
This chapter contains information on the following subjects:
Opening/closing
38
Automatic locking
38WARNING■ Ensure that the lock is properly engaged after closing the boot lid. Other-
wise, the boot lid might open suddenly while the vehicle is moving, even if it was locked – risk of accident!■
Never drive with the boot lid open or unlatched, as otherwise exhaust gases
may get into the interior of the vehicle – risk of poisoning!
■
Do not press on the rear window when closing the luggage compartment lid,
as otherwise it could crack – risk of injury!
CAUTION■ If the vehicle was locked before the boot lid was closed, the lid is immediately
locked automatically when closed.■
Do not press on the rear window when closing the tailgate, it could crack.
Note
The function of the button in the grip above the licence plate is deactivated when
starting off or at a speed of 5 km/hour or more for vehicles with central locking.
The function is restored after the vehicle stops and the door is opened.
37Unlocking and opening
Page 84 of 226
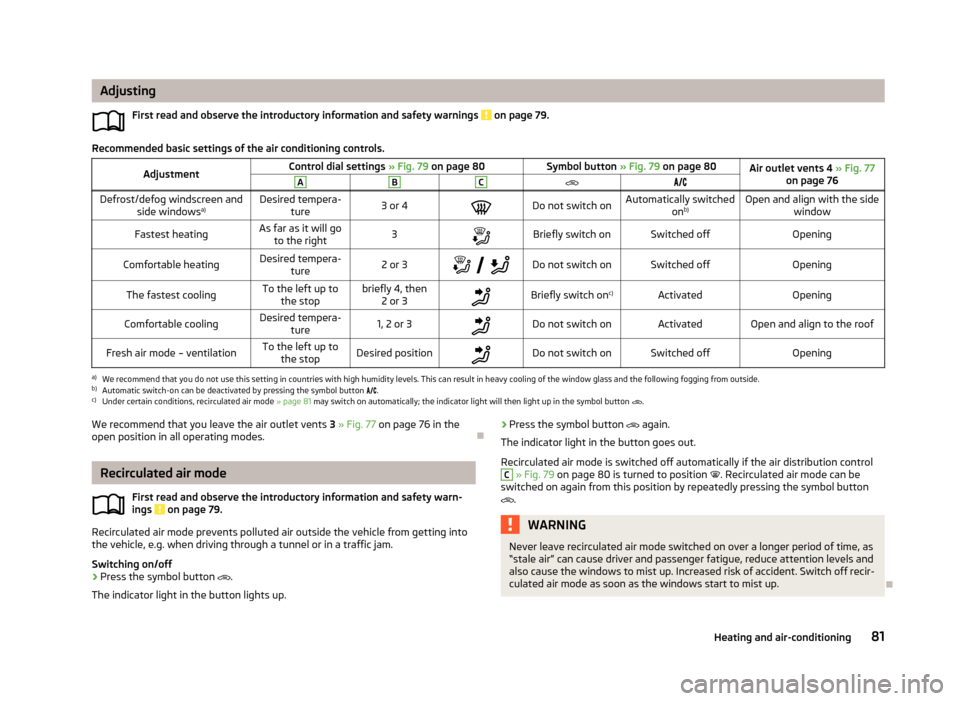
AdjustingFirst read and observe the introductory information and safety warnings
on page 79.
Recommended basic settings of the air conditioning controls.
AdjustmentControl dial settings » Fig. 79 on page 80Symbol button » Fig. 79 on page 80Air outlet vents 4 » Fig. 77
on page 76ABCDefrost/defog windscreen and side windows a)Desired tempera-
ture3 or 4Do not switch onAutomatically switched onb)Open and align with the side
windowFastest heatingAs far as it will goto the right3Briefly switch onSwitched offOpeningComfortable heatingDesired tempera-
ture2 or 3
Do not switch onSwitched offOpeningThe fastest coolingTo the left up to
the stopbriefly 4, then 2 or 3Briefly switch on c)ActivatedOpeningComfortable coolingDesired tempera-
ture1, 2 or 3Do not switch onActivatedOpen and align to the roofFresh air mode – ventilationTo the left up tothe stopDesired positionDo not switch onSwitched offOpeninga)
We recommend that you do not use this setting in countries with high humidity levels. This can result in heavy cooling of the window glass and the following fogging from outside.
b)
Automatic switch-on can be deactivated by pressing the symbol button .
c)
Under certain conditions, recirculated air mode
» page 81 may switch on automatically; the indicator light will then light up in the symbol button
.
We recommend that you leave the air outlet vents
3 » Fig. 77 on page 76 in the
open position in all operating modes.
Recirculated air mode
First read and observe the introductory information and safety warn-ings
on page 79.
Recirculated air mode prevents polluted air outside the vehicle from getting into
the vehicle, e.g. when driving through a tunnel or in a traffic jam.
Switching on/off
›
Press the symbol button
.
The indicator light in the button lights up.
› Press the symbol button
again.
The indicator light in the button goes out.
Recirculated air mode is switched off automatically if the air distribution controlC
» Fig. 79 on page 80 is turned to position . Recirculated air mode can be
switched on again from this position by repeatedly pressing the symbol button
.
WARNINGNever leave recirculated air mode switched on over a longer period of time, as
“stale air” can cause driver and passenger fatigue, reduce attention levels and also cause the windows to mist up. Increased risk of accident. Switch off recir-
culated air mode as soon as the windows start to mist up.
81Heating and air-conditioning
Page 97 of 226
Button/adjust-ment
wheel » Fig. 85ActionRadioAudio sourcesNavigation
4Press and hold buttonNo functionRewindNo function5
Turn upwardsSwitch to the previous station and at
the same time
display list of saved/available stationsSkip to next trackShow the option to stop navigation or display the list of recent destinations
5
Turn downwardsSwitch to the next station and at the same time
display list of saved/available stationsSwitch to start of track a)
6Press brieflyCall up the main menua)
To go to the previous track, press the adjustment wheel twice or rotate it by two positions.
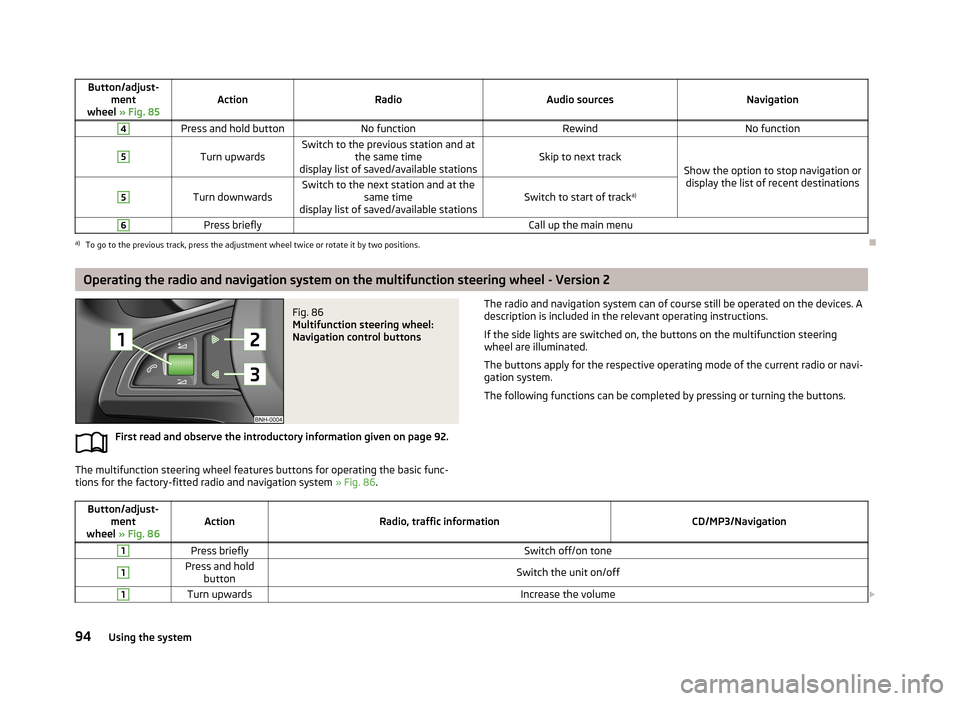
Operating the radio and navigation system on the multifunction steering wheel - Version 2
Fig. 86
Multifunction steering wheel:
Navigation control buttons
First read and observe the introductory information given on page 92.
The multifunction steering wheel features buttons for operating the basic func-
tions for the factory-fitted radio and navigation system » Fig. 86.
The radio and navigation system can of course still be operated on the devices. A
description is included in the relevant operating instructions.
If the side lights are switched on, the buttons on the multifunction steeringwheel are illuminated.
The buttons apply for the respective operating mode of the current radio or navi-
gation system.
The following functions can be completed by pressing or turning the buttons.Button/adjust- ment
wheel » Fig. 86ActionRadio, traffic informationCD/MP3/Navigation
1Press brieflySwitch off/on tone1Press and hold
buttonSwitch the unit on/off1Turn upwardsIncrease the volume 94Using the system
Page 105 of 226
WARNING■Do not depress the accelerator if changing the forward driving mode – risk
of accident!■
Never move the selector lever to mode R or P when driving – risk of acci-
dent!
■
When the vehicle is stationary and the engine is running, the vehicle must
be held in mode D, S or R with the brake pedal. Even when the engine is
idling, the power transmission is never completely interrupted – the vehicle
crawls.
CAUTION
■ If the selector lever is moved to mode N while driving, the accelerator pedal
must be released and you will need to wait until the engine has reached its idling speed before moving the selector lever to a forward driving mode again.■
At temperatures below -10 °C the engine can only be started in the selector lev-
er position P.
■
When stopping on a slope, never try to hold the vehicle using the accelerator
pedal – this may lead to gear damage.
Note
After the ignition is switched off, the ignition key can only be withdrawn if the se-
lector lever is in the position P.
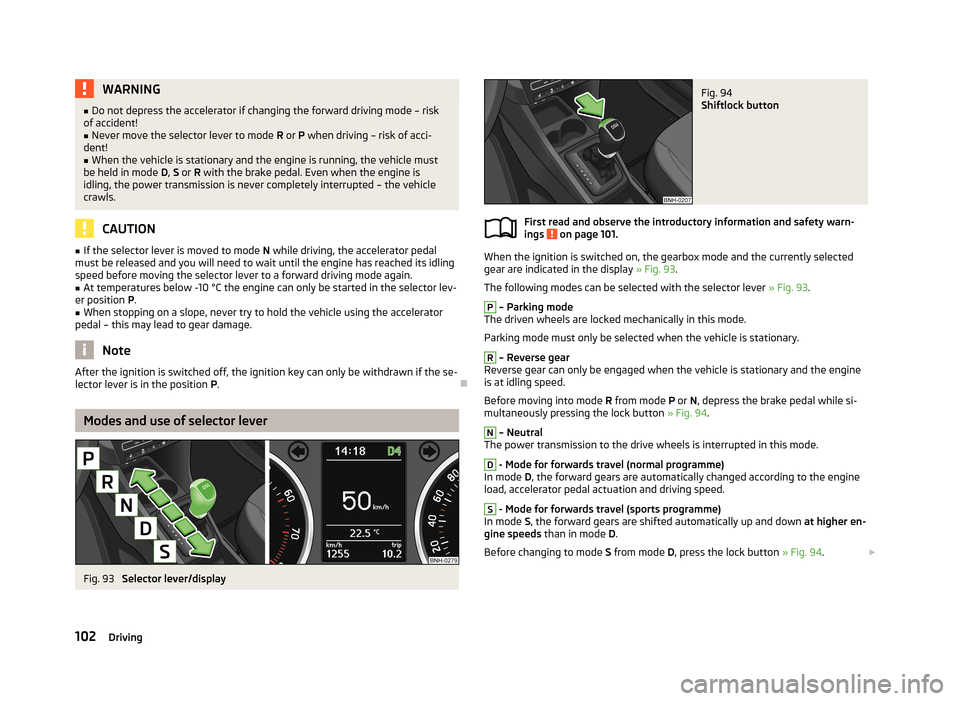
Modes and use of selector lever
Fig. 93
Selector lever/display
Fig. 94
Shiftlock button
First read and observe the introductory information and safety warn-
ings on page 101.
When the ignition is switched on, the gearbox mode and the currently selected
gear are indicated in the display » Fig. 93.
The following modes can be selected with the selector lever » Fig. 93.
P
– Parking mode
The driven wheels are locked mechanically in this mode.
Parking mode must only be selected when the vehicle is stationary.
R
– Reverse gear
Reverse gear can only be engaged when the vehicle is stationary and the engine
is at idling speed.
Before moving into mode R from mode P or N, depress the brake pedal while si-
multaneously pressing the lock button » Fig. 94.
N
– Neutral
The power transmission to the drive wheels is interrupted in this mode.
D
- Mode for forwards travel (normal programme)
In mode D, the forward gears are automatically changed according to the engine
load, accelerator pedal actuation and driving speed.
S
- Mode for forwards travel (sports programme)
In mode S, the forward gears are shifted automatically up and down at higher en-
gine speeds than in mode D.
Before changing to mode S from mode D, press the lock button » Fig. 94.
102Driving
Page 106 of 226
Releasing selector lever from mode P or N (selector lever lock)The selector lever is locked in modes P and N to prevent the forwards travel
mode from being selected accidentally and setting the vehicle in motion. The warning light illuminates in the instrument cluster » page 21.
The selector lever is released by depressing the brake pedal while while simulta-
neously pressing the lock button » Fig. 94.
The selector lever is not locked when quickly moving via position N (e.g. from R to
D ). This, for example, helps to rock out a vehicle that is stuck, e.g. in a bank of
snow. The selector lever lock will engage if the lever is in position N for more than
approx. 2 seconds without the brake pedal being depressed.
The selector lever is locked only when the vehicle is stationary and at speeds up to 5 km/h.
Note
If you want to move the selector lever from mode P to mode D or vice versa, move
the selector lever quickly. This prevents modes R or N from being accidentally se-
lected.
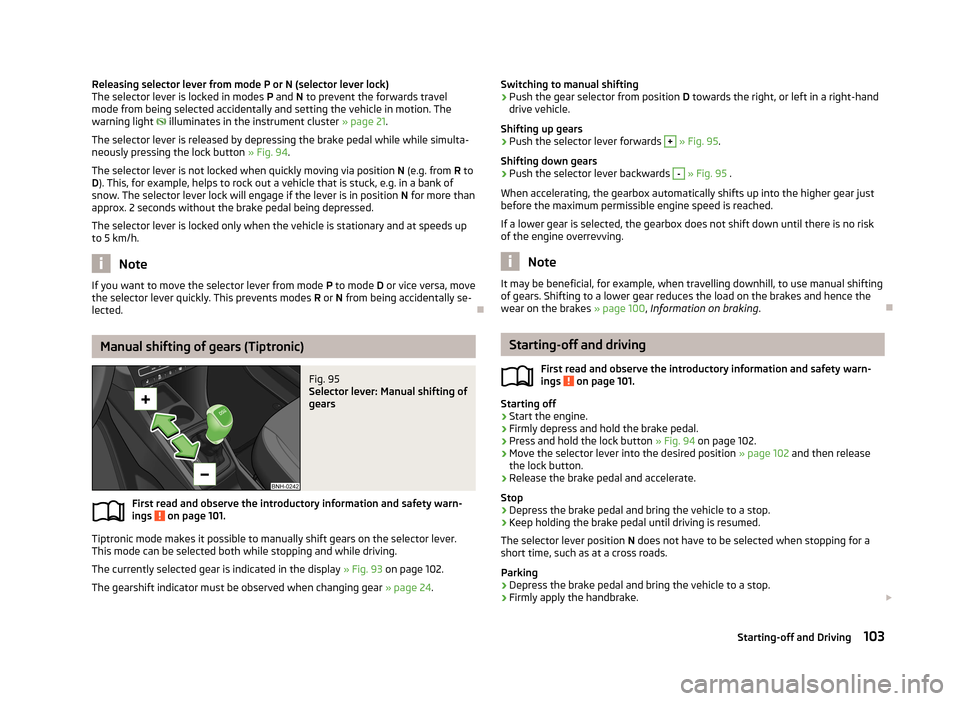
Manual shifting of gears (Tiptronic)
Fig. 95
Selector lever: Manual shifting of
gears
First read and observe the introductory information and safety warn-
ings on page 101.
Tiptronic mode makes it possible to manually shift gears on the selector lever.
This mode can be selected both while stopping and while driving.
The currently selected gear is indicated in the display » Fig. 93 on page 102.
The gearshift indicator must be observed when changing gear » page 24.
Switching to manual shifting›Push the gear selector from position D towards the right, or left in a right-hand
drive vehicle.
Shifting up gears›
Push the selector lever forwards
+
» Fig. 95 .
Shifting down gears
›
Push the selector lever backwards
-
» Fig. 95 .
When accelerating, the gearbox automatically shifts up into the higher gear just before the maximum permissible engine speed is reached.
If a lower gear is selected, the gearbox does not shift down until there is no riskof the engine overrevving.
Note
It may be beneficial, for example, when travelling downhill, to use manual shifting
of gears. Shifting to a lower gear reduces the load on the brakes and hence the
wear on the brakes » page 100, Information on braking .
Starting-off and driving
First read and observe the introductory information and safety warn-
ings
on page 101.
Starting off
›
Start the engine.
›
Firmly depress and hold the brake pedal.
›
Press and hold the lock button » Fig. 94 on page 102.
›
Move the selector lever into the desired position » page 102 and then release
the lock button.
›
Release the brake pedal and accelerate.
Stop
›
Depress the brake pedal and bring the vehicle to a stop.
›
Keep holding the brake pedal until driving is resumed.
The selector lever position N does not have to be selected when stopping for a
short time, such as at a cross roads.
Parking
›
Depress the brake pedal and bring the vehicle to a stop.
›
Firmly apply the handbrake.
103Starting-off and Driving
Page 107 of 226
›Press and hold the lock button
» Fig. 94 on page 102.›Move the selector lever into position P and then release the locking button.
Kickdown
The kickdown function allows you to achieve the maximum acceleration of your
vehicle while driving.
When the accelerator pedal is fully depressed, the kickdown function is activated
in any forward driving mode.
The gearbox shifts down one or more gears depending on the vehicle speed and engine speed, and the vehicle accelerates.
The gearbox does not shift up into the highest gear until the engine has reached
its maximum revolutions for this gear range.WARNINGRapid acceleration, particularly on slippery roads, can lead to loss of vehicle
control – risk of accident!
Malfunction
First read and observe the introductory information and safety warn-
ings
on page 101.
Emergency programme
The transmission switches to the emergency programme, if there is a fault in the
automatic gearbox system.
Indications of an activated emergency programme include the following.
› Only certain gears are selected.
› The reverse gear
R cannot be used.
› Shifting gears in Tiptronic mode is not possible.
Gearbox overheating
The gearbox may become too hot due to frequent repeated starting or stop-and-
go traffic, for example. Overheating is indicated by the warning light » page 13,
Clutches of the automatic gearbox DSG are too hot .
Defective selector lever lock
If the selector lever lock is defective or its power supply is interrupted (e.g. dis-
charged vehicle battery, faulty fuse), the selector lever can no longer be moved
out of position P in the normal manner, and the vehicle can no longer be driven.
The selector lever must be emergency released » page 195.
NoteIf the gearbox has switched to the emergency programme, visit a specialist ga-
rage.
Running in
Introduction
This chapter contains information on the following subjects:
New engine
104
New tyres
105
New brake pads
105
New engine
First read and observe the introductory information given on page 104.
The engine has to be run in during the first 1 500 kilometres.
Up to 1 000 kilometres
›
Do not drive faster than 3/4 of the maximum speed of the gear in use, i.e. 3/4 of
the maximum permissible engine speed.
›
No full throttle.
›
Avoid high engine speeds.
›
Do not tow a trailer.
From 1 000 up to 1 500 kilometres
Gradually increase the power output of the engine up to the full speed of the
gear engaged, i.e. up to the maximum permissible engine speed.
The red scale of the rev counter indicates the range in which the system beginsto limit the engine speed.
During the first operating hours the engine has higher internal friction than later until all of the moving parts have harmonized. The driving style which you adopt
during the first approx.1 500 kilometres plays a decisive part in the success of running in your car.
Never drive at unnecessarily high engine speeds even after the running-in period.
104Driving
Page 120 of 226
The automatic start procedure takes place again. The warning symbol goes
out.
Further information on automatic transmission Engine shut down takes place when the selector lever is in positions P, D , S and N
and in Tiptronic mode.
When the selector lever is in position P, the engine remains shut down even after
you release the brake pedal. Start the engine by pressing the gas pedal or by moving the selector lever into a different mode and releasing the brake pedal.
If the selector lever is moved into position R during the STOP phase , the engine
will re-start.
No automatic engine shutdown takes place when the vehicle is moving at low speed (e.g. during a traffic jam or when tuning) and remains stationary after
pressing the brake pedal lightly. Automatic engine shutdown takes place if you
press the brake pedal down with more force.
Operating conditions of the system
First read and observe the introductory information and safety warn-ings
on page 116.
The START-STOP system is very complex. Some of the procedures are hard to check without servicing.
No engine shut down is carried out
Before each STOP phase, the system checks whether certain conditions have
been met. No engine shut down takes place in the following situations.
› The engine has not reached the minimum temperature for the START STOP
mode.
› The temperature inside the vehicle has not reached the desired temperature
set in the air-conditioning system/heating.
› The external temperature is very low/high.
› The intensive windscreen heater (Climatronic) or windscreen heater/ventilation
is switched on with the maximum air temperature setting (manual air condition-
ing system).
› The parking aid is activated.
› The charge state of the vehicle battery is too low.
› The stationary vehicle is on a steep slope or a steep downhill section.
› The idling speed is too high.
› The steering angle is too large (manoeuvring).
› The selector lever position
R is selected (e.g. when parking).
The warning symbol appears in the instrument cluster display.
The automatic start procedure takes place again
During the STOP phase, the engine fires up without any active driver intervention, e.g. in the following situations.
› The vehicle begins to roll, e.g. on a slope.
› The difference between the temperature setting of the air-conditioning sys-
tem/heating and the temperature of the interior is too large.
› The intensive windscreen heater (Climatronic) or windscreen heater/ventilation
is switched on with the maximum air temperature setting (manual air condition-
ing system).
› The brake pedal was pressed several times (the pressure in the braking system
is too low).
› The charge state of the vehicle battery is too low.
› The current consumption is too high.
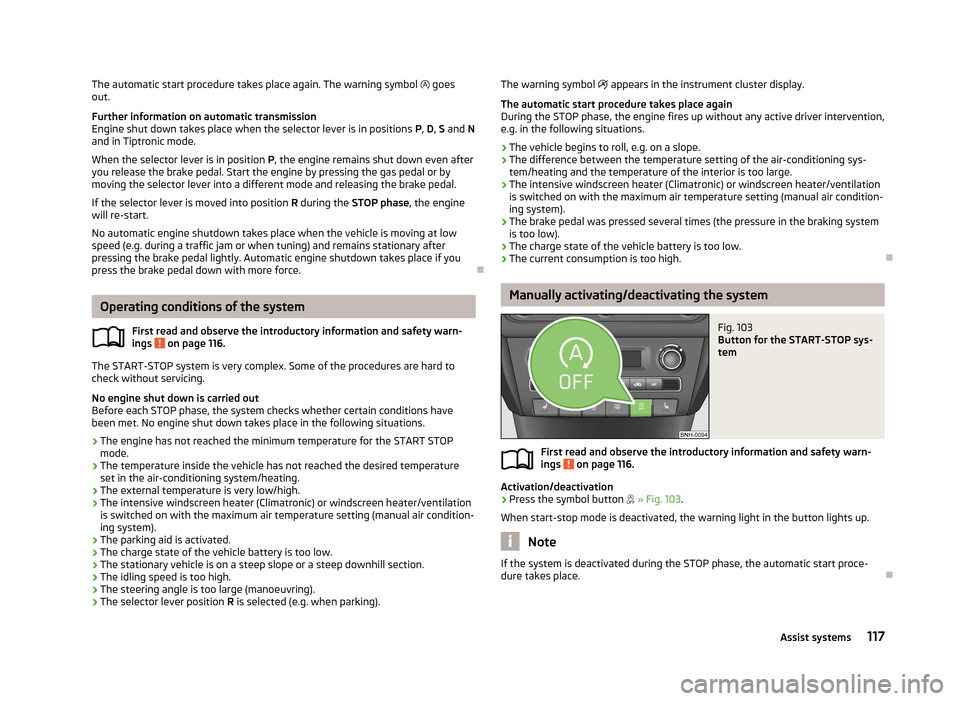
Manually activating/deactivating the system
Fig. 103
Button for the START-STOP sys-
tem
First read and observe the introductory information and safety warn-
ings on page 116.
Activation/deactivation
›
Press the symbol button
» Fig. 103 .
When start-stop mode is deactivated, the warning light in the button lights up.
Note
If the system is deactivated during the STOP phase, the automatic start proce-
dure takes place.
117Assist systems
Page 202 of 226
No.Power consumer39Air blower for heating40Not assigned41Heated front seats42Rear window heater43Horn44Windscreen wipers45Boot lid lock, central locking system46Alarm47Cigarette lighter, power socket in the luggage compartment48ABS49Turn signal lights, brake lights50DC-DC converter, radio51Electric windows (driver's window and rear left window)52Electric windows (front passenger's window and rear right)53Windscreen washer54START-STOP instrument cluster, steering wheel module, multi-function
steering wheel55Control unit for automatic gearbox56Headlight cleaning system57Low beam on the left58Low beam on the right
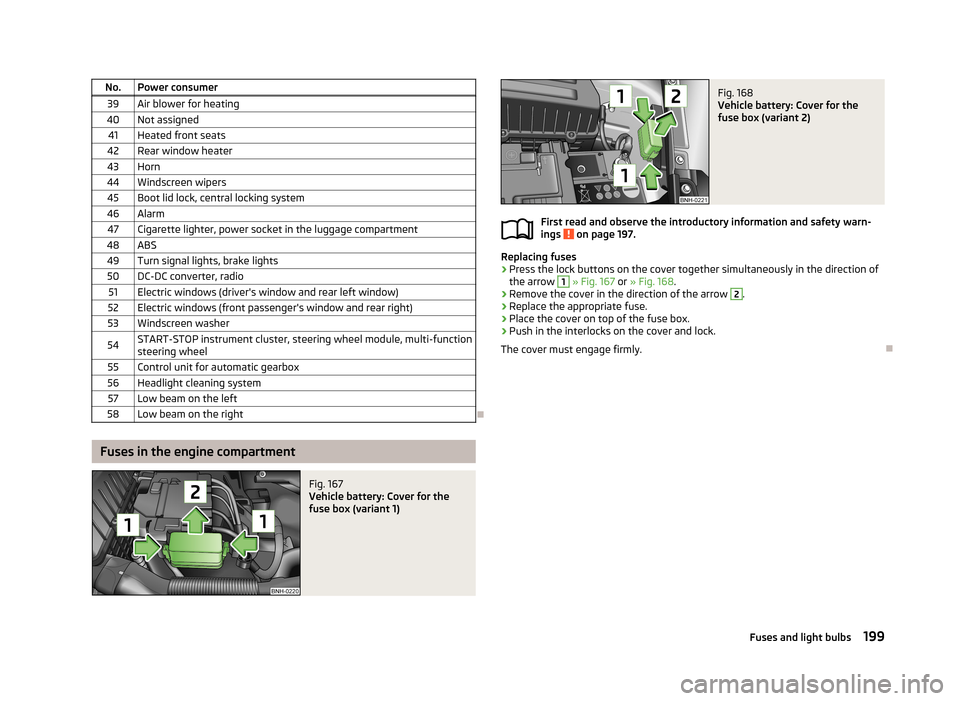
Fuses in the engine compartment
Fig. 167
Vehicle battery: Cover for the
fuse box (variant 1)
Fig. 168
Vehicle battery: Cover for the
fuse box (variant 2)
First read and observe the introductory information and safety warn-
ings on page 197.
Replacing fuses
›
Press the lock buttons on the cover together simultaneously in the direction of
the arrow
1
» Fig. 167 or » Fig. 168 .
›
Remove the cover in the direction of the arrow
2
.
›
Replace the appropriate fuse.
›
Place the cover on top of the fuse box.
›
Push in the interlocks on the cover and lock.
The cover must engage firmly.
199Fuses and light bulbs