ESP SKODA ROOMSTER 2010 1.G Owner's Guide
[x] Cancel search | Manufacturer: SKODA, Model Year: 2010, Model line: ROOMSTER, Model: SKODA ROOMSTER 2010 1.GPages: 231, PDF Size: 12.91 MB
Page 110 of 231
Passive Safety109
Using the system
Safety
Driving Tips
General Maintenance
Breakdown assistance
Praktik
Technical Data
SafetyPassive SafetyBasic informationDriving the safe way
Passive safety measures reduce the risk of injury in accident situations.In this section you will find important info rmation, tips and notes on the subject of
passive safety in your vehicle. We have combined everything here which you should
be familiar with, for example, regarding seat belts, airbags, child seats and safety of
children. It is therefore important, in partic ular, to comply with the notes and warnings
in this section for your own interest and in the interest of those travelling with you.
WARNING
This chapter contains important information on how to use the vehicle for
the driver and his occupants. You will find further information on safety, which
concerns you and those travelling with you, in the following chapters of this
Owner's Manual.
The complete on-board literature should always be in the vehicle. This
applies in particular, if you rent out or sell the vehicle.
Safety equipment
The safety equipment is part of the occupant protection and it can
reduce the risk of injuries in accident situations.“Do not put at risk” your safety and the safety of those travelling with you . In the event
of an accident, the safety equipment can redu ce the risk of injuries. The following list
contains part of the safety equipment in your vehicle:
three-point seat belts for all the seats;
belt force limiters for front seats;
belt tensioners for front seats;
seat belt height adjusters for front seats;
front airbags for the driver and the front passenger*;
side airbags*;
head airbags*;
anchoring points for child seat using the “ISOFIX” system;
anchoring points for child seat using the “Top Tether” system;
head restraints adjustable for height;
adjustable steering column.
The specified safety equipment works togeth er, in order to optimally protect you and
those travelling with you in accident situat ions. The safety equipment does not protect
you or the people travelling with you, if you or your occupants adopt an incorrect
seated position or the equipment is not correctly adjusted or used.
For this reason you will be provided with information on why this equipment is very
important, how it protects you and the occupants, what should be observed when
using the equipment and how you and the peop le travelling with you can make full use
of the existing safety equipment. This Owner's Manual contains important warning
notes, which you and those travelling with you should pay attention to in order to
reduce a risk of injury.
Safety concerns everybody!
Before setting off
The driver is always fully responsibl e for his occupants and for the oper-
ating safety of the vehicle.For your own safety and the safety of the pe ople travelling with you, please pay atten-
tion to the following points before setting off.
Ensure that the lighting and the turn signal system are functioning properly.
Inspect the tyre inflation pressure.
s16g.4.book Page 109 Wednesda y, February 10, 2010 3:53 PM
Page 111 of 231
Passive Safety
110
Ensure that all the windows offer a good visibility to the outside.
Safely attach the items of luggage page 62, “Loading the luggage compartment”.
Ensure that no objects can obstruct the pedal.
Adjust the mirror, the front seat and the head restraint to match your body size.
Point out to your occupants that the head restraints must be adjusted to match
their body size.
Protect the children in suitable child seats with correctly fastened seat belts
page 126, “Transporting children safely”.
Adopt the correct seated position. Also in form your occupants to adopt the correct
seated position.
Fasten the seat belt correctly. Also inform your occupants to properly fasten the
seat belts page 115, “How are seat belts correctly fastened?”.
What influences the driving safety?
The driving safety is primarily determined by the style of driving and the
personal behaviour of all the occupants.The driver is fully responsible for himself an d his occupants. If your driving safety is
effected, you place yourself and the oncomi ng traffic at risk. Please refer to the
following guidelines.
Do not get distracted from concentrating on the traffic situation, e.g. by your occu-
pants or mobile phone calls.
Never drive when your driving ability is impaired, e.g. through medication, alcohol,
drugs.
Keep to the traffic regulations and the permissible speed limit.
Adjust the driving speed at all times to the road condition as well as to the traffic
and weather conditions.
Take regular breaks on long journe ys - at the latest every two hours.
Correct seated positionCorrect seated position for the driver
Correct seated position for the driver is important for safe and relaxed
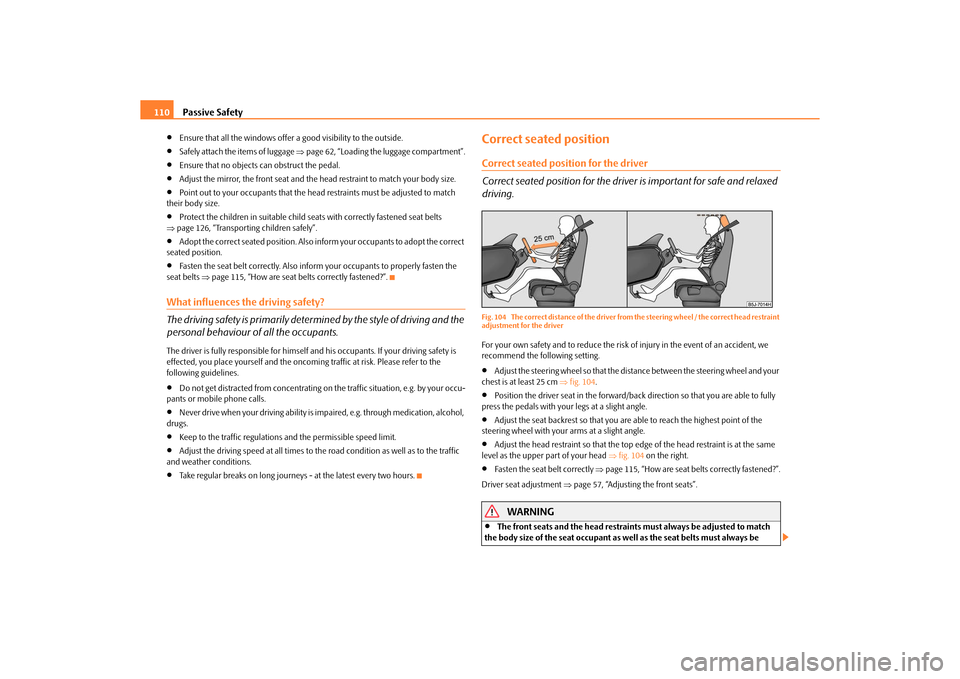
driving.Fig. 104 The correct distance of the driver from the steering wheel / the correct head restraint
adjustment for the driverFor your own safety and to reduce the risk of injury in the event of an accident, we
recommend the following setting.
Adjust the steering wheel so that the distance between the steering wheel and your
chest is at least 25 cm fig. 104 .
Position the driver seat in the forward/back direction so that you are able to fully
press the pedals with your legs at a slight angle.
Adjust the seat backrest so that you are able to reach the highest point of the
steering wheel with your arms at a slight angle.
Adjust the head restraint so that the top edge of the head restraint is at the same
level as the upper part of your head fig. 104 on the right.
Fasten the seat belt correctly page 115, “How are seat belts correctly fastened?”.
Driver seat adjustment page 57, “Adjusting the front seats”.
WARNING
The front seats and the head restraints must always be adjusted to match
the body size of the seat occupant as well as the seat belts must always be
s16g.4.book Page 110 Wednesda y, February 10, 2010 3:53 PM
Page 113 of 231
Passive Safety
112
Always keep your feet in the footwell when the car is being driven - never
put your feet out of the window or on the surfaces of the seats. You will be
exposed to increased risk of injury if it becomes necessary to apply the brake or
in the event of an accident. If the head airbag* is deployed and when adopting
an incorrect seated position, you are exposing yourself to an increased risk of
injury and in the event of an acci dent you may suffer fatal injuries!
If the occupants on the rear seats are not sitting upright, the risk of injury is
increased due to incorrect routing of the seat belt.
The seat backrests must not be angled too far back when driving otherwise
this will affect proper operation of the se at belts and of the airbag system - risk
of injury!
Examples of an incorrect seated position
An incorrect seated position can lead to severe injuries or death for the
occupants.Seat belts offer their optimum protection only if the webbing of the seat belts is prop-
erly routed. Incorrect seated positions considerably reduce the protective functions of
the seat belts and therefore increase the risk of injury due to an incorrect routing of the
seat belt. The driver is fully responsible for himself and his occupants, in particular for
the children. Do not permit an occupant to adopt an incorrect seated position when
the car is moving.
The following list contains the examples of seated positions which are dangerous for
the occupants. This list is not complete, howe ver we would like you to get interested in
this subject.
Therefore, while the car is moving never:
stand up in the vehicle;
stand up on the seats;
kneel on the seats;
tilt the seat backrest fully to the back;
lean against the dash panel;
lie on the rear seat bench;
only sit on the front area of the seat;
sit to the side;
lean out of the window;
put the feet out of the window;
put the feet on the dash panel;
put the feet on the seat upholstery;
transport somebody in the footwell;
have the seat belt not fastened when driving;
occupy the luggage compartment.
WARNING
If the occupant adopts an incorrect seated position, he is exposed to life-
threatening injuries, in case he is hit by a deployed airbag.
Before setting off, please adopt the correct seated position and do not
change this seated position while the car is moving. Also advise your occupants
to adopt the correct seated position and not to change this seated position
while the car is moving.
WARNING (continued)
s16g.4.book Page 112 Wednesda y, February 10, 2010 3:53 PM
Page 117 of 231
Seat belts
116
– Then pull firmly on the belt to ensure that the seat belt height adjuster has correctly
locked in place.
WARNING
Adjust the height of the belt in such a way that the shoulder part of the belt is
positioned approximately across the middle of your shoulder - on no account
across your neck.
Note
It is also possible to adapt the routing of the belt webbing on the front seats by
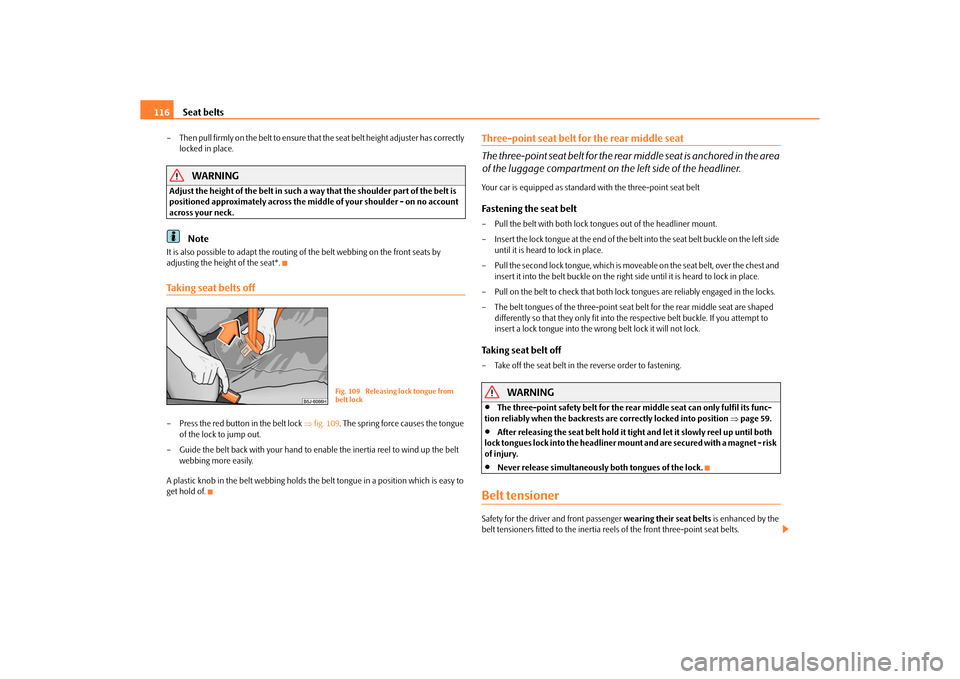
adjusting the height of the seat*.Taking seat belts off– Press the red button in the belt lock fig. 109 . The spring force causes the tongue
of the lock to jump out.
– Guide the belt back with your hand to en able the inertia reel to wind up the belt
webbing more easily.
A plastic knob in the belt webbing holds the be lt tongue in a position which is easy to
get hold of.
Three-point seat belt for the rear middle seat
The three-point seat belt for the rear middle seat is anchored in the area
of the luggage compartment on the left side of the headliner.Your car is equipped as standard with the three-point seat beltFastening the seat belt– Pull the belt with both lock to ngues out of the headliner mount.
– Insert the lock tongue at the end of the belt into the seat belt buckle on the left side
until it is heard to lock in place.
– Pull the second lock tongue, which is move able on the seat belt, over the chest and
insert it into the belt buckle on the right side until it is heard to lock in place.
– Pull on the belt to check that both lock tongues are reliably engaged in the locks.
– The belt tongues of the thre e-point seat belt for the rear middle seat are shaped
differently so that they only fit into the respective belt buckle. If you attempt to
insert a lock tongue into the wrong belt lock it will not lock.Taking seat belt off– Take off the seat belt in the reverse order to fastening.
WARNING
The three-point safety belt for the rear middle seat can only fulfil its func-
tion reliably when the backrests are correctly locked into position page 59.
After releasing the seat belt hold it tight and let it slowly reel up until both
lock tongues lock into the headliner mount and are secured with a magnet - risk
of injury.
Never release simultaneously both tongues of the lock.
Belt tensionerSafety for the driver and front passenger wearing their seat belts is enhanced by the
belt tensioners fitted to the inertia reels of the front three-point seat belts.
Fig. 109 Releasing lock tongue from
belt lock
s16g.4.book Page 116 Wednesda y, February 10, 2010 3:53 PM
Page 118 of 231
Seat belts117
Using the system
Safety
Driving Tips
General Maintenance
Breakdown assistance
Praktik
Technical Data
The fastened three-point seat belts are automatically tensioned in the event of a frontal
or side collision of a certain severity. The belts tensioners are also deployed if the seat
belts are not fastened.
Belt tensioners are not activated in the event of minor frontal collisions, side and rear-
end collisions, in the case of a rollover and also not in accidents in which no major
forces are produced from the front.
WARNING
Any work on the belt tightener system,
including removal and installation of
system components because of other repair work, must only be carried out by
a specialist garage.
The protective function of the system is only adequate for a single accident.
If the belt tensioners have been deployed, it is then necessary to replace the
entire system.
The Owner's Manual must also be handed over to the new owner if the
vehicle is sold.Note
Smoke is generated when the belt tensioners are deployed. This is not an indica-
tion of a fire in the vehicle.
It is essential to pay attent ion to relevant safety regulations if the vehicle or indi-
vidual parts of the system are scrapped. Specialist garages are familiar with these regu-
lations and will be able to provide you with detailed information in this respect.
When disposing of vehicle or parts of the system, it is important to comply with the
national legal requirements.
s16g.4.book Page 117 Wednesda y, February 10, 2010 3:53 PM
Page 125 of 231
Airbag system
124
Important safety information on the head airbag
Correct use of the airbag system cons iderably reduces the risk of injury!
WARNING
It is essential to always switch off page 124 the front passenger airbag
when attaching a child safety seat on th e front passenger seat where the child is
seated with its back facing in direction of travel (in some countries also when
the child is facing the direction of travel). If this is not done, there is a risk of the
child suffering severe or even fatal inju ries if the front passenger airbag is
deployed. In certain countries national legal provisions also require that the
side or head passenger airbags be deac tivated. When transporting a child on
the front passenger seat, pl ease comply with the appropriate national regula-
tions regarding the use of child safety seats.
There must not be any objects in the deployment area of the head airbags
which might prevent the airbag s from inflating properly.
Only hang light items of clothing on the clothes hooks to the vehicle. Never
leave any heavy or sharp-edged objects in the pockets of the items of clothing.
In addition, it is not permitted to use clothes hangers for hanging up items of
clothing.
There must not be any other persons (e .g. children) or animals between the
car occupant and the deployment area of the head airbag. In addition, none of
the occupants should lean their head out of the window when driving, or
extend their arms and hands out of the window.
The sun visors must not be swivelled to the side windows into the deploy-
ment area of the head airbags if any ob jects, such as ball-point pens etc. are
attached to them. This might result in injuries to the occupants if the head
airbag is deployed.
Installing impermissible accessories in the area of the head airbags may
considerably impair the protection offered by the head airbag in the event of it
being deployed. When the deployed head airbag is inflated, parts of the acces-
sories fitted may in certain circumstances be thrown into the interior of the car
and cause injuries to the occupants page 179.
Any work on the head airbag system including installing and removing
system components because of other repair work (e.g. removing headliner)
must only be carried out by a specialist garage.
Deactivating airbagsDeactivating airbags
If any airbags have been deactivated, switch them on again as soon as
possible so that they are able to ag ain provide their proper protection.There is the technical means installed within your vehicle to switch off the front, side*
or head* airbag (take out of commission).
This is why you should have the deactivation of the airbags carried out by a specialist
garage.
On vehicles equipped with the switch for deactivation of the airbags, you can deacti-
vate the front passenger airbag by means of this switch page 125.
Deactivation of airbags is envisaged only for particular instances, such as if:
Yo u m u s t i n exceptional cases use a child seat on the front passenger seat where
the child is seated with its back to the direction of travel (in some countries this must
be in the direction of travel due to other legal regulations applying) page 126,
“Important safety information regarding the use of child safety seats”;
you are not able to maintain the distance of at least 25 cm between middle of
steering wheel and chest, despite the driver seat being correctly adjusted;
special attachments are required in the area of the steering wheel because of a
physical disability;
you have installed other seats (e.g. orthopaedic seats without side airbags).
Monitoring the airbag system
The functionality of the airbag system is al so monitored electronically when one airbag
has been switched off.
If the airbag was switched off using diagnostic equipment:
The airbag indicator light lights up for 3 seconds each time the ignition is switched
on and then flashes after that for about 12 seconds.
If the airbag was switched off using the airbag switch* on the side of the dash
panel:
the airbag indicator light in the instrume nt cluster comes on for about 3 seconds
each time the igniti on is switched on;
s16g.4.book Page 124 Wednesda y, February 10, 2010 3:53 PM
Page 126 of 231
Airbag system125
Using the system
Safety
Driving Tips
General Maintenance
Breakdown assistance
Praktik
Technical Data
switching off the airbag is indicated in the middle of the dash panel on the right by
the lighting up of the indicator light in the display
fig. 117 .
Note
A specialist garage will be able to advise you whether national legislation in your
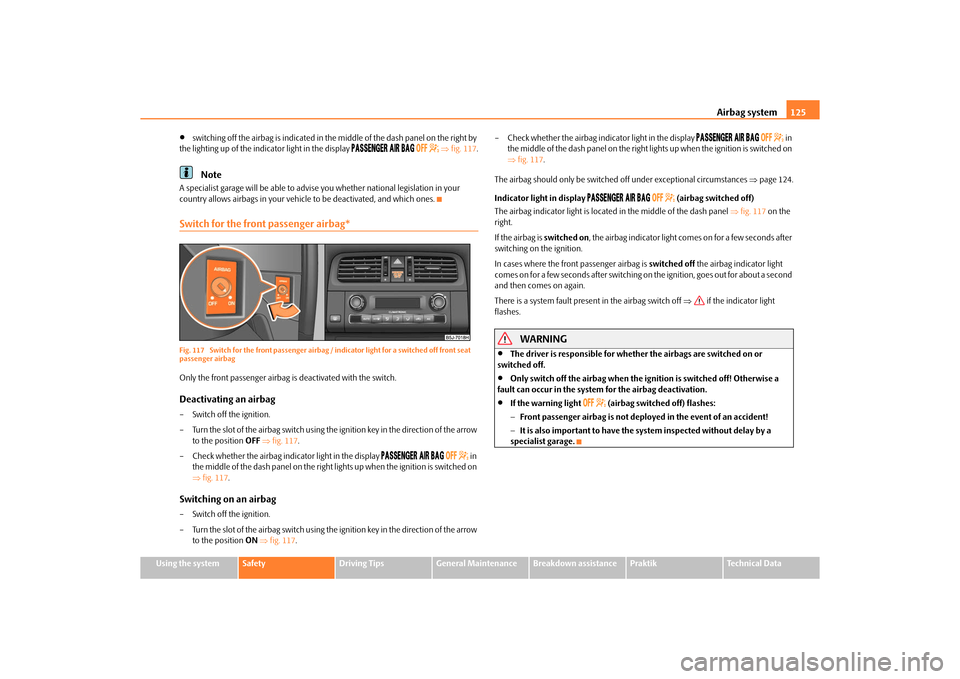
country allows airbags in your vehicl e to be deactivated, and which ones.Switch for the front passenger airbag*Fig. 117 Switch for the front passenger airbag / indicator light for a switched off front seat
passenger airbagOnly the front passenger airbag is deactivated with the switch.Deactivating an airbag– Switch off the ignition.
– Turn the slot of the airbag switch using the ignition key in the direction of the arrow
to the position OFF fig. 117 .
– Check whether the airbag indicator light in the display
in
the middle of the dash panel on the right lights up when the ignition is switched on
fig. 117 .
Switching on an airbag– Switch off the ignition.
– Turn the slot of the airbag switch using the ignition key in the direction of the arrow
to the position ON fig. 117 . – Check whether the airbag indicator light in the display
in
the middle of the dash panel on the right lights up when the ignition is switched on
fig. 117 .
The airbag should only be switched off under exceptional circumstances page 124.
Indicator light in display
(airbag switched off)
The airbag indicator light is located in the middle of the dash panel fig. 117 on the
right.
If the airbag is switched on, the airbag indicator light comes on for a few seconds after
switching on the ignition.
In cases where the front passenger airbag is switched off the airbag indicator light
comes on for a few seconds after switching on the ignition, goes out for about a second
and then comes on again.
There is a system fault present in the airbag switch off if the indicator light
flashes.
WARNING
The driver is responsible for whethe r the airbags are switched on or
switched off.
Only switch off the airbag when the ignition is switched off! Otherwise a
fault can occur in the system for the airbag deactivation.
If the warning light
(airbag switched off) flashes:
Front passenger airbag is not deployed in the event of an accident!
It is also important to have the system inspected without delay by a
specialist garage.
s16g.4.book Page 125 Wednesda y, February 10, 2010 3:53 PM
Page 134 of 231
Intelligent Technology133
Using the system
Safety
Driving Tips
General Maintenance
Breakdown assistance
Praktik
Technical Data
Driving TipsIntelligent TechnologyElectronic stability programme (ESP)*GeneralGeneral
The ESP aids you in maintaining control of your vehicle in situations in which the
vehicle is driving at its dynamic limits, such as entering a curve fast. The risk of skidding
is reduced and your vehicle thus offers greater driving stability depending on the
conditions of the road surface. The system operates at all speeds.
The following systems are integrated into the electronic stability programme:
Electronic Differential Lock (EDL);
Traction control system (TCS);
Antilock brake system (ABS);
Brake Assist;
Uphill Start Assist
Operating principle
The ESP switches on automati cally when the engine is started and then conducts a
self-test. The ESP control unit processes data from the individual systems. It also proc-
esses additional measurement data which are supplied by highly sensitive sensors: the
rotational velocity of the vehicle about its ve rtical axis, the lateral acceleration of the
vehicle, the braking pressure and the steering angle.
The direction which the driver wishes to take is determined based on the steering
angle and the speed of the vehicle and is co nstantly compared with the actual behav-
iour of the vehicle. If differences exist, such as the vehicle beginning to skid, the ESP will
automatically brake the appropriate wheel.
The car is stabilised again by the forces wh ich take effect when the wheel is braked.
Intervention into the brake system takes place primarily on the outer front wheel of a
vehicle which tends to oversteer (tendency fo r the rear of the vehicle to break away) while occurs this is on the inner rear wh
eel of a vehicle which tends to understeer
(tendency to shift out of the curve). This braking control cycle is accompanied by
noises.
If the ESP helps to stabilise the vehicle (f or example when applying and releasing a
braking force to an individual wheel), then the indicator light
flashes quickly.
The ESP system cannot be switched off, only the TCS system can be switched off by
pressing the button page 134, fig. 126. The warning light
page 30 lights up if
the TCS system is switched off.
The warning light
lights up permanently if there is a fault in the ESP system.
The fact that the ESP system operates together with the ABS means that the ESP
warning light will also come on if the ABS system is not operating properly.
If the warning light comes on immediately after starting the engine, the ESP system
can be switched off for technical reasons. In this case, the ESP system can be switched
on again by switching the igni tion on and off. If the warning light goes out, the ESP
system is fully functional again.
WARNING
It is also not possible for the ESP to overcome the physical limits of the vehicle.
Even if a vehicle fitted with ESP you should still always adapt your style of
driving to the condition of the road surfac e and the traffic situation. This partic-
ularly applies when driving on slippery and wet roads. The increased safety
offered must not tempt you to take greater risks than otherwise - risk of an acci-
dent!
Note
All four wheels must be fitted with the same tyres in order to achieve problem-free
operation of the ESP. Differing rolling circum ferences of the tyres can lead to an unde-
sirable reduction in the engine output.
s16g.4.book Page 133 Wednesda y, February 10, 2010 3:53 PM
Page 135 of 231
Intelligent Technology
134
Changes to vehicle (e.g. on engine, on th e brakes, on chassis or another combina-
tion of tyres and wheels) can influence the function of the ESP page 179, “Accesso-
ries, changes and replacement of parts”.
Traction control system (TCS)*
The traction control system prevents the driven wheels from spinning
when accelerating.General
The TCS makes it much easier, and sometimes at all possible, to start off, accelerate and
climb a steep hill when the conditions of the road surface are unfavourable.
Operating principle
The TCS switches on automatically when th e engine is started and then conducts a
self-test. The system monitors the speeds of the driven wheels with the aid of the ABS
sensors. If the wheels are spinning, the force transmitted to the road surface is auto-
matically adapted by reducing the engine speed. The system operates at all speeds.
The TCS operates in combination with the ABS page 136, “Antilock brake system
(ABS)”. The TCS will not function if a fault exists in the ABS system.
Switching off
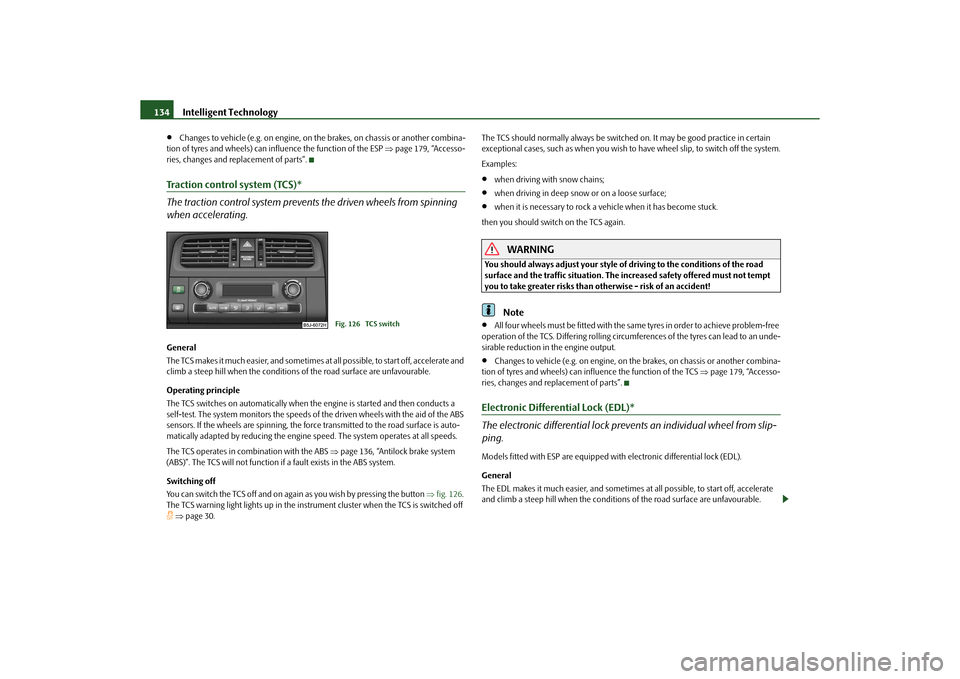
You can switch the TCS off and on again as you wish by pressing the button fig. 126 .
The TCS warning light lights up in the instru ment cluster when the TCS is switched off page 30. The TCS should normally always
be switched on. It may be good practice in certain
exceptional cases, such as when you wish to have wheel slip, to switch off the system.
Examples:
when driving with snow chains;
when driving in deep snow or on a loose surface;
when it is necessary to rock a vehicle when it has become stuck.
then you should switch on the TCS again.
WARNING
You should always adjust your style of driving to the conditions of the road
surface and the traffic situation. The increased safety offered must not tempt
you to take greater risks than otherwise - risk of an accident!
Note
All four wheels must be fitted with the same tyres in order to achieve problem-free
operation of the TCS. Differing rolling circum ferences of the tyres can lead to an unde-
sirable reduction in the engine output.
Changes to vehicle (e.g. on engine, on the brakes, on chassis or another combina-
tion of tyres and wheels) can influence the function of the TCS page 179, “Accesso-
ries, changes and replacement of parts”.
Electronic Differential Lock (EDL)*
The electronic differential lock prev ents an individual wheel from slip-
ping.Models fitted with ESP are equipped with electronic differential lock (EDL).
General
The EDL makes it much easier, and sometimes at all possible, to st art off, accelerate
and climb a steep hill when the conditions of the road surface are unfavourable.
Fig. 126 TCS switch
s16g.4.book Page 134 Wednesda y, February 10, 2010 3:53 PM
Page 136 of 231
Intelligent Technology135
Using the system
Safety
Driving Tips
General Maintenance
Breakdown assistance
Praktik
Technical Data
Operating principle
The EDL is activated automaticall
y, that is without any action on the part of the driver.
It monitors the speeds of the driven wheels with the aid of the ABS sensors. Should
only one drive wheel begin spinning on a slippery surface there will be an appreciable
difference in the speed of the driven wheels. The EDL function brakes the slipping
wheel and the differential transmits a greater driving force to the other driven wheel.
This control process is also accompanied by noises.
Overheating of the brakes
The EDL switches off automatically if unusually severe stresses exist in order to avoid
excessive heat generation in the disc brake on the wheel which is being braked. The
vehicle can continue to be driven and has the same characteristics as a vehicle not
fitted with EDL.
The EDL switches on again automatically as soon as the brake has cooled down.
WARNING
Carefully depress the accelerator when accelerating on uniformly slippery
road surfaces, such as ice and snow. The driven wheels might still spin despite
the EDL and affect the stability of the vehicle - risk of an accident!
You should always adapt your style of driving to the condition of road
surface and to the traffic situation even when your vehicle is fitted with EDL.
The increased safety offered must not tempt you to take greater risks than
otherwise - risk of an accident!Note
If the ABS or TCS or ESP warning light comes on, this may also indicate a fault in the
EDL. Please have the vehicle inspected as soon as possible by a specialist garage.
Changes to vehicle (e.g. on engine, on th e brakes, on chassis or another combina-
tion of tyres and wheels) can in fluence the function of the EDL page 179, “Accesso-
ries, changes and replacement of parts”.
BrakesWhat has a negative effect on braking efficiency?Wear-and-tear
Wear-and-tear to the brake pa ds is greatly dependent on the operating conditions of
the vehicle and your style of driving. Particularly if you drive a great deal in towns and
over short distances or if you adopt a sporty style of driving, it may be necessary to
have the thickness of the brake pads insp ected at a specialist garage between the
service inspections.
Wet roads or road salt
There may be a certain delay before the brakes take full effect un der certain conditions
such as when driving through water, during heavy rain showers or after the vehicle has
been washed in an automatic vehicle wash , since the brake discs and brake pads may
be moist or even have a coating of ice on them in winter. You should dry the brakes as
soon as possible by applying and releasing the brakes several times.
There also may be a certain delay before the full braking efficiency is available when
driving on roads which have been treated with road salt if you have not used the brakes
for some considerable time beforehand. The layer of salt on the brake discs and brake
pads must first be rubbed off when you apply the brakes.
Corrosion
Corrosion on the brake discs and dirt on th e bake pads occur if the vehicle has been
parked for a long period and if you do not make much use of the braking system.
We recommend cleaning the brake discs by firm ly applying the brakes at a fairly high
speed if you do not make much use of the braking system or if surface corrosion is
present .
Faults in the brake surface
If you notice that the braking distance has suddenly become longer and that the brake
pedal can be depressed further, it is possib le that a brake circuit of the dual-circuit
brake system has failed. Drive, in such cases, to the nearest specialist garage without
delay in order to have the problem rectified. Drive at a reduced speed while on your
way to the dealer and adapt your style of driving to the higher brake pedal pressure
required.
s16g.4.book Page 135 Wednesda y, February 10, 2010 3:53 PM