weight SKODA ROOMSTER 2014 1.G Owner's Manual
[x] Cancel search | Manufacturer: SKODA, Model Year: 2014, Model line: ROOMSTER, Model: SKODA ROOMSTER 2014 1.GPages: 204, PDF Size: 14.15 MB
Page 9 of 204
Structure and more information about the Operating
Instructions
Structure of the manual
The operating manual is hierarchically divided into the following areas.
■ Section (e.g. Safety) - the title of the Section is always indicated at the lower
left side
■ Main chapters (e.g. Airbag System) - the title of the main chapter is always
indicated at the lower right side
■ Chapter (e.g. Airbag Overview)
■ Introduction to the topic
- Module Overview within the chapter intro-
ductory information about the chapter content, if necessary, valid for
the entire chapter notes
■ Module (e.g. Front Airbags)
Information Search
When searching for information in the operating instructions, we recommend
using the Index at the end of the manual.
Direction indications
All direction indications such as “left”, “right”, “front”, “rear” relate to the for- ward direction of travel of the vehicle.
Units of measurement
The volume, weight, speed and length data are given in metric units, unless
otherwise indicated.
Display
In this owner's manual, the screen on the MAXI DOT display is used as the dis-
play illustration, provided nothing is otherwise stated.6Structure and more information about the Operating Instructions
Page 11 of 204
Safety
Passive Safety
General information
Introduction
This chapter contains information on the following subjects:
Before setting off
8
Driving safety
8
Safety equipment
8
In this section you will find important information, tips and notes on the sub-
ject of passive safety in your vehicle.
We have combined everything here which you should be familiar with, for ex-
ample, regarding seat belts, airbags, child seats and safety of children.
WARNING■ This chapter contains important information on how to use the vehicle for
the driver and his occupants.■
You can find further information on safety concerning you and those trav-
elling with you in the following chapters of this owner's manual.
■
The complete on-board literature should always be in the vehicle. This
applies in particular, if you rent out or sell the vehicle.
Before setting off
Read and observe
on page 8 first.
For your own safety and the safety of the people travelling with you, please
pay attention to the following points before setting off.
Ensure that the lighting and the turn signal system are functioning proper-
ly.
Ensure that the function of the wiper and the condition of the wiper
blades are free of any defects.
Ensure that all of the windows offer good visibility to the outside.
Adjust the rear-view mirror so that vision to the rear is guaranteed.
Ensure that the mirrors are not covered.
Check the tyre inflation pressure.
Check the engine oil, brake fluid and coolant level.
Secure all items of luggage.
Do not exceed the permissible axle loads and permissible gross weight of
the vehicle.
Close all doors as well as the bonnet and boot lid.
Ensure that no objects can obstruct the pedals.
Protect children in suitable child seats with correctly fastened seat
belts » page 22 , Transporting children safely .
Adopt the correct seated position » page 9, Correct and safe seated
position . Tell your passengers to assume the correct seated position.
Driving safety
Read and observe
on page 8 first.
The driver is fully responsible for himself and his occupants. If your driving
safety is effected, you place yourself and the oncoming traffic at risk.
The following guidelines must therefore be observed. Do not become distracted from concentrating on the traffic situation, e.g.
by your passengers or mobile phone calls.
Never drive when your driving ability is impaired, e.g. due to medication, al-
cohol or drugs.
Keep to the traffic regulations and the permissible speed limit.
Always adjust the driving speed to the road, traffic and weather condi-
tions.
Take regular breaks on long journeys – at least every two hours.
Safety equipment
Read and observe
on page 8 first.
The following list contains only part of the safety equipment in your vehicle.
› Three-point seat belts for all the seats.
› Belt force limiters for the front seats.
› Belt tensioners for the front seats.
› Seat belt height adjusters for the front seats.
› Front airbag for the driver and the front passenger.
› Side airbags.
8Safety
Page 16 of 204
WARNING (Continued)■The lock tongue should only be inserted into the lock which is the correct
one for your seat. Wrong use of the safety belt will reduce its capacity to
protect and the risk of injury increases.■
The slot of the belt tongue must not be blocked, otherwise the belt
tongue will not lock in place properly.
■
Many layers of clothing and loose clothing (e. g. a winter coat over a jack-
et) do not allow you to be correctly seated and impairs proper operation of
the seat belts.
■
Do not use clamps or similar items, which prevent the lash lock function
of the safety belt from operating. A seat belt which is hanging too loose
can result in injuries as your body is moved forward by the kinetic energy
produced in an accident and is then suddenly held firm by the belt.
■
The seat belts for the rear seats can only fulfil their function reliably
when the seat backrests are correctly locked into position » page 71.
WARNINGInformation on the care and maintenance of the safety belts■The belt webbing must always be kept clean. Soiled belts may impair
proper operation of the inertia reel » page 141, Seat belts .■
The seat belts must not be removed or changed in any way. Do not at-
tempt to repair the seat belts yourself.
■
Check the condition of all the seat belts on a regular basis. If any damage
to the seat belts, seat belt connections, inertia reel or the lock is detected,
the relevant seat belt must be replaced by a specialist garage.
■
Damaged seat belts which have been subjected to stress in an accident
and were therefore stretched, must be replaced - this is best done by a
specialist garage. The anchorage points of the belts must also be inspec-
ted. The anchorage points for the belts should also be checked.
Note
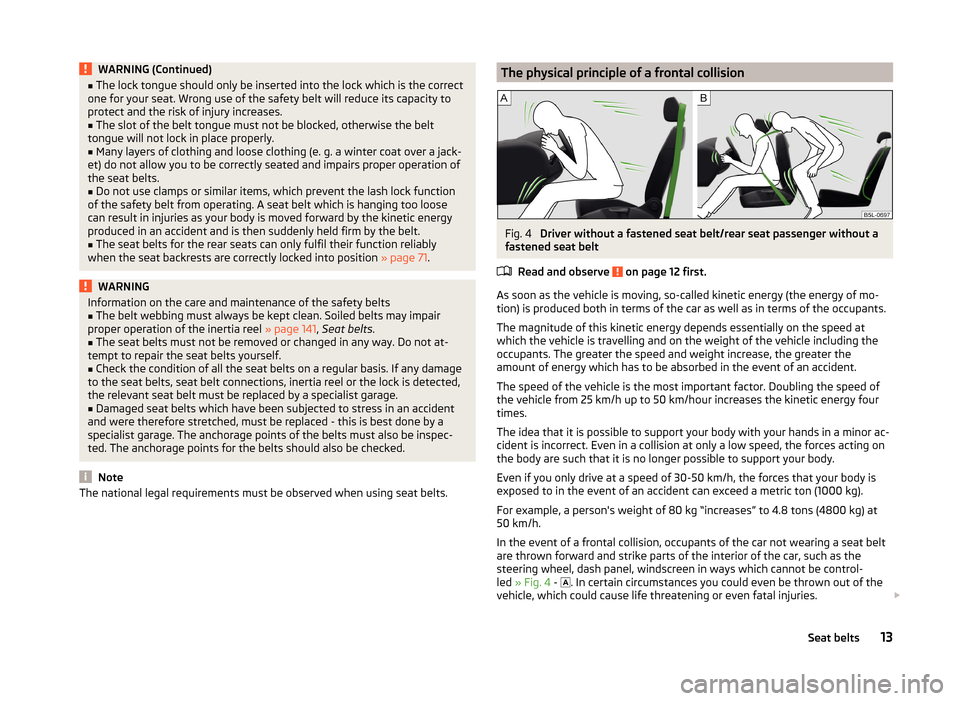
The national legal requirements must be observed when using seat belts.The physical principle of a frontal collisionFig. 4
Driver without a fastened seat belt/rear seat passenger without a
fastened seat belt
Read and observe
on page 12 first.
As soon as the vehicle is moving, so-called kinetic energy (the energy of mo-
tion) is produced both in terms of the car as well as in terms of the occupants.
The magnitude of this kinetic energy depends essentially on the speed at
which the vehicle is travelling and on the weight of the vehicle including the
occupants. The greater the speed and weight increase, the greater the
amount of energy which has to be absorbed in the event of an accident.
The speed of the vehicle is the most important factor. Doubling the speed of
the vehicle from 25 km/h up to 50 km/hour increases the kinetic energy four
times.
The idea that it is possible to support your body with your hands in a minor ac-
cident is incorrect. Even in a collision at only a low speed, the forces acting on
the body are such that it is no longer possible to support your body.
Even if you only drive at a speed of 30-50 km/h, the forces that your body is
exposed to in the event of an accident can exceed a metric ton (1000 kg).
For example, a person's weight of 80 kg “increases” to 4.8 tons (4800 kg) at
50 km/h.
In the event of a frontal collision, occupants of the car not wearing a seat belt
are thrown forward and strike parts of the interior of the car, such as the
steering wheel, dash panel, windscreen in ways which cannot be control-
led » Fig. 4 -
. In certain circumstances you could even be thrown out of the
vehicle, which could cause life threatening or even fatal injuries.
13Seat belts
Page 27 of 204
Use of the child seat in the front passenger seat
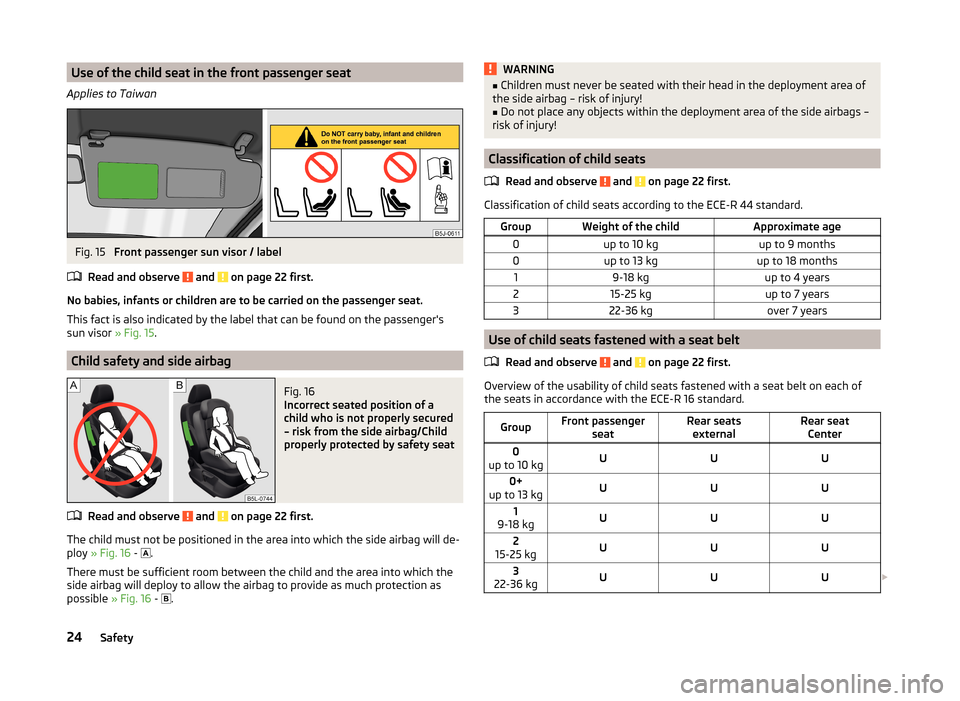
Applies to TaiwanFig. 15
Front passenger sun visor / label
Read and observe
and on page 22 first.
No babies, infants or children are to be carried on the passenger seat.
This fact is also indicated by the label that can be found on the passenger's sun visor » Fig. 15.
Child safety and side airbag
Fig. 16
Incorrect seated position of a
child who is not properly secured
– risk from the side airbag/Child
properly protected by safety seat
Read and observe and on page 22 first.
The child must not be positioned in the area into which the side airbag will de- ploy » Fig. 16 -
.
There must be sufficient room between the child and the area into which the
side airbag will deploy to allow the airbag to provide as much protection as
possible » Fig. 16 -
.
WARNING■
Children must never be seated with their head in the deployment area of
the side airbag – risk of injury!■
Do not place any objects within the deployment area of the side airbags –
risk of injury!
Classification of child seats
Read and observe
and on page 22 first.
Classification of child seats according to the ECE-R 44 standard.
GroupWeight of the childApproximate age0up to 10 kgup to 9 months0up to 13 kgup to 18 months19-18 kgup to 4 years215-25 kgup to 7 years322-36 kgover 7 years
Use of child seats fastened with a seat belt Read and observe
and on page 22 first.
Overview of the usability of child seats fastened with a seat belt on each ofthe seats in accordance with the ECE-R 16 standard.
GroupFront passenger seatRear seatsexternalRear seat Center0
up to 10 kgUUU0+
up to 13 kgUUU1
9-18 kgUUU2
15-25 kgUUU3
22-36 kgUUU 24Safety
Page 76 of 204

headrest adjustFig. 62
Head restraint: adjusting/removing
Read and observe
on page 72 first.
Setting height
›
Grasp the side of the head restraint with both hands and push it upwards as
required » Fig. 62 -
.
›
To move the head restraint downwards, press and hold the safety but-
ton » Fig. 62 -
with one hand and push the head restraint down with the
other hand.
Removing/installing
›
Pull the head restraint out of the seat backrest as far as the stop.
›
Press the locking button in the direction of the arrow » Fig. 62 -
and pull
the head restraint out.
›
To re-insert the head restraint, push it far enough down into the seat back-
rest until the locking button clicks into place.
Boot
Introduction
This chapter contains information on the following subjects:
Class N1 vehicles
74
Fastening elements
74
Folding hooks
74
Fixing nets
75
Fixing floor covering of the luggage compartment
75Boot cover75Net partition76
Please observe the following for the purpose of maintaining good handling
characteristics of your vehicle:
›
Distribute loads as evenly as possible.
›
Place heavy objects as far forward as possible.
›
Attach the items of luggage to the lashing eyes or using the fixing
net » page 74 .
In the event of an accident, even small and light objects gain so much kinetic
energy that they can cause severe injuries.
The magnitude of the kinetic energy is dependent on the speed at which the
vehicle is travelling and the weight of the object.
Example: In the event of a frontal collision at a speed of 50 km/h, an object
weighing 4.5 kg produces energy corresponding to 20 times its own weight.
This means that it results in a weight of approx. 90 kg “ ”.
WARNING■ Store the objects in the boot and attach them to the lashing eyes.■Loose objects can be thrown forward during a sudden manoeuvre or in
case of an accident and can injure the occupants or other road users.■
Loose objects could hit a deployed airbag and injure occupants – there is
a risk of death.
■
Please note that transporting heavy objects alters the handling proper-
ties of the vehicle due to the displacement of the centre of gravity – risk of
accident! The speed and style of driving must be adjusted accordingly.
■
If the items of luggage or objects are attached to the lashing eyes with
unsuitable or damaged lashing straps, injuries can occur in the event of
braking manoeuvres or accidents. To prevent items of luggage from being
thrown forward, always use suitable lashing straps which must be firmly at-
tached to the lashing eyes.
■
The transported items must be stowed in such a way that no objects are
able to slip forward on sudden driving or braking manoeuvres – risk of in-
jury!
■
When transporting fastened objects which are sharp and dangerous in
the boot that has been enlarged by folding the rear seats forward, ensure
the safety of the passengers transported on the other rear seats » page 11,
Correct seated position for the passengers in the rear seats .
73Seats and stowing
Page 77 of 204
WARNING (Continued)■If the rear seat next to the folded forward seat is occupied, ensure maxi-
mum safety, e.g. by placing the goods to be transported in such a way that
the seat is prevented from folding back in case of a rear collision.■
Never drive with the luggage compartment lid open or ajar, as otherwise
exhaust gases may get into the interior of the vehicle – risk of poisoning!
■
Under no circumstances should the permissible axle loads and the per-
missible total vehicle weight be exceeded – risk of accident!
■
Never transport people in the boot!
CAUTION
Please ensure that the heating elements for the rear window heater are not
damaged as a result of abrasive objects.
Note
Tyre pressure must be adjusted to the load » page 157.
Class N1 vehicles
Read and observe
and on page 73 first.
On class N1 vehicles, which are not fitted with a protective grille, a lashing set
which complies with the standard EN 12195 (1 - 4) must be used for fastening
the load.
The proper functioning of the electrical system is essential for the safe opera-
tion of the vehicle. It is important to ensure that it is not damaged during mod-
ifications or when loading or unloading the luggage compartment.
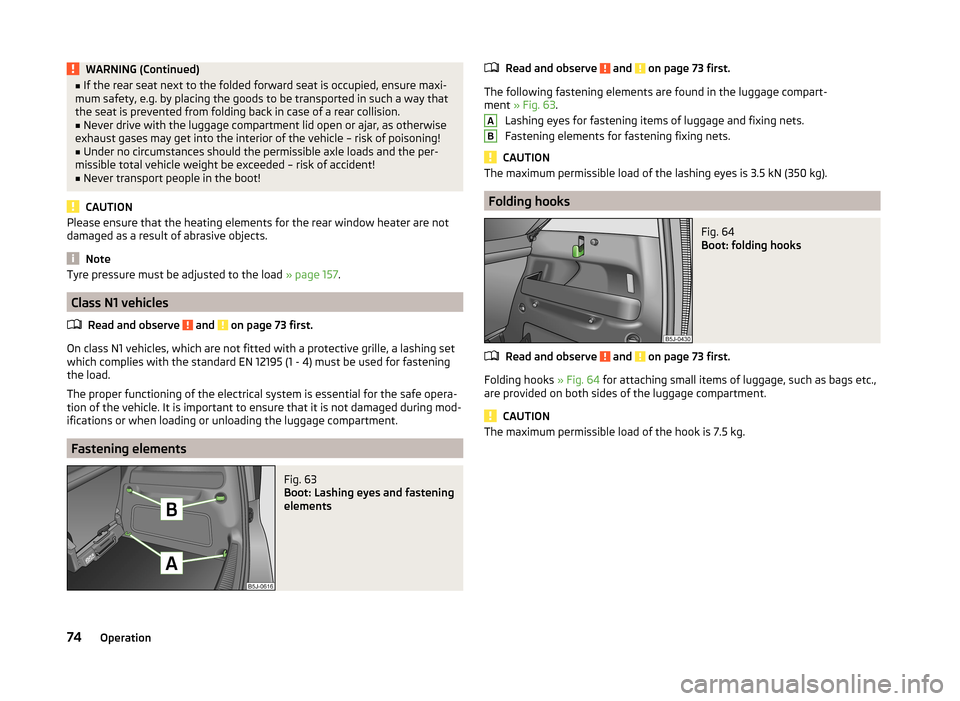
Fastening elements
Fig. 63
Boot: Lashing eyes and fastening
elements
Read and observe and on page 73 first.
The following fastening elements are found in the luggage compart-
ment » Fig. 63 .
Lashing eyes for fastening items of luggage and fixing nets.
Fastening elements for fastening fixing nets.
CAUTION
The maximum permissible load of the lashing eyes is 3.5 kN (350 kg).
Folding hooks
Fig. 64
Boot: folding hooks
Read and observe and on page 73 first.
Folding hooks » Fig. 64 for attaching small items of luggage, such as bags etc.,
are provided on both sides of the luggage compartment.
CAUTION
The maximum permissible load of the hook is 7.5 kg.AB74Operation
Page 78 of 204

Fixing netsFig. 65
Fixing net: double horizontal pocket, floor fixing net/double verti-
cal pockets
Read and observe
and on page 73 first.
Fixing examples of the fixing net as a double horizontal pocket, floor fixing
net » Fig. 65 -
and double vertical pockets
» Fig. 65 -
.
WARNINGDo not exceed the maximum permissible load of the fixing nets. Heavy ob-
jects are not secured sufficiently – risk of injury!
CAUTION
■ The maximum permissible load of the fixing nets is 1.5 kg.■Do not place any sharp objects in the nets – risk of net damage.
Fixing floor covering of the luggage compartment
Read and observe
and on page 73 first.
You can fix the raised floor cover between the backrests and the luggage com-partment cover, if one needs to reach the spare wheel.
Boot coverFig. 66
Removing the luggage compartment cover/luggage compartment
cover in the lower position
Read and observe
and on page 73 first.
The boot cover can be removed if you wish to transport bulky goods.
›
Unhook support straps
1
» Fig. 66 .
›
Fold the luggage compartment cover forwards a little.
›
Remove the cover from the holders
2
by pulling towards the rear, or by
lightly knocking on the underside of the cover in the area between the hold-
ers.
›
To reinstall, first of all push the luggage compartment cover into the holders
2
and then hook the support straps
1
on the boot lid.
The luggage compartment cover can also be fitted in the lower position on the
supporting elements » Fig. 66 -
.
In this position you can store smaller objects up on the luggage compartment
cover up to a total weight of 2.5 kg.
WARNINGNo objects should be placed on the boot cover, the vehicle occupants could
be endangered if there is sudden braking or the vehicle collides with some-
thing.
CAUTION
Please ensure that the heating elements for the rear window heater are not
damaged as a result of objects placed in this area. 75Seats and stowing
Page 83 of 204
›Pull the belt through the tensioning clasps on both sides in turn.›If necessary, you can correct the position of the bicycles in the vehicle.
Roof rack system
Introduction
This chapter contains information on the following subjects:
Roof load
80WARNING■ The transported items on the roof rack must be securely attached – risk
of accident!■
Always secure the load with appropriate and undamaged lashing straps
or tensioning straps.
■
Distribute the load evenly over the roof rack system.
■
Transporting heavy or large objects on the roof rack alters the handling
properties of the vehicle due to the displacement of the centre of gravity or
the increased wind exposure area – risk of accident! The style of driving
and speed must therefore be adapted to the current circumstances.
■
Avoid abrupt and sudden driving/braking manoeuvres.
■
Adjust the speed and driving style to the visibility, weather, road and traf-
fic conditions.
■
The permissible roof load, permissible axle loads and permissible total ve-
hicle weight must not be exceeded under any circumstances – risk of acci-
dent!
CAUTION
■ Only roof racks from the ŠKODA Original Accessories range should be used.■The fitting instructions supplied with the roof luggage rack system must be
observed when handling roof racks.■
Ensure that the boot lid does not hit the roof load when opened.
■
The height of the vehicle changes after mounting a roof luggage rack system
and the load that is secured to it. Compare the vehicle height with available
clearances, such as underpasses and garage doors.
■
Always remove the roof luggage rack system before entering an automated
car wash.
■
Ensure the roof aerial is not impaired by the secured load.
For the sake of the environment
The increased aerodynamic drag results in a higher fuel consumption.NoteIf the vehicle is not factory-equipped with a roof rack, it can be purchased from
the ŠKODA Original Accessories.
Roof load
Read and observe
and on page 80 first.
The maximum permissible roof load (including roof rack system) of 75 kg and
the maximum permissible total weight of the vehicle should not be exceeded.
The full permissible roof load cannot be used if a roof rack system with a lower
load carrying capacity is used. In this case, the roof rack system must only be
loaded up to the maximum weight limit specified in the fitting instructions.
Useful equipment
Introduction
This chapter contains information on the following subjects:
Cupholders
81
Ashtray
81
Cigarette lighter
82
12-volt power outlet
82
Clothes hook
83
Car park ticket holder
83WARNING■ Do not place anything on the dash panel. These objects might slide or fall
down while you are driving (under acceleration or when cornering) and
could distract you from the traffic - there is a risk of an accident.■
Make sure that no objects from the centre console or from other storage
compartments can get into the driver's footwell while you are driving. You
would not be able to brake, operate the clutch pedal or accelerate - danger
of causing an accident!
■
Ash and cigarette or cigar stubs must only be discarded in ashtrays.
80Operation
Page 88 of 204
WARNINGNever put heavy items in the map pockets – risk of injury.
CAUTION
Do not put any large items such as bottles or sharp objects into the map pock-
ets, as the pockets and the seat covers could be damaged.
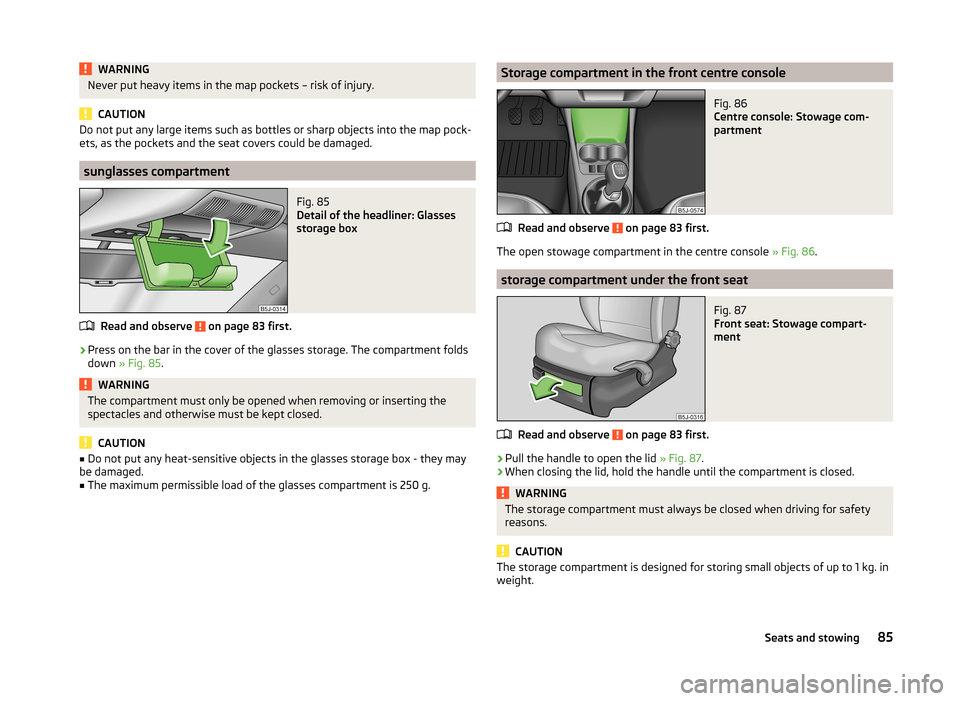
sunglasses compartment
Fig. 85
Detail of the headliner: Glasses
storage box
Read and observe on page 83 first.
›
Press on the bar in the cover of the glasses storage. The compartment folds
down » Fig. 85 .
WARNINGThe compartment must only be opened when removing or inserting the
spectacles and otherwise must be kept closed.
CAUTION
■ Do not put any heat-sensitive objects in the glasses storage box - they may
be damaged.■
The maximum permissible load of the glasses compartment is 250 g.
Storage compartment in the front centre consoleFig. 86
Centre console: Stowage com-
partment
Read and observe on page 83 first.
The open stowage compartment in the centre console » Fig. 86.
storage compartment under the front seat
Fig. 87
Front seat: Stowage compart-
ment
Read and observe on page 83 first.
›
Pull the handle to open the lid » Fig. 87.
›
When closing the lid, hold the handle until the compartment is closed.
WARNINGThe storage compartment must always be closed when driving for safety
reasons.
CAUTION
The storage compartment is designed for storing small objects of up to 1 kg. in
weight.85Seats and stowing
Page 90 of 204
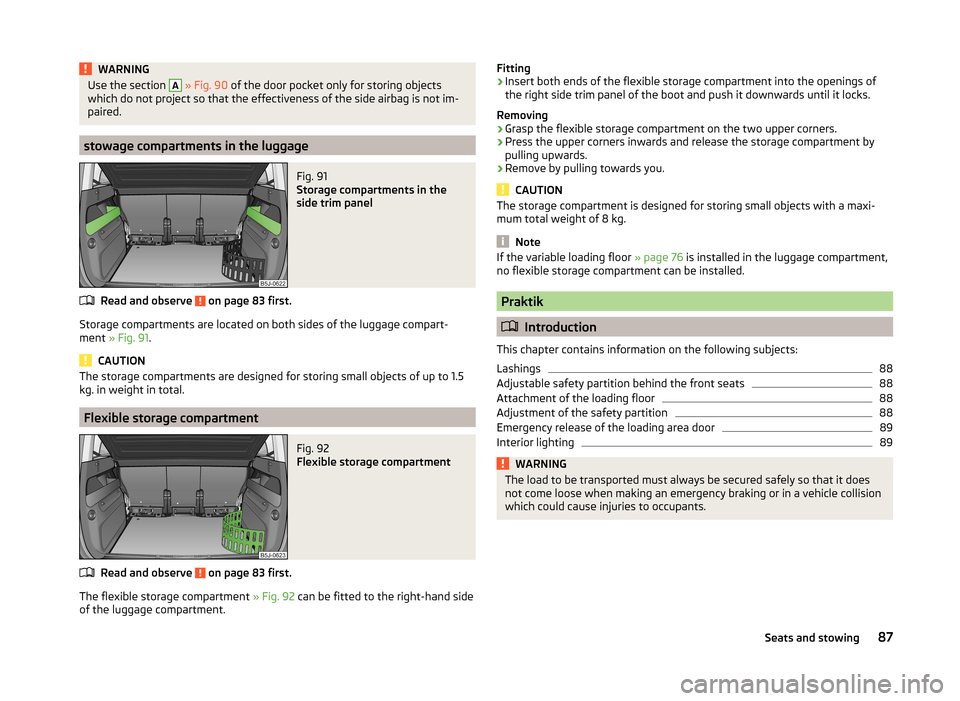
WARNINGUse the section A » Fig. 90 of the door pocket only for storing objects
which do not project so that the effectiveness of the side airbag is not im-
paired.
stowage compartments in the luggage
Fig. 91
Storage compartments in the
side trim panel
Read and observe on page 83 first.
Storage compartments are located on both sides of the luggage compart-
ment » Fig. 91 .
CAUTION
The storage compartments are designed for storing small objects of up to 1.5
kg. in weight in total.
Flexible storage compartment
Fig. 92
Flexible storage compartment
Read and observe on page 83 first.
The flexible storage compartment » Fig. 92 can be fitted to the right-hand side
of the luggage compartment.
Fitting›Insert both ends of the flexible storage compartment into the openings of
the right side trim panel of the boot and push it downwards until it locks.
Removing›
Grasp the flexible storage compartment on the two upper corners.
›
Press the upper corners inwards and release the storage compartment by
pulling upwards.
›
Remove by pulling towards you.
CAUTION
The storage compartment is designed for storing small objects with a maxi-
mum total weight of 8 kg.
Note
If the variable loading floor » page 76 is installed in the luggage compartment,
no flexible storage compartment can be installed.
Praktik
Introduction
This chapter contains information on the following subjects:
Lashings
88
Adjustable safety partition behind the front seats
88
Attachment of the loading floor
88
Adjustment of the safety partition
88
Emergency release of the loading area door
89
Interior lighting
89WARNINGThe load to be transported must always be secured safely so that it does
not come loose when making an emergency braking or in a vehicle collision
which could cause injuries to occupants.87Seats and stowing