ESP SKODA SUPERB 2005 1.G / (B5/3U) DX Navigation System Manual
[x] Cancel search | Manufacturer: SKODA, Model Year: 2005, Model line: SUPERB, Model: SKODA SUPERB 2005 1.G / (B5/3U)Pages: 75, PDF Size: 3.09 MB
Page 47 of 75
RADIO NAVIGATION SYSTEM46
NAVIGATION
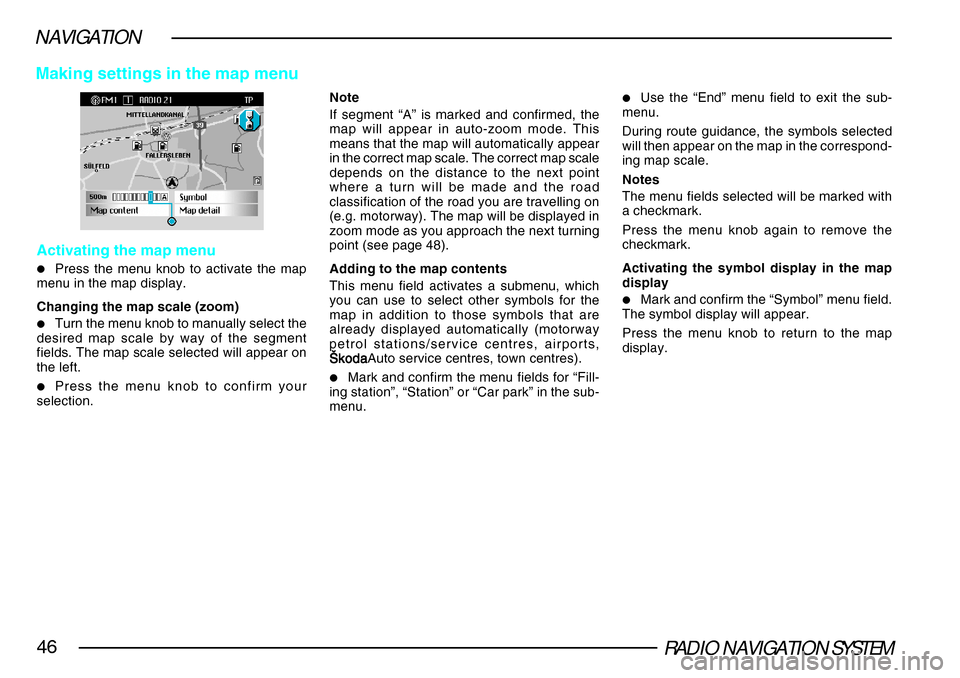
Activating the map menu
•Press the menu knob to activate the map
menu in the map display.
Changing the map scale (zoom)
•Turn the menu knob to manually select the
desired map scale by way of the segment
fields. The map scale selected will appear on
the left.
•Press the menu knob to confirm your
selection. Note
If segment “A” is marked and confirmed, the
map will appear in auto-zoom mode. This
means that the map will automatically appear
in the correct map scale. The correct map scale
depends on the distance to the next point
where a turn will be made and the road
classification of the road you are travelling on
(e.g. motorway). The map will be displayed in
zoom mode as you approach the next turning
point (see page 48).
Adding to the map contents
This menu field activates a submenu, which
you can use to select other symbols for the
map in addition to those symbols that are
already displayed automatically (motorway
petrol stations/service centres, airports,
·koda·koda ·koda·koda
·kodaAuto service centres, town centres).•Mark and confirm the menu fields for “Fill-
ing station”, “Station” or “Car park” in the sub-
menu.
•Use the “End” menu field to exit the sub-
menu.
During route guidance, the symbols selected
will then appear on the map in the correspond-
ing map scale.
Notes
The menu fields selected will be marked with
a checkmark.
Press the menu knob again to remove the
checkmark.
Activating the symbol display in the map
display
•Mark and confirm the “Symbol” menu field.
The symbol display will appear.
Press the menu knob to return to the map
display.
Making settings in the map menu
Page 51 of 75
RADIO NAVIGATION SYSTEM50
NAVIGATION
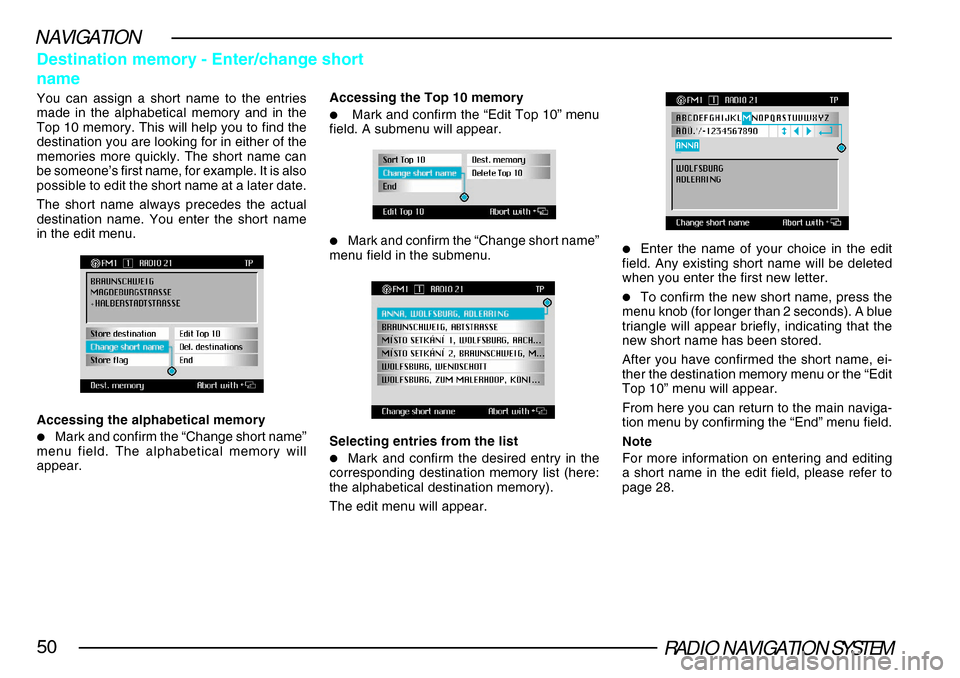
Destination memory - Enter/change short
name
You can assign a short name to the entries
made in the alphabetical memory and in the
Top 10 memory. This will help you to find the
destination you are looking for in either of the
memories more quickly. The short name can
be someone’s first name, for example. It is also
possible to edit the short name at a later date.
The short name always precedes the actual
destination name. You enter the short name
in the edit menu.Accessing the Top 10 memory
•Mark and confirm the “Edit Top 10” menu
field. A submenu will appear.
•Mark and confirm the “Change short name”
menu field in the submenu.
Selecting entries from the list
•Mark and confirm the desired entry in the
corresponding destination memory list (here:
the alphabetical destination memory).
The edit menu will appear.
•Enter the name of your choice in the edit
field. Any existing short name will be deleted
when you enter the first new letter.
•To confirm the new short name, press the
menu knob (for longer than 2 seconds). A blue
triangle will appear briefly, indicating that the
new short name has been stored.
After you have confirmed the short name, ei-
ther the destination memory menu or the “Edit
Top 10” menu will appear.
From here you can return to the main naviga-
tion menu by confirming the “End” menu field.
Note
For more information on entering and editing
a short name in the edit field, please refer to
page 28.
Accessing the alphabetical memory
•Mark and confirm the “Change short name”
menu field. The alphabetical memory will
appear.
Page 54 of 75
RADIO NAVIGATION SYSTEM53
NAVIGATION
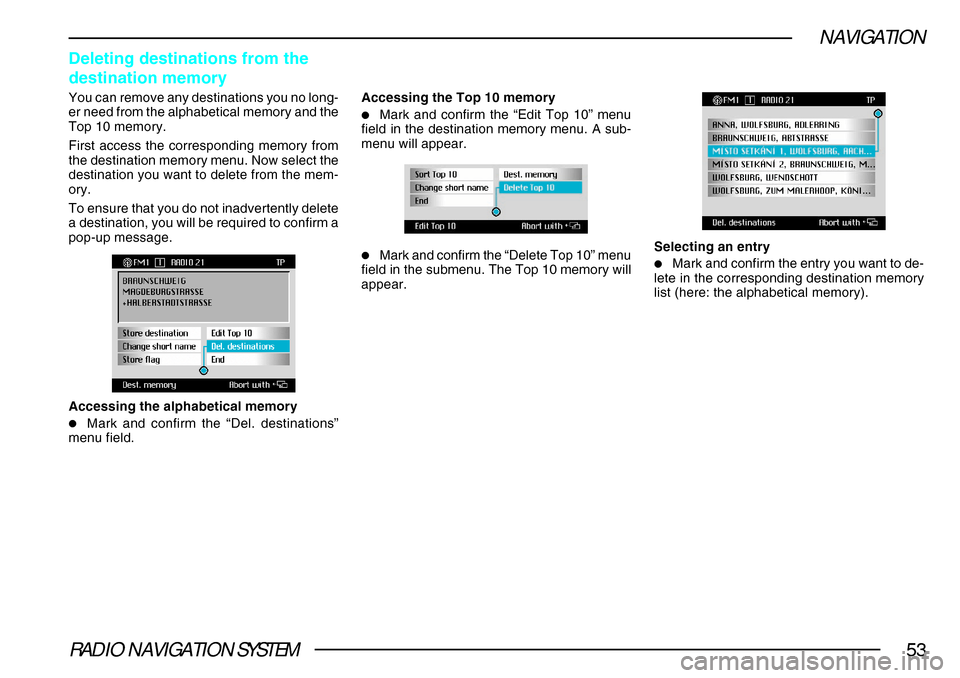
Deleting destinations from the
destination memory
You can remove any destinations you no long-
er need from the alphabetical memory and the
Top 10 memory.
First access the corresponding memory from
the destination memory menu. Now select the
destination you want to delete from the mem-
ory.
To ensure that you do not inadvertently delete
a destination, you will be required to confirm a
pop-up message.
Accessing the alphabetical memory
•Mark and confirm the “Del. destinations”
menu field.
Accessing the Top 10 memory
•Mark and confirm the “Edit Top 10” menu
field in the destination memory menu. A sub-
menu will appear.
•Mark and confirm the “Delete Top 10” menu
field in the submenu. The Top 10 memory will
appear. Selecting an entry•Mark and confirm the entry you want to de-
lete in the corresponding destination memory
list (here: the alphabetical memory).
Page 56 of 75
RADIO NAVIGATION SYSTEM55
NAVIGATION
Important information
This system has been pre-equipped for dynam-
ic navigation. The following prerequisites must
be fulfilled before you can take advantage of
this function:
–the navigation CD must be able to support
dynamic navigation
– it must be possible for the receiver to pick
up at least one TMC station.
If you have any questions, please contact a
·koda Auto service centre.
What is dynamic navigation?
Dynamic navigation means that the system
automatically calculates and adjusts the driving
route on the basis of the traffic information re-
ceived.
This traffic information is transmitted inaudibly
by a number of different radio stations on the
TMC (Traffic Message Channel) in addition to
their regular programming.
The navigation system receives this informa-
tion via a separate TMC box and evaluates it
accordingly. If the system receives traffic in
formation that affects the calculated route, the
route will be re-calculated automatically.
Automatic traffic congestion function (for systems with dynamic navigat\
ion)
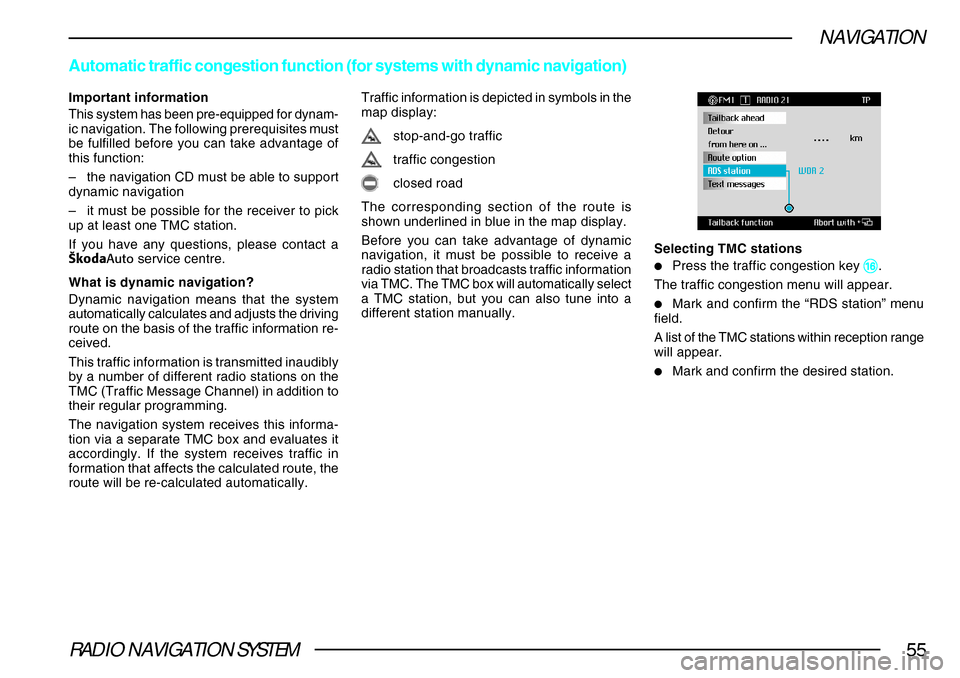
Traffic information is depicted in symbols in the
map display:
stop-and-go traffic
traffic congestion
closed road
The corresponding section of the route is
shown underlined in blue in the map display.
Before you can take advantage of dynamic
navigation, it must be possible to receive a
radio station that broadcasts traffic information
via TMC. The TMC box will automatically select
a TMC station, but you can also tune into a
different station manually. Selecting TMC stations
•Press the traffic congestion key ^^ ^^
^.
The traffic congestion menu will appear.
•Mark and confirm the “RDS station” menu
field.
A list of the TMC stations within reception range
will appear.
•Mark and confirm the desired station.
Page 58 of 75
RADIO NAVIGATION SYSTEM57
NAVIGATION
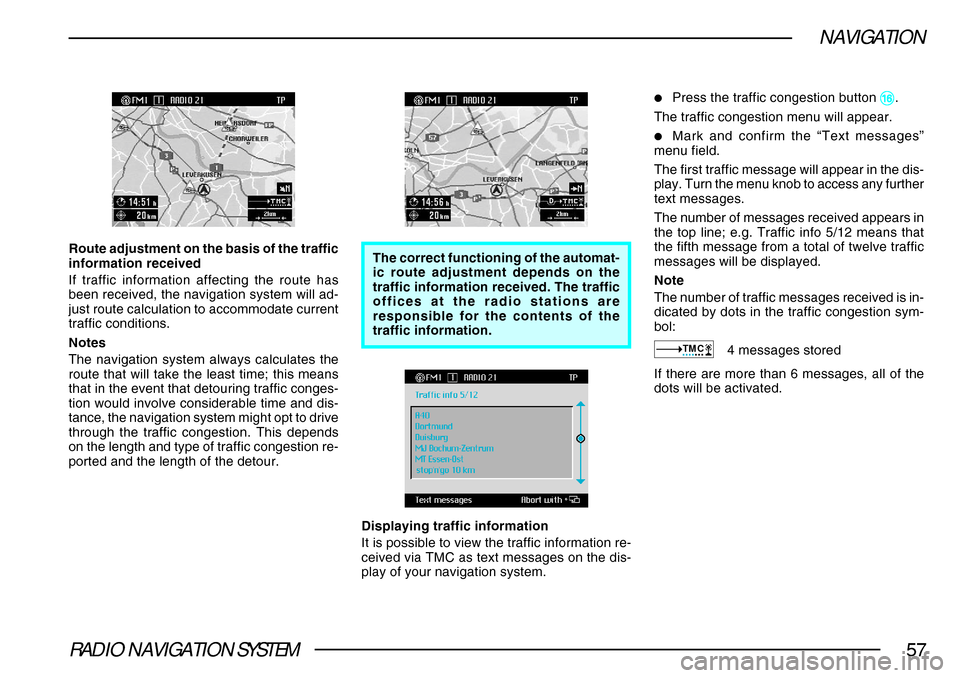
Route adjustment on the basis of the traffic
information received
If traffic information affecting the route has
been received, the navigation system will ad-
just route calculation to accommodate current
traffic conditions.
Notes
The navigation system always calculates the
route that will take the least time; this means
that in the event that detouring traffic conges-
tion would involve considerable time and dis-
tance, the navigation system might opt to drive
through the traffic congestion. This depends
on the length and type of traffic congestion re-
ported and the length of the detour.The correct functioning of the automat-
ic route adjustment depends on the
traffic information received. The traffic
offices at the radio stations are
responsible for the contents of the
traffic information.
Displaying traffic information
It is possible to view the traffic information re-
ceived via TMC as text messages on the dis-
play of your navigation system.
•Press the traffic congestion button ^^ ^^
^.
The traffic congestion menu will appear.
•Mark and confirm the “Text messages”
menu field.
The first traffic message will appear in the dis-
play. Turn the menu knob to access any further
text messages.
The number of messages received appears in
the top line; e.g. Traffic info 5/12 means that
the fifth message from a total of twelve traffic
messages will be displayed.
Note
The number of traffic messages received is in-
dicated by dots in the traffic congestion sym-
bol:
TMC4 messages stored
If there are more than 6 messages, all of the
dots will be activated.
Page 59 of 75
RADIO NAVIGATION SYSTEM58
NAVIGATION
Manual traffic congestion function (for systems with dynamic navigation)
In addition to dynamic navigation, you can use
the manual traffic congestion function to ex-
clude sections of the route lying ahead. The
navigation system will then calculate an alter-
nate route to the selected destination, where-
by the excluded sections of road will be by-
passed as far as possible. Route guidance will
be continued using the new route.
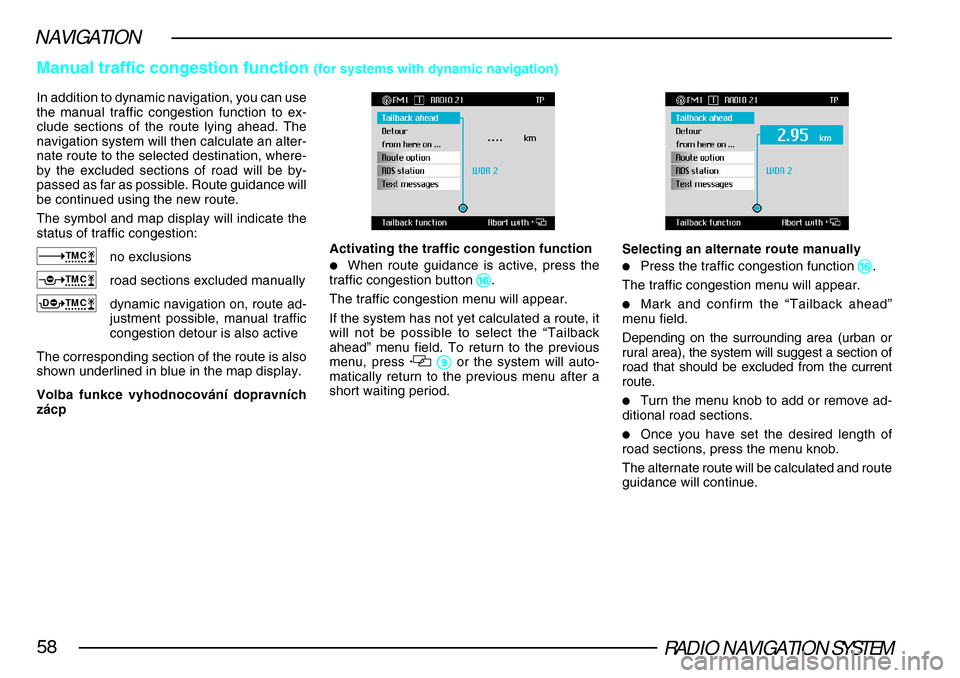
The symbol and map display will indicate the
status of traffic congestion:
TMCno exclusions
TMCroad sections excluded manually
TMCDdynamic navigation on, route ad-
justment possible, manual traffic
congestion detour is also active
The corresponding section of the route is also
shown underlined in blue in the map display.
Volba funkce vyhodnocování dopravních
zácp Activating the traffic congestion function
•When route guidance is active, press the
traffic congestion button ^^ ^^
^.
The traffic congestion menu will appear.
If the system has not yet calculated a route, it
will not be possible to select the “Tailback
ahead” menu field. To return to the previous
menu, press
99 99
9 or the system will auto-
matically return to the previous menu after a
short waiting period.
Selecting an alternate route manually
•Press the traffic congestion function ^^ ^^
^.
The traffic congestion menu will appear.
•Mark and confirm the “Tailback ahead”
menu field.
Depending on the surrounding area (urban or
rural area), the system will suggest a section of
road that should be excluded from the current
route.
•Turn the menu knob to add or remove ad-
ditional road sections.
•Once you have set the desired length of
road sections, press the menu knob.
The alternate route will be calculated and route
guidance will continue.
Page 67 of 75
RADIO NAVIGATION SYSTEM66
TV
Switching off television mode
•Go to the audio menu by pressing the AU-
DIO button.
•Select and confirm the desired audio
source.
Press the NAVI button to go to the navigation
menu.
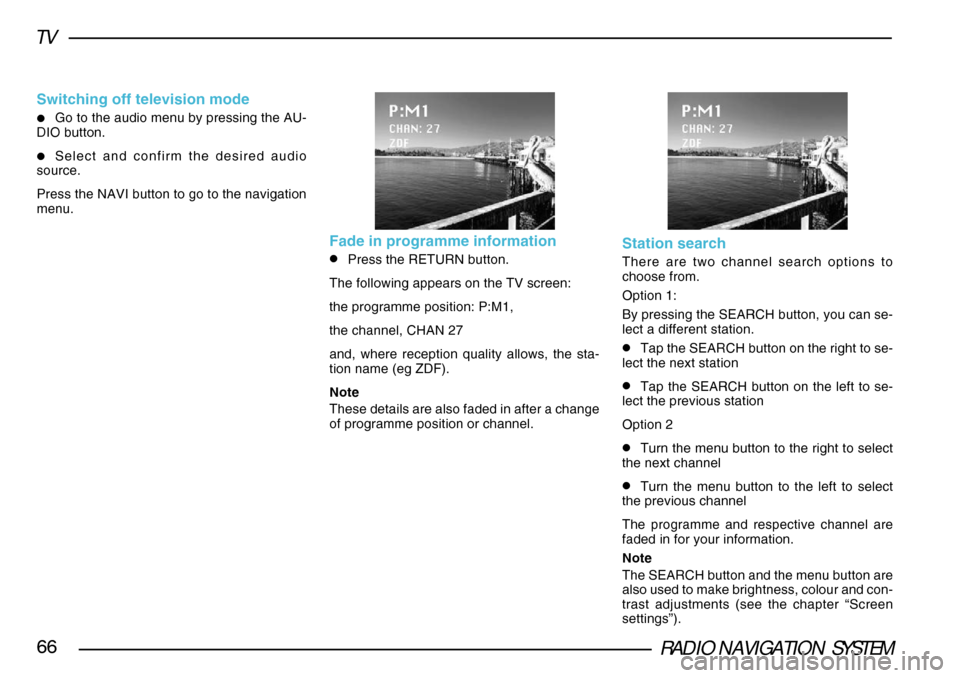
Fade in programme information
•Press the RETURN button.
The following appears on the TV screen:
the programme position: P:M1,
the channel, CHAN 27
and, where reception quality allows, the sta-
tion name (eg ZDF).
Note
These details are also faded in after a change
of programme position or channel.Station search
There are two channel search options to
choose from.
Option 1:
By pressing the SEARCH button, you can se-
lect a different station.
•Tap the SEARCH button on the right to se-
lect the next station
•Tap the SEARCH button on the left to se-
lect the previous station
Option 2
•Turn the menu button to the right to select
the next channel
•Turn the menu button to the left to select
the previous channel
The programme and respective channel are
faded in for your information.
Note
The SEARCH button and the menu button are
also used to make brightness, colour and con-
trast adjustments (see the chapter “Screen
settings”).
Page 68 of 75
RADIO NAVIGATION SYSTEM67
TV
Storing a station
You can store six television stations on the sta-
tion buttons 1-6.
•Set the desired station using the SEARCH
button or the menu button.
•Once you can see the desired station, press
the desired station button until the set is brief-
ly muted.
A brief acoustic signal completes the storage
of a station.
To go to the stored station , you have only to
tap the appropriate station button briefly. The
respective TV programme appears on the
screen provided you are within the station’s
transmission range.
1
2
3
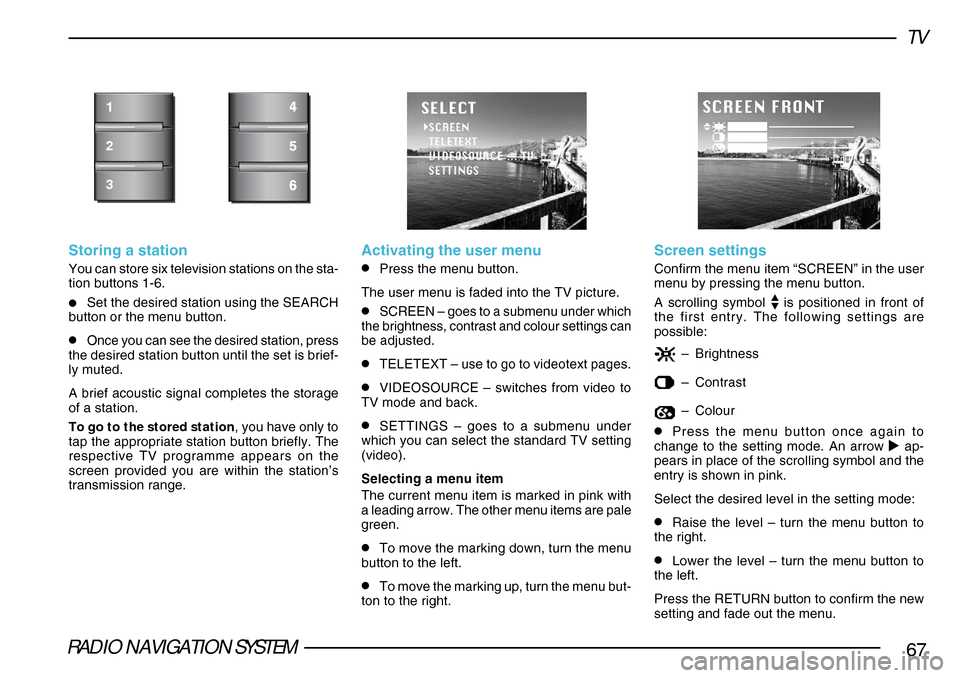
Activating the user menu
•Press the menu button.
The user menu is faded into the TV picture.
•SCREEN – goes to a submenu under which
the brightness, contrast and colour settings can
be adjusted.
•TELETEXT – use to go to videotext pages.
•VIDEOSOURCE – switches from video to
TV mode and back.
•SETTINGS – goes to a submenu under
which you can select the standard TV setting
(video).
Selecting a menu item
The current menu item is marked in pink with
a leading arrow. The other menu items are pale
green.
•To move the marking down, turn the menu
button to the left.
•To move the marking up, turn the menu but-
ton to the right.
Screen settings
Confirm the menu item “SCREEN” in the user
menu by pressing the menu button.
A scrolling symbol
is positioned in front of
the first entry. The following settings are
possible:
– Brightness
–Contrast
–Colour
•Press the menu button once again to
change to the setting mode. An arrow ap-
pears in place of the scrolling symbol and the
entry is shown in pink.
Select the desired level in the setting mode:
•Raise the level – turn the menu button to
the right.
•Lower the level – turn the menu button to
the left.
Press the RETURN button to confirm the new
setting and fade out the menu.
Page 74 of 75

Škoda Auto is constantly working on the further development of all types and models. Please understand that, for this reason, chan-
ges to the scope of supply in terms of shape, equipment and engineering may be introduced at any time. It is therefore not possible
to derive any claims from the information, illustrations and descriptions contained in this Owner ´s Manual .
Reprinting, reproduction, translation or any other use of this document, in whole or in parts, is not permitted without the written
consent of Škoda Auto.
Škoda Auto expressly reserves all rights in respect of copyright.
Subject to modification.
Published by
ŠKODA AUTO a.s.
© ŠKODA AUTO a.s. 2003
` This paper was manufactured from pulp bleached without using chlorine.
Velka_navigace_anglicky.indd30.6.2003, 14:02
2