radio SKODA SUPERB 2005 1.G / (B5/3U) DX Navigation System Manual
[x] Cancel search | Manufacturer: SKODA, Model Year: 2005, Model line: SUPERB, Model: SKODA SUPERB 2005 1.G / (B5/3U)Pages: 75, PDF Size: 3.09 MB
Page 61 of 75
RADIO NAVIGATION SYSTEM60
NAVIGATION
Selecting an alternate route
•Mark and confirm the “Diversion” menu
field.
Depending on your current surroundings (city
or rural area), the system will suggest that you
exclude a specific route section.
•Turn the menu knob to add or remove ad-
ditional route sections.
•Once you have set the length of the route
you want to exclude, press the menu knob.
The “Activate excl.” menu field will be marked
automatically.
•Press the menu knob again.
The alternate route will be calculated and route
guidance will continue. Cancelling the alternate route
•Press the traffic congestion button ^^ ^^
^.
The traffic congestion menu will appear.
•Mark and confirm the “Delete bypass” menu
field.
The exclusion in the route will be cancelled and
the route will be re-calculated.
Notes
Route exclusions will remain stored until you
have reached your destination or cancel them.
If you use the traffic congestion function again,
any previous route exclusions will be cancelled
and the new entry will be stored for the current
route.
Travel guide
You can use a travel guide to obtain informa-
tion on travel destinations and then to select a
destination. Travel information is stored in cat-
egories.
The categories are:
– Accommodation
– Food and Drink
– Tourist Information
Travel information can also include hotel pric-
es, features, telephone and fax numbers.
If your navigation CD supports several travel
guides, a submenu will appear after you con-
firm the “Travel guide” menu field and you can
select the travel guide you want to use.
If there is only one travel guide on the CD, the
menu field will give you only once choice (e.g.
MERIAN scout).
Note
If your CD does not include a travel guide, the
“Travel guide” menu option will not appear.
Page 62 of 75
RADIO NAVIGATION SYSTEM61
NAVIGATION
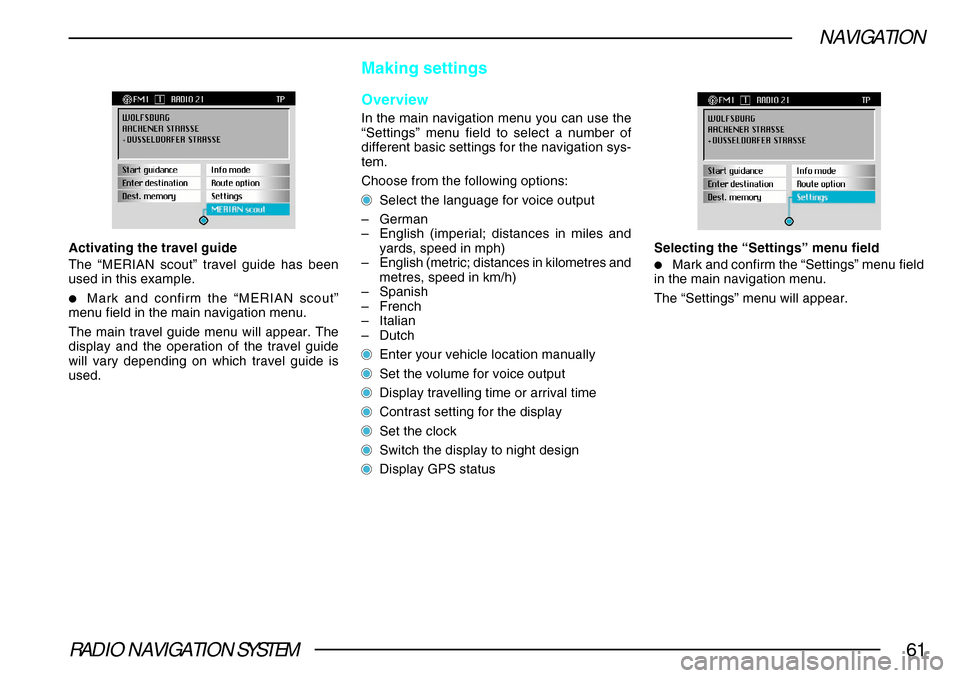
Activating the travel guide
The “MERIAN scout” travel guide has been
used in this example.
•Mark and confirm the “MERIAN scout”
menu field in the main navigation menu.
The main travel guide menu will appear. The
display and the operation of the travel guide
will vary depending on which travel guide is
used.
Making settings
Overview
In the main navigation menu you can use the
“Settings” menu field to select a number of
different basic settings for the navigation sys-
tem.
Choose from the following options:
Select the language for voice output
– German
– English (imperial; distances in miles and
yards, speed in mph)
– English (metric; distances in kilometres and
metres, speed in km/h)
– Spanish
– French
– Italian
– Dutch
Enter your vehicle location manually
Set the volume for voice output
Display travelling time or arrival time
Contrast setting for the display
Set the clock
Switch the display to night design
Display GPS status Selecting the “Settings” menu field
•Mark and confirm the “Settings” menu field
in the main navigation menu.
The “Settings” menu will appear.
Page 63 of 75
RADIO NAVIGATION SYSTEM62
NAVIGATION
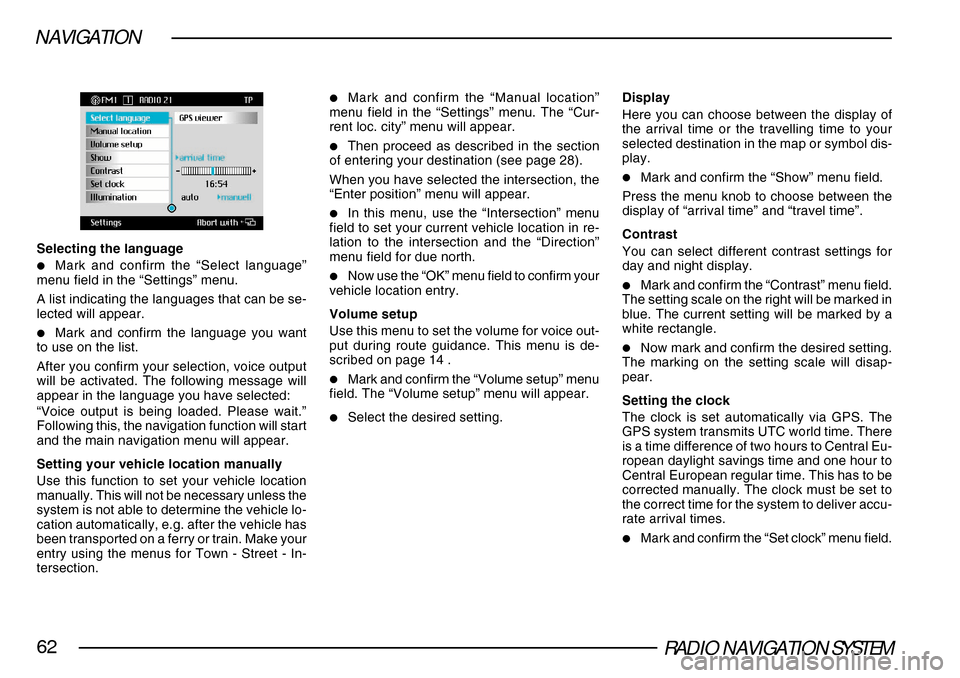
Selecting the language
•Mark and confirm the “Select language”
menu field in the “Settings” menu.
A list indicating the languages that can be se-
lected will appear.
•Mark and confirm the language you want
to use on the list.
After you confirm your selection, voice output
will be activated. The following message will
appear in the language you have selected:
“Voice output is being loaded. Please wait.”
Following this, the navigation function will start
and the main navigation menu will appear.
Setting your vehicle location manually
Use this function to set your vehicle location
manually. This will not be necessary unless the
system is not able to determine the vehicle lo-
cation automatically, e.g. after the vehicle has
been transported on a ferry or train. Make your
entry using the menus for Town - Street - In-
tersection.
•Mark and confirm the “Manual location”
menu field in the “Settings” menu. The “Cur-
rent loc. city” menu will appear.
•Then proceed as described in the section
of entering your destination (see page 28).
When you have selected the intersection, the
“Enter position” menu will appear.
•In this menu, use the “Intersection” menu
field to set your current vehicle location in re-
lation to the intersection and the “Direction”
menu field for due north.
•Now use the “OK” menu field to confirm your
vehicle location entry.
Volume setup
Use this menu to set the volume for voice out-
put during route guidance. This menu is de-
scribed on page 14 .
•Mark and confirm the “Volume setup” menu
field. The “Volume setup” menu will appear.
•Select the desired setting. Display
Here you can choose between the display of
the arrival time or the travelling time to your
selected destination in the map or symbol dis-
play.
•Mark and confirm the “Show” menu field.
Press the menu knob to choose between the
display of “arrival time” and “travel time”.
Contrast
You can select different contrast settings for
day and night display.
•Mark and confirm the “Contrast” menu field.
The setting scale on the right will be marked in
blue. The current setting will be marked by a
white rectangle.
•Now mark and confirm the desired setting.
The marking on the setting scale will disap-
pear.
Setting the clock
The clock is set automatically via GPS. The
GPS system transmits UTC world time. There
is a time difference of two hours to Central Eu-
ropean daylight savings time and one hour to
Central European regular time. This has to be
corrected manually. The clock must be set to
the correct time for the system to deliver accu-
rate arrival times.
•Mark and confirm the “Set clock” menu field.
Page 64 of 75
RADIO NAVIGATION SYSTEM63
NAVIGATION
The hours will appear in white lettering.
•Turn the menu knob to enter the current
time.
•Press the menu knob to confirm the time
you have entered.
Night display
You can select whether you want to switch the
display to night display manually by pressing
the display button
88 88
8 or automatically when the
car headlights are switched on.
•Mark the “Illumination” menu field in the
“Settings” menu.
Press the menu knob repeatedly to switch be-
tween the “auto” and “manual” switching
modes.
The display selected will be marked by a blue
triangle and blue lettering.
Note
You can always switch the display manually,
even if the automatic function has been
activated. GPS viewer
GPS (Global Positioning System) is a naviga-
tion system that was developed by the
Pentagon. It currently consists of 25 satellites
that orbit the Earth at an altitude of 21,000 km.
If the system is able to pick up signals from at
least 3 of the satellites, it will be able to
determine the vehicle’s current location.
•Mark and confirm the “GPS viewer” menu
field in the “Settings” menu.
The information display that appears will indi-
cate:
– the number of satellites available
– the number of satellites whose signals are
within reception range
– the current geographical location of the ve-
hicle.
Note
If the system is not able to pick up signals from
at least 3 satellites, the following message will
appear: “Geographic location cannot current-
ly be determined”. Anti-theft coding is an electronic system that
prevents unauthorised persons from using the
equipment after it has been disconnected from
its power source.
Each time that
–
the system is disconnected from the vehi-
cle power supply
– the battery is disconnected
– the electric fuse for the radio blows
the following message will appear in the dis-
play: “SAFE”. You will not be able to switch on
the system until you have entered the correct
code.
This code number can be found along with
the series number in the back of the operat-
ing instructions on the “Equipment card”.
Make sure that you remove the “Equipment
card” and keep it in a safe place. Never leave
the card inside the vehicle. This makes the
equipment useless to thieves!
Anti-theft coding
Page 65 of 75
RADIO NAVIGATION SYSTEM64
NAVIGATION
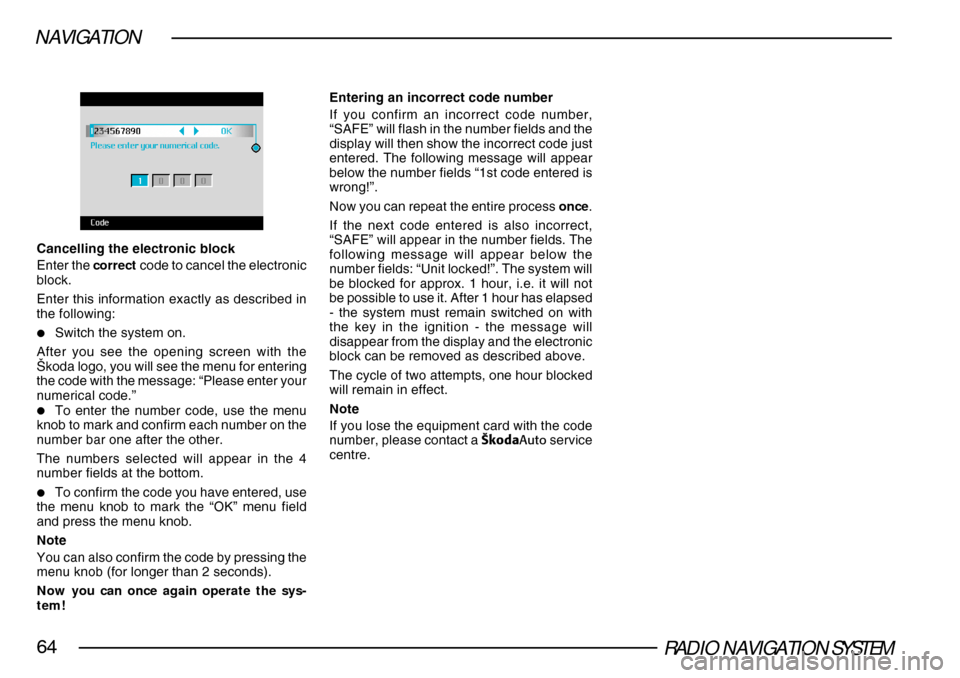
Cancelling the electronic block
Enter the correct code to cancel the electronic
block.
Enter this information exactly as described in
the following:
•Switch the system on.
After you see the opening screen with the
·koda logo, you will see the menu for entering
the code with the message: “Please enter your
numerical code.”
•To enter the number code, use the menu
knob to mark and confirm each number on the
number bar one after the other.
The numbers selected will appear in the 4
number fields at the bottom.
•To confirm the code you have entered, use
the menu knob to mark the “OK” menu field
and press the menu knob.
Note
You can also confirm the code by pressing the
menu knob (for longer than 2 seconds).
Now you can once again operate the sys-
tem! Entering an incorrect code number
If you confirm an incorrect code number,
“SAFE” will flash in the number fields and the
display will then show the incorrect code just
entered. The following message will appear
below the number fields “1st code entered is
wrong!”.
Now you can repeat the entire process
once.
If the next code entered is also incorrect,
“SAFE” will appear in the number fields. The
following message will appear below the
number fields: “Unit locked!”. The system will
be blocked for approx. 1 hour, i.e. it will not
be possible to use it. After 1 hour has elapsed
- the system must remain switched on with
the key in the ignition - the message will
disappear from the display and the electronic
block can be removed as described above.
The cycle of two attempts, one hour blocked
will remain in effect.
Note
If you lose the equipment card with the code
number, please contact a ·koda Auto service
centre.
Page 66 of 75
RADIO NAVIGATION SYSTEM65
TV
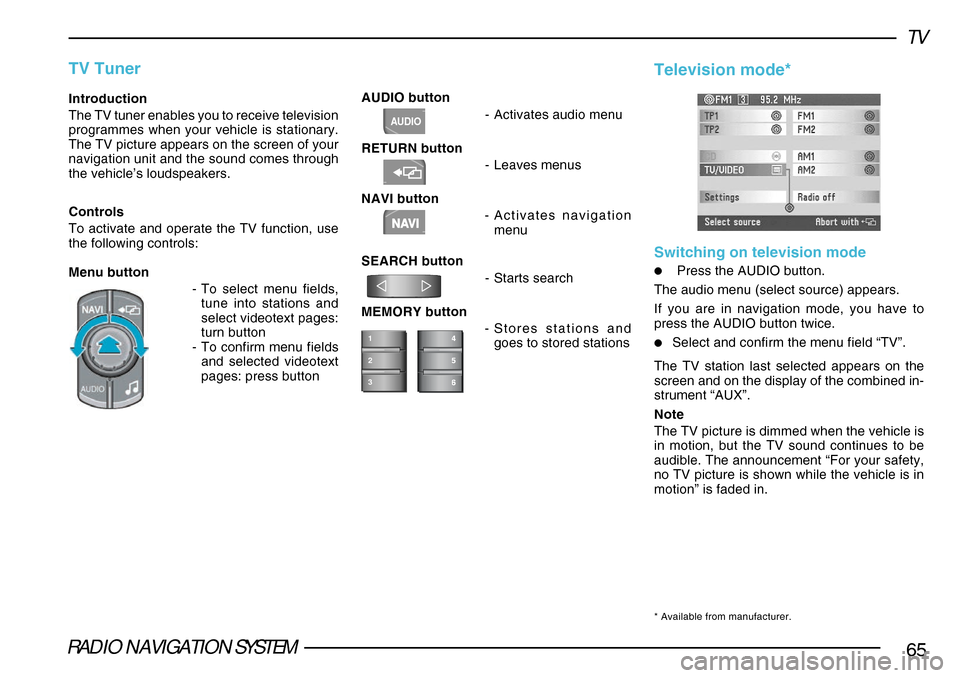
AUDIO button-Activates audio menu
RETURN button -Leaves menus
NAVI button -Activates navigation
menu
SEARCH button -Starts search
MEMORY button -Stores stations and
goes to stored stationsIntroduction
The TV tuner enables you to receive television
programmes when your vehicle is stationary.
The TV picture appears on the screen of your
navigation unit and the sound comes through
the vehicle’s loudspeakers.
Controls
To activate and operate the TV function, use
the following controls:
Menu button
-To select menu fields,
tune into stations and
select videotext pages:
turn button
- To confirm menu fields
and selected videotext
pages: press button
TV Tuner
1
2
3
NAVI
AUDIO
Television mode*
Switching on television mode
•Press the AUDIO button.
The audio menu (select source) appears.
If you are in navigation mode, you have to
press the AUDIO button twice.
•Select and confirm the menu field “TV”.
The TV station last selected appears on the
screen and on the display of the combined in-
strument “AUX”.
Note
The TV picture is dimmed when the vehicle is
in motion, but the TV sound continues to be
audible. The announcement “For your safety,
no TV picture is shown while the vehicle is in
motion” is faded in.
* Available from manufacturer.
Page 67 of 75
RADIO NAVIGATION SYSTEM66
TV
Switching off television mode
•Go to the audio menu by pressing the AU-
DIO button.
•Select and confirm the desired audio
source.
Press the NAVI button to go to the navigation
menu.
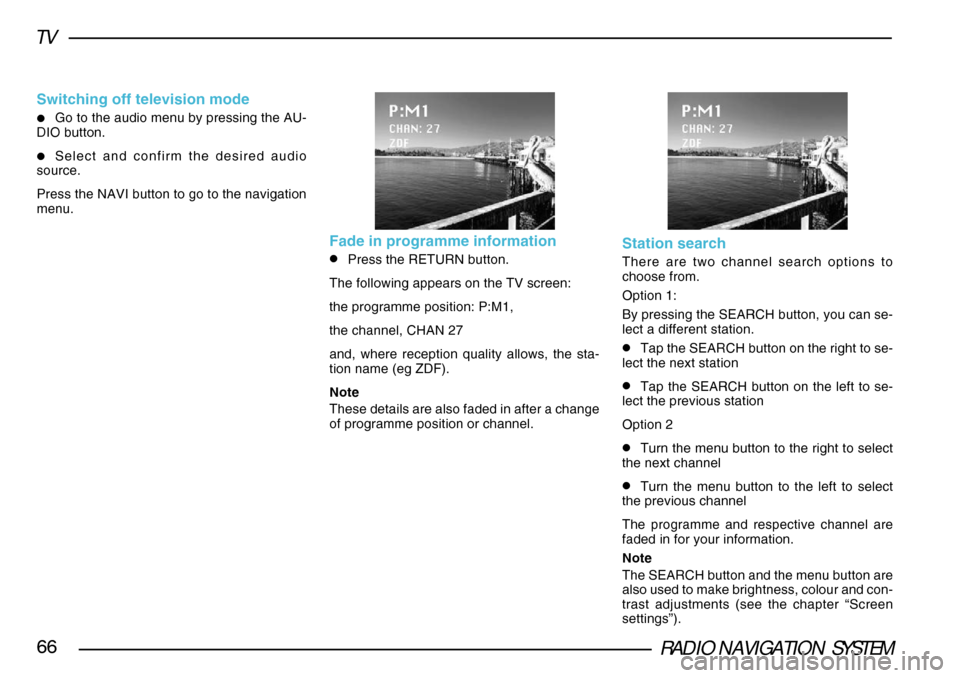
Fade in programme information
•Press the RETURN button.
The following appears on the TV screen:
the programme position: P:M1,
the channel, CHAN 27
and, where reception quality allows, the sta-
tion name (eg ZDF).
Note
These details are also faded in after a change
of programme position or channel.Station search
There are two channel search options to
choose from.
Option 1:
By pressing the SEARCH button, you can se-
lect a different station.
•Tap the SEARCH button on the right to se-
lect the next station
•Tap the SEARCH button on the left to se-
lect the previous station
Option 2
•Turn the menu button to the right to select
the next channel
•Turn the menu button to the left to select
the previous channel
The programme and respective channel are
faded in for your information.
Note
The SEARCH button and the menu button are
also used to make brightness, colour and con-
trast adjustments (see the chapter “Screen
settings”).
Page 68 of 75
RADIO NAVIGATION SYSTEM67
TV
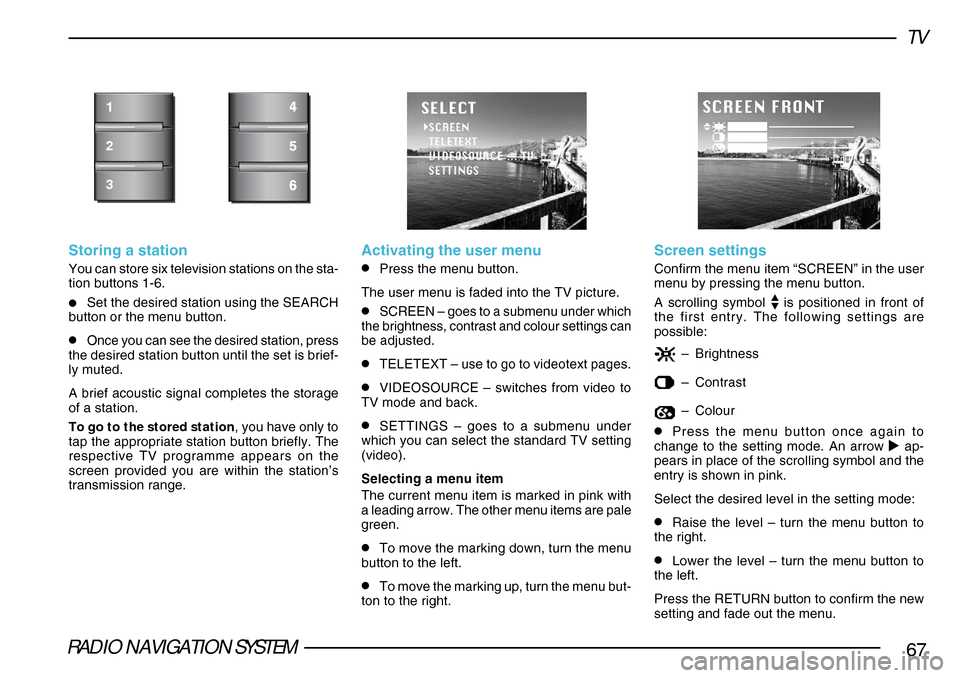
Storing a station
You can store six television stations on the sta-
tion buttons 1-6.
•Set the desired station using the SEARCH
button or the menu button.
•Once you can see the desired station, press
the desired station button until the set is brief-
ly muted.
A brief acoustic signal completes the storage
of a station.
To go to the stored station , you have only to
tap the appropriate station button briefly. The
respective TV programme appears on the
screen provided you are within the station’s
transmission range.
1
2
3
Activating the user menu
•Press the menu button.
The user menu is faded into the TV picture.
•SCREEN – goes to a submenu under which
the brightness, contrast and colour settings can
be adjusted.
•TELETEXT – use to go to videotext pages.
•VIDEOSOURCE – switches from video to
TV mode and back.
•SETTINGS – goes to a submenu under
which you can select the standard TV setting
(video).
Selecting a menu item
The current menu item is marked in pink with
a leading arrow. The other menu items are pale
green.
•To move the marking down, turn the menu
button to the left.
•To move the marking up, turn the menu but-
ton to the right.
Screen settings
Confirm the menu item “SCREEN” in the user
menu by pressing the menu button.
A scrolling symbol
is positioned in front of
the first entry. The following settings are
possible:
– Brightness
–Contrast
–Colour
•Press the menu button once again to
change to the setting mode. An arrow ap-
pears in place of the scrolling symbol and the
entry is shown in pink.
Select the desired level in the setting mode:
•Raise the level – turn the menu button to
the right.
•Lower the level – turn the menu button to
the left.
Press the RETURN button to confirm the new
setting and fade out the menu.
Page 69 of 75
RADIO NAVIGATION SYSTEM68
TV
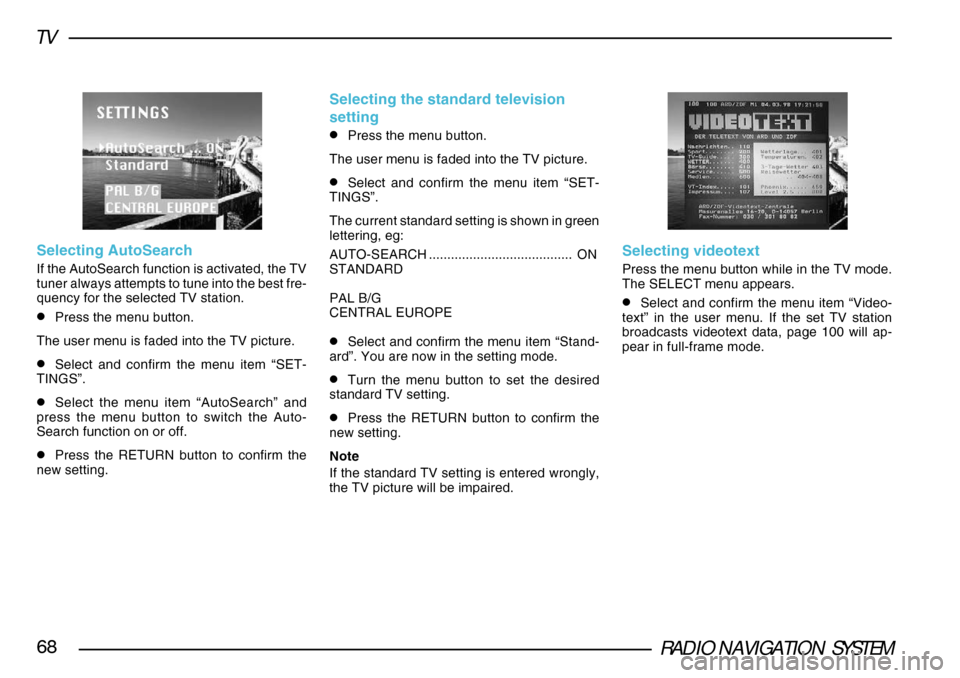
Selecting AutoSearch
If the AutoSearch function is activated, the TV
tuner always attempts to tune into the best fre-
quency for the selected TV station.
•Press the menu button.
The user menu is faded into the TV picture.
•Select and confirm the menu item “SET-
TINGS”.
•Select the menu item “AutoSearch” and
press the menu button to switch the Auto-
Search function on or off.
•Press the RETURN button to confirm the
new setting.
Selecting the standard television
setting
•Press the menu button.
The user menu is faded into the TV picture.
•Select and confirm the menu item “SET-
TINGS”.
The current standard setting is shown in green
lettering, eg:
AUTO-SEARCH ....................................... ON
STANDARD
PAL B/G
CENTRAL EUROPE
•Select and confirm the menu item “Stand-
ard”. You are now in the setting mode.
•Turn the menu button to set the desired
standard TV setting.
•Press the RETURN button to confirm the
new setting.
Note
If the standard TV setting is entered wrongly,
the TV picture will be impaired.
Selecting videotext
Press the menu button while in the TV mode.
The SELECT menu appears.
•Select and confirm the menu item “Video-
text” in the user menu. If the set TV station
broadcasts videotext data, page 100 will ap-
pear in full-frame mode.
Page 70 of 75
RADIO NAVIGATION SYSTEM69
TV
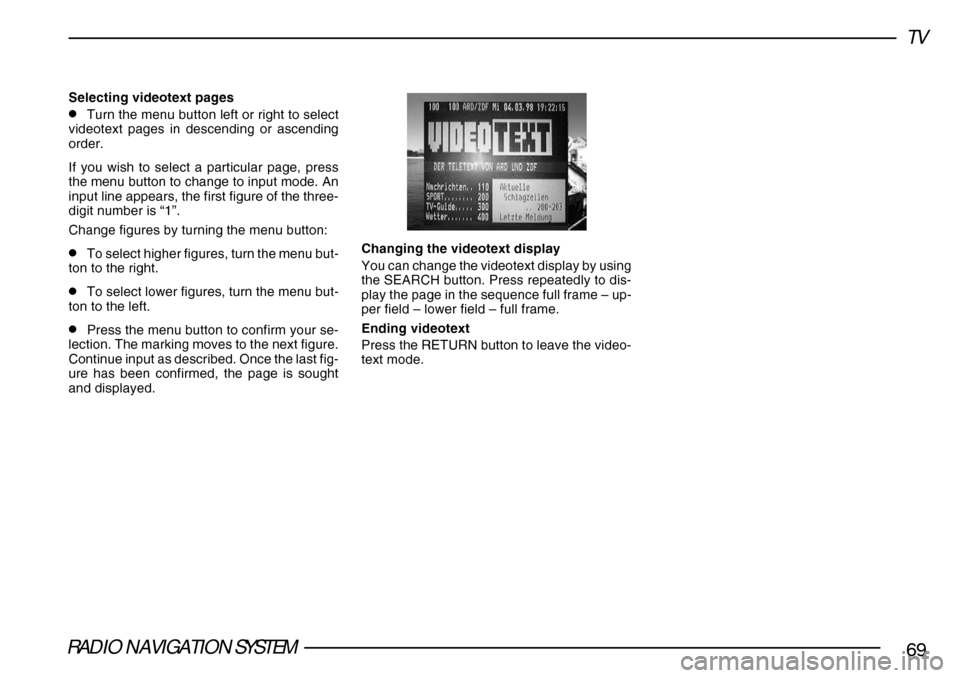
Selecting videotext pages
•Turn the menu button left or right to select
videotext pages in descending or ascending
order.
If you wish to select a particular page, press
the menu button to change to input mode. An
input line appears, the first figure of the three-
digit number is “1”.
Change figures by turning the menu button:
•To select higher figures, turn the menu but-
ton to the right.
•To select lower figures, turn the menu but-
ton to the left.
•Press the menu button to confirm your se-
lection. The marking moves to the next figure.
Continue input as described. Once the last fig-
ure has been confirmed, the page is sought
and displayed. Changing the videotext display
You can change the videotext display by using
the SEARCH button. Press repeatedly to dis-
play the page in the sequence full frame – up-
per field – lower field – full frame.
Ending videotext
Press the RETURN button to leave the video-
text mode.