technical data SKODA SUPERB 2005 1.G / (B5/3U) Service Manual
[x] Cancel search | Manufacturer: SKODA, Model Year: 2005, Model line: SUPERB, Model: SKODA SUPERB 2005 1.G / (B5/3U)Pages: 281
Page 86 of 281

Seats and Stowage85
Using the systemSafetyDriving TipsGeneral MaintenanceBreakdown assistanceTechnical Data
The fixing nets and the installation instruction are located in the luggage
compartment.
WARNING
•The whole strength of the net makes it possible to load the
pocket with objects of up to 1.5 kg in weight. Heavy objects are not
secured sufficiently - risk of injury and net damage!
•The load to be transported must be fixed in place in such a way
that it cannot move during the journey and when braking.
Caution
Do not place any objects with sharp edges in the nets - risk of net
damage.
Folding double hooks
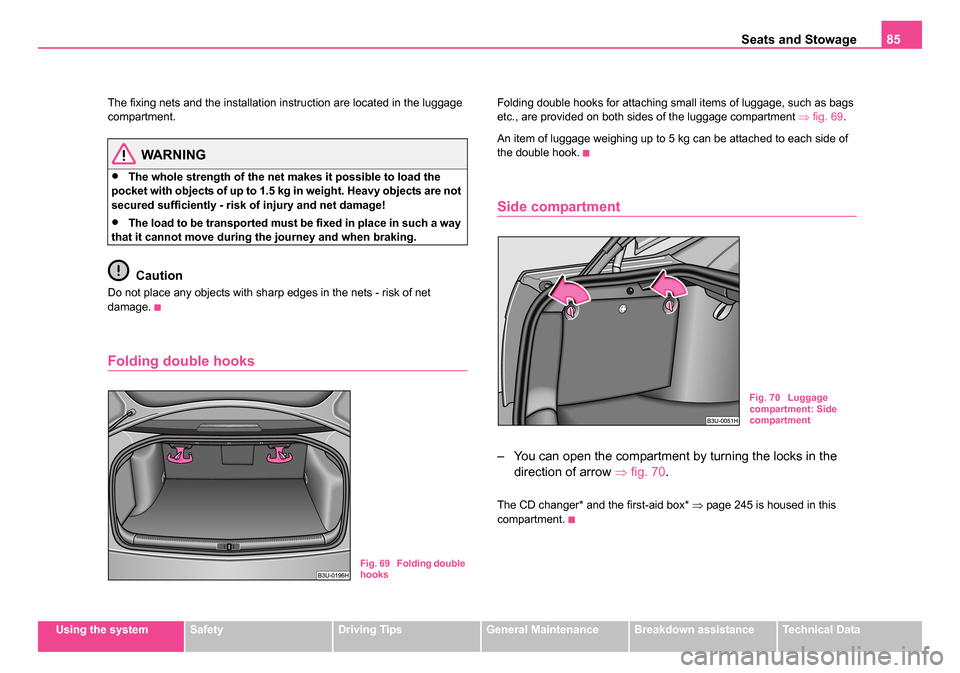
Folding double hooks for attaching small items of luggage, such as bags
etc., are provided on both sides of the luggage compartment ⇒fig. 69 .
An item of luggage weighing up to 5 kg can be attached to each side of
the double hook.
Side compartment
– You can open the compartment by turning the locks in the direction of arrow ⇒fig. 70.
The CD changer* and the first-aid box* ⇒page 245 is housed in this
compartment.
Fig. 69 Folding double
hooks
Fig. 70 Luggage
compartment: Side
compartment
s3ec.book Seite 85 Montag, 2. Mai 2005 3:42 15
Page 88 of 281

Seats and Stowage87
Using the systemSafetyDriving TipsGeneral MaintenanceBreakdown assistanceTechnical Data
on the knob is visible. If the seat backrest is correctly locked, the knob is
pushed back and the red surface is not visible.
WARNING
•The belt locks and the pelvic belt must be in their original posi-
tion after folding back the seat backrest - they must be ready to use.
•The seat backrests must be securely interlocked in position so
that no objects in the luggage compartment can slide forward if
there is sudden braking - risk of injury!
•Pay attention that the rear seat backrest is correctly interlocked.
It is only then that the three-point seat belt for the middle seat can
reliably fulfil its function.
•Before folding the seat backrest back into the secure position,
place the rear lateral seat belt behind the edge of the side trim
panel. Take suitable measures to prevent that the seat belt is
jammed between the seat backrest and the side trim panel is thus
damaged.
The luggage compartment cover
You can use the luggage compartment cover behind the head restraints
of the rear seats for storing light and soft items.
WARNING
No objects should be placed on the luggage compartment cover,
the vehicle occupants could be endangered if there is sudden
braking or the vehicle co llides with something.
Caution
Please ensure that the heating elements of the rear window heater are not
damaged as a result of objects placed in this area.
s3ec.book Seite 87 Montag, 2. Mai 2005 3:42 15
Page 90 of 281

Seats and Stowage89
Using the systemSafetyDriving TipsGeneral MaintenanceBreakdown assistanceTechnical Data
WARNING
•After placing items into the through-loading bag, you must
secure the bag with the securing belt .
•The securing belt must hold the items tight.
•Ensure that the securing belt on ski sport articles lies in the
middle between the bindings (see imprint on the through-loading
bag).
Note
•Place the skis with the tips facing the front, snowboards and ski sticks
with the tips facing the rear into the through-loading bag.
•If there are several pairs of skis in the through-loading bag, ensure that
the bindings are positioned at the same height.
•The through-loading bag must never be folded together or stowed
when moist.
The cool box in the a rmrest of rear seats*
Using the system
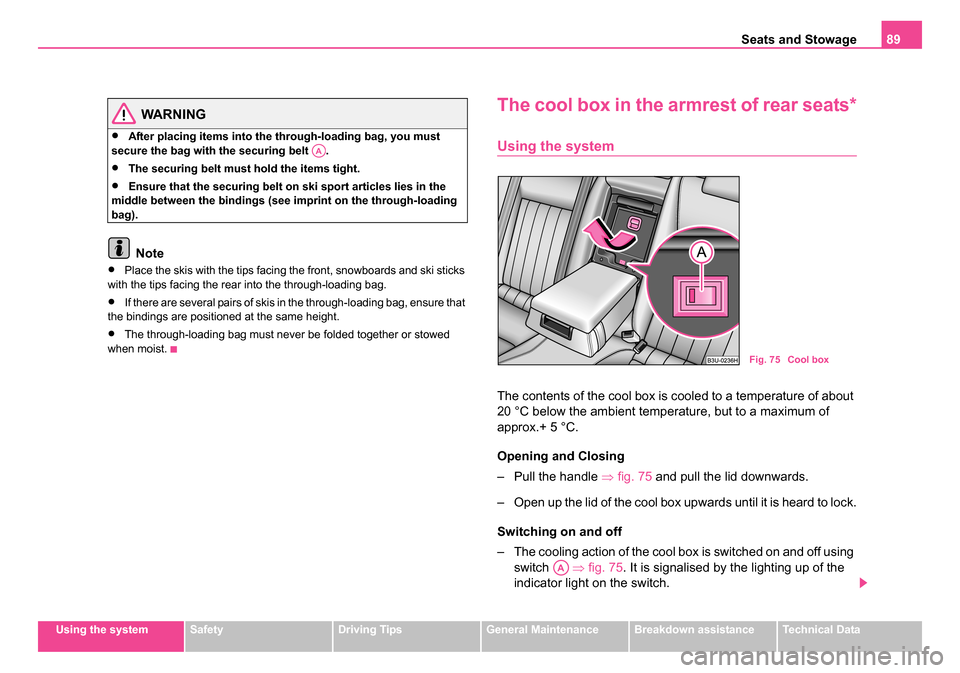
The contents of the cool box is cooled to a temperature of about
20 °C below the ambient temperature, but to a maximum of
approx.+ 5 °C.
Opening and Closing
– Pull the handle ⇒fig. 75 and pull the lid downwards.
– Open up the lid of the cool box upwards until it is heard to lock.
Switching on and off
– The cooling action of the cool box is switched on and off using switch ⇒fig. 75. It is signalised by the lighting up of the
indicator light on the switch.
AA
Fig. 75 Cool box
AA
s3ec.book Seite 89 Montag, 2. Mai 2005 3:42 15
Page 92 of 281

Seats and Stowage91
Using the systemSafetyDriving TipsGeneral MaintenanceBreakdown assistanceTechnical Data
Removing and installing the cool box
Removing
– Switch the cooling mode of the cool box off ⇒page 89. – Remove the locking mechanism
⇒fig. 77.
– Open the lid of the cool box.
– Press open the upper side of the cool box from the inside in the direction of arrow and put away the cool box in the
luggage compartment (see arrow ).
– Unplug the plug connector (the plug connector is located in the luggage compartment in the lower part of the fixing frame
for the cool box).
Fitting
– Place the cool box on the luggage compartment partition and plug in the plug.
– Remove the locking mechanism ⇒fig. 77.
– Fold the lid of the cool box onto the fixing frame ⇒fig. 78.
– Lift the cool box with the palm of the hand on the inside of the upper wall of the cool box.
– Insert the cool box with the lower edge into the lower holding bracket on the luggage compartment partition.
– Pull the cool box forwards to the upper edge until the stop (see arrow ), press with the palm of the hand onto the upper wall
(see arrow ), pull the box again forwards and press down-
wards (see arrow ).
– Push the locking mechanism ⇒fig. 77 up to the stop into
the fixing frame.
– Close the lid of the cool box.
Fig. 77 Removing the
cool box
Fig. 78 Installing the
cool box
AA
A1
A2
AA
A1
A2
A3
AA
s3ec.book Seite 91 Montag, 2. Mai 2005 3:42 15
Page 94 of 281

Seats and Stowage93
Using the systemSafetyDriving TipsGeneral MaintenanceBreakdown assistanceTechnical Data
Caution
•The parts of the folding box can be damaged if handled roughly or in
an unprofessional way.
•Before you lower the folding box B into the ready position ⇒page 92,
fig. 80 , it is necessary to remove the net*, in order to avoid net damage.
Opening folding box
You can transport the opened folding box in the secured end or
middle position against the partition of the luggage compartment.
Opening folding box
– Lower the folding box into the ready position ⇒page 92.
– Press the button marked “PUSH” ⇒fig. 81.
– Grasp the folding box at the handle and push it in direction of arrow 1 against the partition of the luggage compartment
into the secured position. The lock below the button must be
heard to engage. If correctly locked, the button marked
“PUSH” moves back into its initial position.
– Raise the lid in direction of arrow 2 ⇒ fig. 82.
Fig. 81 Luggage
compartment: folding
box
Fig. 82 Opening
folding box
AB
AA
AB
s3ec.book Seite 93 Montag, 2. Mai 2005 3:42 15
Page 96 of 281

Seats and Stowage95
Using the systemSafetyDriving TipsGeneral MaintenanceBreakdown assistanceTechnical Data
– Close the lid in direction of arrow 2.
– Press on the button marked “PUSH” ⇒page 94, fig. 84
and push the folding box into the secured middle position.
– Once again press on the button marked “PUSH” and push the folding box carefully into the secured position against the
partition of the luggage compartment in direction of arrow
(ready position). If correctly lo cked, the button marked “PUSH”
is moved back into its initial position.
You can leave the folding box in the ready position for use, or fold it down
into the transport position ⇒page 92.
Caution
•The parts of the folding box can be damaged if handled roughly or in
an unprofessional way.
•First check for yourself whether the cover for the through-loading bag*
is closed before you lower the folding box into the ready position on the
partition of the luggage compartment ⇒page 88.
The roof luggage rack system
Description
Pay attention to the following points if you wish to transport luggage or
other items on the roof of your vehicle:
•Your car has streamlined rain channels integrated into the roof. For
this reason, it is not possible to use conventional roof racks. We therefore recommend that you only use base roof bars from the Škoda Genuine
Accessories.
•These base roof bars are the supporting elements for a complete roof
bar system. Separate additional components are required for safety
reasons for transporting luggage, bikes, surfboards, skis and boats. All
these system components are available from Škoda Dealers.
Caution
•If you use other roof rack systems or if the roof bars are not properly
fitted, then any damage which may result to your car is not covered by the
warranty agreements. It is therefore essential to pay attention to the fitting
instructions supplied with the roof luggage rack system.
•On models fitted with a power sliding/tilting roof, ensure that the
opened sliding/tilting roof does not strike any items of luggage transported
on the roof.
For the sake of the environment
The increased aerodynamic drag results in a higher fuel consumption.
One should therefore take off the roof bar system after use.
AB
AB
A3
AB
s3ec.book Seite 95 Montag, 2. Mai 2005 3:42 15
Page 98 of 281

Seats and Stowage97
Using the systemSafetyDriving TipsGeneral MaintenanceBreakdown assistanceTechnical Data
Cup holder
Drinks can holder in centre console
You can place two cups or beverage cans into the recesses ⇒fig. 86 .
WARNING
•Do not place any hot beverages into the cup holder. If the
vehicle moves, the hot beverages may spill - risk of scalding!
•Do not use any cups or beakers which are made of brittle mate-
rial (e.g. glass, porcelain). You might be injured by them in the
event of an accident!
Drinks can holder in armrest of the rear seats
The drinks can holder is provided in the stowage compartment.
Access to drinks can holder
– Raise the cover of the armrest.
You can take off the drinks can holder. Unlock it ⇒fig. 87 and attach it to
the cover of the armrest. Do not attach the drinks can holder to the cover
of the armrest, if the armrest is fitted with controls for the front passenger
seat ⇒page 79, fig. 60 . When folding down the cover, the holder could be
damaged and the controls for the front passenger seat could be operated.
Only place cans into the drinks can holder which are held tight in the
holder.
It is possible to place up to two beverage cans in the drinks can holder of
the armrest.
Fig. 86 Centre
console: Cup holder
Fig. 87 Drinks can
holder in rear armrest
s3ec.book Seite 97 Montag, 2. Mai 2005 3:42 15
Page 100 of 281

Seats and Stowage99
Using the systemSafetyDriving TipsGeneral MaintenanceBreakdown assistanceTechnical Data
Removing ashtray insert
– Press the cover of the ashtray down slightly as far as the stop.
– Grasp the ashtray insert and pull it out at an angle of about
45°.
Insert ashtray insert
– Position the ashtray insert at an angle of about 45° and press it into the mount as far the stop.
WARNING
Never lay flammable objects in the ashtray basin - risk of fire!
Ashtray in the armrest*
Ashtray located in the armrest of the rear right door
Opening ashtray
– Press on the middle part of the cover of the ashtray.
Removing ashtray insert
– Press on the top part of the opened ashtray in position , the ashtray insert is raised ⇒fig. 90.
Insert ashtray insert
– Press the ashtray insert into the armrest.
WARNING
Never lay flammable objects in the ashtray basin - risk of fire!
Fig. 90 Ashtray in the
armrest of the rear right
door
AA
AB
s3ec.book Seite 99 Montag, 2. Mai 2005 3:42 15
Page 102 of 281

Seats and Stowage101
Using the systemSafetyDriving TipsGeneral MaintenanceBreakdown assistanceTechnical Data
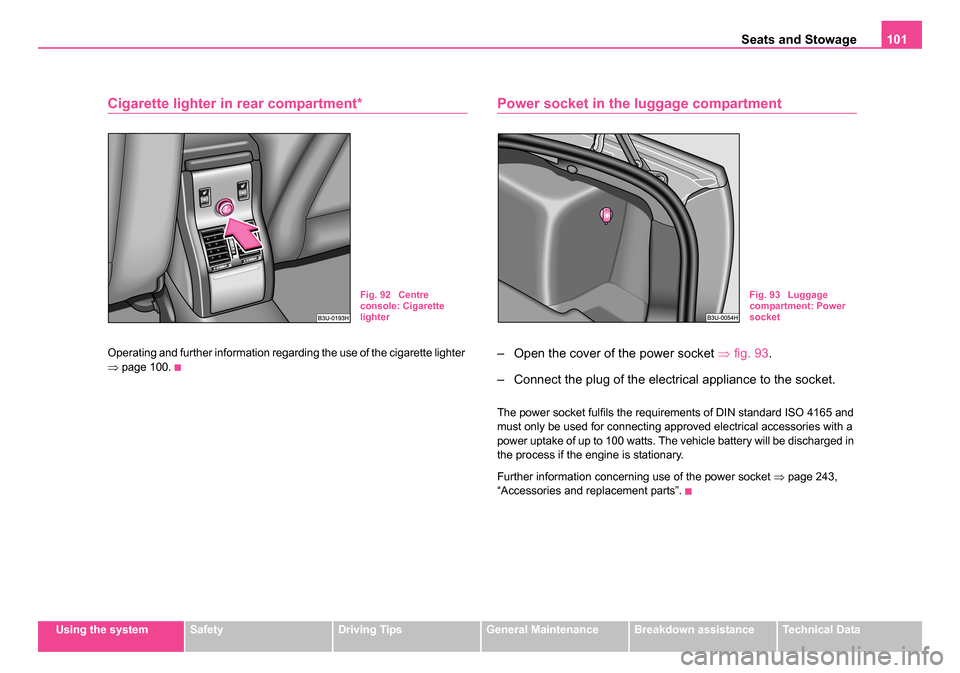
Cigarette lighter in rear compartment*
Operating and further information regarding the use of the cigarette lighter
⇒page 100.
Power socket in the luggage compartment
– Open the cover of the power socket ⇒fig. 93.
– Connect the plug of the electrical appliance to the socket.
The power socket fulfils the requirements of DIN standard ISO 4165 and
must only be used for connecting approved electrical accessories with a
power uptake of up to 100 watts. The vehicle battery will be discharged in
the process if the engine is stationary.
Further information concerning use of the power socket ⇒page 243,
“Accessories and replacement parts”.
Fig. 92 Centre
console: Cigarette
lighterFig. 93 Luggage
compartment: Power
socket
s3ec.book Seite 101 Montag, 2. Mai 2005 3:42 15
Page 104 of 281

Seats and Stowage103
Using the systemSafetyDriving TipsGeneral MaintenanceBreakdown assistanceTechnical Data
Locking the storage compartment
– Turn the master key in the lock to the right.
Unlocking the storage compartment
– Turn the master key in the lock to the left.
Two holders for placing drink cans are located on the inside of the lid.
WARNING
•The storage compartment must always be closed when driving
for safety reasons.
•The drinks can holder should not be used while driving.
Cooling of storage compar tment on front passenger
side
– You can switch the cooling system on or off using the control
dial ⇒fig. 95.
The cooling of the storage compartment operates only if the air condi-
tioning system is switched on. We recommend that you switch off the
cooling (opening concealed) if it is operating in the heating mode or if you
are not using the cooling system for the storage compartment.
Storage drawer*
– Press in the middle of the storage compartment ⇒fig. 96 and
the storage compartment will come out.
WARNING
•The storage compartment is not a substitute for the ashtray and
must also not be used for such purposes - risk of fire!
Fig. 95 Storage
compartment: Control
dial for the cooling
system
Fig. 96 Dash panel:
Storage drawer
s3ec.book Seite 103 Montag, 2. Mai 2005 3:42 15